
Oil pastels are soft, waxy sticks that blend under a fingertip, which is why they shine on subjects built from glowing bands of color rather than fine detail. For this lesson I picked the classic beginner scene, a sunset over the sea with a palm tree in silhouette, because it uses every core technique at once. You'll learn oil pastel drawing step by step, from light layering and finger blending to scratching wave lines into the water with a toothpick.
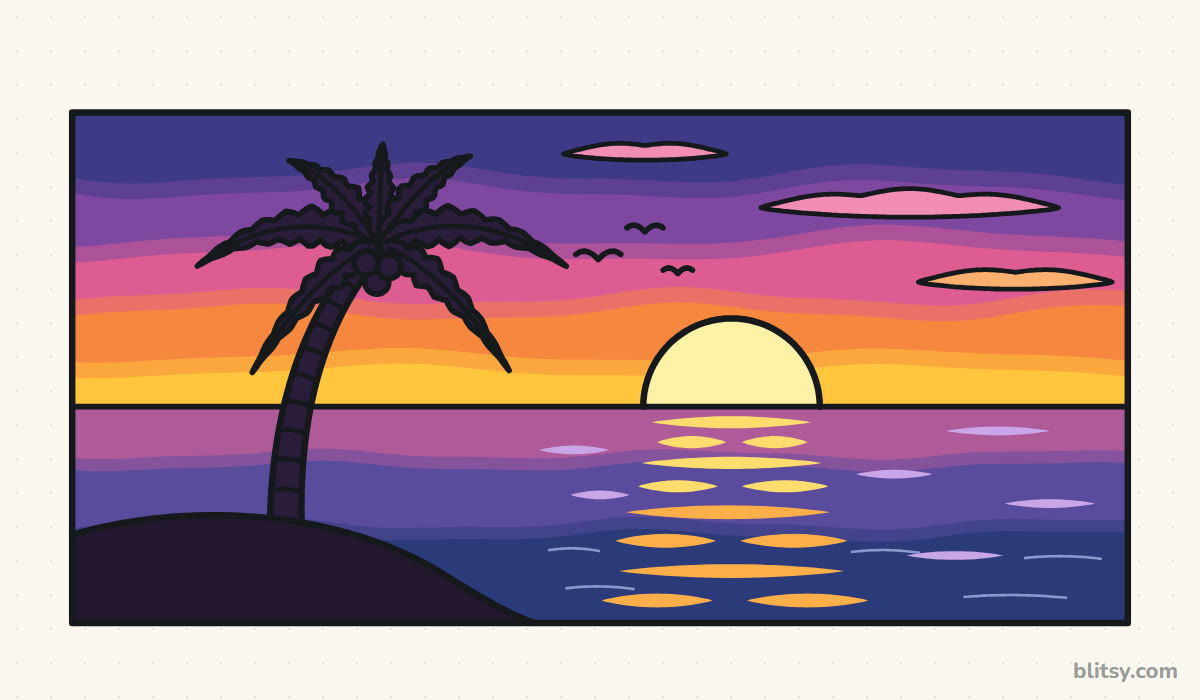
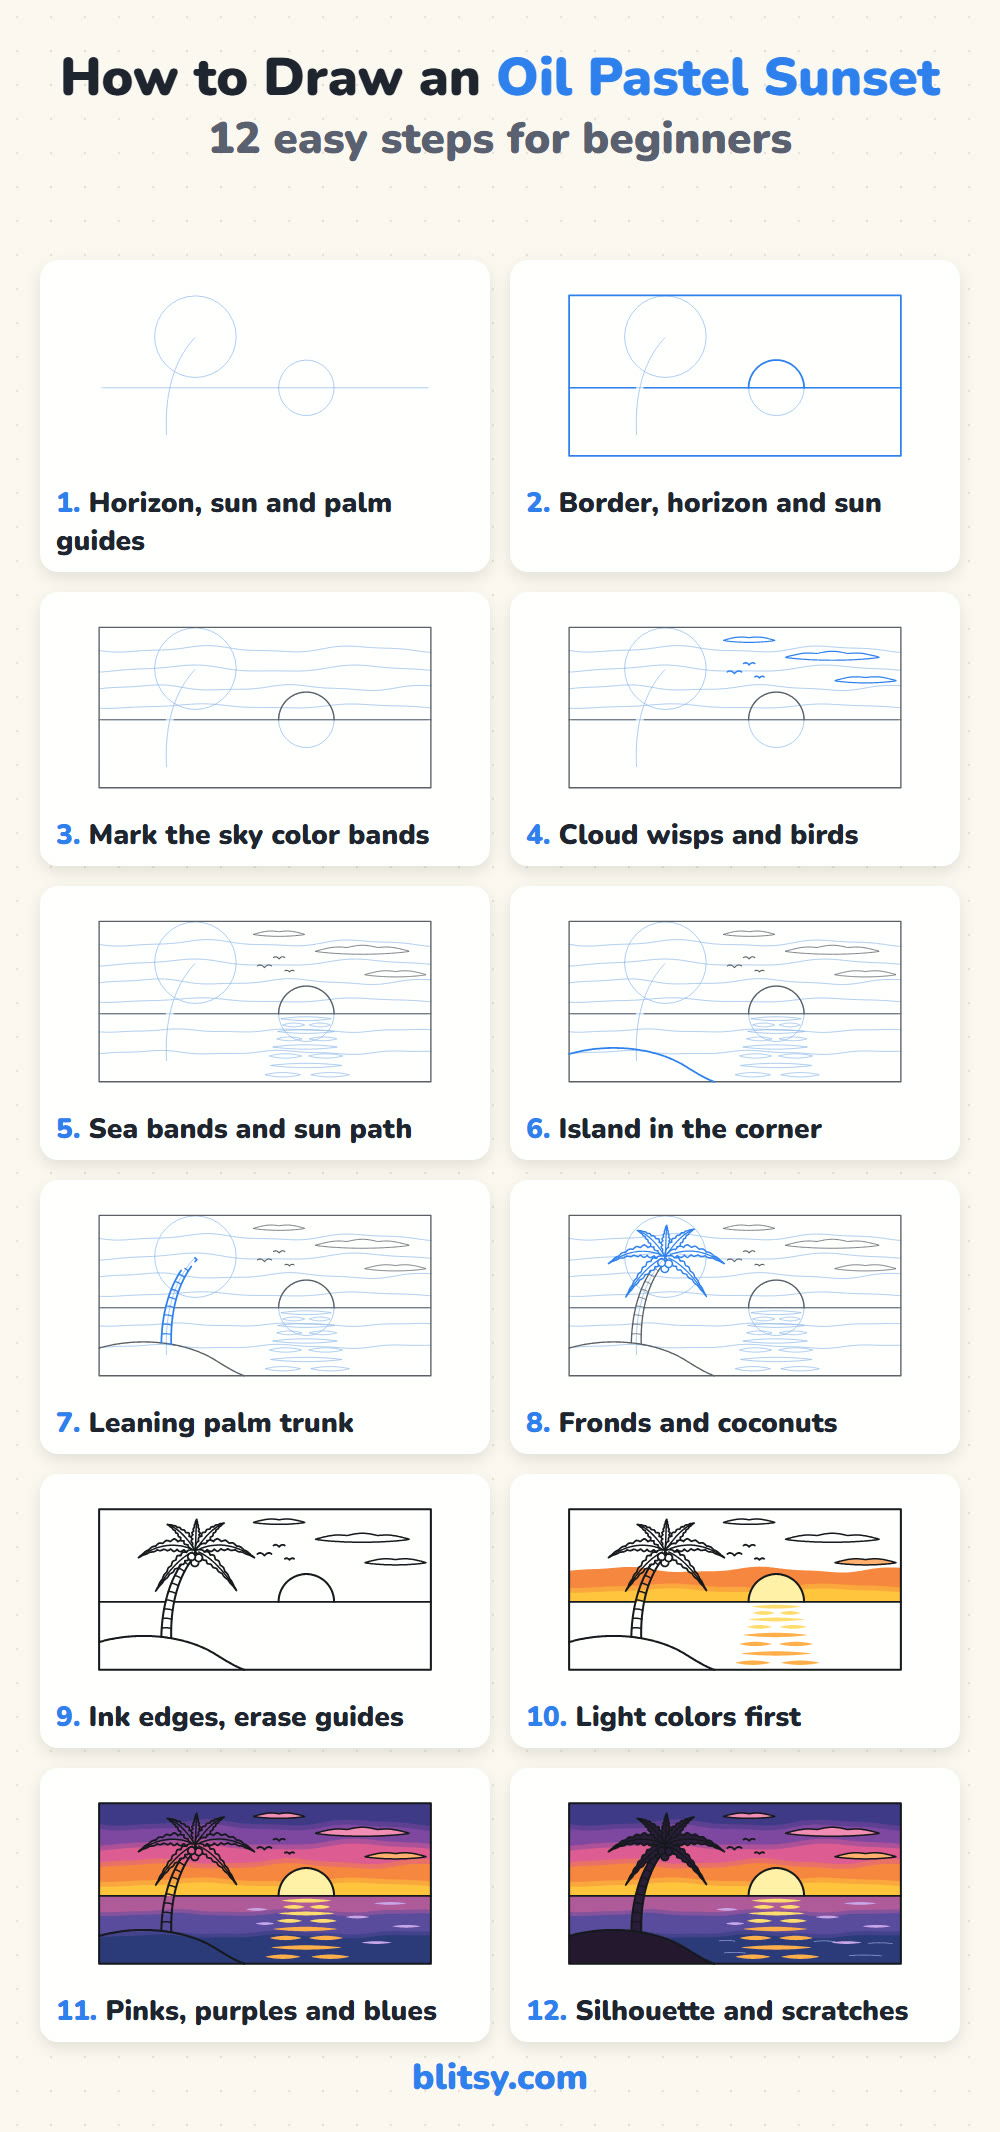
Think of the step pictures as a pencil plan: whatever you add in that step shows in blue, and older lines turn gray. Pale blue marks are guides, band lines included, so keep them faint. They get erased before any pastel touches the paper.
Quick overview
⏱️ Time: about 45 to 60 minutes, most of it coloring and blending
🎯 Level: beginner, fine for kids around 8 and up with a little help blending
✏️ Steps: 12
🌅 You'll draw: a sunset over the sea with a palm tree silhouette
A Pastel Kit for a Glowing Sunset
- Oil pastels; a basic student set of 24 is enough
- Paper with some tooth, like pastel or mixed-media paper
- A pencil and an eraser
- A black permanent marker
- A fingertip, tissues or a paper blending stump
- A toothpick for scratching
- Masking tape (optional) for a clean border
Smooth printer paper is fine for a first try, but it fills up after one or two layers.
Oil Pastel Drawing Step by Step
Step 1: Sketch faint guide lines and circles
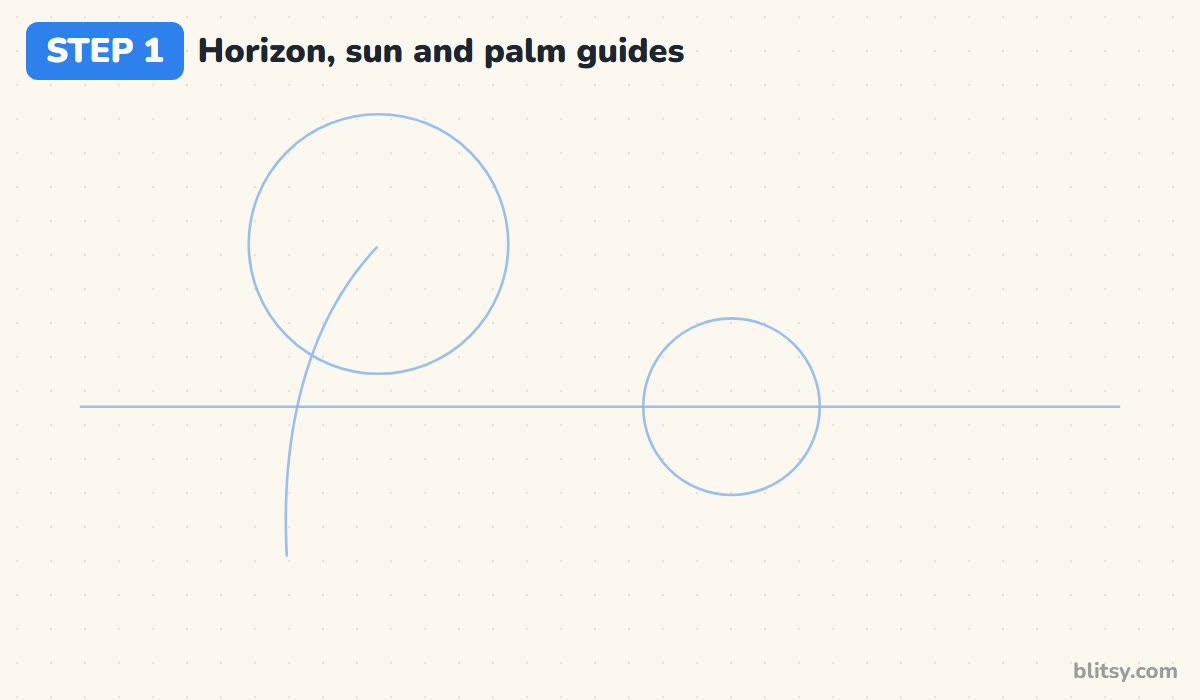
Turn your paper sideways and draw a light horizon a little below the middle. Put a circle on it toward the right for the sun, half above and half below. On the left, sketch a curved trunk line and a big circle for the leaves. I keep the horizon low on purpose, because a tall sky gives the colors room to blend.
💡 Tip: Hold the pencil near its end and barely touch the paper. Pastel won't hide a deep groove.
Step 2: Draw the border and the setting sun
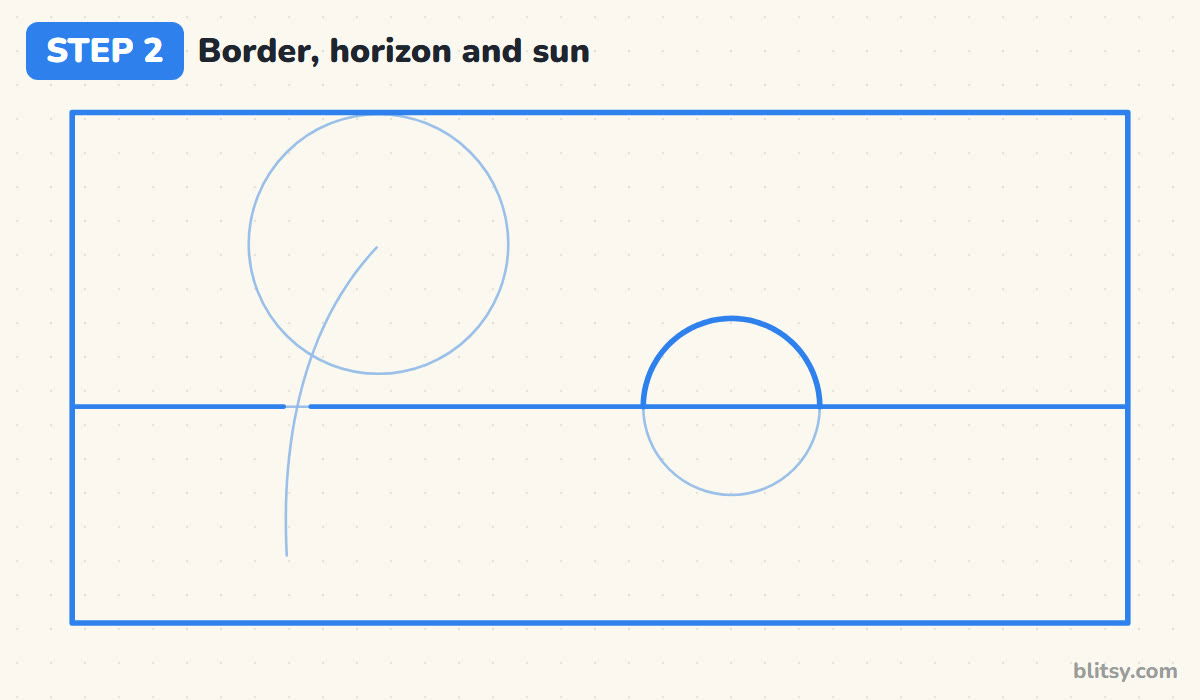
Draw a rectangle around the scene with a margin on every side. Go over the horizon with a firmer line, leaving a small gap where the trunk guide crosses it. Then trace only the top half of the sun. The hidden bottom half is what makes it read as a sunset.
💡 Tip: Masking tape along the border gives a crisp edge. Peel it off slowly at the very end.
Step 3: Mark the bands of sky color
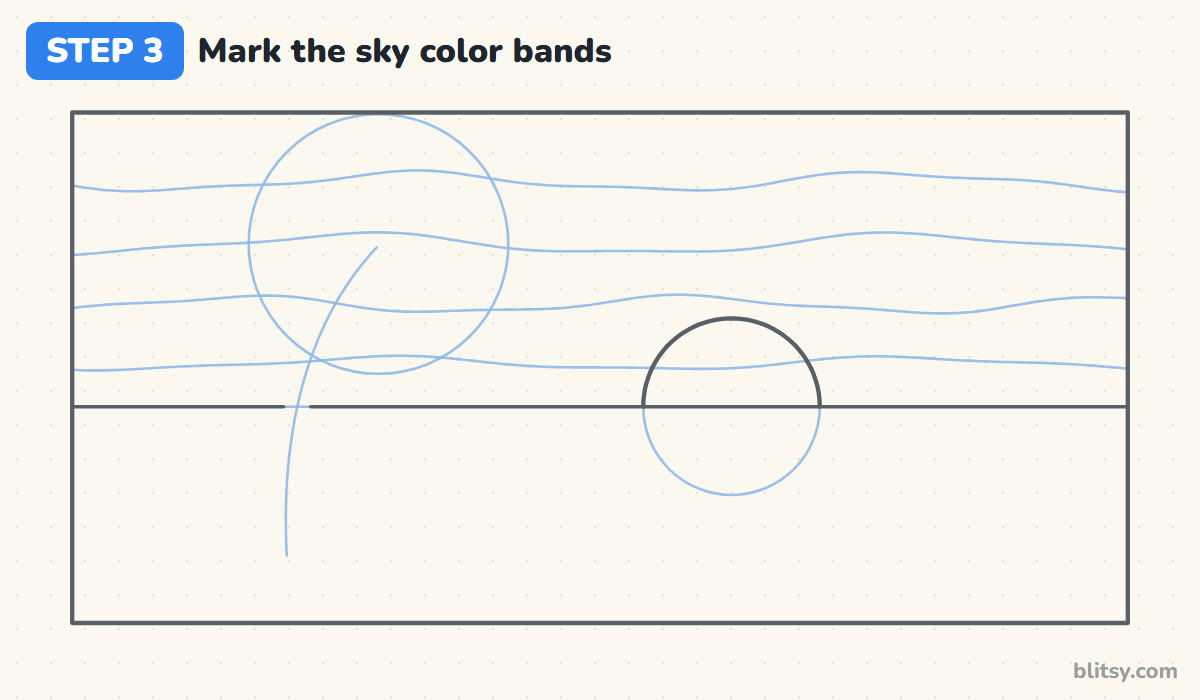
Split the sky into five bands with four soft, wavy lines. Yellow goes at the bottom, then orange, pink and purple, with deep violet on top. Let the bands vary in height and let the lines wobble, since wavy edges blend more easily than straight ones.



💡 Tip: Number each band lightly from 1 to 5 so you never reach for the wrong pastel later.
Step 4: Add cloud wisps and a few birds
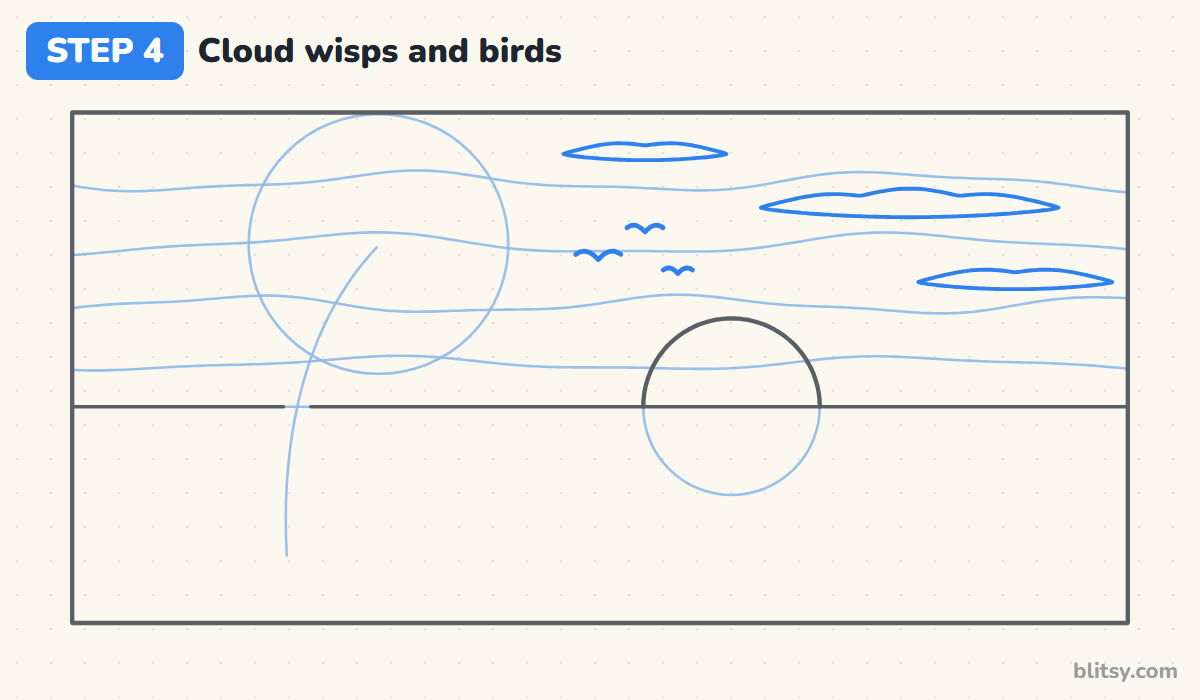
Draw three long, thin clouds on the right side of the sky, each flat underneath with a few gentle bumps on top. Near the center, add three tiny birds as wide, shallow M shapes in different sizes. Small birds spaced apart make the sky feel huge.
💡 Tip: Keep the clouds flat and long. Puffy round clouds belong to a sunny afternoon.
Step 5: Mark the sea bands and the sun path
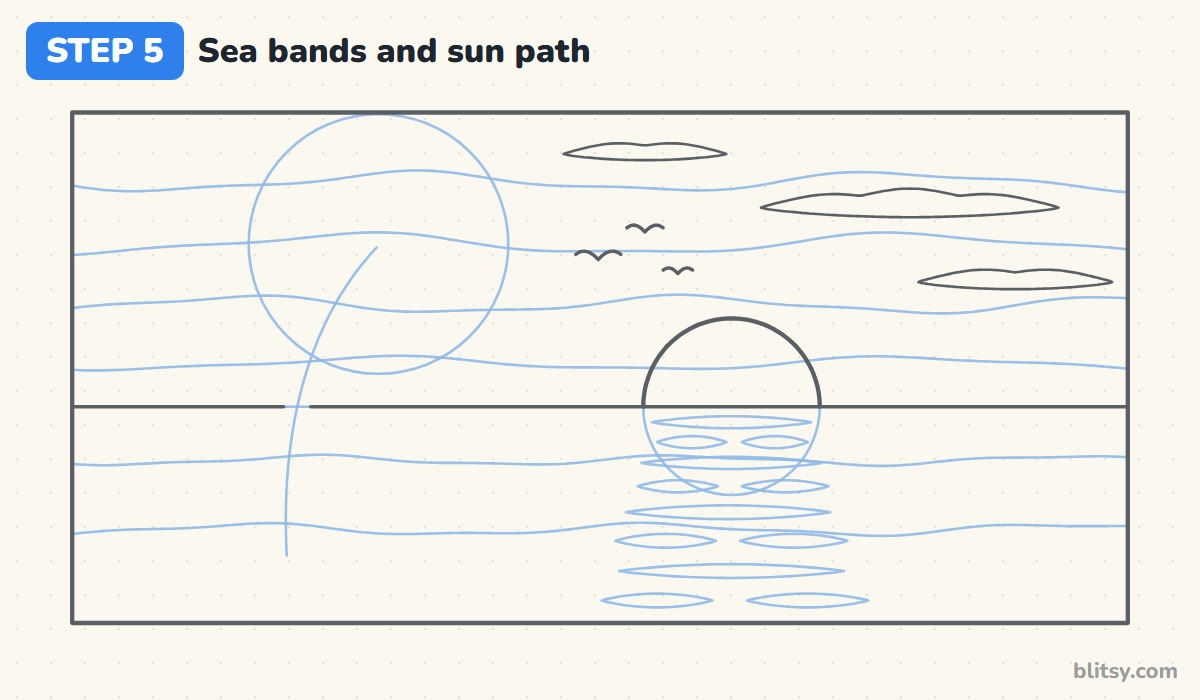
Draw two calm wavy lines below the horizon to split the sea into three bands. Then sketch the sun's reflection as a column of flat, pointed streaks under the sun, longer as they come closer, with some rows broken in two. Water reflects light in pieces, so a solid stripe looks like a road.
💡 Tip: Line up the middle of every streak under the sun's center, or the reflection drifts sideways.
Step 6: Draw the island in the corner
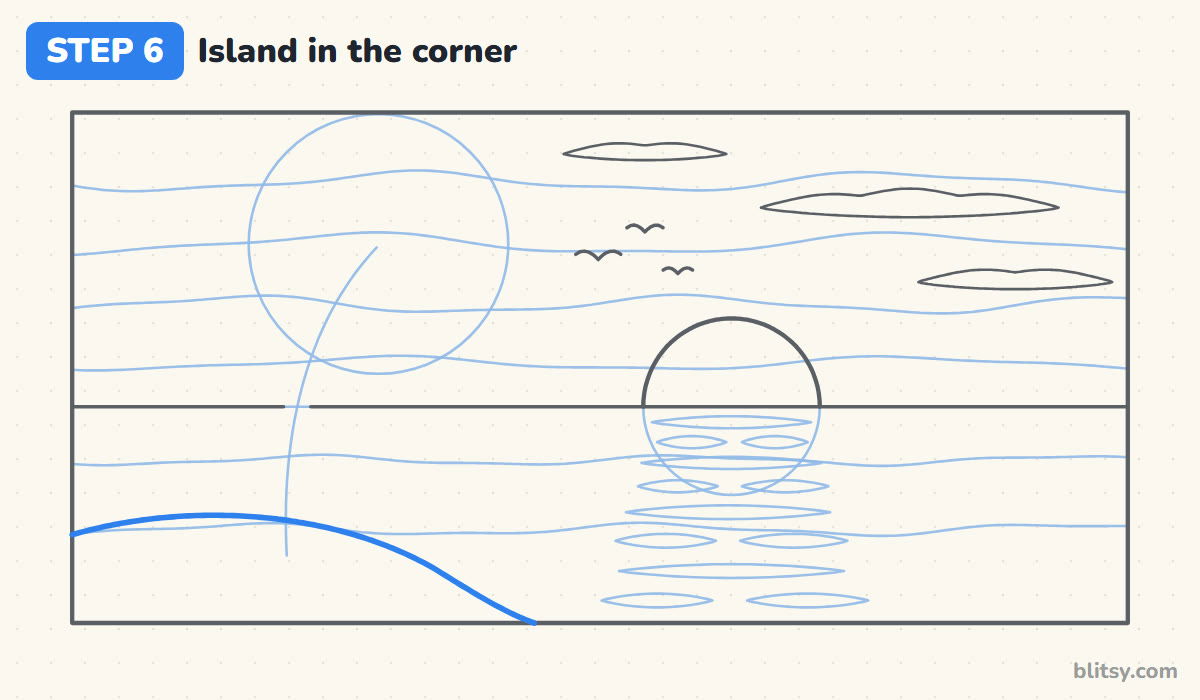
In the bottom left, draw a low, rounded hill that starts on the left border and slopes down to the bottom edge about a third of the way across. Keep it low, because a tall island hides the water and crowds the palm. Its top crosses the trunk guide, since the tree grows out of it.
💡 Tip: Draw the hill in one slow sweep from left to right instead of short, scratchy strokes.
Step 7: Draw the leaning palm trunk
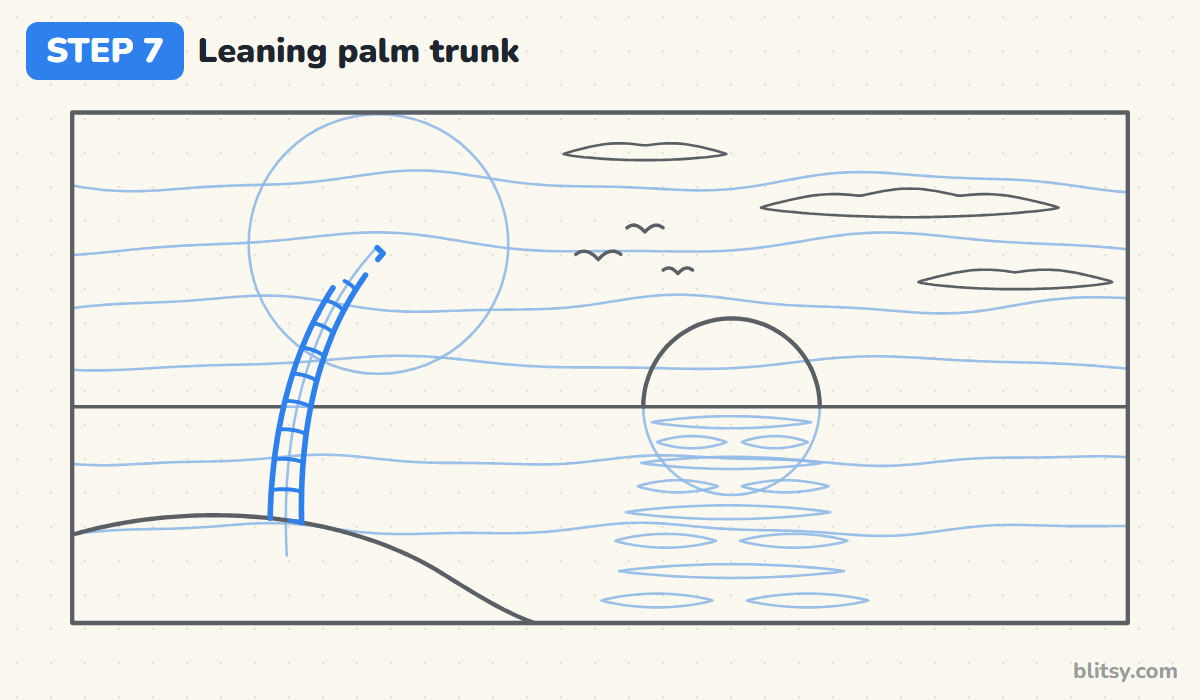
Follow the curved guide with two lines, wider at the bottom and narrower at the top, ending at the center of the leaf circle. Add short curved rings across the trunk, a little closer together near the top. A gentle lean looks natural, as beach palms usually bend toward the water.



💡 Tip: Let the rings curve slightly downward. Straight rings flatten the trunk into a ladder.
Step 8: Add the fronds and coconuts
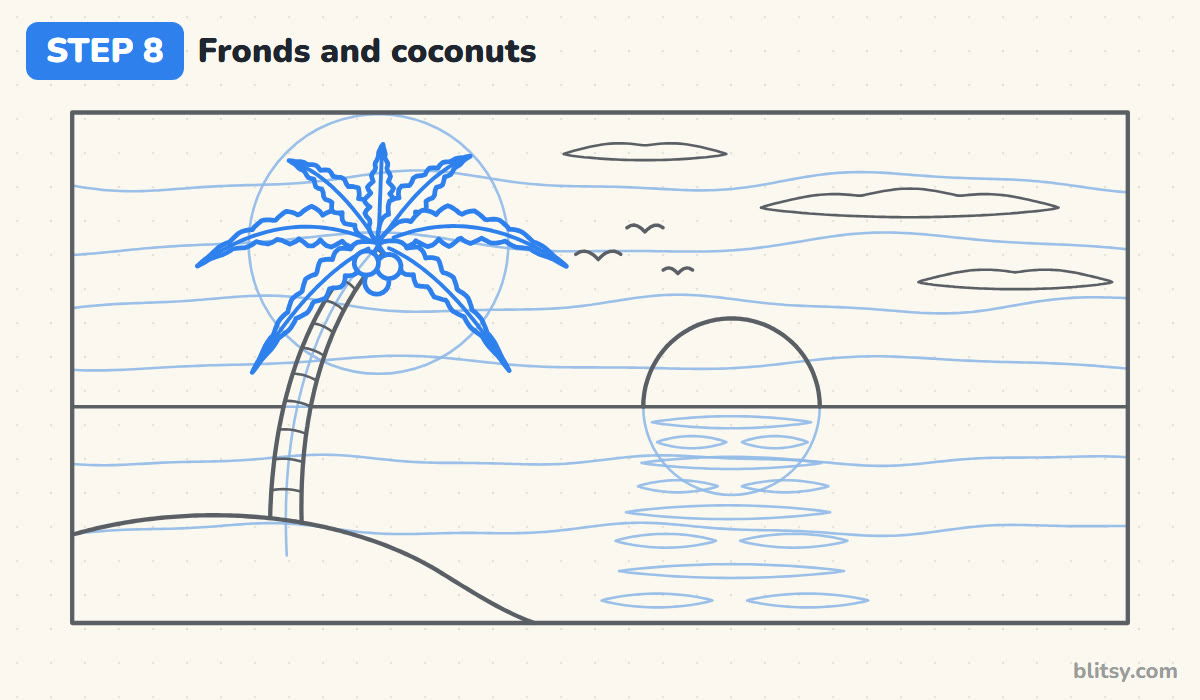
From the top of the trunk, draw seven long fronds that fan out like a firework, each with a center line and a jagged edge for the leaflets. Let the side fronds droop at the tips. Tuck three small coconuts under the crown. I start with the upright frond and work outward, so the shape stays balanced.
💡 Tip: Make the side fronds longer than the top one. Equal lengths turn the tree into a star.
Step 9: Ink the outlines and erase the guides
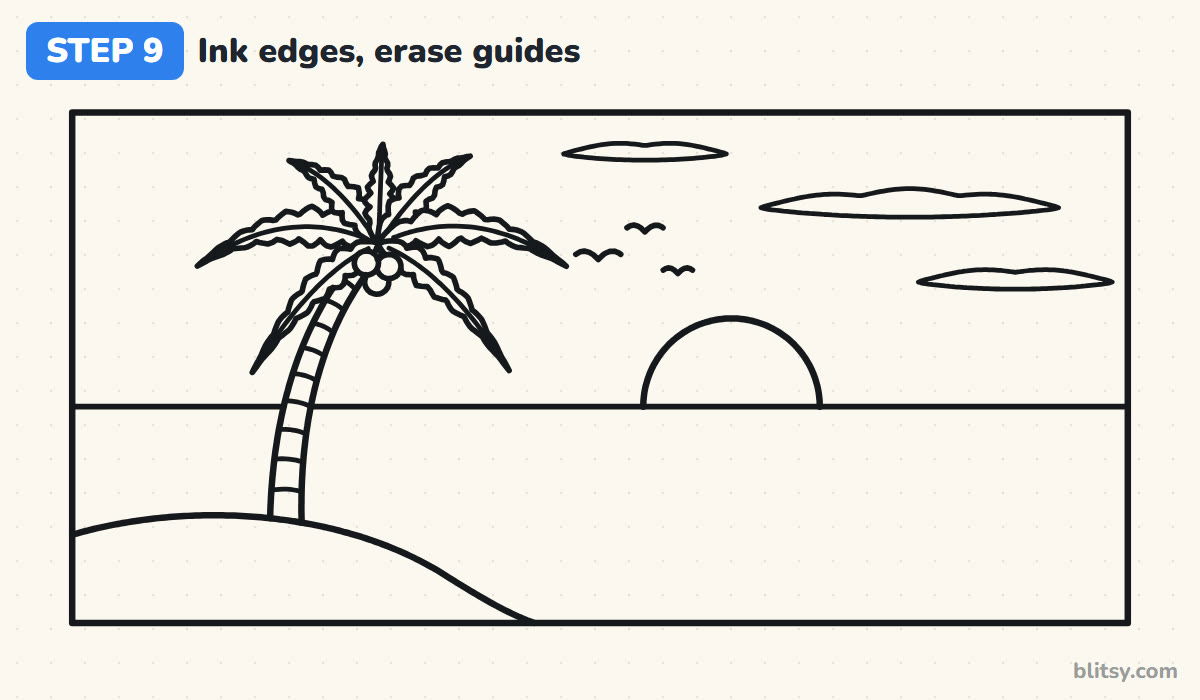
Trace every keeper line with a black permanent marker, the palm and island included. Water-based markers can smear under pastel, so permanent is safer. Once it's dry, erase the guides with a light touch, leaving a faint ghost of the band lines to show where each color goes.
💡 Tip: Thin lines are enough here. Heavy black outlines can dull a bright sky.
Step 10: Color the light colors first
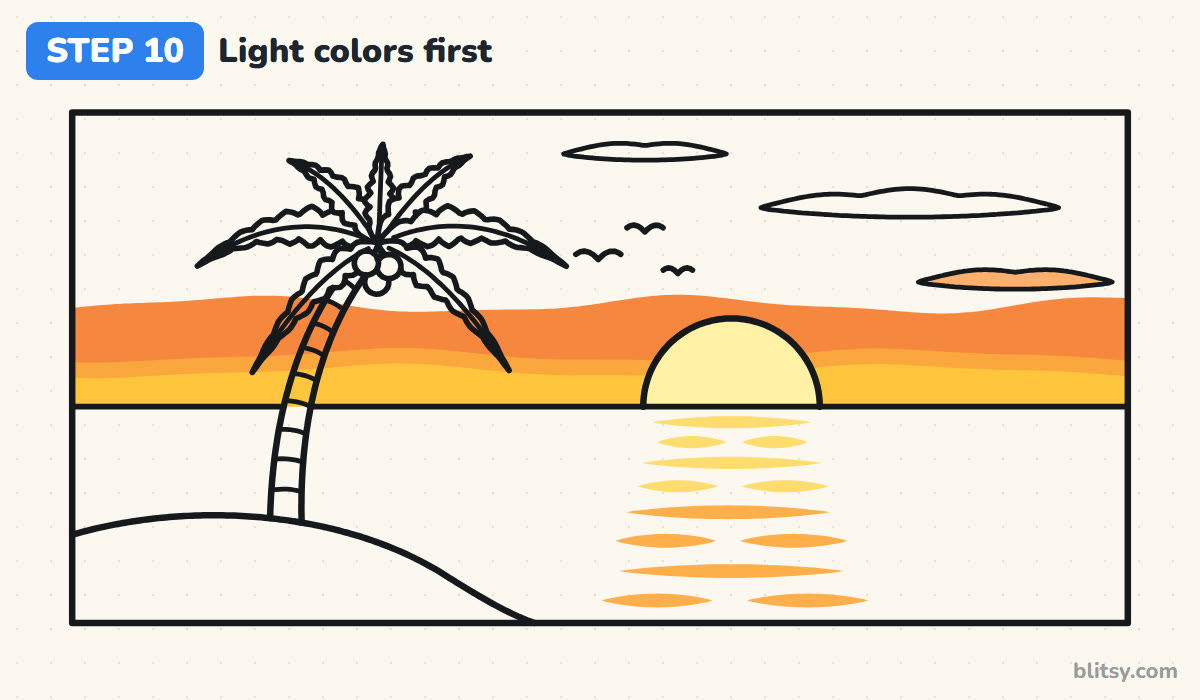
Oil pastels work from light to dark, because dark covers light far better than the reverse. Color the sun pale yellow, the bottom band golden yellow and the next one orange, all with gentle pressure. Overlap yellow and orange where they meet and rub the seam with a fingertip or tissue until a soft mixed strip appears. Fill the water streaks with yellow and orange too.
💡 Tip: Wipe the yellow stick on a tissue after it touches orange. Dirty yellow turns muddy fast.
Step 11: Add the cooler sky and sea colors
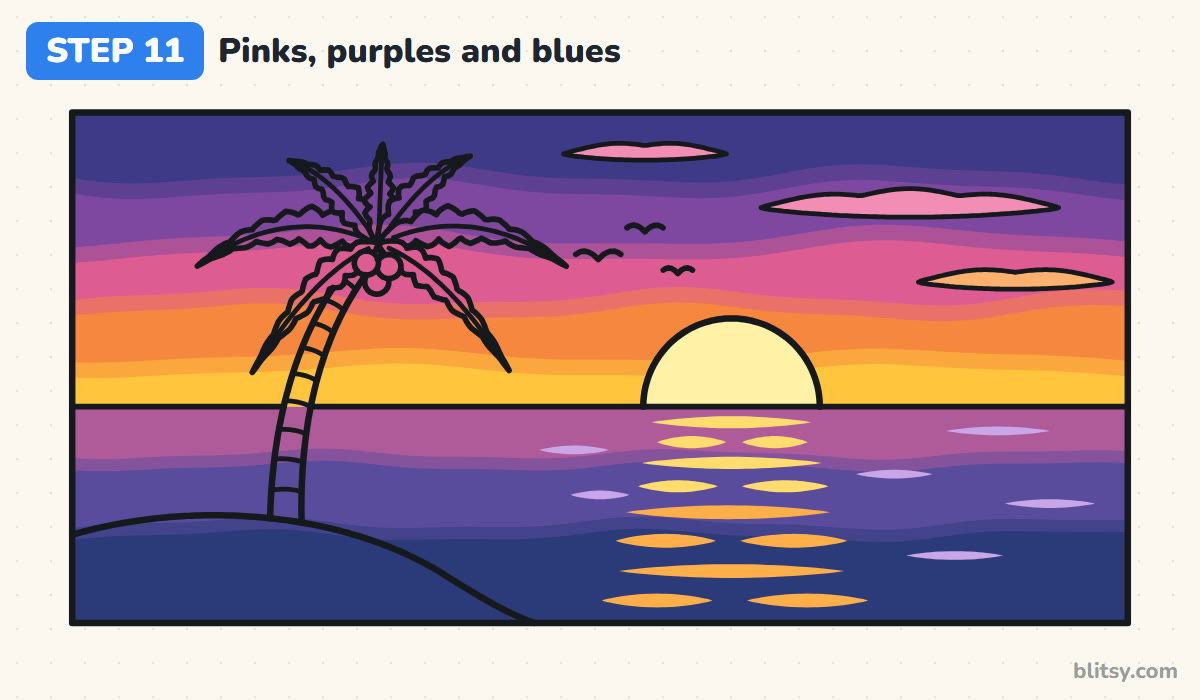
Keep climbing with pink, then purple, then deep violet, overlapping each color slightly into the band below and blending the seam. Color the clouds light pink and orange. In the sea, use purple near the horizon and blue below. For the front band, lay light purple first and press dark blue firmly on top; that buried purple returns in the last step. Color around the sun streaks.

💡 Tip: Blend with a stump or cotton swab in short side-to-side strokes. Circles drag colors into each other.
Step 12: Fill the silhouette and scratch the waves
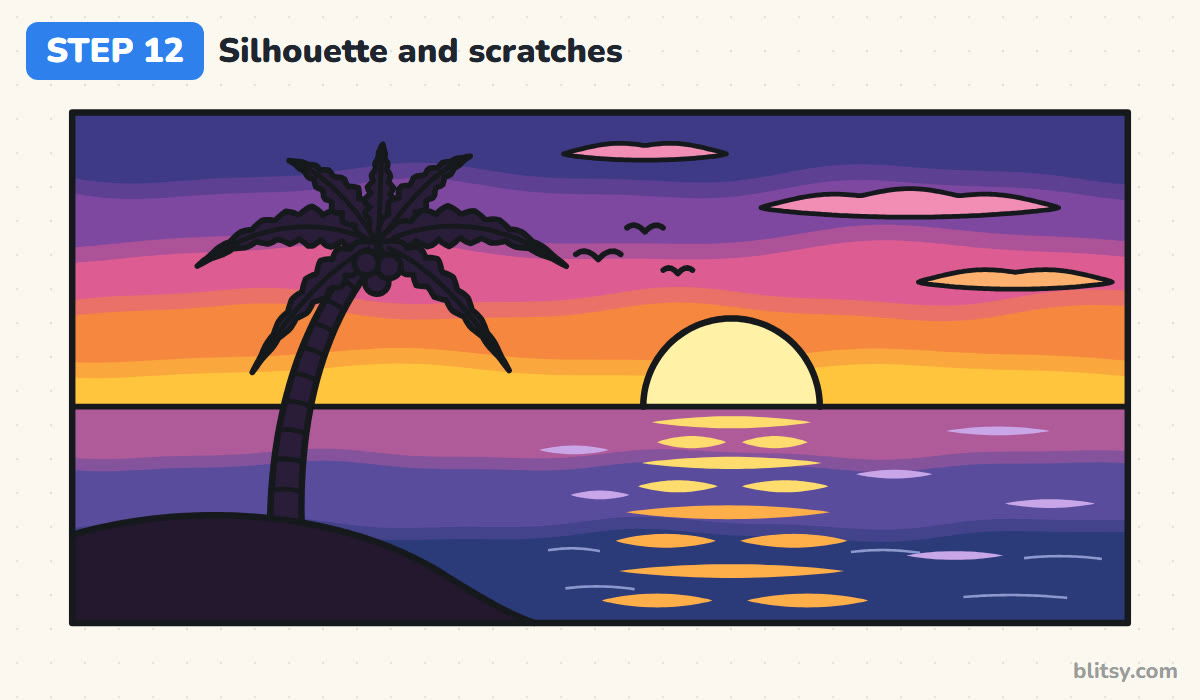
Press a black pastel firmly over the island and the whole palm. I color the sky across the palm first, since firm black covers lighter layers well; if yours looks patchy, leave the tree blank next time. Finish with sgraffito: scratch a few short wavy lines into the dark front water with a toothpick, and the purple underneath shows through like ripples.
💡 Tip: Scratch last and gently. Dig too hard and you'll reach white paper instead of purple.
Why Pastel Sunsets Turn Muddy
- Pressing hard from the first stroke. Heavy early layers fill the paper's tooth, and nothing grips on top. Start light and save firm pressure for the final layer.
- Coloring dark before light. Yellow laid over purple looks gray and dull. Work outward from the sun, lightest colors first.
- Piling on too many layers. After about three, the wax gets slick and the pastel just pushes around. If a patch turns shiny, stop adding and move on.
- Blending with a dirty finger. Purple on your fingertip ends up in the yellow. Wipe your finger on a tissue or baby wipe between colors.
- Rubbing every edge away. Blend only the seams between bands. A sky blended all over melts into one brownish haze.
Other Skies to Try With the Same Pastels
Once this sunset feels easy, keep the layering method and swap the scene: a night sky with a pale moon, or a sailboat instead of the palm. Moonlit scenery, cherry blossoms and lavender fields all work with the same layers. For more warm-weather scenes, try the summer beach drawing tutorial, or practice another tree shape with the easy tree drawing tutorial.
Sunset Coloring Page and a Step Guide to Print
Want to practice blending without drawing first? Print the sunset coloring page. The colored example at the top shows the band order, and the thick outline below is ready for layering. Use heavier paper if you color it with oil pastels. The step-by-step guide PDF has all 12 steps and tips, two to a page.
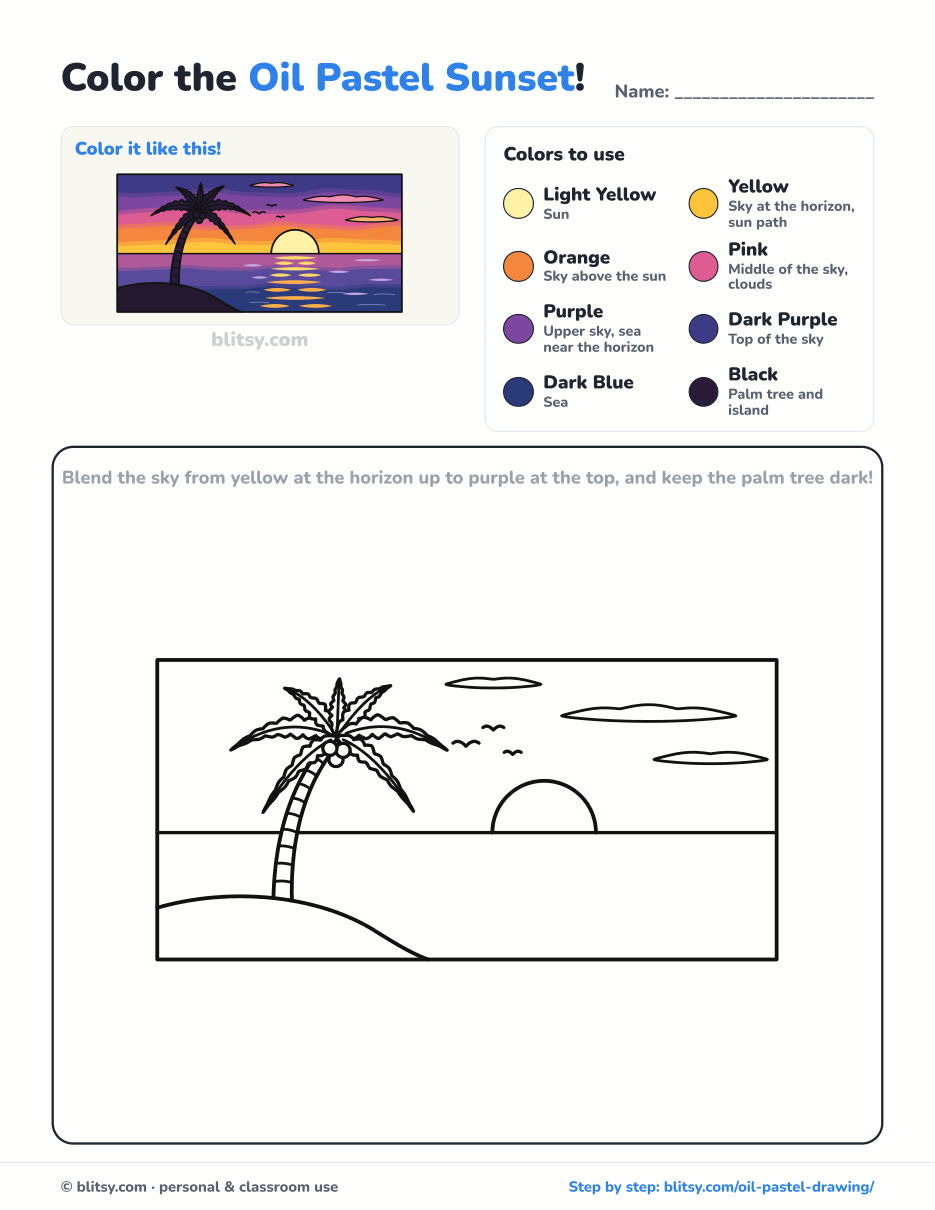
Black outlines with a colored example and the color names at the top. Ready to print and color.
⬇️ Download Coloring PageEvery step picture with its instructions and tips, to keep beside your paper while you draw.
⬇️ Download Drawing Guide📱 On a phone? Tap a download button, then open the file and choose Share → Save to Files or Print. On a computer, the PDF opens or saves straight to your Downloads folder.
Pin the Twelve Sunset Steps
Fresh Subjects for Your Oil Pastels
Each link is a step-by-step tutorial for one subject. Flowers, fruit and garden scenes all take oil pastel layers well.
- Hibiscus Drawing: The hibiscus drawing tutorial gives you five red petals around a maroon eye, a good subject for blending reds.
- Rose Drawing: Learn how to draw a rose with the spiral method, plus a bud and two leaves.
- Strawberry Drawing: Draw a whole berry and a cut half in this strawberry drawing step by step lesson.
- Avocado Drawing: Two cut halves with a leaf on the stem come together in the avocado drawing tutorial.
- Succulent Drawing: Sage leaves with pink tips sit in a warm clay pot in this succulent drawing tutorial.
- Tree Drawing: The apple tree drawing tutorial layers light and dark leaf clusters, which suits pastels.
- Chalk Art: Take your colors outside with the sidewalk chalk art tutorial: hopscotch, a rainbow and a sun.
- Jack O Lantern Drawing: A ribbed pumpkin with a candlelit grin starts from one oval in the jack o lantern tutorial.
- Magnolia Flower Drawing: Draw an open magnolia, a half-closed one and a furry bud with this magnolia flower drawing tutorial.
- Grass Drawing: The how to draw grass guide builds a meadow in three greens from one bending blade.
- Flower Drawing: A potted bouquet of a pink flower, two bluebells and a yellow star flower fills the flower drawing step by step lesson.
- Tulip Drawing: Red, pink and yellow tulips lean in different ways in this tulip drawing tutorial.
- Pizza Drawing: Golden crust and one slice pulled away make the pizza drawing tutorial a fun break from scenery.
- Garden Drawing: The garden drawing tutorial sets a sunflower, a fence and a watering can into one flower bed scene.
- Dandelion Drawing: Draw a yellow dandelion beside a seed head with the dandelion drawing tutorial.
- Cell Drawing: For a science page, the how to draw a cell guide maps out a colorful animal cell in 12 steps.
Oil Pastel Questions From First-Time Blenders
What paper is best for oil pastel drawing?
Paper with a slight texture, called tooth, holds the most layers. Pastel paper and mixed-media paper both work well, and heavy drawing paper is fine for practice. Very smooth paper fills up quickly.
How do you blend oil pastels without a blending tool?
Your fingertip is the classic blender, and a folded tissue or cotton swab works too. You can also blend by going over two colors with a lighter pastel and firm pressure.
Are oil pastels good for kids?
Yes. They're bright, need no water and forgive a lot of mistakes. They are messy, so keep baby wipes nearby, and younger kids can skip the scratching step.
How do you keep an oil pastel drawing from smudging?
Oil pastel never fully dries, so it stays soft. Lay a sheet of glassine or parchment paper over it before stacking, or frame it under glass. Fixative sprays made for oil pastels exist too, and an adult should handle those.
When your sunset is done, peel off the tape and prop it up across the room, because blended bands glow brightest from a few steps back. 🌅
Related posts:
 How to Draw a Car Step by Step (Easy Drawing for Beginners)
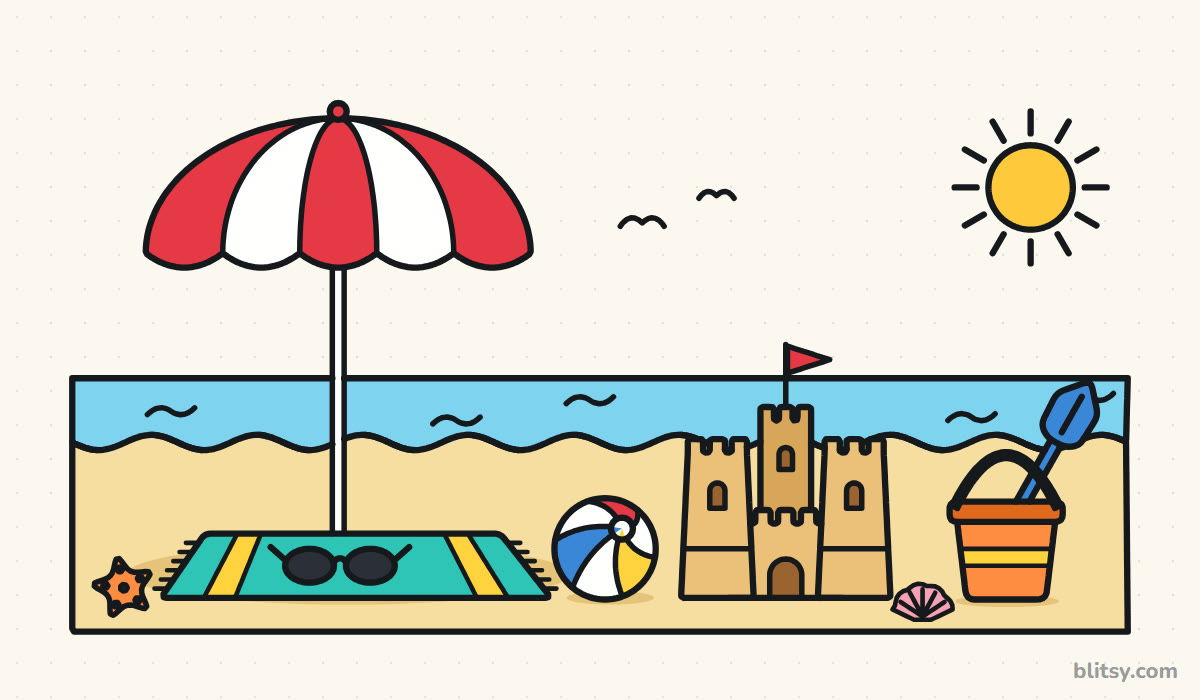 Summer Drawing Step by Step (Easy Beach Scene for Beginners)
 How to Draw a Whale Step by Step (Easy for Beginners)
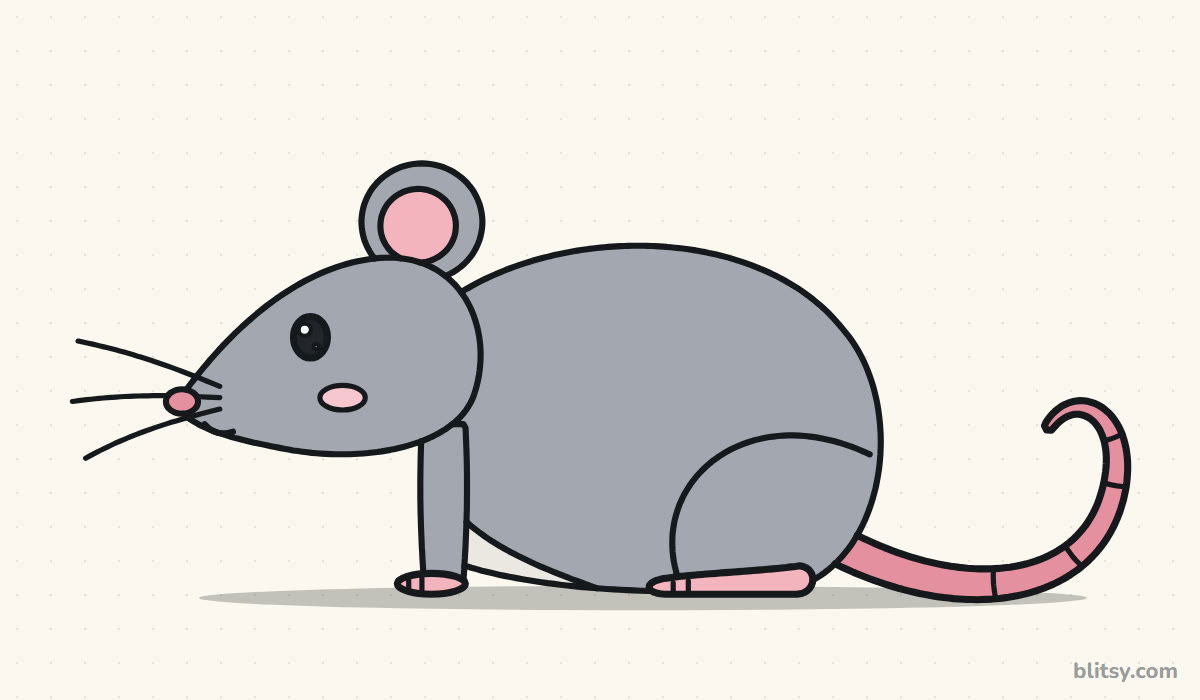 How to Draw a Rat Step by Step (Easy for Beginners)
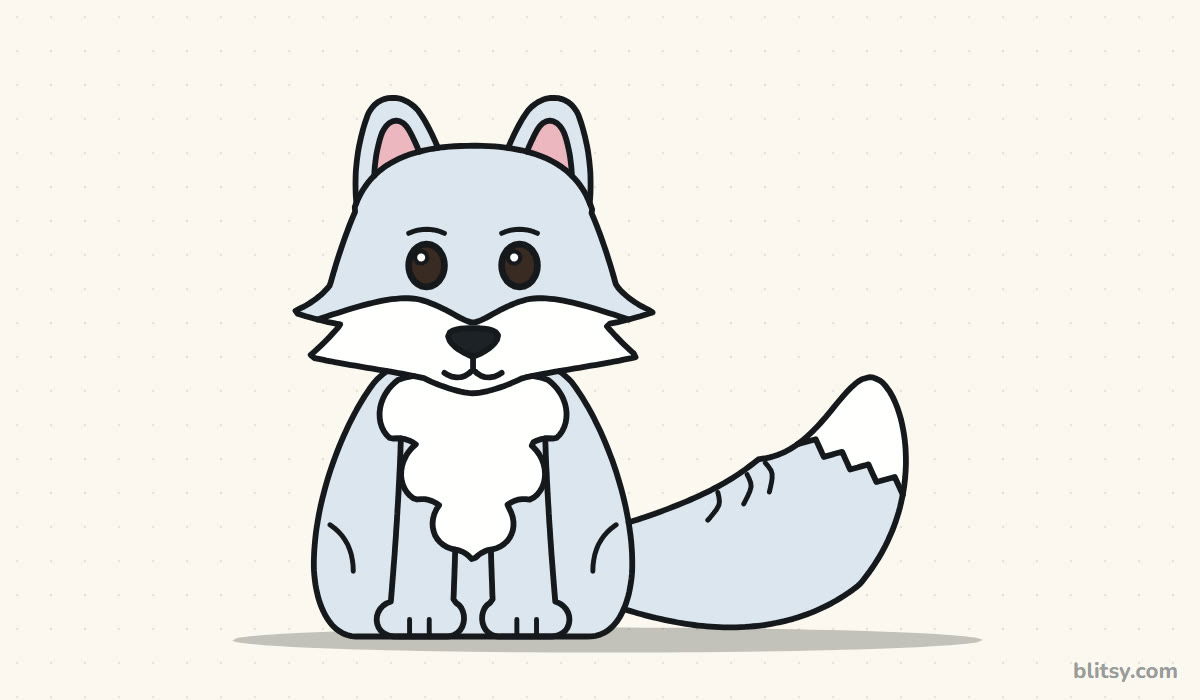 How to Draw an Arctic Fox Step by Step (Easy for Beginners)
 How to Draw Olaf Step by Step (Easy for Beginners)
 How to Draw a Ladybug Step by Step (Easy for Beginners)
 How to Draw a Dog Step by Step (Easy Side View for Beginners)
 How to Draw a Leopard Step by Step (Easy for Beginners)
 How to Draw a Light Bulb Step by Step (Easy for Beginners)
 How to Draw a Crow Step by Step (Easy for Beginners)
 How to Draw an Eagle Step by Step (Easy for Beginners)

