
Most first trees end up as a brown stick holding a green ball, and the fix is simpler than it looks. In this lesson I'll show you how to draw a tree step by step, starting with a sturdy trunk and a Y of branches before a single leaf goes on. The crown is a set of bumpy clusters that overlap like clouds, so it looks full without hundreds of single leaves. I added a few red apples to mine, which makes it an apple tree; leave them off and the same shape passes for a big shady oak.
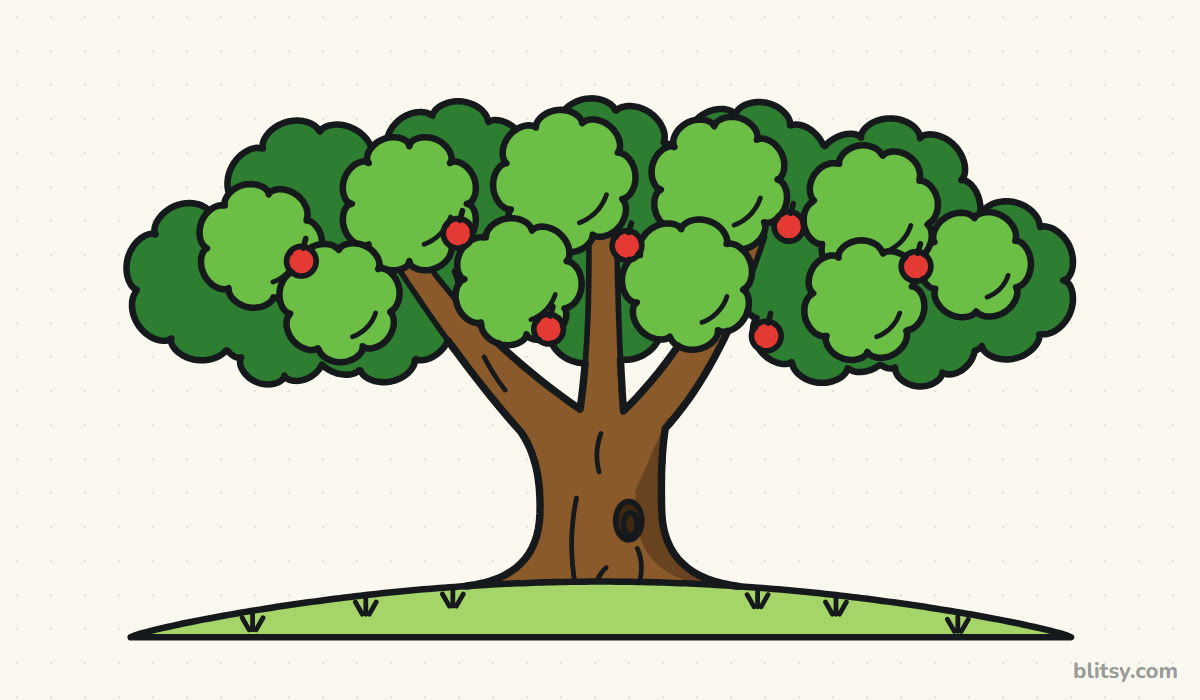
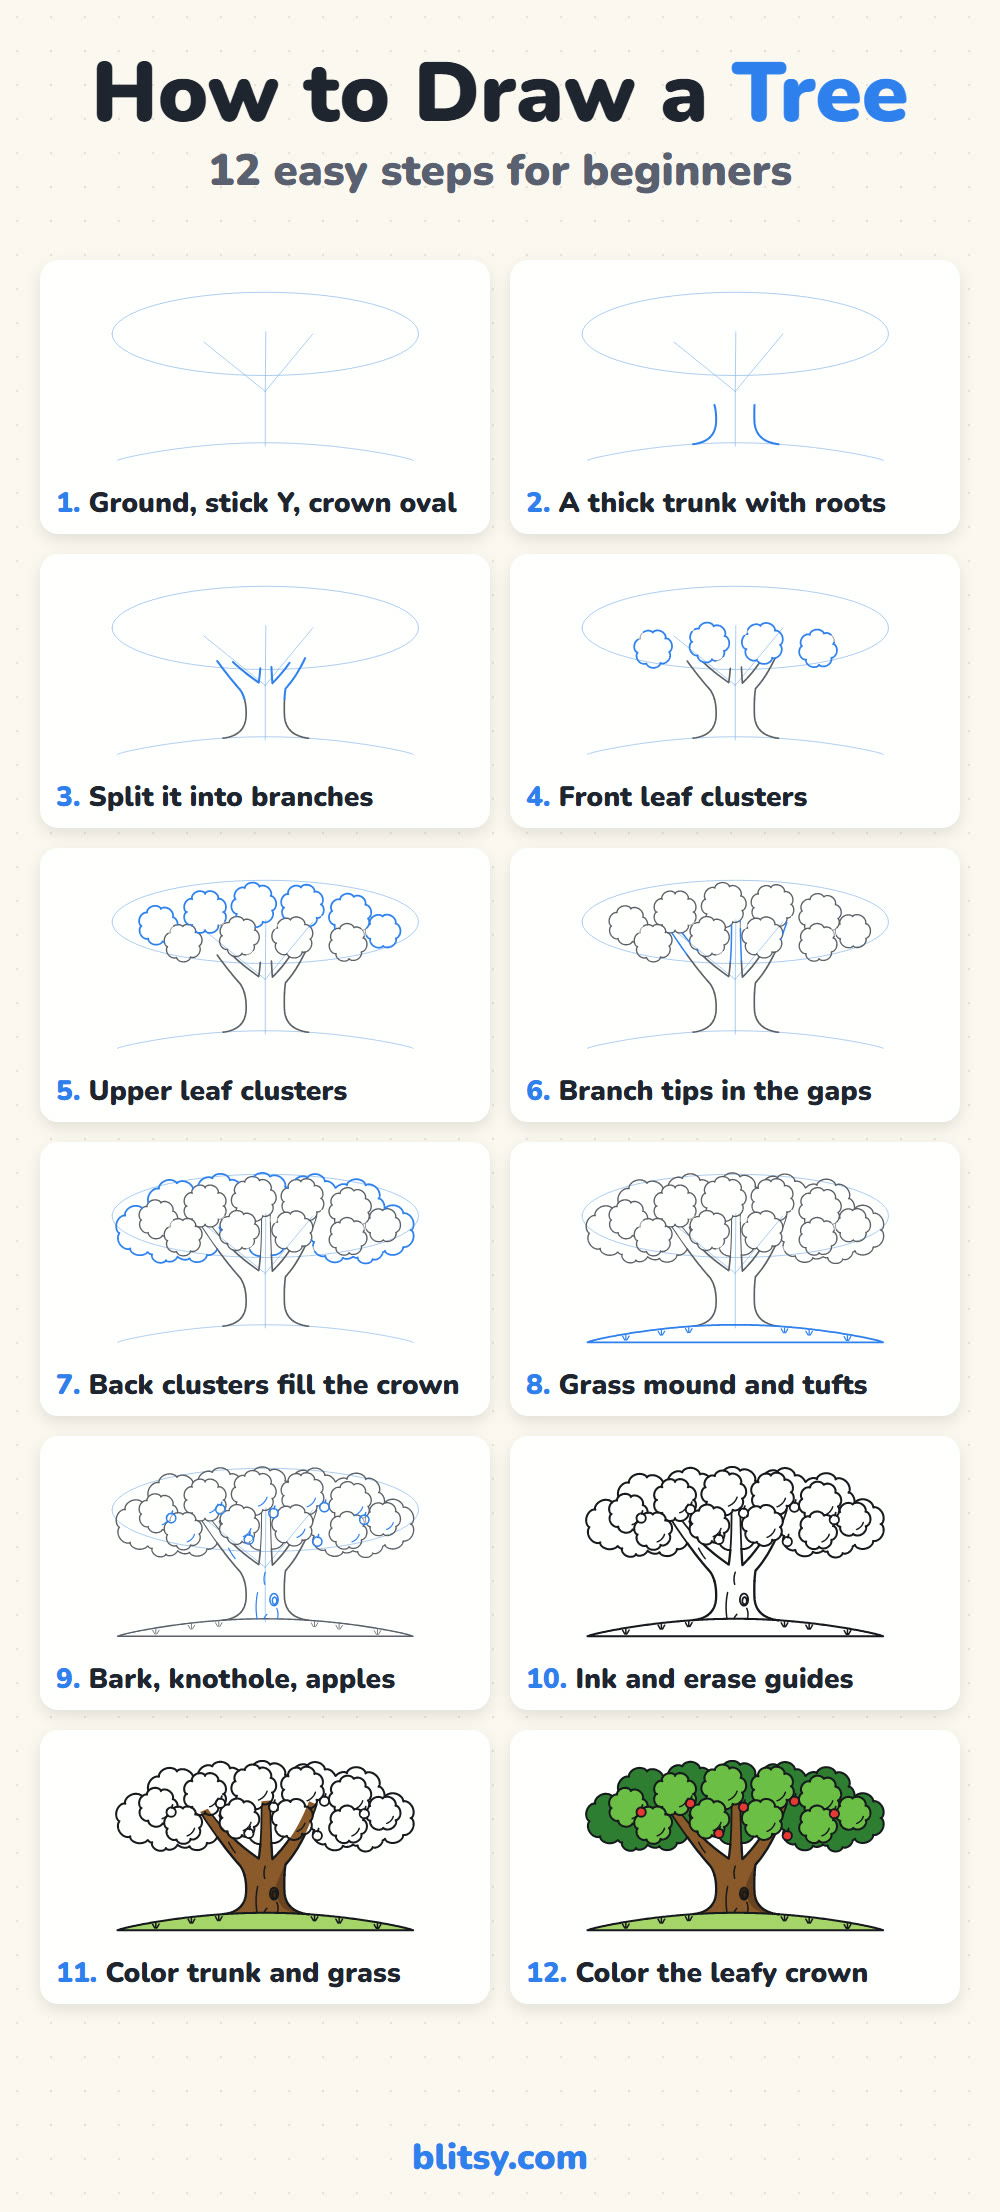
Each step picture uses two colors: blue for the lines you add right now, gray for earlier work. The thin pale blue shapes at the start are helper lines, so sketch them faintly. They get erased once the pen comes out in step 10.
Quick overview
⏱️ Time: about 30 to 40 minutes with coloring
🎯 Level: easy, good for kids from about 7 and adult beginners
✏️ Steps: 12
🌳 You'll draw: a leafy apple tree with a flared trunk, three branches and a grassy hill
Pencils and Greens for a Shady Tree
- A regular HB pencil for the light helper lines
- An eraser that won't smear graphite
- A black felt-tip pen or fineliner
- Colored pencils or markers in two greens, light green, brown, dark brown and red
- Paper turned sideways, since this tree grows wider than it is tall
Only have one green? Color the back clusters with heavy pressure and the front ones with a light touch, and you'll still see two layers.
How to Draw a Tree Step by Step
Step 1: Sketch the ground, a stick Y and a crown oval
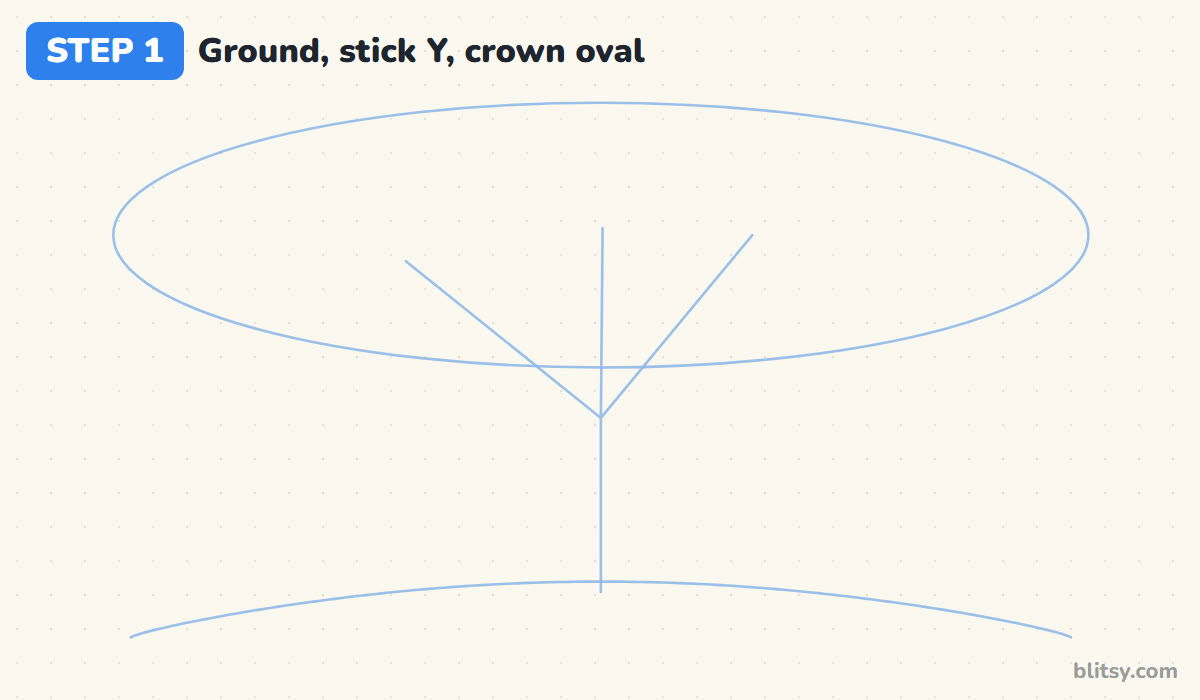
Start low on the page with a gentle hill curve. From its middle, draw a line up about a third of the page, then split it three ways: left, straight up and right. Around the top, add a wide, flat oval spanning almost the whole paper. That oval is where the leaves will live, and the stick Y shows where the branches run inside it.
💡 Tip: Keep the oval wider than it is tall, about three times wider.
Step 2: Draw a thick trunk that flares into roots
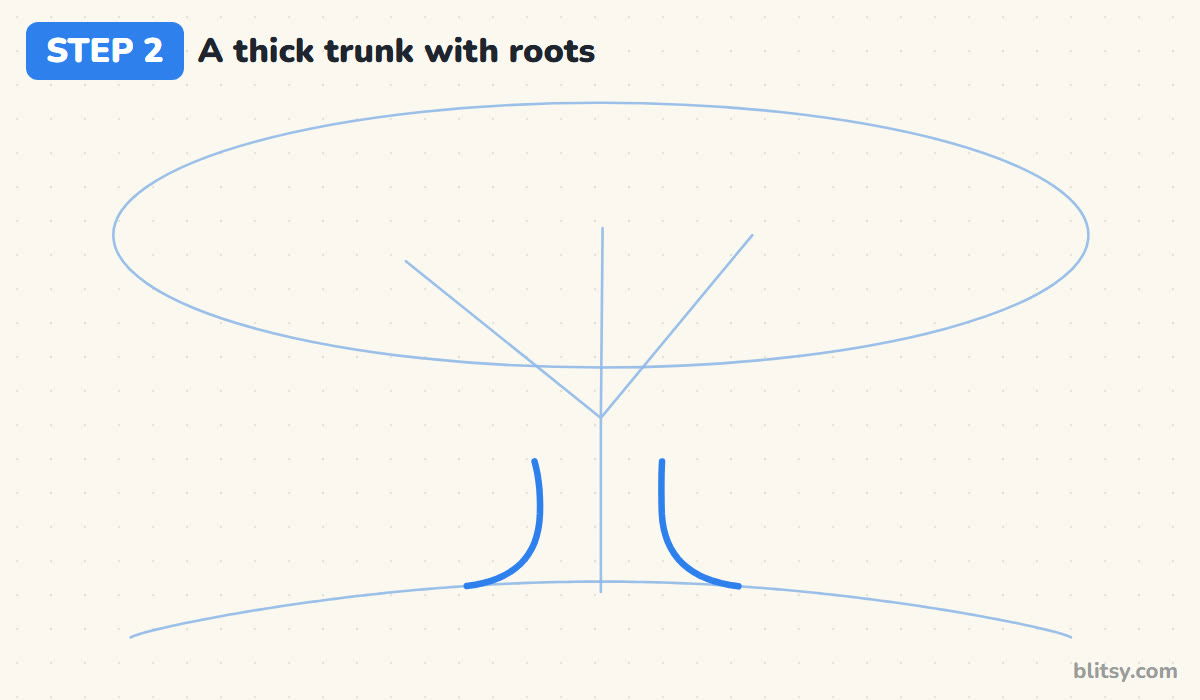
Draw two lines on either side of the stick and let them run down to the hill. Near the ground, curve both outward so the trunk spreads like a skirt. That flare is what makes a tree look planted. A trunk that meets the ground as two straight posts looks pushed into the soil.
💡 Tip: Bend the root curves late, only in the bottom quarter of the trunk.
Step 3: Split the trunk into three branches
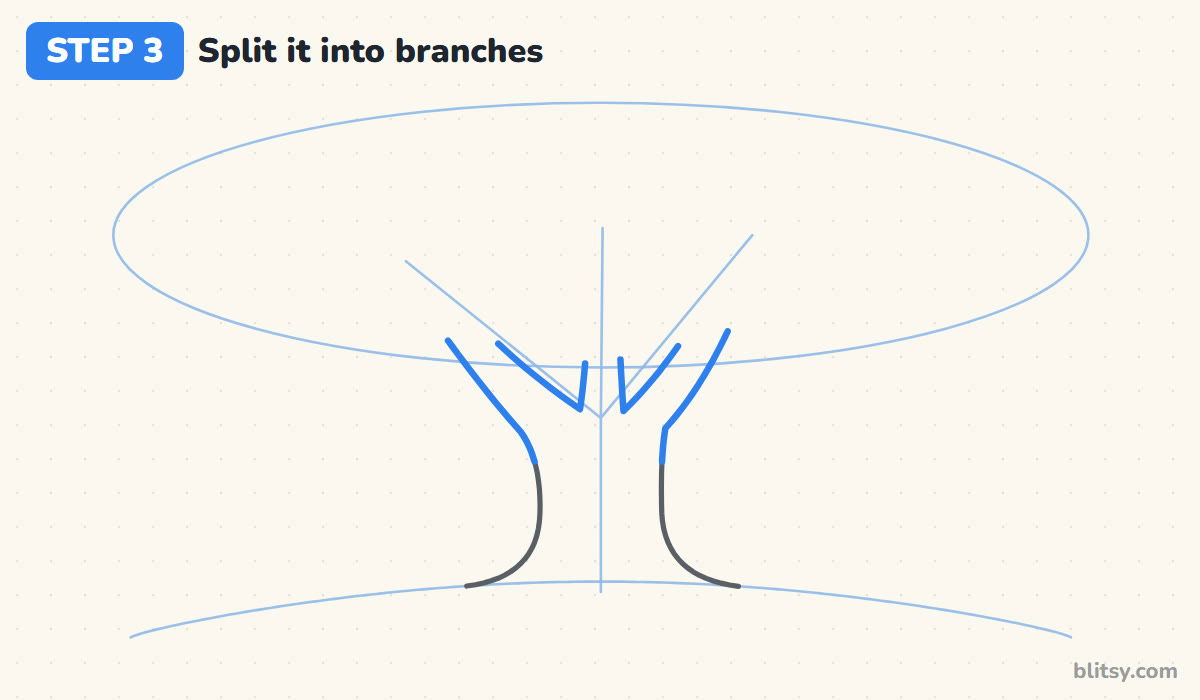
Where the stick Y splits, carry the outer trunk lines up and out along the left and right guides. Then draw a narrow V on each side of the middle guide, so a smaller third branch rises between the big ones. Let every branch taper a little as it climbs, and stop the lines at the bottom of the oval.



💡 Tip: Branches should never be wider than the trunk they grow from.
Step 4: Add the front row of leaf clusters
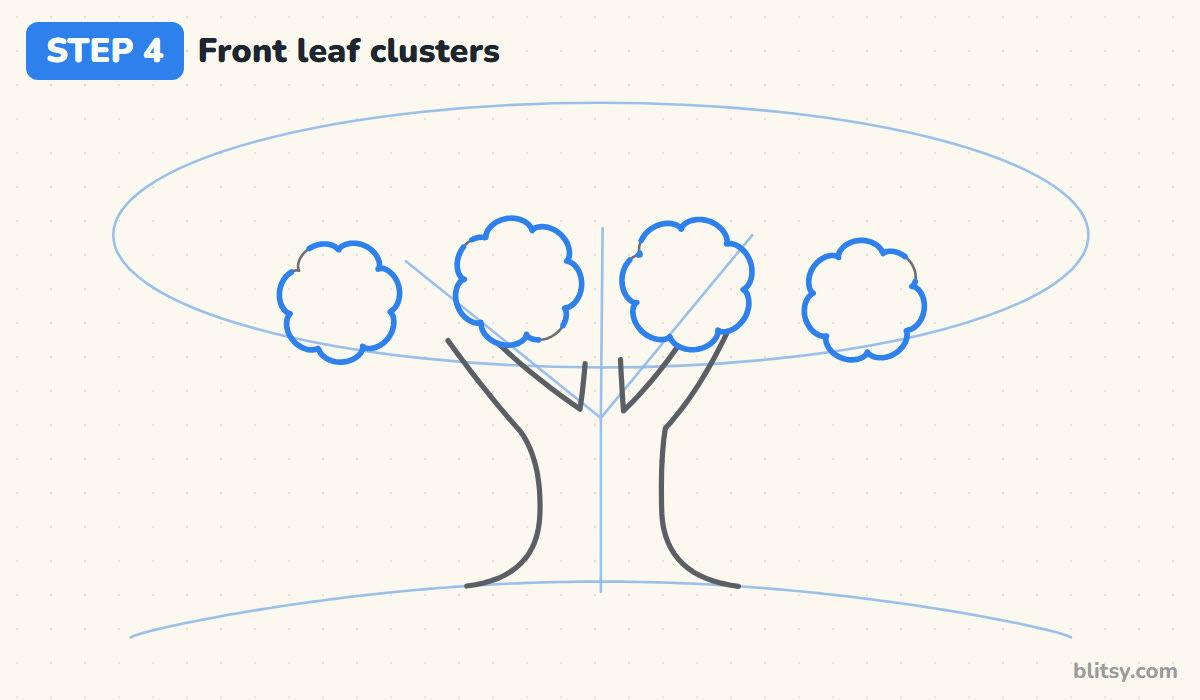
Now the leaves. Draw four round, bumpy shapes along the lower half of the oval, like small clouds with scalloped edges. I draw each one as a chain of little bumps going around in a circle rather than one smooth circle, because the bumps are what tell people they're looking at leaves.
💡 Tip: Make the bumps different sizes so the clusters don't look stamped.
Step 5: Stack the upper clusters behind them
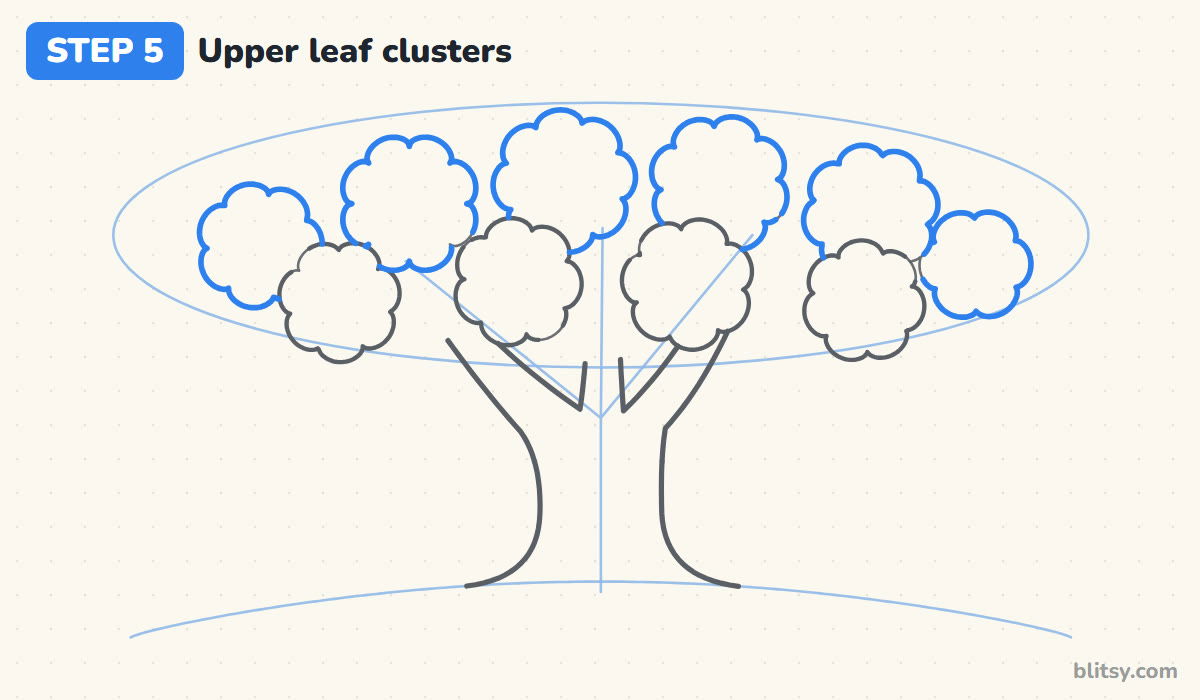
Add six more bumpy clusters higher up, filling the top of the oval from side to side. These sit behind the front row, so wherever a new cluster runs into a front one, stop your line at its edge. Skipping that habit is why so many crowns turn into a pile of crossing circles.
💡 Tip: Ask which cluster is closer before every line. The closer one stays whole.
Step 6: Let branch tips peek through the gaps
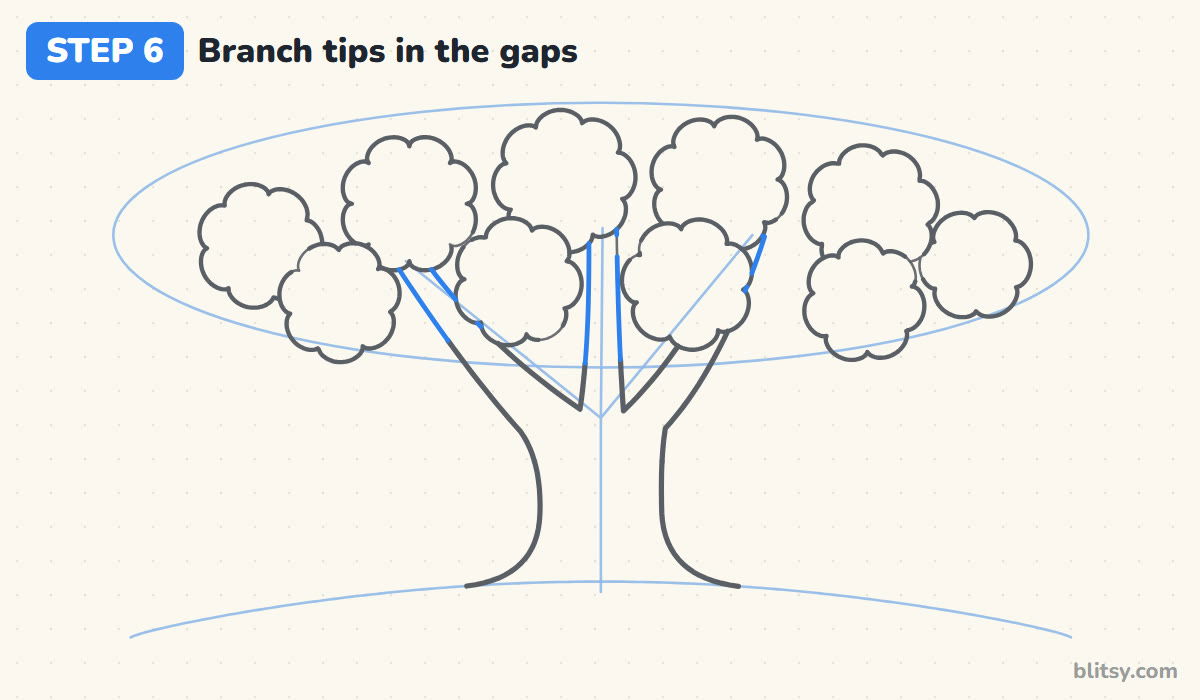
Look for the small spaces left between the clusters. Inside a few of them, continue the branch lines from step 3 so the wood seems to pass behind the leaves. The middle branch shows best. A short piece in each gap is enough for the eye to connect the branches all the way up.
💡 Tip: Line up each branch piece with the part below it, like a ruler hidden behind the leaves.
Step 7: Fill the outer crown with back clusters
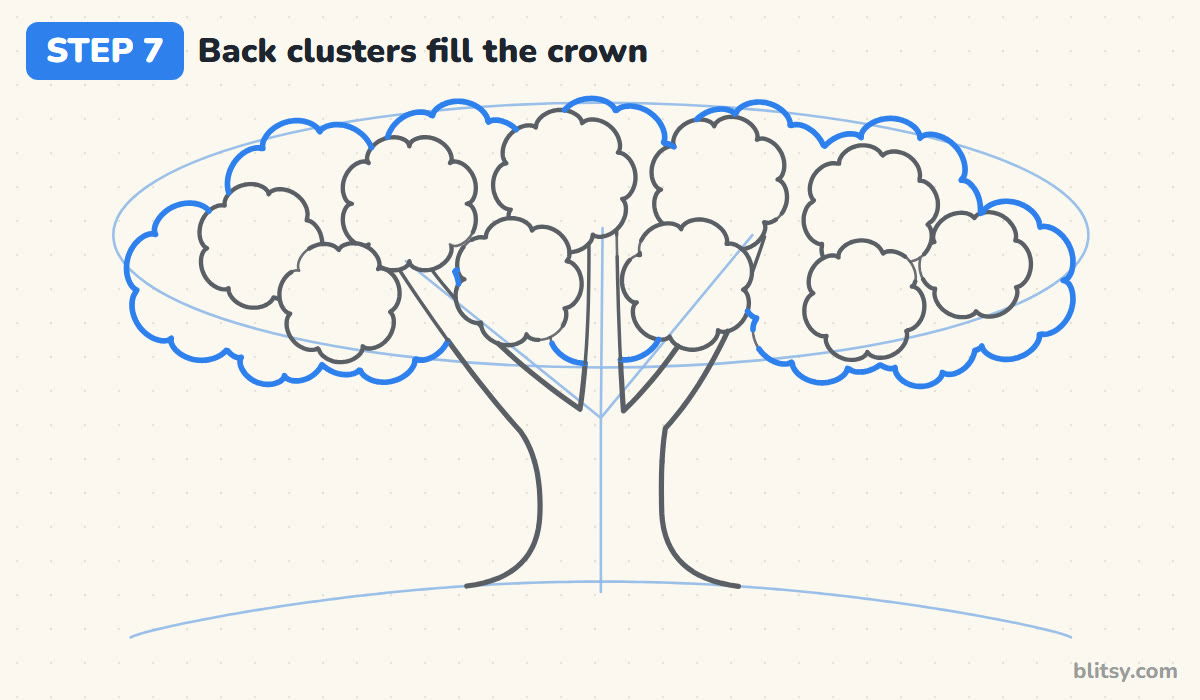
Wrap a bumpy line around the outside of everything, filling the oval right to its edges. Let it dip a little lower on both sides than in the middle, so the crown droops the way heavy leafy trees do. These are the leaves furthest back, so the line stops wherever a front cluster or a branch is in the way.




💡 Tip: Bigger bumps on the outer edge make the crown look fuller from a distance.
Step 8: Draw the grass mound and tufts
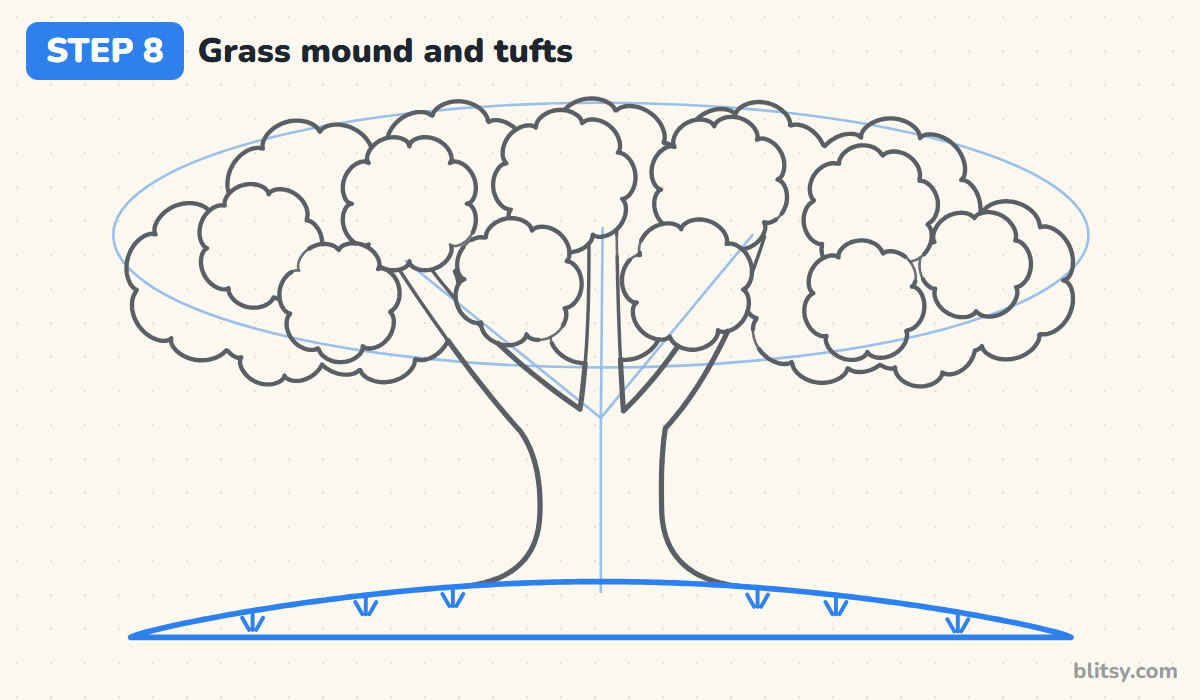
Go over the hill guide with a firm curve, then close it with a flat line along the bottom. The roots should sit right on that top curve. Scatter six small grass tufts across the hill, each made of three short strokes fanning out from one point, and keep them away from the trunk.
💡 Tip: Put the tufts at different heights on the hill instead of in one row.
Step 9: Add bark lines, a knothole and apples
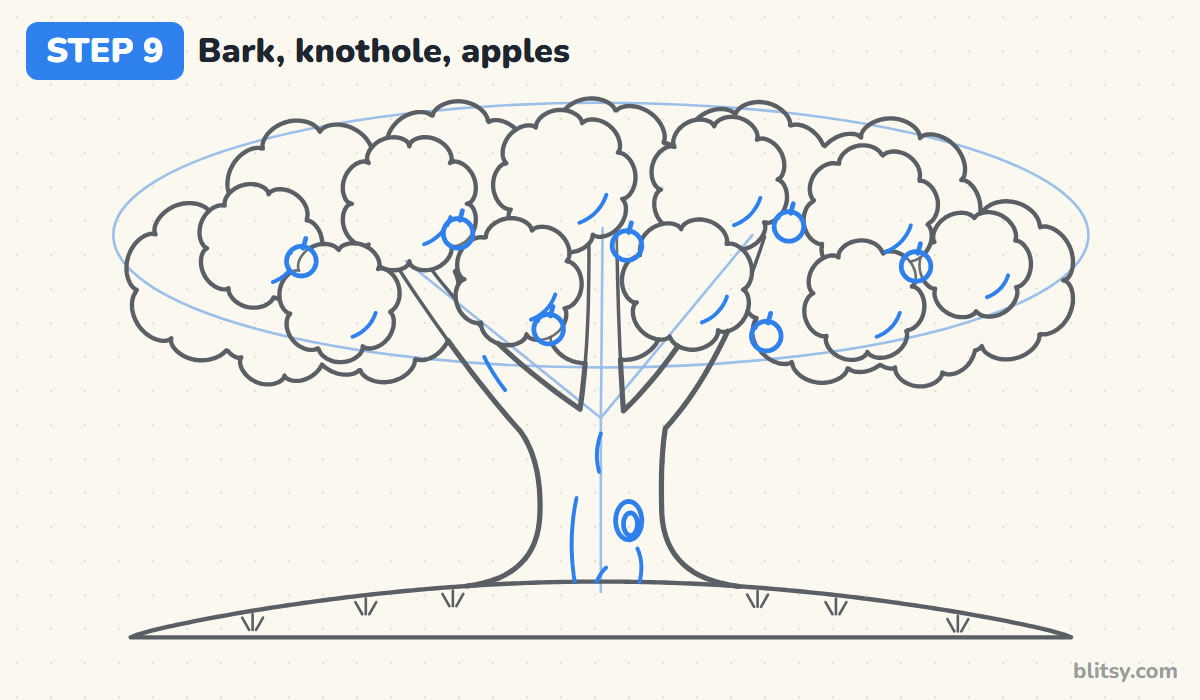
On the trunk, draw a few short, wavy up-and-down lines, plus two on the branches. Below the split, add a tall oval knothole with a smaller oval inside. Then dot seven small circles over the crown for apples, each with a tiny stem. A short curved mark on the lower right of every front cluster hints at the shadow under each clump.
💡 Tip: Leave gaps between bark lines; five or six are plenty for the whole trunk.
Step 10: Ink the tree and erase the helper lines
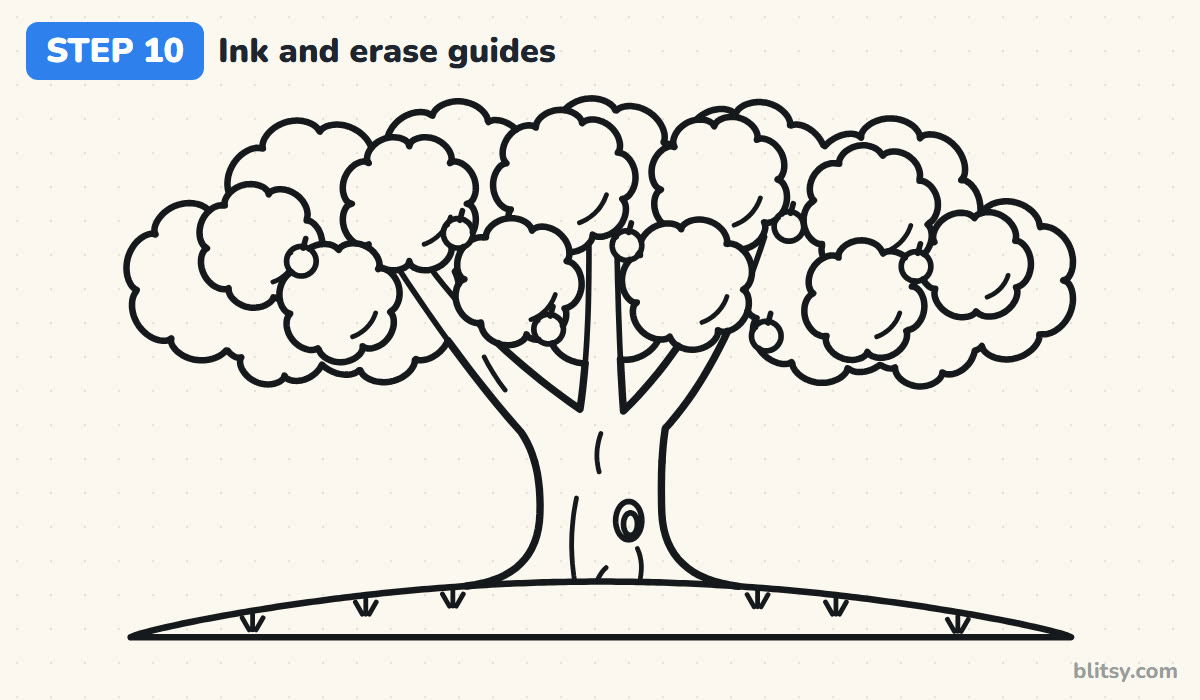
Trace all the keeper lines with your black pen, from the trunk and clusters down to the tufts. Wait a minute for the ink to dry. Then rub out the oval, the stick Y, the hill guide and the bits of cluster outline crossing the apples. What's left is a clean line drawing that already looks like a tree.
💡 Tip: Ink the big outer outline first, while your hand is fresh and steady.
Step 11: Color the trunk and the grass
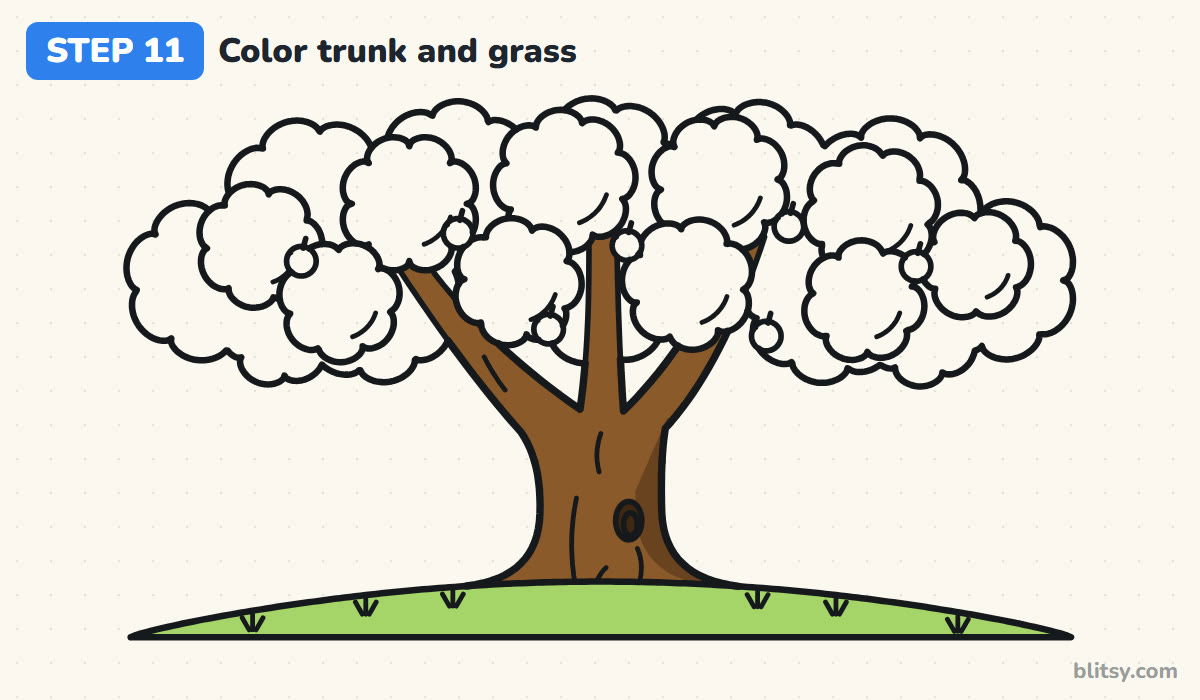
Fill the trunk and the branch pieces with medium brown. Go over a thin strip along the right side of the trunk with dark brown, and fill the knothole with your darkest brown. That darker side makes the trunk look round instead of flat. Finish the hill in light green.




💡 Tip: Press lightly for the first layer of brown; you can always add more.
Step 12: Color the leafy crown and apples
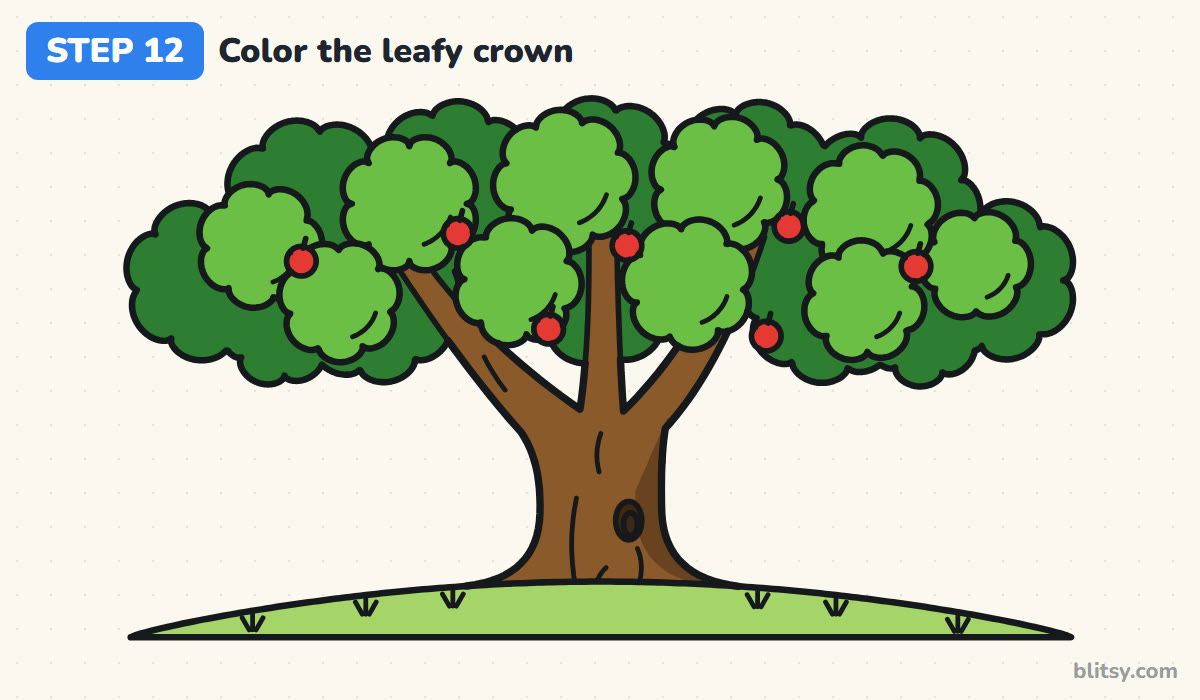
Color the back clusters, the ones around the outside and in the gaps, dark green. Use a brighter, lighter green for the ten front clusters. The two greens give the crown its depth, so don't skip the dark one. Color the apples red last.
💡 Tip: Color each cluster in small circles to match the bumpy edges.
Lollipop Trees and Other Common Slip-Ups
- A skinny trunk under a huge crown. The tree looks like it could snap. Keep the trunk clearly wider than any branch, all the way down to the roots.
- Straight trunk edges meeting the ground. It reads as a post. Curve the bottom outward into roots.
- One smooth circle of leaves. That's the lollipop look. Build the crown from several bumpy clusters instead.
- Every cluster drawn as a full circle. The overlapping lines get messy fast. Stop each back cluster where a front one covers it.
- The same green everywhere. The clusters melt together. A darker green for the back ones separates them right away.
Seasons, Swings and Other Tree Twists
The same trunk and crown work all year. Color the clusters orange and gold for autumn, leave the crown off for a bare winter tree, or swap the apples for pink blossoms in spring. A rope swing on the left branch or a small bird in one of the gaps is a nice extra. If you liked the apples, practise them up close with the apple drawing tutorial, and for an autumn version try the fall leaf drawing tutorial.
Apple Tree Coloring Page and a Printable Step Guide
Want something to hand out in class or print at home? The tree coloring page has a small finished example at the top with each color named next to it, and a big outline with thick lines below. The step-by-step guide PDF collects all 12 steps with their tips, two per page. Both print on Letter or A4 paper.
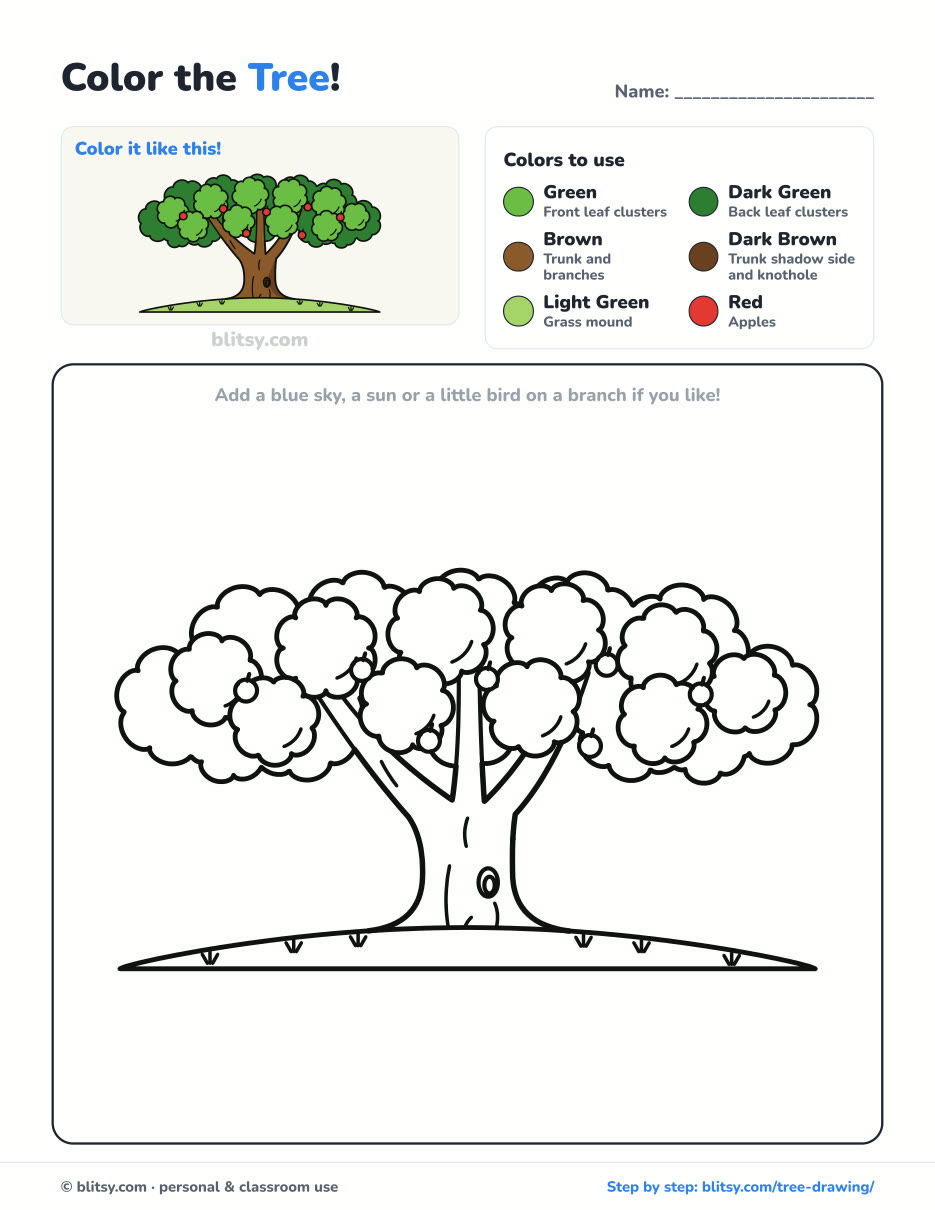
Black outlines with a colored example and the color names at the top. Ready to print and color.
⬇️ Download Coloring PageEvery step picture with its instructions and tips, to keep beside your paper while you draw.
⬇️ Download Drawing Guide📱 On a phone? Tap a download button, then open the file and choose Share → Save to Files or Print. On a computer, the PDF opens or saves straight to your Downloads folder.
Keep the Apple Tree Steps on Pinterest
Tree Drawing Questions I Hear a Lot
What is the easiest way to draw a tree?
Start with a trunk that flares at the bottom and splits into a Y, then cover the top with a few bumpy cloud shapes. That skips drawing single leaves entirely.
How do you draw tree leaves without drawing every leaf?
Group them. Each bumpy cluster stands for hundreds of leaves, and two greens, one for the front clusters and one for the back, make the crown look thick.
How long does it take to draw a tree?
The line drawing takes about 15 to 20 minutes for a beginner. Coloring adds another 15 or so, mostly for the crown.
Is this tree easy enough for kids?
Yes, for most kids around 7 and up. Younger children can skip the branch tips and the leaf marks and draw fewer, bigger clusters.
Start with that gentle hill curve today, and let your tree grow as wide as the page allows. 🌳
Related posts:
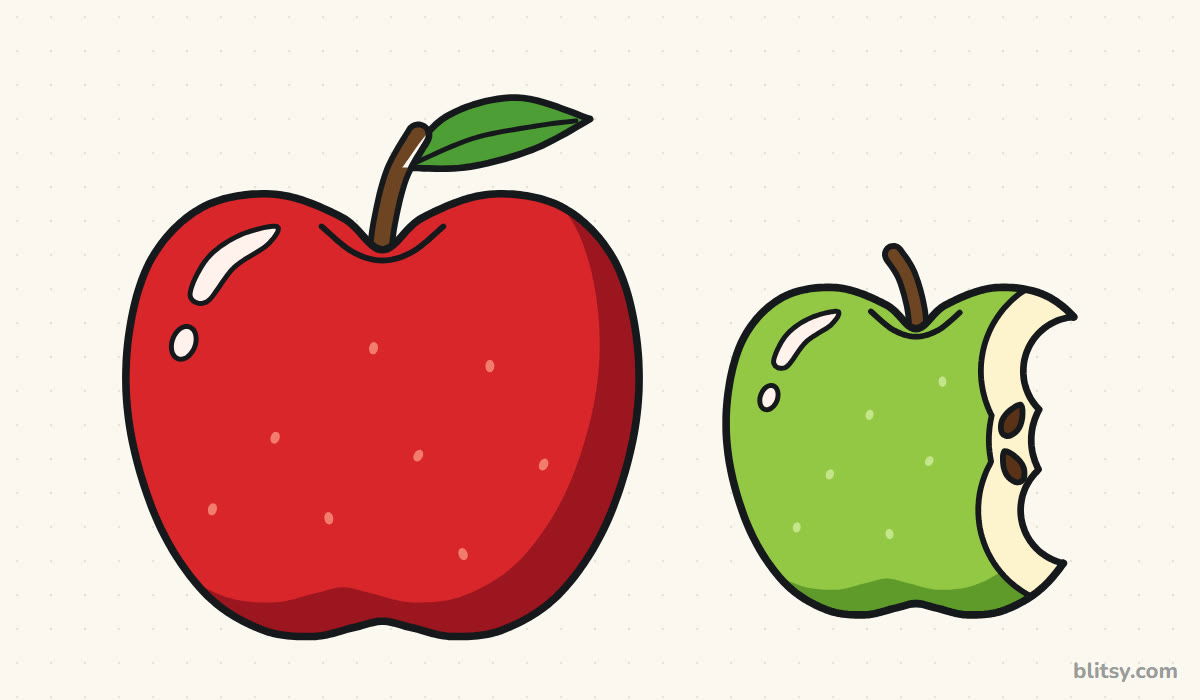 How to Draw an Apple Step by Step (Red and Bitten Green)
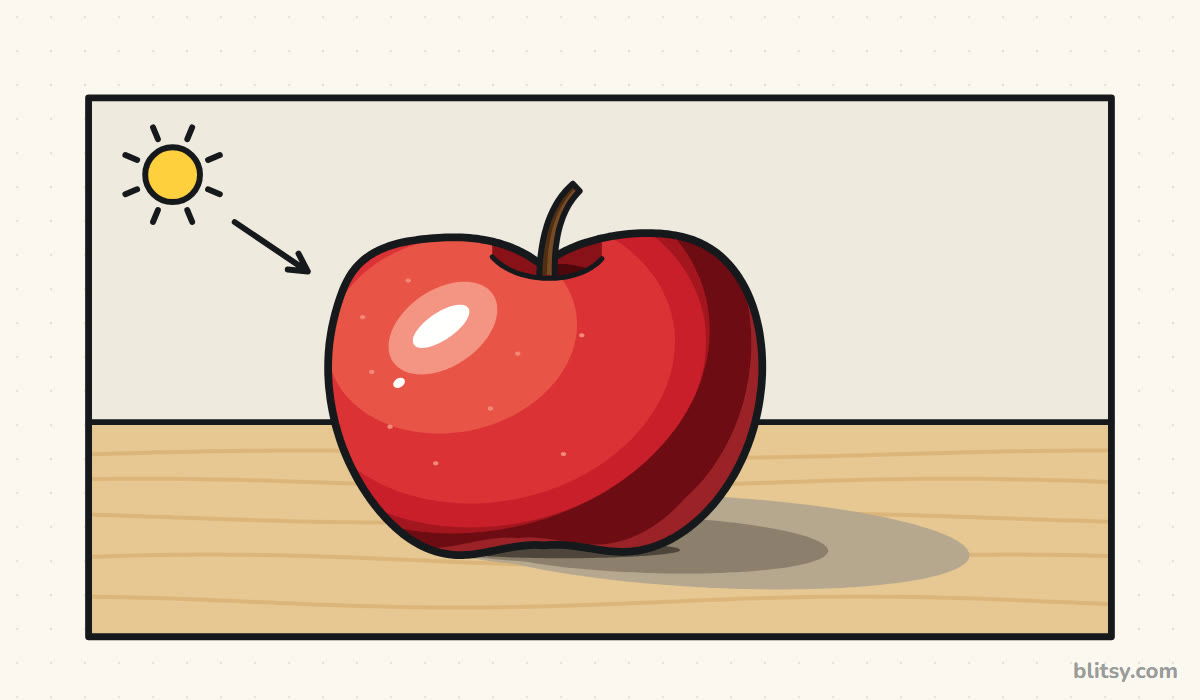 Realistic Drawing Step by Step (Shade a Shiny Apple)
 How to Draw a Whale Step by Step (Easy for Beginners)
 How to Draw Lungs Step by Step (Easy Science Diagram)
 How to Draw a Pineapple Step by Step (Easy Crown and Slice)
 How to Draw Iron Man Step by Step (Easy Chibi for Kids)
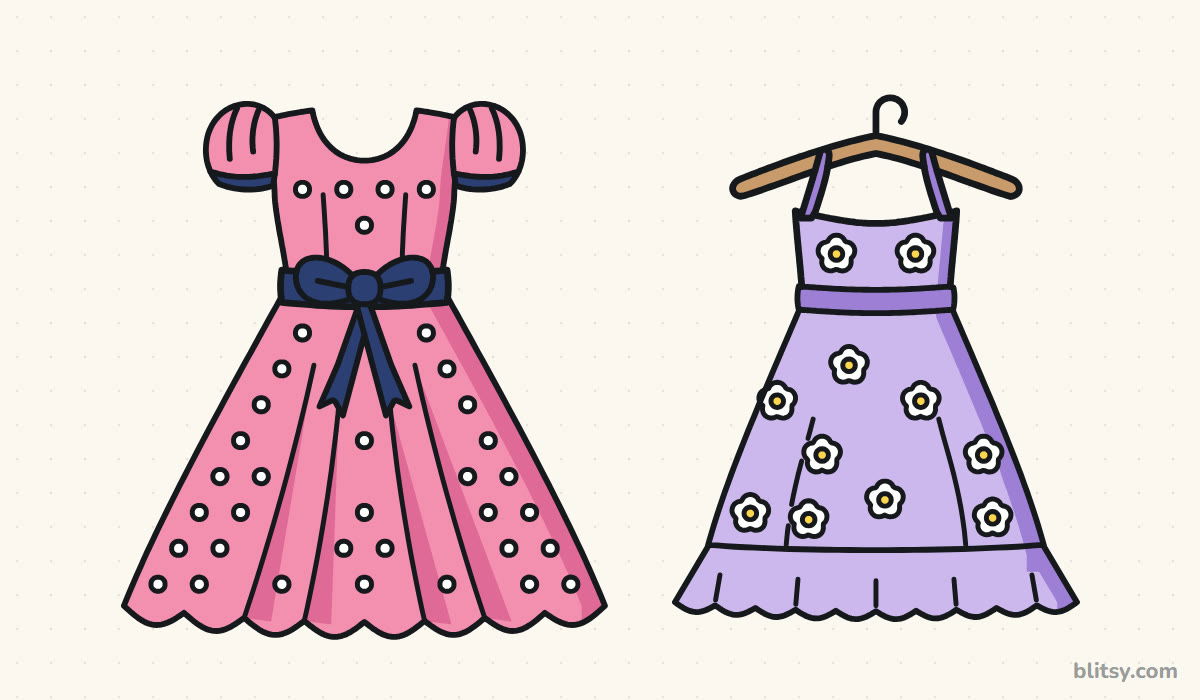 How to Draw a Dress Step by Step (Easy Party Dress)
 How to Draw a Chicken Step by Step (Easy for Beginners)
 How to Draw a UFO Step by Step (Cute Alien Saucer)
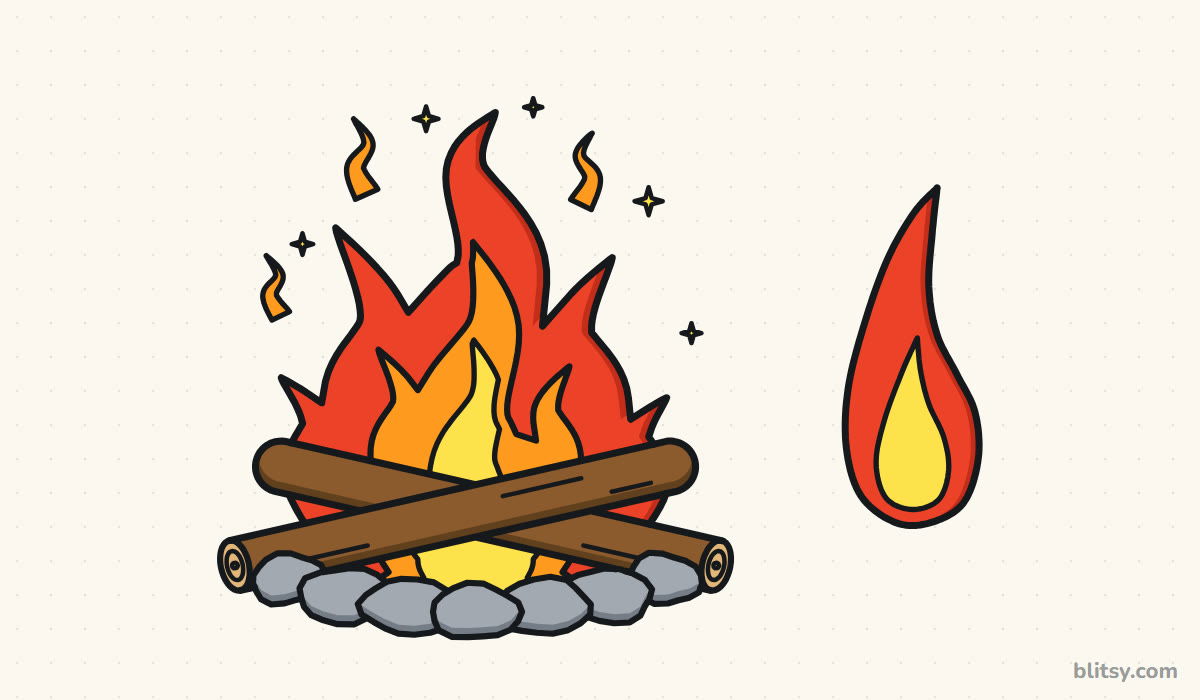 How to Draw Flames Step by Step (Easy Campfire Drawing)
 How to Draw a Moon Step by Step (Sleepy Crescent + Phases)
 How to Draw a Tiger Step by Step (Easy Walking Pose)

