
Darth Vader has been the most famous helmet in the galaxy since he first stomped onto movie screens in Star Wars back in 1977. Strip away the drama and that helmet is really a dome, a flared rim and a triangle, which makes him a surprisingly friendly subject for new artists. In this lesson I'll show you how to draw Darth Vader step by step as a small chibi figure holding his lightsaber straight up like a glowing toy. This is my simple fan-art version for drawing practice, not a copy of any official Star Wars artwork.
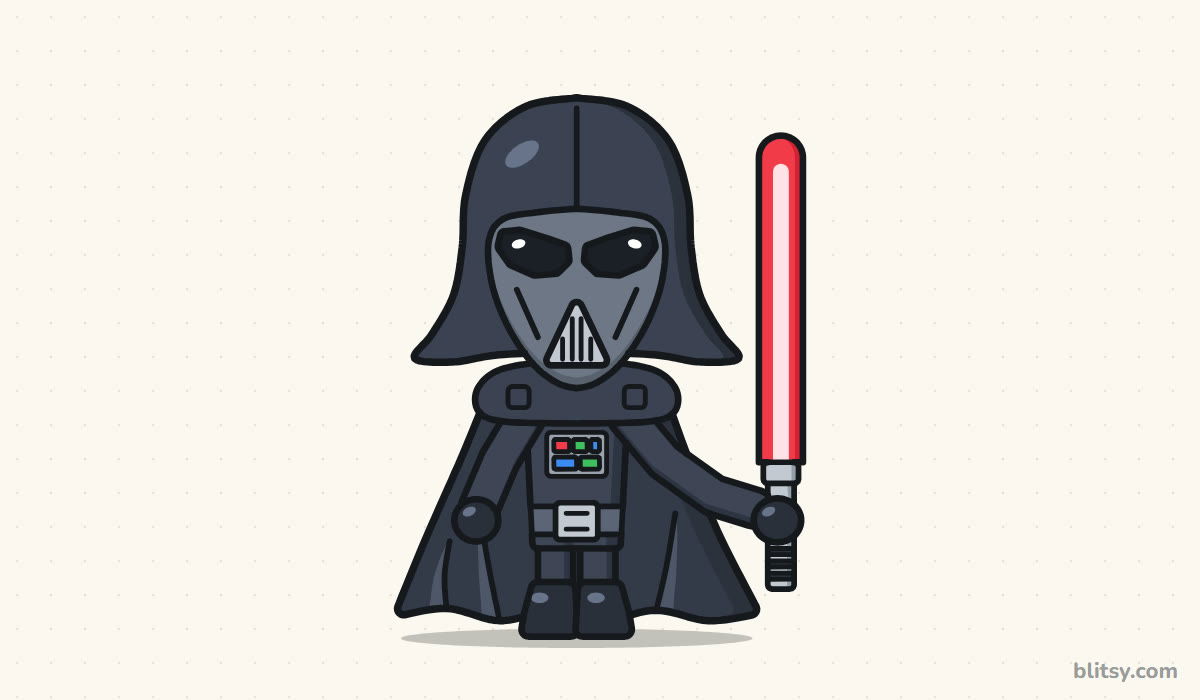
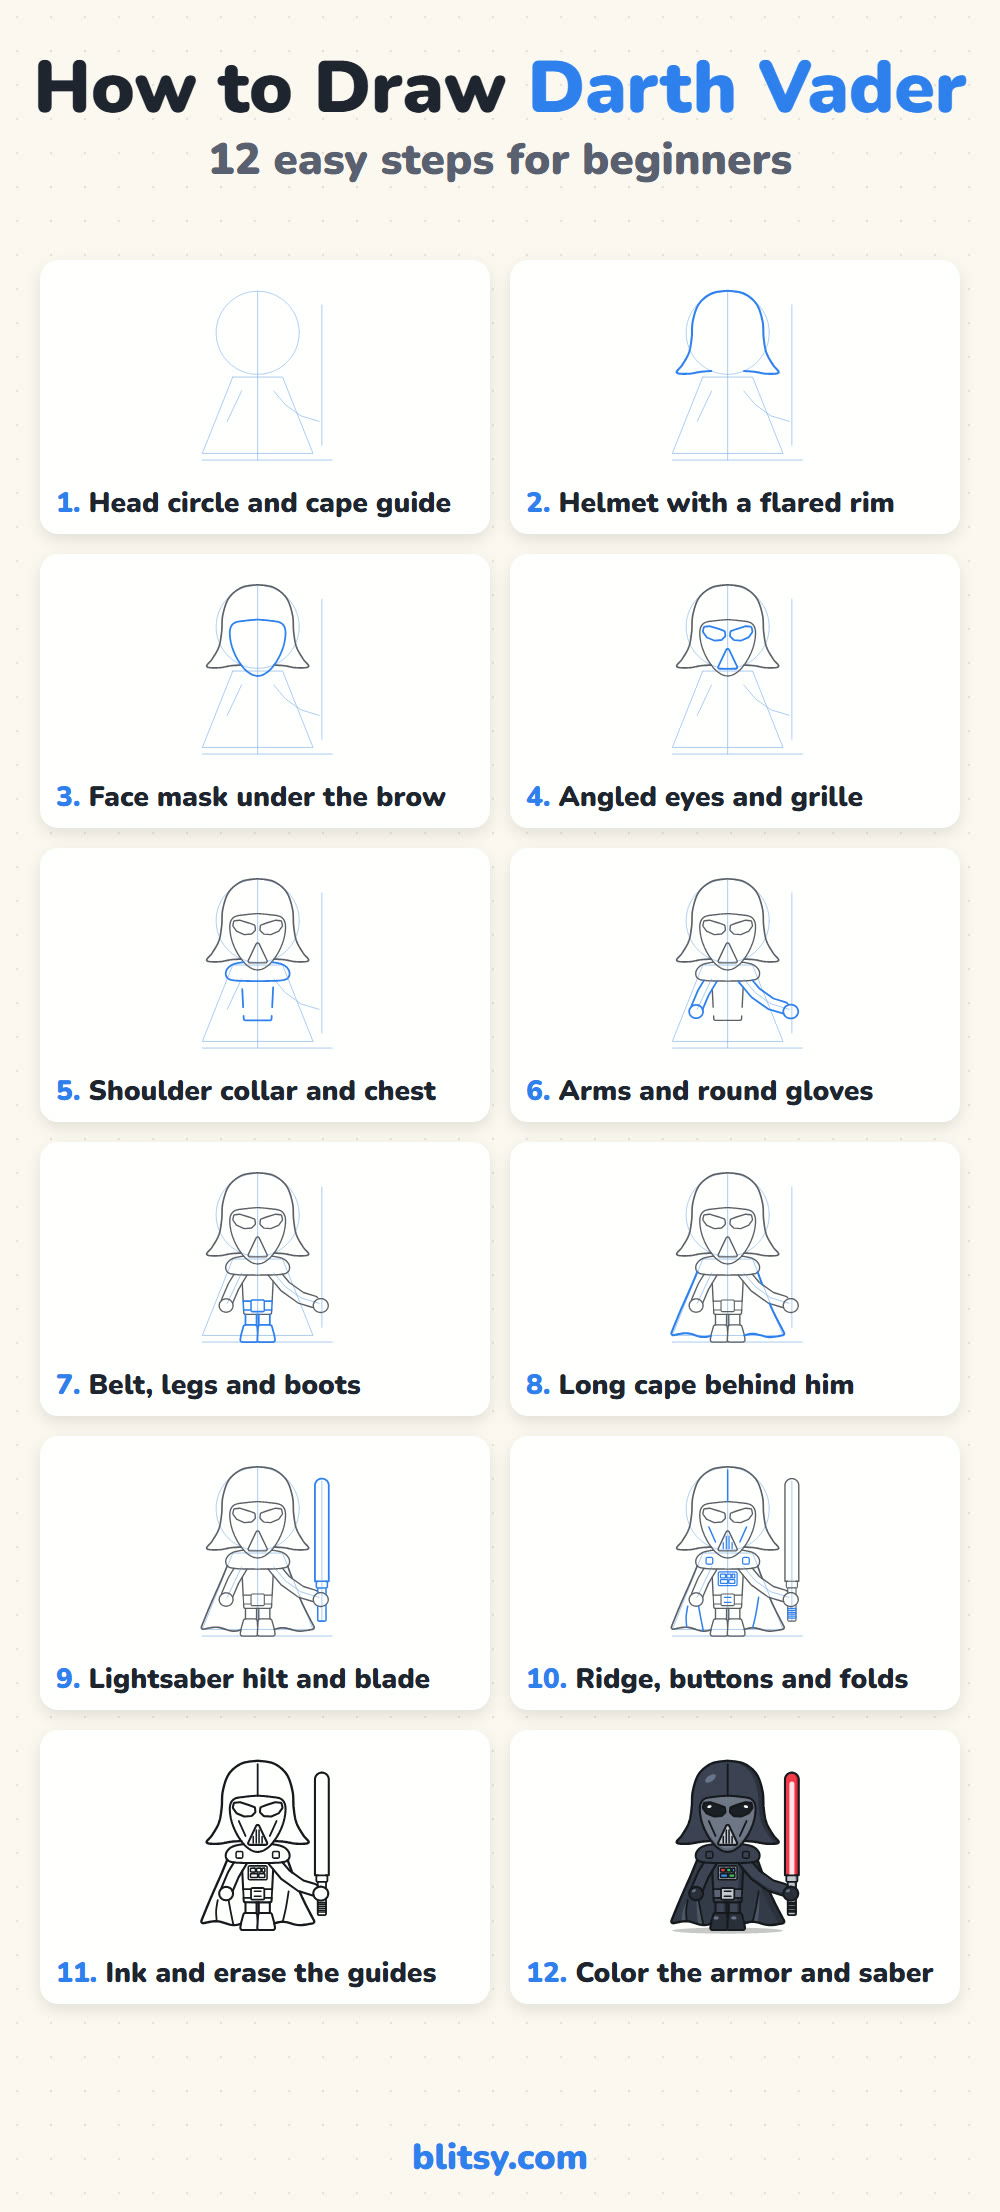
Bright blue in a picture means those lines are new in that step, and gray means you drew them before. The pale blue circle and straight lines are only helpers that disappear once you ink.
Quick overview
⏱️ Time: around 45 minutes, coloring included
🎯 Level: easy, fine for kids about 7 and older
✏️ Steps: 12
🌌 You'll draw: a chibi Darth Vader with a flowing cape and a red lightsaber
Gear for Your Sith Lord Sketch
- A soft pencil you can press lightly (HB works)
- A good eraser that won't smear
- A black fineliner or marker for inking
- Three grays: dark, medium and light
- Black plus red and light pink
- A little green and blue for the buttons
- Plain white paper
No three grays? One dark gray works fine if you press hard on the helmet and cape and lightly on the mask.
How to Draw Darth Vader Step by Step
Step 1: Sketch a head circle and a cape guide
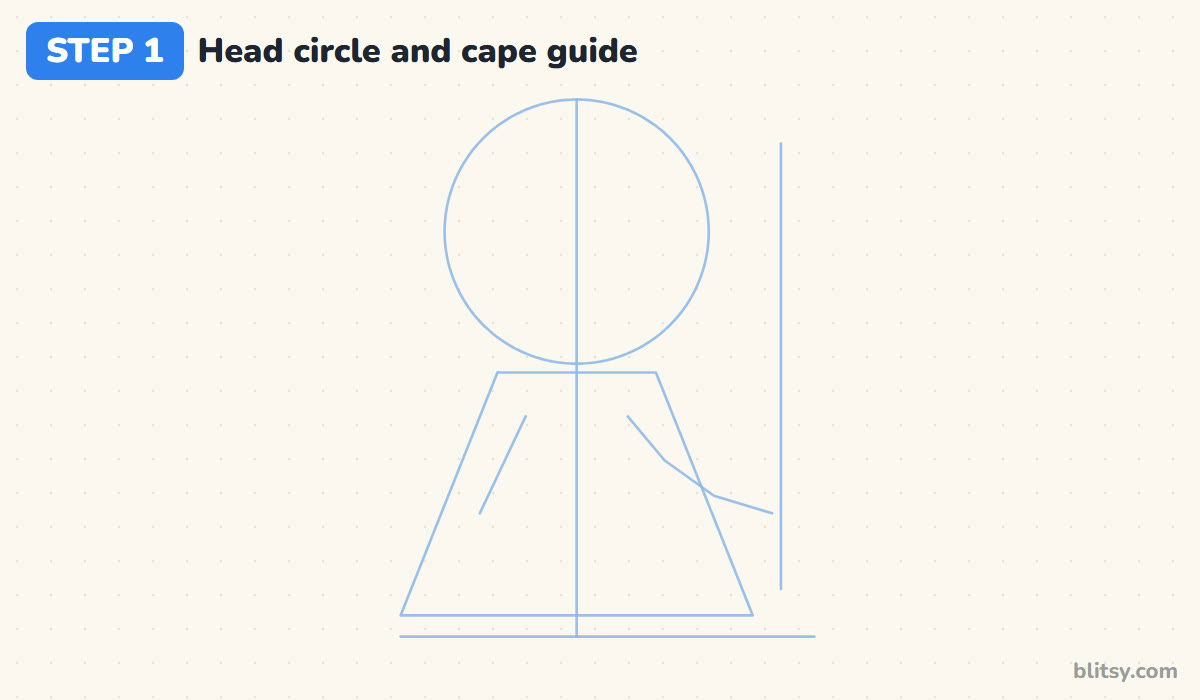
Draw a ground line near the bottom of your page and a light line down the middle. Up top, draw a big circle for the helmet. Under it, sketch a trapezoid, narrow at the shoulders and wide at the ground, for the cape. Add two arm lines and one tall line on the right for the lightsaber.
💡 Tip: Make the circle about as tall as the trapezoid. A head that big is what turns him into a chibi.
Step 2: Draw the helmet with a flared rim
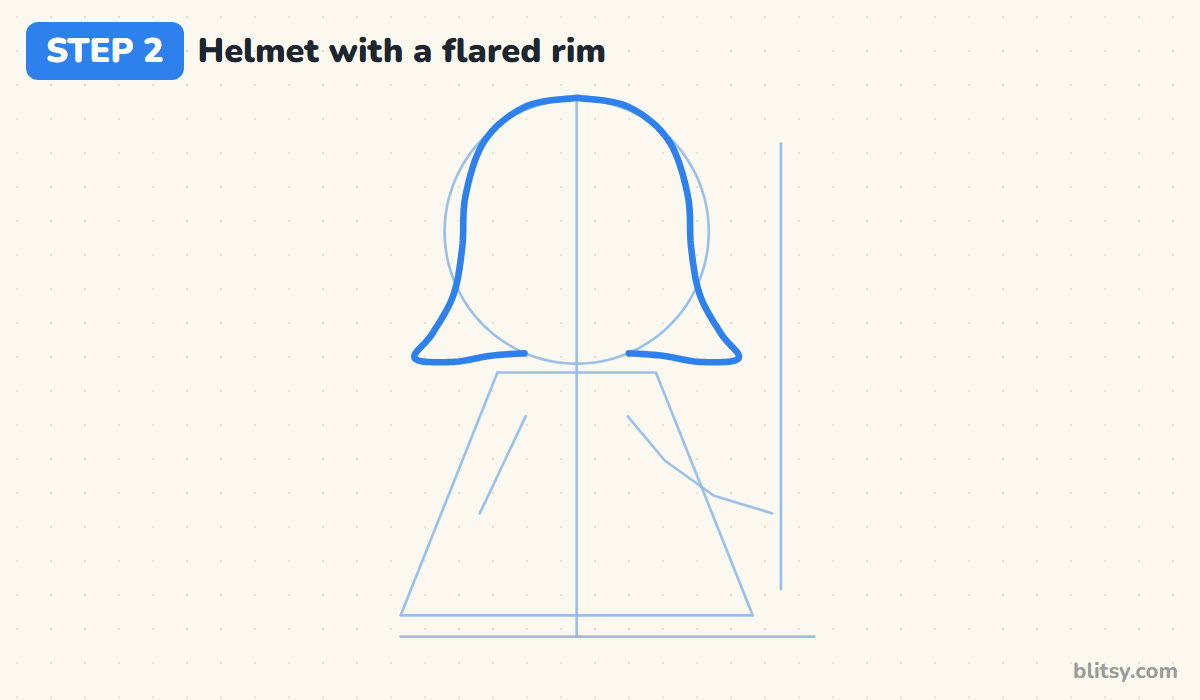
Follow the top of the circle for the rounded dome. About halfway down, let each side run fairly straight, then sweep outward into a wide flare with a soft point. I think of it like a bell or a samurai helmet, and that flare is the shape people recognize first.
💡 Tip: Check the two flares against the center line. If one sticks out farther, nudge it until they match.
Step 3: Add the face mask
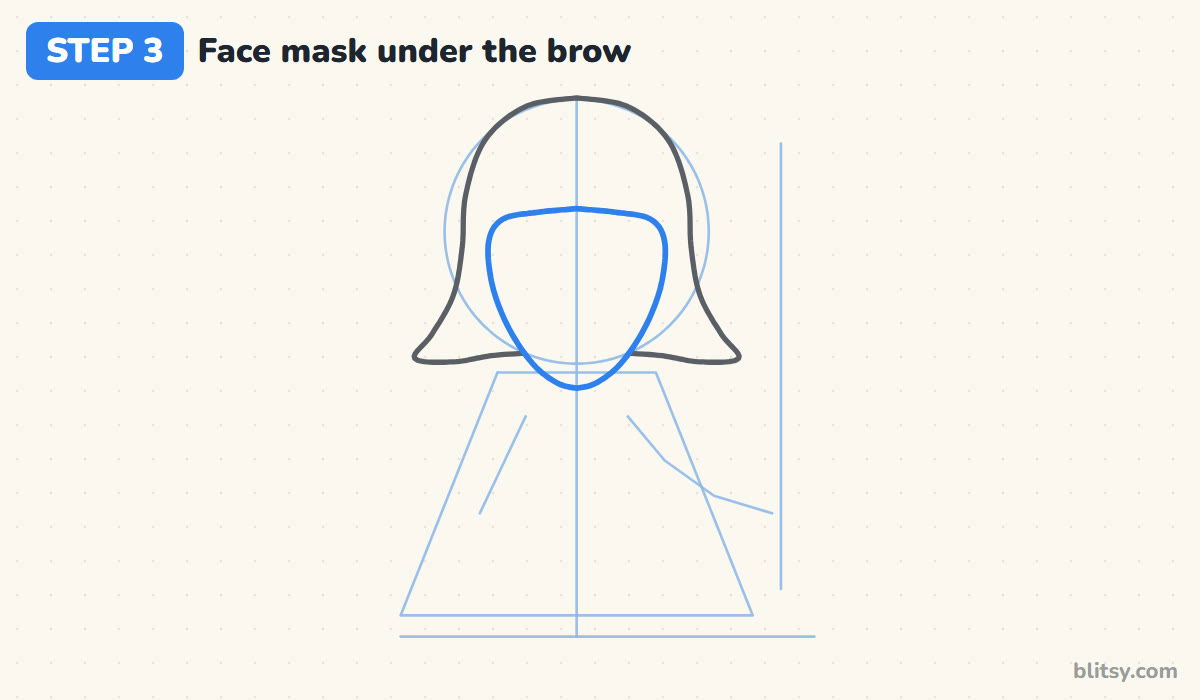
Start the mask with a nearly flat brow line across the middle of the helmet. From each end, curve down along the cheeks and meet in a rounded chin that hangs a little below the helmet rim. A band of helmet should show on both sides.



💡 Tip: Keep the brow low. If it sits too high, the dome looks small and he loses his heavy look.
Step 4: Draw the angled eyes and the mouth grille
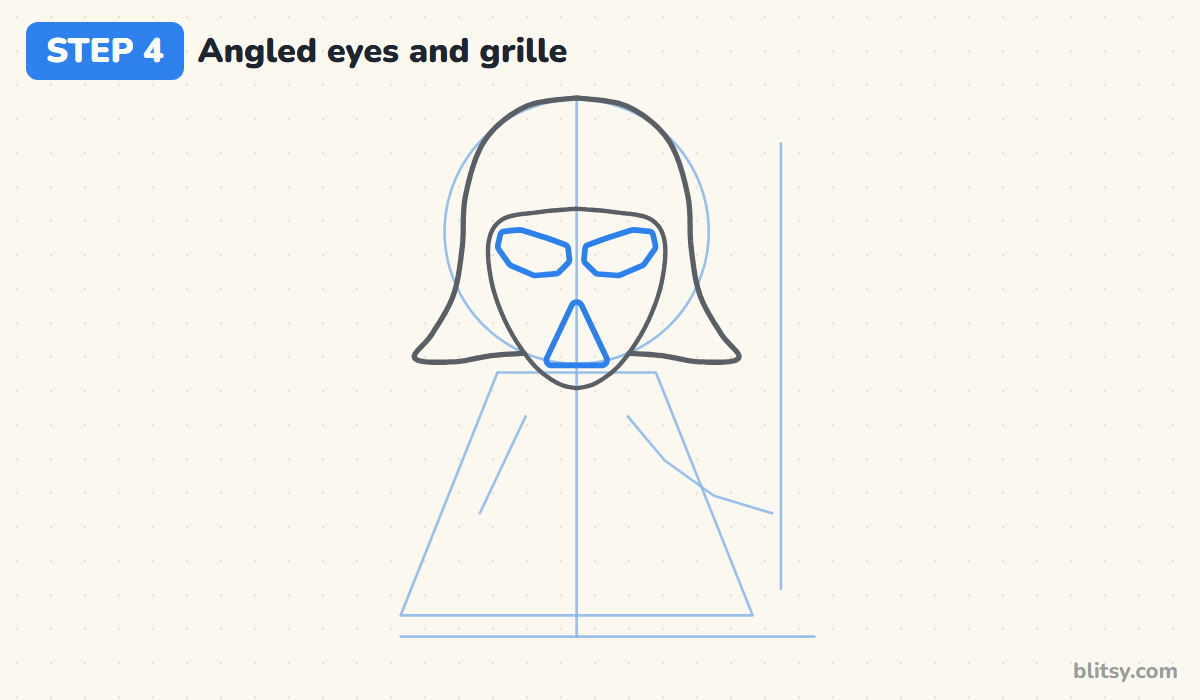
Just under the brow, draw two wide lenses with angled corners. Their inner corners dip toward the nose, which gives him a stern look without any eyebrows. Below them, on the middle line, draw a triangle pointing up for the mouth grille.
💡 Tip: Leave a gap about one finger wide between the two eyes, or the mask will look crowded.
Step 5: Shape the shoulder collar and the chest
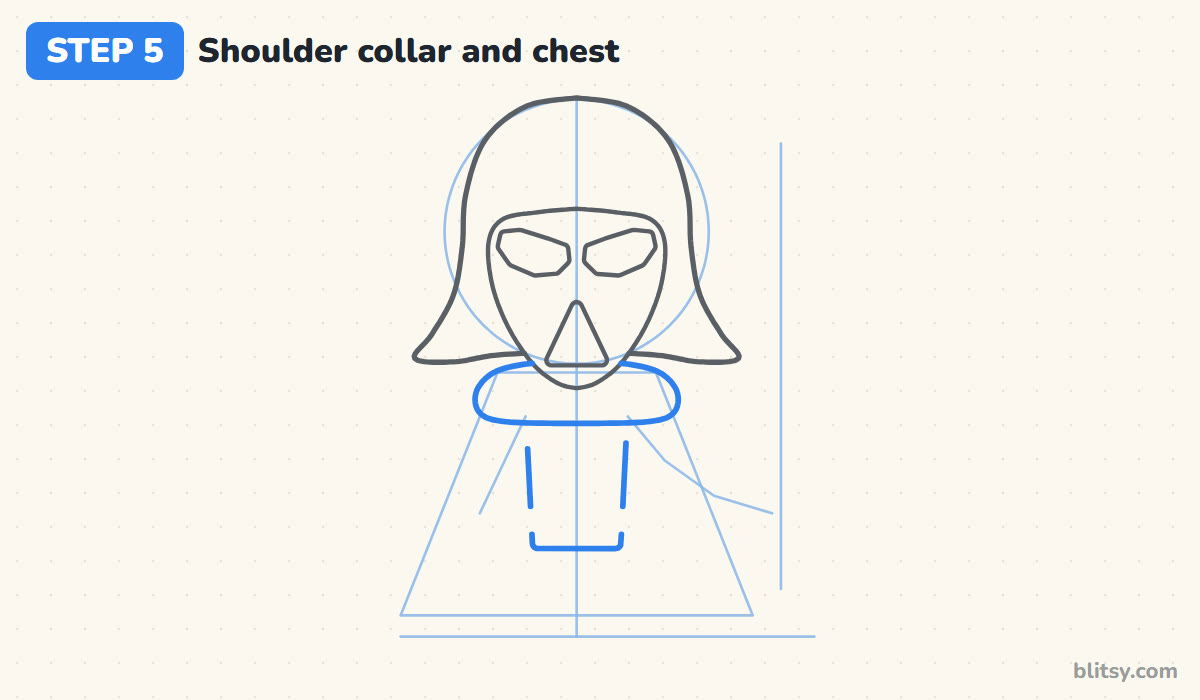
Right below the chin, draw a rounded, pillow-like collar across both shoulders. Its middle hides behind the chin. Underneath, draw the chest as a short block that narrows a little toward the waist. Only its sides and bottom show.
💡 Tip: Draw the collar wider than the mask. Broad shoulders keep the giant helmet from looking wobbly.
Step 6: Draw the arms and round gloves
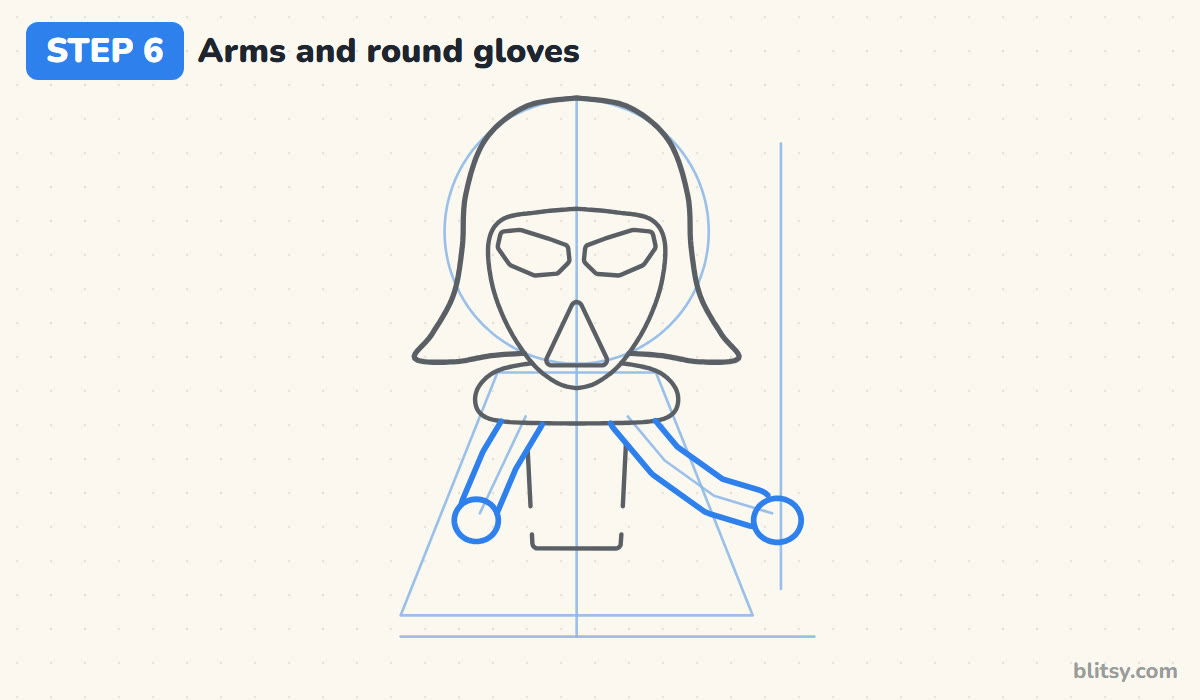
On the left, a short arm hangs slightly away from the body. On the right, the arm bends out toward the lightsaber line. Give both arms soft width, like tubes rather than sticks, and end each one with a round glove. The right glove sits right on the saber line.
💡 Tip: Draw both arms the same thickness so the pose feels balanced, even though one bends.
Step 7: Add the belt, the legs and boots
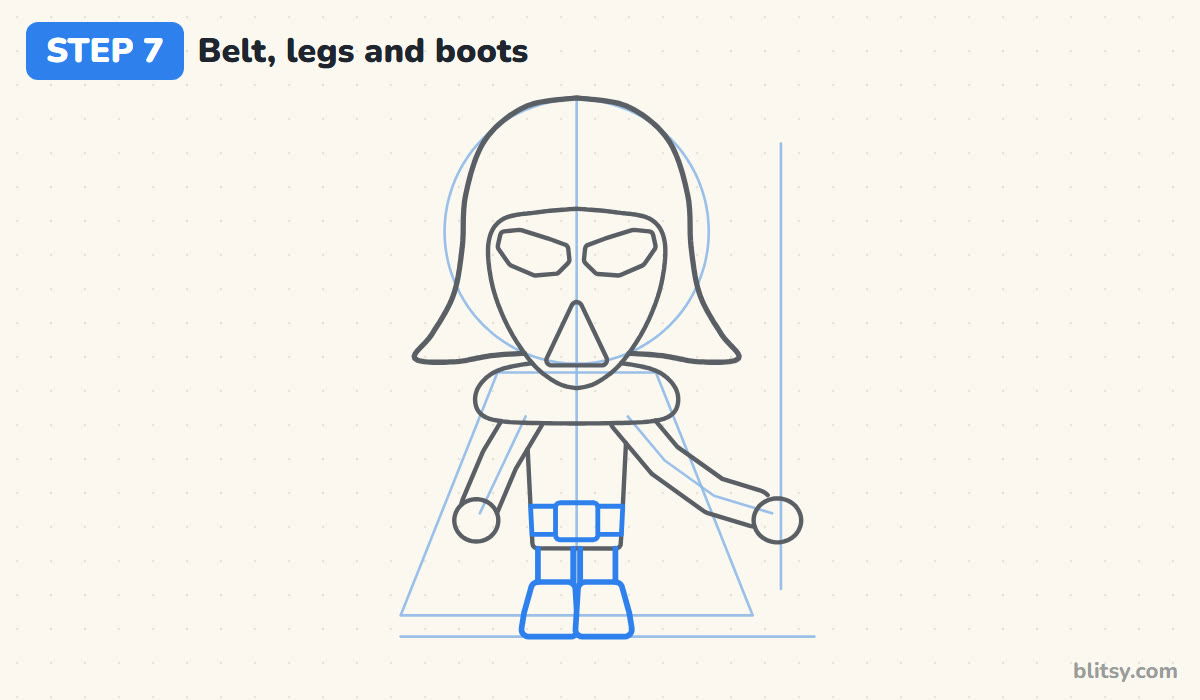
Across the bottom of the chest, draw a belt band with a square buckle box in the center. Below it, two short legs drop down side by side, each ending in a chunky boot that rests flat on the ground line. Long legs would break the chibi proportions, so keep them stubby.




💡 Tip: Stop the boots exactly on the ground line so he stands instead of floating.
Step 8: Sweep a long cape behind him
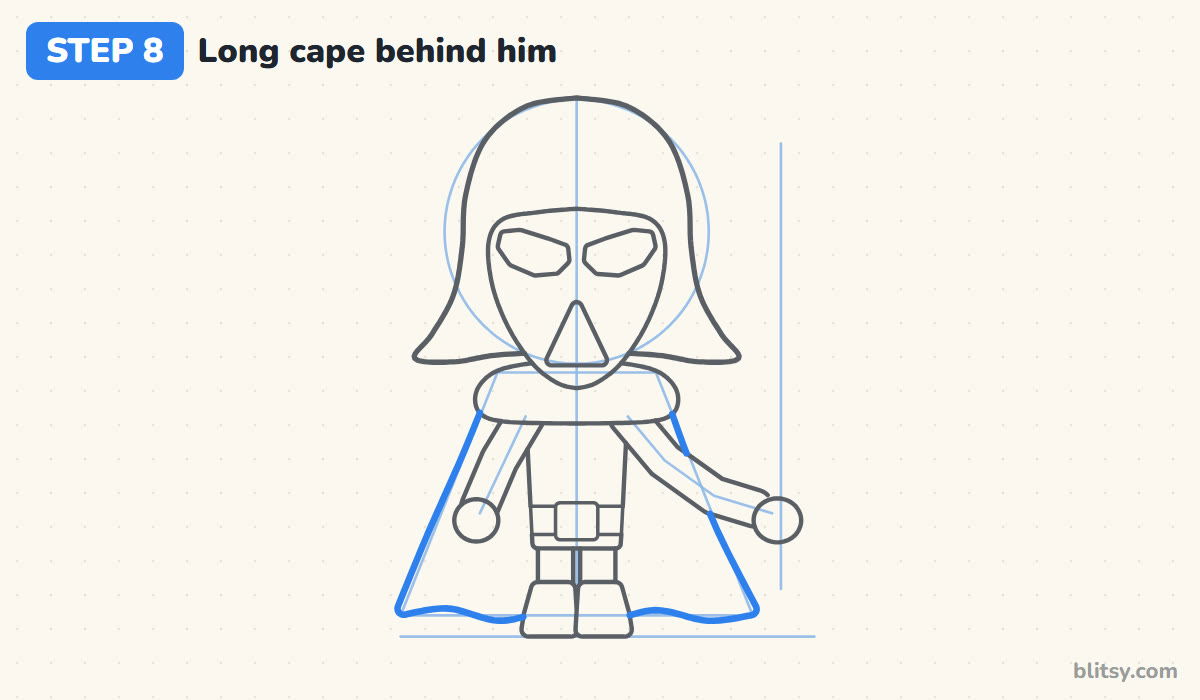
Trace down the sides of your trapezoid for the cape. It starts behind the collar, slides out behind the arms and spreads wider at the bottom. Join the sides with a gently wavy hem behind the legs. I draw the cape after the body on purpose, so I only sketch the parts that peek out.
💡 Tip: Keep the hem waves shallow. Big zigzags make the cape look torn instead of heavy cloth.
Step 9: Draw the lightsaber hilt and blade
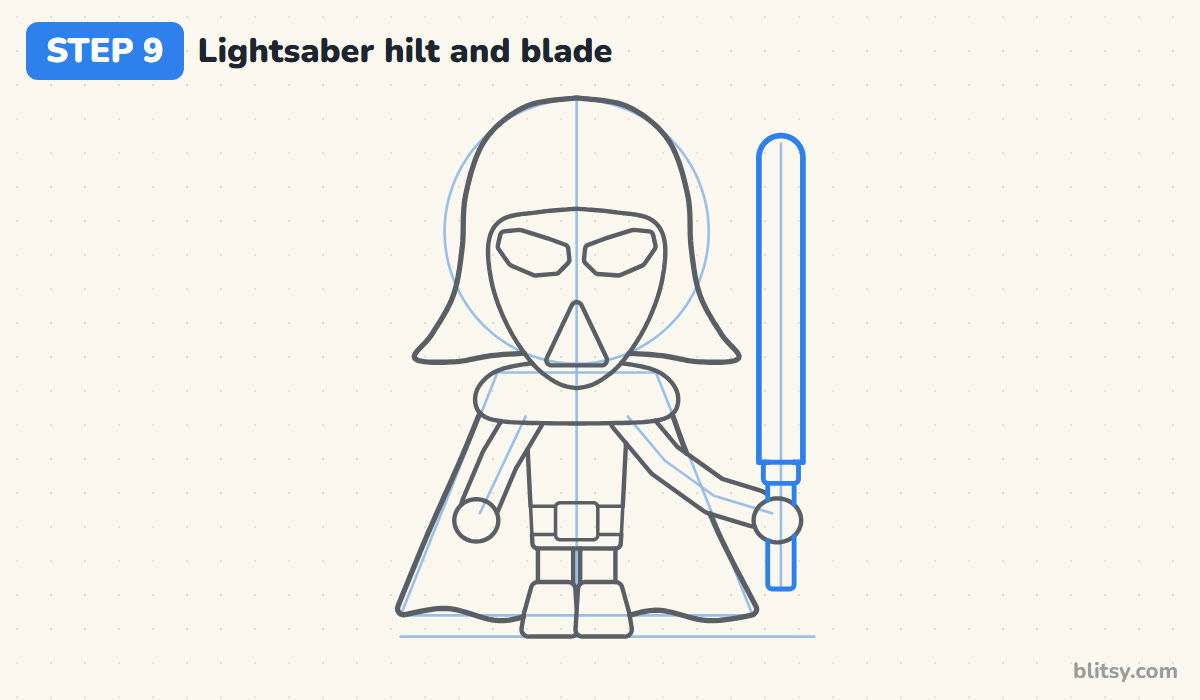
Below the right glove, draw a slim rounded rectangle for the hilt, with a slightly wider band above the glove. From there, draw the blade as a long capsule running straight up the guide. He holds it upright and still, like a shining toy.
💡 Tip: Use a ruler or the edge of a book for the blade so it stays perfectly straight.
Step 10: Add the ridge and the small details
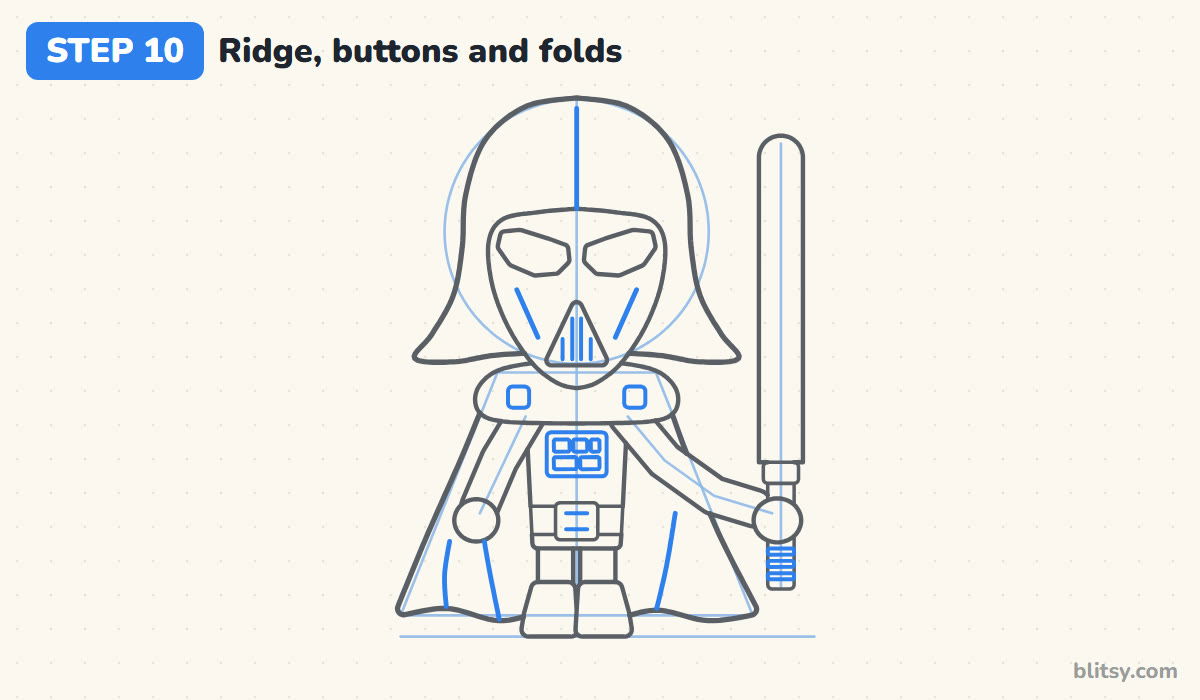
These little marks sell the character. Draw a line down the center of the dome, a slanted line on each cheek and four slits in the grille. Put two square clasps on the collar and a small panel of tiny boxes on the chest. Finish with grip ridges on the hilt and three soft folds in the cape.
💡 Tip: Draw the chest buttons small and neat. Five tiny boxes are enough to read as a control panel.
Step 11: Ink the lines and erase the guides
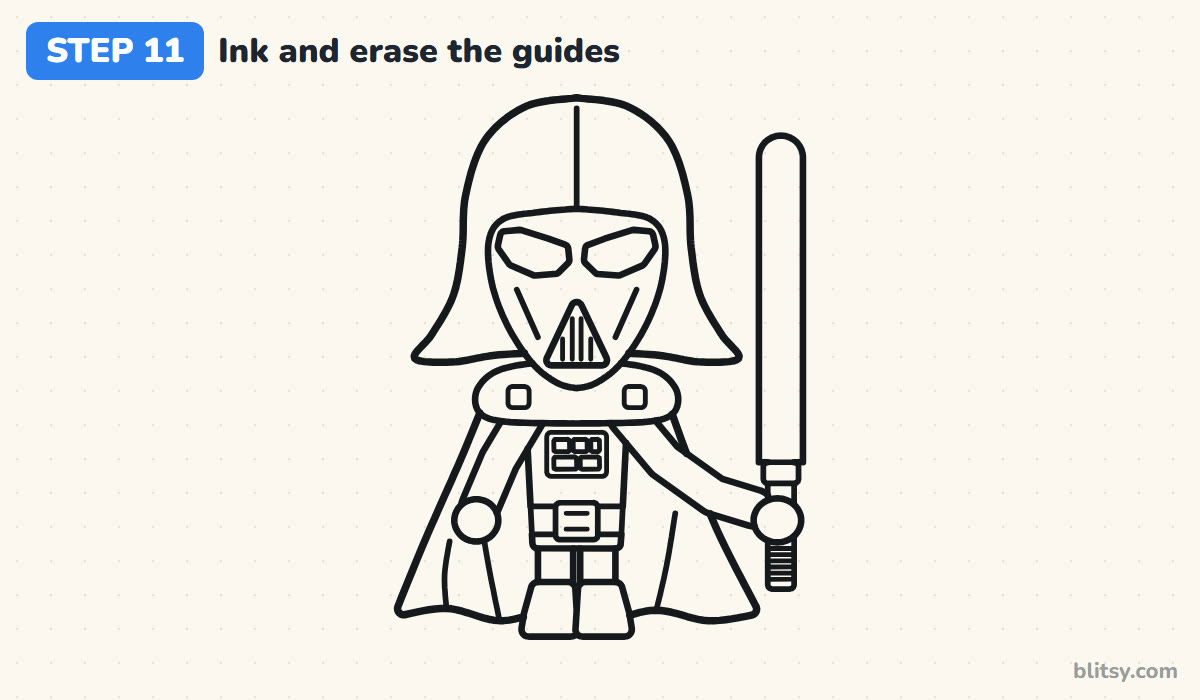
Go over every keeper line with your black marker, starting with the helmet and cape outlines while your hand is fresh. Skip all the guide shapes. Give the ink a minute to dry before erasing, or the marker can smudge.

💡 Tip: Pull long curves like the cape in one smooth motion; short, hesitant strokes look hairy.
Step 12: Color the armor and the lightsaber
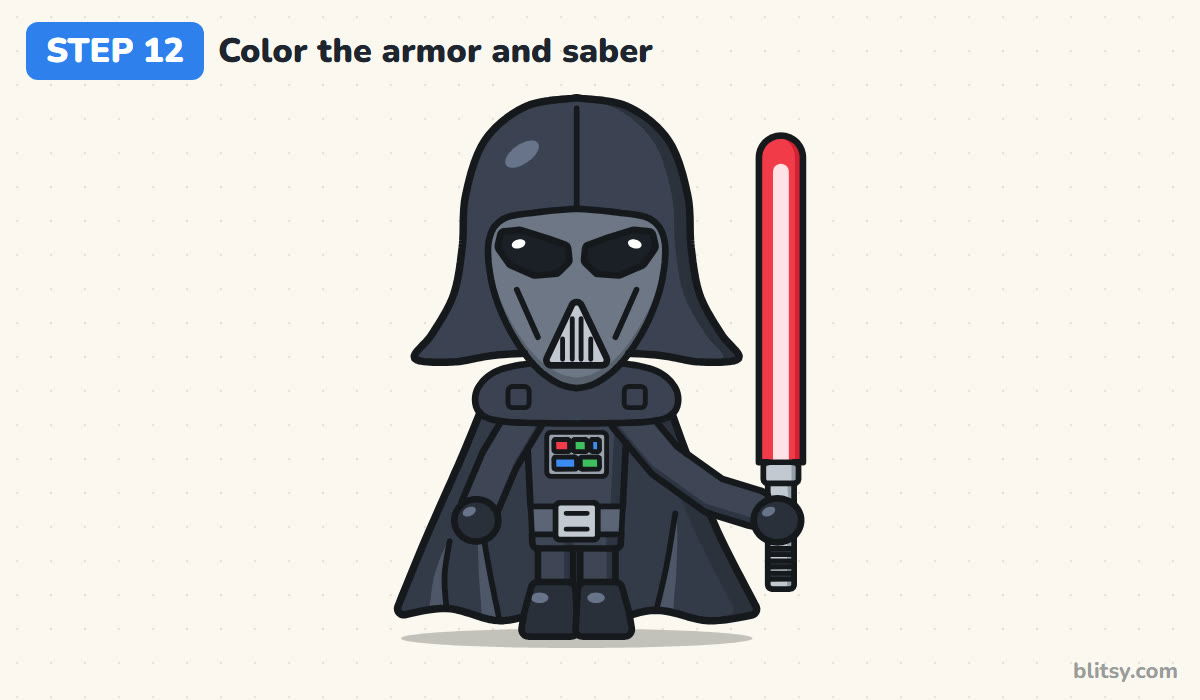
Color the helmet and collar dark gray, along with the cape and suit, and make the mask a lighter gray so it stands apart. Fill the eyes black but leave a white shine in each one; the gloves and boots are black too. Use light gray on the metal parts. For the blade, color the outer part red and keep a pale pink strip down the middle so it glows.
💡 Tip: Don't use pure black on the helmet. Dark gray lets the outlines and the shine still show.
Where Vader Sketches Tend to Slip
- A helmet with no flare. Without the wide bottom rim he looks like he's wearing a plain bike helmet. Push the flares out past the mask on both sides.
- Coloring everything solid black. The lines vanish and the drawing turns into a blob. Use dark gray for the armor and save real black for small parts.
- Round, cartoon eyes. Circles make him look surprised. Give the lenses angled corners that tilt toward the nose.
- A cape that hugs the body. If it doesn't widen at the bottom, it reads as a long coat. Let it flare out well past the boots.
- A blade drawn freehand and wavy. A bent lightsaber looks like a noodle. Use a straight edge and keep the blade upright.
Swap the Blade, Change the Scene
After a few tries, change things up. Give him a blue or green blade, or add a starfield behind the cape. Older kids can try the cape blowing to one side by curving both edges the same way. Younger artists can skip the cheek lines and grille slits, since the helmet alone tells everyone who he is. If helmets are your favorite part, the Master Chief drawing tutorial uses a similar big-head trick, and my how to draw an astronaut step by step lesson keeps you in outer space.
Grab the Darth Vader Coloring Page and Printable Guide
Need a quiet activity for a Star Wars fan? Print the free Darth Vader coloring page, which has a small colored example and a color key at the top. The step-by-step PDF guide holds all 12 steps with tips, two per page, on Letter or A4 paper.
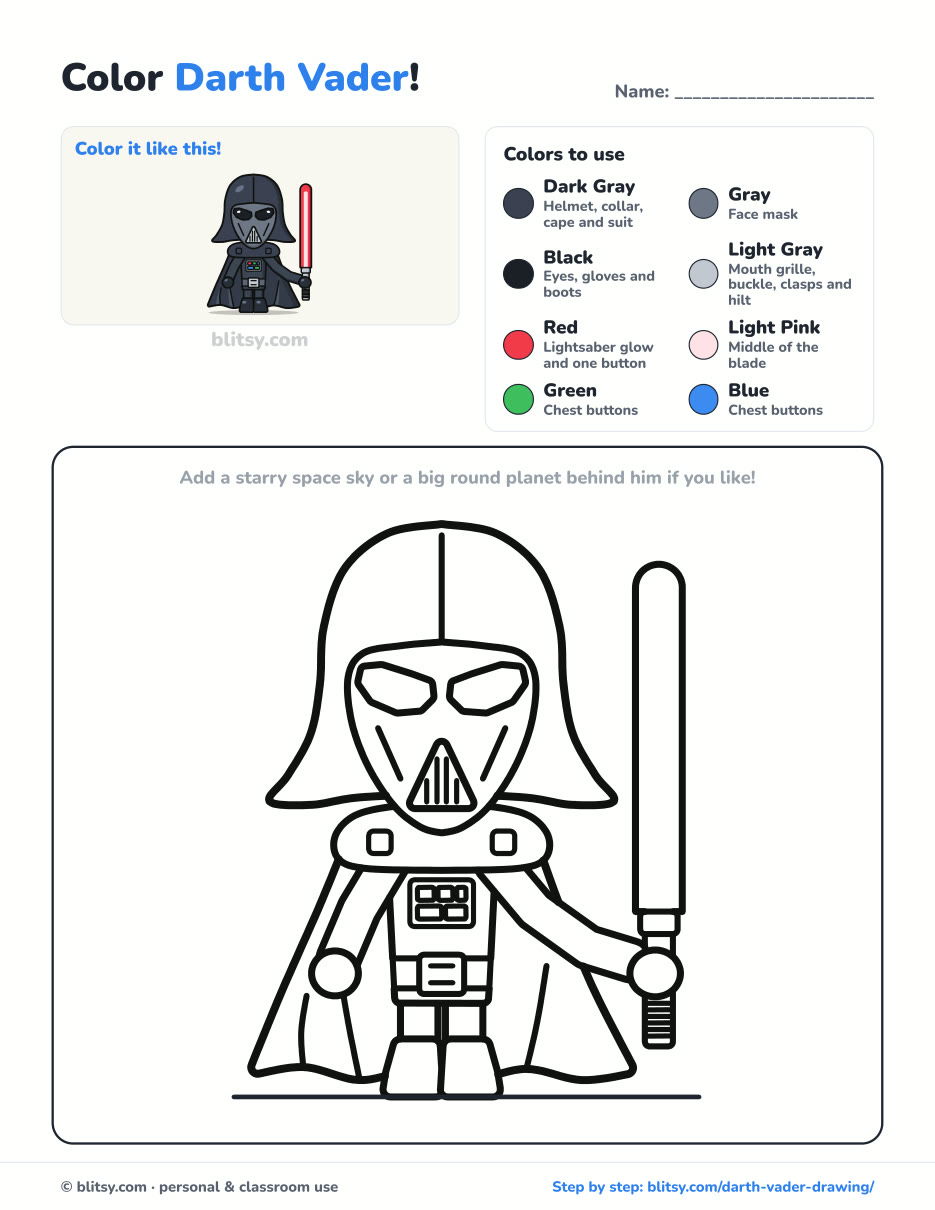
Black outlines with a colored example and the color names at the top. Ready to print and color.
⬇️ Download Coloring PageEvery step picture with its instructions and tips, to keep beside your paper while you draw.
⬇️ Download Drawing Guide📱 On a phone? Tap a download button, then open the file and choose Share → Save to Files or Print. On a computer, the PDF opens or saves straight to your Downloads folder.
Pin the Vader Steps for Your Next Drawing Night
Vader Fans: More Chibi Characters to Draw
Each of these is a step-by-step tutorial in the same friendly style, with a picture for every step and plenty of room to change details.
- Monster Drawing: Grow a furry cyclops and a three-eyed jelly buddy out of plain ovals with this how to draw a monster step by step lesson.
- Cat Noir Drawing: Another masked hero, drawn chibi size with a staff and curled tail, in the Cat Noir drawing tutorial.
- Astronaut Drawing: Stay in space with the easy astronaut drawing tutorial, which ends with a smiling explorer next to the moon.
- Abraham Lincoln Drawing: The Abraham Lincoln drawing step by step portrait builds a steady, thoughtful face under a tall hat.
- Cowboy Drawing: Draw a cartoon kid in a big curled hat, waving with one hand and holding a lasso, using the how to draw a cowboy guide.
- Tinkerbell Drawing: A flying chibi Tinker Bell with see-through wings is the subject of the Tinkerbell drawing step by step lesson.
Darth Vader Drawing Questions, Answered
What is the easiest way to draw Darth Vader?
Draw him as a chibi from the front. A big circle sets up the helmet, a trapezoid sets up the cape, and the flared rim plus the grille make him easy to recognize.
How do you draw Darth Vader's helmet?
Start with a rounded dome, let the sides fall straight, then flare them out at the bottom like a bell. Add a mask with a flat brow, two angled eyes and a small triangle grille pointing up between the cheeks.
What colors do I need for Darth Vader?
Dark gray for the armor and cape, a lighter gray for the mask, light gray for the metal bits and black for the small parts. Add red and light pink for the lightsaber.
Can kids draw this Darth Vader?
Yes. Every part is a simple shape, and most children around 7 and up can finish it in under an hour. Younger kids can leave out the small details and still end up with a clear Vader.
One big circle and a flared rim later, a tiny Sith lord should be standing on your paper, glowing blade and all. ⭐🖍️
Related posts:
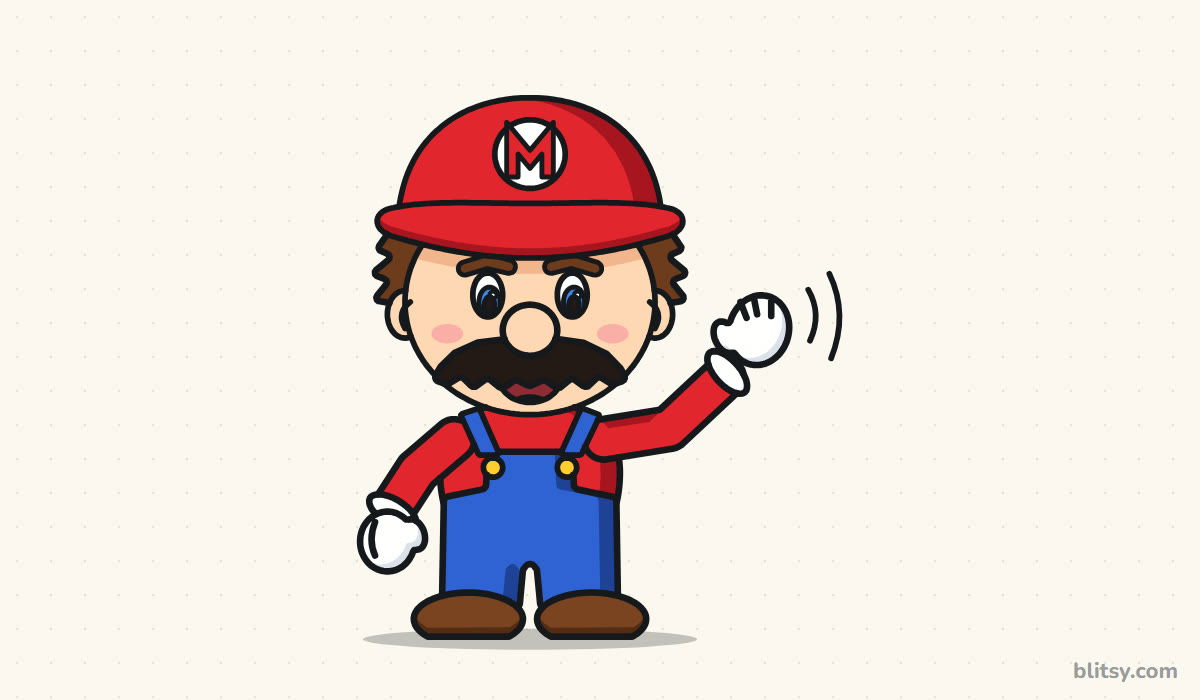 How to Draw Mario Step by Step (Easy Chibi Version)
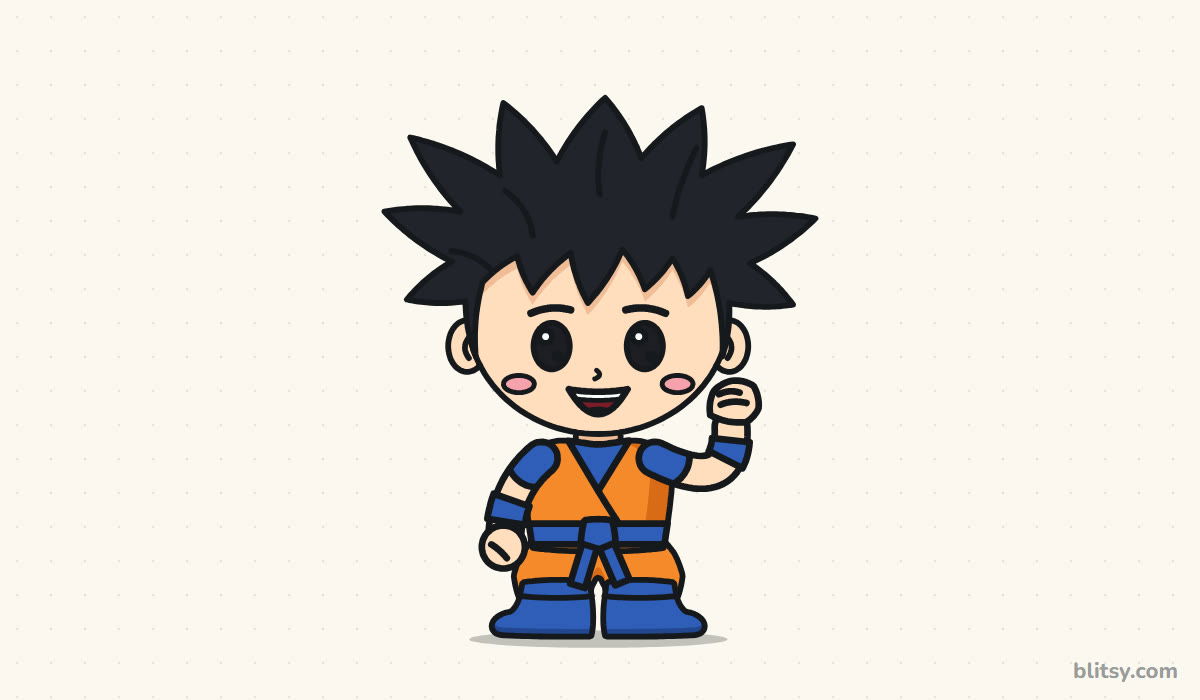 How to Draw Goku Step by Step (Easy Chibi Version)
 How to Draw Freddy Krueger Step by Step (Cute Chibi Version)
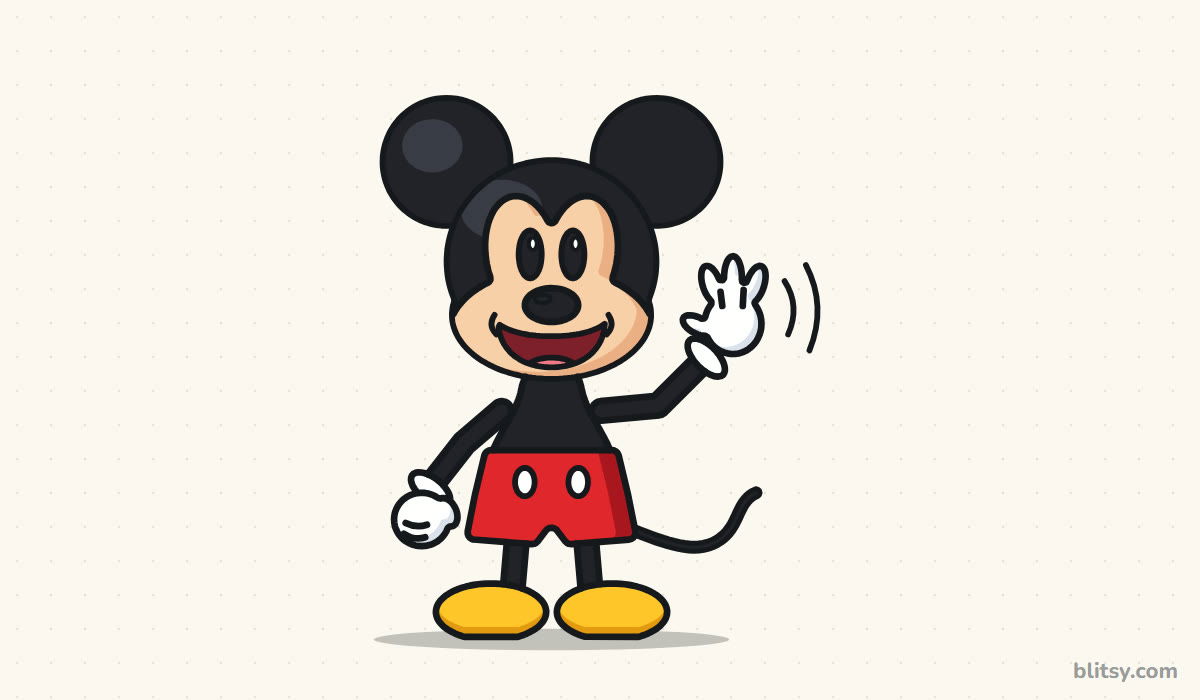 How to Draw Mickey Mouse Step by Step (Easy Cute Version)
 How to Draw Wonder Woman Step by Step (Chibi for Kids)
 How to Draw the Hulk Step by Step (Easy Chibi for Kids)
 How to Draw Iron Man Step by Step (Easy Chibi for Kids)
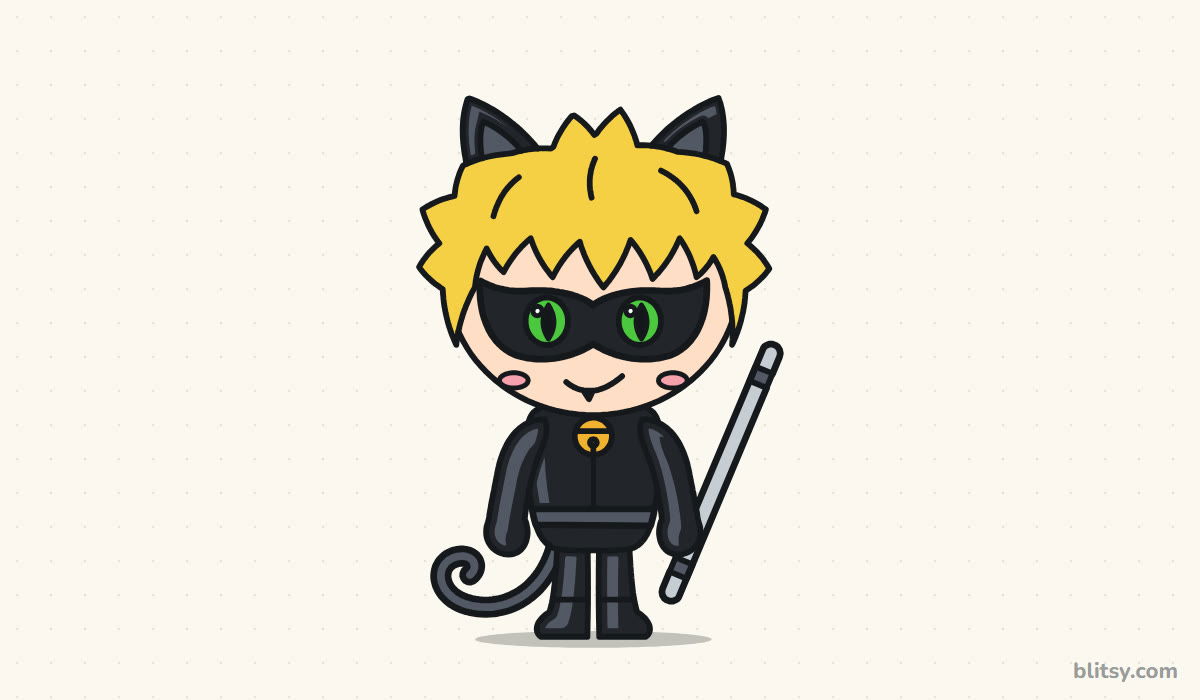 How to Draw Cat Noir Step by Step (Easy Chibi Hero)
 How to Draw Ariana Grande Step by Step (Cute Chibi Fan Art)
 How to Draw Master Chief Step by Step (Easy Chibi Armor)
 How to Draw the Joker Step by Step (Easy Chibi for Beginners)
 How to Draw a Chibi Step by Step (Easy 2-Head Method)

