
A garden can mean almost anything, so for this lesson I picked one clear scene: a sunny flower bed in front of a wooden picket fence. Below you'll learn how to draw a garden step by step, with a tall sunflower, two tulips, two daisies, a round bush and a blue watering can. The real skill here is overlapping: once you know what sits in front, a busy scene stops feeling hard.
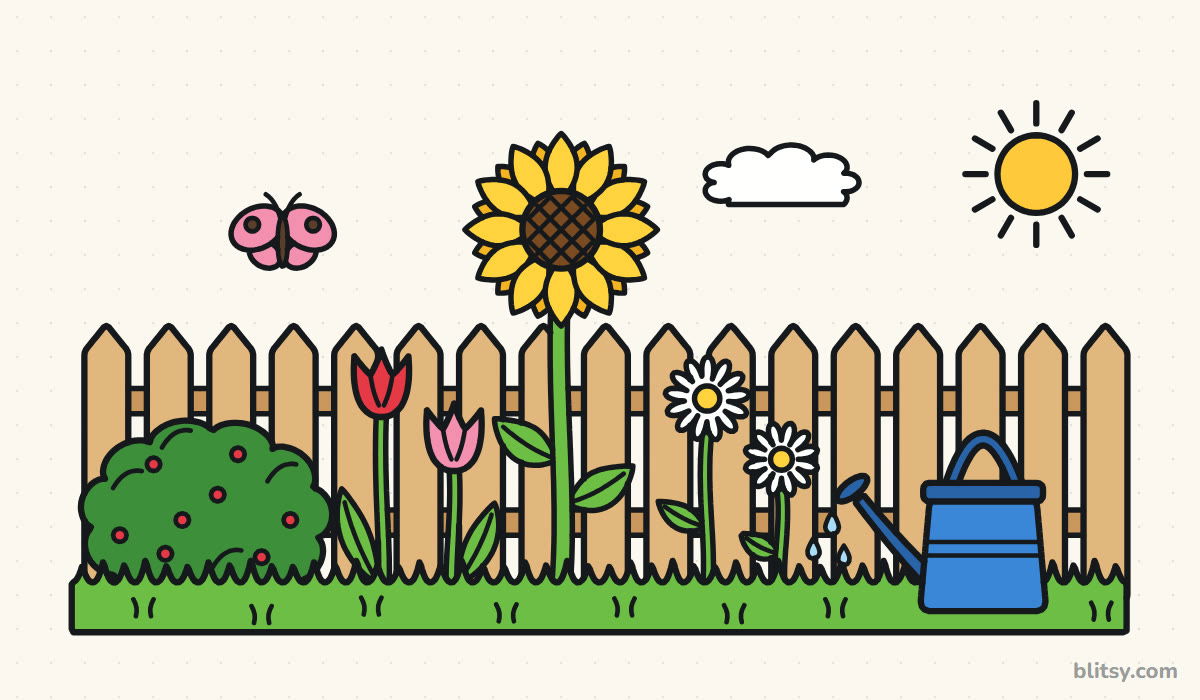
Blue marks the part you add in each step picture, and earlier work turns gray. The pale blue shapes are helper guides; sketch them lightly, since they get erased in step 11.
Quick overview
⏱️ Time: about 30 to 40 minutes with coloring
🎯 Level: easy, good for kids from about 7 and for adults who are starting out
✏️ Steps: 12
🌻 You'll draw: a flower bed with a sunflower, tulips, daisies, a berry bush, a watering can and a picket fence
Garden Sketch Supplies on One Desk
- A regular pencil you can press softly
- An eraser that doesn't smudge
- A black marker or fineliner for inking
- Colored pencils or crayons in yellow, brown, red, pink, two greens, light brown and blue
- A sheet of paper turned sideways, because a garden is wide
A ruler helps with the fence, but freehand fences look friendly too.
How to Draw a Garden Step by Step
Step 1: Draw the ground line and the fence line
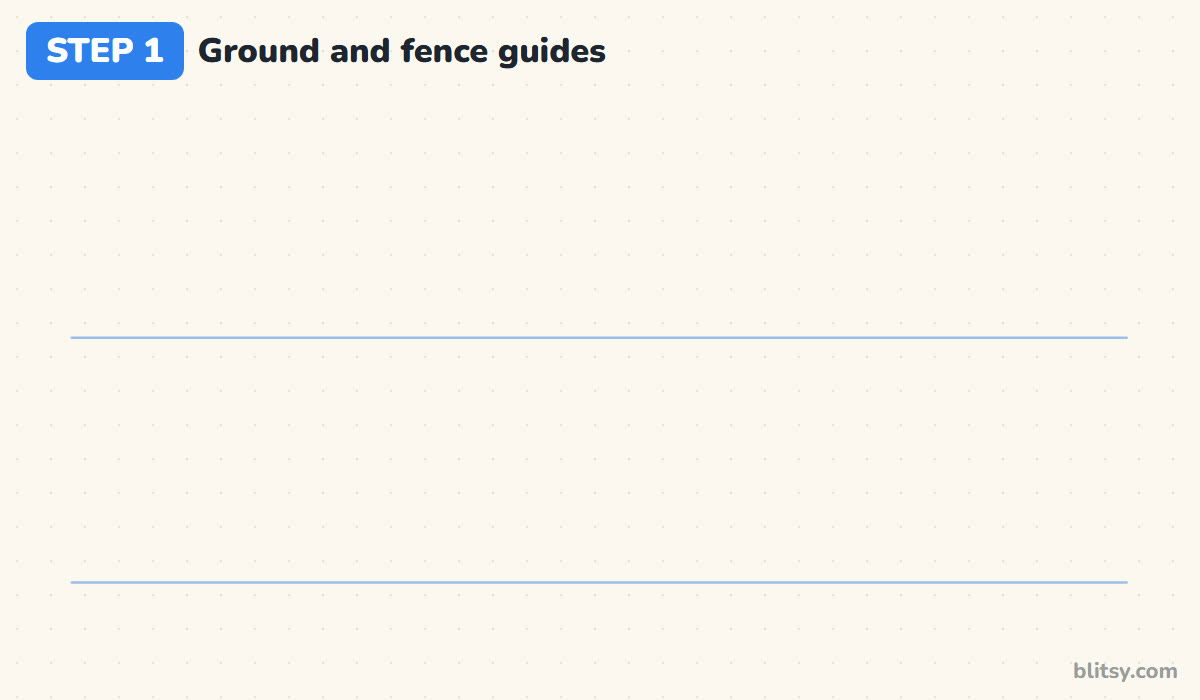
Turn your paper sideways and draw a long, light line about a fifth of the way up from the bottom, where the grass begins. A second line a little above the middle marks the tops of the fence pickets. Keep both level, since they hold the whole scene together.
💡 Tip: Make a small dot at each end first, then join the dots in one smooth pull of the pencil.
Step 2: Place circles, ovals and a box
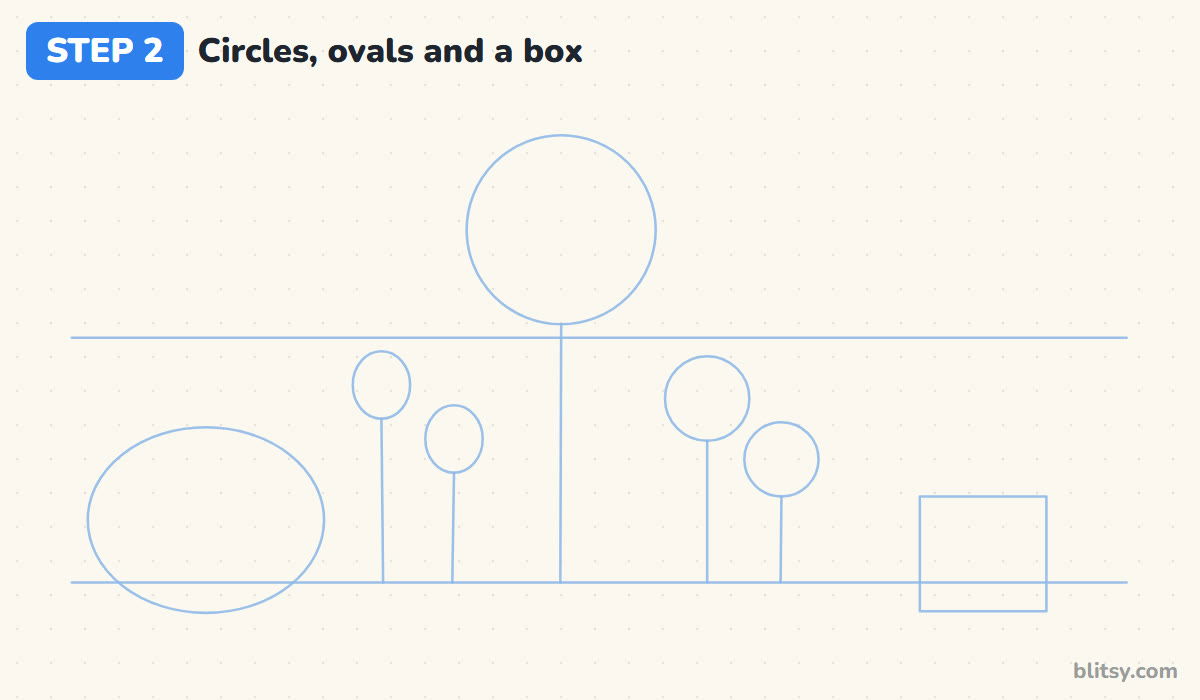
Now plan where every plant will stand. Draw a big circle in the middle, rising above the fence line, for the sunflower head. Add two small ovals on its left for tulips and two circles on its right for daisies. On the far left sketch a wide oval for the bush, and on the right a box for the watering can. Finish with a stem line from each flower down to the ground.
💡 Tip: Give every flower a different height. A row of heads at one level looks like a fence of lollipops.
Step 3: Draw the sunflower head
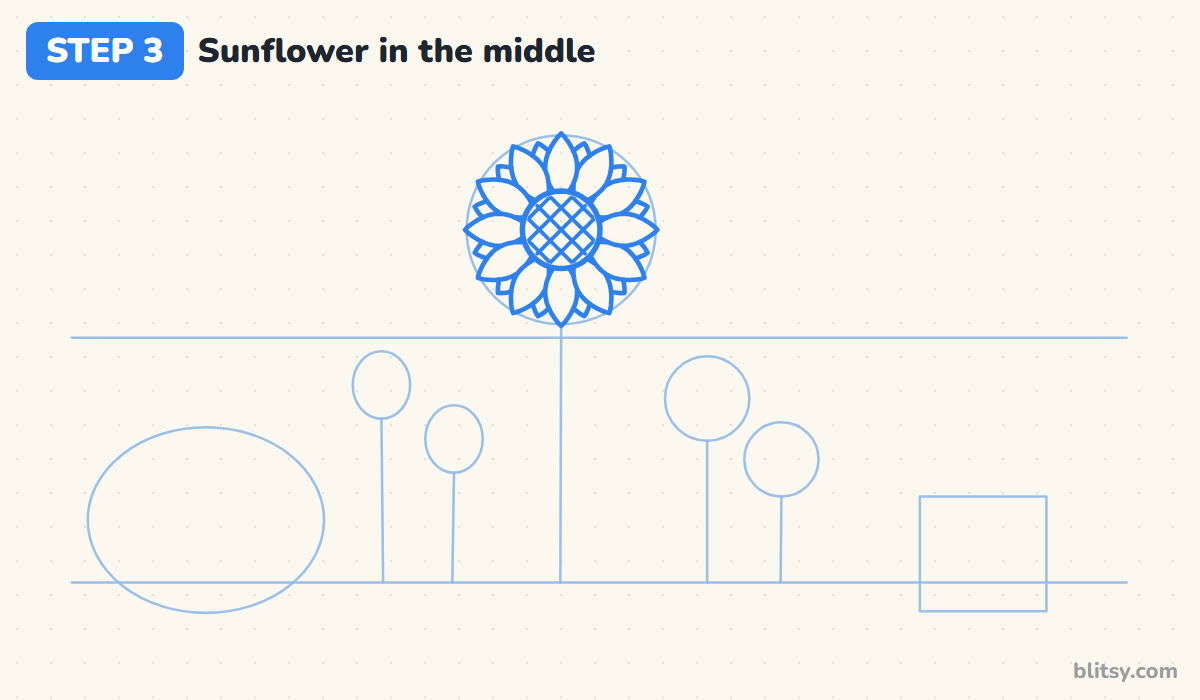
Draw a smaller circle in the center of the big guide for the seed middle. Add twelve pointed petals around it, like the numbers on a clock, then tuck short petal tips into the gaps for a second row behind. A crisscross pattern fills the middle. I draw the sunflower first because it sits in front of the fence, so no fence lines ever cross it.




💡 Tip: Place the top and bottom petals first, then the two side ones. The other eight fill in easily between them.
Step 4: Add the tulips and the daisies
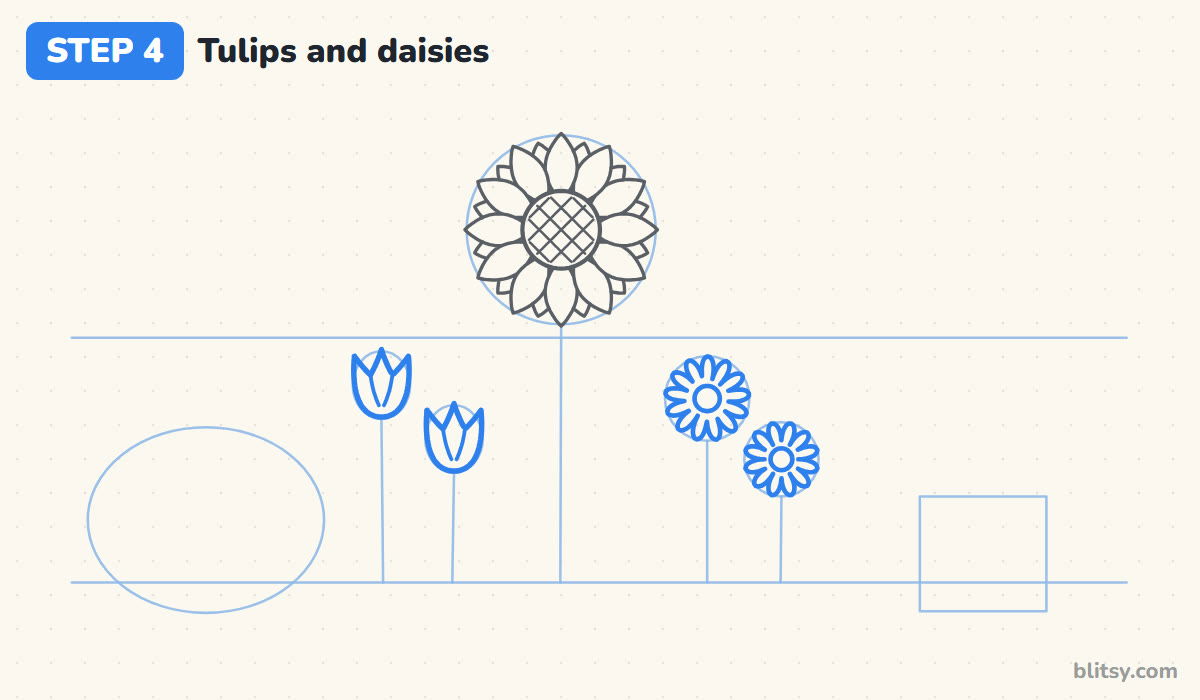
Turn each tulip oval into a cup: a round bottom and three points on top, with the middle point a little taller. Two short curves inside show the front petal. For each daisy, draw a small center circle, then go around it with rounded petals that dip in close to the middle.
💡 Tip: Count as you go around a daisy. Twelve or thirteen petals looks full without getting crowded.
Step 5: Draw the watering can
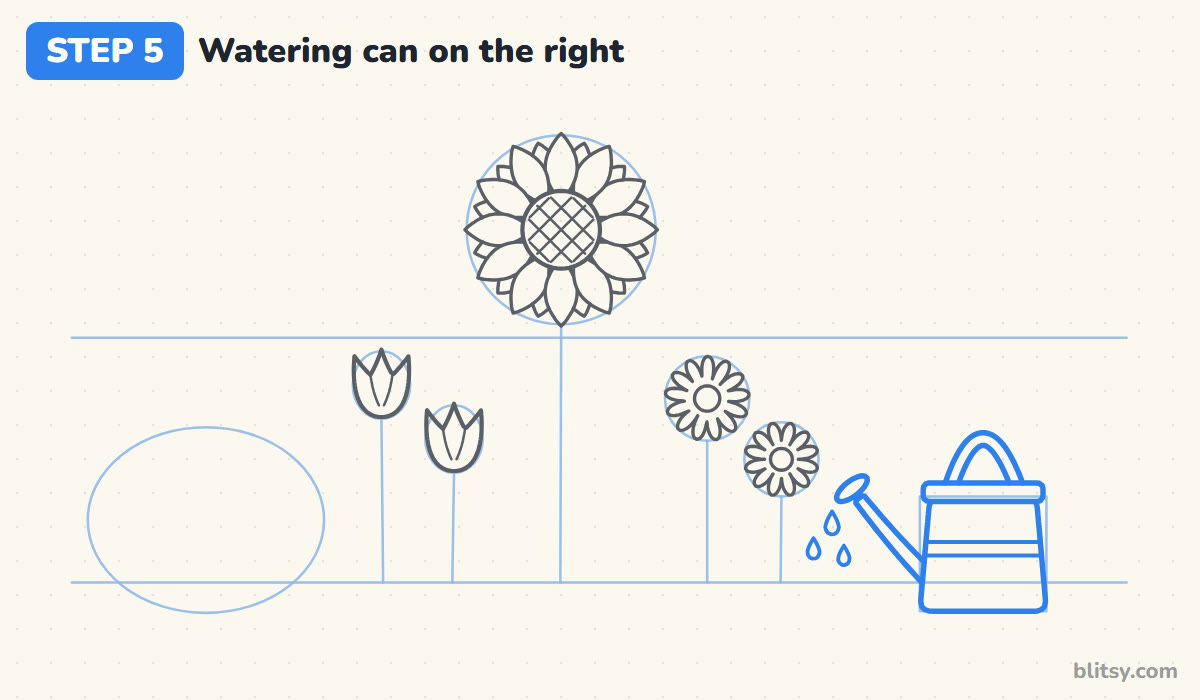
Use the box as your guide and draw a can body slightly wider at the bottom than the top. Lay a flat rim across the top and an arched handle above it. The spout leaves the lower left side and angles up to a small oval sprinkler. Add a stripe and three falling teardrops.
💡 Tip: Start the spout low on the can. Near the top, it looks like a teapot.
Step 6: Add pointy grass along the bottom
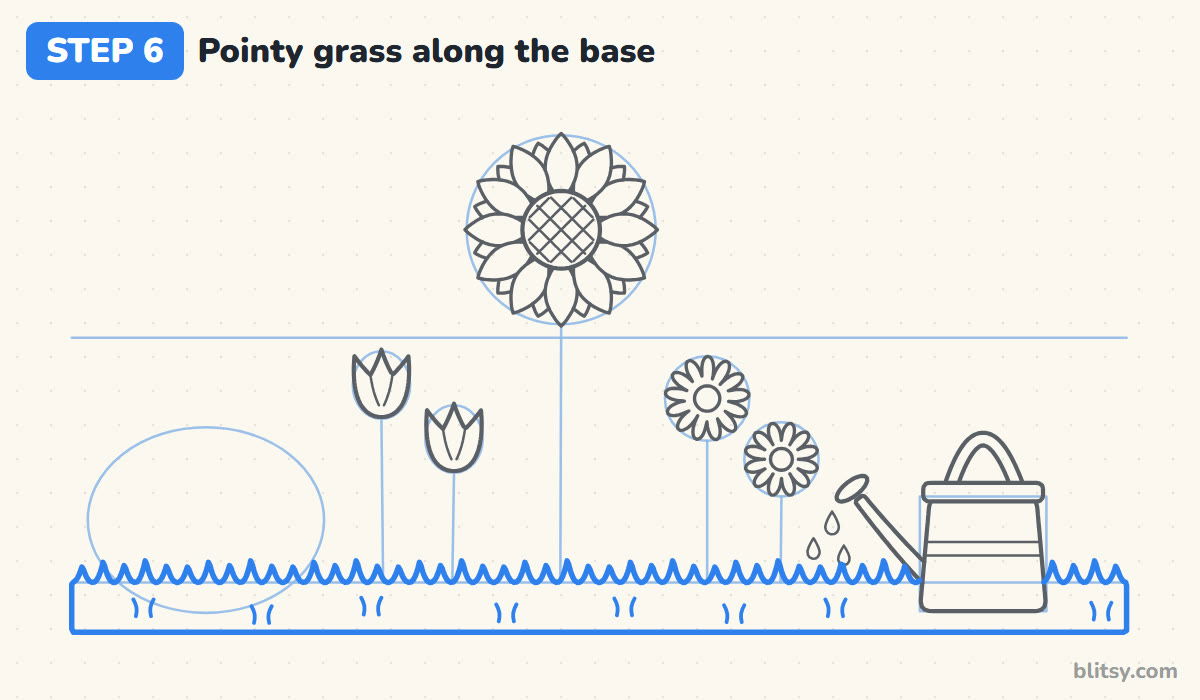
Along the ground line, draw a zigzag of little grass points across the page, some taller than others. Stop the grass where it meets the watering can, because the can stands in front of it. Close the band with a straight line near the bottom and add a few small tufts inside.
💡 Tip: Draw the zigzag in short bursts of five or six points. Long runs drift and wobble.
Step 7: Draw stems and leaves
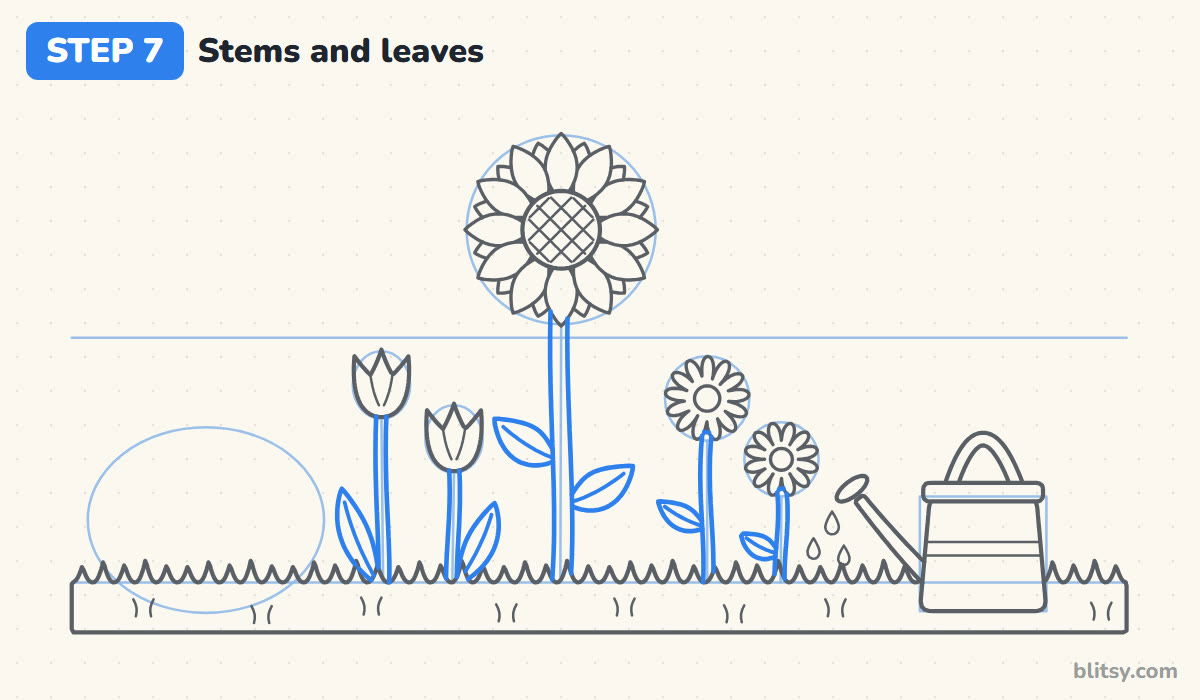
Go over each stem guide with two close lines, making the sunflower stem the thickest. Every stem starts under its flower and disappears into the grass. Add pointed leaves: two wide ones on the sunflower, a long blade beside each tulip and a small leaf on each daisy, each with a center vein.


💡 Tip: Put leaves on opposite sides as you go up a stem. Leaves all on one side make the plant lean.
Step 8: Round out the berry bush
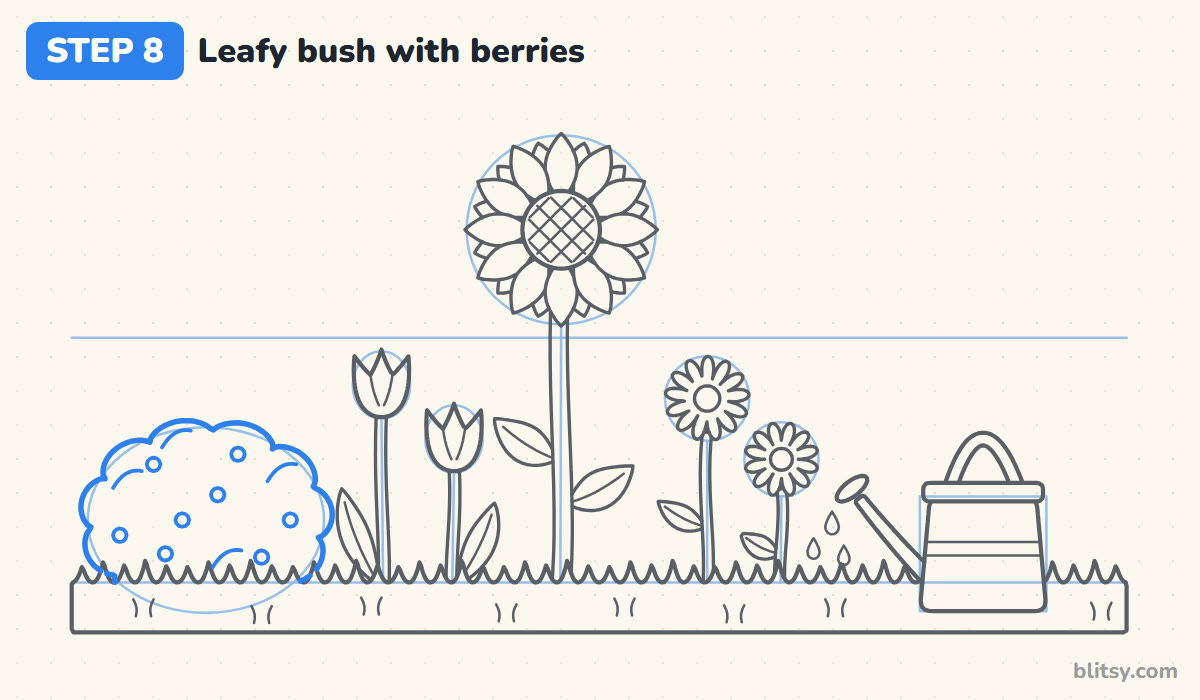
Trace around the bush oval with a bumpy line, like the top of a cloud, and let the bottom sink behind the grass. Inside, draw a handful of small circles for berries and a few short curves for leaf clumps. I scatter the berries unevenly on purpose. In neat rows they look like buttons.
💡 Tip: Vary the size of the bumps a little. Perfectly equal bumps start to look like a cloud again.
Step 9: Draw the picket fence behind everything
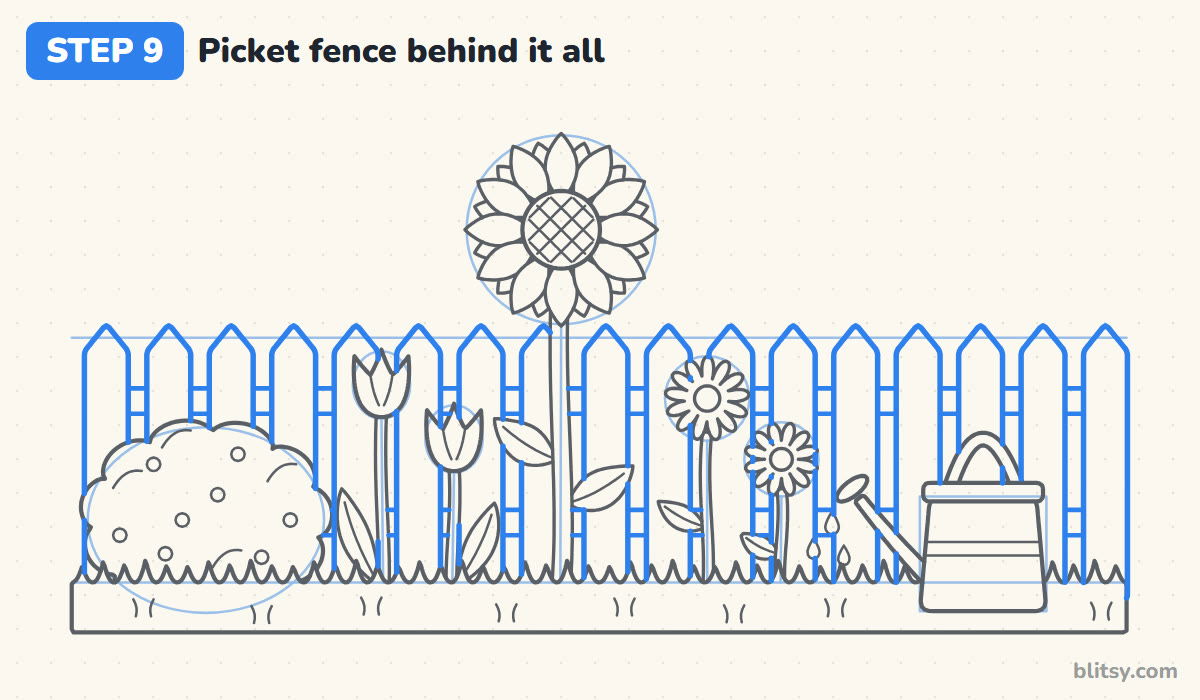
This is where overlapping pays off. Draw tall pickets with pointed tops along the fence line, leaving a small gap between each. Whenever a picket reaches a flower, a leaf or the bush, stop the line and pick it up on the other side. Then add two flat rails, drawn as short pieces in the gaps.
💡 Tip: Use a strip of scrap paper as a spacer so every gap between pickets comes out the same width.
Step 10: Add the sun, a cloud and a butterfly
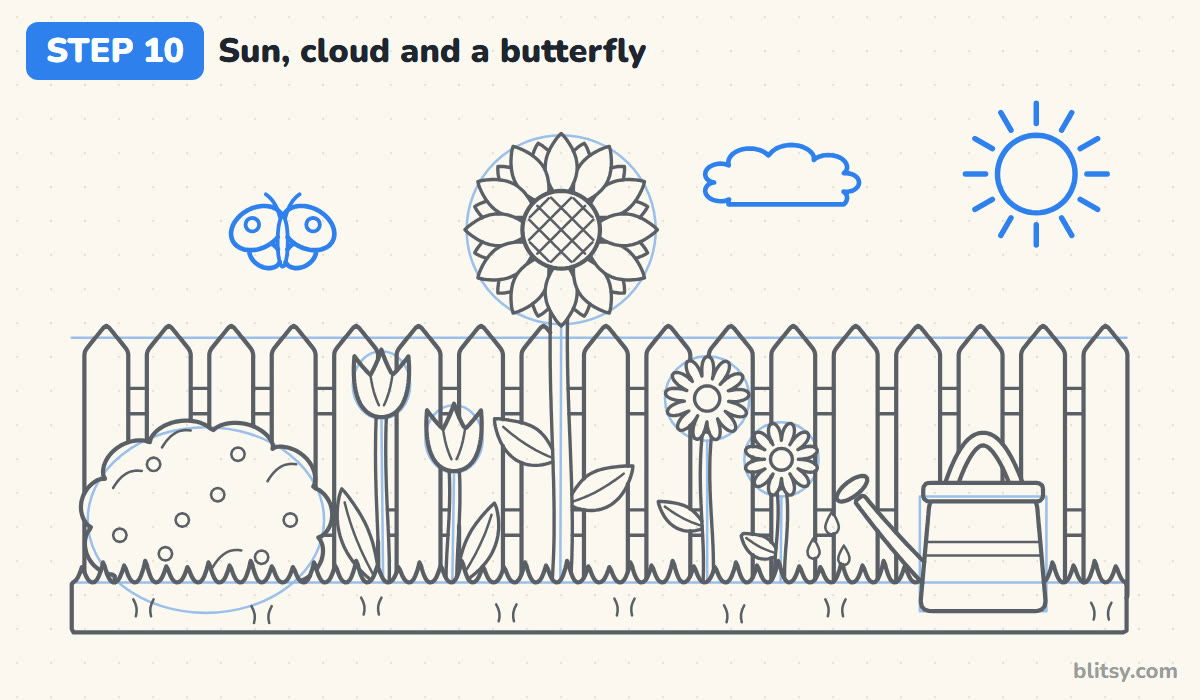
In the top right corner, draw a circle with short rays for the sun. Put a small cloud with a flat bottom between the sun and the sunflower. Above the bush, add a butterfly: a thin body, two big top wings, two smaller bottom wings and curly antennae.
💡 Tip: Keep the sky items small. A huge sun pulls the eye away from the flowers.
Step 11: Ink the lines and erase the guides
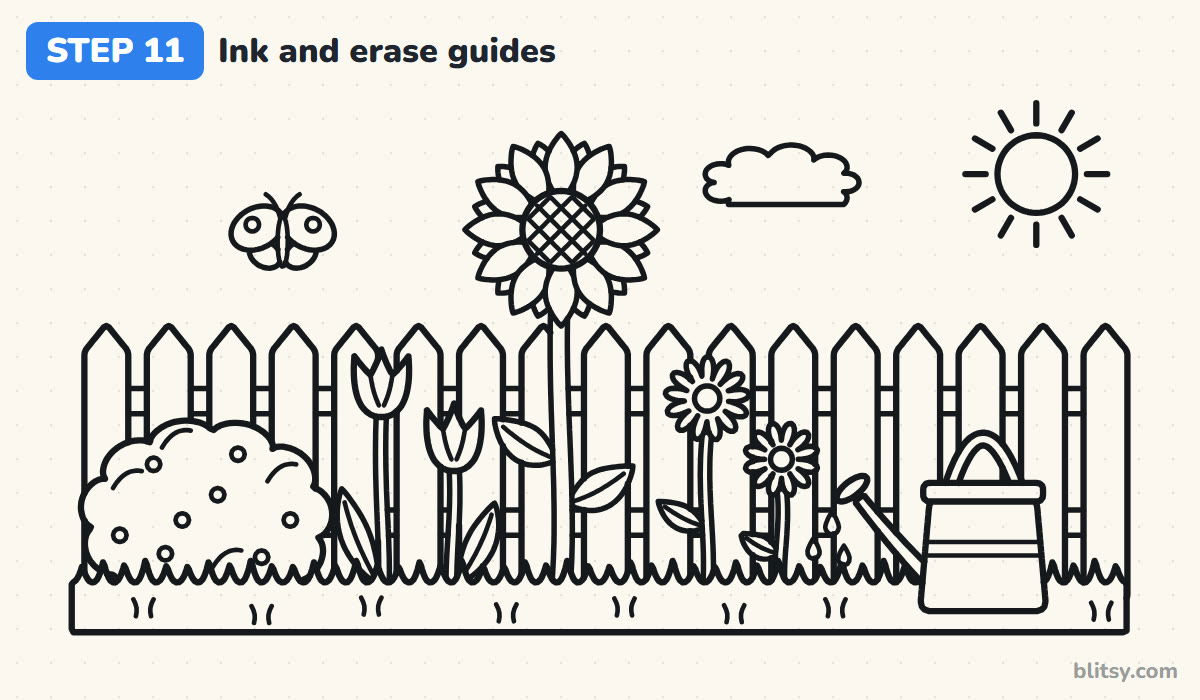
Trace every line you want to keep with the black marker, working from top to bottom so your hand doesn't smudge fresh ink. Let it dry for a minute. Then erase the two guide lines and all the helper shapes.




💡 Tip: Rest the side of your hand on a scrap of paper while inking. It keeps oils and smears off the page.
Step 12: Color the garden
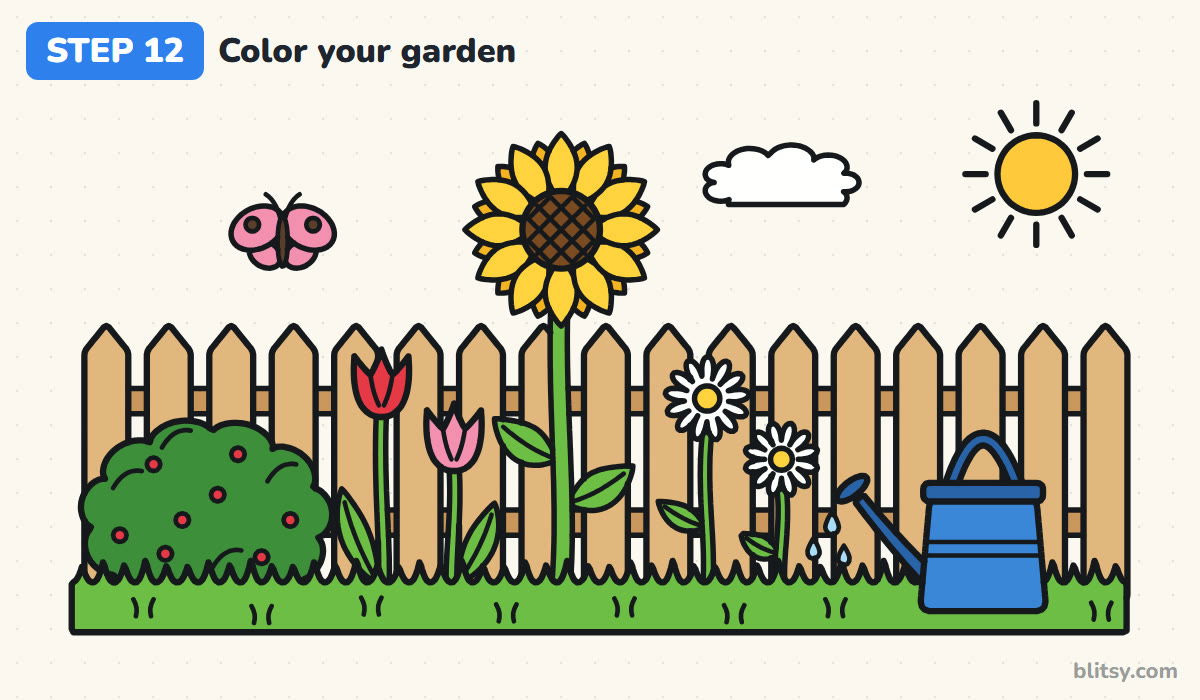
Color the fence light brown, pressing harder on the rails so they look shadier. Use dark green for the bush and red for its berries. A brighter green covers the grass and every stem and leaf. Give the sunflower yellow petals with a brown middle, one tulip red and one pink, and the daisies yellow centers. Finish with a blue can, a yellow sun and a pink butterfly.
💡 Tip: Color the light parts first. Yellow goes muddy if you color it next to wet marker or dark pencil.
Garden Scenes That Turn Into a Jumble
- Drawing the fence first. Then every flower ends up with fence lines running through it. Draw the plants in front first and let the fence fill in behind them.
- All the flowers the same height. The row looks stiff. Let the sunflower tower, keep the tulips medium and set the daisies low.
- Stems that float. A stem that ends above the grass makes the flower hover. Run every stem down until the grass covers it.
- Pickets with uneven gaps. A few wide gaps make the fence look broken. Keep the spacing steady, even if the pickets wobble a bit.
- Crowding the sky. A sky full of birds and clouds fights with the flowers. One sun, one cloud and one butterfly are plenty.
Planting New Ideas in Your Paper Garden
Once this bed feels easy, change one thing at a time. Swap the sunflower for a tall row of hollyhocks, turn the bush into a vegetable patch with carrots poking out or drop autumn leaves over the fence. If you'd like to practice single blooms before a whole bed, the flower drawing tutorial is a good next stop, and this how to draw a plant lesson covers leaves and pots.
Garden Coloring Page and a Printable Lesson PDF
Want to color without drawing first? Print the garden coloring page. A small colored example at the top names every color, and the big outline below has thick lines that are easy to stay inside. The step-by-step guide PDF holds all 12 steps and tips, two to a page. Both fit Letter or A4 paper.
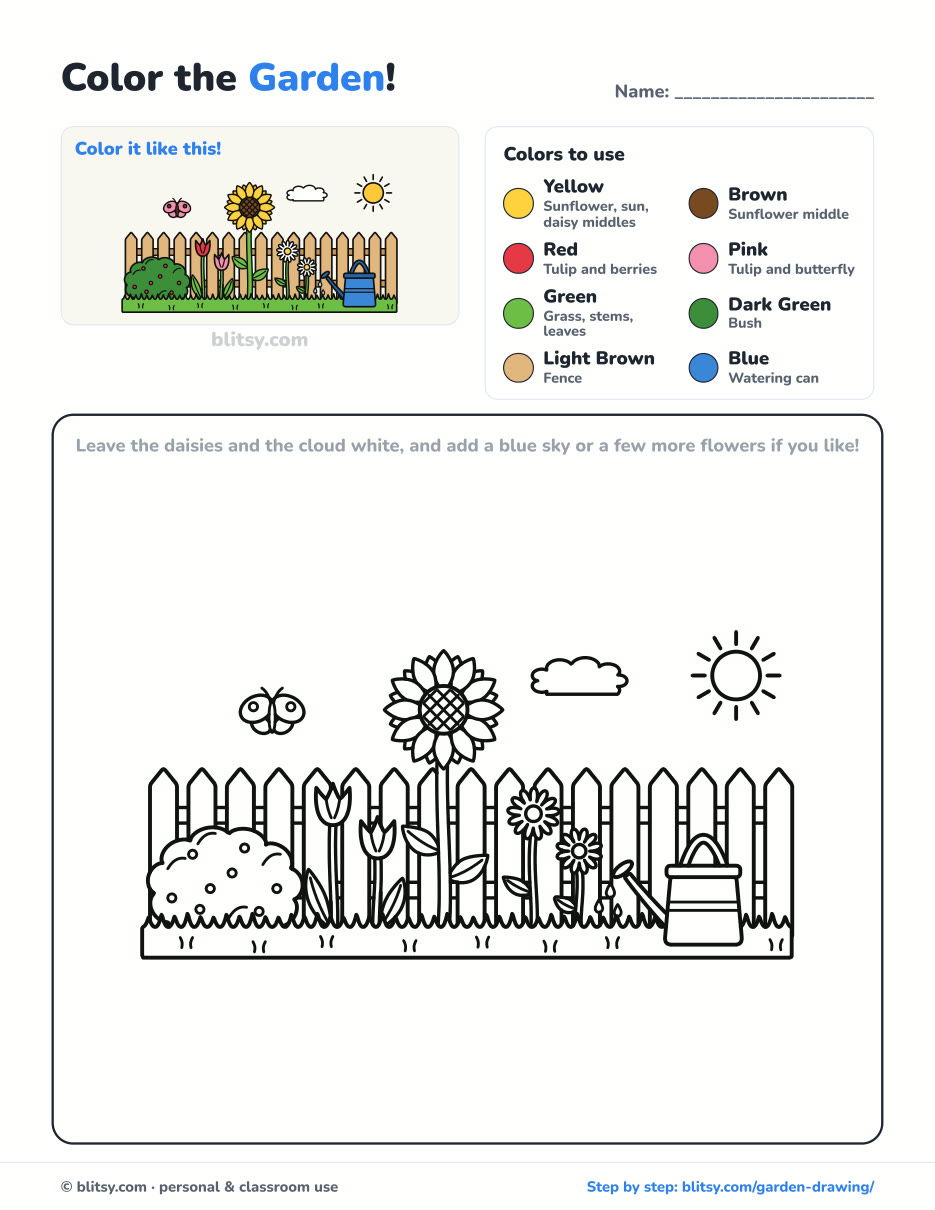
Black outlines with a colored example and the color names at the top. Ready to print and color.
⬇️ Download Coloring PageEvery step picture with its instructions and tips, to keep beside your paper while you draw.
⬇️ Download Drawing Guide📱 On a phone? Tap a download button, then open the file and choose Share → Save to Files or Print. On a computer, the PDF opens or saves straight to your Downloads folder.
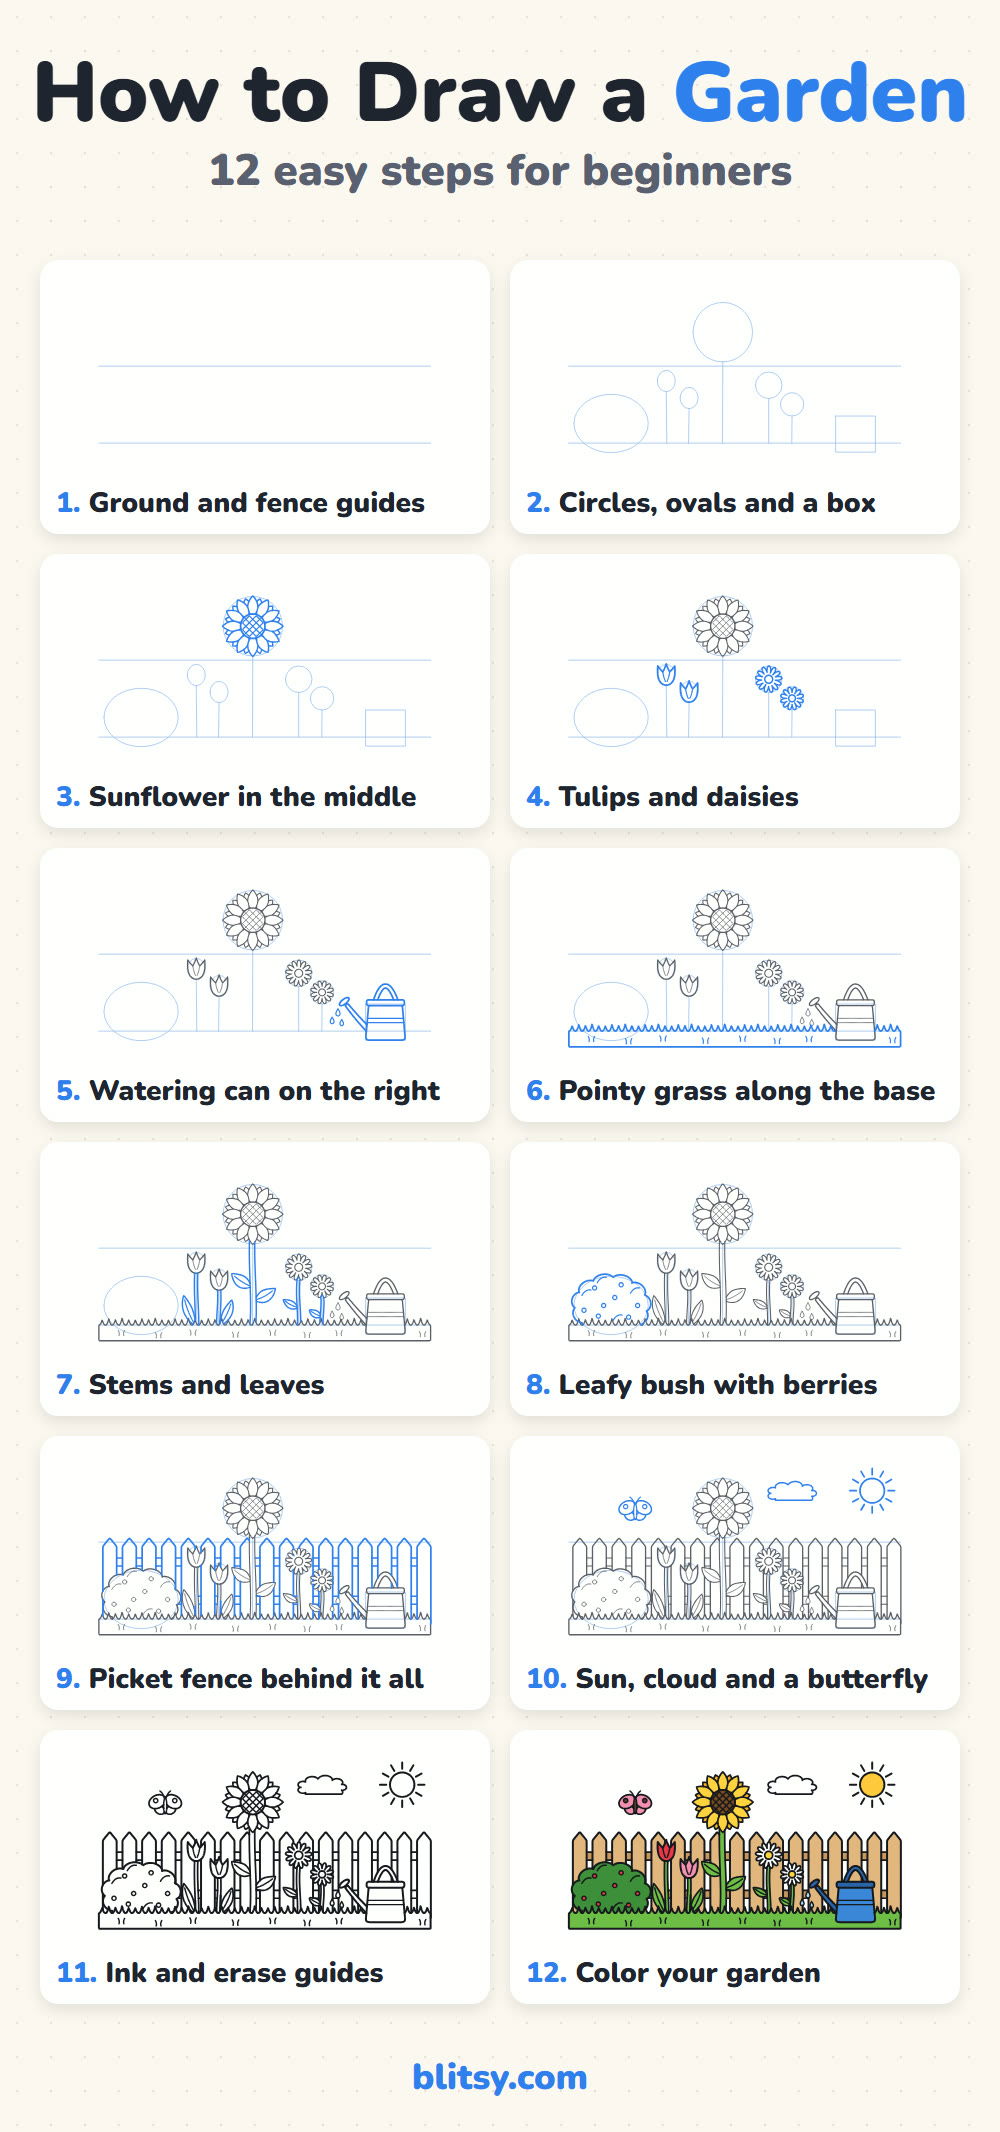
One Pin With the Whole Flower Bed
Planted the Flower Bed? Draw These Next
Each of these is a full step-by-step tutorial, so you can grow your garden page one plant or fruit at a time.
- Birthday Cake Drawing: Take a break from the soil with this birthday cake drawing tutorial: two frosted tiers, sprinkles and three candles.
- Avocado Drawing: Two cut halves, one with a smiling pit, make up this how to draw an avocado lesson.
- Jack O Lantern Drawing: Carve a candlelit grin into a ribbed pumpkin with the jack o lantern drawing step by step guide.
- Hibiscus Drawing: Add a tropical bloom with the hibiscus drawing tutorial, five red petals and a bud on the side.
- Oil Pastel Drawing: Blend warm sky bands and a sinking sun in this oil pastel drawing step by step sunset.
- Rose Drawing: The rose drawing tutorial opens a red rose from one tight spiral and adds a bud on its own branch.
- Strawberry Drawing: Draw a whole berry and a cut half, plus a little white flower, in the how to draw a strawberry tutorial.
- Pineapple Drawing: A golden pineapple under a green crown takes 11 calm steps in this pineapple drawing tutorial.
- Fruit Drawing: Fill a blue bowl with five fruits in the fruit bowl drawing tutorial, a banana leaning over the rim.
- Plant Drawing: Grow a monstera with split leaves in a striped coral pot with this plant drawing step by step lesson.
- Tulip Drawing: Three tulips lean in three directions in the easy tulip drawing tutorial, one leaf twisting to show its back.
- Mushroom Drawing: A storybook toadstool would sit nicely at the edge of your bed. Learn it with the how to draw a mushroom step by step guide.
- Sunflower Drawing: Give the sunflower a page of its own in this sunflower drawing tutorial, with a bee flying in.
- Pumpkin Drawing: Pile three pumpkins on hay with the pumpkin drawing tutorial, which starts from a few light ovals.
- Succulent Drawing: Finish with a potted echeveria in the succulent drawing step by step lesson.
What Young Artists Ask About Garden Drawings
What is the easiest way to draw a garden?
Draw a ground line, add a few flowers of different heights, then put a simple fence behind them. Drawing the front plants first keeps the scene clean.
How do you draw a simple flower garden for kids?
Stick to three flower shapes: a round daisy, a cup-shaped tulip and a sunflower with pointed petals. Younger kids can leave out the fence rails and the butterfly.
What should I put in a garden drawing?
Flowers and grass, plus something behind them like a fence or a hedge. One garden object, such as a watering can, makes it feel lived in.
How long does it take to draw a garden?
About 20 minutes for the lines and 15 more for coloring. The fence takes longest, so take a short break before it if you need one.
Next time you walk past a real flower bed, notice which plant stands in front, then come back and grow your own on paper. 🌻
Related posts:
 Summer Drawing Step by Step (Easy Beach Scene for Beginners)
 How to Draw a Bed Step by Step (Easy 3D Bed for Beginners)
 How to Draw a Dandelion Step by Step (Flower + Seed Head)
 How to Draw a Hibiscus Step by Step (Easy Tropical Flower)
 How to Draw a Flower Step by Step (Easy Potted Bouquet)
 How to Draw a Magnolia Flower Step by Step (Easy Guide)
 How to Draw a Whale Step by Step (Easy for Beginners)
 How to Draw Lungs Step by Step (Easy Science Diagram)
 How to Draw a Plant Step by Step (Easy Potted Monstera)
 How to Draw the Fortnite Llama Step by Step (Easy Fan Art)
 How to Draw a Hoodie Step by Step (Front and Back View)
 How to Draw a Parrot Step by Step (Easy Scarlet Macaw)

