
A magnolia looks fancy, yet every petal on it is the same simple shape: a spoon with a round end. Below I'll show you how to draw a magnolia flower step by step, with one big open bloom, a half-open one and a closed bud on a bare branch. You only need a pencil, some patience with curves and a few pinks.
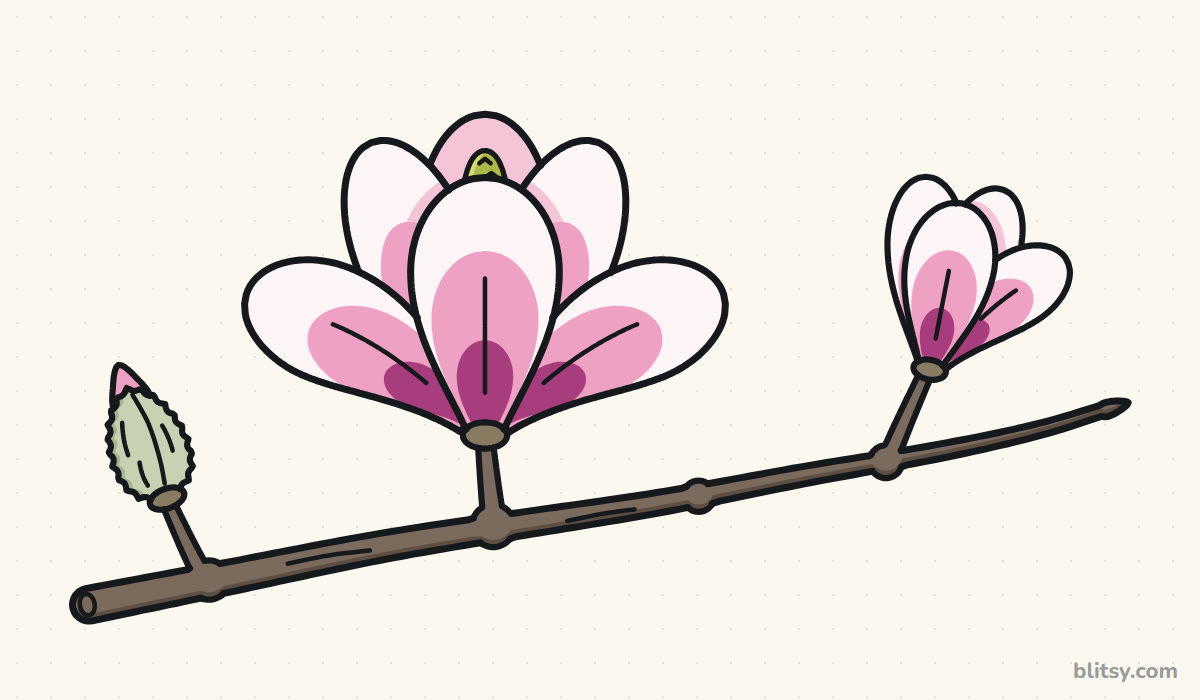
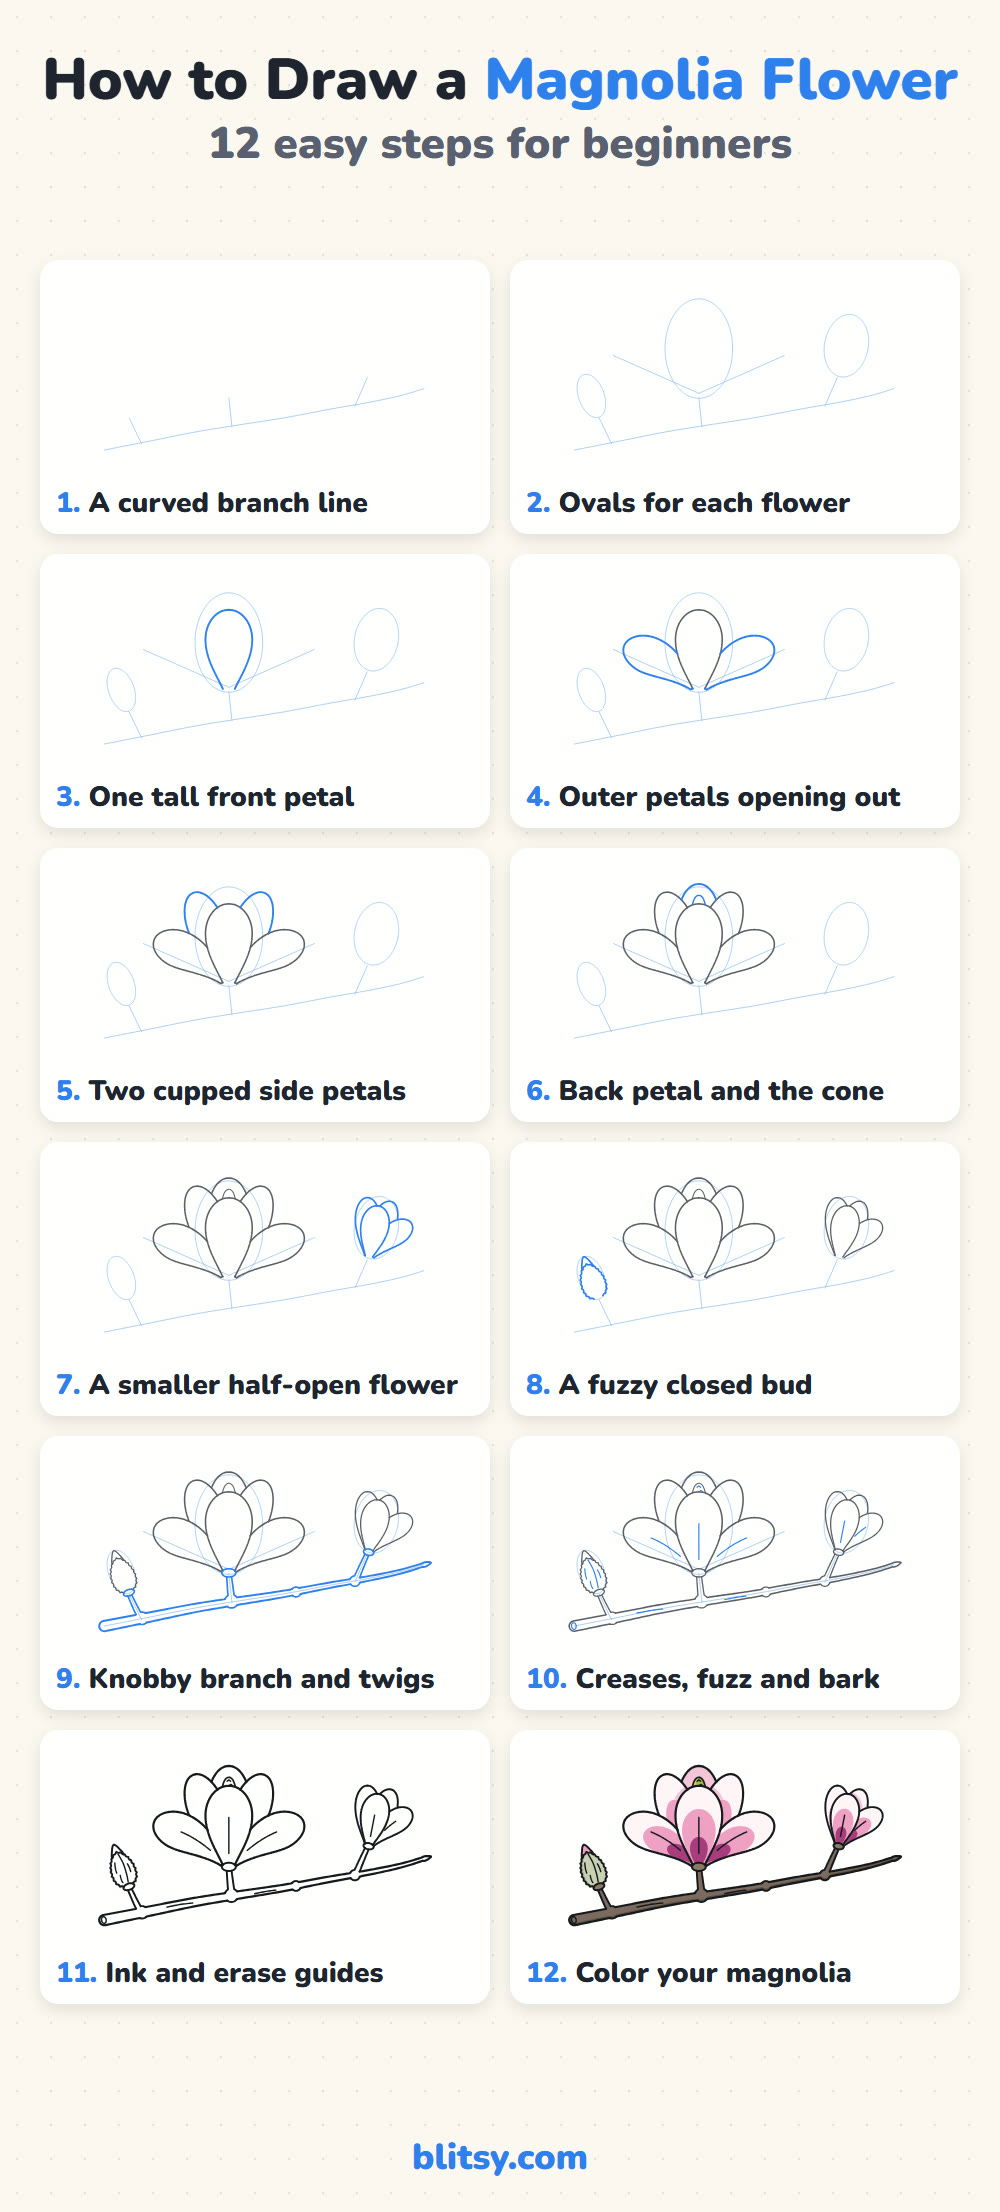
Blue means new: the bright blue lines in every picture are the ones to add in that step, the gray lines are already done, and the pale blue shapes are light guides you'll rub out near the end.
Quick overview
⏱️ Time: around 35 minutes with coloring
🎯 Level: easy to medium; kids from about 7 can follow along
✏️ Steps: 12
🌸 You'll draw: a pink and white magnolia bloom, a half-open flower and a fuzzy bud on a bare branch
Supplies for a Spring Magnolia Sketch
- A soft pencil, such as an HB or 2B
- An eraser that doesn't smudge
- A black fineliner or felt tip pen
- Colored pencils in pink, magenta, light pink, yellow green, gray green and brown
- Plain paper, turned sideways
White paper does half the work here, since the tops of the petals stay almost white.
How to Draw a Magnolia Flower Step by Step
Step 1: Sketch a long curved branch line
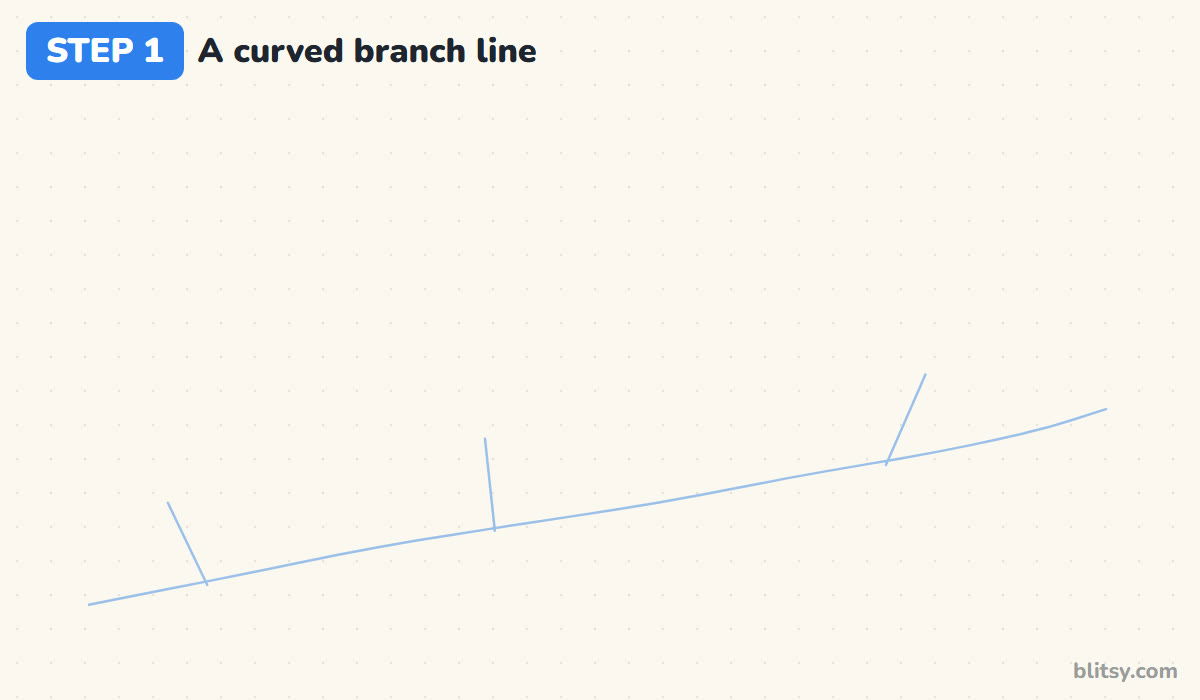
Start low on the left side of the page and draw one gentle line rising toward the upper right. Add three short lines sticking up from it: near the left end, in the middle and toward the right. Those are the twigs for the bud and the two flowers. I always place the branch first, because it decides where everything else sits.
💡 Tip: Keep the branch line slightly curved; a ruler-straight branch looks like a stick from a hardware store.
Step 2: Add ovals to plan each flower
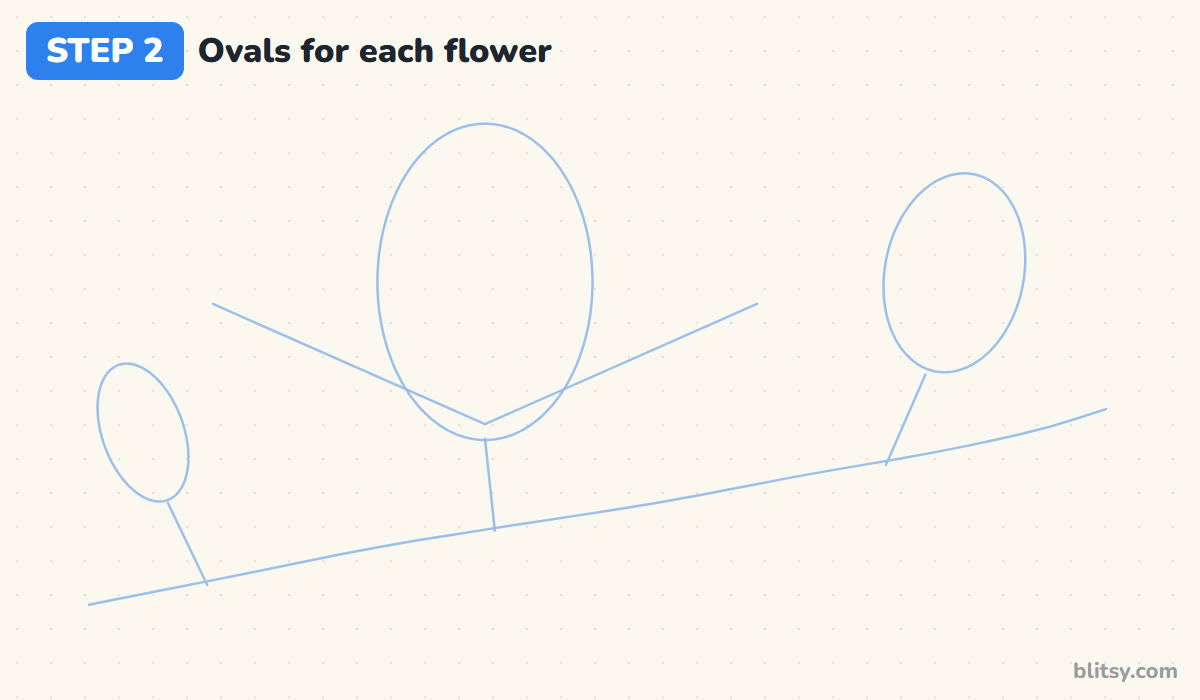
On the middle twig, draw a tall oval for the big bloom. From its bottom, add two slanted lines fanning out left and right; the outer petals will follow them. Then draw a medium oval on the right twig and a small, tilted one on the left. Different sizes show the flowers opening at different times.
💡 Tip: Draw ovals with your whole arm moving, not just your fingers, and they'll come out rounder.
Step 3: Draw one tall front petal
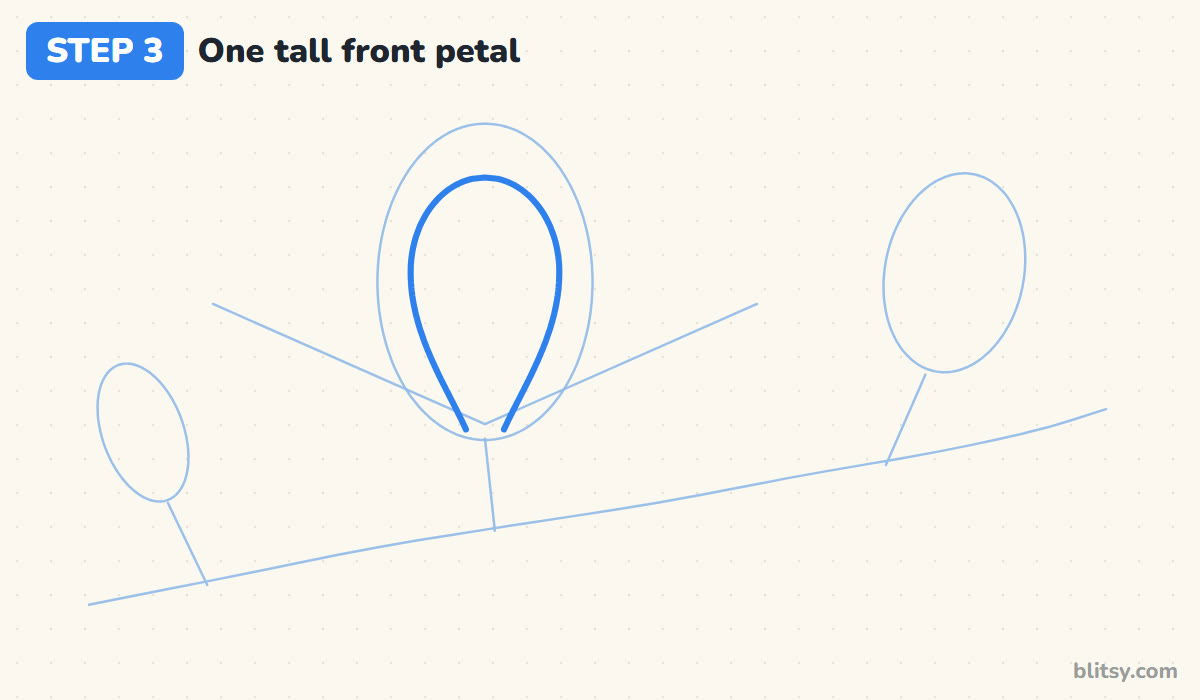
Inside the big oval, draw the petal that faces you. It's narrow at the bottom and swells into a wide, round top, a lot like a spoon standing on its handle. I stop the top a little below the oval's edge, because the petals behind it need to rise above it. Leave the bottom open for now.

💡 Tip: If your spoon looks like a balloon, pinch the bottom narrower; the thin base is what makes it a petal.
Step 4: Add the outer petals opening outward
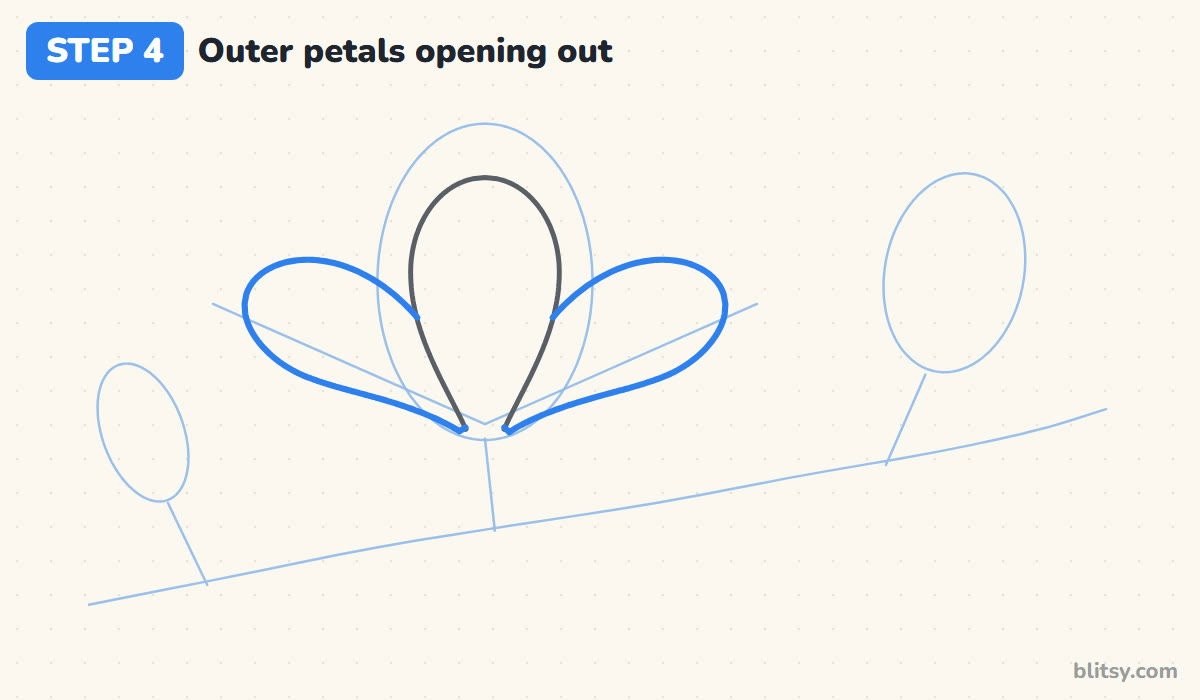
Follow the two fan lines and draw a petal along each one, starting from the base of the front petal. These outer petals have already bent open, so they lie almost sideways. Give them the same spoon shape and tuck each one behind the front petal.
💡 Tip: Let the bottom edge of each outer petal sag slightly; petals that bend down look heavier and more real.
Step 5: Draw two cupped side petals
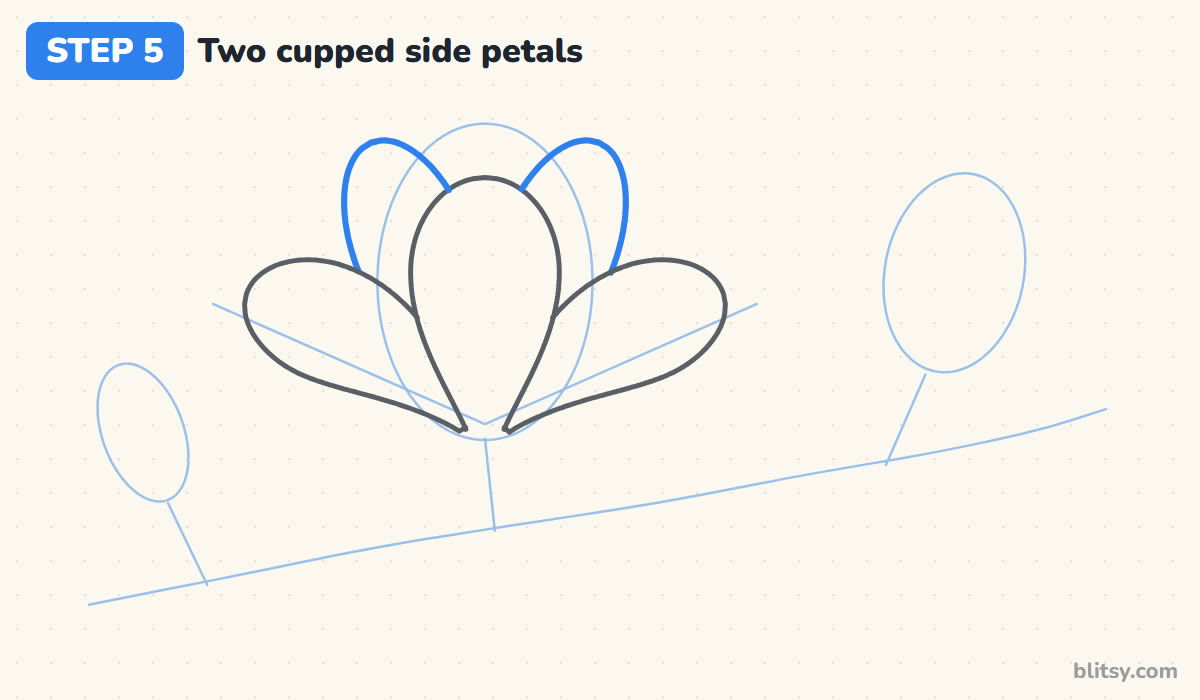
Fill the gap between the front petal and each outer petal with an upright petal leaning a little outward. You'll see only its top, from where it peeks over the outer petal to where it goes behind the front one. Stopping the line at the edge is what makes petals look layered.
💡 Tip: Make the tops of these two petals the highest points of the flower except for the back petal.
Step 6: Add the back petal and the cone
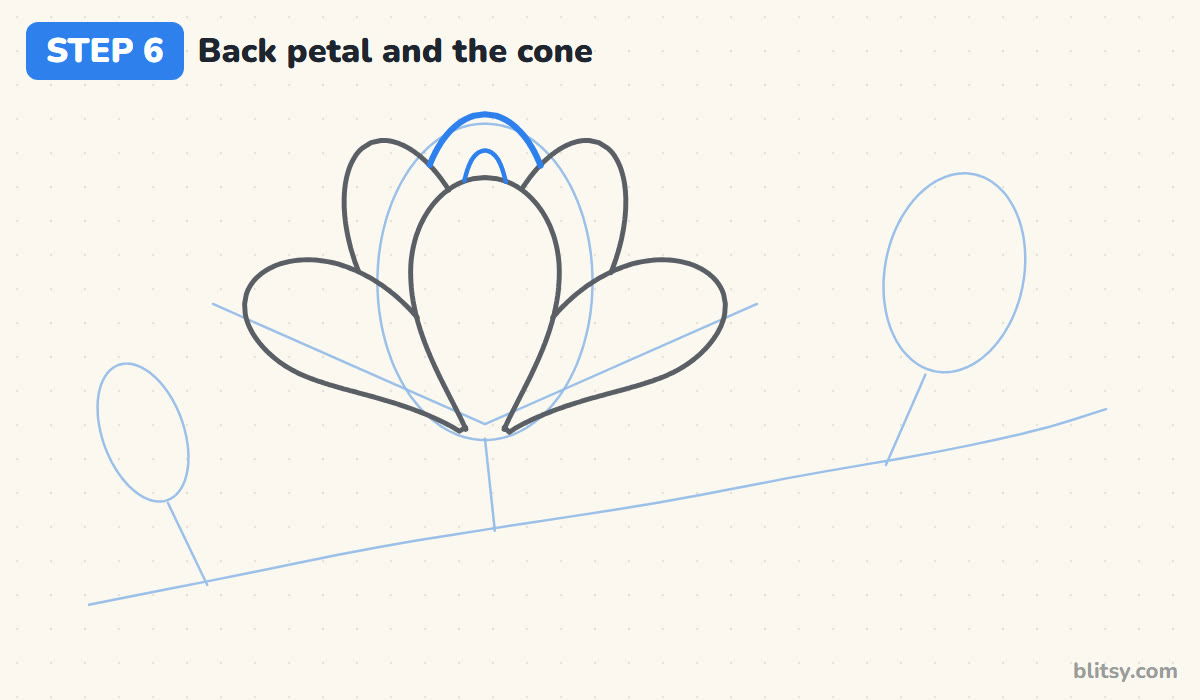
Between the two side petals, draw a rounded arch for the back petal. Just under that arch and above the front petal, draw a tiny pointed dome. That's the cone in the centre of the flower, where the seeds form later. I only show its tip, because a magnolia hides most of its centre inside the cup.
💡 Tip: Keep the cone small; if it's big, the flower starts to look like a lotus.
Step 7: Draw a smaller half-open flower
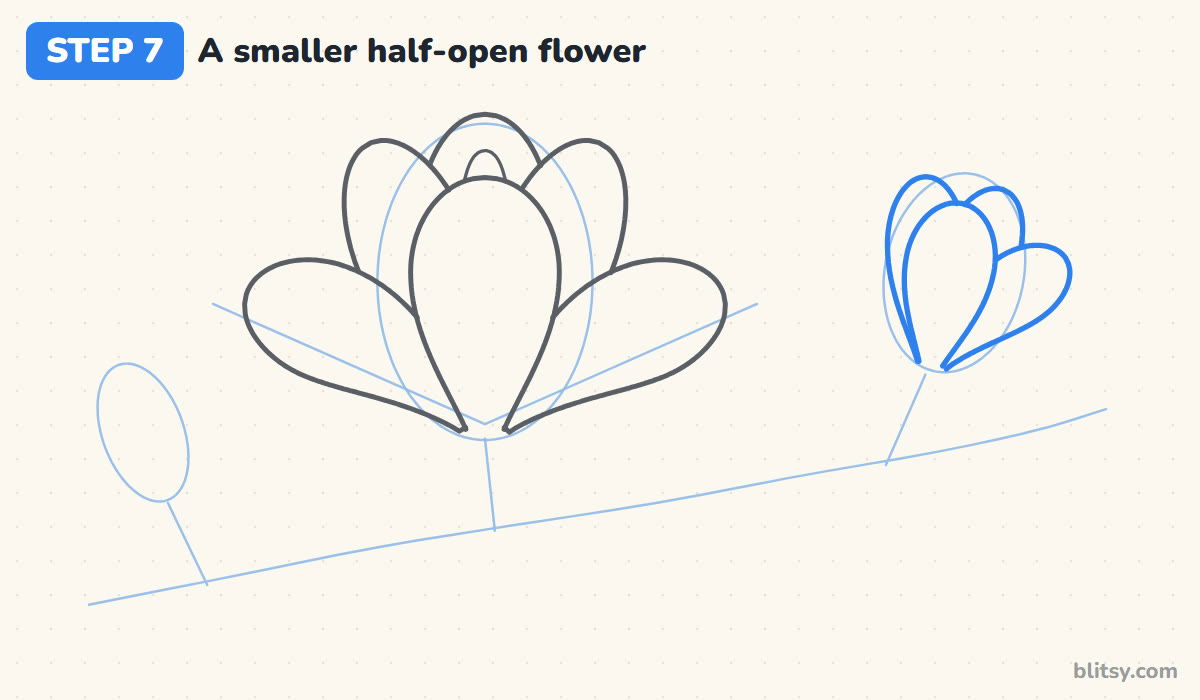
On the right oval, repeat the same idea in a tighter version: a front petal, two upright petals peeking out behind it and one petal on the right just starting to fold open. I tilt this flower a little to the right so it doesn't copy the big one.


💡 Tip: Overlap these petals more than on the big flower; crowded petals read as a flower that hasn't finished opening.
Step 8: Draw a fuzzy closed bud
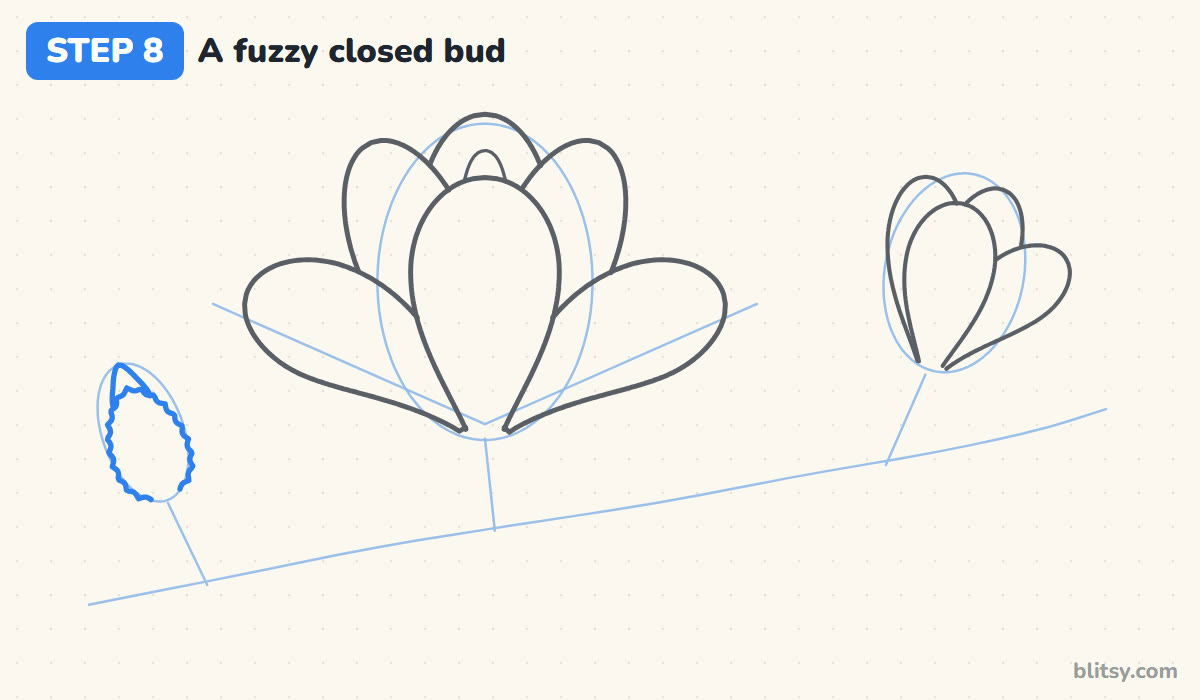
In the small left oval, draw a teardrop with the point at the top. Make the edge out of tiny bumps, like small scallops. Real magnolia buds wear a furry wrapper all winter, and the bumpy line shows that softness. At the top, add a small pointed tip of petal poking out.
💡 Tip: Keep the bumps small and even; big bumps turn the bud into a pinecone.
Step 9: Turn the lines into a knobby branch
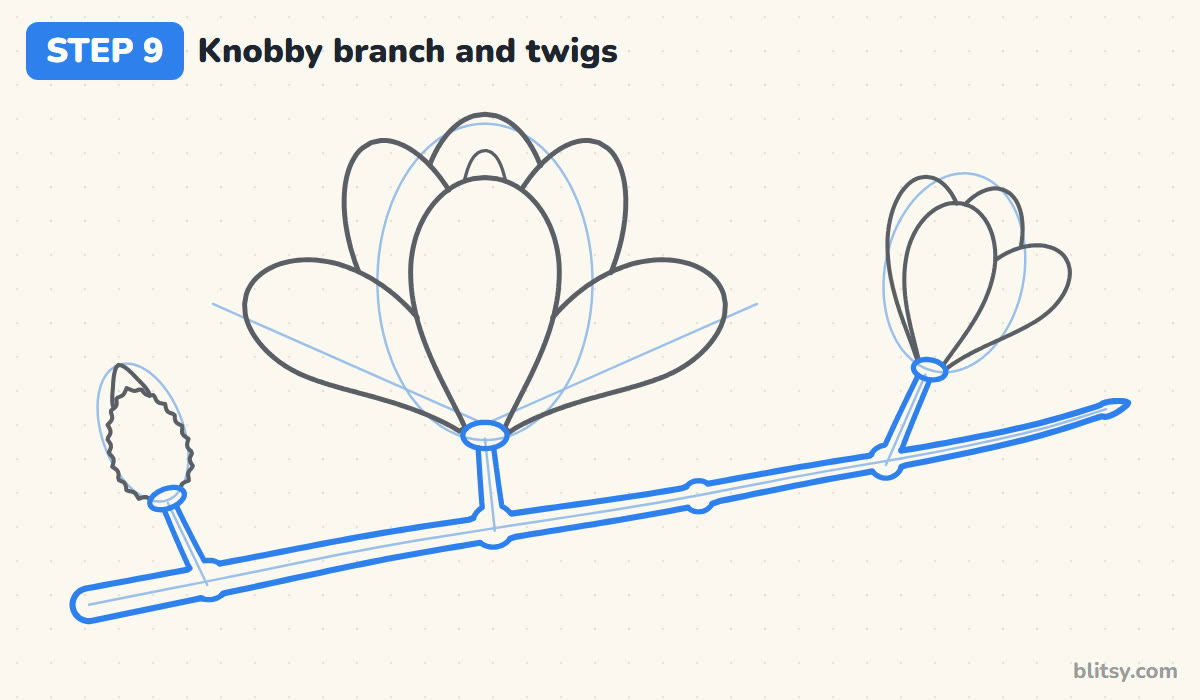
Draw a small flat oval under each flower and the bud, like a cup they sit in. Then trace both sides of the branch so it's thick on the left and thin at the right end, and do the same for the twigs. Where a twig leaves the branch, let the outline bulge into a round knob. My favourite part is these knuckles, because they make the wood look real.
💡 Tip: Add one extra knob on a bare part of the branch; it looks like a spot where a leaf grew last year.
Step 10: Add creases, fuzz and bark lines
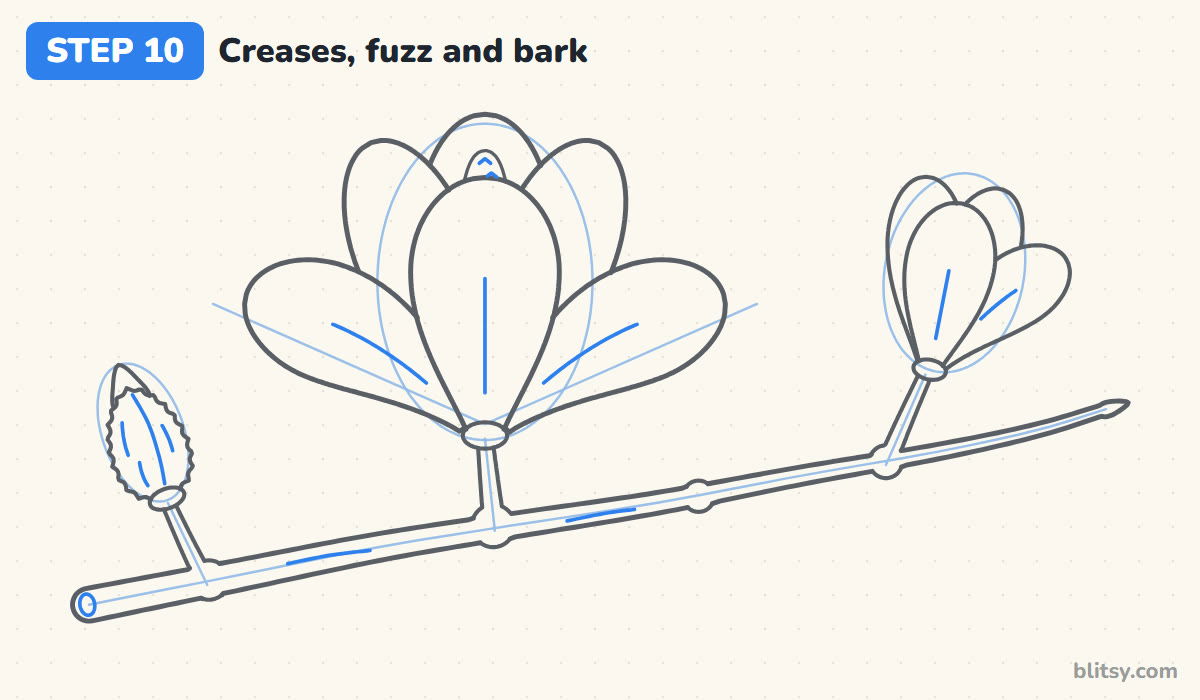
Draw a short line up the middle of the front petal and the outer petals, stopping well before the tip. Put a few tiny curved marks on the cone. Inside the bud, add a seam and some short strokes for fur, then a few thin dashes along the branch for bark.
💡 Tip: Draw the details with a lighter hand than the outlines, so they stay quiet.
Step 11: Ink your drawing and erase the guides
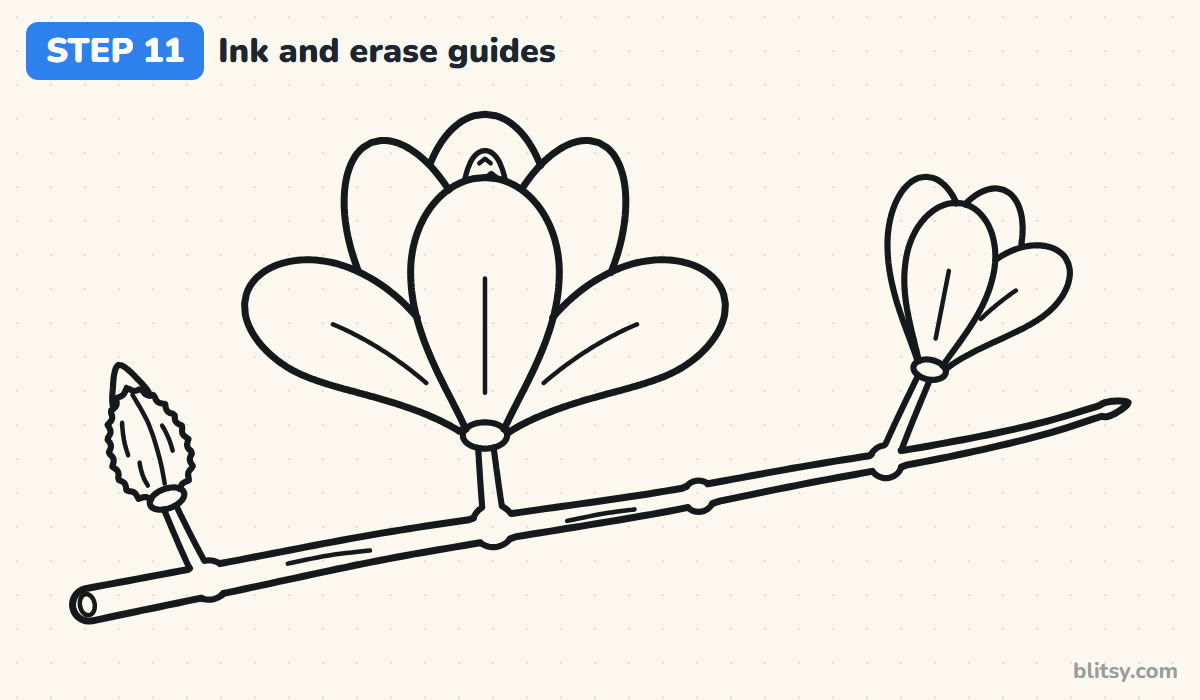
Trace every keeper line with your black pen, starting with the big flower and working out to the branch. Leave the ovals and fan lines in pencil. Let the ink dry for a minute, then erase. If a petal line ended too early, close it up now.

💡 Tip: Ink the long branch lines in one slow pass rather than many short ones, so they don't look hairy.
Step 12: Color your magnolia
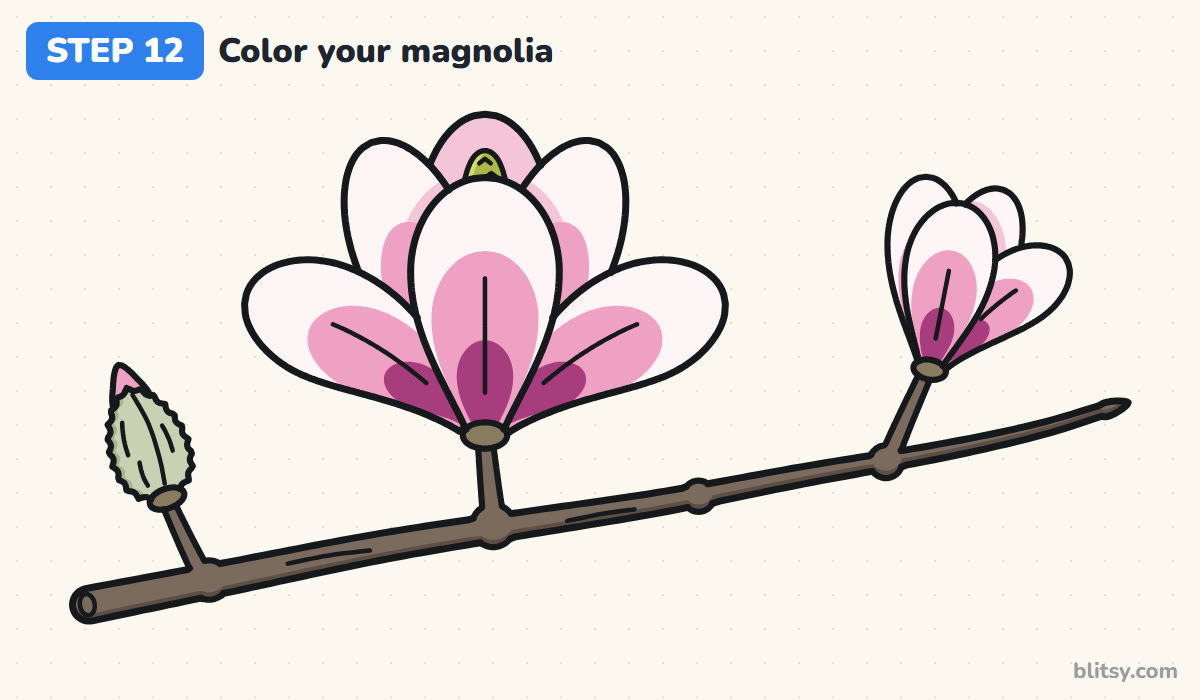
Leave the petal tops white or give them the lightest touch of pink. Color the lower half of each petal pink and add magenta right at the base. Use light pink inside the cup, yellow green on the cone, gray green on the bud and brown on the branch, with a darker brown along its bottom edge.
💡 Tip: Color the pink from the base upward and lift the pencil as you go, so the pink fades into the white.
Places Where Magnolia Sketches Go Sideways
- Pointed petal tips. Sharp points turn a magnolia into a lily or a lotus. Round off every tip like the end of a spoon.
- Petals as wide at the base as at the top. The flower looks like a stack of paddles. Keep the bottom of each petal narrow.
- Drawing every petal in full. Lines cross and the flower turns into a tangle. Draw the front petal first and stop each petal behind it at the edge.
- Adding green leaves to the branch. A bare branch is what makes these flowers read as an early spring magnolia, so I'd try it bare first.
- A smooth, skinny branch. It looks too weak to hold a big bloom. Make it thicker at one end and give it knobs where the twigs grow.
Magnolia Variations Worth Trying Next
Add more flowers along the branch, or draw a second branch crossing behind the first. A star magnolia has thin, ribbon-like petals, while a southern magnolia opens into a wide white saucer framed by dark, shiny leaves, and the same steps work for both. If you like cup-shaped flowers, try the easy tulip drawing tutorial next, or fill a pot with three kinds of blooms in the flower drawing step by step lesson.
Magnolia Coloring Page and Printable Drawing Steps
The free magnolia coloring page has a small colored sample at the top and a key that names each color, so kids can match the pinks and browns on the big outline below. The PDF drawing guide puts all 12 steps and tips on a few printable pages, handy for a class or a quiet afternoon.
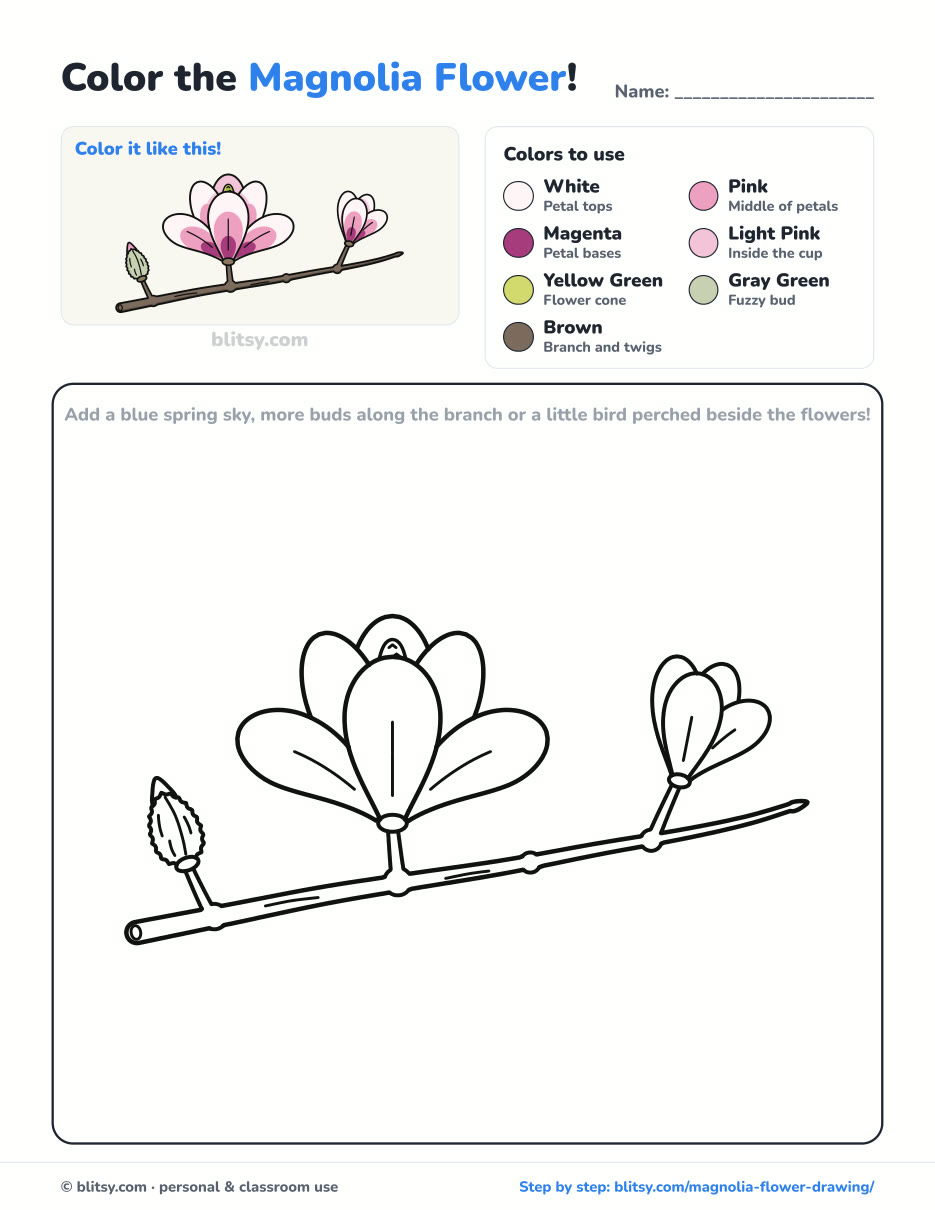
Black outlines with a colored example and the color names at the top. Ready to print and color.
⬇️ Download Coloring PageEvery step picture with its instructions and tips, to keep beside your paper while you draw.
⬇️ Download Drawing Guide📱 On a phone? Tap a download button, then open the file and choose Share → Save to Files or Print. On a computer, the PDF opens or saves straight to your Downloads folder.
Pin the Magnolia Steps for Springtime
Magnolia Drawing Questions, Answered
What is the easiest way to draw a magnolia flower?
Draw one tall spoon-shaped petal, add a spoon on each side and two more opening outward, then put it on a short brown twig. Round tips and narrow bases are all that make it a magnolia.
How do you draw a magnolia for kids?
Skip the half-open flower and the bud, and use only the big bloom on a thick branch. Younger kids can draw five round petals without the hidden-line trick and still get a nice result.
What colors are magnolia flowers?
Many are white, pink or purple, and the saucer magnolia shown here is white at the top with pink to deep purple near the base. Some kinds are pale yellow.
Why is a magnolia branch drawn without leaves?
Many magnolias bloom before their leaves come out in spring, so the flowers sit on bare wood. Magnolias are an ancient group of flowering plants, and that early bloom on bare wood is one of their best known habits.
Pin your finished branch somewhere you'll see it, and next time try a whole tree of these pink cups. 🌸
Related posts:
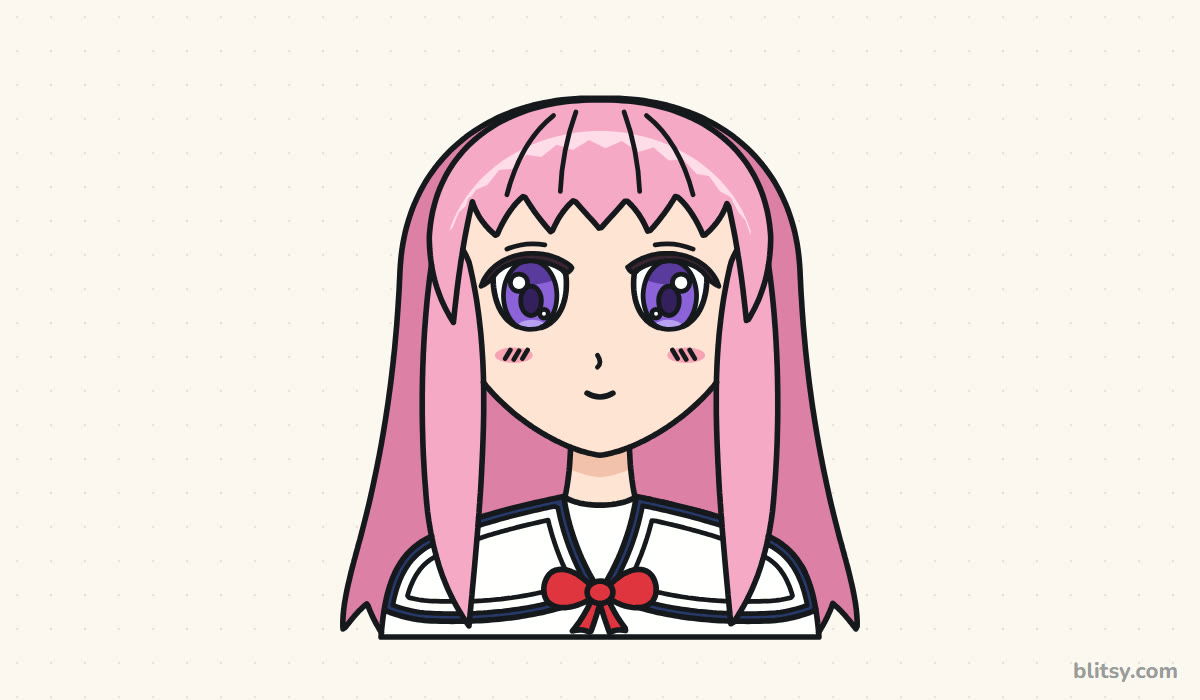 How to Draw an Anime Girl Step by Step (Easy Face Guide)
 How to Draw Luffy Step by Step (Easy Straw Hat Guide)
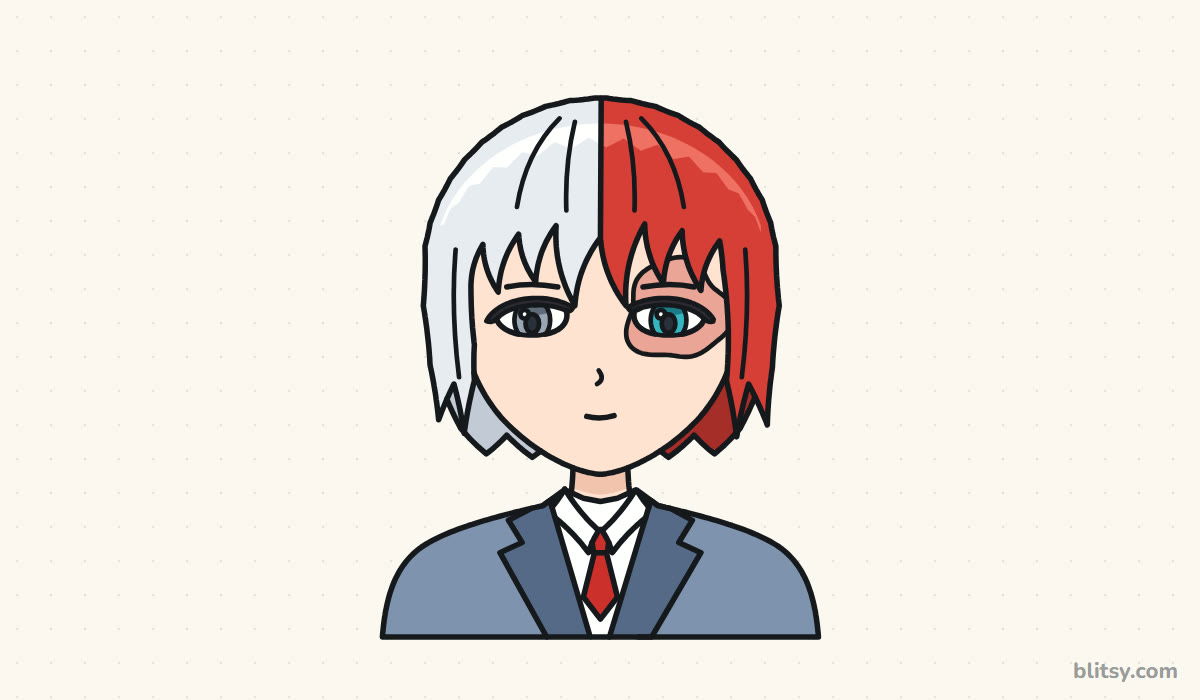 How to Draw Todoroki Step by Step (Easy Fire and Ice Guide)
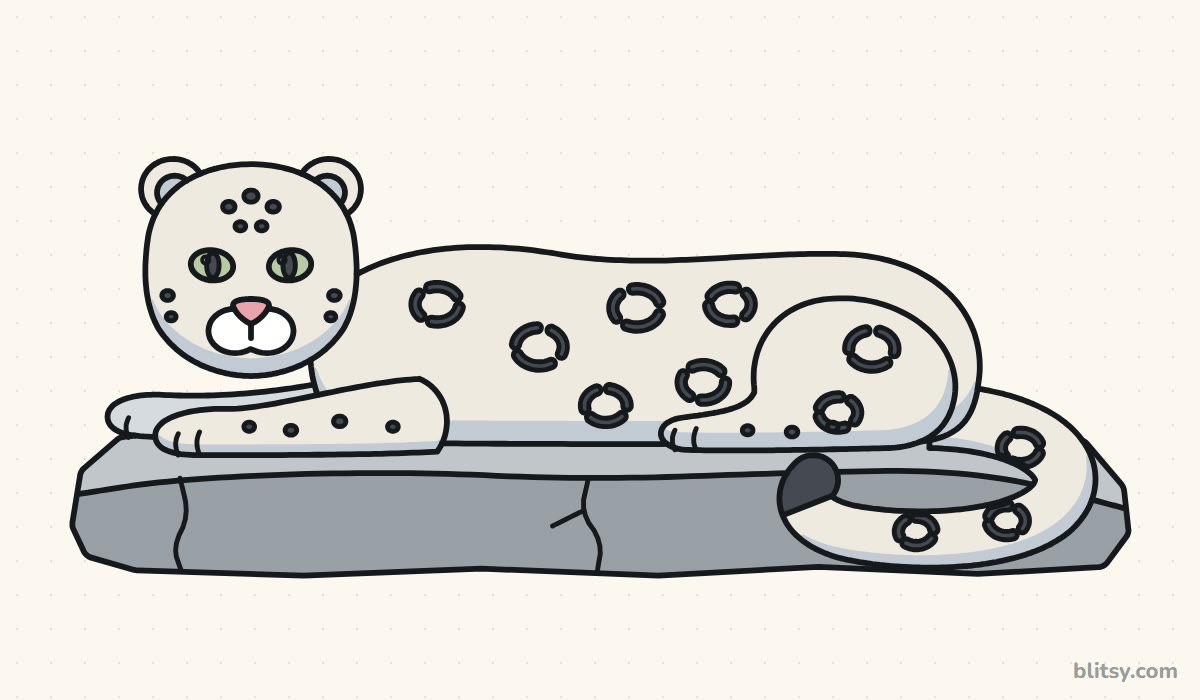 How to Draw a Snow Leopard Step by Step (Easy Guide)
 How to Draw a Cat Face Step by Step (Easy Tabby Guide)
 How to Draw a Face Step by Step (Easy Proportions Guide)
 How to Draw a Side Profile Step by Step (Easy Head Guide)
 How to Draw a Jellyfish Step by Step (Cute, Easy Guide)
 How to Draw a Dandelion Step by Step (Flower + Seed Head)
 How to Draw a Garden Step by Step (Easy Flower Bed Scene)
 How to Draw a Hibiscus Step by Step (Easy Tropical Flower)
 How to Draw a Flower Step by Step (Easy Potted Bouquet)

