
Three snowballs, a carrot and a hat. Few winter drawings are more familiar, and that's exactly why they're worth getting right. This lesson shows you how to draw a snowman step by step in the old-fashioned style, with a tall top hat, a coal smile and a striped scarf caught by the wind. I stand him on a soft hill of snow next to a little pine tree, so you finish with a small winter scene.
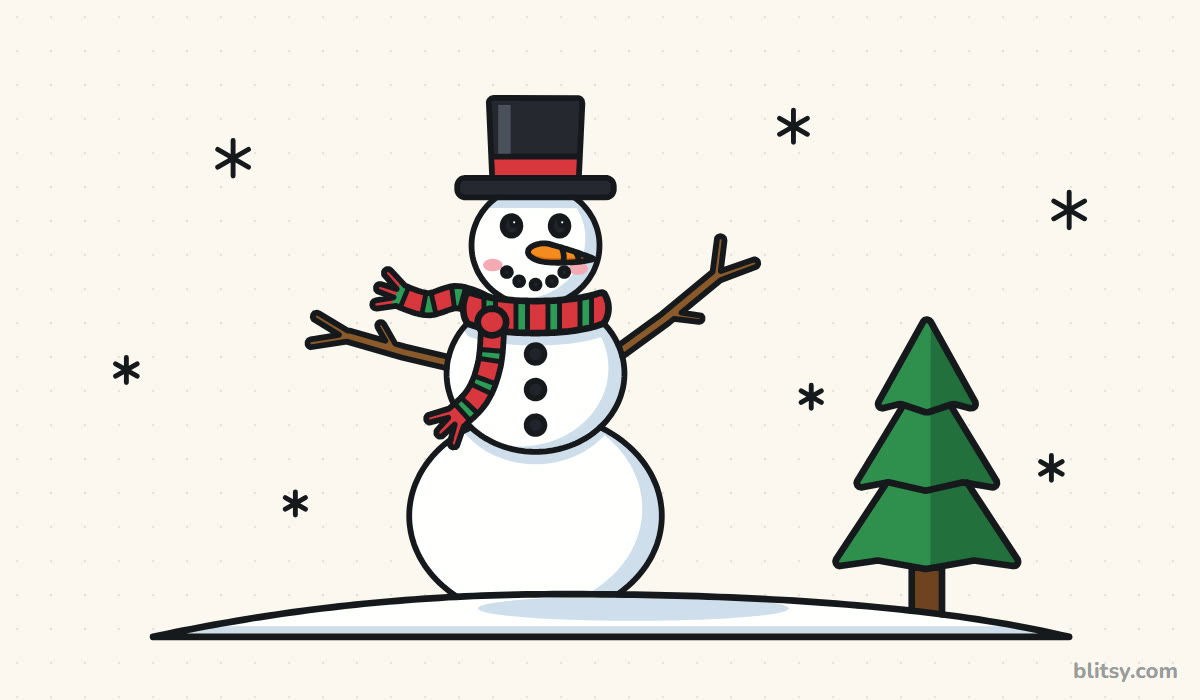
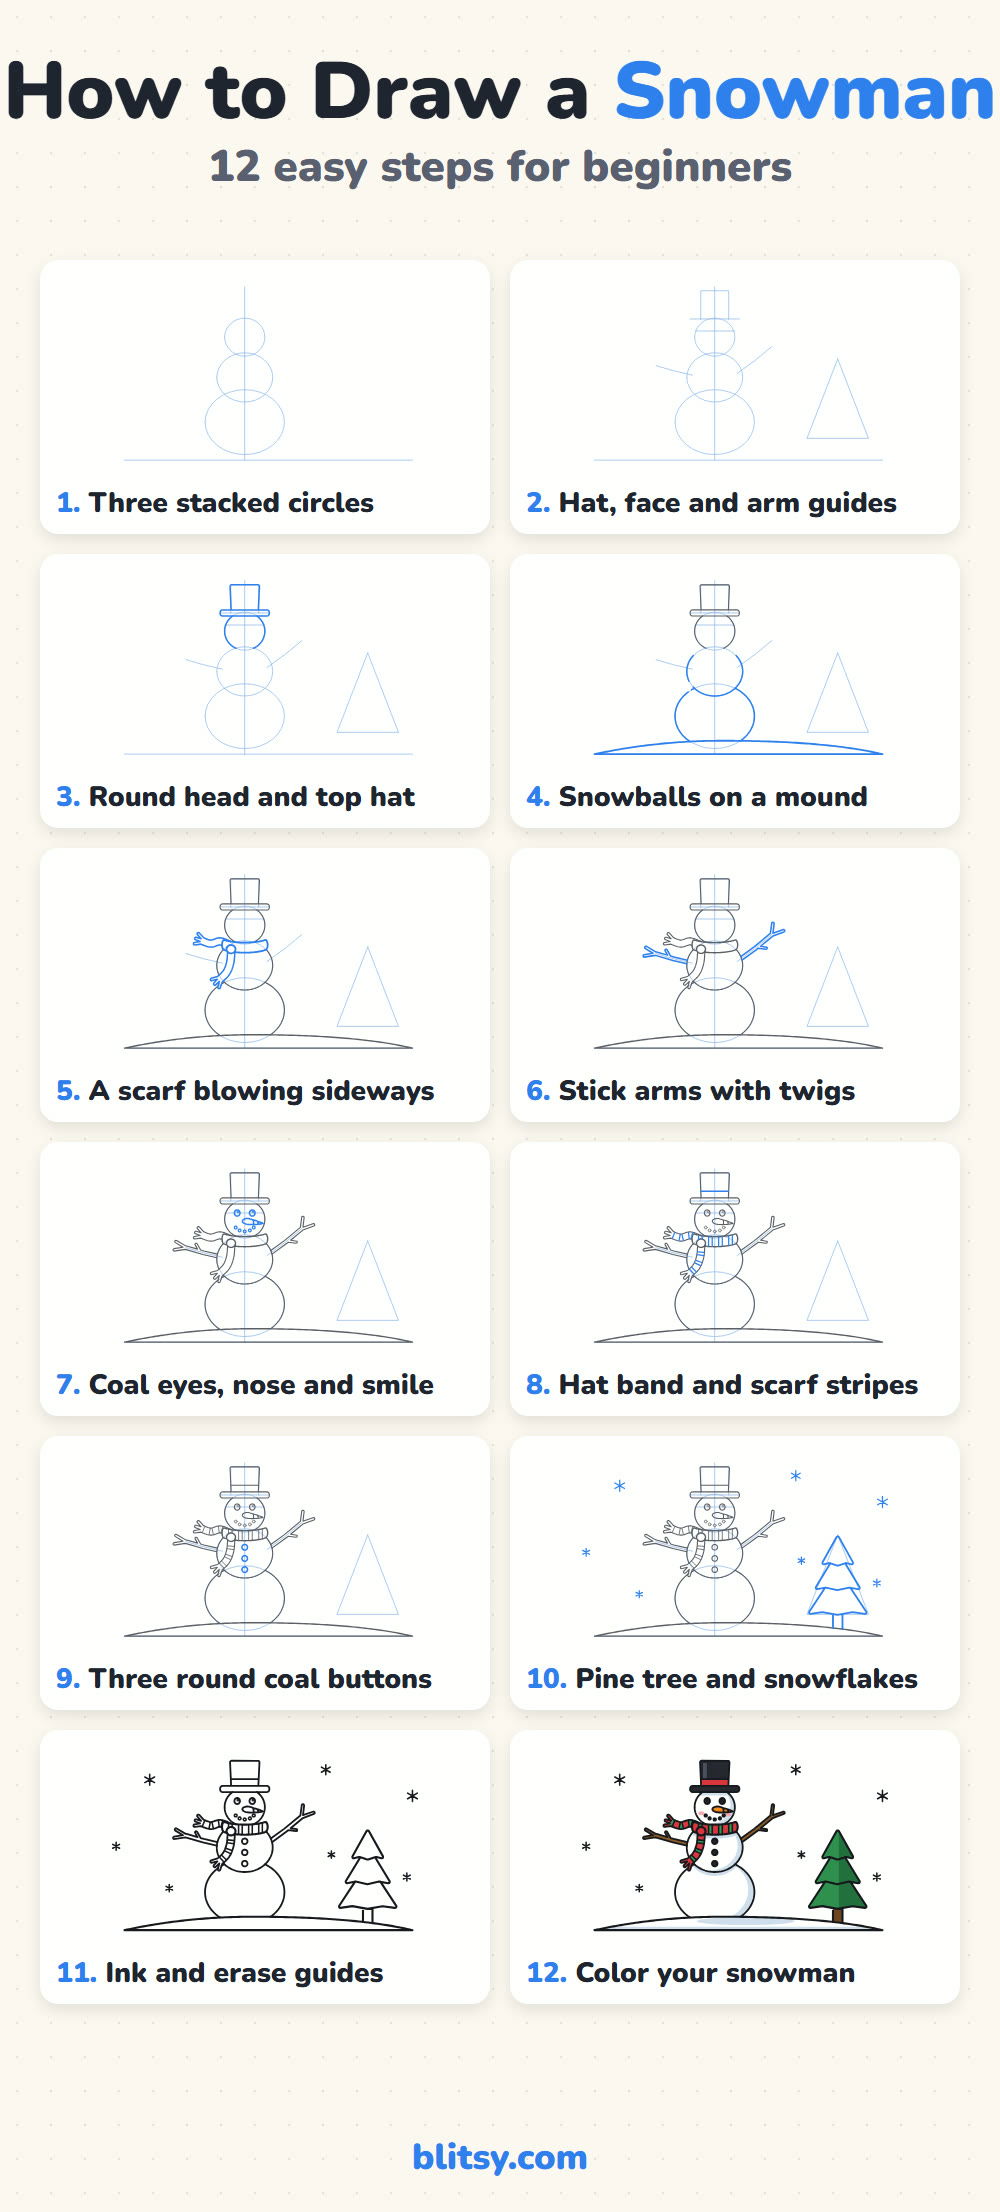
Snowman parts you still need to draw show up in blue, while finished parts from earlier steps turn gray.
Quick overview
⏱️ Time: about 30 minutes, coloring included
🎯 Level: easy, good for kids from around 5
✏️ Steps: 12
⛄ You'll draw: a top-hat snowman with a striped scarf, a pine tree and falling snow
Supplies for a Top Hat Snowman
- A regular HB pencil for the light guide shapes
- A clean eraser
- A black fineliner or felt-tip pen
- Colored pencils or markers: red, green, orange, brown, black, pink
- A pale blue or light gray pencil for the shadows on the snow
- Plain white paper
Skip the white pencil; the paper itself already gives you the color of snow.
How to Draw a Snowman Step by Step
Step 1: Stack three guide circles
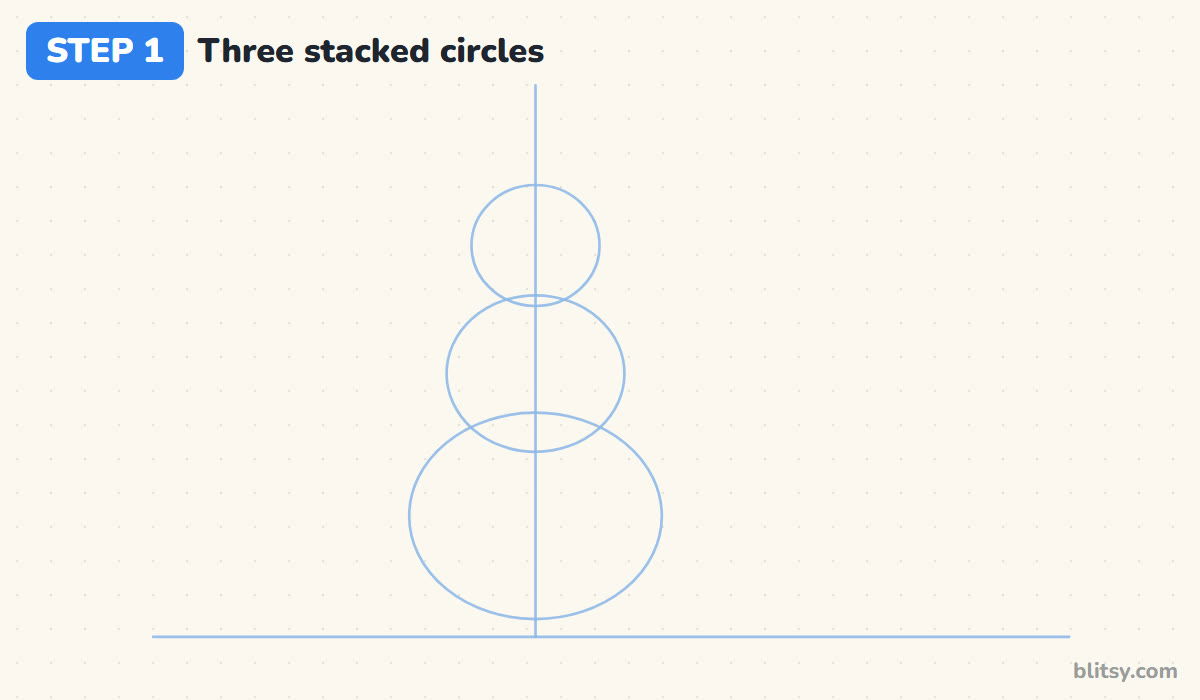
Start low on the page with a long ground line, then draw a straight line up through the middle. Stack three circles along it: a small head, a medium body and the biggest ball at the bottom. Let each one overlap the one below a little. I make every ball clearly bigger than the one above, because equal sizes look like a stack of coins.
💡 Tip: Draw each circle in two halves, left then right, and check that both sides bulge the same amount.
Step 2: Sketch guides for the hat, face and arm lines
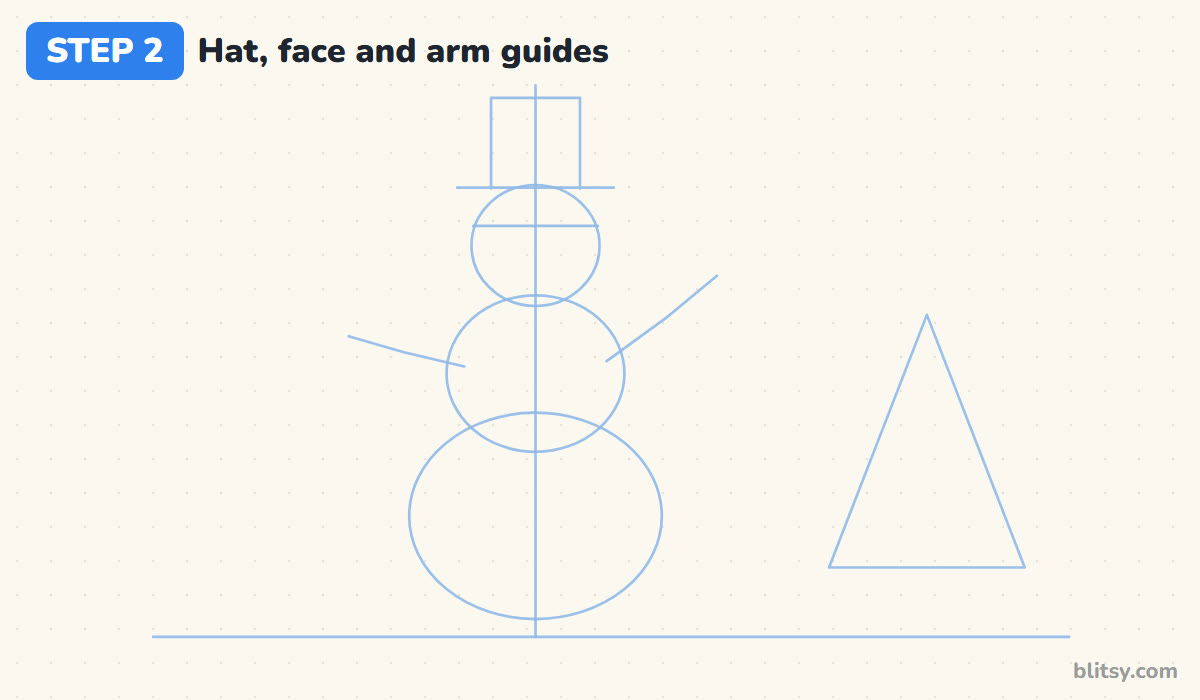
Above the head, draw a tall rectangle for the hat crown and a wider flat line under it for the brim. Add one short line across the head for the eyes. Then sketch two bent lines out from the middle ball, one going sideways and one rising like a wave. A tall triangle on the right marks the spot for the pine tree.
💡 Tip: Keep the eye line in the upper half of the head so there's room for the nose and smile below it.
Step 3: Draw the round head and the top hat
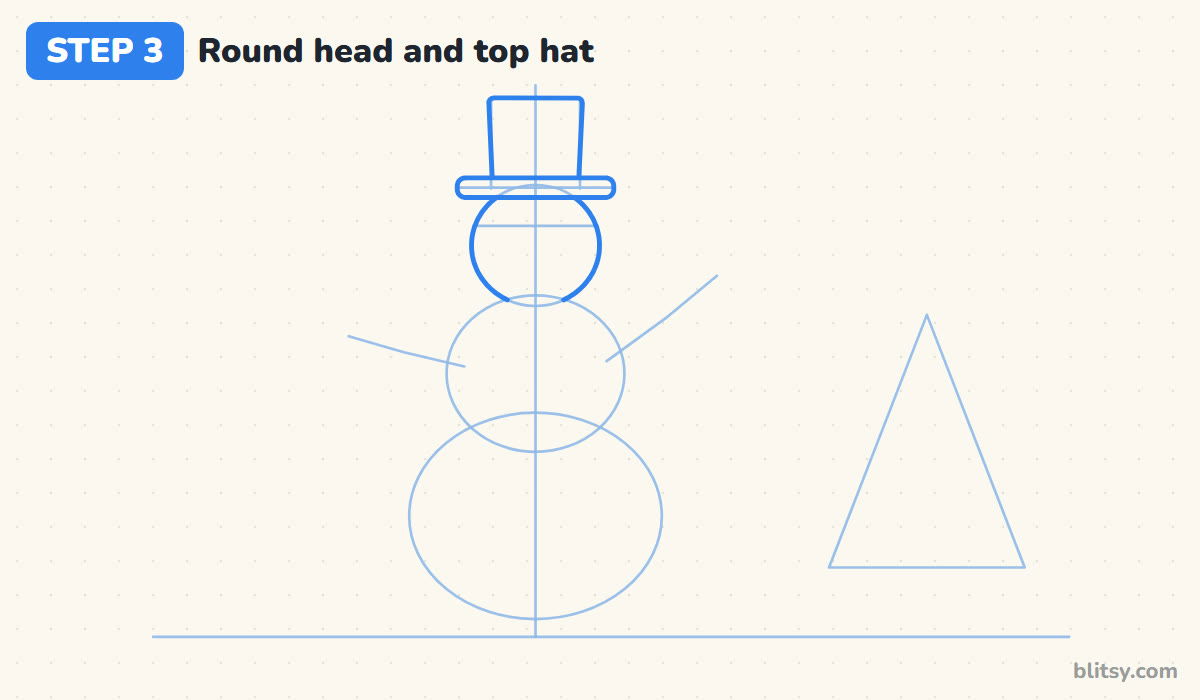
Go over the head circle with a smooth, firm line, leaving out the top where the brim sits. The crown is a tall shape that narrows very slightly toward the bottom, with soft corners. Under it, draw the brim as a long, thin rounded bar. Most beginners make the brim too short, and then the hat looks like a bucket.




💡 Tip: Let the brim overhang the head on both sides by about the width of your finger.
Step 4: Outline the snowballs and a mound of snow
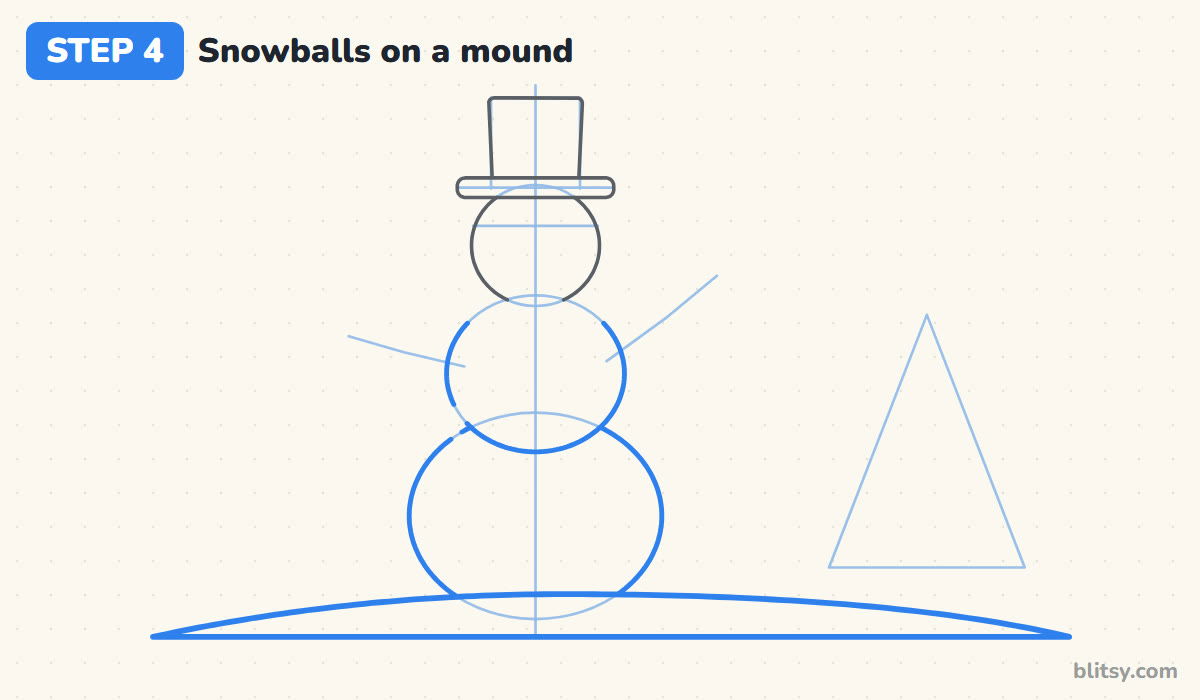
Trace the middle circle, stopping where the head covers it, then outline the big bottom ball. Now draw a low, wide hill across the bottom of the page. The bottom snowball should sink into it a little, so stop its outline at the hill line. That small trick makes him look heavy and planted in real snow.
💡 Tip: Draw the hill with one slow sweep of your arm, not lots of short strokes.
Step 5: Wrap a scarf with blowing tails
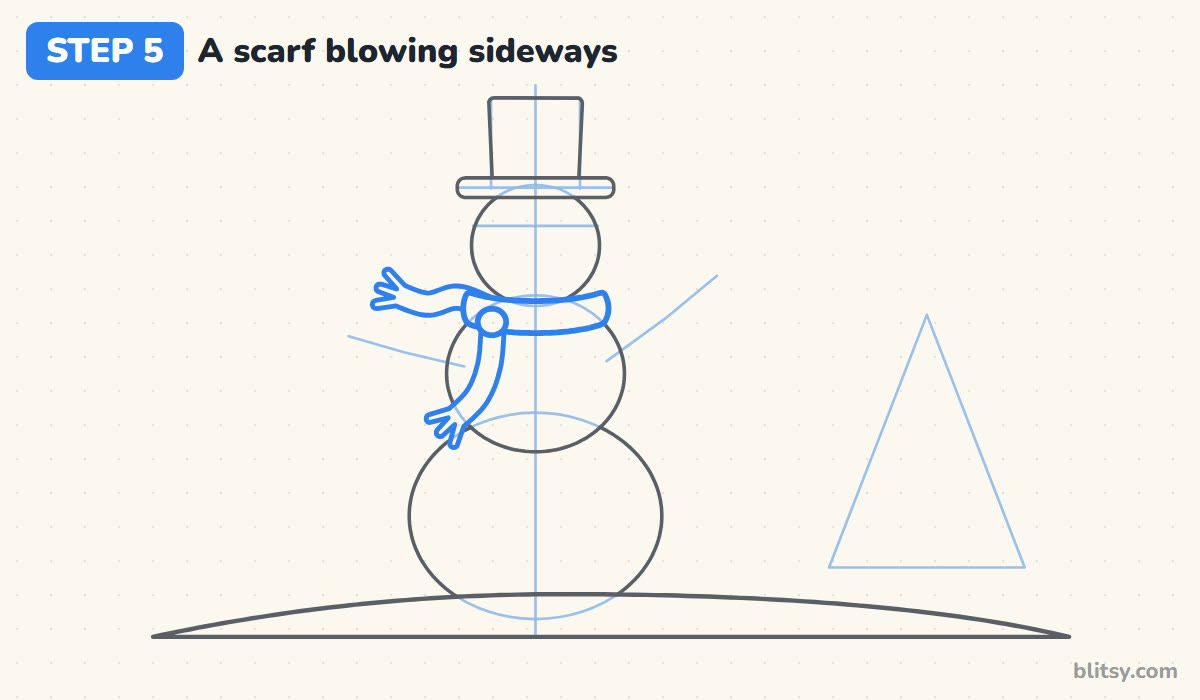
Draw a curved band around the neck where the head meets the middle ball, with a small round knot on the left. One tail hangs down over the body and flicks out to the left. The other streams sideways, as if the wind is pulling it. I finish both ends with three short fringe strands that fan out.
💡 Tip: Point both tails the same way. That one choice is what tells the viewer it's windy.
Step 6: Add stick arms with twig fingers
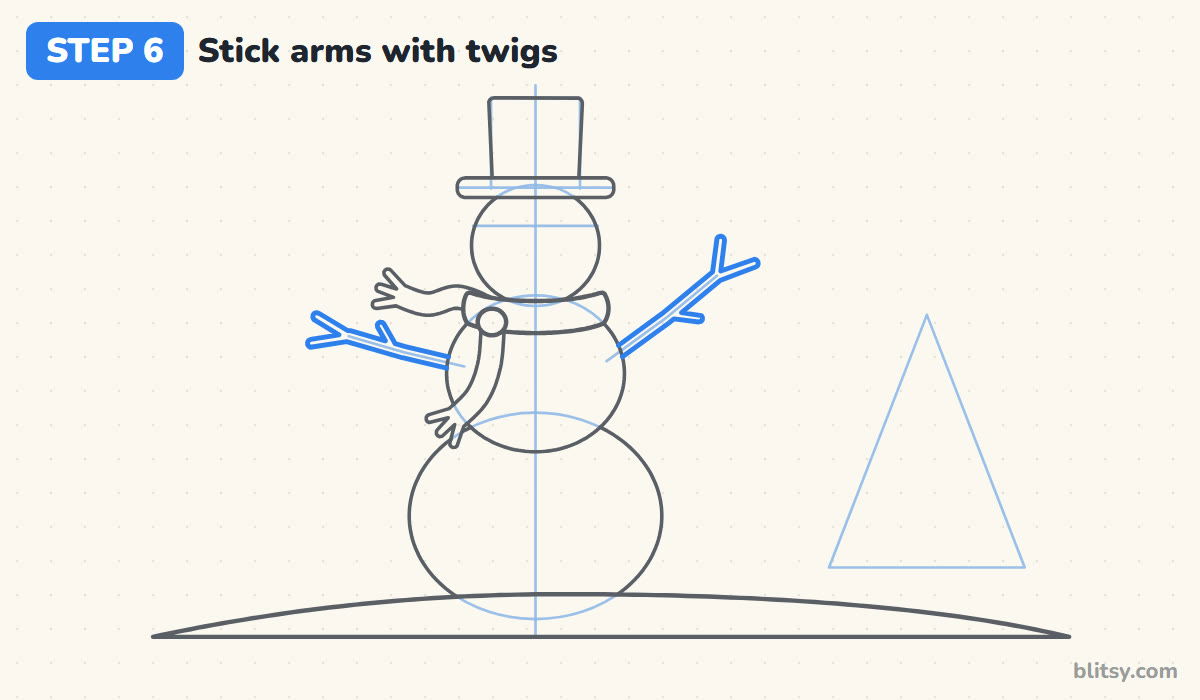
Follow your arm guides with thin double lines that start right at the edge of the middle ball. Give each stick a slight bend, split the end into two small twigs, and add one extra twig halfway along. I raise one arm higher than the other, which makes him look like he's waving hello.
💡 Tip: Make the twigs crooked on purpose. Perfectly straight sticks look like they came from a ruler.
Step 7: Place coal eyes, a carrot nose and a dotted smile
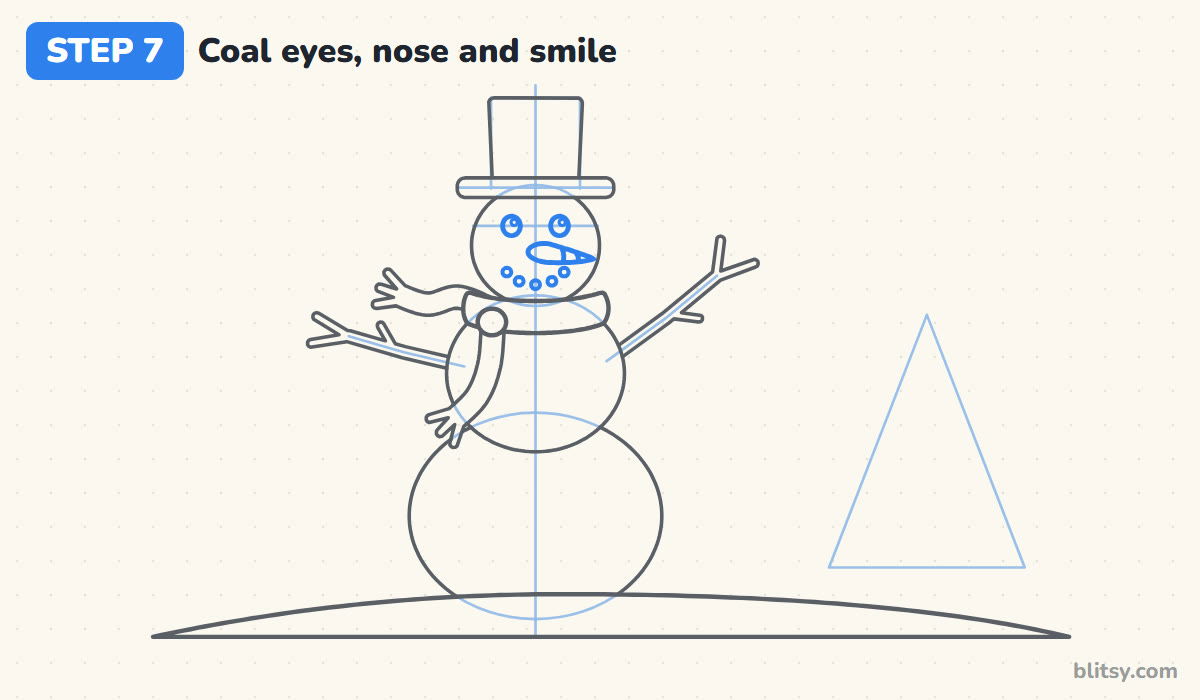
On the eye line, draw two small round eyes with a tiny shine in each. Just below them, start a carrot nose with a rounded end and stretch it to the right into a sharp point. Two curved marks across it give it texture. For the smile, place five dots in a gentle curve, like coal pressed into the snow.
💡 Tip: Space the smile dots evenly; one dot out of line makes the grin look crooked.
Step 8: Draw the hat band and scarf stripes
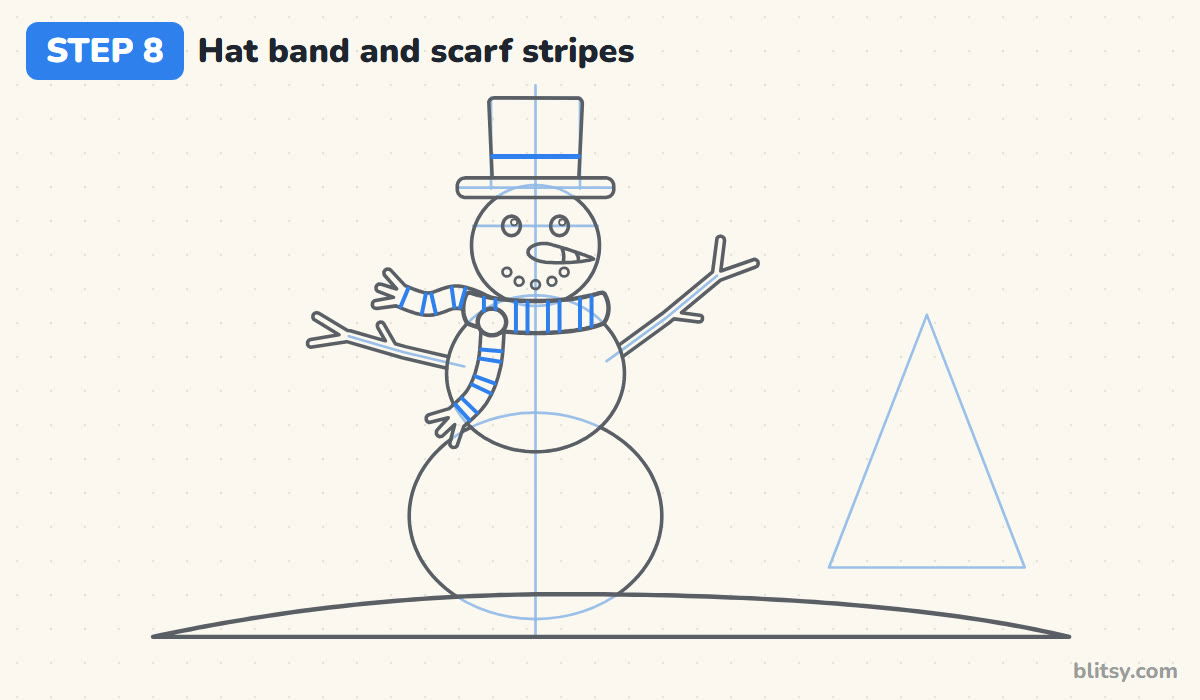
Across the lower part of the hat crown, draw one line parallel to the brim; the space below it becomes the red band. On the scarf, add pairs of short lines across the neck band and both tails for stripes. On the curving tails, turn each stripe so it runs across the fabric, not straight up and down.
💡 Tip: Stripes that follow the bend of the tail make the scarf look soft and wrapped, not flat.
Step 9: Add three round coal buttons
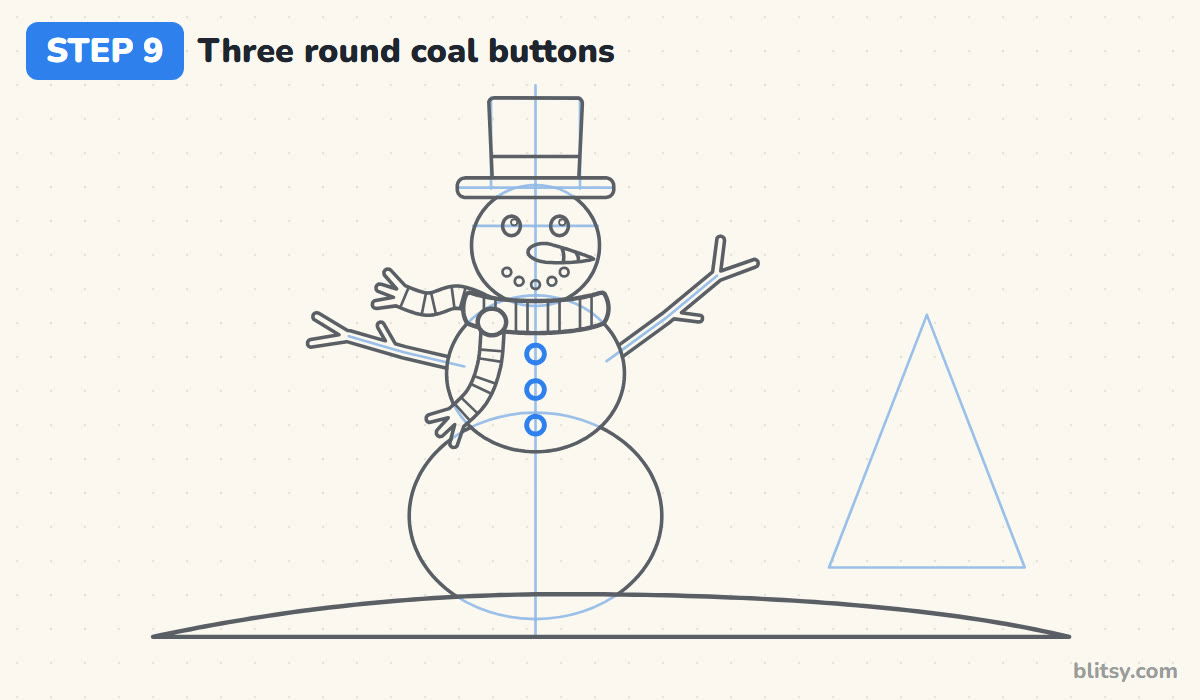
Down the center of the middle snowball, draw three small circles in a straight line. Put the first just under the scarf and the last a little above the big snowball. Same size for all three. They're simple, but they help the eye read the middle ball as his chest.
💡 Tip: Use the center guide line to keep the buttons lined up before you erase it.
Step 10: Draw a pine tree and some snowflakes
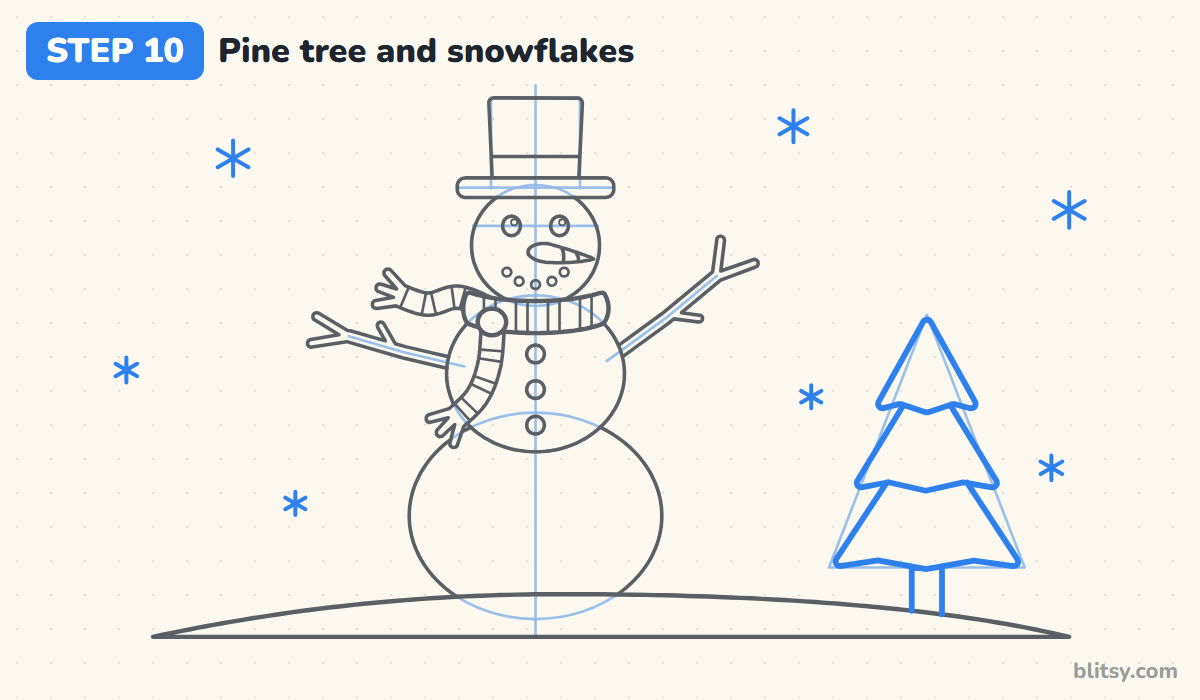
Inside the triangle, build the tree from three stacked layers, the top one smallest, each with a slightly wavy bottom edge. A short trunk peeks out under the lowest layer and disappears into the snow. For snowflakes, draw small stars of three crossing lines and scatter about seven of them around.
💡 Tip: Keep the tree shorter than the snowman so he stays the main character of the picture.
Step 11: Ink your lines and erase the guides
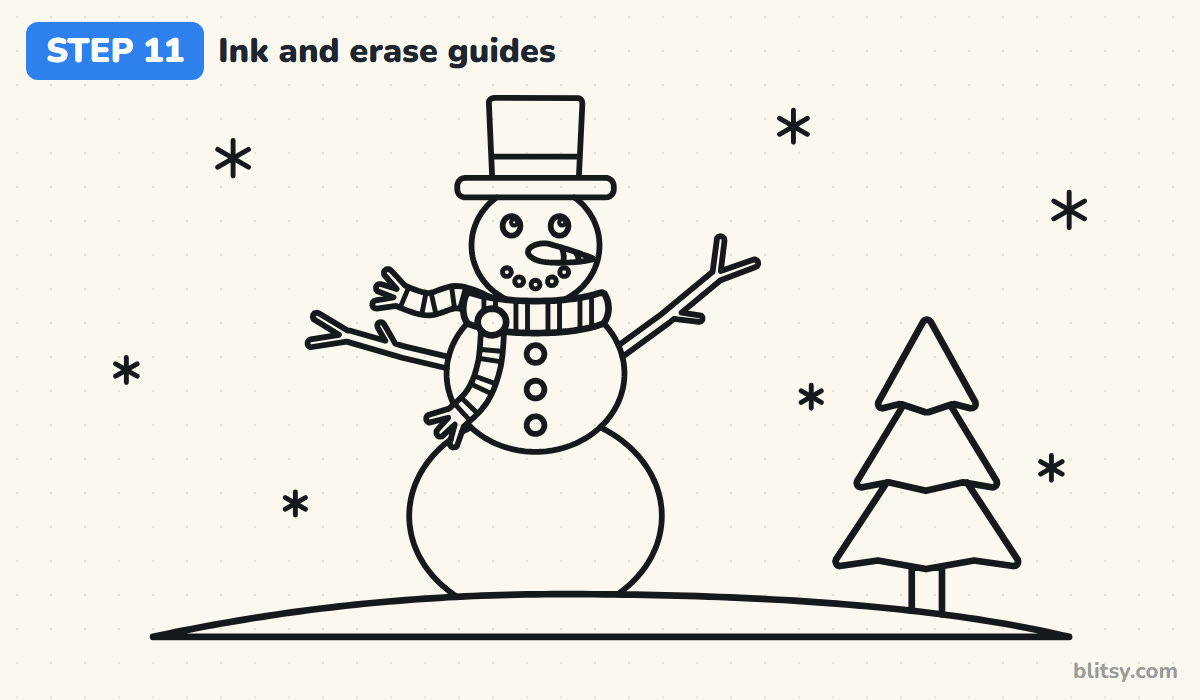
Trace every final line with a black pen. I go around the big shapes first with steady strokes, then do the small parts like the smile dots and fringe. Let the ink dry for a minute. Then erase the circles, the center line, the hat box and the tree triangle.

💡 Tip: Rest the side of your hand on a scrap of paper while inking so you don't smear what's done.
Step 12: Color your snowman
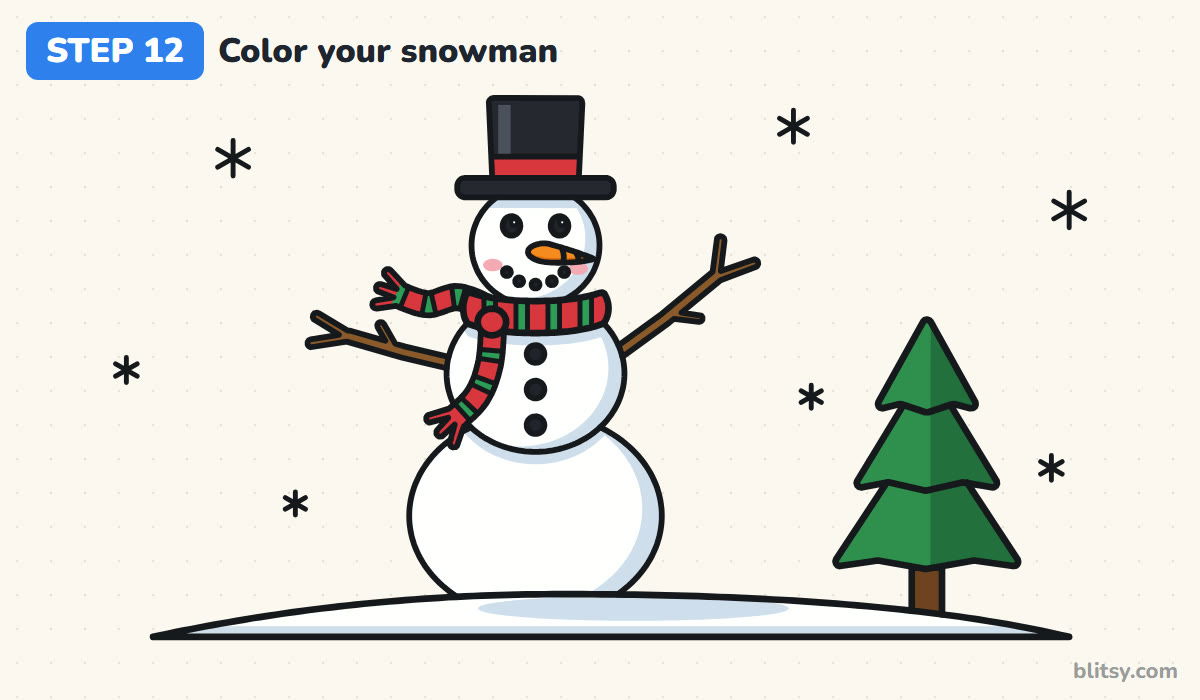
Leave the snowballs and the hill mostly white. With light pressure, add pale blue along the right side of each ball, under the scarf and under the brim. The hat is black with a thin gray shine stripe, the scarf red with green stripes. Use orange for the nose, brown for the sticks and a touch of pink on the cheeks.
💡 Tip: Shade the tree's right half a darker green so it matches the shadows on the snowman.
Snowman Sketches That Come Out Stiff or Lopsided
- All three balls the same size. He ends up looking like a tower. Make each ball clearly bigger than the one above it.
- The bottom ball floating in the air. Sink it into the snow hill and stop the outline at the hill line so he has weight.
- A short, stubby hat brim. Without a wide brim the hat reads as a pot. Stretch the brim past the crown on both sides.
- Scarf tails pointing in different directions. It looks messy instead of windy. Send both tails the same way.
- Gray scribbles all over the snow. Heavy shading makes white look dirty. Keep the pale blue to the edges and leave the middle of each ball bright.
Swap the Hat, Change the Weather
Once the three-ball base feels easy, I like to change one thing at a time. Trade the top hat for a knitted bobble hat, give him earmuffs, or put a broom in one stick hand. A smaller snowman beside him makes a sweet snow child. If you want a snowman with a lot more personality, the Olaf drawing tutorial is a fun next step, and this tree drawing step by step lesson helps you fill the background with a forest.
Free Snowman Coloring Page and a Printable Drawing Guide
The snowman coloring page has a small colored example and a color key across the top, so kids can match the scarf and hat, with a large outline below for their own version. The step-by-step PDF guide holds all 12 steps with pictures and tips, two per page. Both print well on Letter or A4 paper.
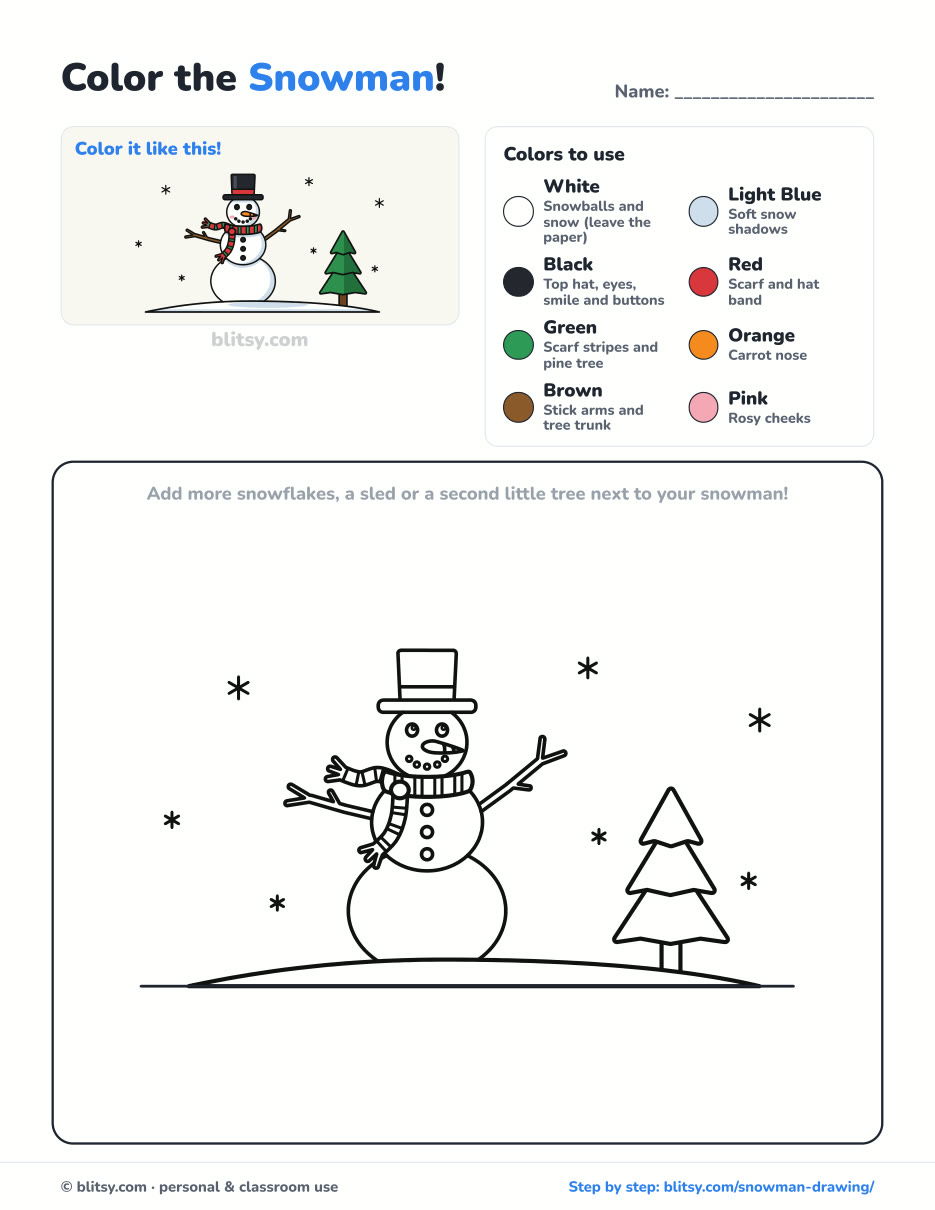
Black outlines with a colored example and the color names at the top. Ready to print and color.
⬇️ Download Coloring PageEvery step picture with its instructions and tips, to keep beside your paper while you draw.
⬇️ Download Drawing Guide📱 On a phone? Tap a download button, then open the file and choose Share → Save to Files or Print. On a computer, the PDF opens or saves straight to your Downloads folder.
Pin the Top Hat Snowman for Winter Break
Winter Is Long: More Tutorials After Your Snowman
Each one is a full step-by-step tutorial with a picture for every stage, from holiday scenes to simple objects.
- Realistic Drawing: Learn how light, value and shadow make a shiny red apple look solid in this realistic drawing tutorial.
- Halloween Drawing: A friendly haunted house with glowing windows and a grinning pumpkin starts from one hill line in this Halloween drawing step by step lesson.
- Mandala Drawing: Build a colorful eight-part mandala one ring at a time with this how to draw a mandala tutorial.
- Basketball Drawing: Draw an orange ball flying toward a hoop, seams wrapping the right way, in this basketball drawing tutorial.
- Light Bulb Drawing: A glowing old-style bulb with a curly filament comes from one circle and a box in this light bulb drawing step by step guide.
- School Drawing: A red-brick school with a clock and a little bell tower takes 12 steps in this school drawing tutorial.
- Wave Drawing: Curl a deep blue ocean wave into a hollow tube with claw-shaped foam in this how to draw a wave step by step lesson.
- Mountain Drawing: Swap snow for peaks with this how to draw a mountain step by step lesson: three peaks, a calm lake and a few pine trees.
- Flames Drawing: A crackling campfire and a simple flame icon both grow from one S-curve in this flames drawing tutorial.
- Money Drawing: Three stacked bills, a tied money bag and a pile of gold coins fill this money drawing step by step lesson.
Snowman Drawing Questions Parents and Kids Ask
What is the easiest way to draw a snowman?
Stack three circles that grow in size from top to bottom, then add a hat, a carrot nose and two stick arms. Everything else is a small extra you can skip.
How do you draw a snowman for kids?
Use only circles and lines. Let younger kids draw the arms as single lines and the scarf as a plain band without stripes or fringe.
How long does it take to draw a snowman?
Around 15 to 20 minutes for the drawing and another 10 for coloring. The scarf and its stripes take the most time.
What colors do you need to color a snowman?
Black for the hat and buttons, orange for the nose, brown for the arms, red and green for the scarf, and a pale blue for the snow shadows. The paper does the white.
Pick up that pencil, give your snowman a hat that's a little too tall, and let his scarf fly in whatever direction the wind is blowing today. ⛄❄️
Related posts:
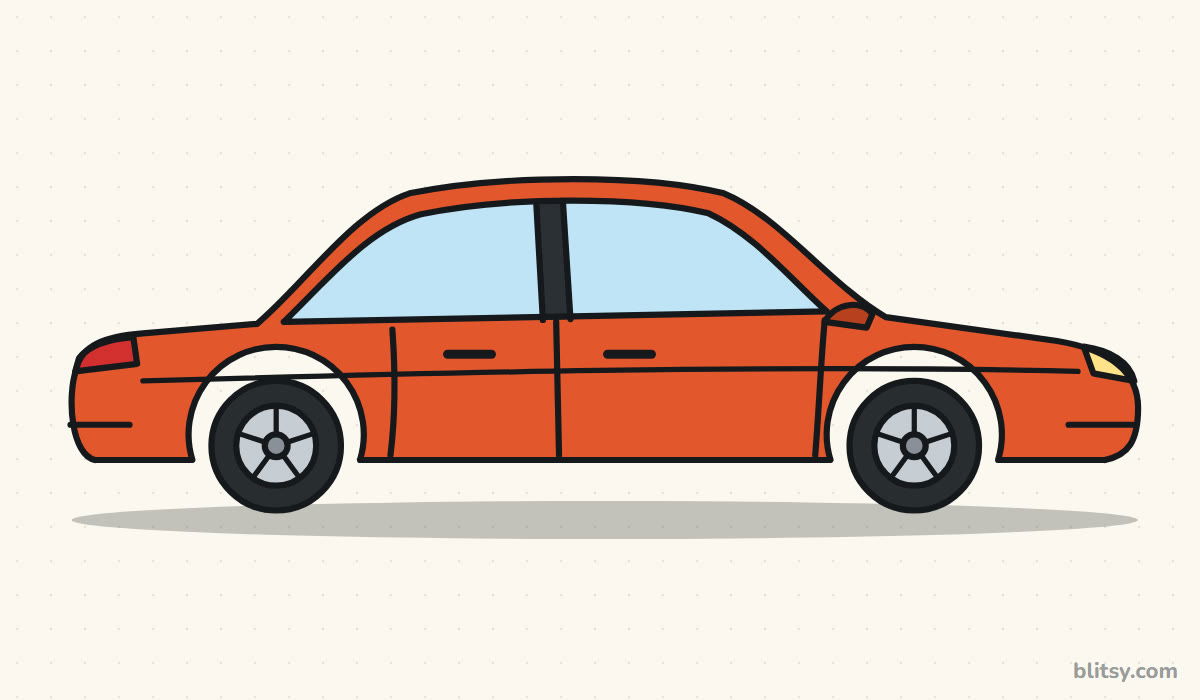 How to Draw a Car Step by Step (Easy Drawing for Beginners)
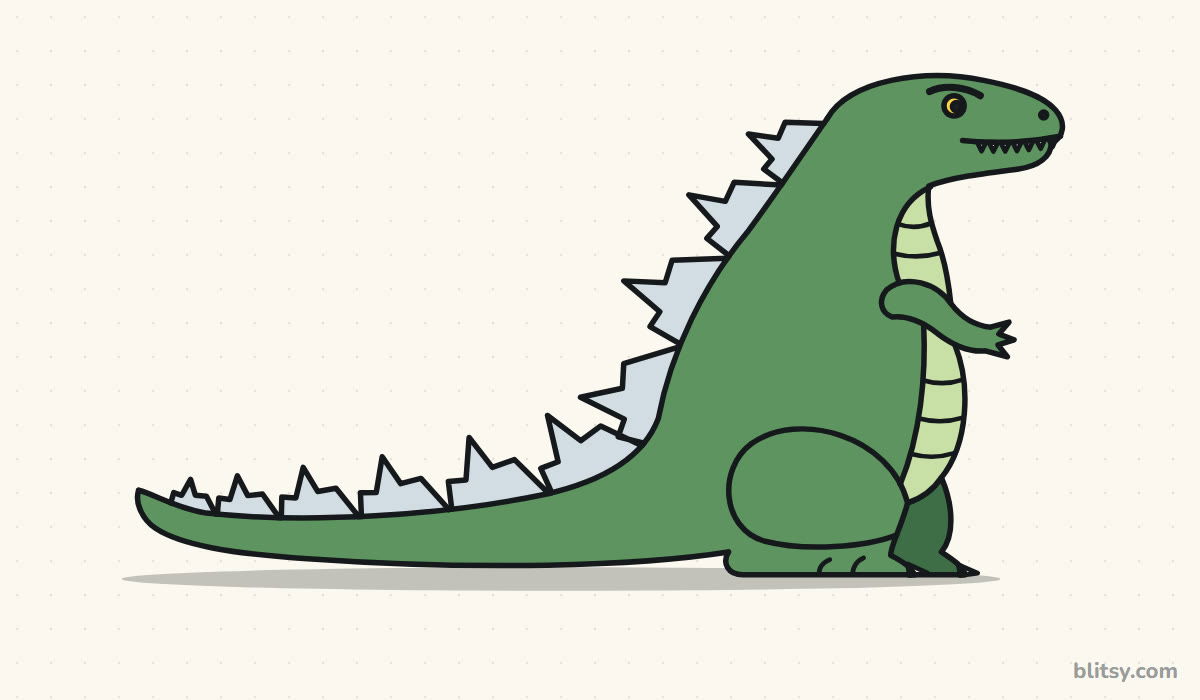 How to Draw Godzilla Step by Step (Easy Kaiju for Beginners)
 How to Draw a Whale Step by Step (Easy for Beginners)
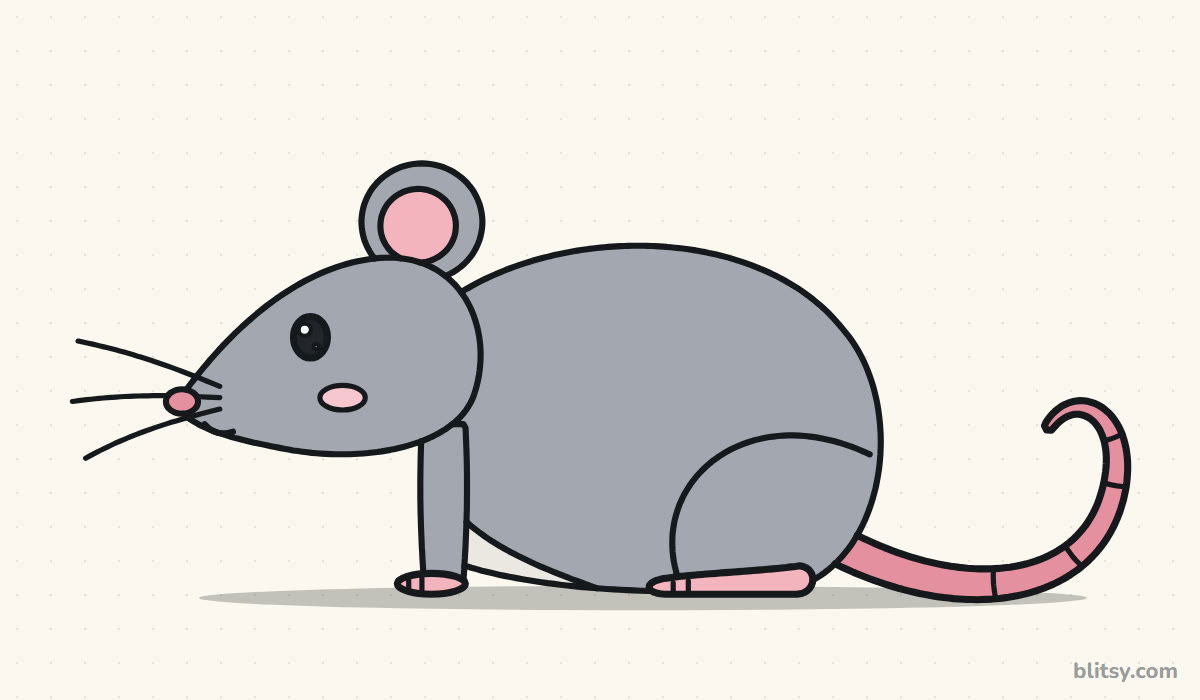 How to Draw a Rat Step by Step (Easy for Beginners)
 How to Draw an Arctic Fox Step by Step (Easy for Beginners)
 How to Draw a Shark Step by Step (Easy for Beginners)
 How to Draw a Dog Step by Step (Easy Side View for Beginners)
 How to Draw a Chicken Step by Step (Easy for Beginners)
 How to Draw a Fish Step by Step (Easy Goldfish for Beginners)
 How to Draw a Light Bulb Step by Step (Easy for Beginners)
 How to Draw a Crow Step by Step (Easy for Beginners)
 How to Draw an Eagle Step by Step (Easy for Beginners)

