
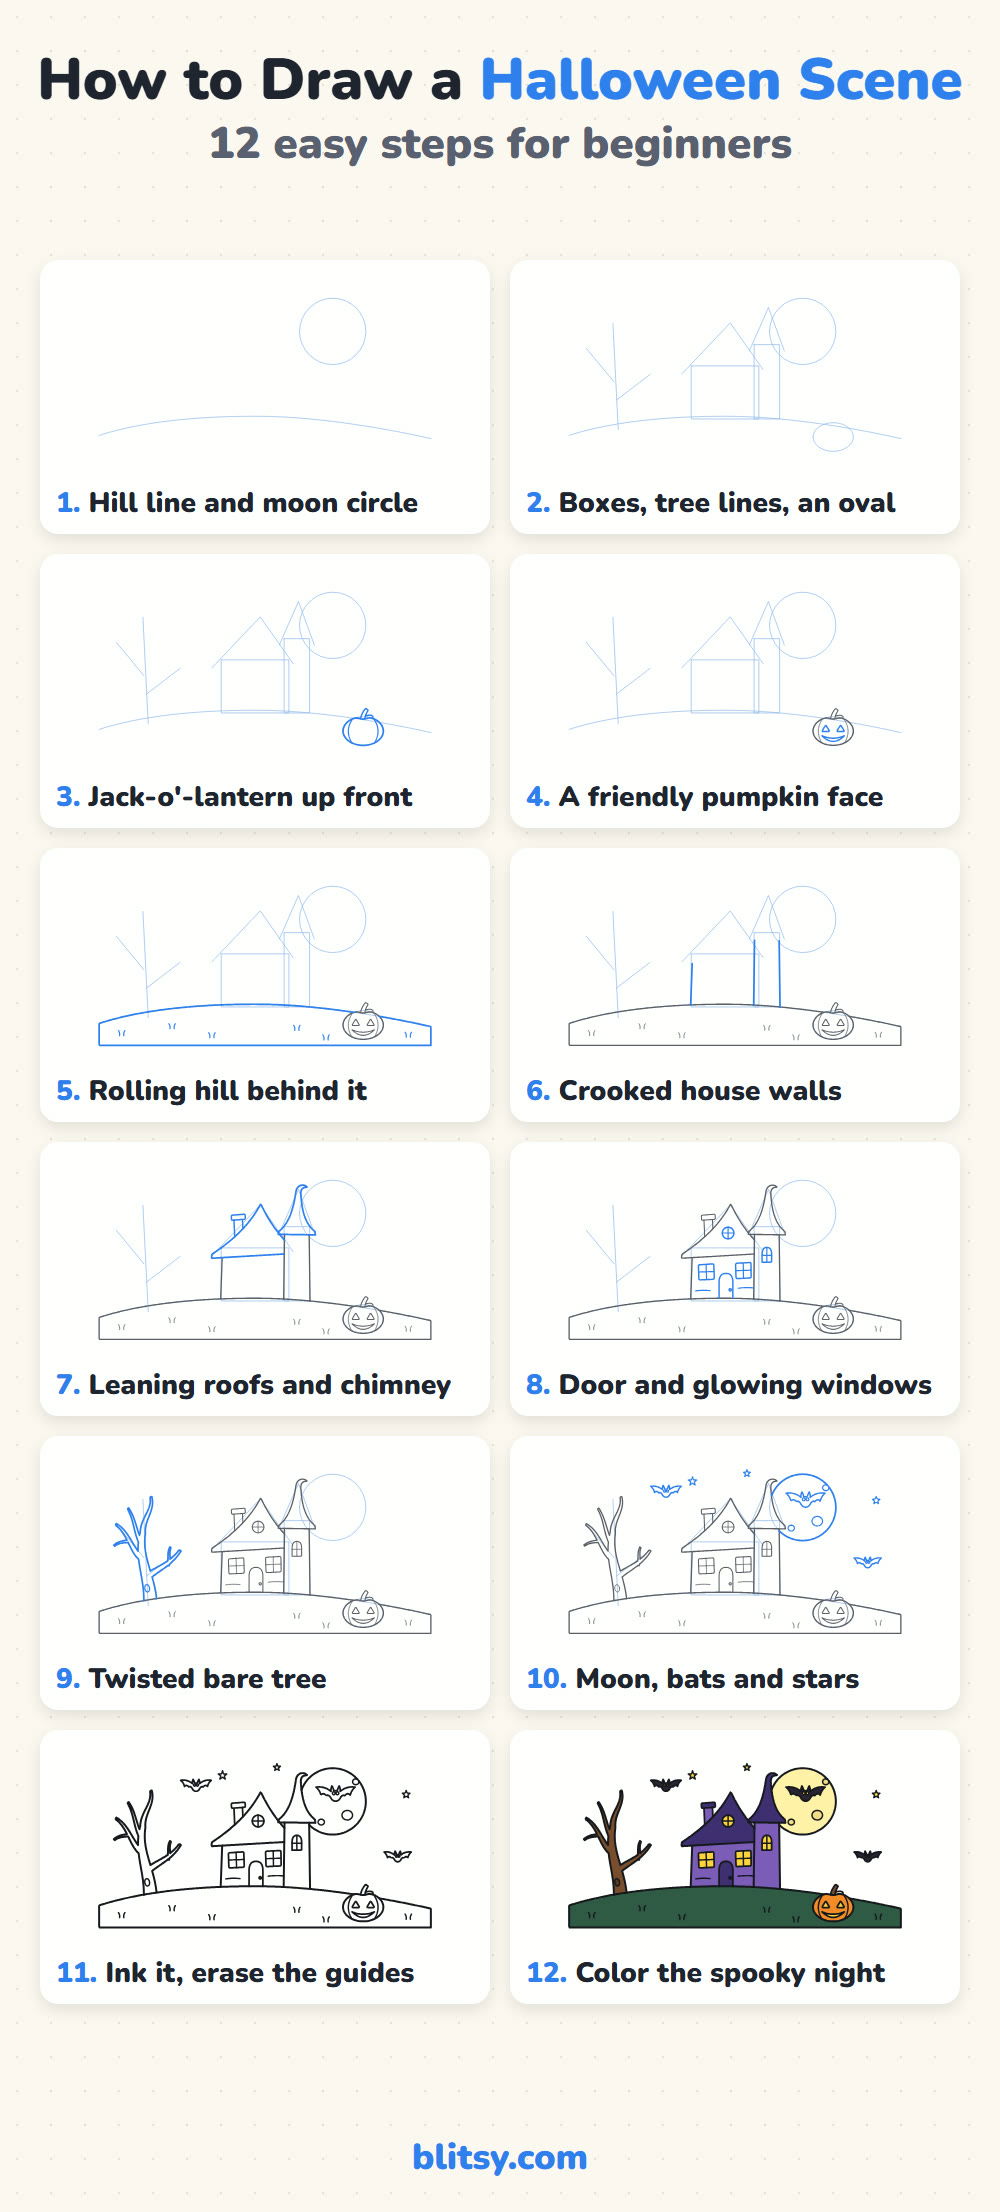
Halloween isn't one thing to draw, it's a whole mood, so I turned it into one small scene. This halloween drawing step by step lesson puts a crooked purple house on a hill, a huge moon behind it, a few bats, a bare twisted tree and a smiling jack-o'-lantern up front. I chose a haunted house because it gathers the Halloween symbols into one picture, and glowing windows keep it cozy rather than creepy for younger artists.
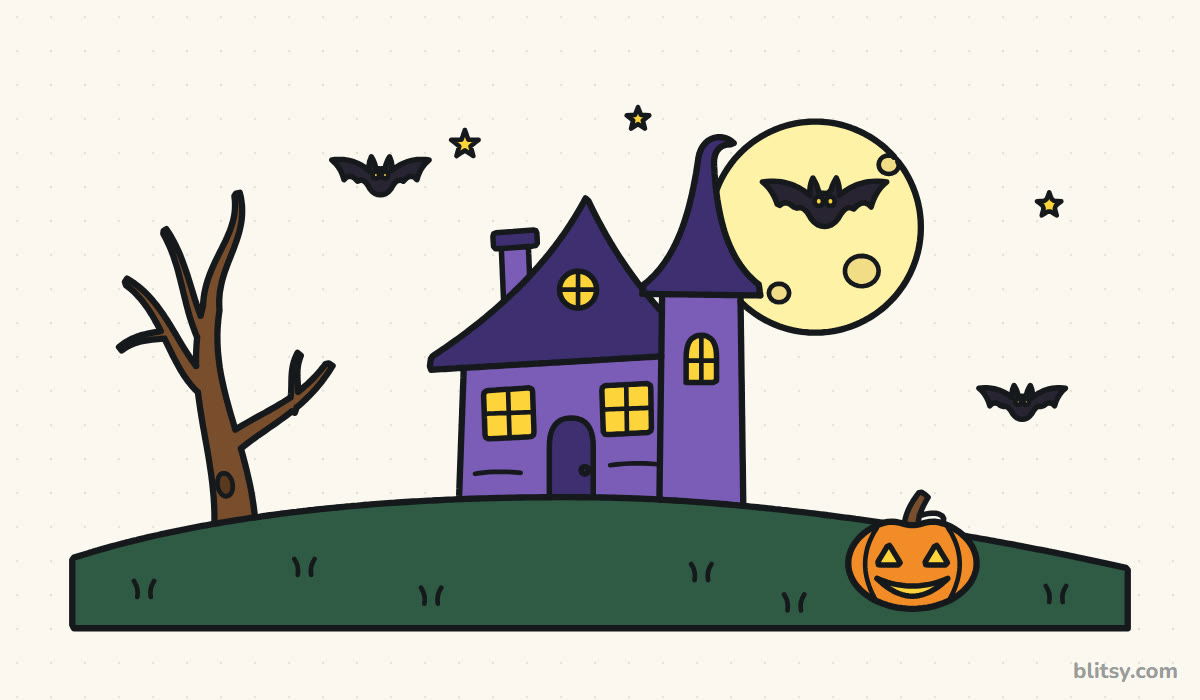
Whatever you add in a step appears in blue, while older work sits in gray. Pale blue shapes are construction guides, so keep your pencil light on them; step 11 erases them.
Quick overview
⏱️ Time: roughly 35 to 45 minutes, coloring included
🎯 Level: easy, fine for kids around 6 and up and for grown-up beginners
✏️ Steps: 12
🎃 You'll draw: a haunted house on a hill under a full moon, with bats, stars, a twisted tree and a jack-o'-lantern
Pencils and Crayons for a Moonlit Scene
- A soft pencil (HB or 2B) for light guide lines
- A clean eraser
- A black marker or felt-tip pen for the final lines
- Crayons or colored pencils: purple, dark purple, yellow, pale yellow, black, orange, brown and dark green
- Plain paper turned sideways, since the scene is wider than it is tall
A school pencil case covers the whole lesson.
Halloween Drawing Step by Step
Step 1: Sketch the hill line and the moon circle
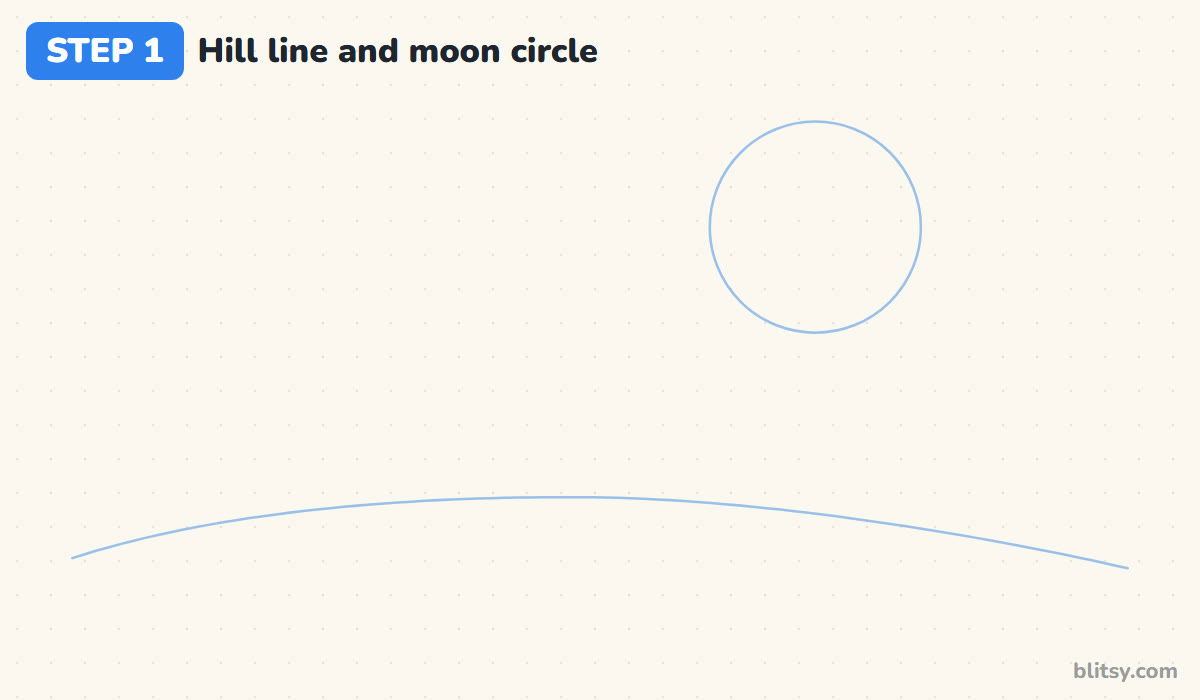
Start with one long, gentle curve across the lower third of the page. It rises a little in the middle, because the house will sit on the top of the hill. Above the right half, draw a large circle for the moon. Let it be big, about a quarter of the page wide, so it can frame the house later.
💡 Tip: Trace a cup or a roll of tape for the moon if your freehand circles come out lumpy.
Step 2: Add boxes, tree lines and a pumpkin oval
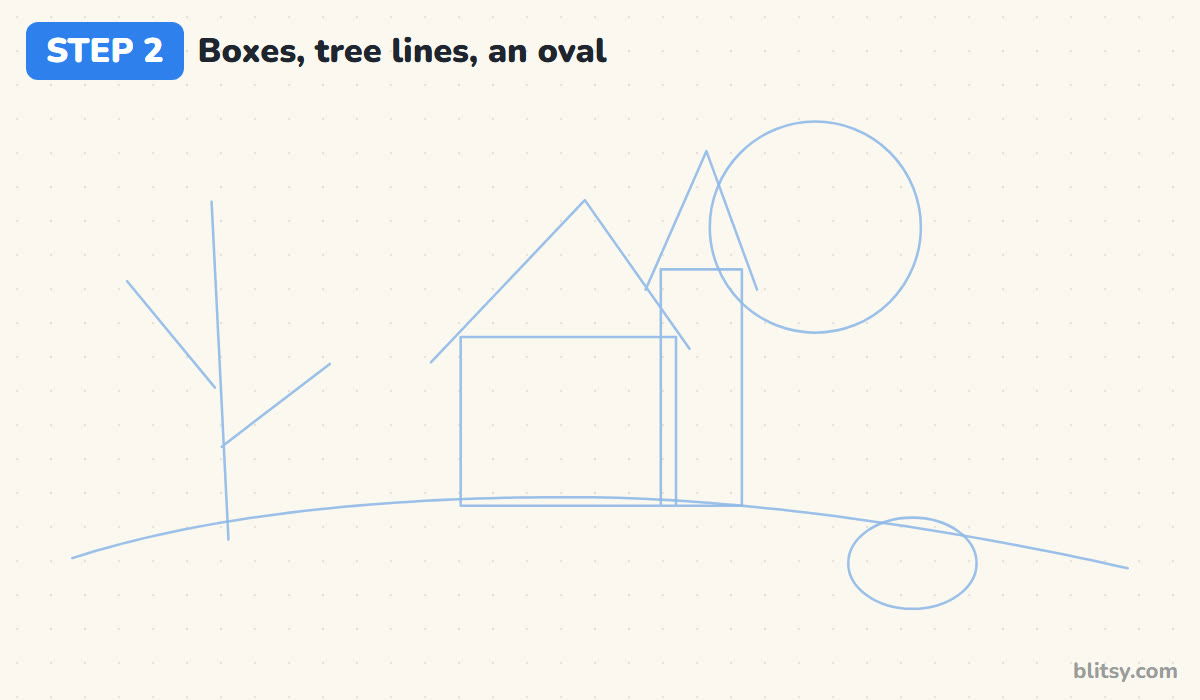
Now map out where everything stands. Draw a wide box on the hill for the house, with a triangle roof. Beside it, add a tall narrow box with a pointed triangle for the tower, poking into the moon circle. On the left, sketch three straight lines for a trunk and two branches, then a flat oval low on the right for the pumpkin.
💡 Tip: Overlap the tower guide with the moon on purpose. That overlap is what makes the moon look far away.
Step 3: Draw the jack-o'-lantern in front
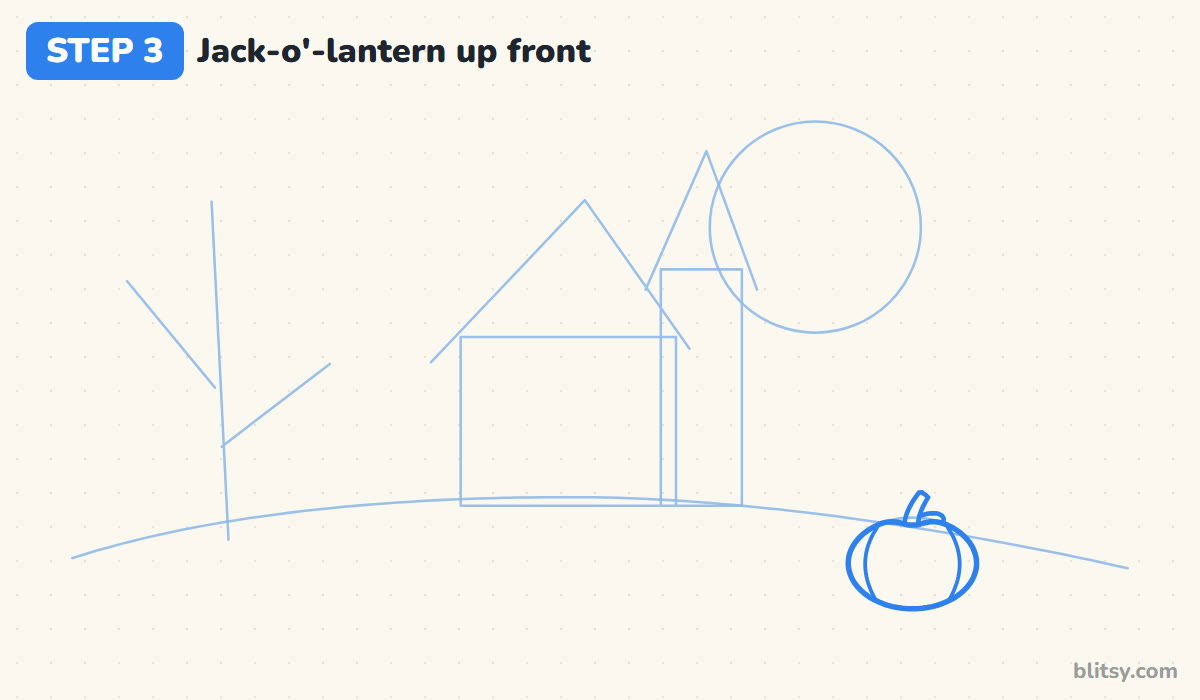
I always begin a scene with the thing closest to you, so the jack-o'-lantern comes first. Go around the oval with a slightly squashed outline that dips a little at the top center. Add a short bent stem with a curly vine, then two curved lines on each side for the pumpkin ribs.
💡 Tip: Keep the ribs well out toward the sides, or they'll crash into the face you add next.




Step 4: Give the pumpkin a friendly face
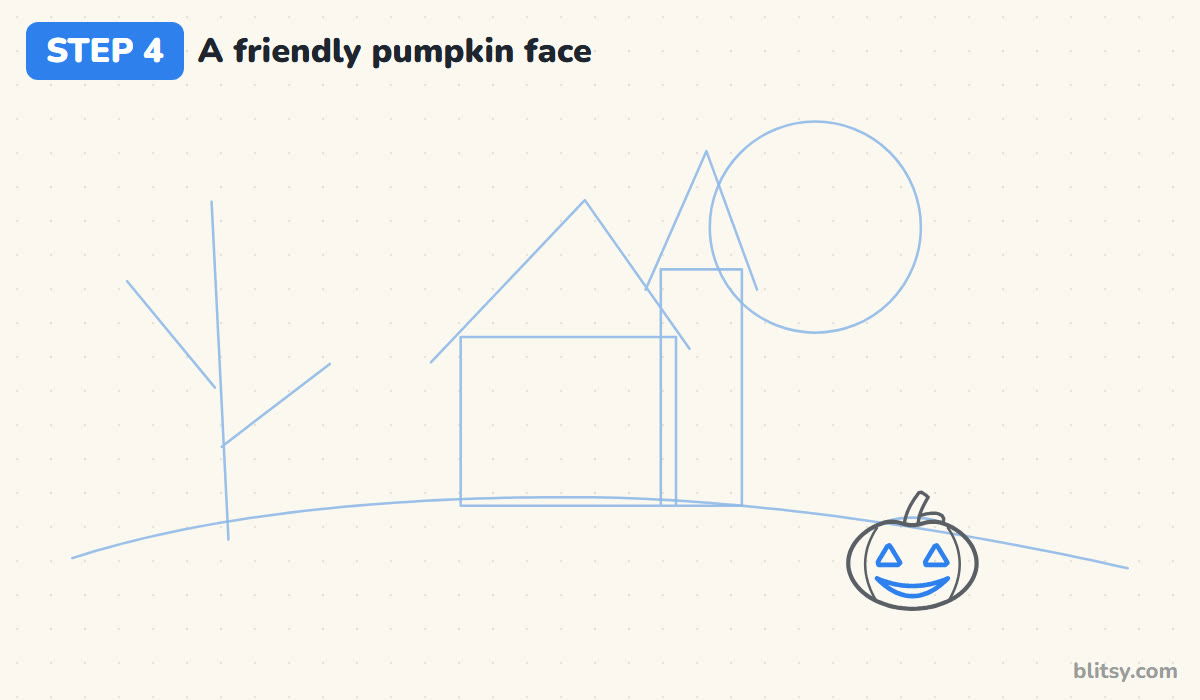
Draw two small triangles for eyes, pointing up, with a gap between them about one eye wide. Below, add a wide smile shaped like a slice of melon. Pointy teeth and slanted eyes would push the face toward scary, which isn't the goal here.
💡 Tip: Round off the corners of the eye triangles a tiny bit. Sharp corners look angry; soft ones look happy.
Step 5: Draw the rolling hill behind the pumpkin
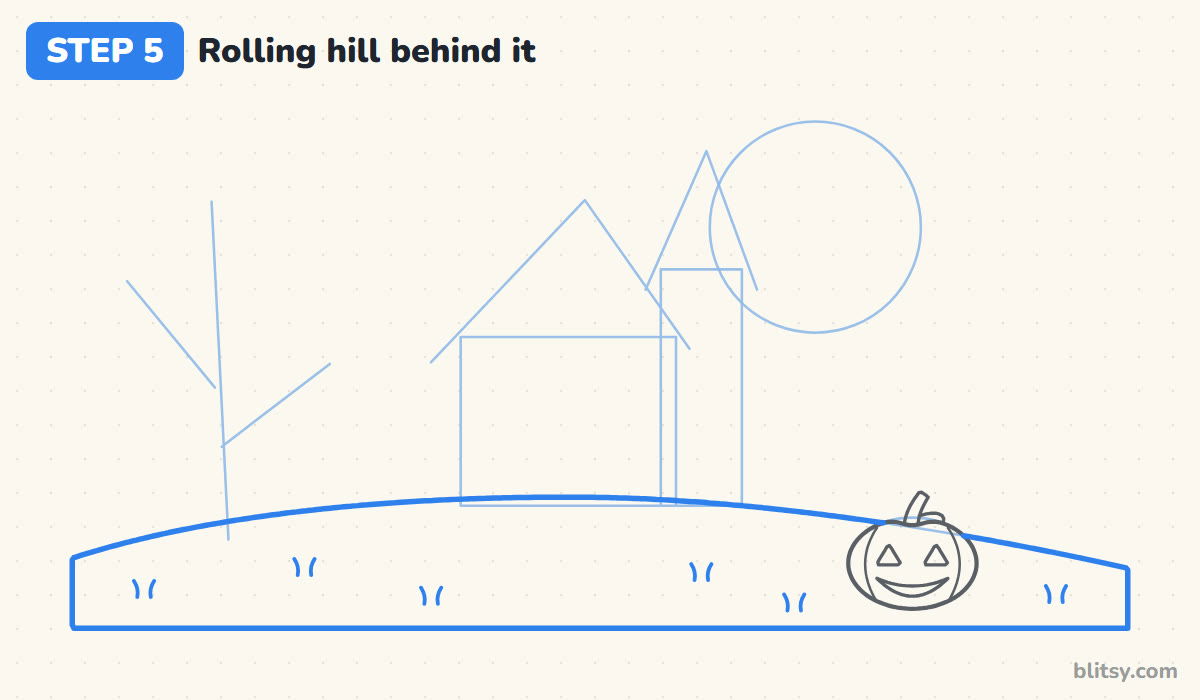
Go over the hill guide with a firm line, stopping where it meets the pumpkin and carrying on past it. Close the hill with straight sides and a flat base. A few tiny double flicks on the slope read as grass.
💡 Tip: Leave the grass tufts sparse. Five or six are enough to suggest a lawn without filling the hill with noise.
Step 6: Draw crooked walls for the house and tower
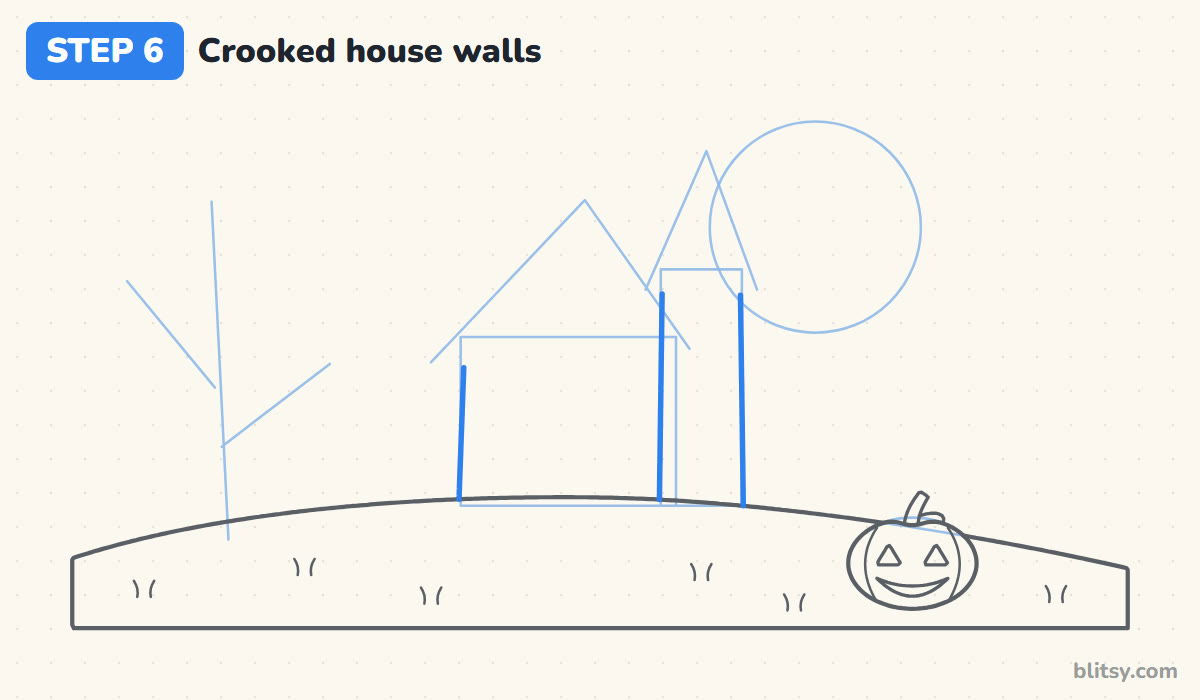
Here's where the haunted feel starts. Draw the tower walls first, since the tower stands in front of the main house. Then draw the house walls, letting the left side lean a little outward. Both walls should sink into the hill, as if the house has settled over the years.
💡 Tip: Tilt one wall, not both. A single lean looks charmingly crooked; two leans make the house look like it's falling over.
Step 7: Add the leaning roofs and a chimney
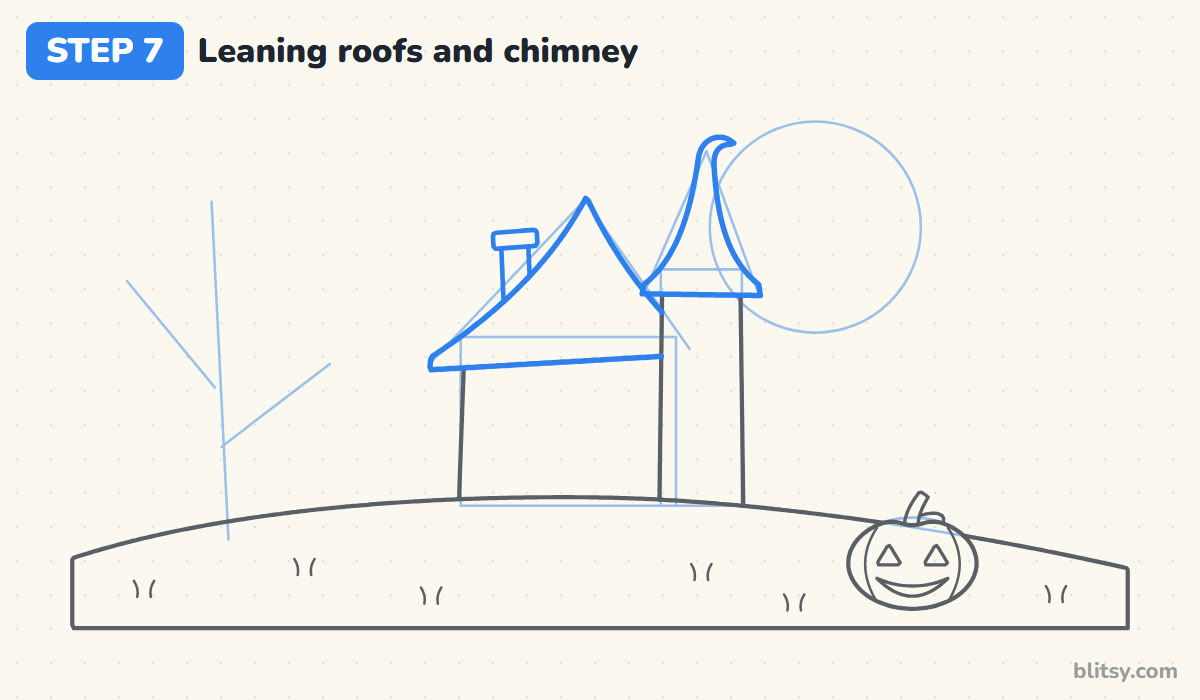
Turn the tower triangle into a witch hat: wide brim at the bottom, sides that curve inward, and a tip that bends over like a hook. The main roof gets a sagging left slope and a peak that leans slightly right. Add a little chimney poking out of the left slope, with a cap on top.
💡 Tip: Bend the hat tip toward the moon. It gives the tower a sense of movement and points the eye across the picture.


Step 8: Draw the door and the glowing windows
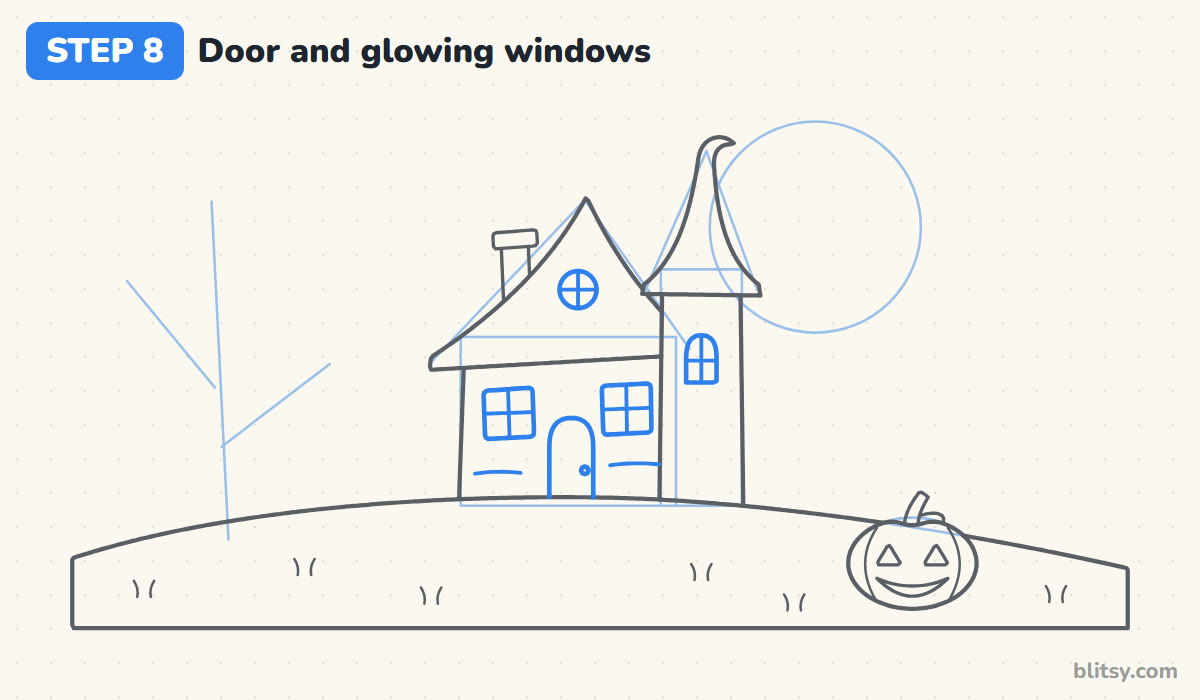
Place an arched door in the middle of the house with a small round knob. Two square windows go on either side, each split into four panes by a cross. Put a round window in the roof and a tall arched one in the tower, then a couple of short wavy lines on the walls for old boards.
💡 Tip: Line up the tops of the two square windows. Everything else can be wonky, but level windows keep the house readable.
Step 9: Draw a twisted bare tree
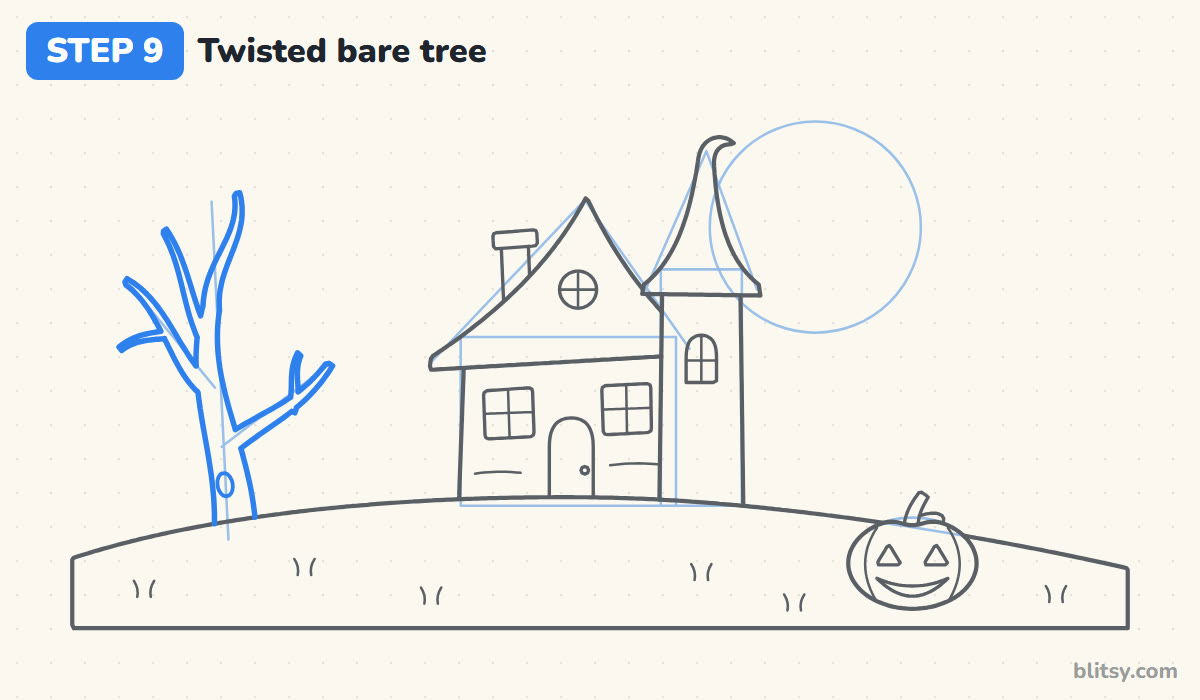
Follow the trunk guide with two lines that start wide at the hill and narrow as they climb, swaying left and right like a slow S. Branches leave the trunk and taper to thin tips; add a couple of small twigs off them. A little oval knot hole on the trunk makes the tree feel old.
💡 Tip: Make every branch thinner than the part it grows out of. Equal thickness turns a tree into a bunch of pipes.
Step 10: Fill the sky with the moon, bats and stars
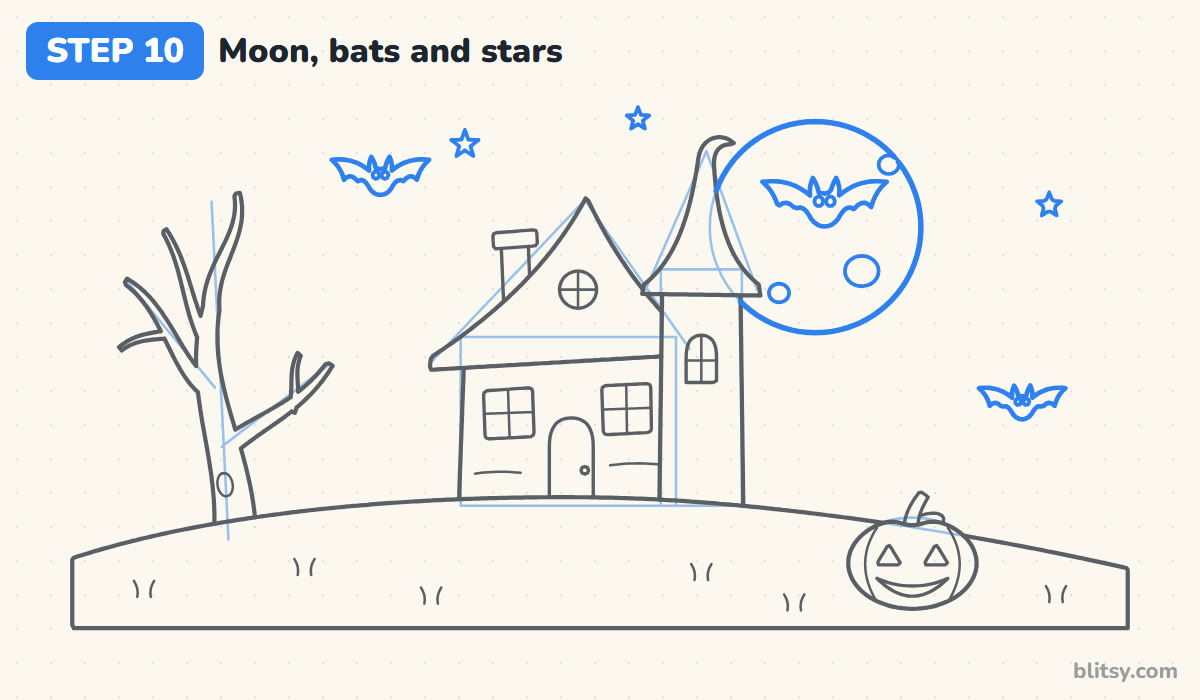
Draw the moon outline, stopping wherever the tower hat or a bat covers it, and add three crater circles. My bats are simple: two pointed ears, wings with a wavy bottom edge and two round eyes. Put one big bat in front of the moon, two smaller ones in open sky, then three tiny stars.
💡 Tip: Draw the bats at different sizes. A big one and two small ones suggest some bats are closer than others.
Step 11: Ink the scene and erase the guides
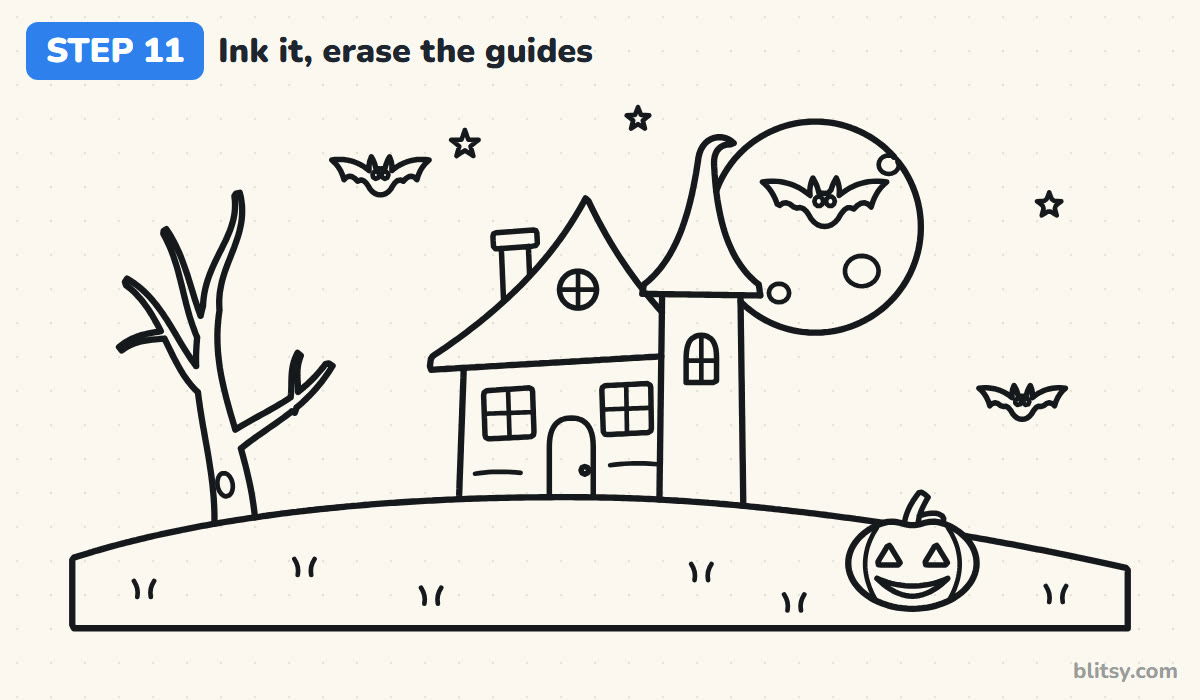
Trace every line you want to keep with the black marker, working from the top down so your hand doesn't drag through wet ink. Once it's dry, erase all the light guides.
💡 Tip: Ink the tiny window crosses last, with a light touch. They clog up quickly if you press hard.

Step 12: Color your Halloween night
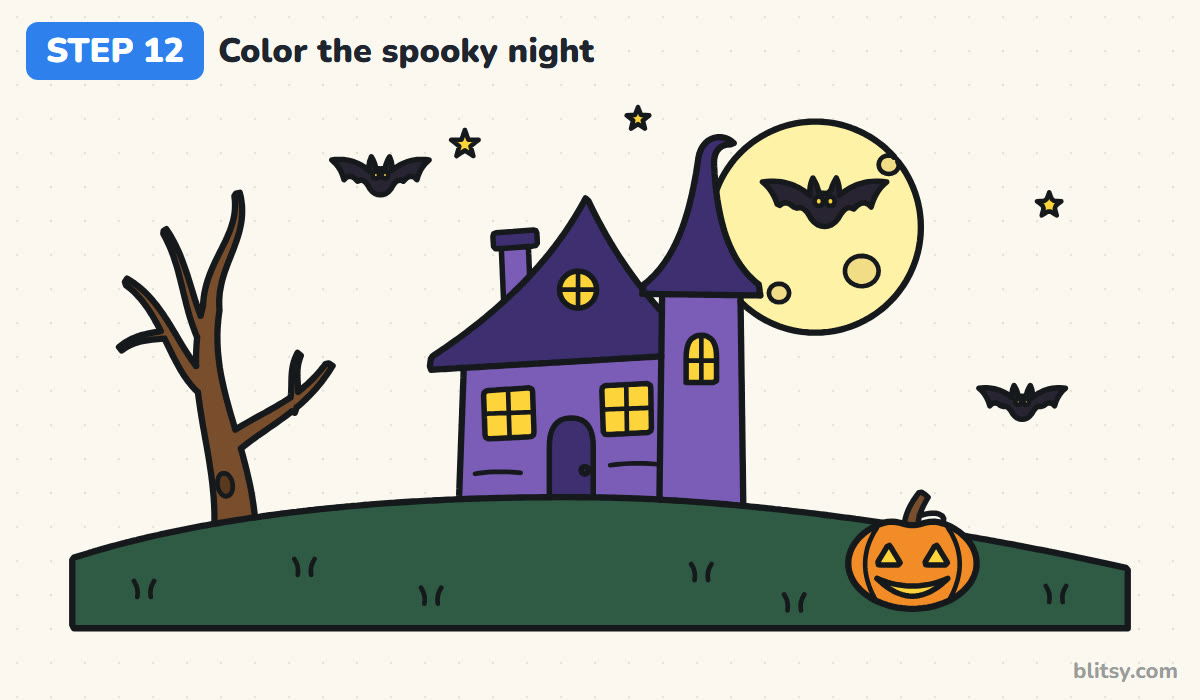
Color the moon pale yellow with slightly darker craters, and the bats black with yellow eyes. The tree is brown, the walls and chimney purple, the roofs and door dark purple. Make every window bright yellow so the house seems to glow. Finish with a dark green hill and an orange pumpkin with a yellow face.
💡 Tip: Color the yellow windows before the dark purple roof. Light colors stay clean when nothing dark is next to them yet.
Where a Spooky House Starts Looking Messy
- Drawing the moon first. Then the tower has a circle running through it. Draw the house and bats first and let the moon fill in behind them.
- A house that floats on the hill. If the walls stop above the hill line, the house hovers. Run the walls down until the hill hides their bottoms.
- Crooked everything. When every line wobbles, the house just looks badly drawn. Pick two or three lean points, like one wall and the roof peak, and keep the windows level.
- Bats as big as the house. Oversized bats steal the show. Keep even the biggest one smaller than the tower roof.
- Coloring the windows dark. Dark windows make the house feel empty and scary. Bright yellow ones say someone's home and the lights are on.
Swapping in Your Own Halloween Characters
When the scene feels comfortable, change one piece. Put a black cat on the roof, hang a ghost in the tower window, add a witch flying across the moon or line a few more pumpkins along the hill. To practice the pumpkin on its own first, try the jack-o'-lantern drawing tutorial, and if you'd like a friendly ghost for that window, this cute ghost drawing tutorial is a good place to start.
Haunted House Coloring Page and a Printable Steps PDF
If your kids want to skip straight to coloring, print the Halloween coloring page. A small colored version at the top shows which crayon goes where, and the big outline has thick lines that are easy to stay inside. The step-by-step guide PDF holds all 12 steps with their tips, two per page, and it prints on Letter or A4.
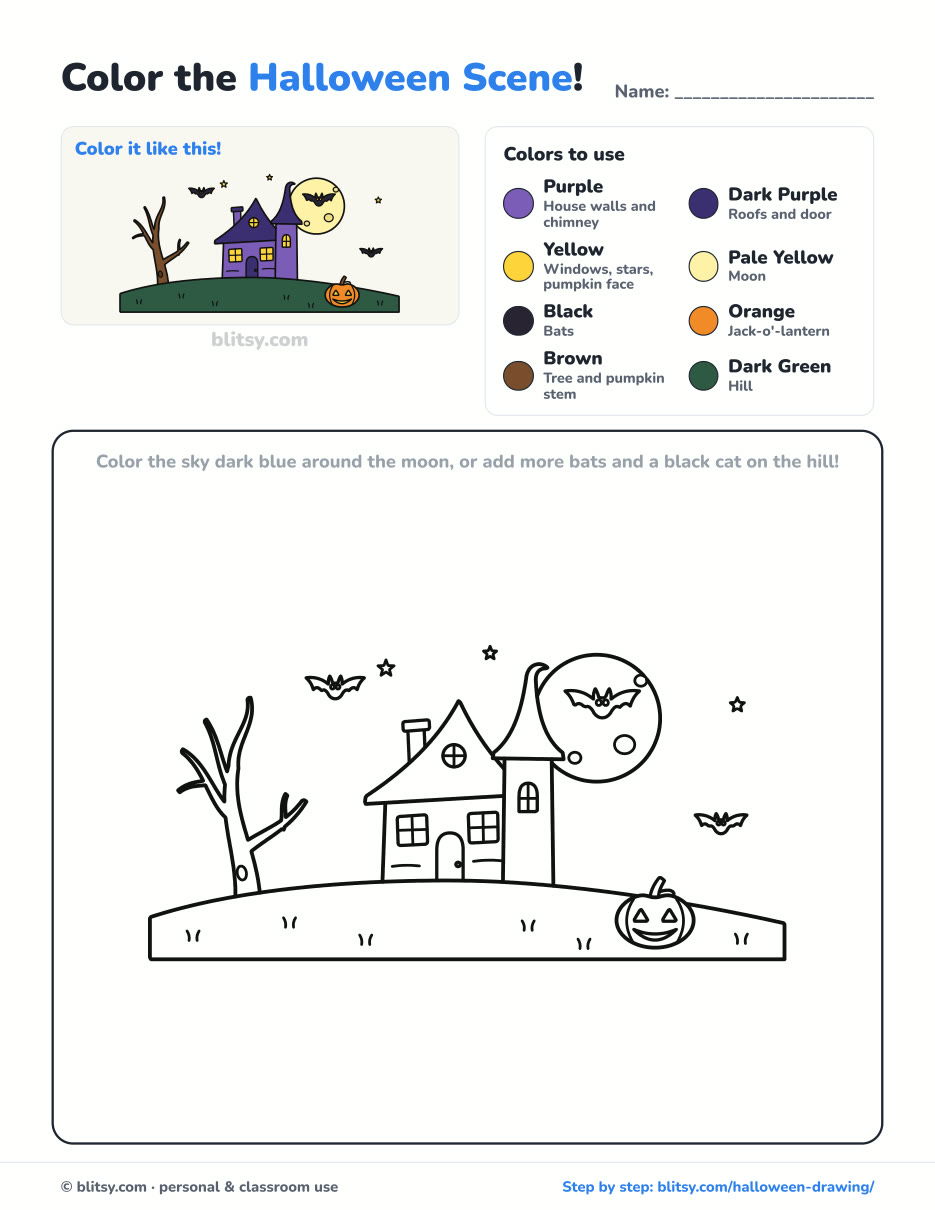
Black outlines with a colored example and the color names at the top. Ready to print and color.
⬇️ Download Coloring PageEvery step picture with its instructions and tips, to keep beside your paper while you draw.
⬇️ Download Drawing Guide📱 On a phone? Tap a download button, then open the file and choose Share → Save to Files or Print. On a computer, the PDF opens or saves straight to your Downloads folder.
A Haunted Hill Pin for Halloween Night
Haunted House Done? Try These Seasonal Tutorials
Each link opens a step-by-step tutorial, with scenes and objects for every season, not only October.
- Basketball Drawing: A ball flies toward a hoop with a diamond net in this how to draw a basketball step by step lesson.
- Flames Drawing: The flames drawing tutorial draws a crackling campfire inside a ring of stones.
- Wave Drawing: Curl an ocean wave over into a tube with the wave drawing tutorial.
- Snowman Drawing: Winter comes next: build a snowman in a striped scarf in the snowman drawing step by step guide.
- Mountain Drawing: Three snowy peaks sit above a lake in this mountain drawing tutorial.
- Money Drawing: The how to draw money lesson stacks bills next to a money bag and a pile of coins.
- Realistic Drawing: Learn to shade one shiny apple with the realistic drawing tutorial.
- School Drawing: A brick schoolhouse with a bell tower finishes the school drawing tutorial.
- Mandala Drawing: Grow a colorful mandala ring by ring in this mandala drawing step by step lesson.
- Light Bulb Drawing: The light bulb drawing tutorial adds glowing rays around an old-style bulb.
Halloween Drawing Questions From Parents and Kids
What is an easy Halloween drawing for kids?
A jack-o'-lantern or a simple haunted house works best, because both are built from basic shapes. This scene combines them, and kids under 7 can leave out the tree and the bats.
How do you make a Halloween drawing look cute instead of scary?
Use round shapes, smiling faces and bright yellow light in the windows. Soft corners and warm colors keep the mood friendly.
What colors should I use for a Halloween drawing?
Orange, purple, black and yellow are the classic set. A pale moon and a dark green hill give those colors something to stand out against.
How long does this Halloween scene take to draw?
Around 25 minutes for the lines and 15 to 20 for coloring. The house is a natural place to pause.
Tape the finished scene to a window or the front door, and your house is ready for trick-or-treaters. 🦇
Related posts:
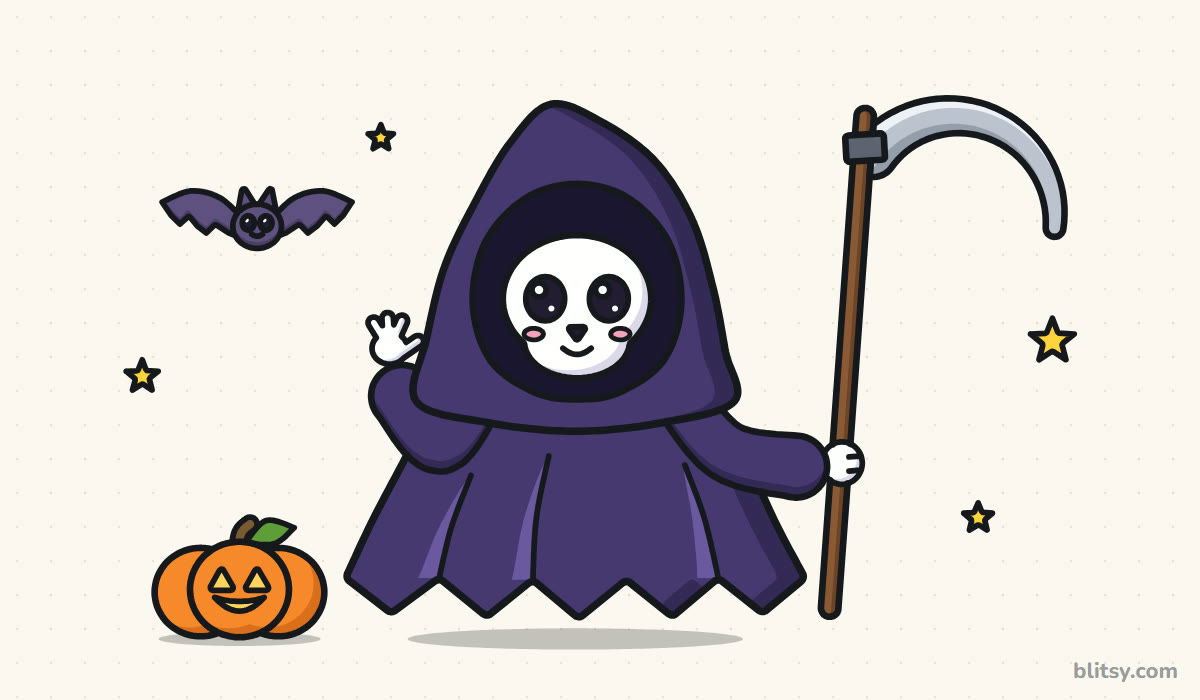 How to Draw a Grim Reaper Step by Step (Cute Halloween)
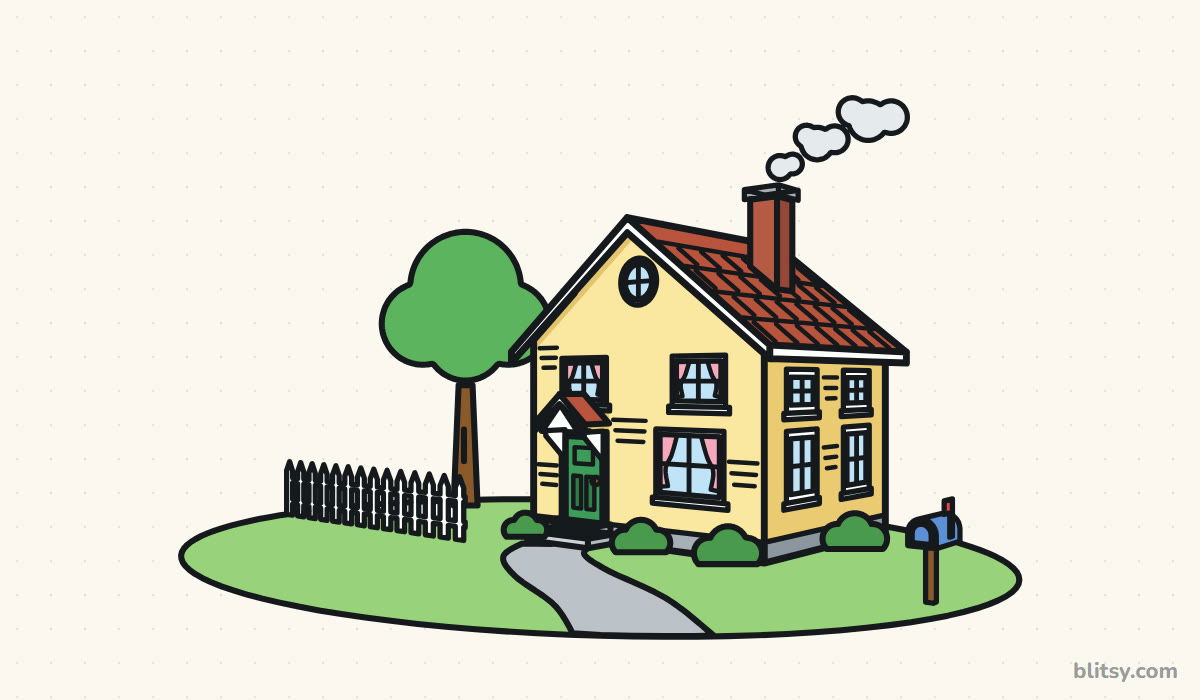 How to Draw a House Step by Step (Easy 3D Look)
 How to Draw a Tooth Step by Step (Cute and Easy for Kids)
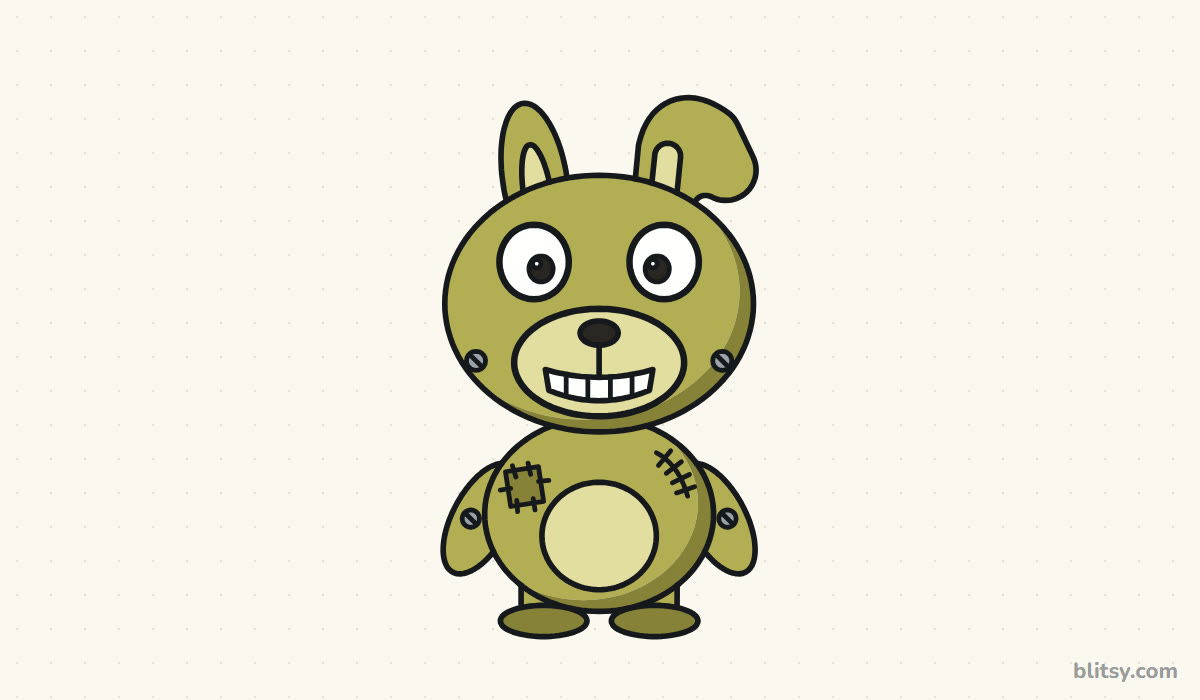 How to Draw Springtrap Step by Step (Cute Chibi for Kids)
 How to Draw a Care Bear Step by Step (Cute Fan Art for Kids)
 How to Draw a UFO Step by Step (Cute Alien Saucer)
 How to Draw an Owl Step by Step (Cute Night Owl)
 How to Draw an Axolotl Step by Step (Cute and Easy)
 How to Draw a Frog Step by Step (Cute Frog on a Log)
 How to Draw a Jellyfish Step by Step (Cute, Easy Guide)
 How to Draw Cerberus Step by Step (Cute and Easy)
 How to Draw a Monster Step by Step (Cute and Easy)

