
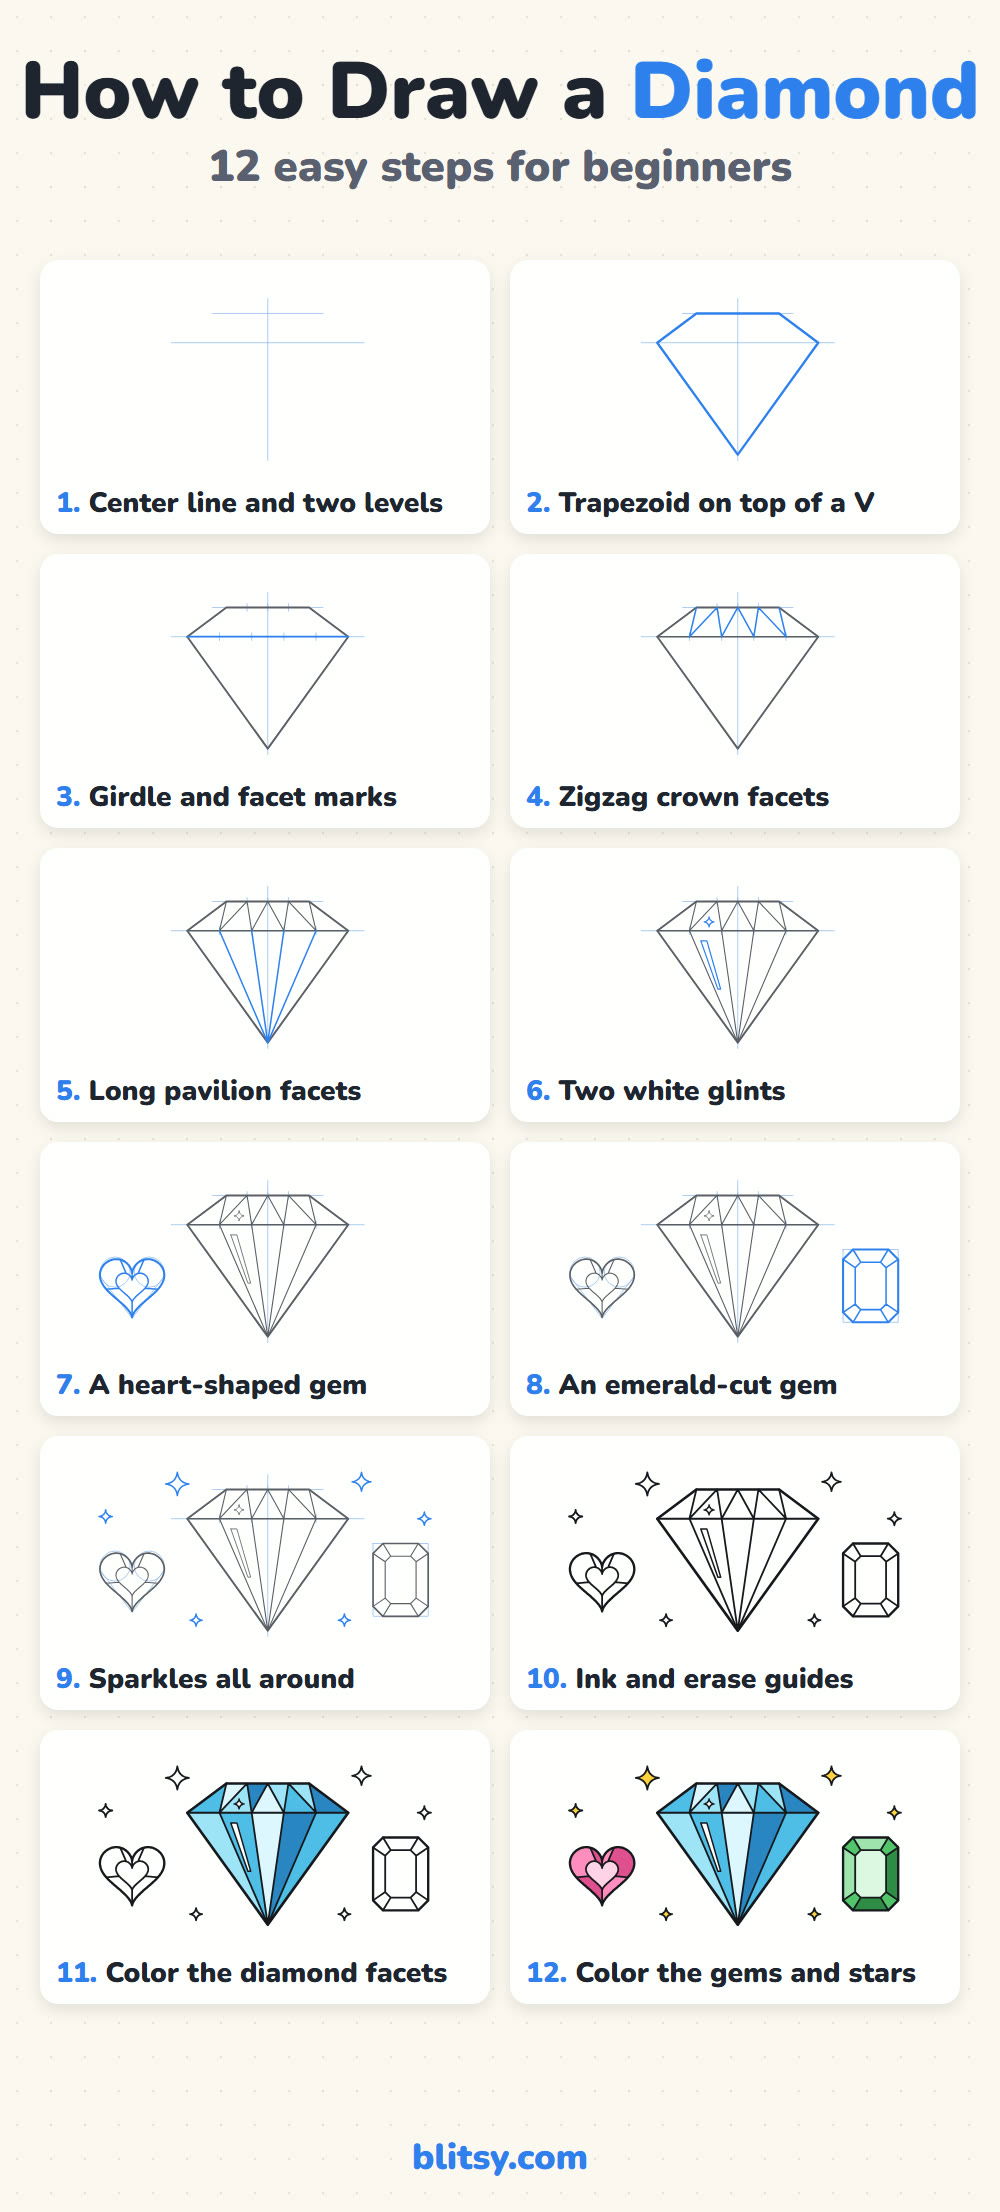
Diamonds look complicated because of all those little facets, but underneath they are just two simple shapes stacked on top of each other. This tutorial shows you how to draw a diamond step by step, starting with a flat trapezoid for the top and a long V for the bottom, then splitting both into neat facets with straight lines. We'll finish with white glints, yellow sparkles and two smaller gems, a pink heart and a green emerald cut. A ruler helps, but you can do it freehand too.
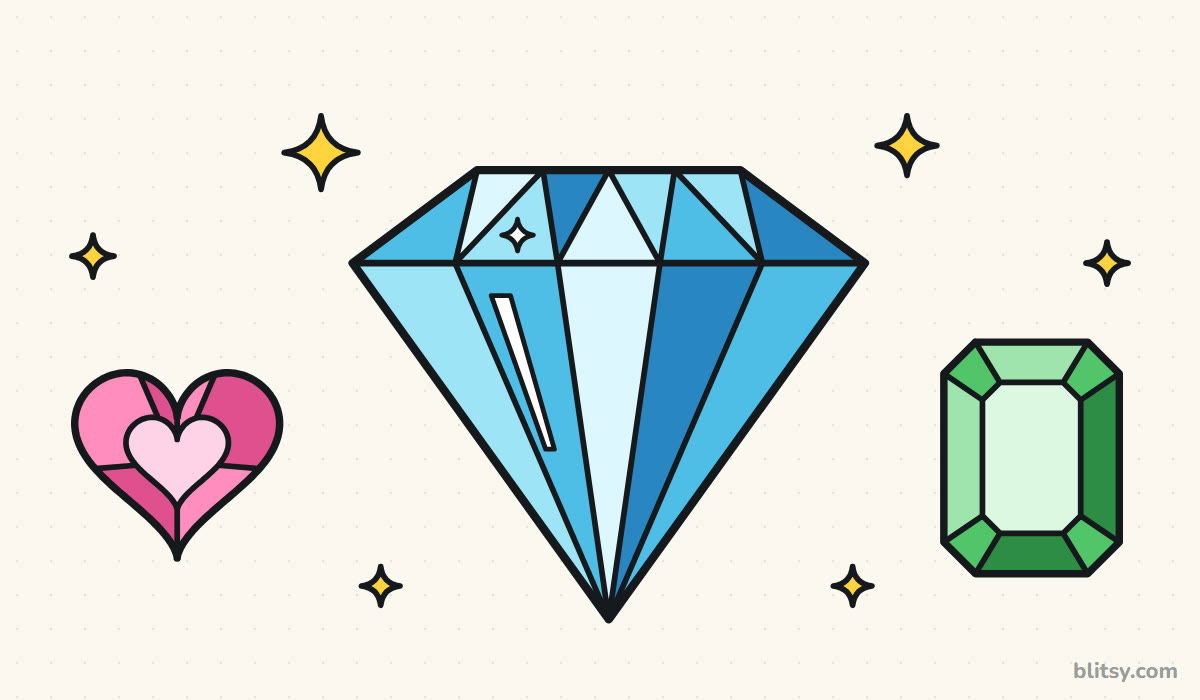
Whatever you add in a step shows up in blue, and earlier work turns gray. The pale helper lines at the start get rubbed out in step 10.
Quick overview
⏱️ Time: about 25 minutes
🎯 Level: easy, fine for kids from about 7
✏️ Steps: 12
💎 You'll draw: a faceted diamond with a heart gem, an emerald-cut gem and sparkles
Gear for a Crisp Gem Sketch
- A sharp pencil
- A soft eraser
- A ruler (very handy for the facet lines)
- A black fineliner or thin marker
- Colored pencils or markers in four blues, pink, dark pink, two greens and yellow
- White paper turned sideways
If you only own one blue, press lightly, medium and hard to get three shades from the same pencil.
How to Draw a Diamond Step by Step
Step 1: Draw a center line and two level lines
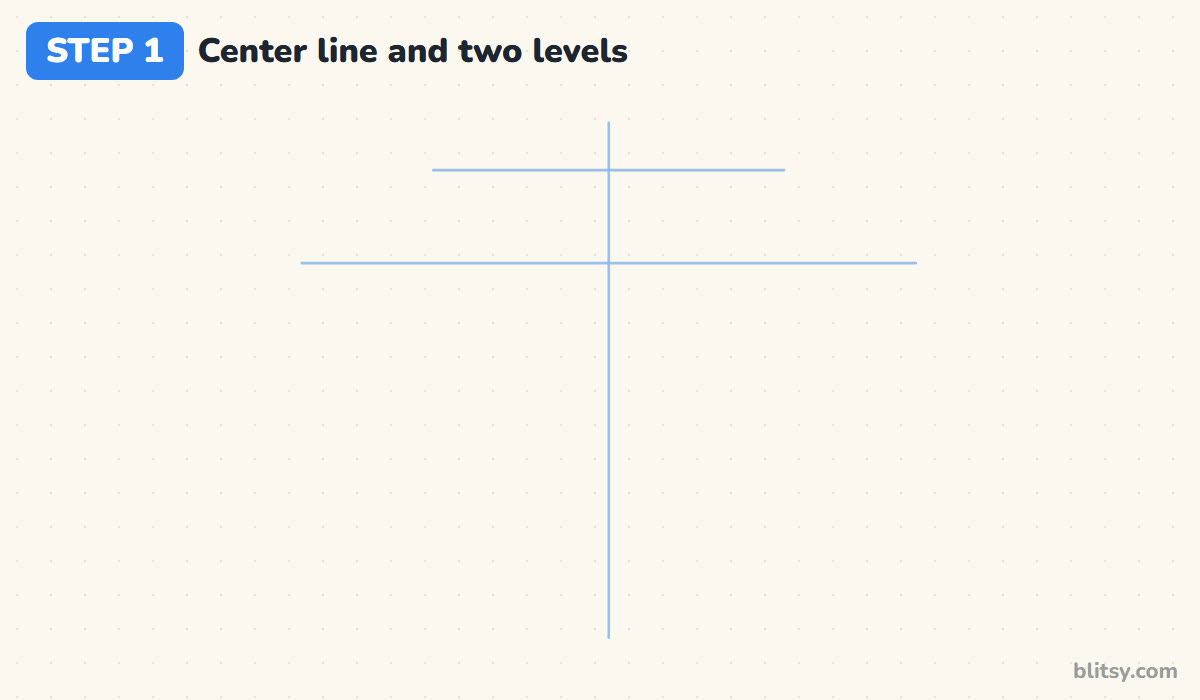
Start with a tall vertical line down the middle of your page. Near the top, cross it with a short horizontal line, and a little lower add a much longer one. The short line is the flat top of the gem, called the table; the long one marks where the diamond is widest. I keep the gap between them small, about a quarter of the gem's height.
💡 Tip: Press so lightly that you can barely see these lines.
Step 2: Draw a trapezoid on top of a V
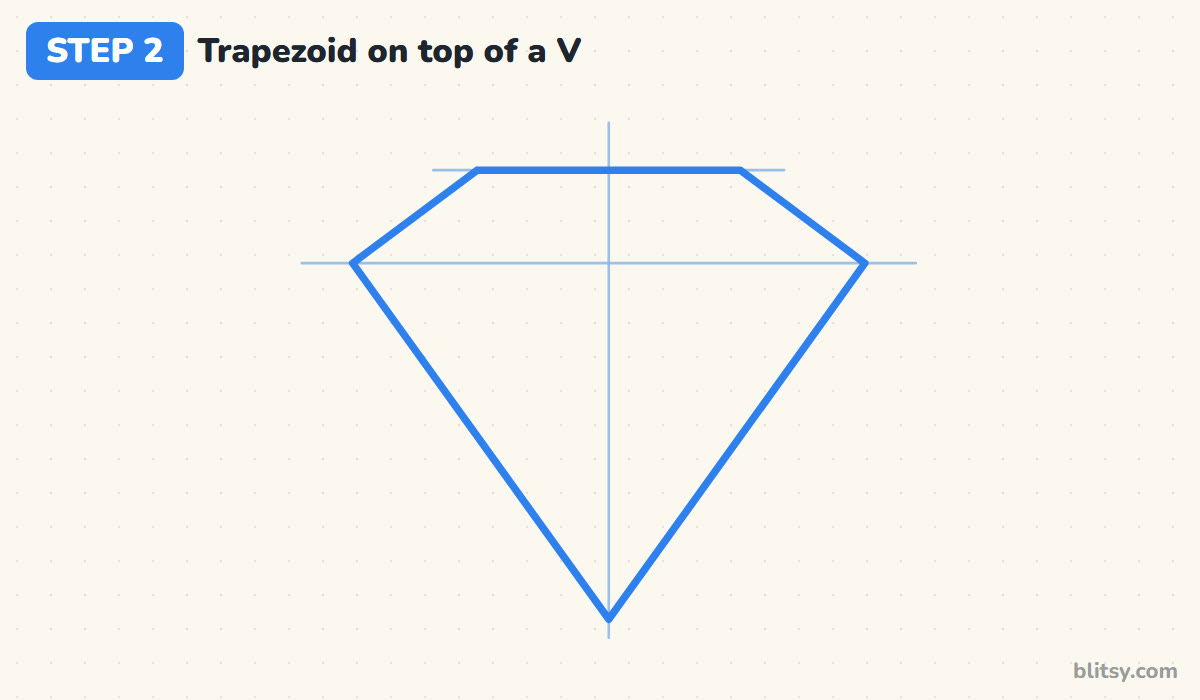
Join the ends of the short line to the ends of the long line. That slanted box is a trapezoid, and it becomes the crown. From both ends of the long line, draw straight lines down to one point on the center line, far below. I always check that the V is much taller than the trapezoid, because a short V makes the gem look like a squashed lampshade.
💡 Tip: Use a ruler for the long V sides so they stay perfectly straight.
Step 3: Add the girdle and mark the facet points
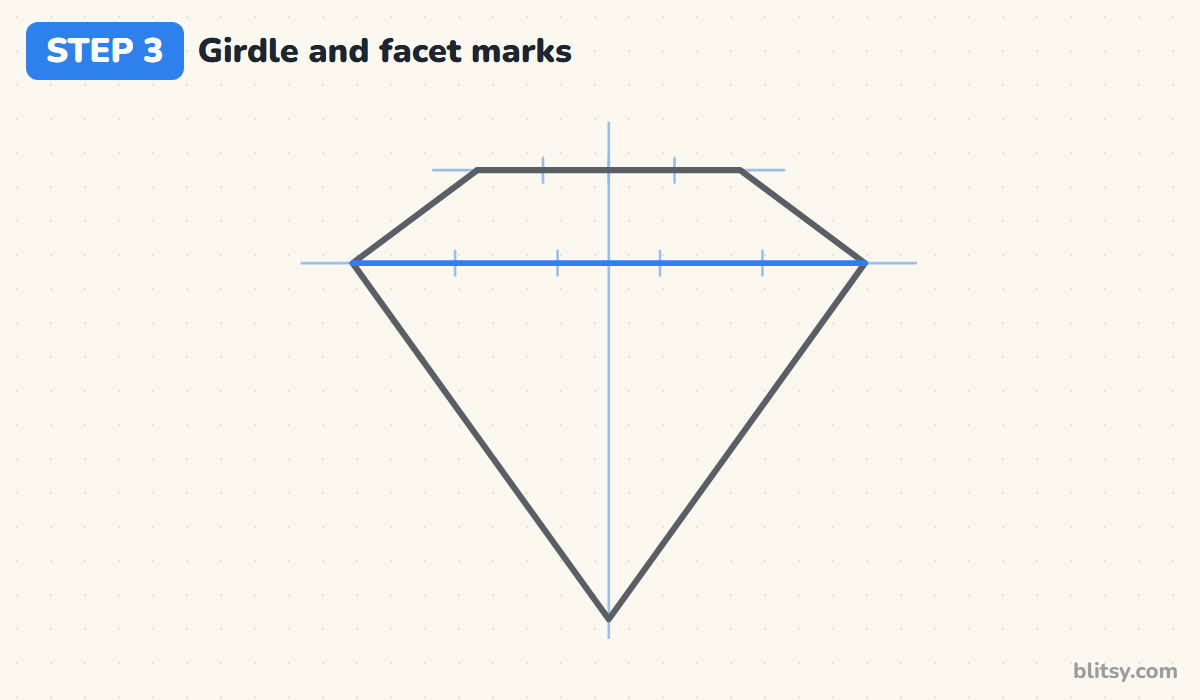
Go over the long level line firmly. On a real gem this widest edge is called the girdle, and it splits the top half from the bottom half. Then make three small tick marks along the table and four along the girdle, evenly spaced, with the middle table tick right on the center line. Every facet line will start and stop at these marks.




💡 Tip: Measure the gaps with your ruler or a strip of paper for even spacing.
Step 4: Zigzag the crown facets
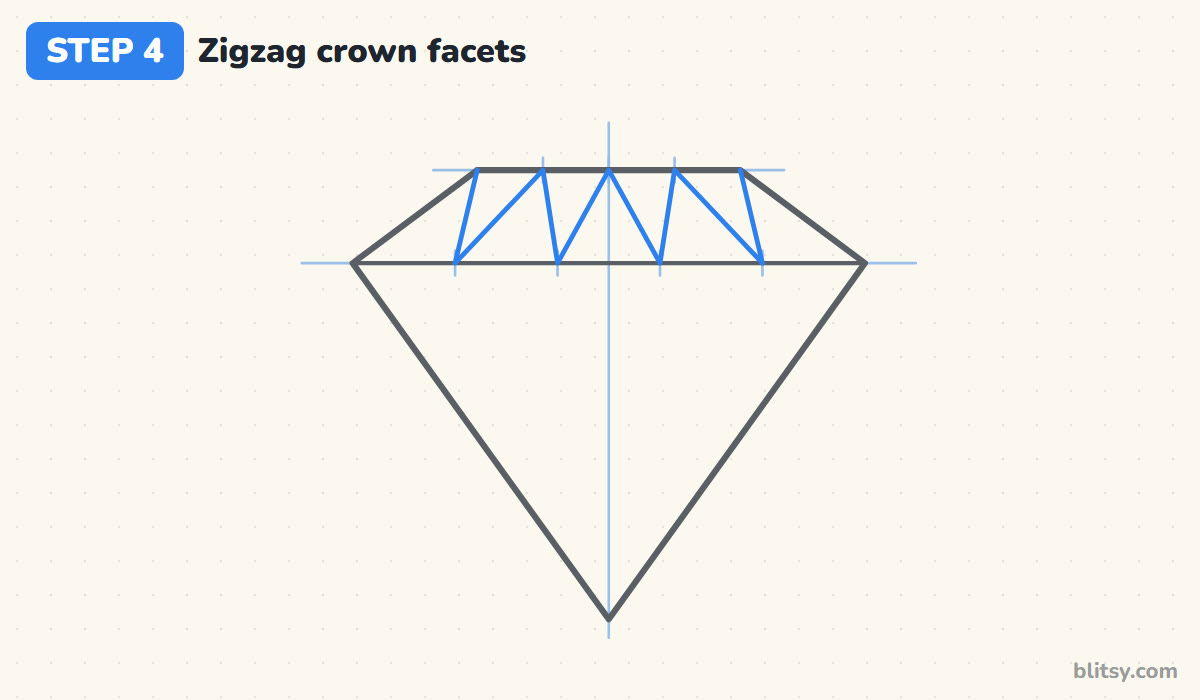
Inside the trapezoid, draw a zigzag that bounces between the table and the girdle. Start at the top left corner, go down to the first girdle tick, up to the first table tick, and carry on to the top right corner. The crown is now a row of triangles pointing up and down, and that pattern is what makes it read as cut stone.
💡 Tip: Touch each tick mark exactly; a missed point leaves a lopsided facet.
Step 5: Draw the long pavilion facets
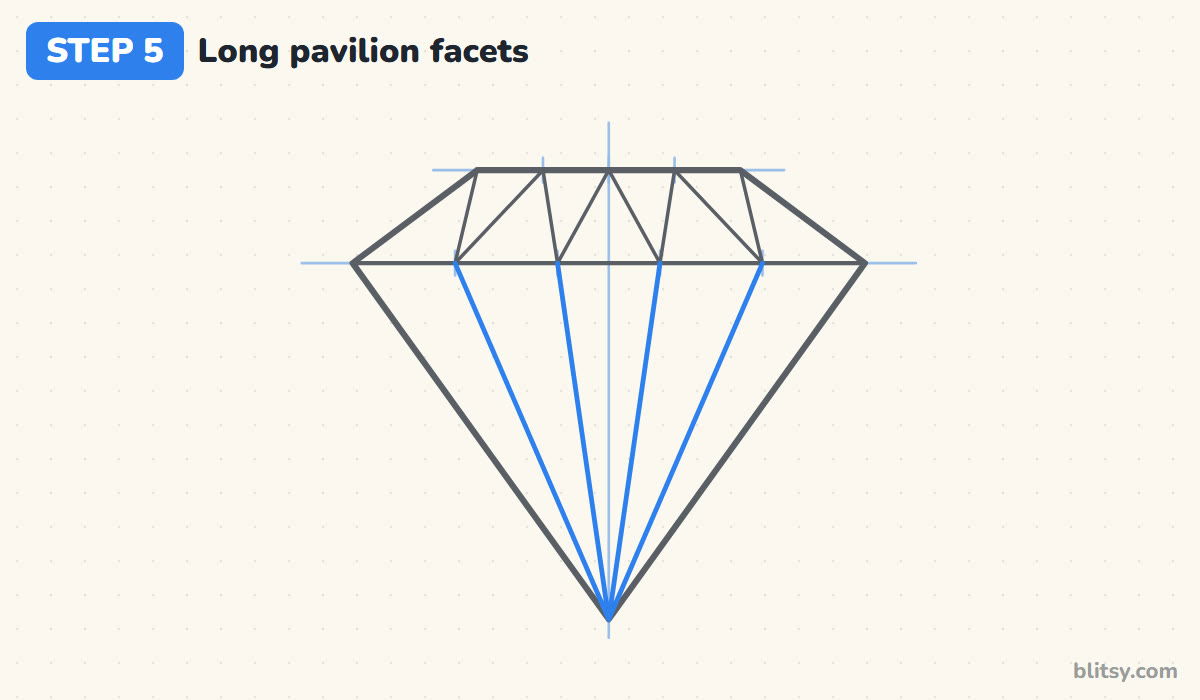
The bottom part of a diamond is called the pavilion. From each of the four girdle ticks, pull a straight line down to the bottom point, so they all meet like the spokes of a folded fan. You'll get five long, thin triangles. I draw each line from the top toward the point, because aiming at a fixed spot is easier than starting there.
💡 Tip: Put your ruler on the tick and the point before you draw each line.
Step 6: Add two white glints
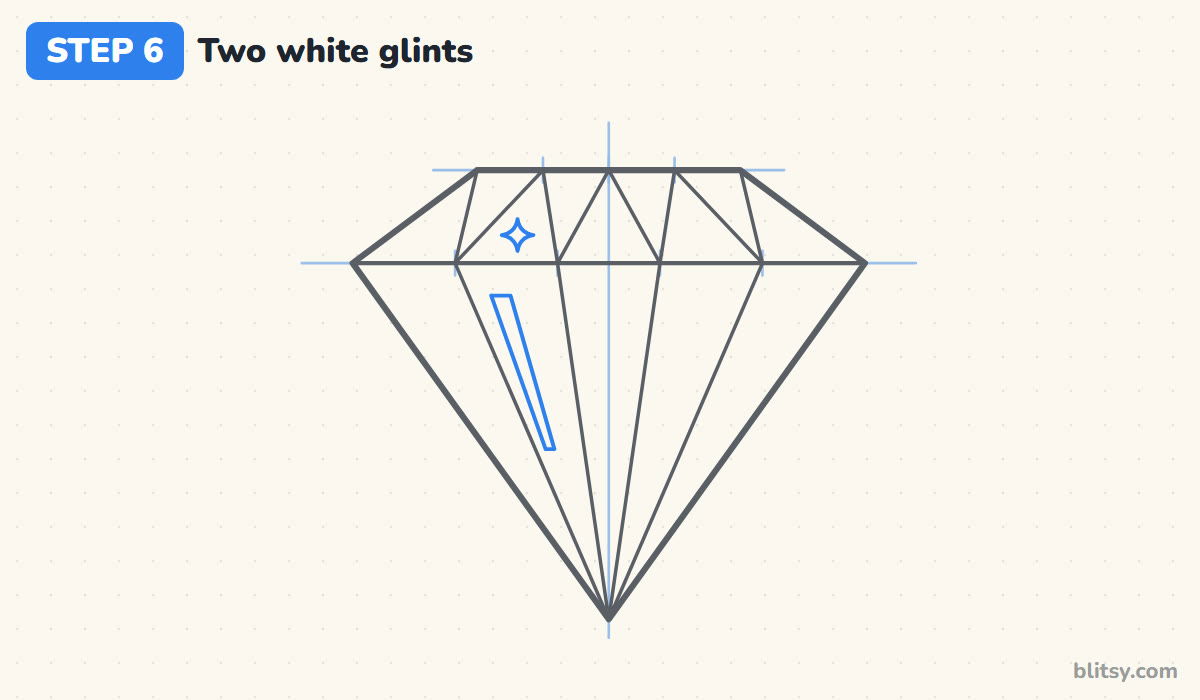
Glints are the bright flashes that make a gem look shiny. Draw one slim, slanted sliver inside the second pavilion facet from the left, running in the same direction as the facet lines. Then add a tiny four-point star in a crown triangle on the left. I place both glints on the left side, since that's where the light in this picture comes from.
💡 Tip: Keep glints small; a big white shape looks like a hole in the gem.
Step 7: Draw a heart-shaped gem on the left
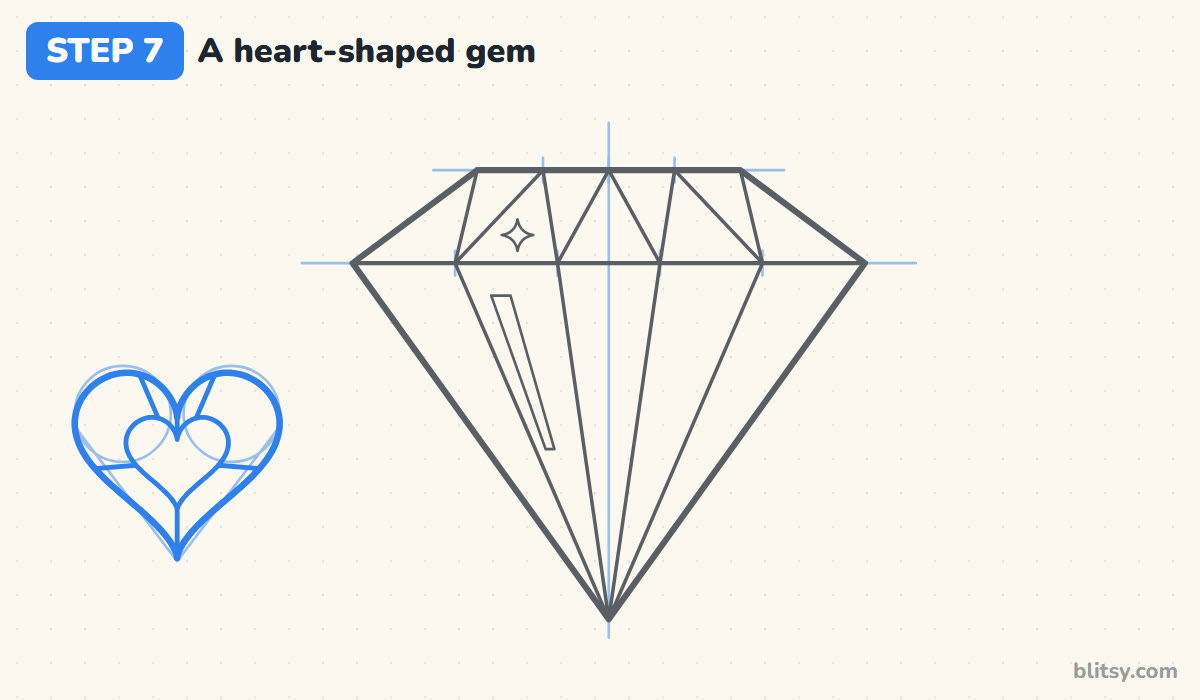
Lightly sketch two side-by-side circles with a V under them, then trace a heart around that guide. Inside, draw a smaller heart about half the size for the flat top. Connect the two hearts with six short lines: at the top dip, on each bump, on each side and at the bottom tip. Each section becomes a facet.




💡 Tip: Draw the left half of the heart first, then mirror it on the right.
Step 8: Draw an emerald-cut gem on the right
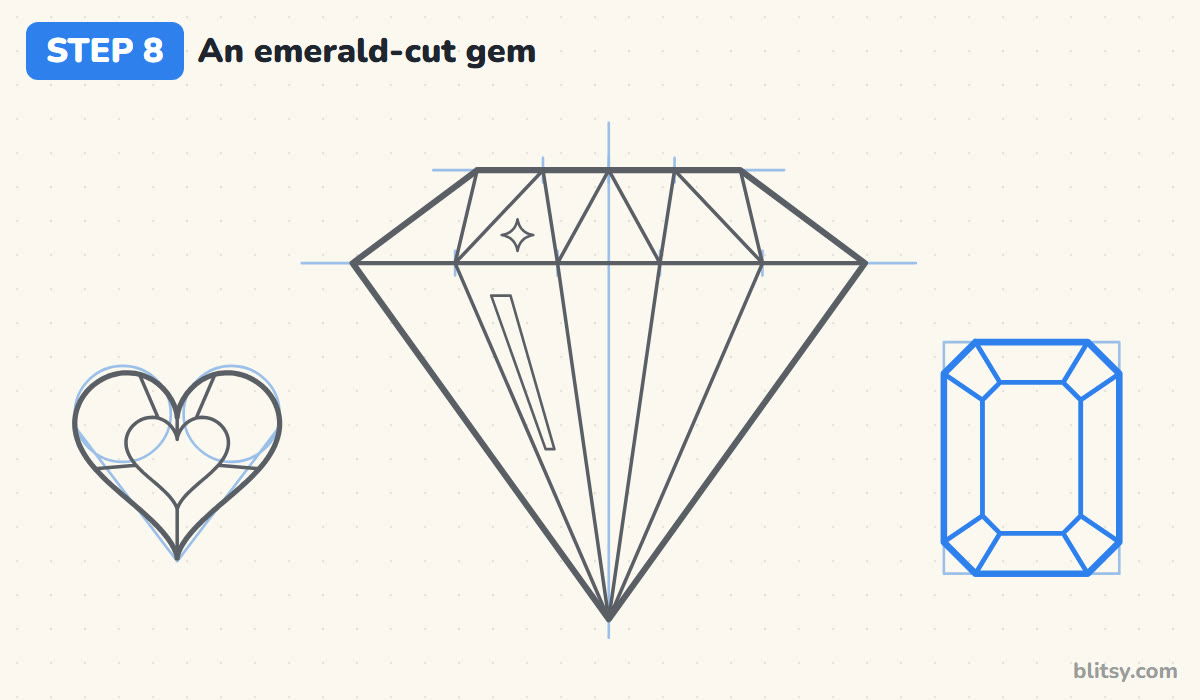
Sketch a tall rectangle and cut off each corner with a short diagonal to make an eight-sided shape. Draw a smaller copy inside it, then join each inner corner to the matching outer corner. Jewelers call this a step cut, because the facets circle the stone in flat bands like stairs.
💡 Tip: Make all four corner cuts the same size, or the gem looks chipped.
Step 9: Scatter sparkles around the gems
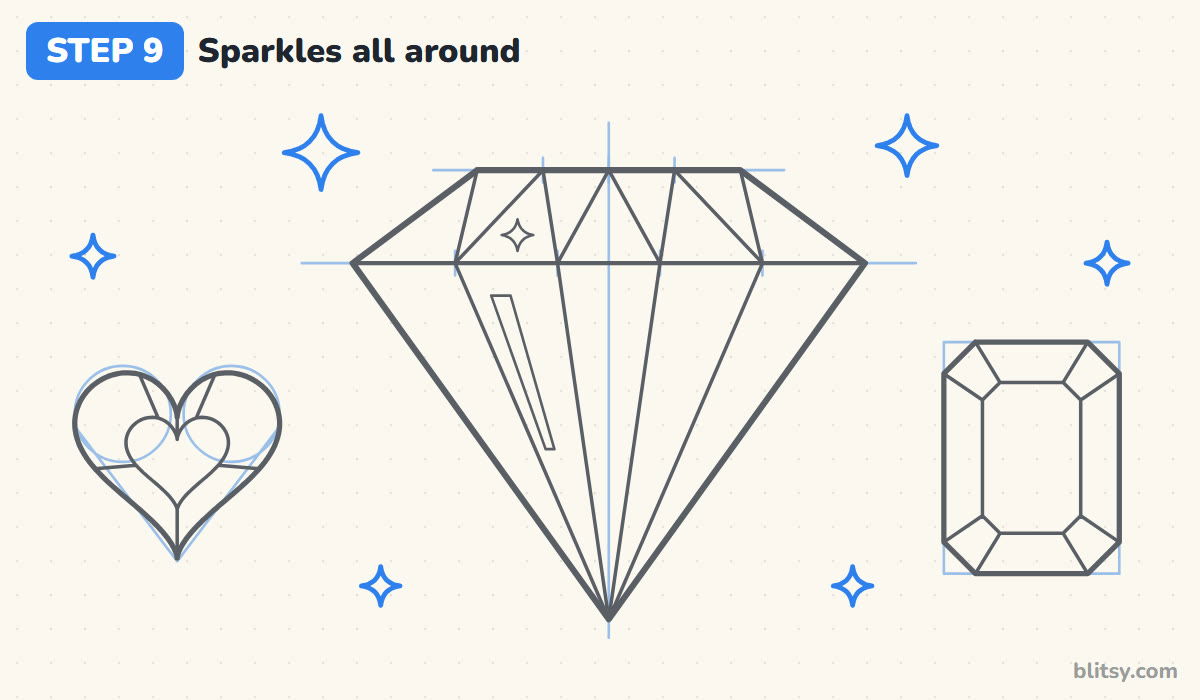
Add six four-point sparkles in the empty spaces: two larger ones above the diamond and four small ones lower down and out at the sides. Each one is four points joined by inward curves. Spread them so no corner feels bare, but keep them clear of the gem outlines. Too many start to look like snow.
💡 Tip: Vary the sparkle sizes; equal stars look stamped on.
Step 10: Ink the lines and erase the guides
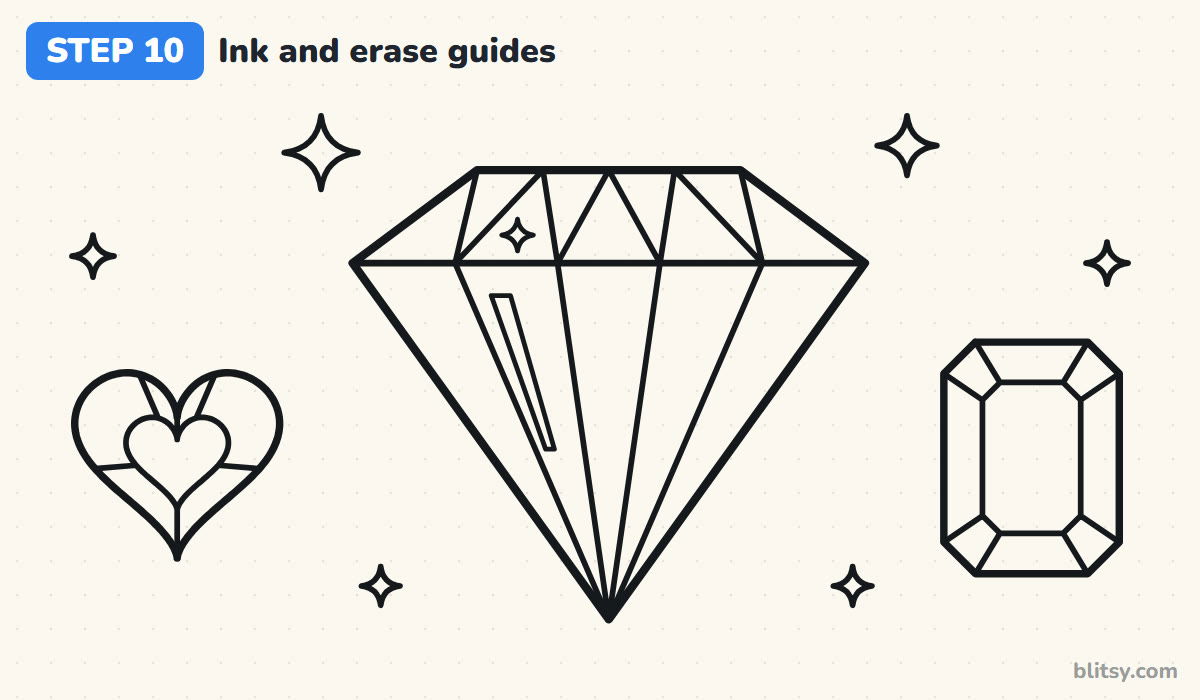
Trace every keeper line with your black pen: the diamond outline, the girdle, all the facet lines, the glints, both small gems and the sparkles. Skip the center line, the level lines, the tick marks and the helper shapes around the heart and the emerald. Let the ink dry fully, then erase every pencil guide.
💡 Tip: Ink the outer outline a little thicker than the facet lines inside.
Step 11: Color the diamond facets
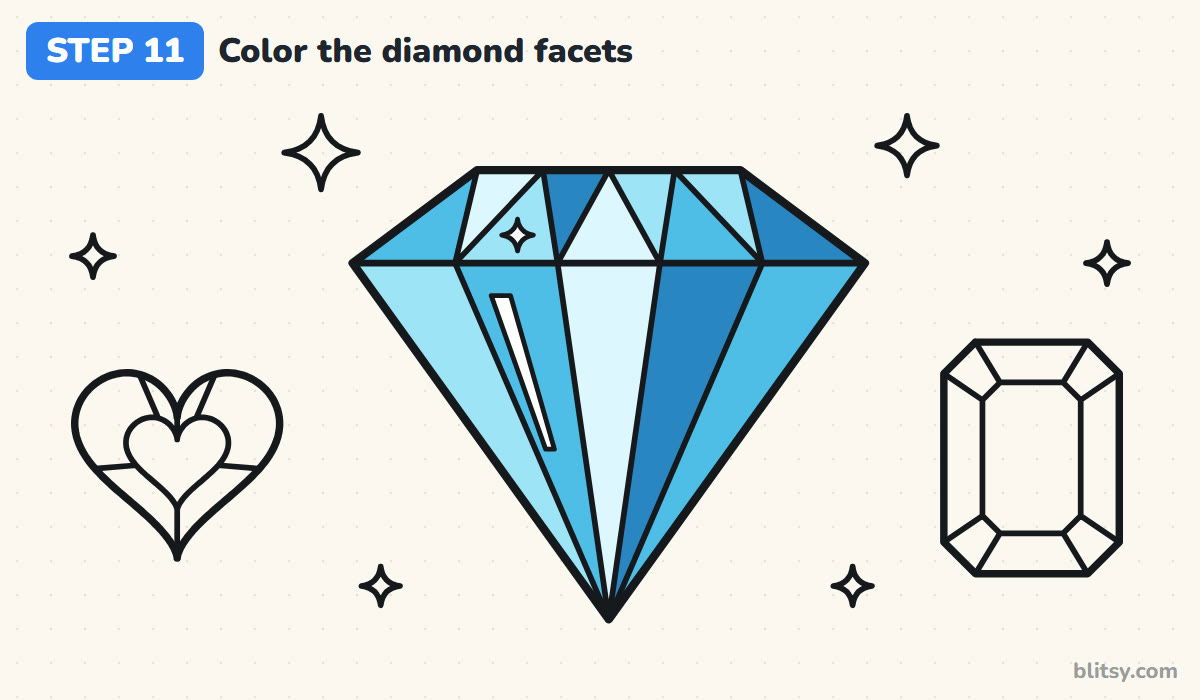
Here's my trick for sparkle: never give two neighboring facets the same blue. Use four shades, from very light to deep blue, and keep switching as you move across the crown and down the pavilion. Make the center pavilion facet the palest and put the darkest blues on the right, away from the light. Leave both glints white.




💡 Tip: Color each facet in one direction only, following its long side.
Step 12: Color the small gems and sparkles
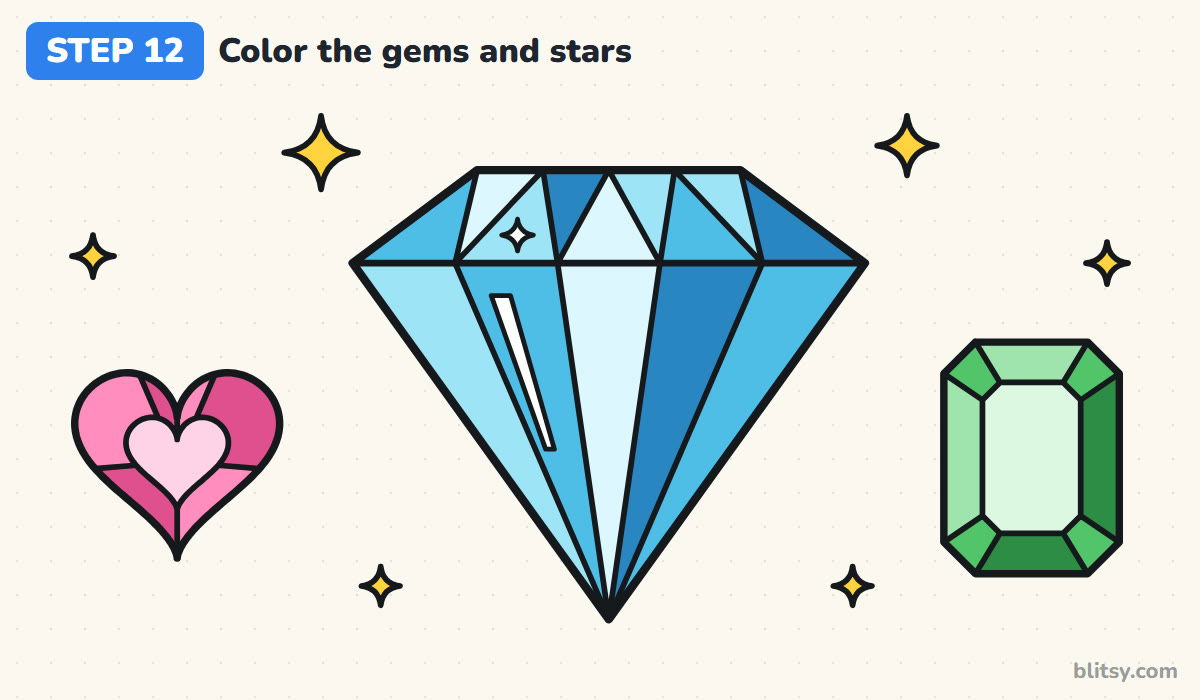
Fill the inner heart with light pink, then alternate pink and dark pink around the outer facets. For the emerald, keep the middle very pale, use light green on the top and left bands, medium green on the corners and dark green on the right and bottom. Color the sparkles yellow, and your gem collection is finished!
💡 Tip: Test each shade on scrap paper before you touch the gem.
Why Diamond Facets Go Crooked
- A V that's too short. When the bottom point sits close to the girdle, the gem looks flat and wide. Make the pavilion about four times taller than the crown.
- Uneven tick marks. Facets of random widths make the stone look cracked. Measure the spacing and mark it before drawing any facet line.
- Pavilion lines that miss the point. Lines ending beside the tip leave a scribbly knot at the bottom. Aim every line at one shared point and draw slowly.
- Matching colors side by side. Two neighbors in the same blue merge into one blob, and the sparkle disappears. Switch shades on every facet.
- Coloring over the glints. Once a glint is blue, the shine is gone. Outline the white slivers well and color around them.
Gem Ideas to Try Next
Once the blue diamond feels comfortable, change the color: a red version reads as a ruby and a purple one as an amethyst, with the very same facet lines. You can also set the diamond on a ring band. Little kids can skip the zigzag and the glints and just draw the trapezoid, the V and the girdle line. If you enjoy faceted shapes, the crystal drawing tutorial is a natural next step, and how to draw a star will help you polish those sparkles.
Diamond Coloring Page and a Printable Step Guide
Want to practice the shading away from the screen? The diamond coloring page shows a small colored example with the colors to use, plus a big bold outline below for crayons or markers. The step-by-step PDF guide has all 12 steps and tips on paper. Both fit Letter and A4 sheets.
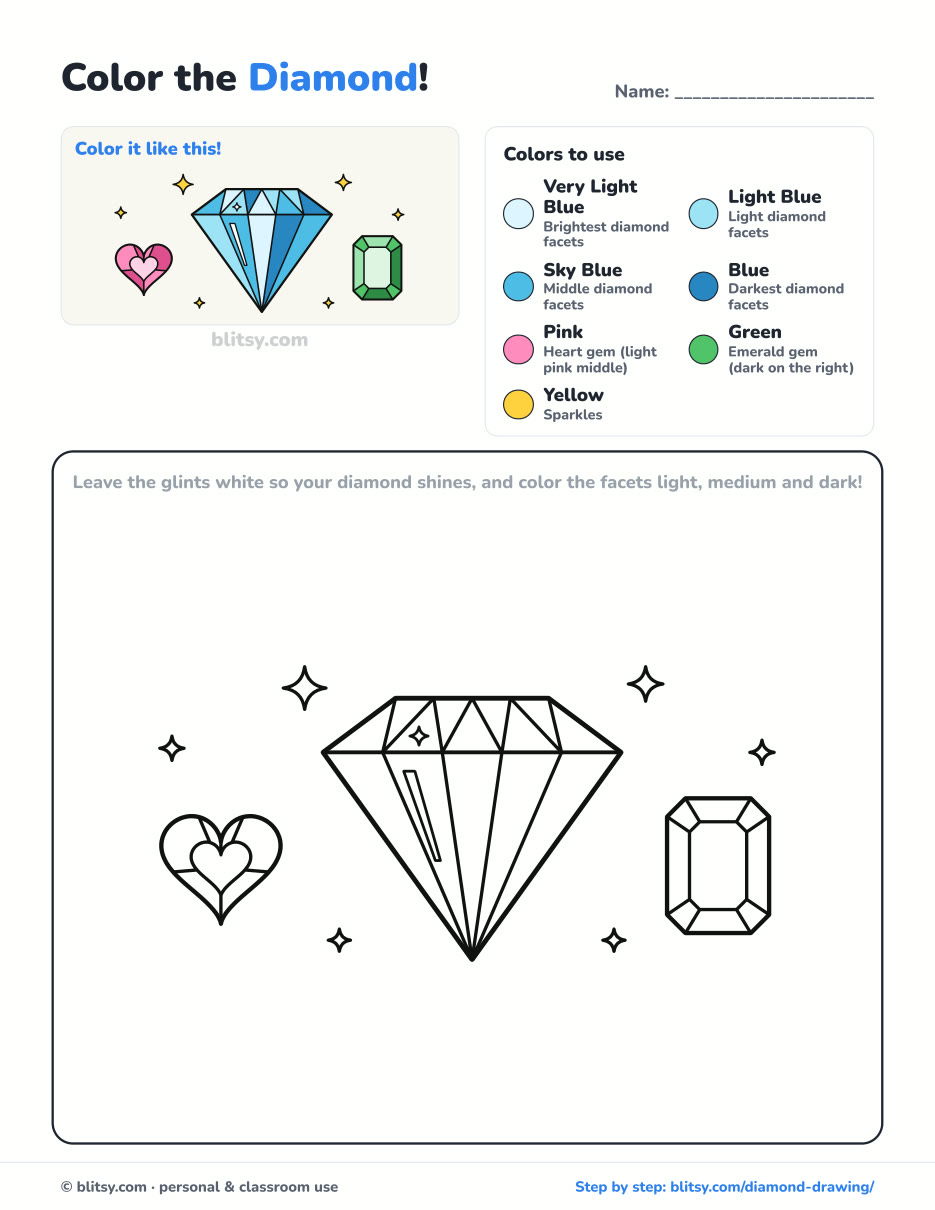
Black outlines with a colored example and the color names at the top. Ready to print and color.
⬇️ Download Coloring PageEvery step picture with its instructions and tips, to keep beside your paper while you draw.
⬇️ Download Drawing Guide📱 On a phone? Tap a download button, then open the file and choose Share → Save to Files or Print. On a computer, the PDF opens or saves straight to your Downloads folder.
Pin the Gem Steps for Later
After the Diamond, Draw Something Solid
These are all step-by-step tutorials with a picture for each step, from vehicles to furniture.
- Monster Truck Drawing: A flame-painted truck rolls over a dirt mound in this monster truck drawing tutorial.
- Rocket Drawing: Launch a rocket past a ringed planet with the how to draw a rocket step by step lesson.
- Train Drawing: Draw a steam engine with a red boiler and spoked wheels in the train drawing tutorial.
- Rocks Drawing: Shade a chunky gray boulder and two neighbors with this how to draw rocks guide, keeping each top the palest part.
- Realistic Drawing: Your diamond shows how facets catch light. The realistic drawing step by step lesson does the same on a round apple.
- Baseball Bat Drawing: A wooden bat, a glove and a ball make a small still life in the baseball bat drawing tutorial.
- Castle Drawing: Three towers, a gate and a drawbridge come together in the castle drawing tutorial.
- Bed Drawing: Draw a 3D wooden bed with plump pillows and a star duvet using how to draw a bed step by step.
- Tank Drawing: A cartoon tank with a round turret and a long track loop is the goal of this tank drawing tutorial.
- UFO Drawing: Finish with a cute alien saucer, beam switched on, in the UFO drawing step by step guide.
Gem Drawing Questions, Answered
What is the easiest way to draw a diamond?
Draw a short flat line, a longer line below it, join them into a trapezoid and add a long V underneath. A couple of lines inside each part are enough to make it look cut.
What are the parts of a diamond called?
The flat top is the table, the slanted top band is the crown, the widest edge is the girdle and the long bottom part is the pavilion. The tiny tip at the bottom is called the culet.
How do I make a diamond drawing look shiny?
Color neighboring facets in light, medium and dark shades of one color, leave a few small white glints, and add sparkle stars around the gem.
Can kids draw this diamond?
Yes. Children around 7 can follow every step, especially with a ruler. Younger ones can stop after the outline and the girdle and still color a nice gem.
Try one in red or purple next time and start your own little treasure chest of gems. 💎
Related posts:
 How to Draw a Whale Step by Step (Easy for Beginners)
 How to Draw Lungs Step by Step (Easy Science Diagram)
 How to Draw a Pineapple Step by Step (Easy Crown and Slice)
 How to Draw Iron Man Step by Step (Easy Chibi for Kids)
 How to Draw a Dress Step by Step (Easy Party Dress)
 How to Draw a Chicken Step by Step (Easy for Beginners)
 How to Draw a UFO Step by Step (Cute Alien Saucer)
 How to Draw a Volcano Step by Step (Easy Erupting Volcano)
 How to Draw a Crow Step by Step (Easy for Beginners)
 How to Draw a Tiger Step by Step (Easy Walking Pose)
 How to Draw a Heart Step by Step (Even, Symmetric Shape)
 How to Draw a Jellyfish Step by Step (Cute, Easy Guide)

