
Most drawings look flat for one reason, and it isn't the outline. Realism comes from light, and the quickest way to learn it is to draw one round, shiny object lit from one side. This lesson walks you through realistic drawing step by step with a red apple on a table. Once that clicks, it works on cups, eggs and faces too.
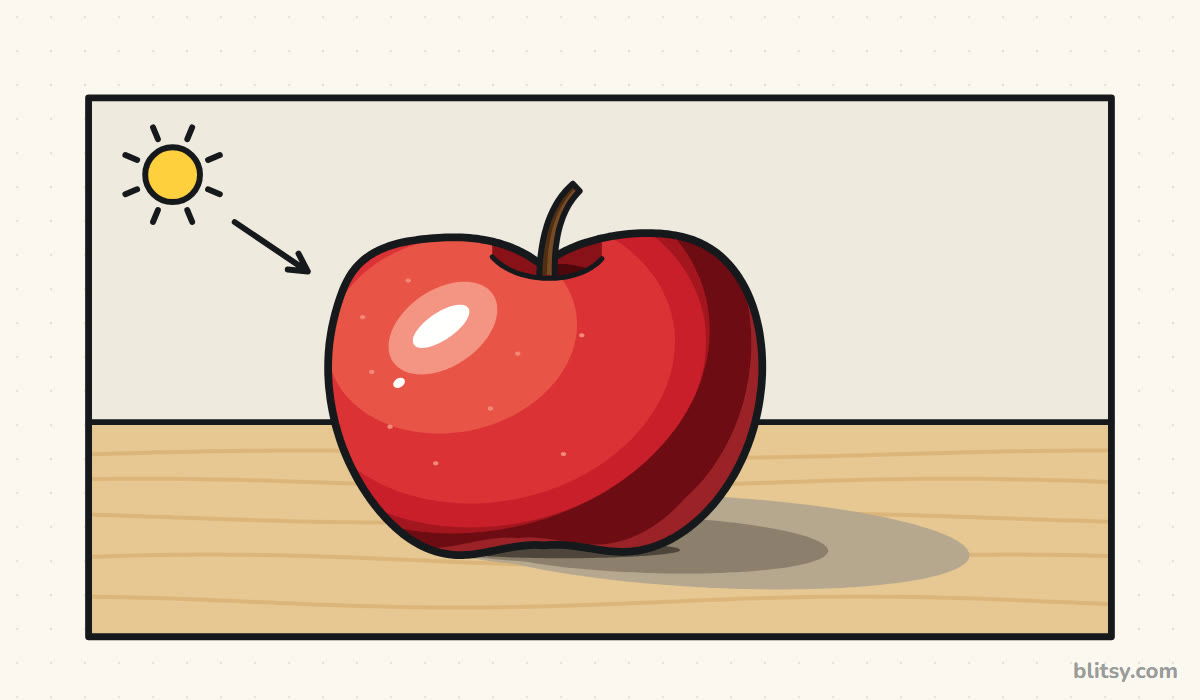
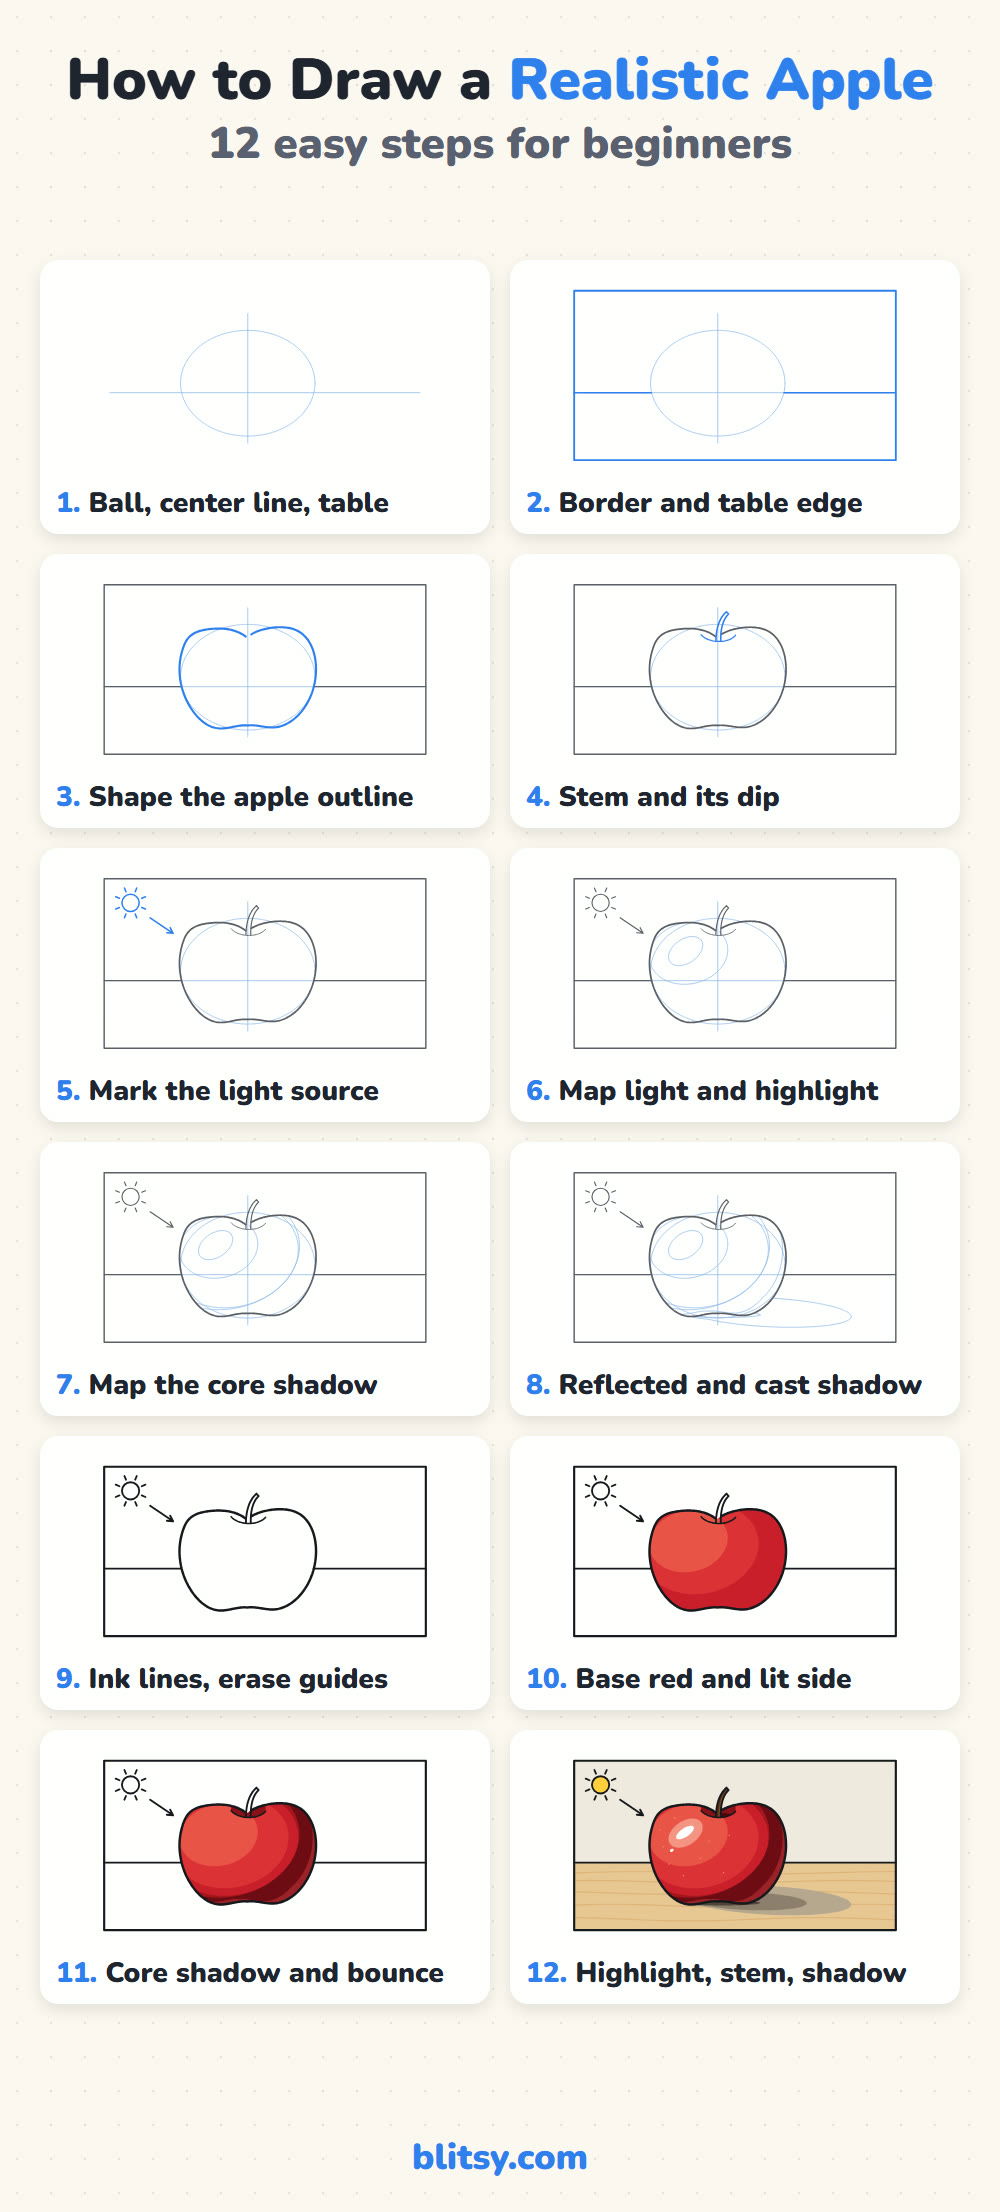
In each picture, the part you add in that step is blue and earlier work turns gray. Thin pale lines are light sketch marks that map each value and get erased later. In the shading steps, the colors stand in for the pencil values you'll build up.
Quick overview
⏱️ Time: about 40 to 60 minutes, longer if you blend slowly
🎯 Level: beginner to improving, best for ages 10 and up
✏️ Steps: 12
🍎 You'll draw: a shiny red apple on a wooden table, lit from the upper left
Shading Supplies for a Lifelike Apple
- A real apple and a desk lamp, or a clear photo of a side-lit apple
- Graphite pencils: an HB for sketching, plus a 2B and a 4B or 6B for darks
- Smooth drawing paper (printer paper works for practice)
- A blending stump, or a folded tissue
- A kneaded eraser for lifting highlights, and a regular eraser for clean-up
- Red, dark red and brown colored pencils if you want the color version
Two pencils and a tissue are enough to learn this; the extra grades just make the darkest darks easier.
Realistic Drawing Step by Step
Step 1: Sketch the oval, center line and table
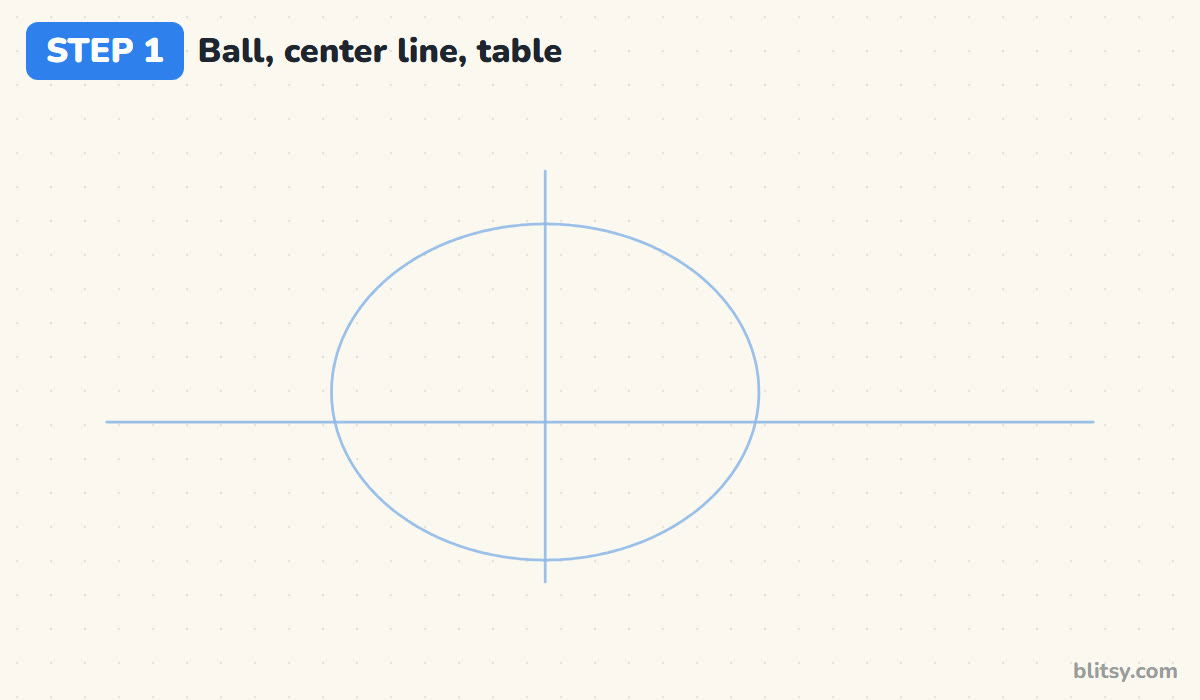
Set the apple under a lamp so the light hits it from one side, and look at it for a minute. With an HB and barely any pressure, draw a slightly wide oval, a vertical line through its middle and a level line behind it for the table. An apple is wider than it is tall, so a perfect circle reads as a ball.
💡 Tip: Hold the pencil far back from the tip. It's almost impossible to press hard that way.
Step 2: Draw the border and the table edge
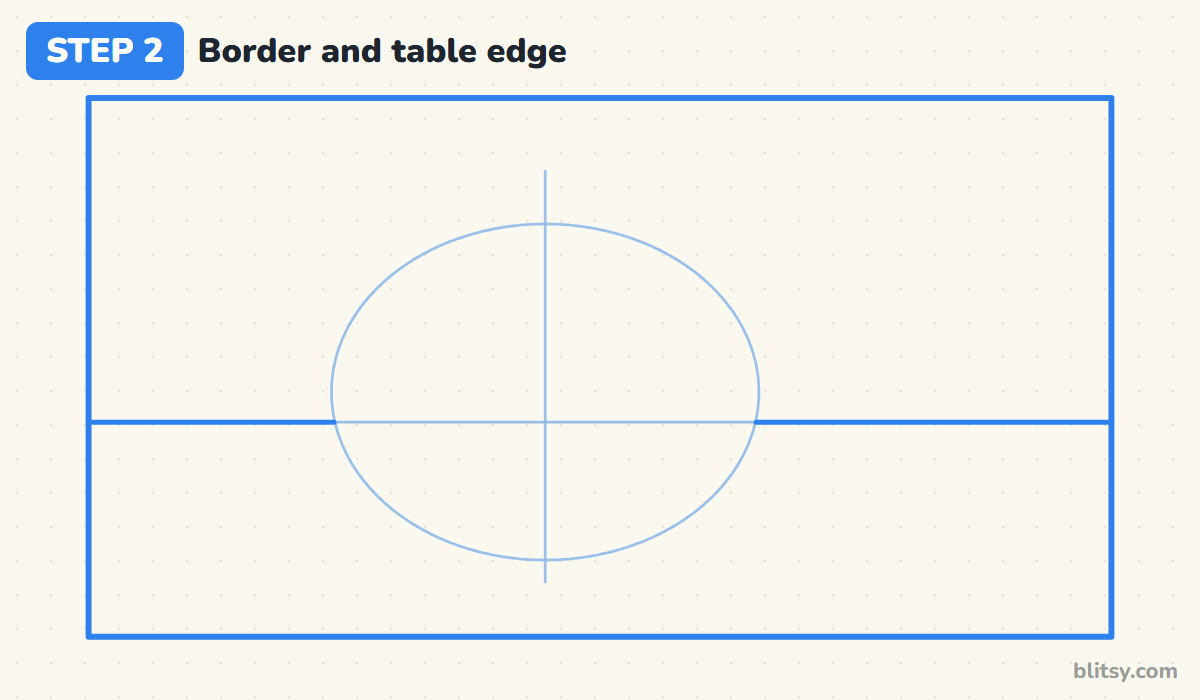
A box around the drawing turns a floating fruit into a small still life. Draw the border, then firm up the table line. I place the apple a little left of center, because the cast shadow will stretch to the right.
💡 Tip: Leave more empty table on the shadow side than on the light side.
Step 3: Shape the apple around the oval
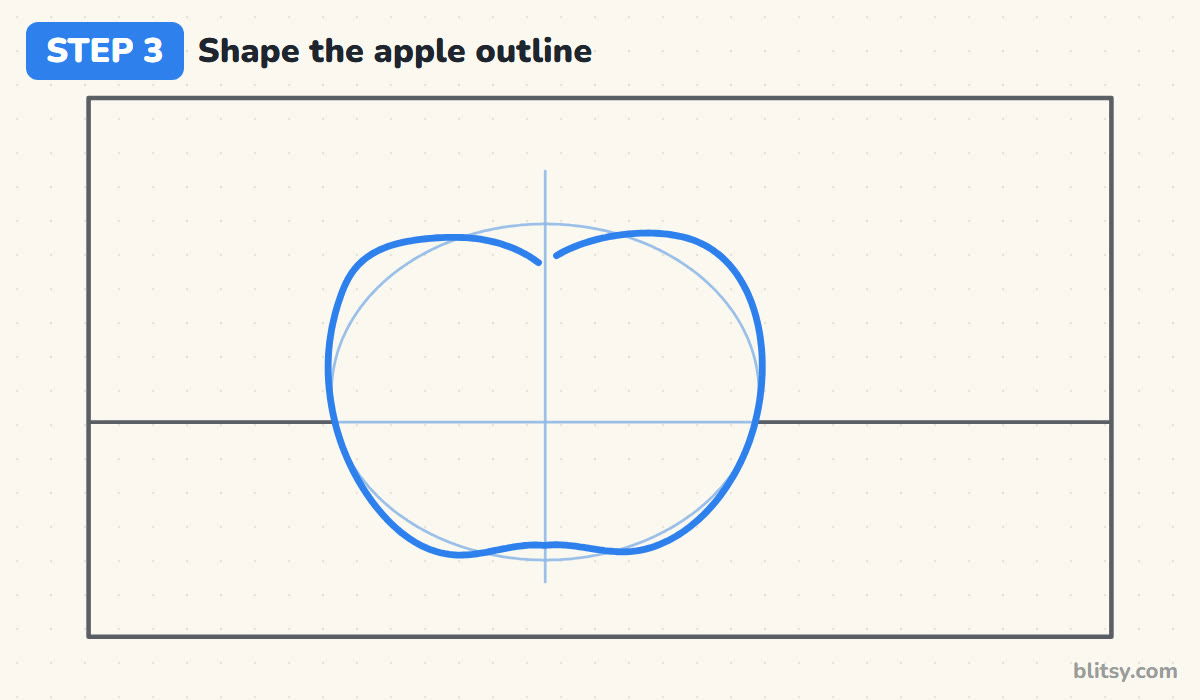
Now reshape the oval into an apple. The top has two soft shoulders that rise a bit above the guide, with a dip in the middle for the stem. The bottom flattens with a gentle wave where it rests on the table. Keep this line light; it's a map, not the final edge.




💡 Tip: Look at your real apple's silhouette, not the apple you remember. No two are the same shape.
Step 4: Add the stem and the dip around it
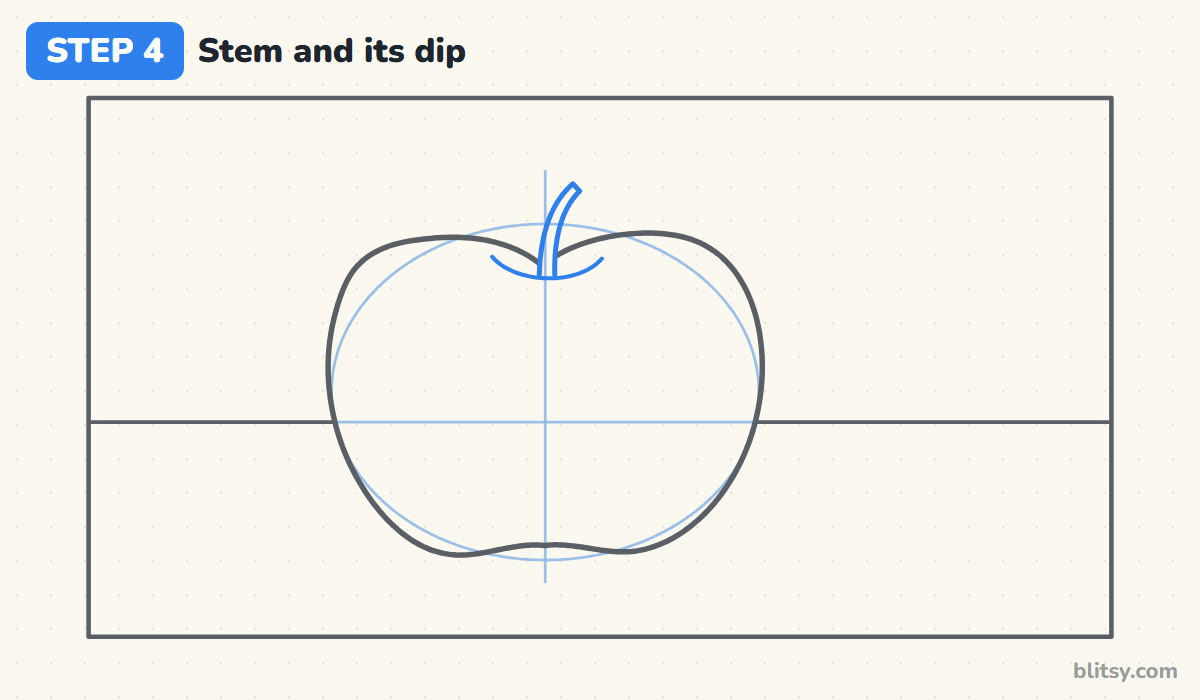
Draw the stem as two close lines that curve slightly to the right, with a flat cut at the end. Add a shallow curve under its base. That small curve tells the eye the top sinks inward, the first hint of depth.
💡 Tip: Make the stem thinner at the top than at the base. Even width looks like a stick pushed in.
Step 5: Decide where the light comes from
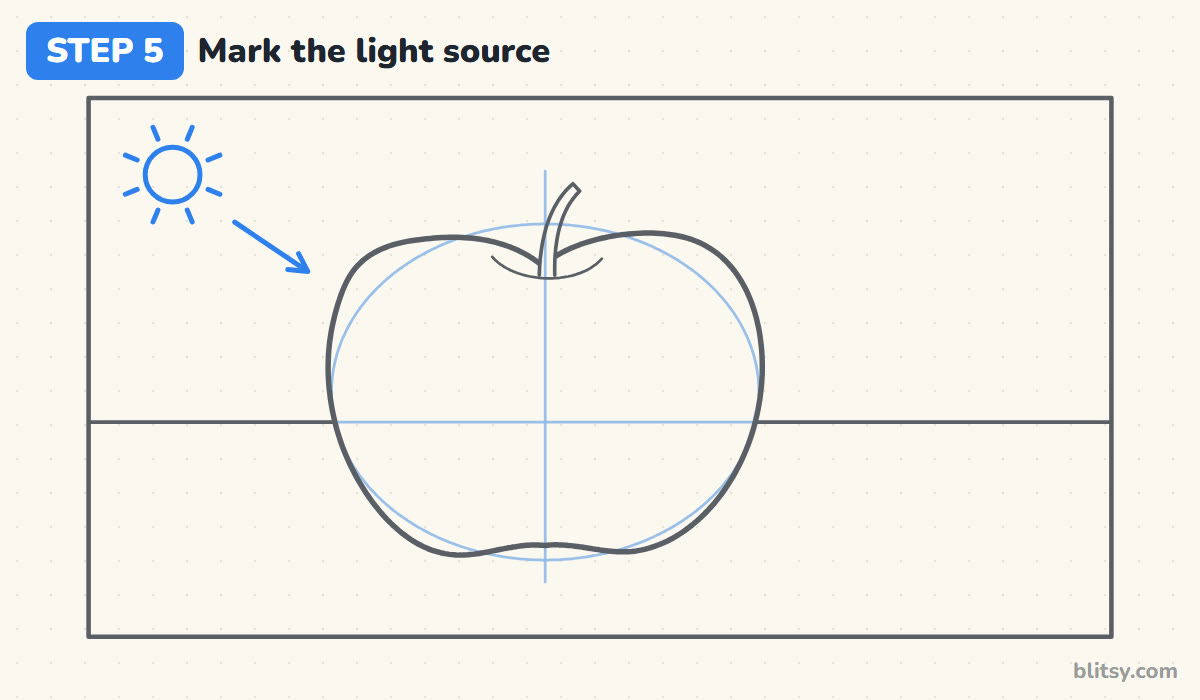
Mark a small sun in the corner and an arrow pointing at the apple. Every shading choice from here on depends on this direction. Ours comes from the upper left, so the upper left of the apple will be brightest and the lower right darkest. When I skip this, I end up with shadows on both sides.
💡 Tip: If you work from life, don't move the lamp or the apple until you're done.
Step 6: Map the light and the highlight
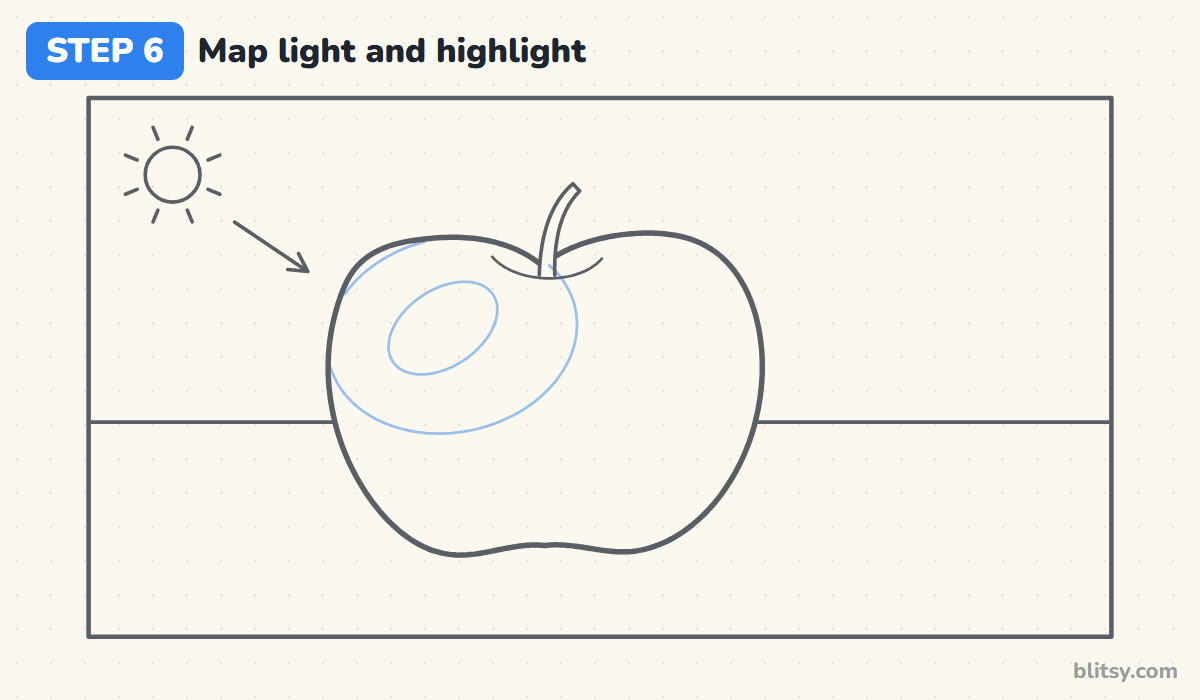
Erase the oval and the center line first. Then lightly outline two shapes on the side facing the light: a big rounded area where the skin is brightest, and a small slanted oval inside it for the shine. On a glossy apple the highlight is crisp and sits where the curve faces the lamp most directly.
💡 Tip: Draw the highlight smaller than you think. A big white patch reads as a hole or a sticker.
Step 7: Find the core shadow band
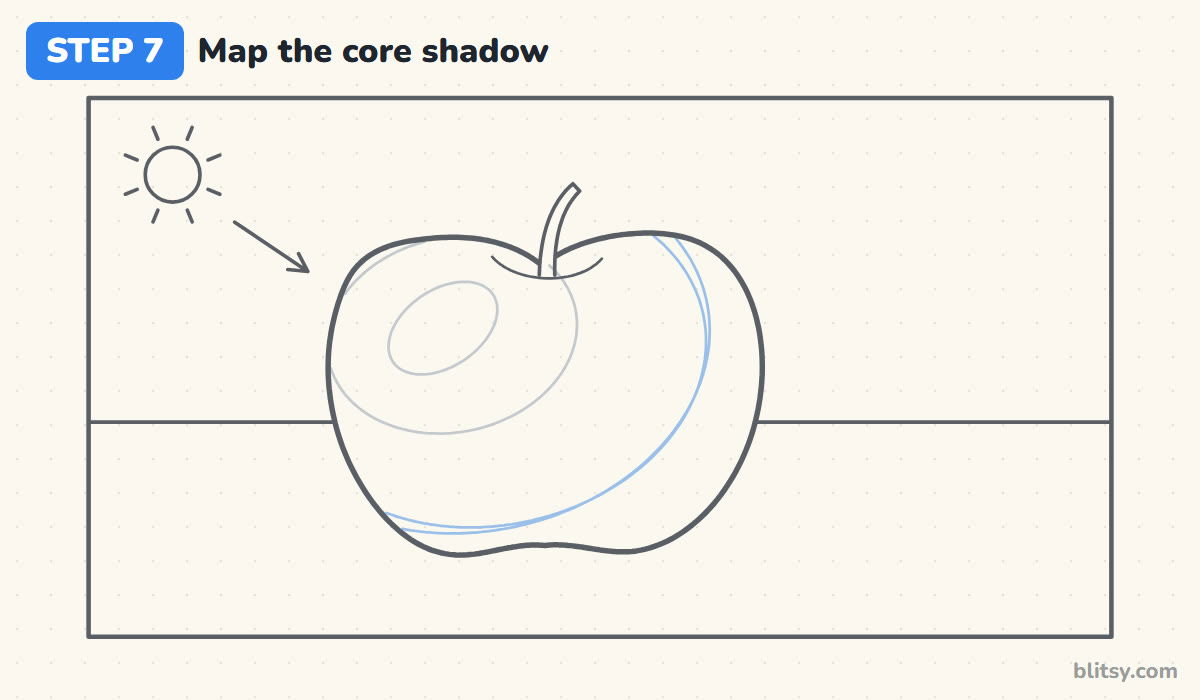
The core shadow is the darkest band, where the form turns away from the light. Draw two curved lines on the lower right: an outer one where the half-tone begins and an inner one for the core. They curve like the apple, never straight across it.



💡 Tip: Squint at your apple. The core shadow is the dark band that's still visible with your eyes half closed.
Step 8: Mark the reflected light and cast shadow
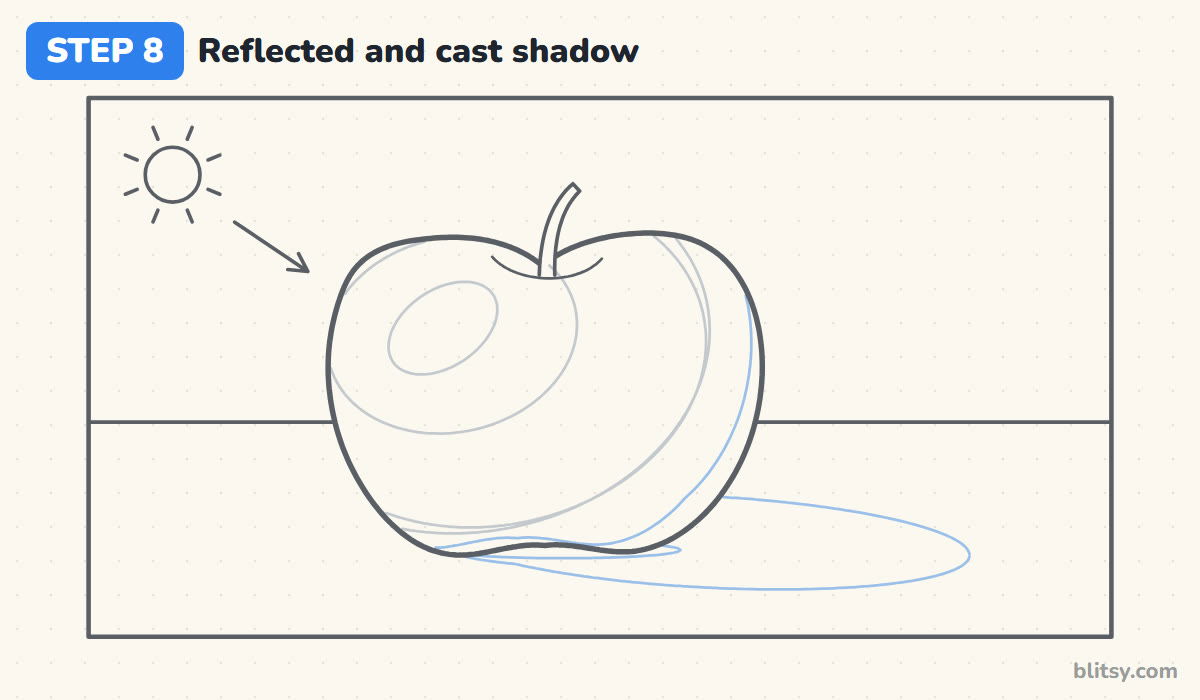
Light bounces off the table back onto the apple, so draw a thin rim along the lower right edge. It's lighter than the core shadow but never as bright as the lit side. Then outline the cast shadow, a long oval stretching away from the light, plus a narrow sliver right under the apple.
💡 Tip: The cast shadow always points away from the sun mark. Check the arrow before you draw it.
Step 9: Firm up the edges and clean up
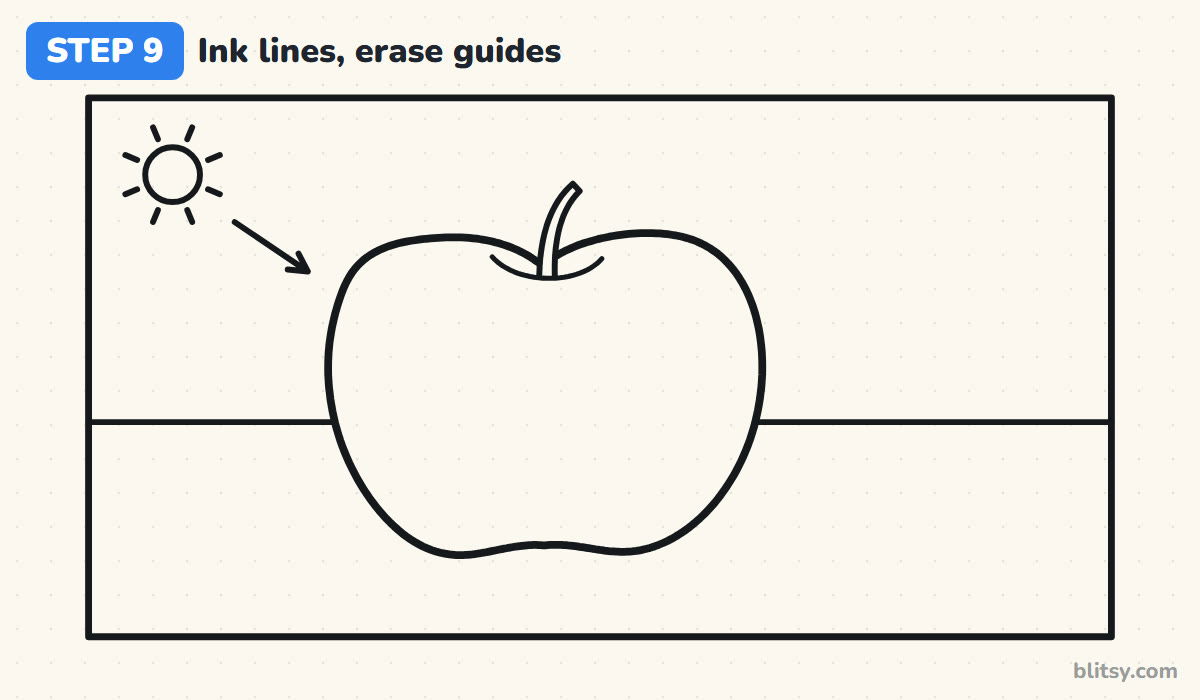
Go over the apple's edge, the stem, the dip, the table line and the border with a firmer line. Then dab the mapping lines with a kneaded eraser until they're only just visible; I keep them faint so I don't lose the shapes. Real objects have no outlines, so on a pencil version keep this edge soft.
💡 Tip: Roll the kneaded eraser to a point and press, don't rub. It lifts graphite without smearing.
Step 10: Lay in the base tone and lit side
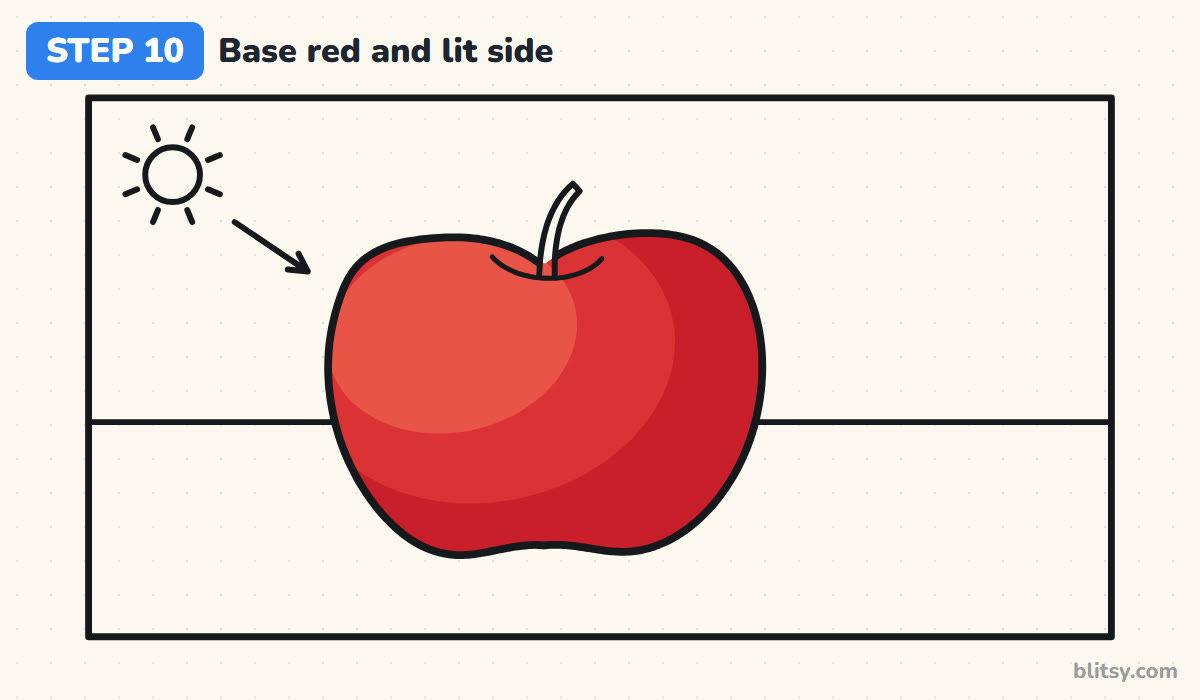
Shade the whole apple with one even, light layer, leaving the highlight untouched. Add a second layer over everything except the big lit area, so the bright side starts to glow. Use small circles or short strokes that follow the curve. Several light layers blend far better than one heavy one.
💡 Tip: Protect the highlight from the start. Untouched paper stays whiter than any spot you erase later.
Step 11: Build the core shadow and the bounce
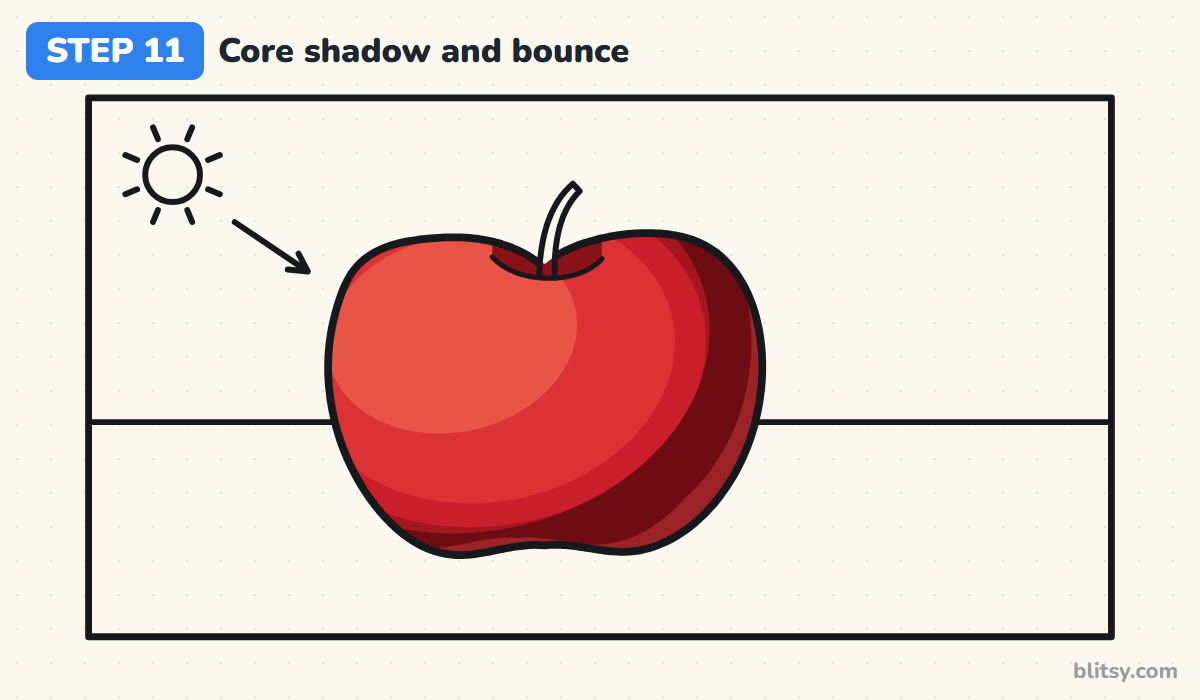
Switch to a 2B or 4B and darken the half-tone band, then press a little more for the core shadow inside it. Keep the reflected rim a step lighter than the core. Blend each band into its neighbor with a stump or tissue, moving along the form. The dip around the stem gets a dark touch too.


💡 Tip: Blend from light toward dark, never the reverse, or you'll drag gray into the bright side.
Step 12: Lift the highlight and drop the shadow
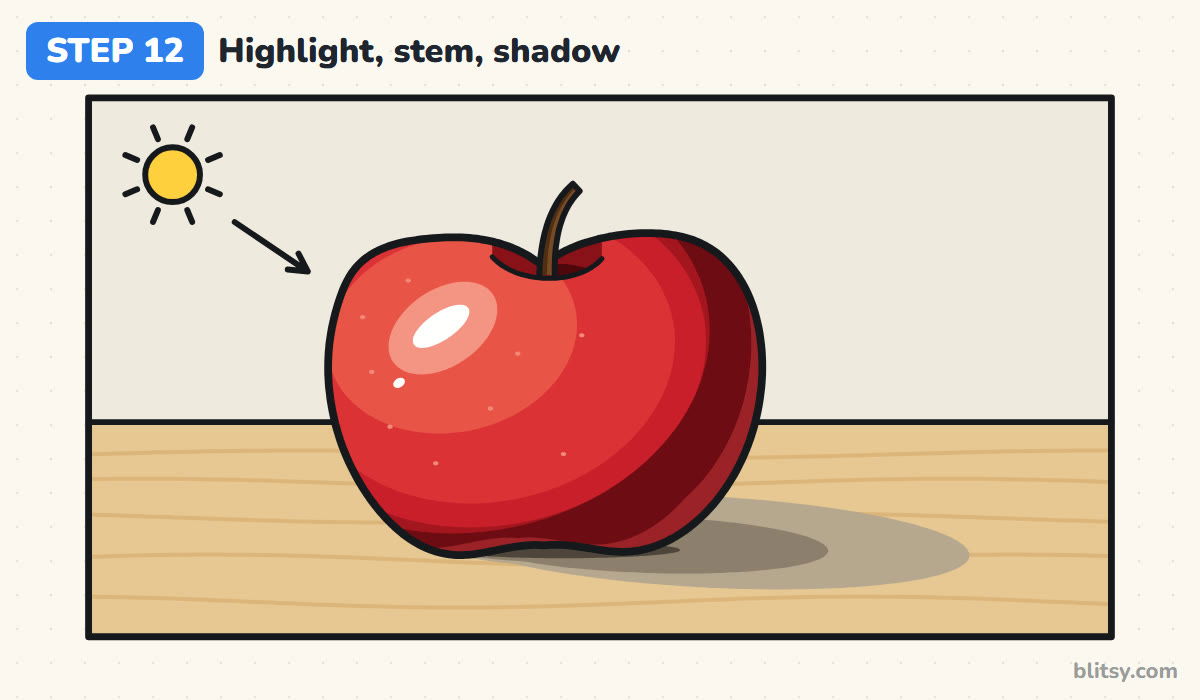
Clean the highlight edge with a pointed eraser and add one tiny second shine below it. Darken the stem's right side. Last, shade the cast shadow: darkest right under the apple, then lighter as it moves away. That dark contact line makes the apple sit on the table instead of hovering.
💡 Tip: Press hardest in the thin sliver where apple meets table. It's the darkest spot in the whole drawing.
Shading Slips That Flatten a Round Apple
- Shadows on every side. Without a fixed light source, beginners darken all the edges. Pick one direction and keep the dark side opposite it.
- Pressing hard from the first layer. Heavy graphite gets shiny and won't erase. Build up three or four light layers instead.
- A reflected light that's too bright. If the bounce light matches the lit side, the apple looks transparent. Keep it clearly darker than any part facing the lamp.
- Hard outline all the way round. A heavy black line kills the illusion in a pencil drawing. Let the values meet the background and keep the edge soft on the light side.
- A floating apple. A light, even cast shadow makes the fruit hover. Darken the narrow occlusion shadow right at the contact point.
Beyond the Apple: Other Objects to Shade
Once the apple feels solid, keep the same lamp and try an egg, an orange or a white mug. The five parts of light stay the same; only the shape and the shine change. If you want a simpler warm-up, the apple drawing tutorial starts with clean outlines, and when you're ready for a harder round form, how to draw a face step by step uses exactly the same light and shadow.
Shiny Apple Coloring Page and a Printable Shading Guide
Younger artists can practice the same idea with color. The realistic apple coloring page shows a finished example next to a color key: light red on the sunny side, dark red away from it and a white spot left bare for the shine. The step-by-step guide PDF holds all 12 steps with tips, two per page.
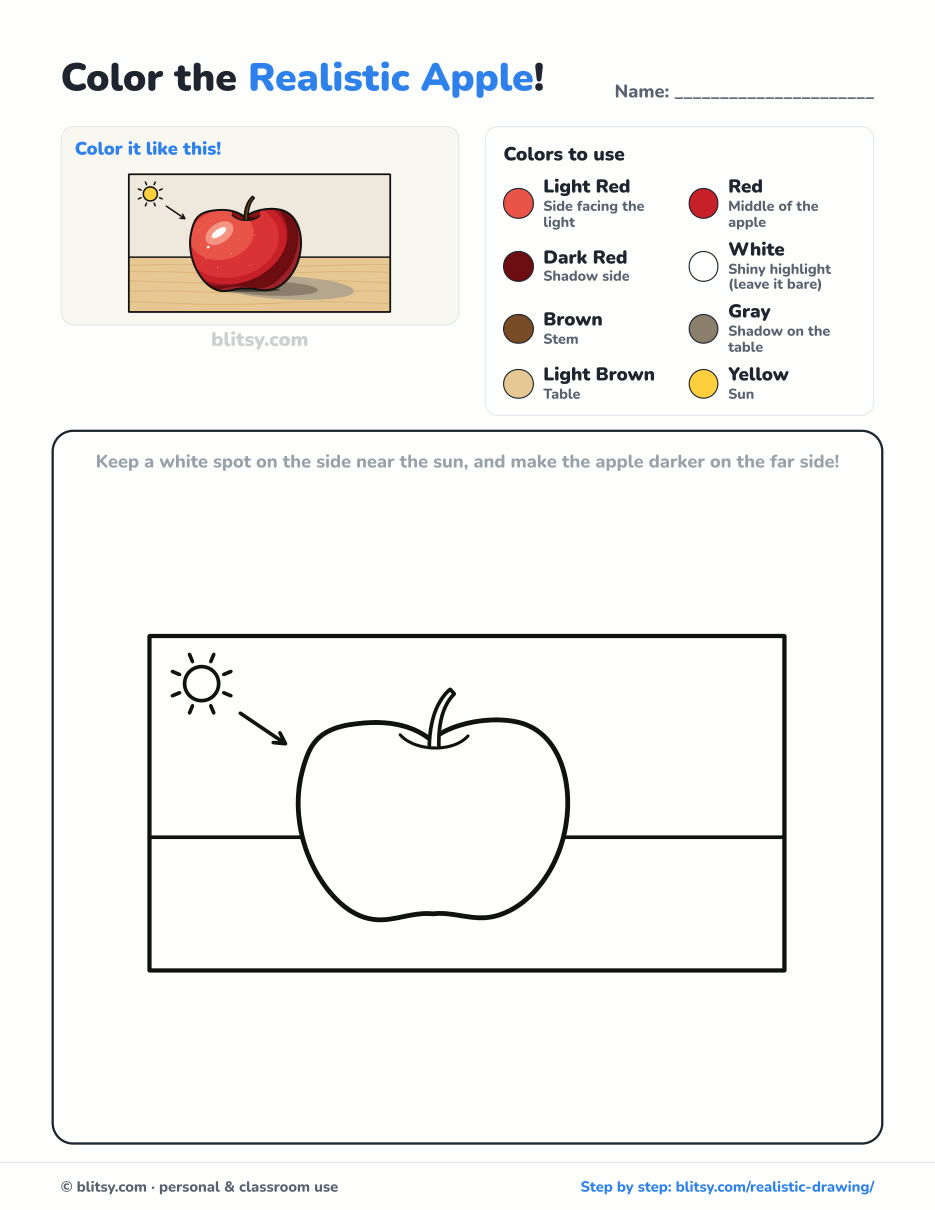
Black outlines with a colored example and the color names at the top. Ready to print and color.
⬇️ Download Coloring PageEvery step picture with its instructions and tips, to keep beside your paper while you draw.
⬇️ Download Drawing Guide📱 On a phone? Tap a download button, then open the file and choose Share → Save to Files or Print. On a computer, the PDF opens or saves straight to your Downloads folder.
Pin the Apple Lesson Before Your Next Still Life
Realism Questions Beginners Keep Asking
How do beginners start drawing realistic objects?
Start with one simple object under a single light, like an apple or an egg. Draw a light outline, mark where the light comes from, then shade the big value shapes before any small details.
What are the five parts of light in shading?
The highlight, the light tone, the core shadow, the reflected light and the cast shadow. Learning to see those five on a round object is the base of realistic drawing.
Which pencils are best for realistic drawing?
An HB for sketching and light layers, a 2B for middle values and a 4B or 6B for the darkest shadows. You can do a lot with just an HB and a 2B.
How do you blend pencil shading smoothly?
Shade in light layers that follow the form, then rub gently with a blending stump or folded tissue. Blend from light toward dark, and lift highlights with a kneaded eraser.
Put the apple under your lamp, squint at it for a moment, and shade what you see rather than what you expect. 🍎
Related posts:
 How to Draw a Tree Step by Step (Easy Leafy Apple Tree)
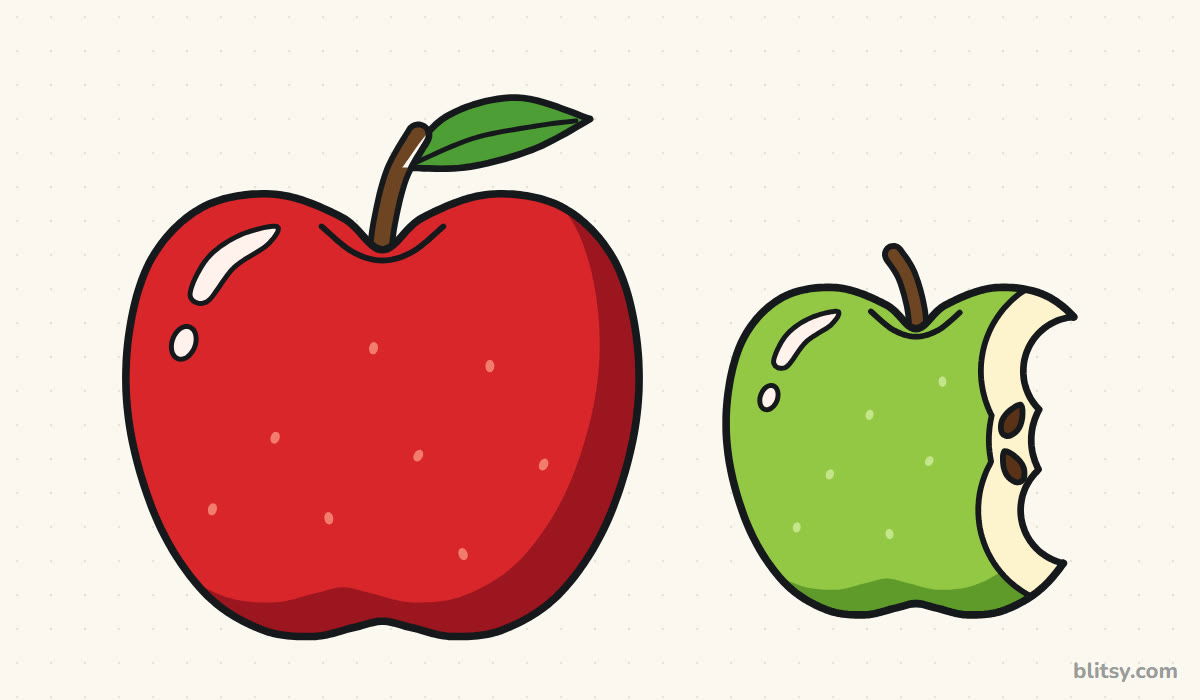 How to Draw an Apple Step by Step (Red and Bitten Green)
 How to Draw a Car Step by Step (Easy Drawing for Beginners)
 Oil Pastel Drawing Step by Step (Easy Sunset for Beginners)
 Summer Drawing Step by Step (Easy Beach Scene for Beginners)
 How to Draw a Rocket Step by Step (Easy Blast-Off Drawing)
 How to Draw Rocks Step by Step (Easy Boulder Drawing)
 How to Draw Flames Step by Step (Easy Campfire Drawing)
 Halloween Drawing Step by Step (Cute Haunted House for Kids)
 How to Draw a Scarecrow Step by Step (Easy Fall Drawing)
 Love Drawing Step by Step: Two Hugging Bears (Easy)
 How to Draw a Whale Step by Step (Easy for Beginners)

