
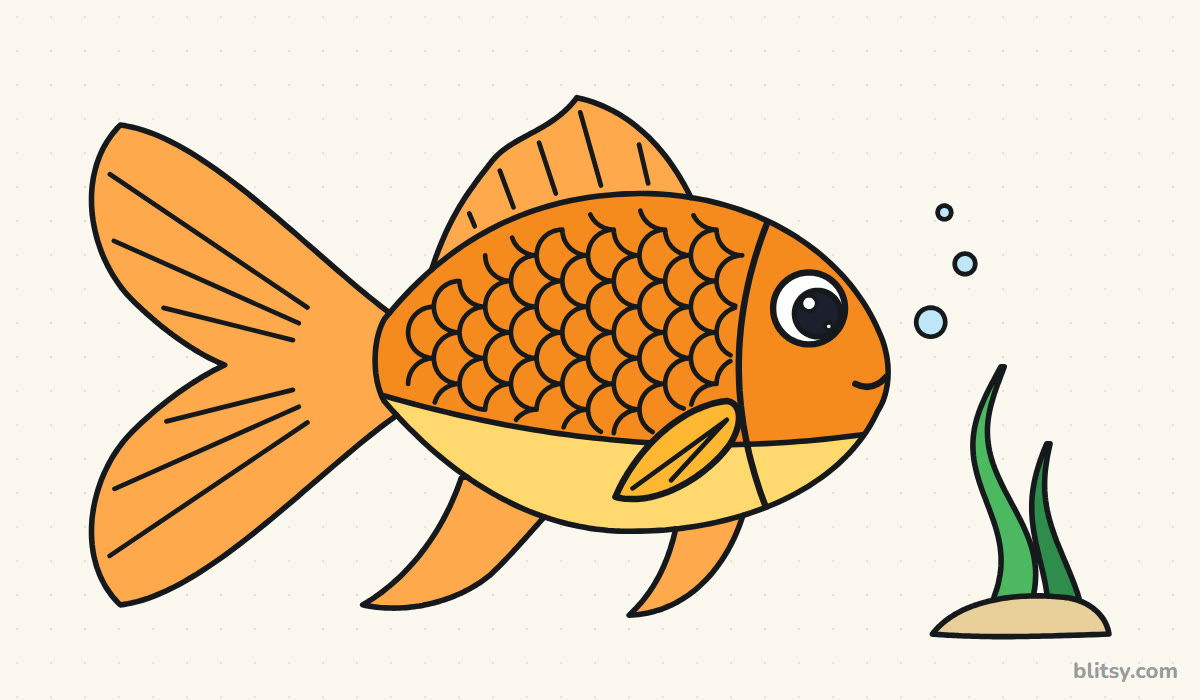
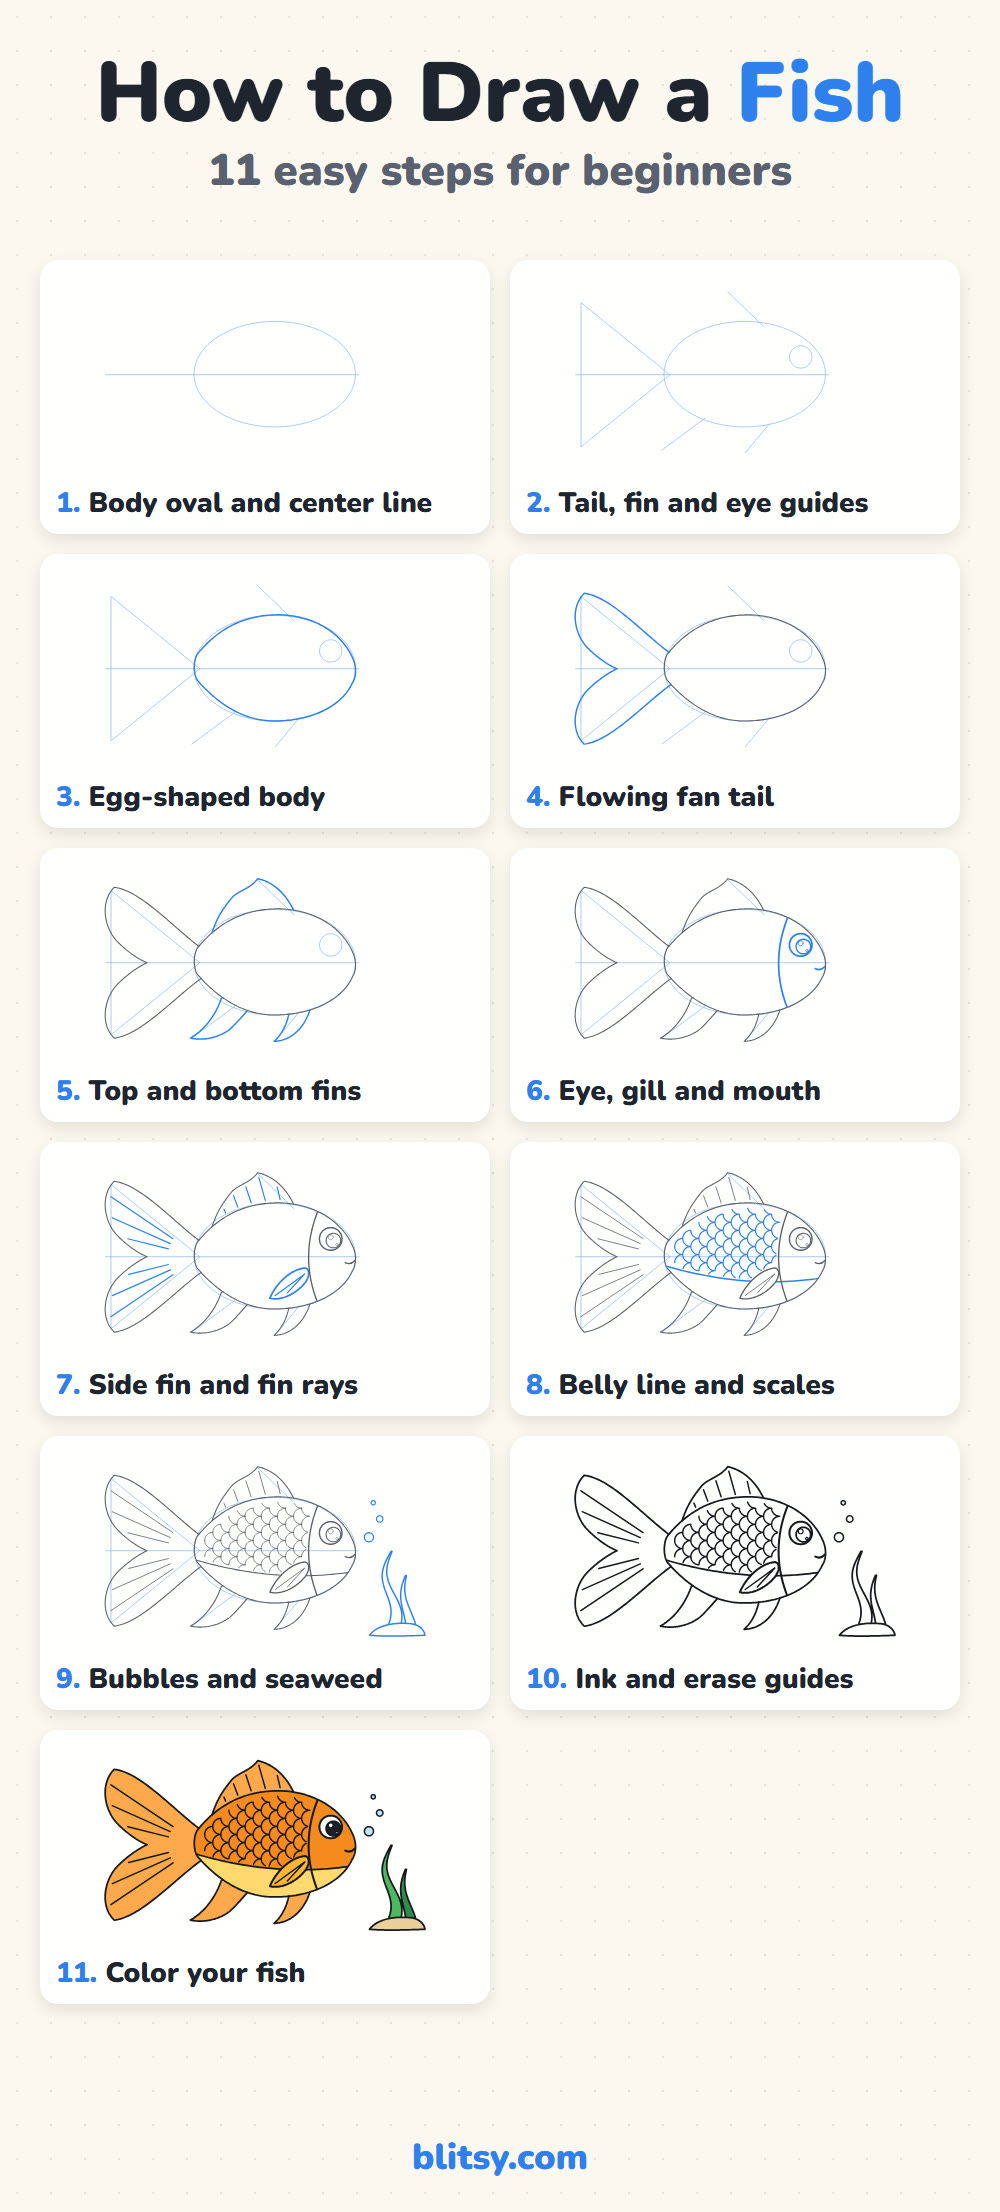
A goldfish is my favorite first fish to teach, because almost everything about it is round and forgiving. The body is basically an egg, and the fins can wobble a little without looking wrong. Below I'll show you how to draw a fish step by step, starting with a light oval and ending with an orange goldfish, a yellow belly, a floaty tail and a little patch of seaweed. You don't need any drawing experience. If you can draw a circle and a few curved lines, you can finish this one.
One small part arrives in every picture below. Look for the blue lines: that is the bit you draw in that step. Everything gray is already on your page, and the pale blue shapes are soft guides that get erased near the end.
Quick overview
⏱️ Time: around 30 minutes, a bit longer with all the scales
🎯 Level: easy; kids aged 6 and up can follow along
✏️ Steps: 11
🐠 You'll draw: a smiling goldfish swimming to the right, with bubbles and seaweed
Goldfish Supplies Before You Start
- A regular pencil (HB or 2B)
- A soft eraser
- A fine black marker or pen for the final lines
- Colored pencils or markers in orange, light orange, yellow, green, light blue and tan
- Plain paper, turned sideways
The tail is almost as wide as the body, so a landscape sheet gives the whole fish room to swim.
How to Draw a Fish Step by Step
Step 1: Draw the body oval and a center line
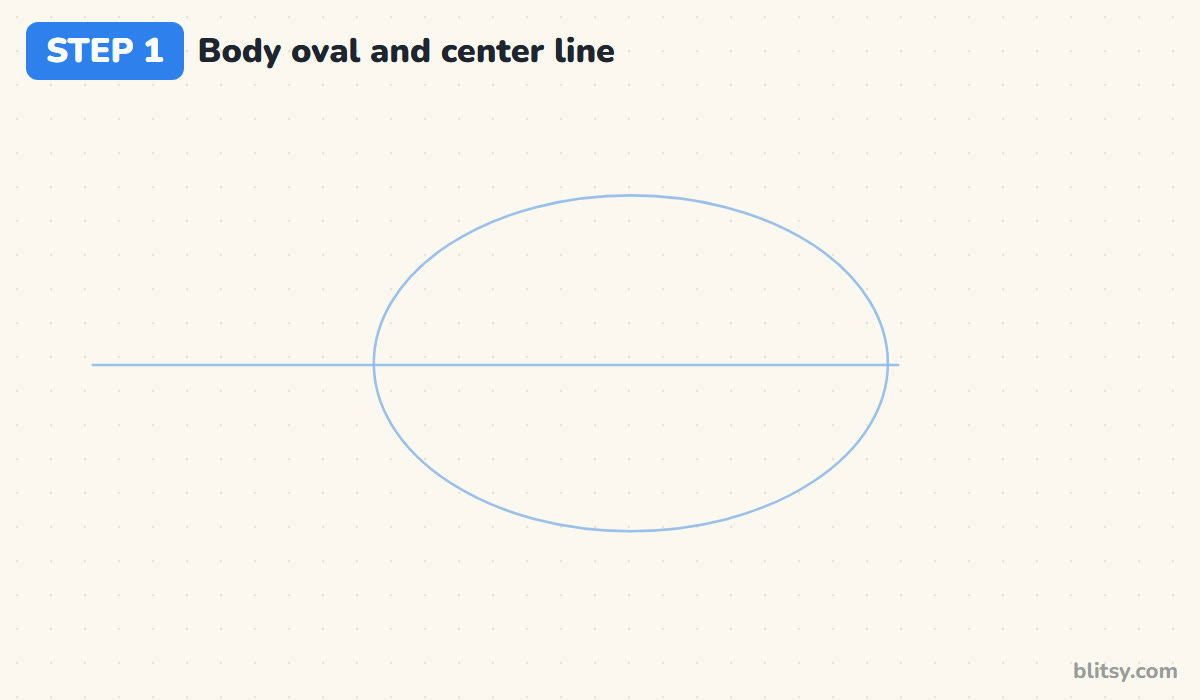
Begin a little right of the middle of your page with a wide oval, about one and a half times as wide as it is tall. Then run a straight sideways line through its middle and let it stick out far to the left. That line marks where the tail will go and keeps the fish level.
💡 Tip: Draw the oval in two or three light passes rather than one hard loop.
Step 2: Add guides for the tail, fins and eye
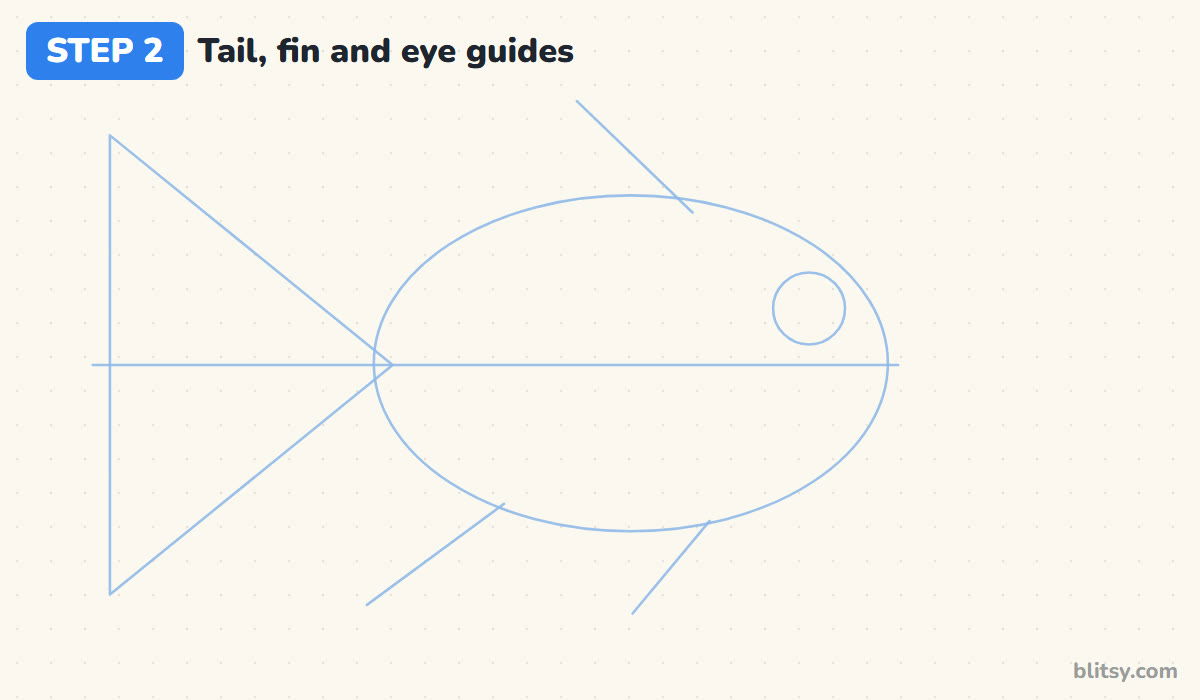
On the left end of the oval, draw a big triangle lying on its side, with its point touching the body. Above the body, add one slanted line for the top fin, and two short slanted lines underneath for the bottom fins. Finally, place a small circle near the right end, a little above the center line. That's the eye.
💡 Tip: Make the triangle tall. A small tail guide always gives you a stubby little tail.
Step 3: Shape the egg-shaped body
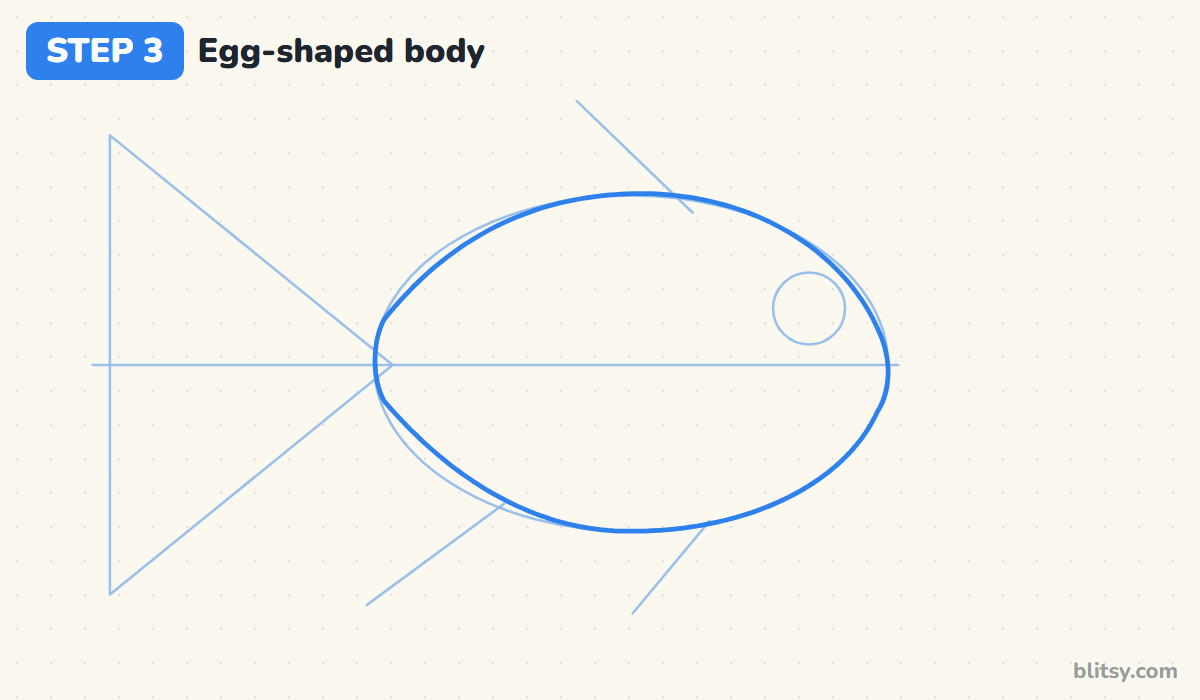
Trace over the oval, but change it slightly. The head end on the right stays round and full, and the left end narrows into a short neck where the tail joins. I think of it as an egg lying on its side with the pointed end toward the tail. Pinch the curve in a little right at the tail point.




💡 Tip: Keep the front of the head round. A pointy nose turns a goldfish into a shark.
Step 4: Draw a flowing fan tail
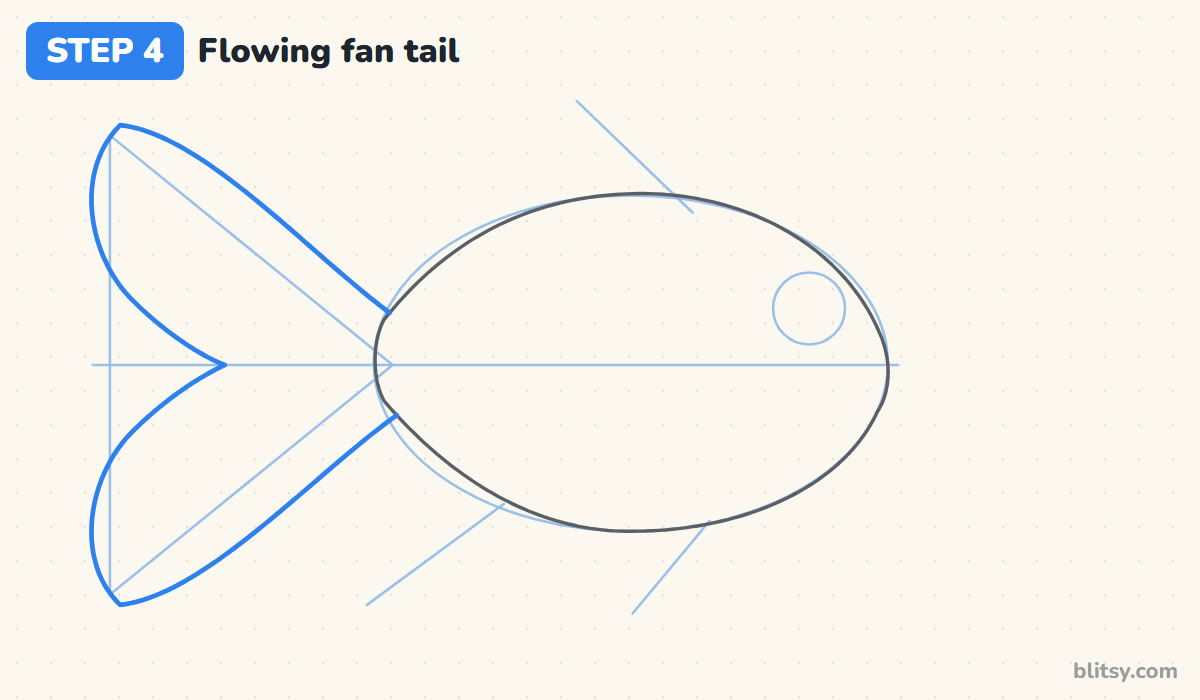
Use the triangle as a frame. Start at the top of the tail joint, sweep a curve up and out to the top corner, then curve back in toward the center line to make a V-shaped notch. Repeat the same shape below for the lower lobe. Both lobes should bulge outward like puffed sails.
💡 Tip: Swing your whole arm for the long tail curves, not only your wrist.
Step 5: Add the top and bottom fins
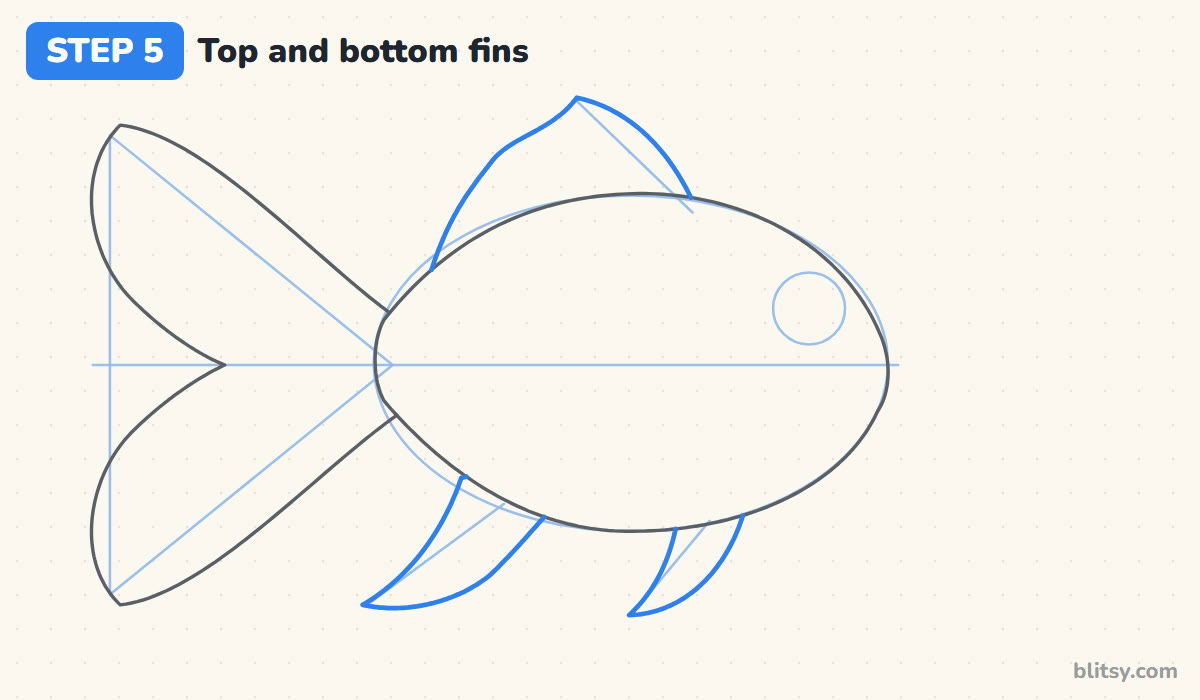
The top fin starts on the back near the head, rises to a peak above your slanted guide, and then slopes down toward the tail with a gentle wave. Underneath, draw two pointed fins that sweep back toward the tail, a longer one at the rear and a shorter one under the chest. Stop each fin line where it touches the body.
💡 Tip: Point every fin slightly backward. Fins that point forward make the fish look like it's reversing.
Step 6: Draw the eye, gill and mouth
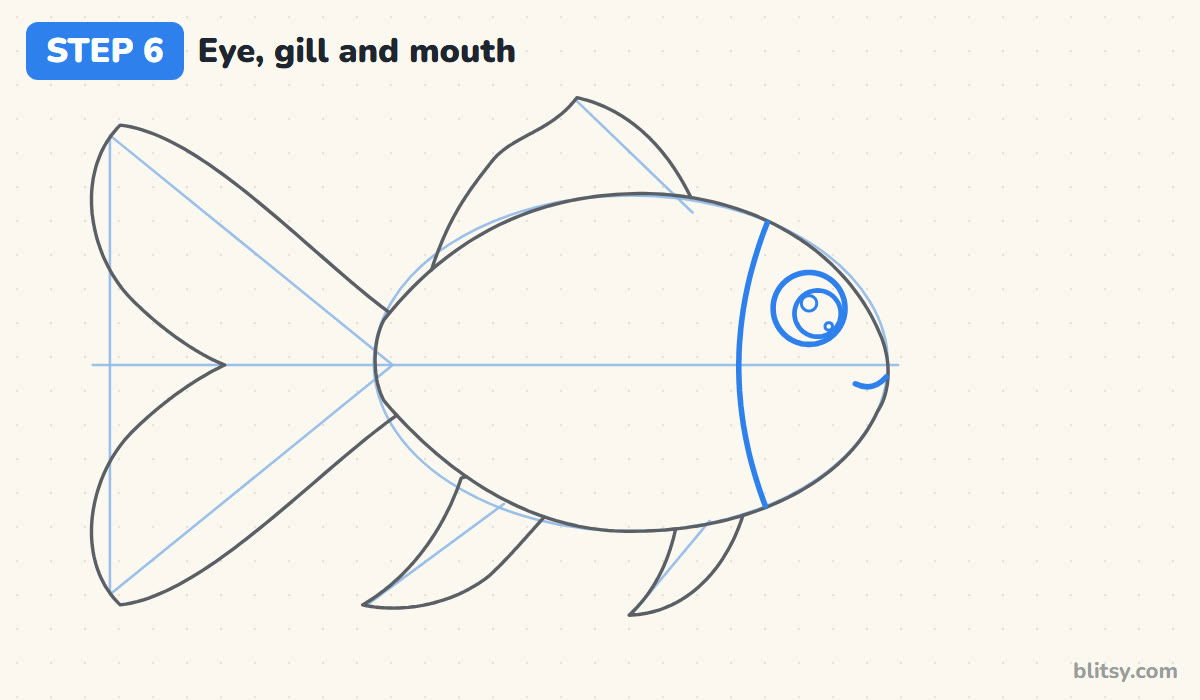
Go over the eye guide with a clean circle, then draw a smaller circle inside it, shifted toward the front, for the pupil. Add one round shine and a tiny dot. Next, draw the gill as a long curve from the top of the body to the bottom, just behind the eye, bowing toward the tail. Finish with a small upturned mouth at the very front.
💡 Tip: Leave the shines empty and round. They're what make the eye look wet and alive.
Step 7: Add the side fin and fin rays
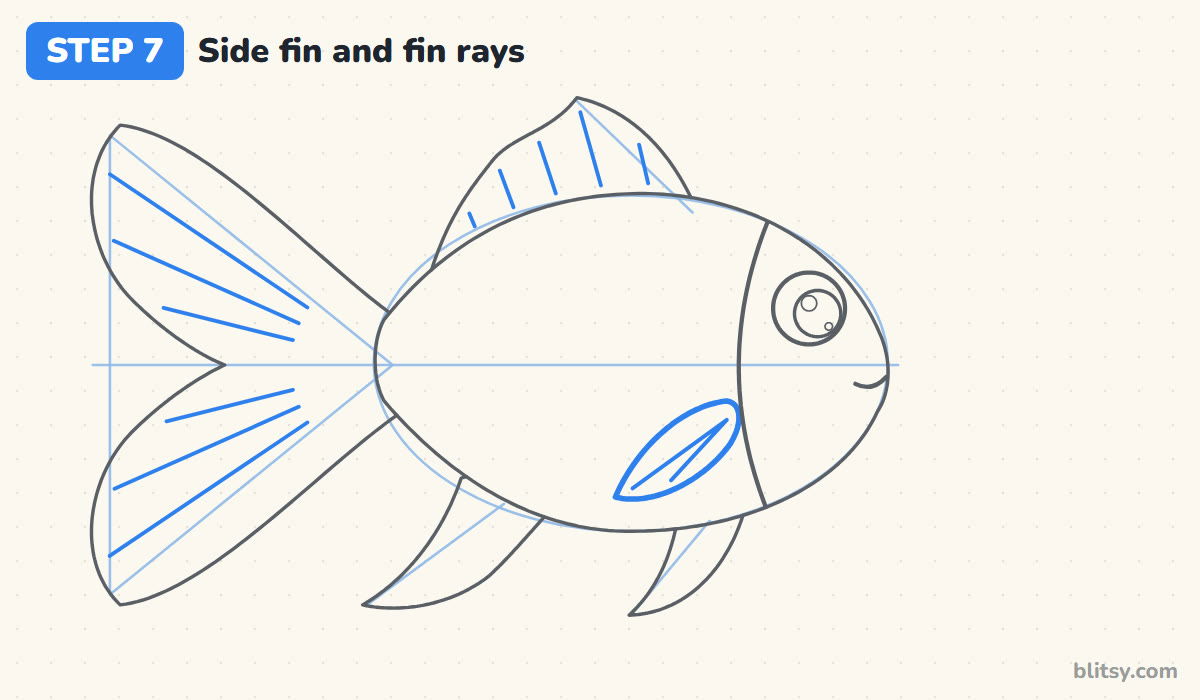
Just behind the gill and below the middle, draw a leaf-shaped side fin that points down and back. Now give the fins some texture. Draw a few straight rays across each tail lobe, starting a little away from the body so they don't crowd the joint. Add four or five slanted lines on the top fin and two thin lines inside the side fin.


💡 Tip: Space the rays out generously. Five clean lines read better than fifteen crowded ones.
Step 8: Draw the belly line and scales
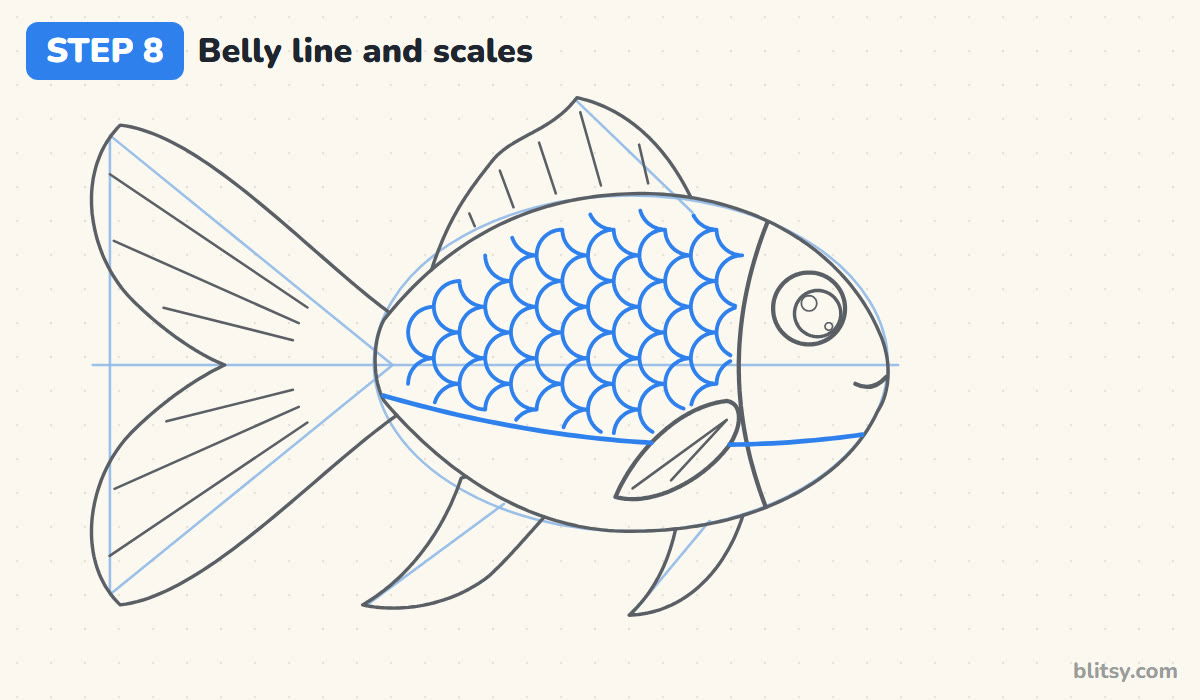
Draw a soft curve from the mouth back to the tail, through the lower third of the body. Below it is the belly, which stays smooth. Above it come the scales: small half circles in rows from the gill toward the tail, each bulging toward the tail. Start the next column halfway down the one before it, so the rows interlock like roof tiles.
💡 Tip: Finish one full column before starting the next. It keeps the pattern from drifting.
Step 9: Add bubbles and seaweed
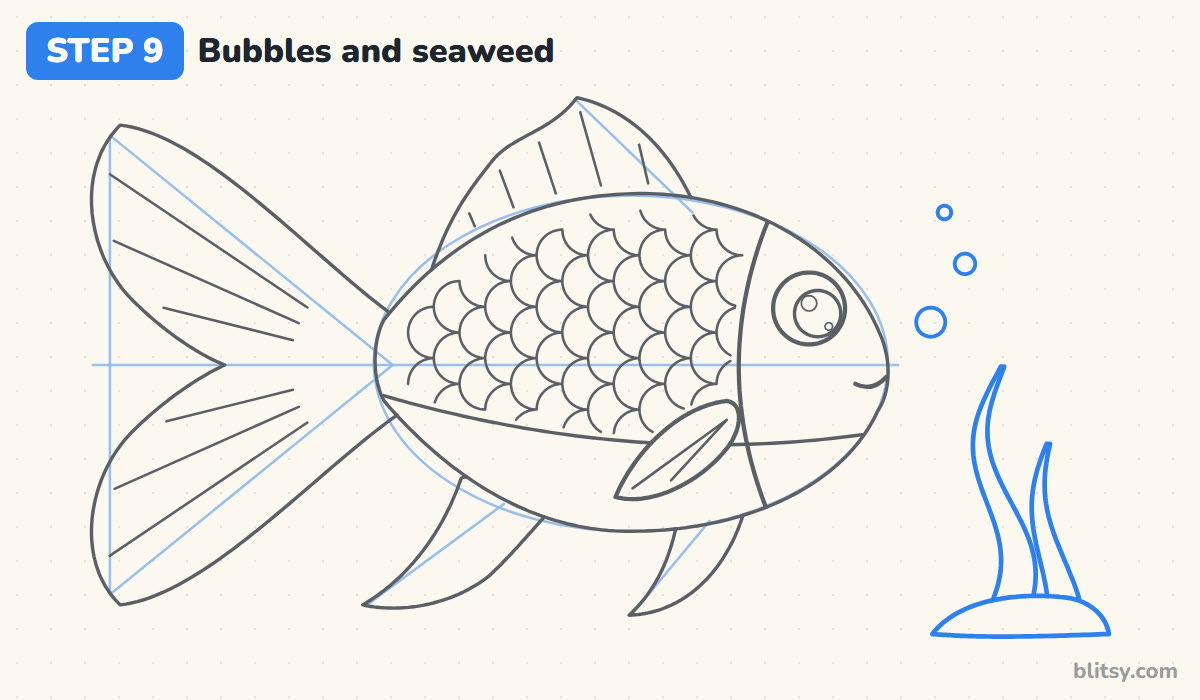
Put three bubbles in front of the mouth, getting smaller as they float up. To the right of the fish, draw two wavy blades of seaweed growing out of a small mound of sand. The front blade is taller, and the back one peeks out from behind it. This small scene tells everyone your fish is underwater.
💡 Tip: Wiggle the seaweed in an S shape. Straight blades look like grass on land.
Step 10: Ink the lines and erase the guides
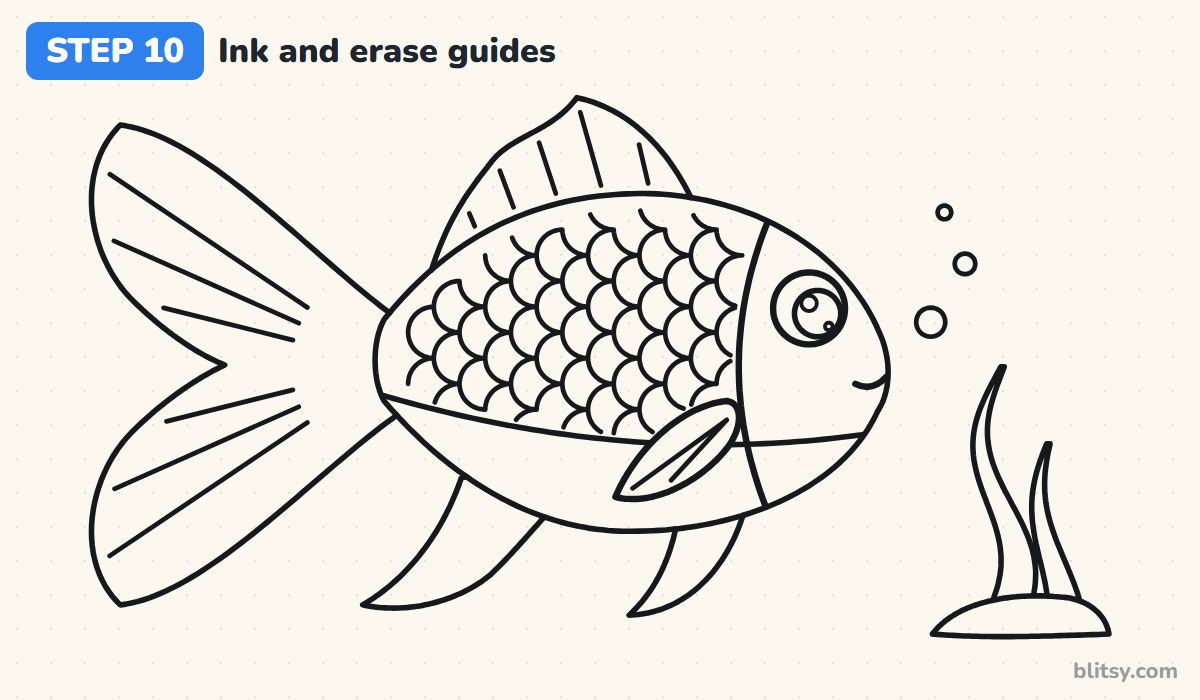
Take your black marker and trace every line you want to keep, from the body outline and fins down to the smallest scale and the sand mound. Skip the oval, the center line, the triangle and the fin guides. Let the ink dry for a minute, then erase all the pencil underneath.
💡 Tip: Ink the scales last, when your hand is warmed up and steady.
Step 11: Color your fish
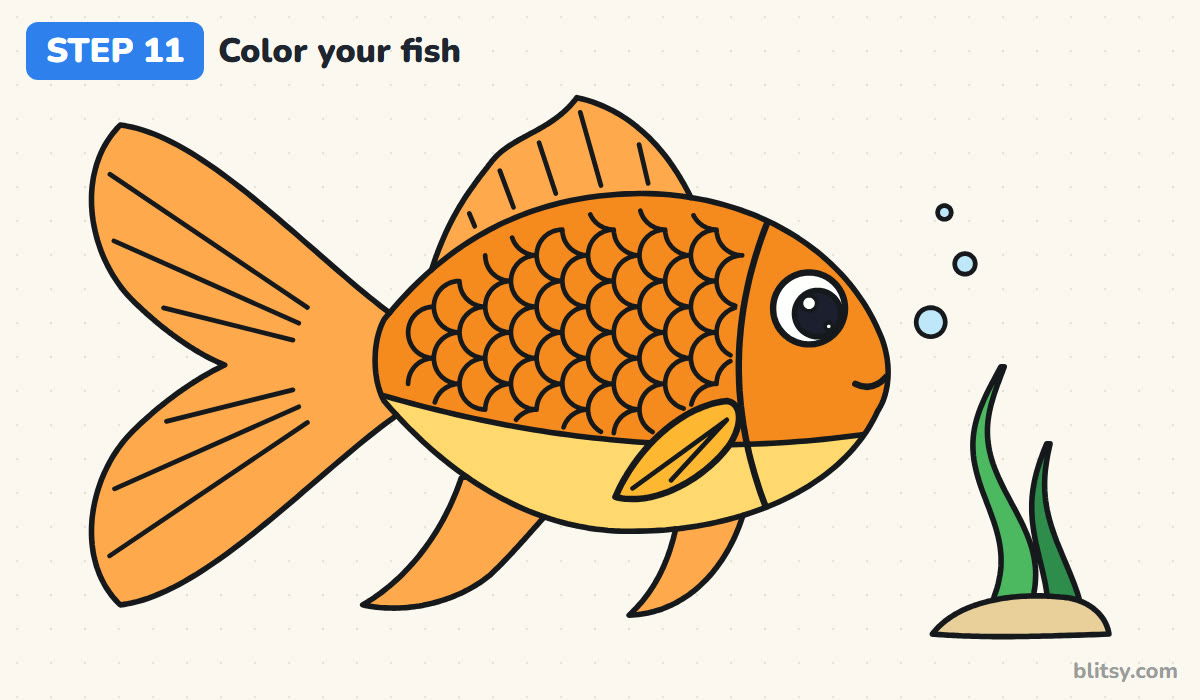
Color the body and scales a bright orange. Use a lighter orange for the tail and the top and bottom fins, which makes them look thin and see-through. The belly is yellow, and I like a gold side fin so it stands out against the body. Fill the pupil black and leave the shines white. Finish with light blue bubbles, two greens for the seaweed and tan sand.
💡 Tip: Color the tail in strokes that follow the ray lines outward.
Why a Fish Drawing Can Look Stiff
- A tail that is too small. A goldfish tail is nearly as long as the body. Draw the triangle guide big, and the tail follows.
- Scales all over the fish. Covering the head and belly makes the drawing busy. Keep scales between the gill and the tail, above the belly line.
- Fins glued flat against the body. Let each fin swing outward and back with some space underneath. That gap is what suggests swimming.
- The eye in the middle of the body. Fish eyes sit close to the front of the head. Place it well forward, above the mouth.
- Pressing hard on the guides. Dark guide lines won't erase cleanly. Keep them faint enough that you can barely see them.
Turn This Goldfish Into Other Fish
The same oval works for lots of fish. Stretch it longer and paint it blue and yellow for a tropical reef fish, or make it tall and flat with long trailing fins for an angelfish. A calico goldfish gets patches of orange and black on white instead of one color. Small kids can skip the scales entirely; the fan tail and the shiny eye still say fish. To fill an ocean around your goldfish, add a friendly coral octopus from the octopus drawing tutorial or a floaty pink one from the jellyfish drawing tutorial.
Goldfish Coloring Page and Printable Drawing Steps
Want to color on paper? The free goldfish coloring page shows a colored example and a key with every color word, above a large clean outline. The printable step-by-step guide has all 11 steps with their tips, ready for Letter or A4.
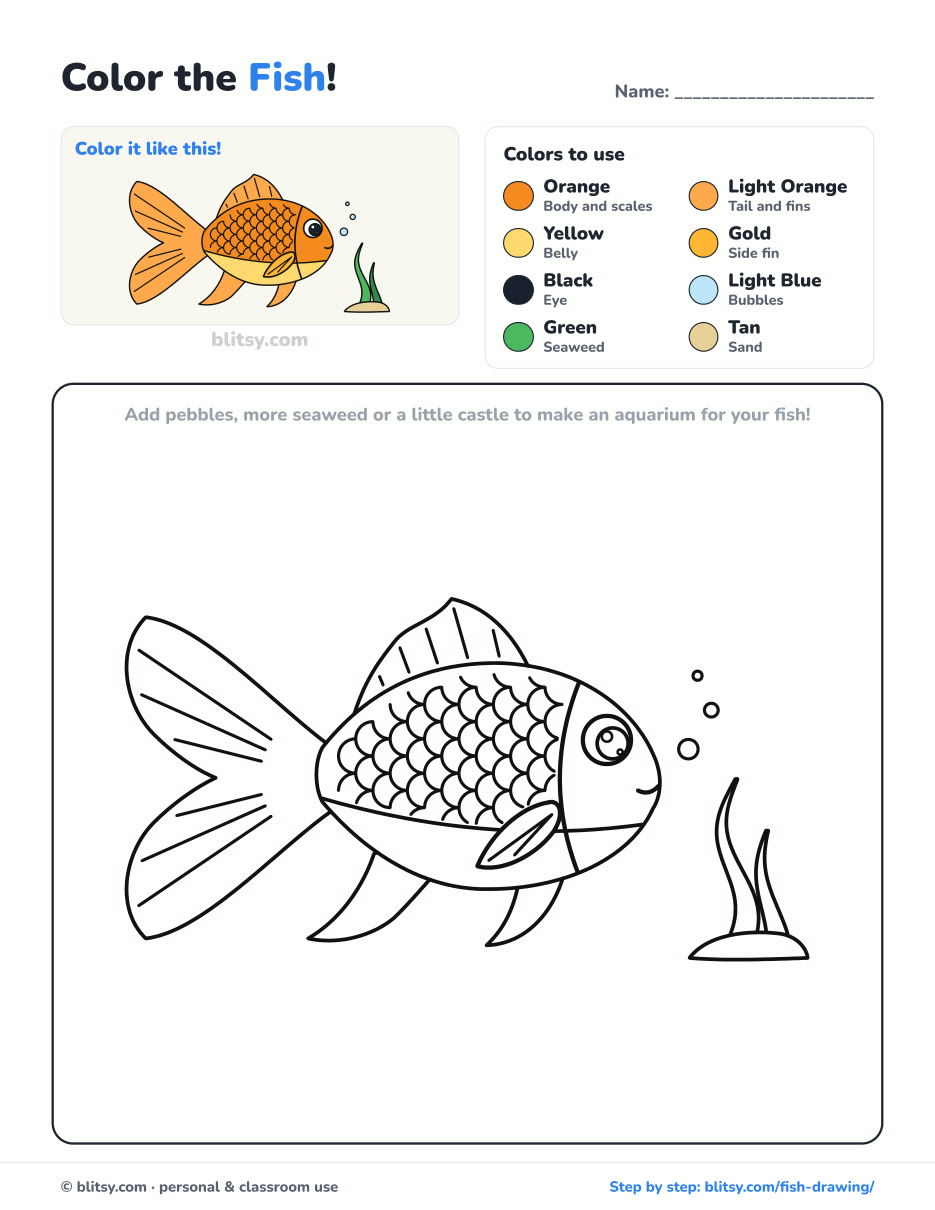
Black outlines with a colored example and the color names at the top. Ready to print and color.
⬇️ Download Coloring PageEvery step picture with its instructions and tips, to keep beside your paper while you draw.
⬇️ Download Drawing Guide📱 On a phone? Tap a download button, then open the file and choose Share → Save to Files or Print. On a computer, the PDF opens or saves straight to your Downloads folder.
Keep the Goldfish Steps on Pinterest
Beyond the Goldfish: Animals, Birds and Outfits
These links each open one step-by-step tutorial, from sea creatures and birds to a few clothes to draw.
- Jellyfish Drawing: The jellyfish drawing tutorial draws a pink bell with a sleepy smile and a baby beside it.
- Ladybug Drawing: Draw a round red ladybug on a leaf with this how to draw a ladybug guide.
- Dove Drawing: A peace dove with wings up takes twelve steps in the dove drawing tutorial.
- Peacock Drawing: Learn how to draw a peacock with its tail fanned wide open.
- Shoe Drawing: The shoe drawing tutorial pairs a red high-top with a low-top sneaker.
- Feather Drawing: Two feathers start from a curved line and a leaf shape in the feather drawing step by step lesson.
- Mask Drawing: Draw a purple masquerade mask with gold trim in this mask drawing tutorial.
- Lion Drawing: A kind-eyed lion with a big mane waits in the easy lion drawing tutorial.
- Hoodie Drawing: The hoodie drawing tutorial shows one hoodie from the front and the back.
- Cardinal Drawing: Draw a perched red cardinal with its black mask using the cardinal drawing step by step lesson.
- Spider Drawing: One silk line, one web and one friendly spider: that is the spider drawing tutorial.
- French Bulldog Drawing: The French bulldog drawing tutorial finishes with a bow tie on a square-headed Frenchie.
- Chicken Drawing: A hen and a chick on a patch of grass come from a circle and an oval in the chicken drawing tutorial.
- Suit Drawing: Learn how to draw a suit step by step, with a jacket, trousers and a striped tie.
Goldfish Drawing Questions From Beginners
What is the easiest fish to draw?
A goldfish is one of the easiest, because its body is a simple egg shape and its fins are soft curves. Start with an oval and a triangle, and the rest builds on those.
How do you draw fish scales easily?
Draw small half circles in columns, each bulging toward the tail, and start every new column halfway down the previous one. Keep them inside the body and above the belly.
How long does it take to draw a fish?
About 30 minutes for this goldfish, including coloring. Without the scales and the seaweed, younger kids can finish in 15 to 20 minutes.
What colors should I use for a goldfish?
Bright orange for the body, a lighter orange for the fins and tail, and yellow for the belly. Add black for the pupil and green for any plants around it.
Somewhere on a blank page there's room for a goldfish, so start with that faint oval and find out what color yours wants to be. 🐠✏️
Related posts:
 How to Draw a Car Step by Step (Easy Drawing for Beginners)
 How to Draw Godzilla Step by Step (Easy Kaiju for Beginners)
 How to Draw a Whale Step by Step (Easy for Beginners)
 How to Draw a Rat Step by Step (Easy for Beginners)
 How to Draw an Arctic Fox Step by Step (Easy for Beginners)
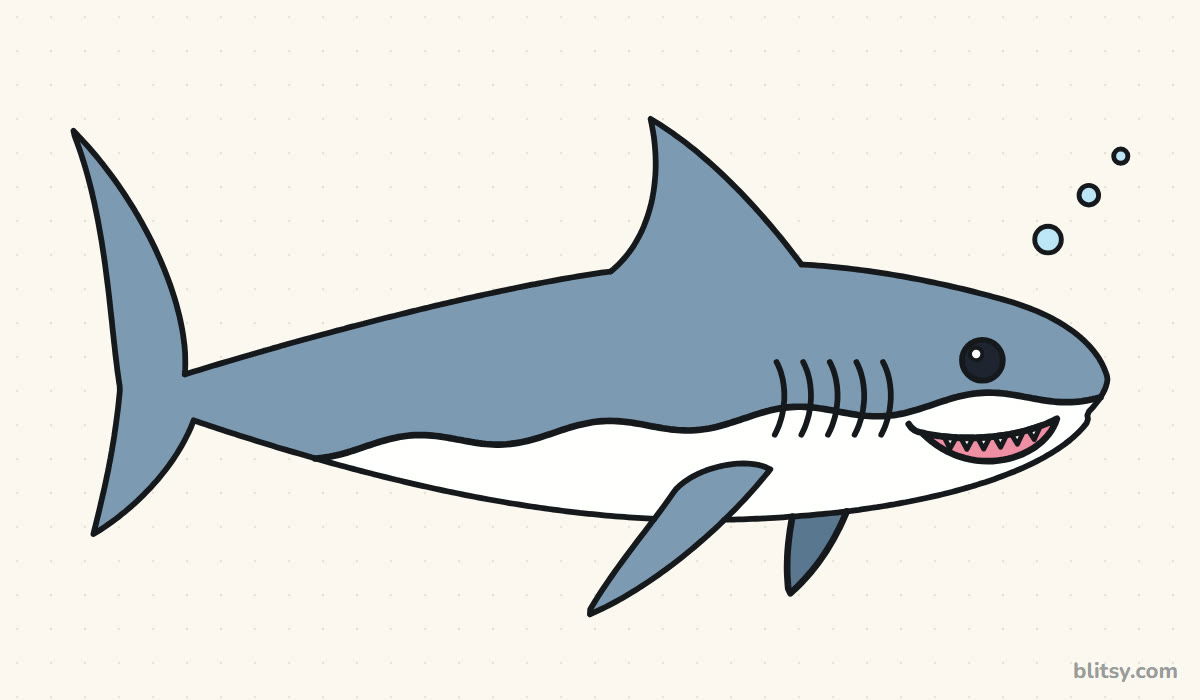 How to Draw a Shark Step by Step (Easy for Beginners)
 How to Draw a Dog Step by Step (Easy Side View for Beginners)
 How to Draw a Chicken Step by Step (Easy for Beginners)
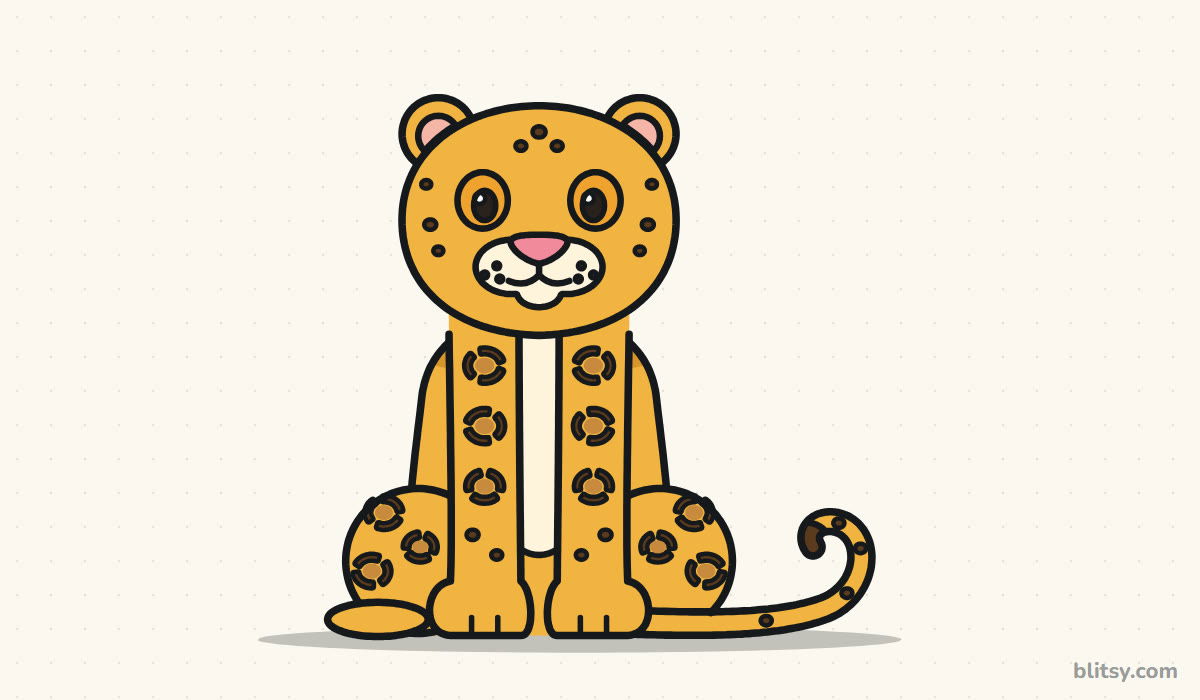 How to Draw a Leopard Step by Step (Easy for Beginners)
 How to Draw a Light Bulb Step by Step (Easy for Beginners)
 How to Draw a Crow Step by Step (Easy for Beginners)
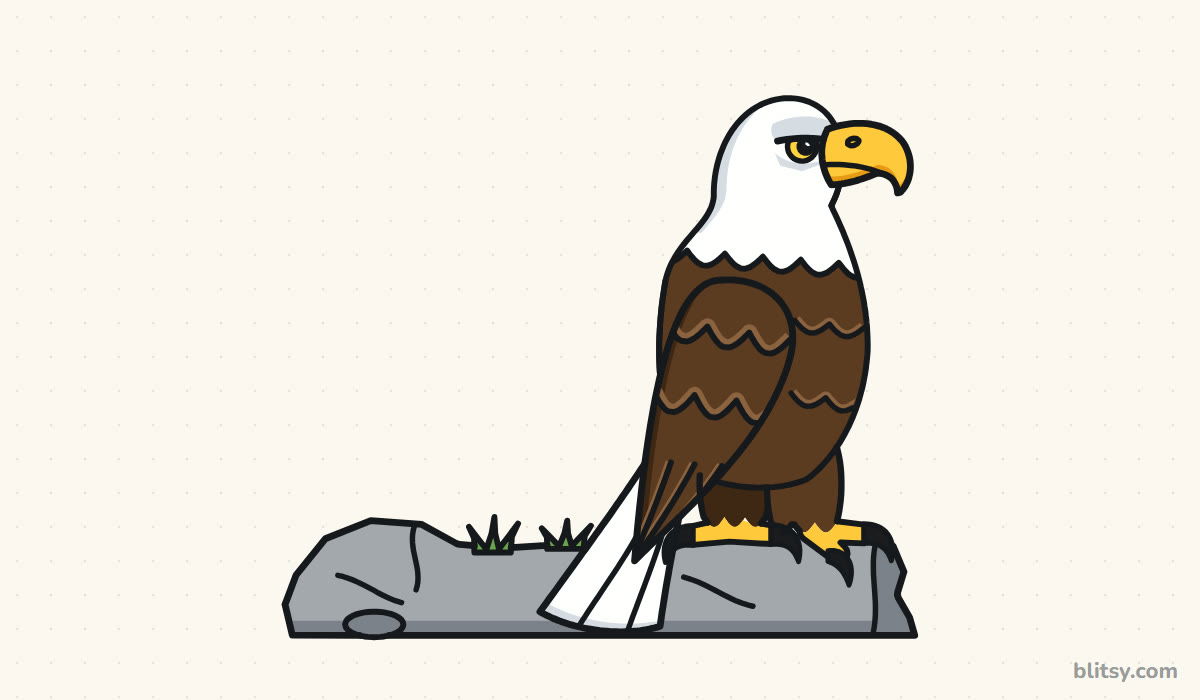 How to Draw an Eagle Step by Step (Easy for Beginners)

