
Houseplants are one of the friendliest things to draw, because no two leaves have to match and nobody will tell you a leaf is the wrong size. This lesson shows you how to draw a plant step by step, using a monstera in a striped pot as our model. I picked the monstera because its split leaves are easy to recognise, even in a simple cartoon. You'll start every leaf from one curved line, so the shapes come out balanced without any guessing.
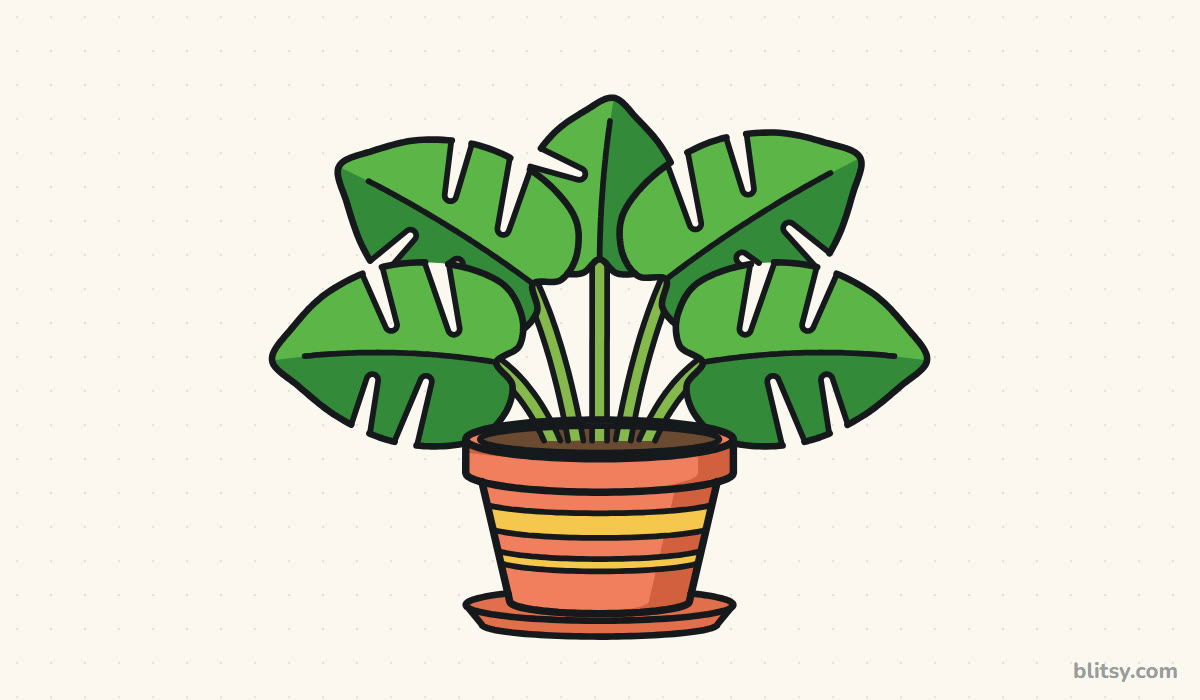
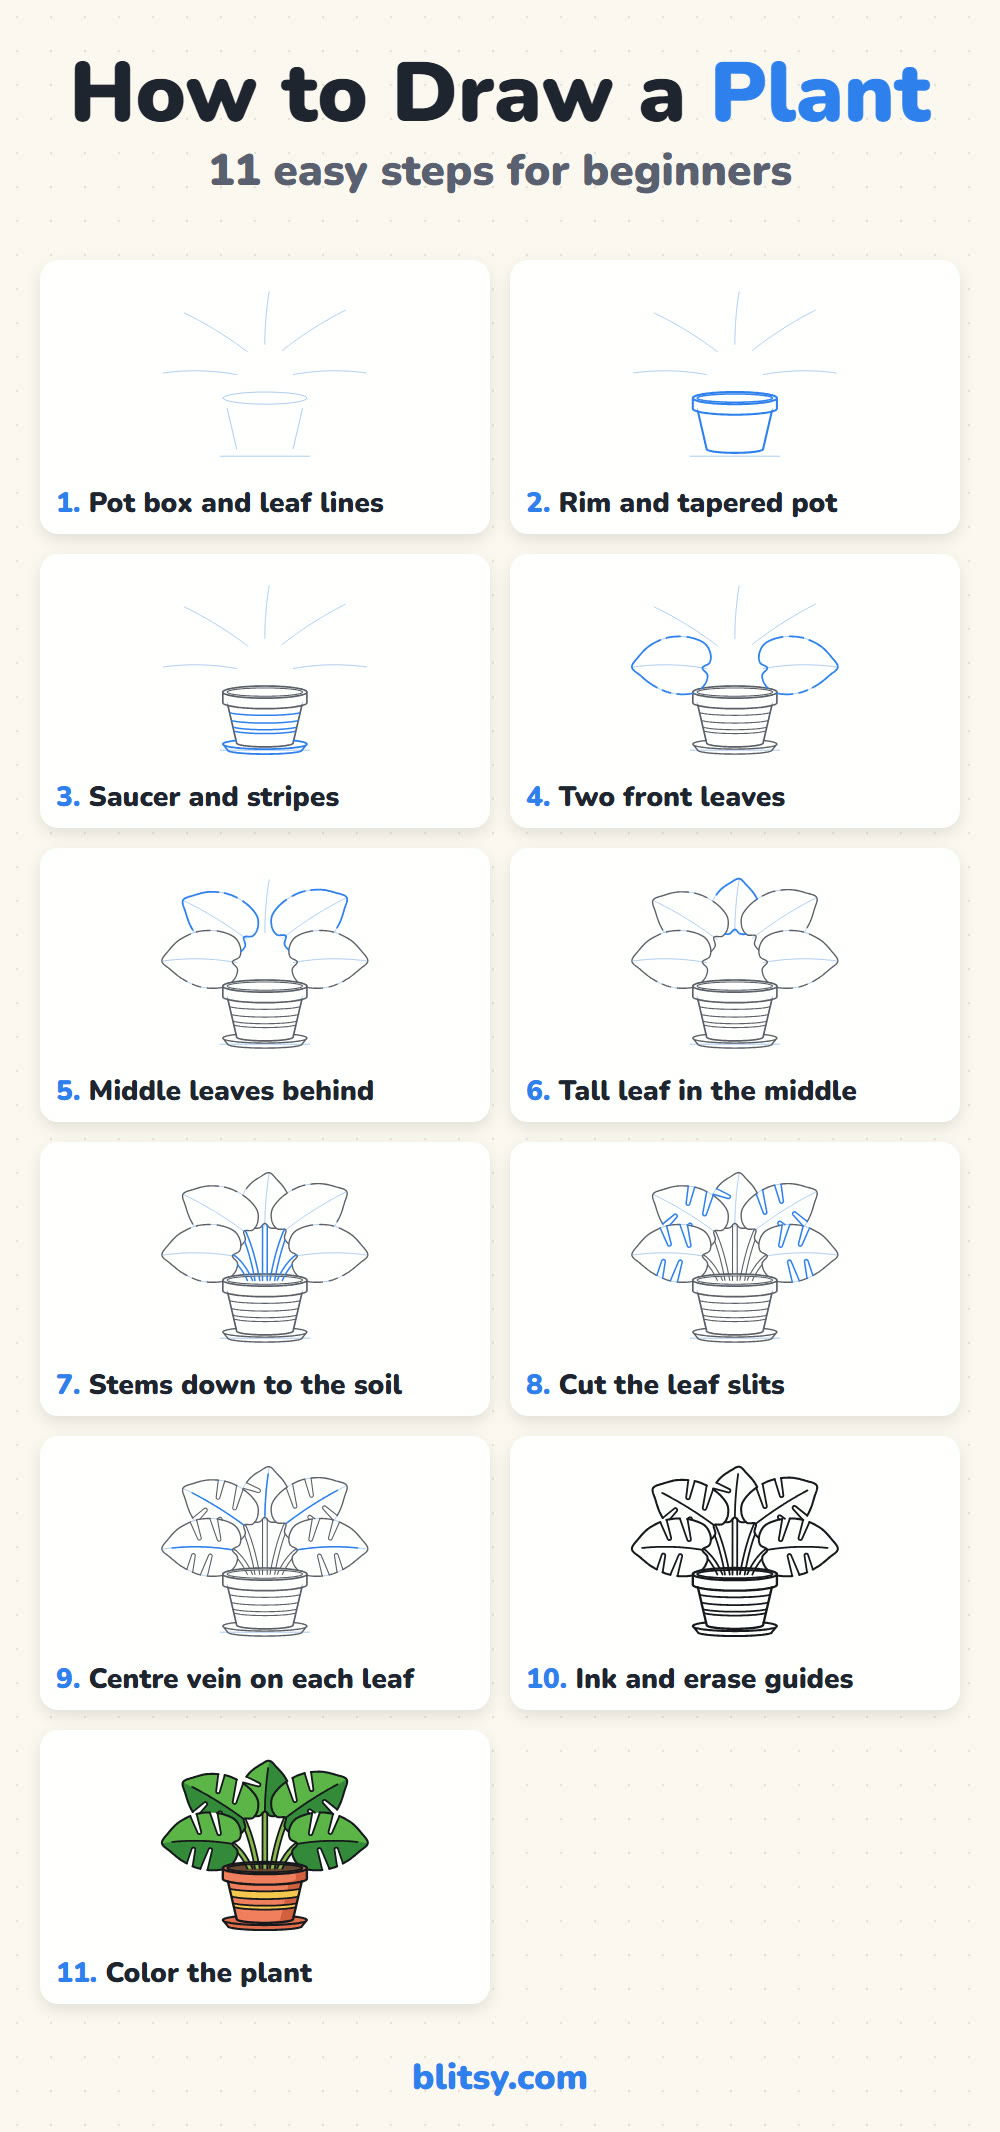
Watch for the color change from picture to picture: whatever you add in a step is blue, and older work fades to gray. The pale blue marks are construction lines, so keep your pencil pressure very soft there, because they disappear in step 10.
Quick overview
⏱️ Time: roughly 25 to 35 minutes, coloring included
🎯 Level: easy, fine for kids around 7 and older
✏️ Steps: 11
🪴 You'll draw: a potted monstera with five split leaves, a striped pot and a saucer
Monstera Sketch Supplies for a Rainy Afternoon
- An HB pencil for faint guide lines
- A soft eraser that lifts pencil cleanly
- A black fineliner or felt-tip pen for the final lines
- Colored pencils or markers: green, dark green, yellow green, coral, yellow and brown
- Plain paper turned sideways, since the leaves spread wide
If you only own one green, press harder on the vein side of each leaf and you'll still get two shades.
How to Draw a Plant Step by Step
Step 1: Sketch the pot shape and leaf centre lines
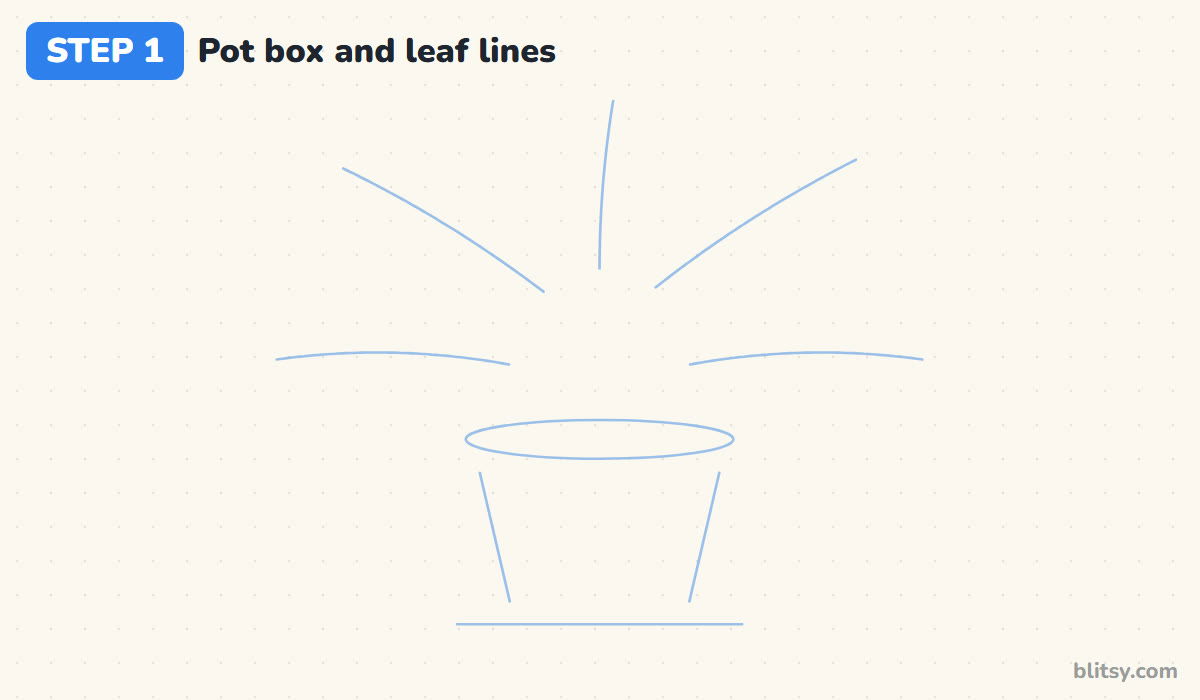
Near the bottom middle of the page, draw a flat oval for the pot opening and two slanted lines below it that come closer together at the bottom. Add a short flat line under them for the table. Above the pot, draw five gently curved lines fanning out: two low, two diagonal and one tall in the middle. Each is the spine of a future leaf.
💡 Tip: Press so lightly that you can barely see the lines. They're only there to steer you.
Step 2: Draw the rim and the tapered pot
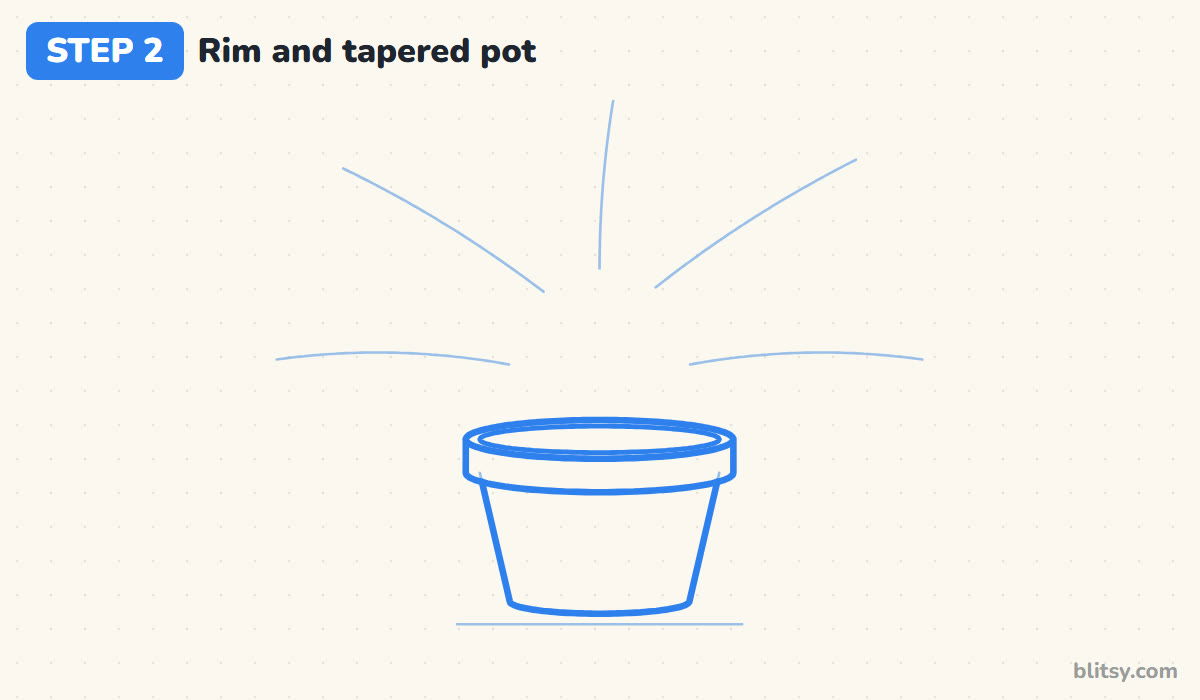
Go over the oval with a firmer line, then add a smaller oval just inside it to show the rim's thickness. Drop short straight sides from the oval and close them with a curve to make a band. Below the band, follow the slanted guides down and finish with a curve at the base. I always bend that last curve downward, because a flat edge makes the pot look like a paper cutout.
💡 Tip: Keep the rim band about as tall as your thumbnail is wide on the page.
Step 3: Add a saucer and the pot stripes
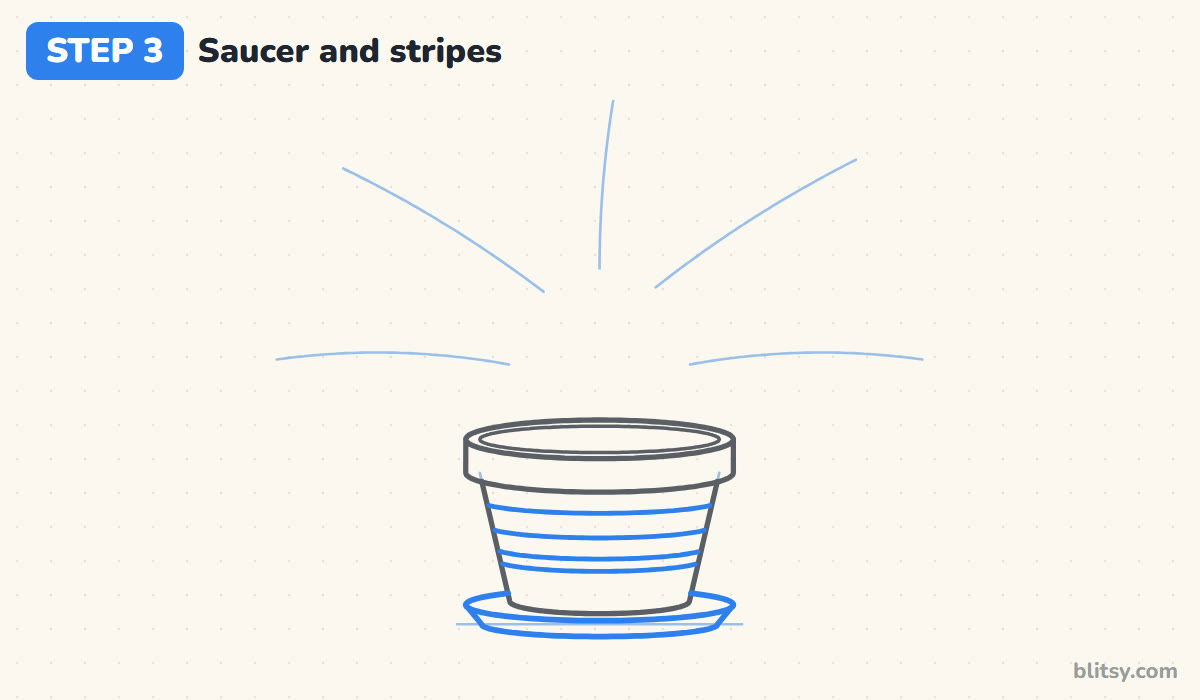
Under the pot, draw a wide, shallow dish: an oval that peeks out on both sides, with a slanted edge underneath. It should stick out past the pot a little, the way a real saucer does. Then draw four curved lines across the pot to make two stripes, a thick one and a thin one. Bend them downward like smiles so they wrap around the round body.




💡 Tip: Draw the stripe curves with the same bend as the bottom of the pot.
Step 4: Draw the two front leaves
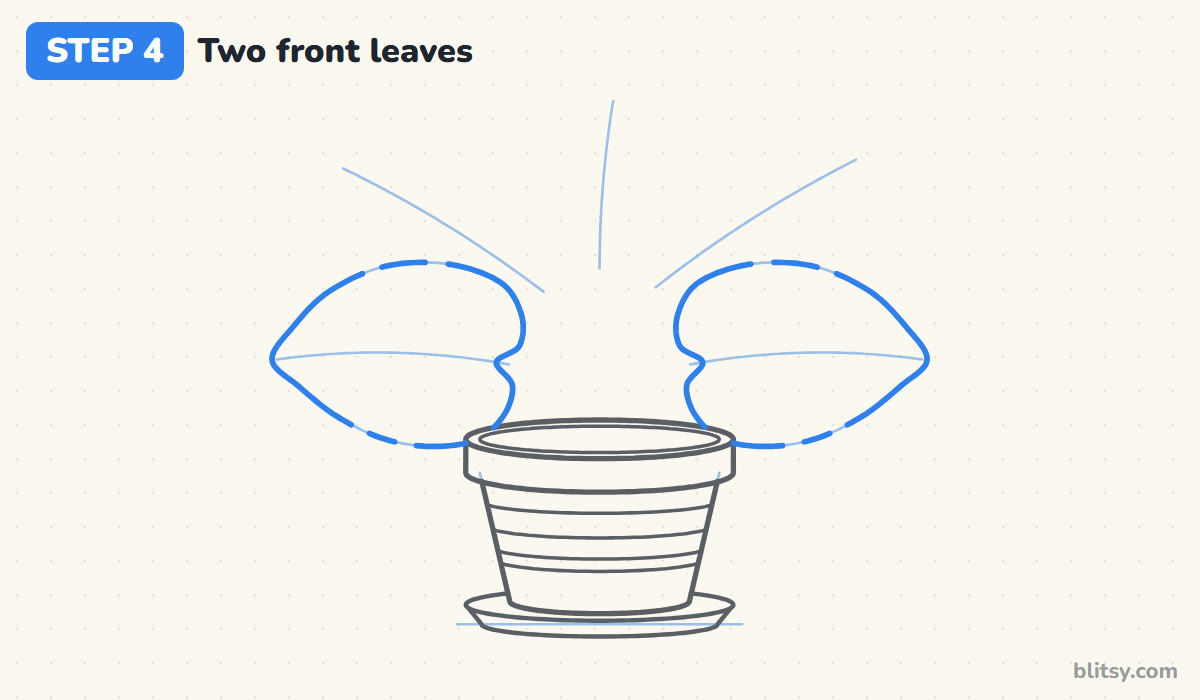
Start with the two low centre lines. Around each one, draw a wide leaf shape: round and full near the stem end, tapering to a point at the tip, with a small heart-shaped dip where the stem joins. Picture the centre line as the leaf's backbone, with roughly the same width on both sides of it. Leave a few tiny gaps in the edge where the slits will go later.
💡 Tip: Turn your paper so you can pull the pencil toward you along each leaf edge.
Step 5: Tuck the middle leaves behind
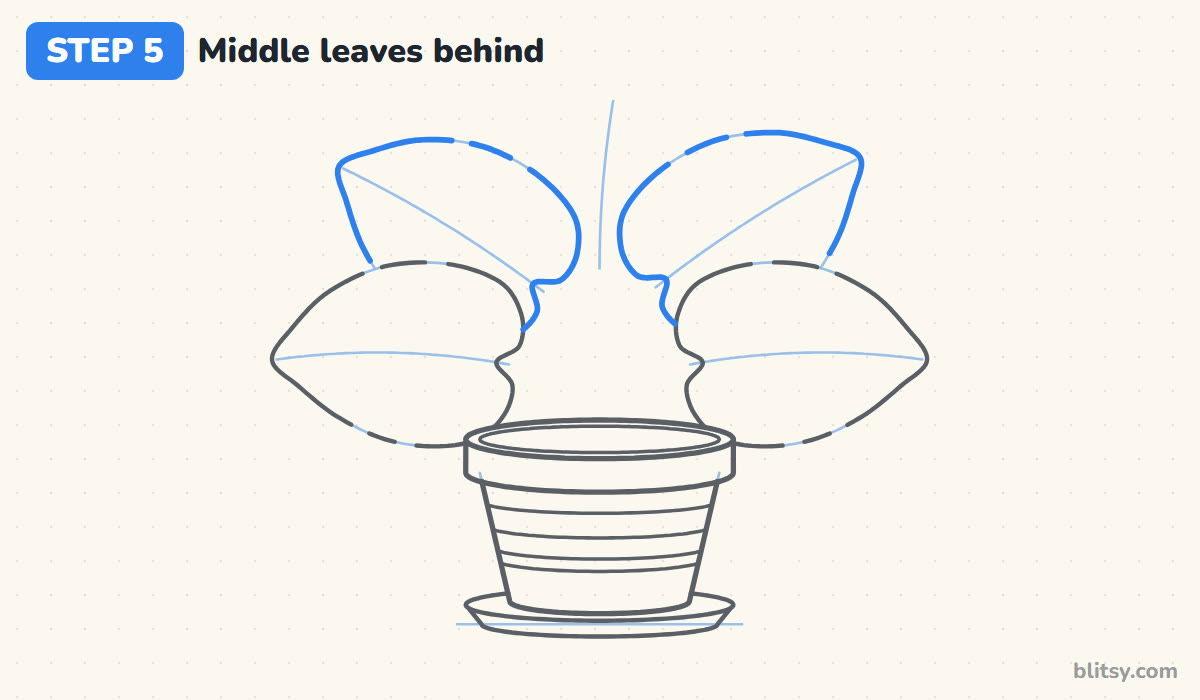
Use the two diagonal centre lines to draw two more leaves the same way, a touch longer than the front pair. Wherever a new leaf runs into a front leaf, stop your line at that edge. In my lessons this one habit makes the biggest difference: the plant looks full and layered instead of a tangle of crossing lines.
💡 Tip: Before each line, ask yourself which leaf is closer to you. The closer one wins.
Step 6: Add the tall leaf in the middle
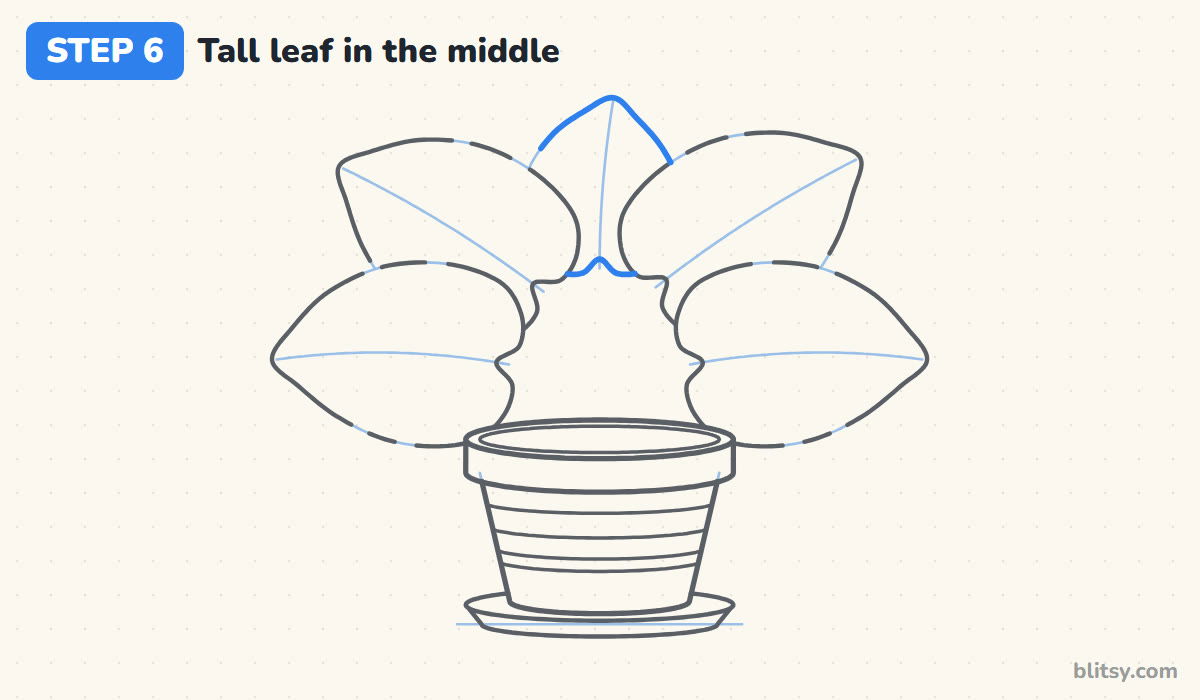
Wrap a slightly narrower leaf around the tall centre line. Only its upper part shows, because the middle leaves cover its base, so start your outline where it appears between them and carry it up to a point. Keeping this leaf a little smaller makes it look like a newer one, which is how monsteras actually grow, with fresh leaves rising from the middle.
💡 Tip: Give the top leaf a slight lean so the plant doesn't look stiff.
Step 7: Draw stems down to the soil
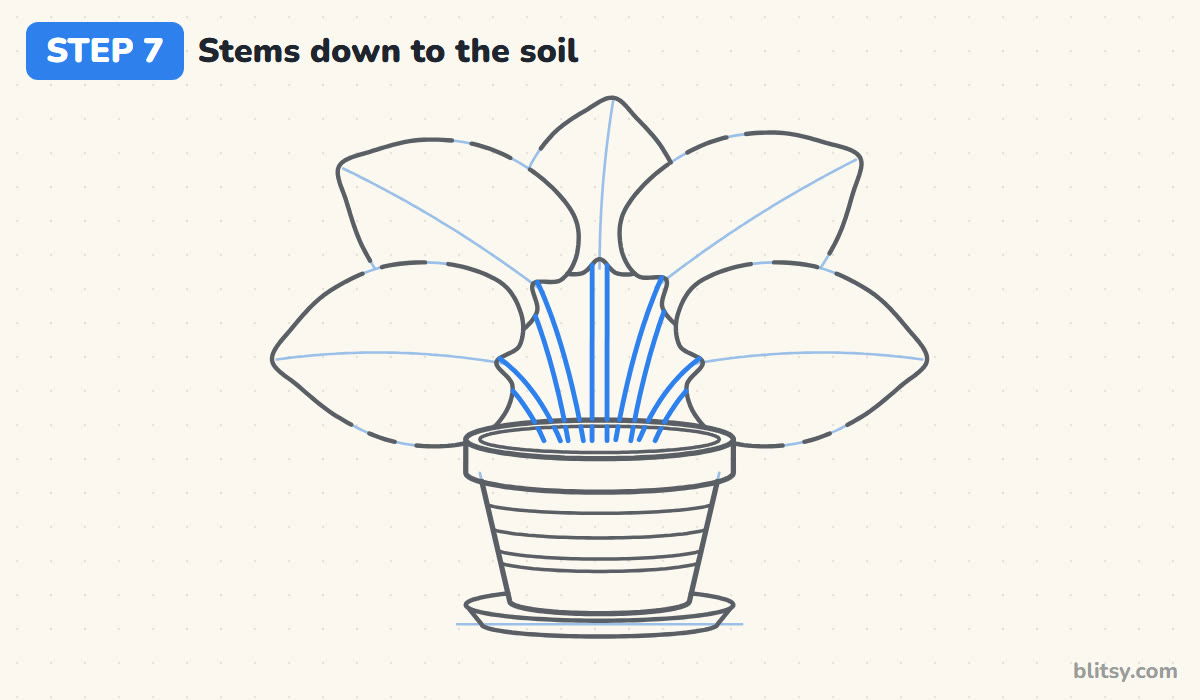
From the base of each leaf, draw a thin stem of two close parallel lines curving down into the pot opening. Let the stems meet near the middle of the soil, as if they grow from one spot, and stop each one where the front rim hides it. I like a gentle curve here; a ruler-straight stalk looks stiff.




💡 Tip: Keep both lines of a stem the same distance apart from top to bottom.
Step 8: Cut the slits into the leaves
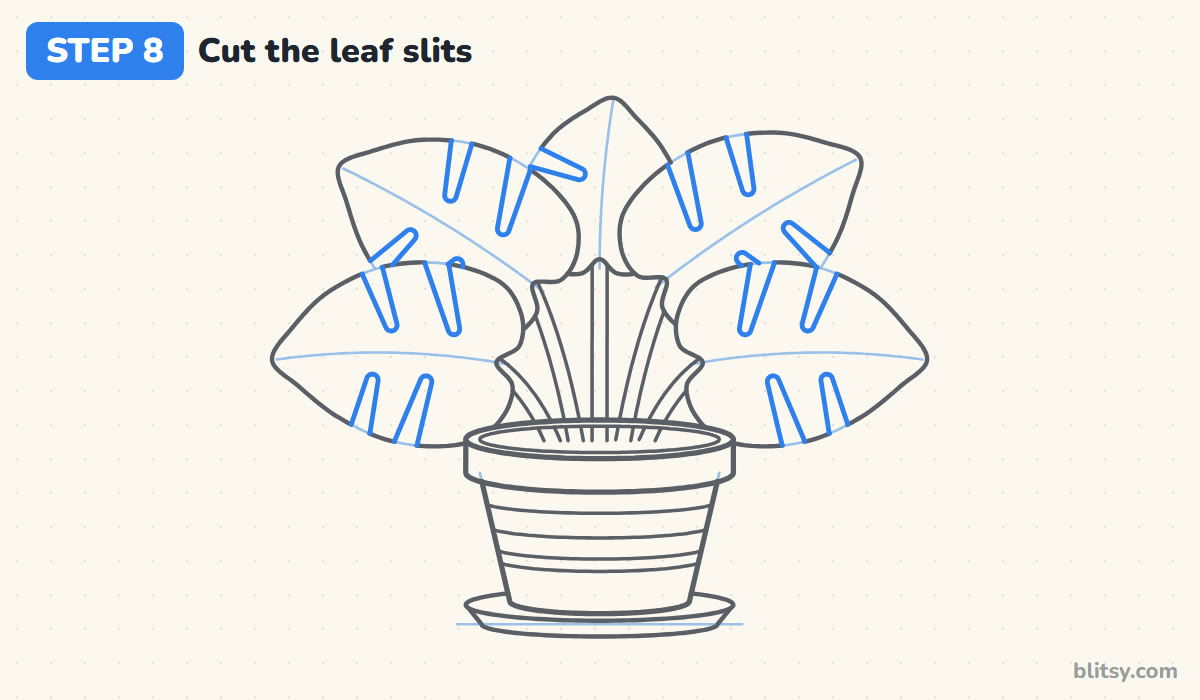
This is the step that turns a plain leaf into a monstera. At each gap you left, draw a narrow U shape that runs from the edge toward the centre line, wider at the edge and rounded at the inner end. Two per side is plenty on the big leaves, and one is enough on the tall one. Angle each slit slightly toward the leaf tip, following the direction the leaf's side veins would run.
💡 Tip: Stop every slit well before the centre line. A leaf cut all the way through falls apart.
Step 9: Draw a centre vein on each leaf
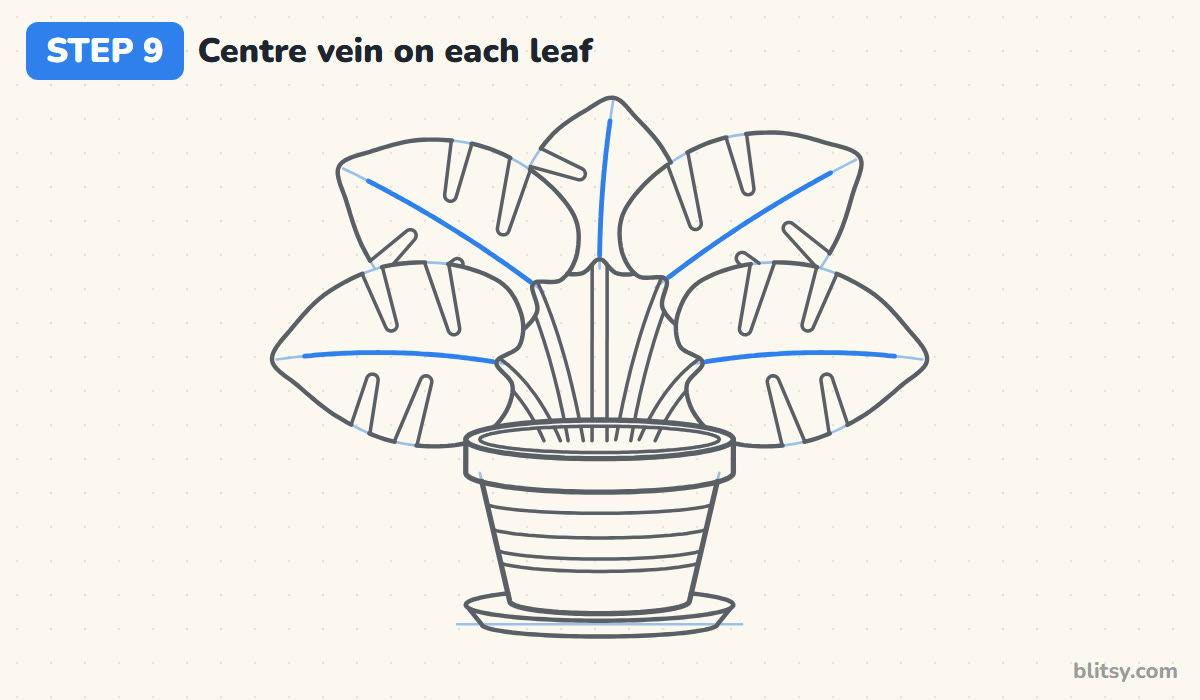
Go over each centre line inside its leaf with a single firm stroke, starting at the stem and stopping just before the tip. Skip the parts hidden behind other leaves. This one line does a lot of work: it shows which way each leaf faces and splits it into a light side and a dark side for coloring later.
💡 Tip: Lift the pencil off gradually near the tip so the vein fades instead of ending in a blob.
Step 10: Ink the lines and erase the guides
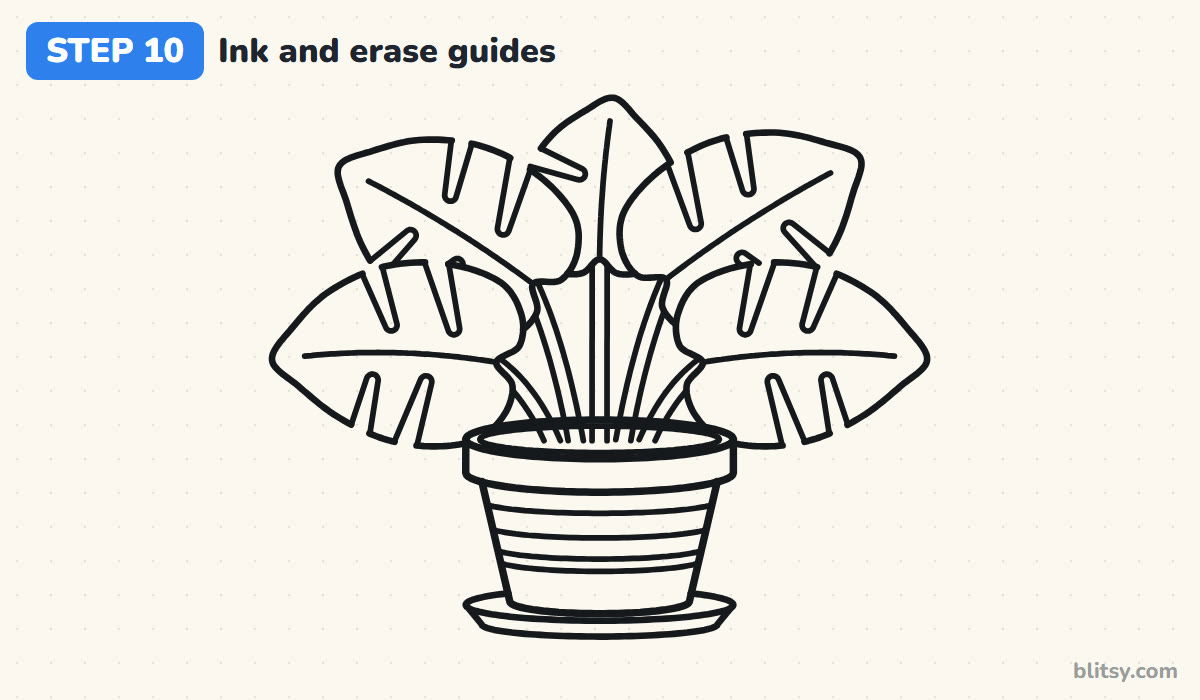
Trace every line you want to keep with your black pen: pot, saucer, stripes, leaves, slits, stems and veins. Give the ink a minute to dry. Then erase all the guide lines, plus the tiny bits of leaf edge across each slit opening. Your monstera now has clean open cuts and is ready to color.
💡 Tip: Ink the pot and leaf outlines first, then the small inside lines, so you don't smudge them.
Step 11: Color the plant
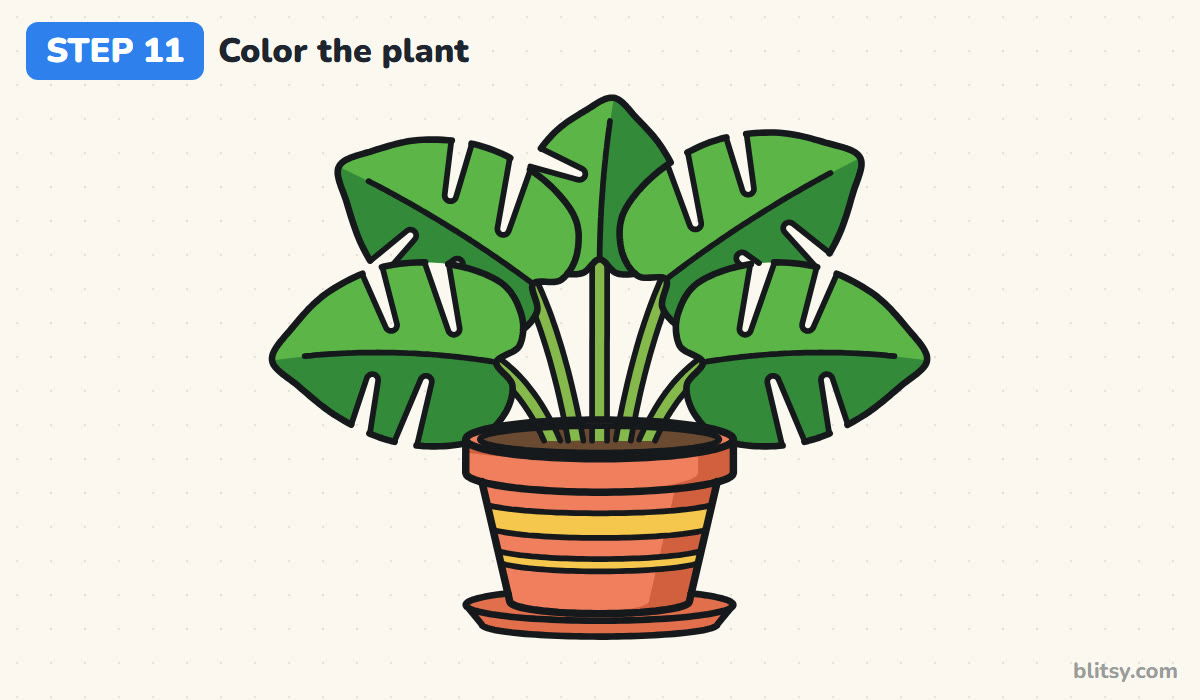
Fill each leaf with a fresh green, then use dark green on the lower side of every vein. That two-tone split gives a quick sense of light falling from above. Color the stems yellow green and the soil brown. Paint the pot coral with yellow stripes, add a deeper coral strip along the right side of the pot and rim, and finish the saucer in the darker coral too.




💡 Tip: Color each leaf in strokes that follow its vein, from stem toward tip.
Monstera Mix-Ups That Make Leaves Look Like Paddles
- Leaves drawn without a centre line. Freehand ovals end up lopsided. Sketch the spine first and build both sides around it.
- Every leaf drawn whole. Overlapping outlines turn into a knot. Stop each back leaf's line where a front leaf covers it.
- Slits that reach the vein. The leaf looks chopped into strips. Keep a solid band of leaf along the centre.
- A pot too small for the plant. The plant looks ready to tip over. Make the rim at least as wide as half the leaf spread.
- One flat green everywhere. Leaves blend into one green blob. A darker side on each vein separates them instantly.
Swapping Pots, Leaves and Shelves for Your Plant
Once the monstera feels comfortable, try a different pot: a woven basket, a white pot with polka dots or a hanging planter with ropes. You can drop the slits and round the leaves for a pothos look, or add one tightly curled new leaf rising from the soil. If you'd like a smaller, rounder houseplant next, the succulent drawing tutorial is a good follow-up, and the garden drawing tutorial takes plants outdoors.
Houseplant Coloring Page and a Printable Monstera Guide
For a quiet activity at home or in class, the plant coloring page shows a small colored version at the top with every color named beside it, and a large outline underneath with thick lines for little hands. The step-by-step guide PDF holds all 11 steps with their tips, two to a page. Both fit Letter and A4 paper.
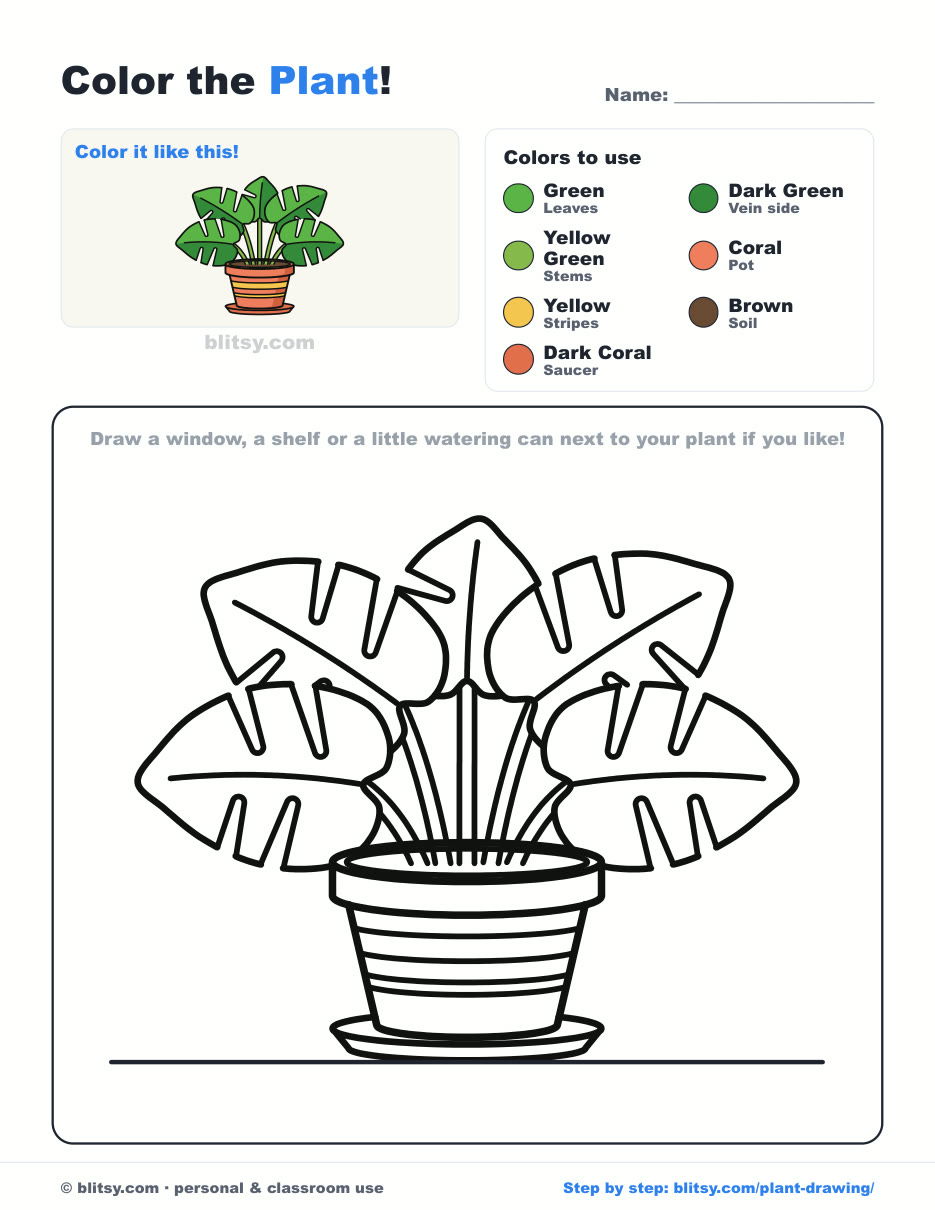
Black outlines with a colored example and the color names at the top. Ready to print and color.
⬇️ Download Coloring PageEvery step picture with its instructions and tips, to keep beside your paper while you draw.
⬇️ Download Drawing Guide📱 On a phone? Tap a download button, then open the file and choose Share → Save to Files or Print. On a computer, the PDF opens or saves straight to your Downloads folder.
Monstera Steps Gathered on One Tall Pin
Houseplant Ready? Try These Garden and Food Tutorials
Each one is a step-by-step tutorial, so you can keep practicing leaves, curves and color one lesson at a time.
- Avocado Drawing: Two circles become a pair of cute cut halves in the avocado drawing tutorial.
- Mushroom Drawing: The how to draw a mushroom lesson builds a storybook toadstool with two small brown mushrooms and a snail.
- Tulip Drawing: Three tulips and a twisting leaf make up this tulip drawing step by step guide.
- Cell Drawing: Follow the cell drawing tutorial for a clear animal cell diagram.
- Succulent Drawing: Another houseplant to try: the succulent drawing tutorial draws a potted echeveria.
- Sunflower Drawing: A big sunflower, a younger bloom and a bee fill the how to draw a sunflower lesson.
- Pineapple Drawing: Draw the leafy crown and a fresh slice in this pineapple drawing tutorial.
- Fruit Drawing: The fruit drawing step by step lesson arranges five fruits in a blue bowl.
- Oil Pastel Drawing: Try a new medium with the oil pastel drawing tutorial, a sunset with a dark palm.
- Pizza Drawing: Golden crust, red sauce and one cheesy slice pulled away make the pizza drawing tutorial a fun break.
- Garden Drawing: Take plants outdoors with this garden drawing tutorial, a flower bed with a fence and a watering can.
- Birthday Cake Drawing: Draw a two-tier cake with candles in the birthday cake drawing tutorial.
- Dandelion Drawing: One flower in bloom and one seed head sit side by side in this dandelion drawing step by step guide.
- Pumpkin Drawing: Three pumpkins rest on golden hay in the how to draw a pumpkin lesson.
- Jack O Lantern Drawing: Carve a glowing grin into one pumpkin with the jack o lantern drawing tutorial.
Houseplant Drawing Questions Beginners Bring Me
What is the easiest plant to draw for beginners?
A plant with a few big, simple leaves in a pot, like the monstera here. Large leaves are easier than lots of tiny ones, and the pot gives you a solid base to build on.
How do you draw a leaf easily?
Draw a curved centre line first, then add a rounded edge on each side that meets at a point at the tip. Matching the width on both sides keeps the leaf balanced.
How long does it take to draw a potted plant?
Around 15 minutes for the line drawing and another 10 to 20 for coloring.
Can kids skip the leaf slits?
Yes. Without the slits you get a sweet heart-leaf plant, which is a fine drawing on its own. Add the slits later when the leaf shapes feel easy.
Pick a corner of your page, sketch those five spine lines and watch your monstera fill the pot. 🪴
Related posts:
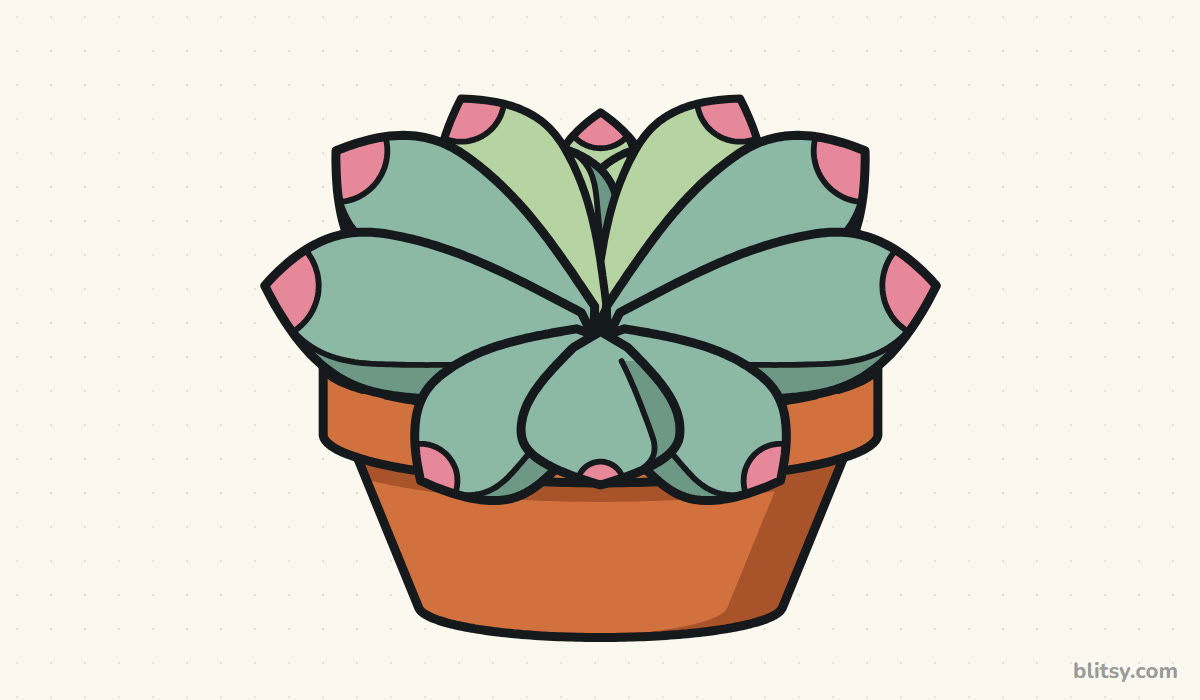 How to Draw a Succulent Step by Step (Easy Potted Echeveria)
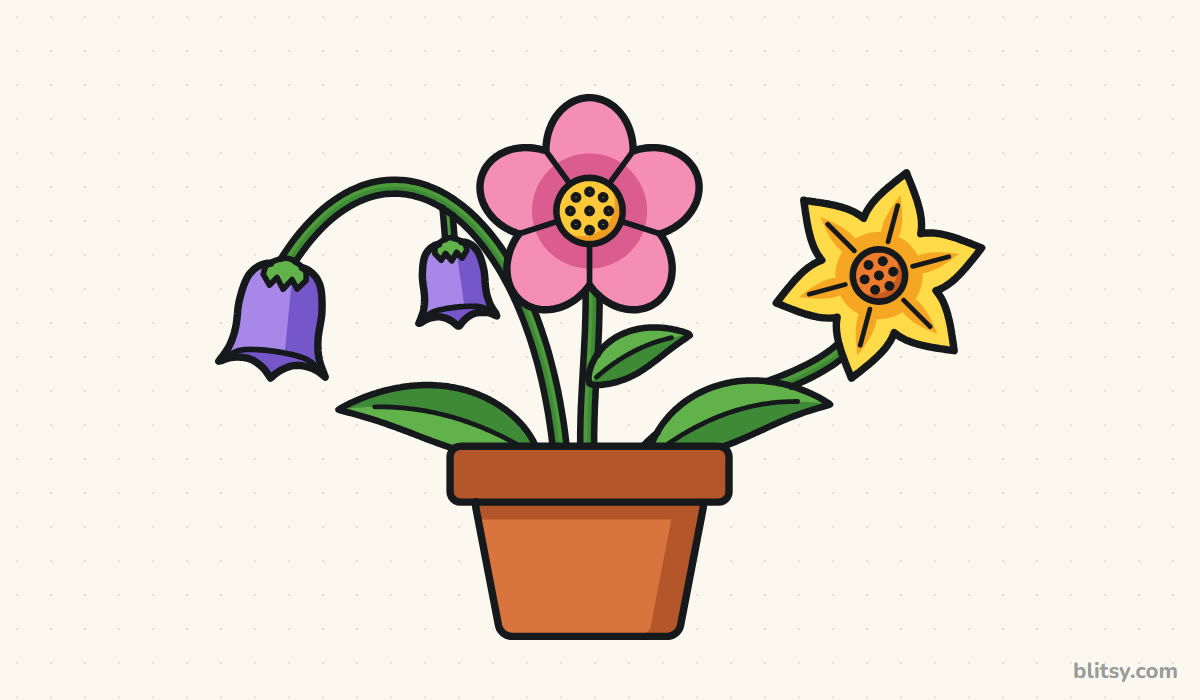 How to Draw a Flower Step by Step (Easy Potted Bouquet)
 How to Draw a Whale Step by Step (Easy for Beginners)
 How to Draw Lungs Step by Step (Easy Science Diagram)
 How to Draw a Pineapple Step by Step (Easy Crown and Slice)
 How to Draw the Fortnite Llama Step by Step (Easy Fan Art)
 How to Draw a Hoodie Step by Step (Front and Back View)
 How to Draw a Parrot Step by Step (Easy Scarlet Macaw)
 How to Draw a Police Car Step by Step (Easy for Kids)
 How to Draw a Volcano Step by Step (Easy Erupting Volcano)
 How to Draw a Crow Step by Step (Easy for Beginners)
 How to Draw a Tiger Step by Step (Easy Walking Pose)

