
An apple is often the first thing an art teacher puts on the table, and for good reason: it looks simple, yet it quietly teaches shape, shine and shading. Here you'll learn how to draw an apple step by step, starting from two circles that overlap like a pair of soap bubbles. We'll make a shiny red apple first, then a smaller green one with a bite taken out. If you can draw a circle, you can draw this.
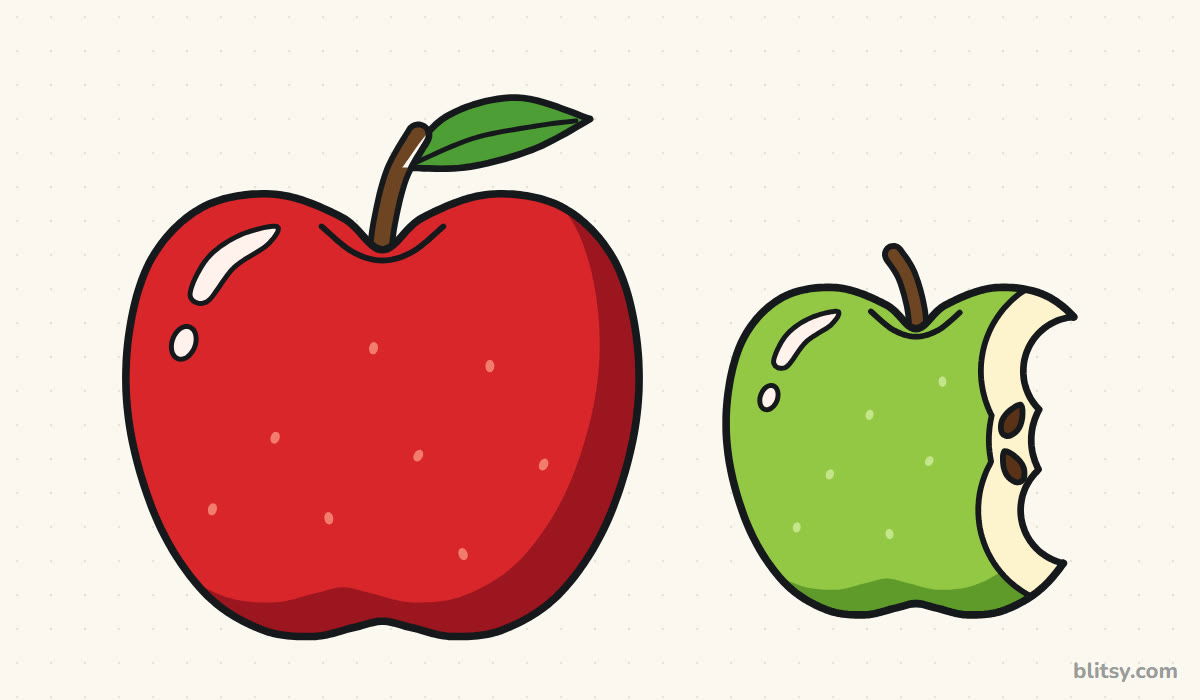
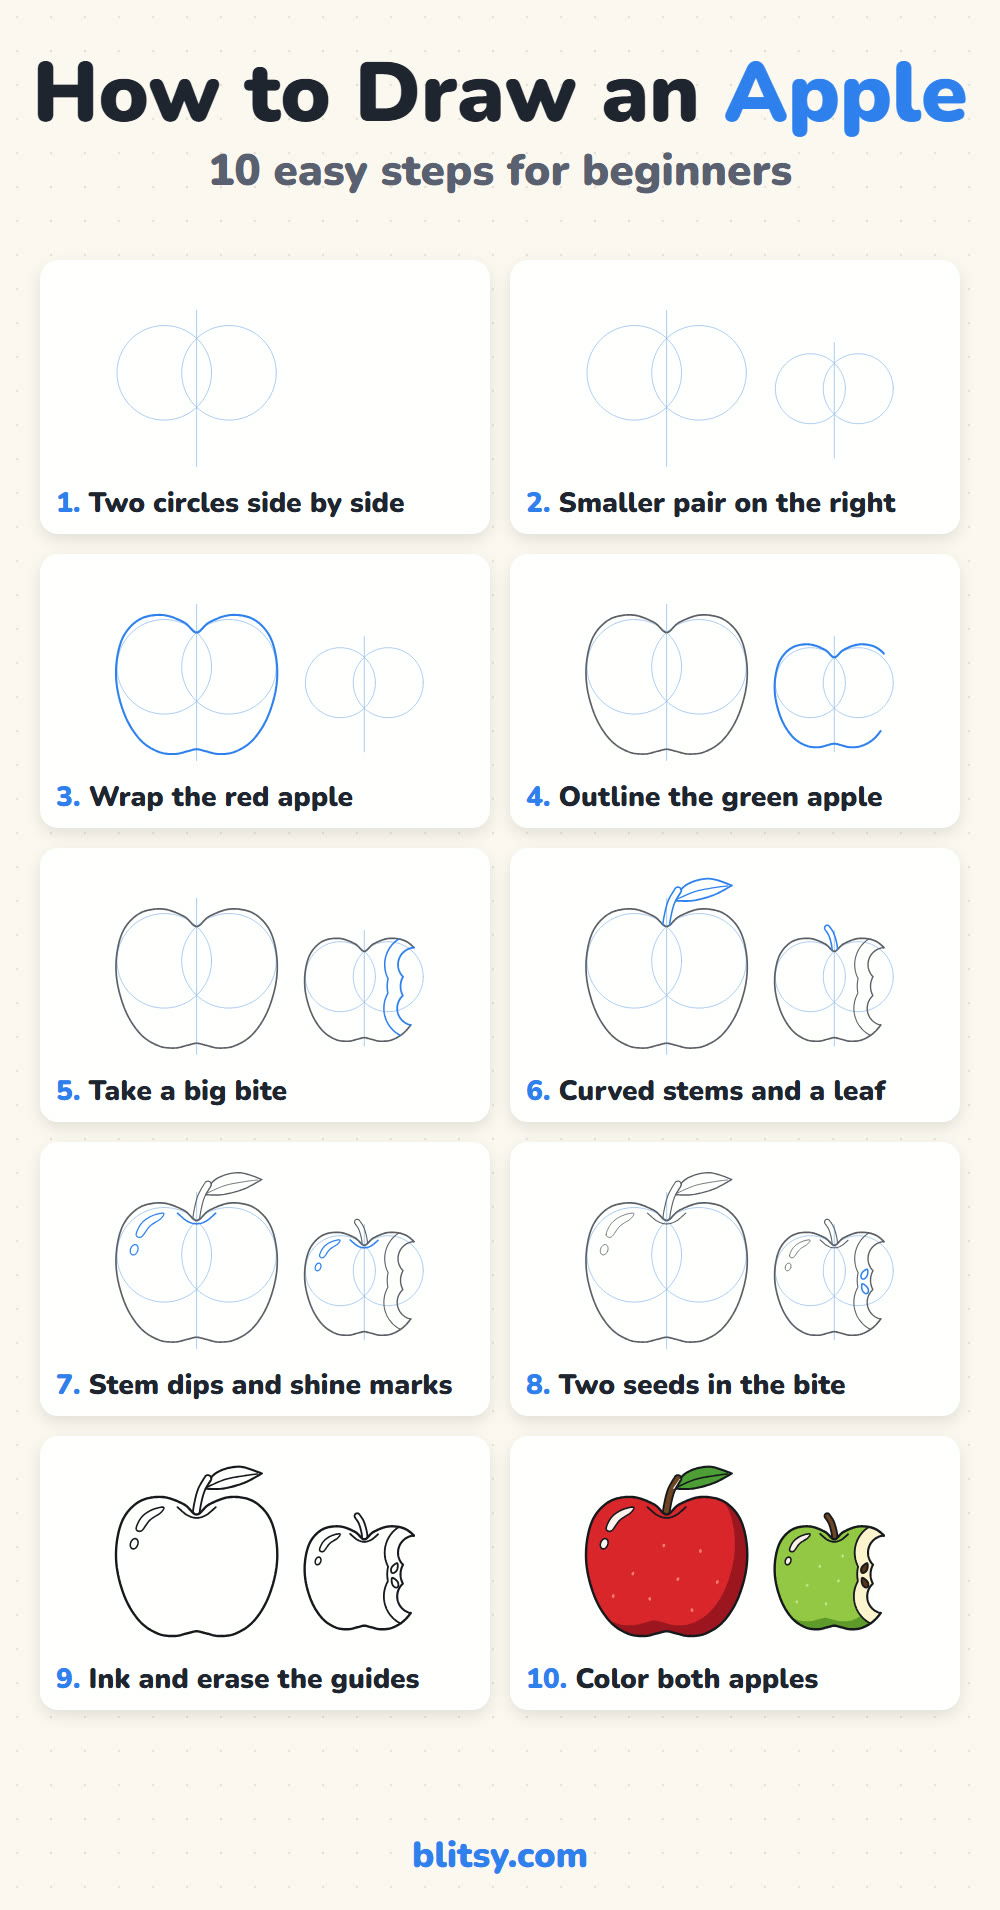
Both apples grow a little in every picture below. Gray lines were already on your paper, blue lines are the ones to add now. The pale blue circles and the straight middle line are only helpers, so keep your pencil soft on them; they get erased in step 9.
Quick overview
⏱️ Time: roughly 20 minutes, a bit longer if you color slowly
🎯 Level: easy, good for kids from about 6 and for adults starting out
✏️ Steps: 10
🍎 You'll draw: a shiny red apple with a stem and leaf, and a green apple with a bite and two seeds
Pencils and Crayons for an Apple Still Life
- A regular pencil (HB is fine) for light sketching
- An eraser that doesn't smudge
- A black marker or fineliner for the final outline
- Colored pencils or crayons in red, dark red, light green, cream or pale yellow, brown and green
- A sheet of paper turned sideways so both apples fit
No dark red? Go over your red a second time with a little brown on top and you'll get close.
How to Draw an Apple Step by Step
Step 1: Draw two overlapping circles
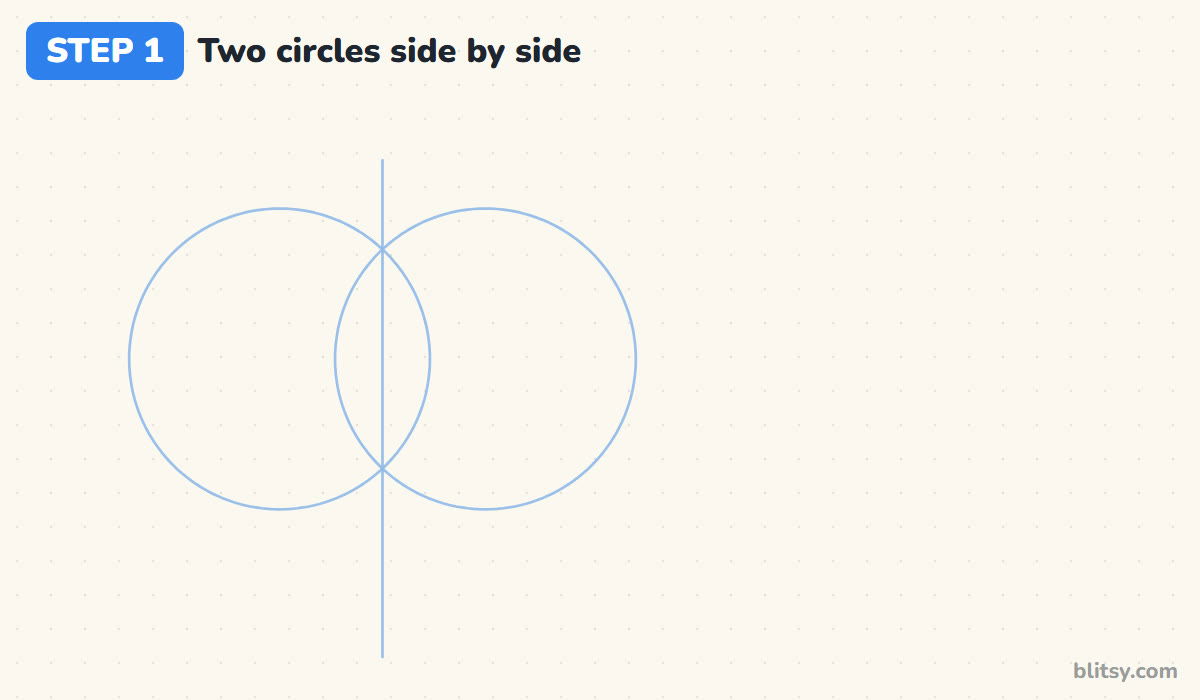
On the left half of your paper, draw two circles of the same size, side by side, overlapping by about a third. Then run a light straight line down through the spot where they cross. Those circles become the rounded shoulders of the apple, and the line keeps the stem and the bottom centered. When I teach apples, this is always where I start, because it gives you the heart-ish shape almost for free.
💡 Tip: Sketch each circle with a few quick, loose loops. A slow single line usually comes out lumpy.
Step 2: Repeat a smaller pair on the right
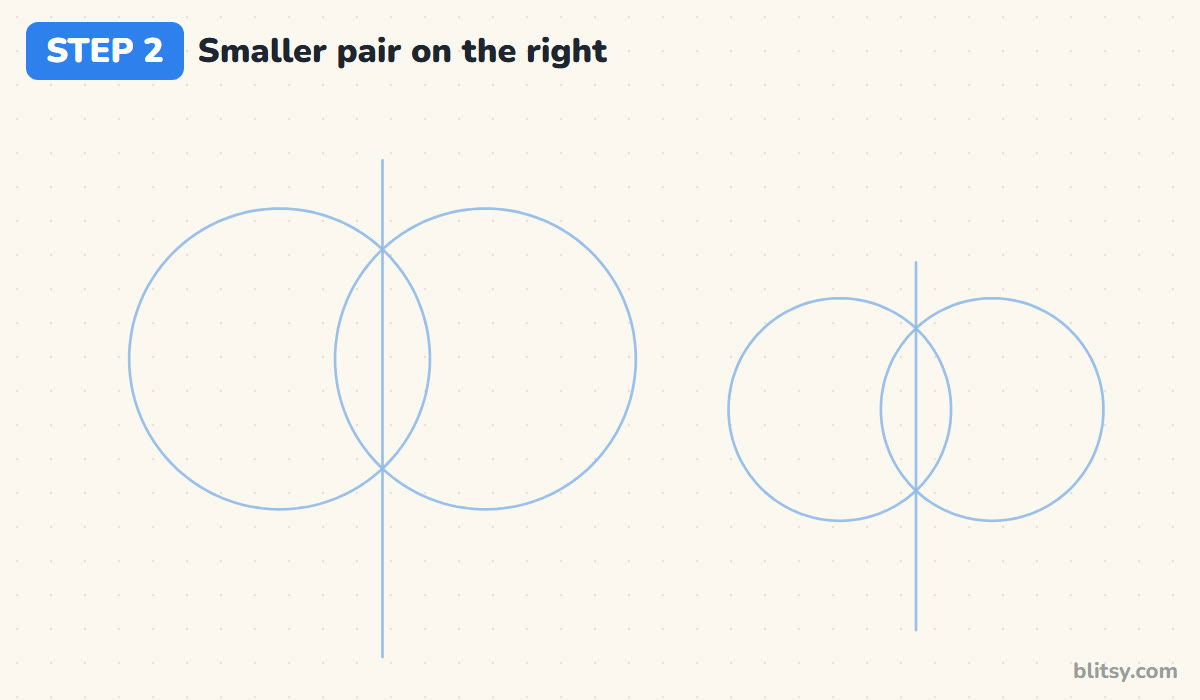
Leave a gap about as wide as your thumb, then draw the same setup for the green apple, only smaller, roughly three quarters the size. Add its own middle line too. I like having one big apple and one small one, because two identical fruits sitting side by side look like a sticker sheet instead of a still life.
💡 Tip: Line up the bottoms of both sets, not the tops. The fruits should look like they sit on the same table.
Step 3: Wrap the outline of the red apple
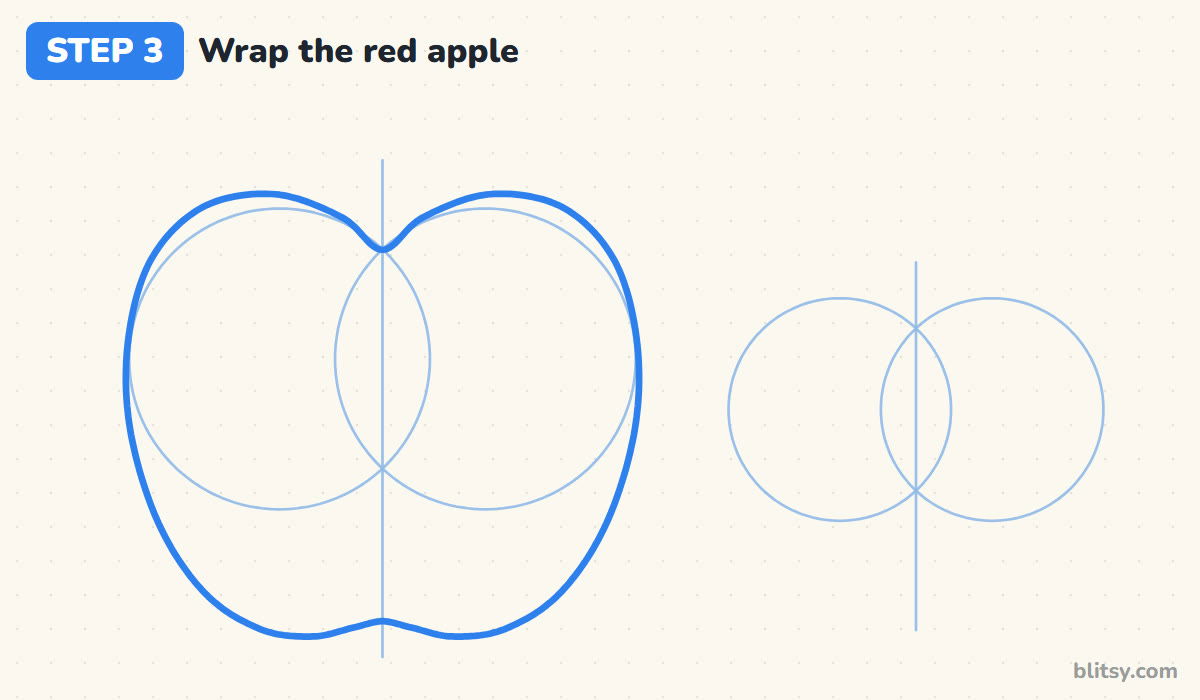
Start at the middle line, just below where the circles cross at the top. Pull your line up and over the left circle, down its side, and keep going past the bottom of the circle, curving in slowly. Close the base with a gentle wave that has a tiny dip at the center. Do the right side the same way. The top dip and the narrower bottom are what make it read as an apple and not a tomato.

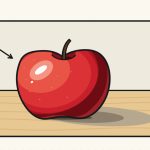


💡 Tip: Let the outline bulge a hair outside the guide circles at the shoulders. Apples are fuller up there than you'd expect.
Step 4: Outline the green apple
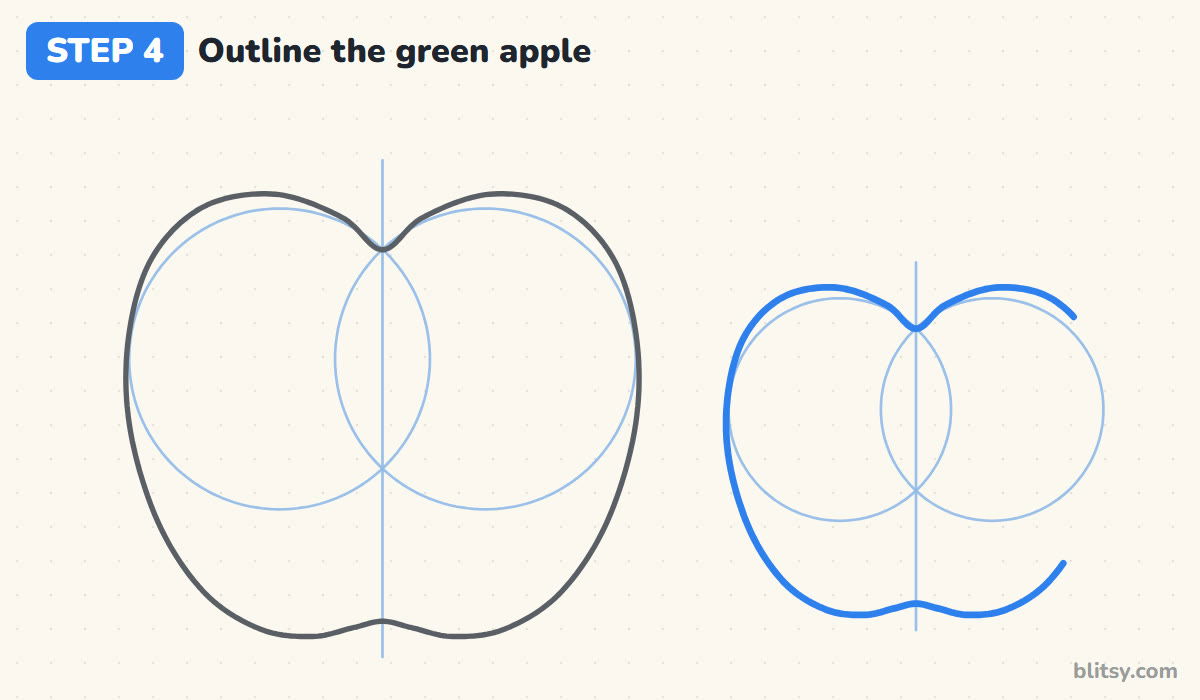
Wrap the small circles the same way, with the dip on top and the rounded base, but on the right side stop just past the top of the shoulder and again just above the bottom. Leave the right side open between those two points, since a bite is about to go there. My stopping points are chosen by eye and don't need to be exact.
💡 Tip: Glance at your red apple while you draw. Copying your own shape is easier than inventing a new one.
Step 5: Take a big bite out of it
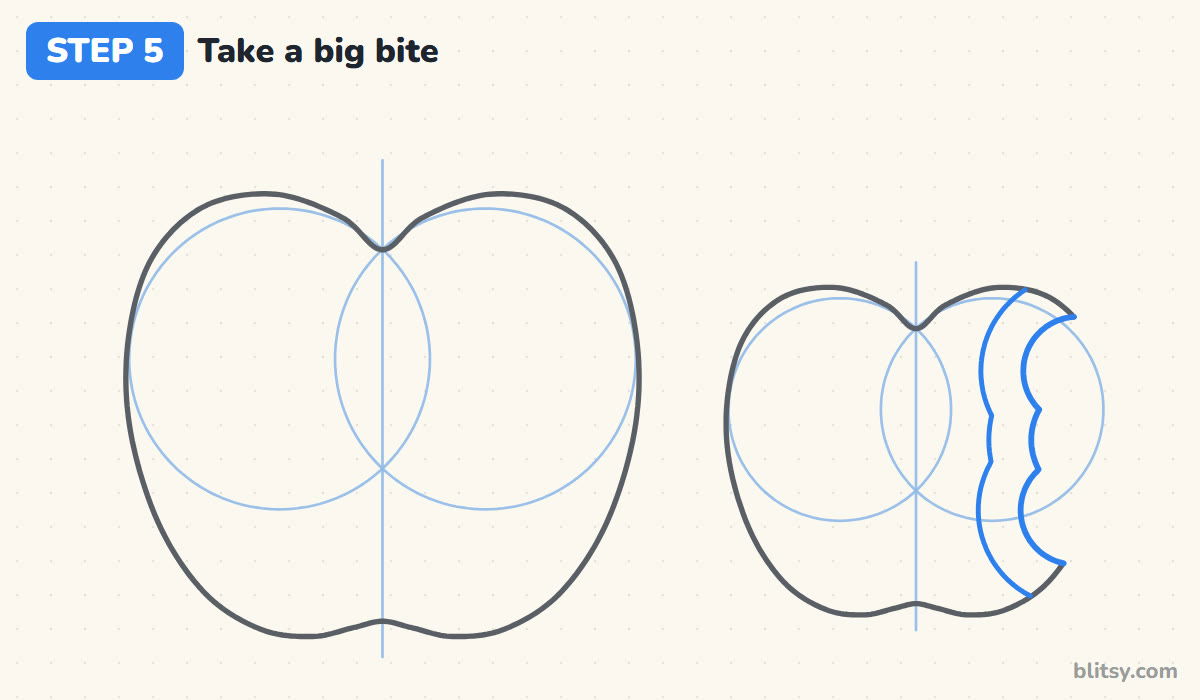
Join the two loose ends with three curved scoops that cut into the apple, like the edge of a cloud turned inward. Where two scoops meet, let them form a small point; those points are the tooth marks. Next, draw a second line inside the apple that follows the bite at a steady distance. The band between the two lines is the flesh you can see, and the outer line marks where the skin stops.
💡 Tip: Make the middle scoop the deepest. A bite from real teeth is never perfectly even.
Step 6: Add curved stems and a leaf
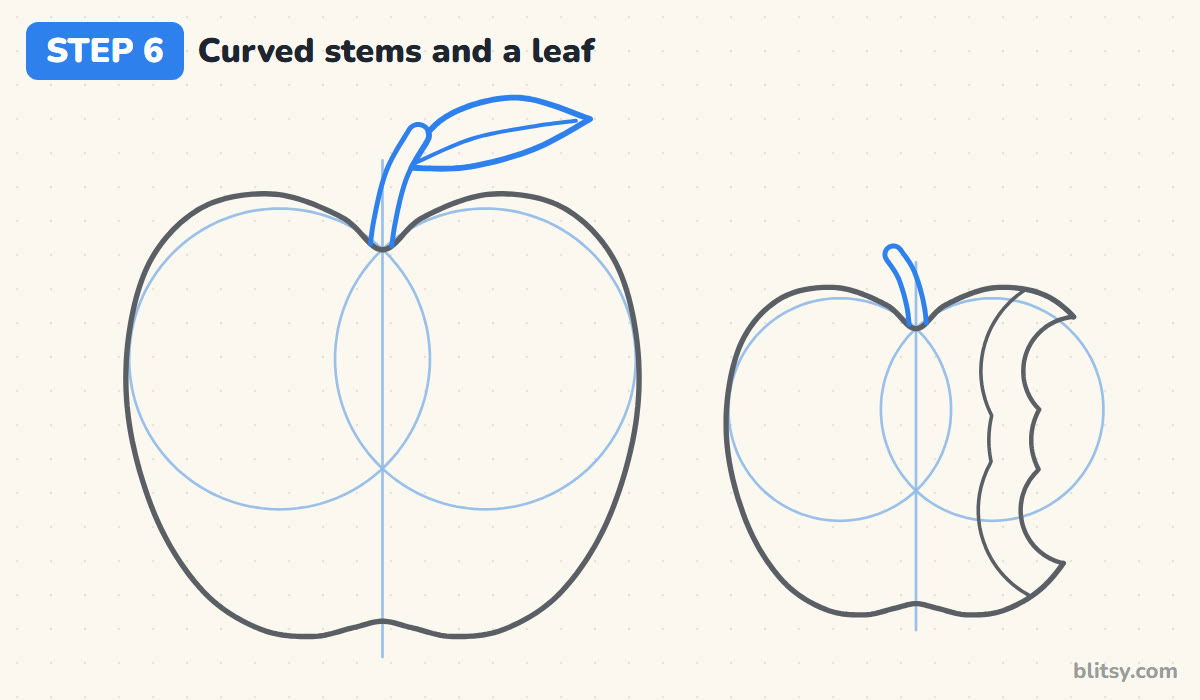
From the dip of the red apple, draw a short stem that leans and curves to the right, using two lines that end in a rounded tip. Partway up, add a leaf pointing out to the right: two arcs that meet in a sharp point, with a vein through the middle. Give the green apple a stem too, leaning the other way. I skip the leaf on the small apple so the eye goes to the bite.
💡 Tip: Stems are thin. If yours is wider than your little fingernail on paper, slim it down.
Step 7: Shape the stem dips and shine marks
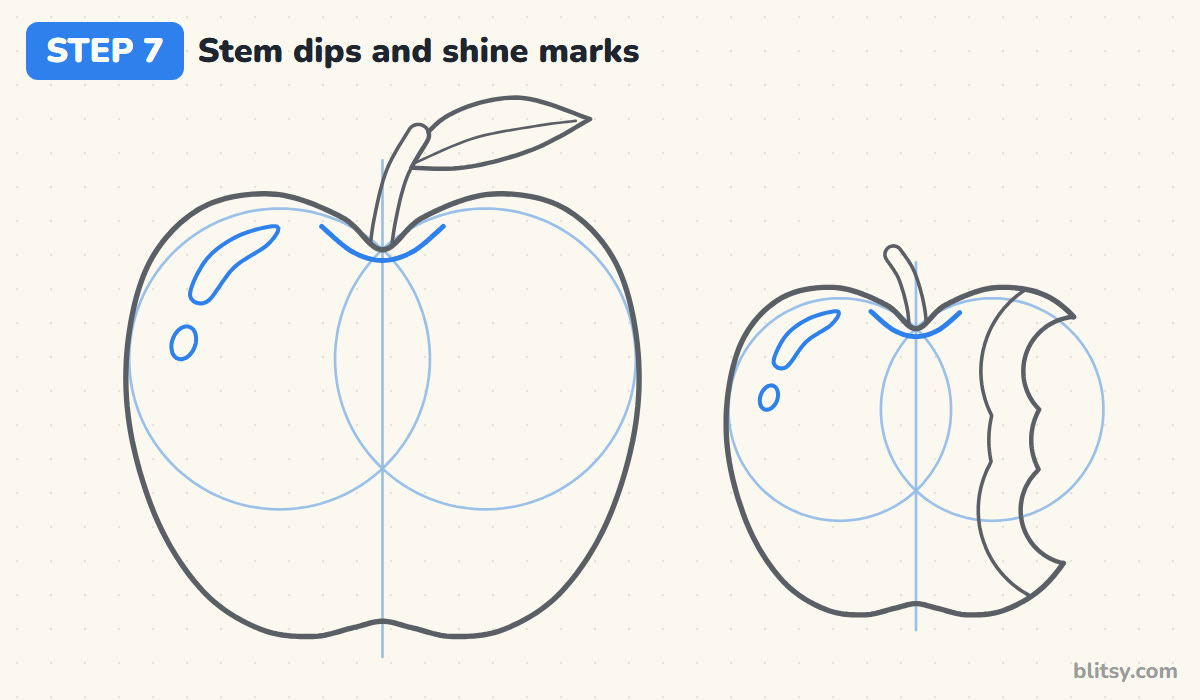
Under each stem, draw a soft little smile that hugs the dip; it shows the hollow the stem grows out of. Then, high on the left side of each apple, draw a curved stripe that follows the round shoulder, with a small oval below it. These outline the shine. Most beginners put the shine right in the middle, which flattens the fruit. Near the edge looks rounder.




💡 Tip: Keep both shines on the same side. One light source, one side of shine.
Step 8: Draw two seeds in the bite
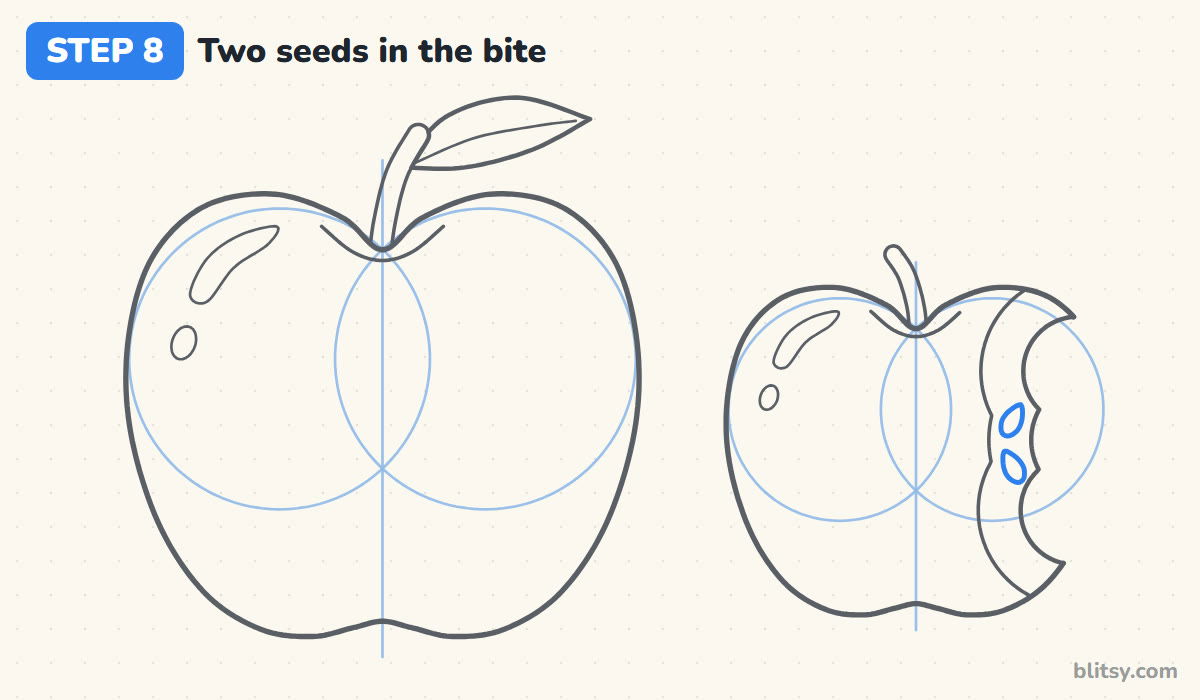
Inside the cream band, near the deepest part of the bite, draw two small teardrops, one above the other. Point their narrow ends inward, toward the center of the apple, the way real apple seeds sit around the core. They only need to be about as long as a grain of rice on your page.
💡 Tip: Tilt the two seeds slightly toward each other so they look like a pair.
Step 9: Ink the lines and erase the guides
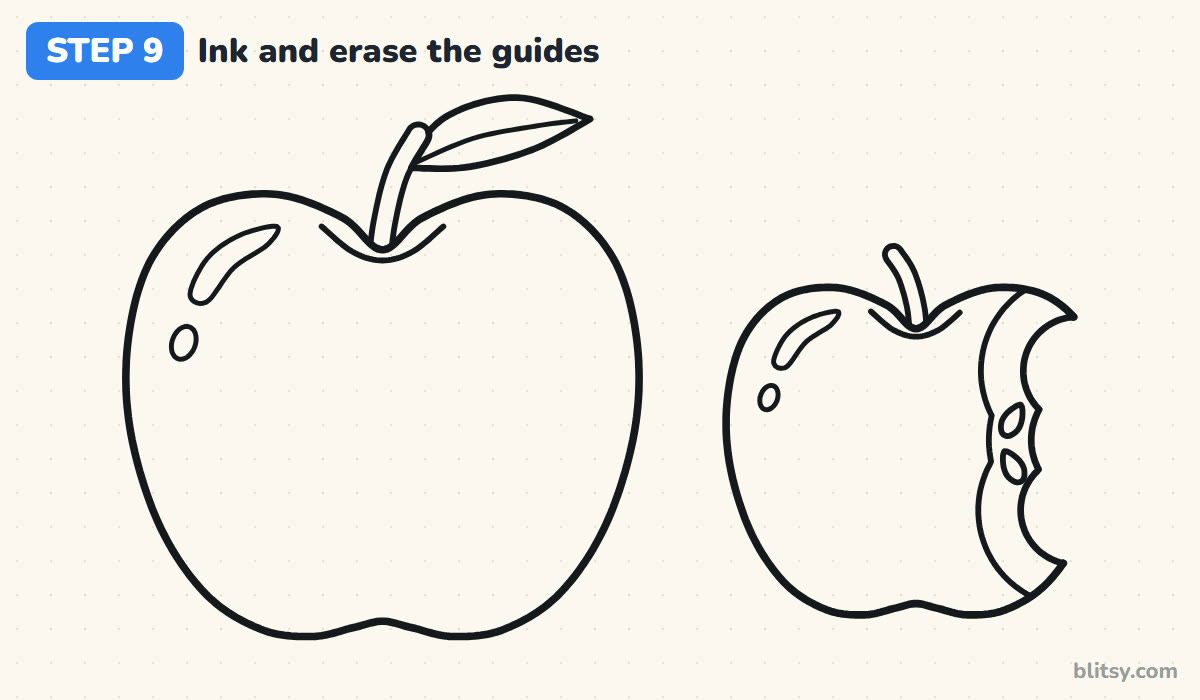
Trace the lines you want to keep with your black marker: both outlines, the bite, the flesh line, the stems, the leaf, the dips, the shine marks and the seeds. Wait a minute for the ink to dry, then erase the guide circles and both middle lines. I always photocopy the clean outline at this point, so there's a spare to color later.
💡 Tip: Press a bit harder on the outer edges than on the small inside shapes. The apples will pop off the page.
Step 10: Color both apples
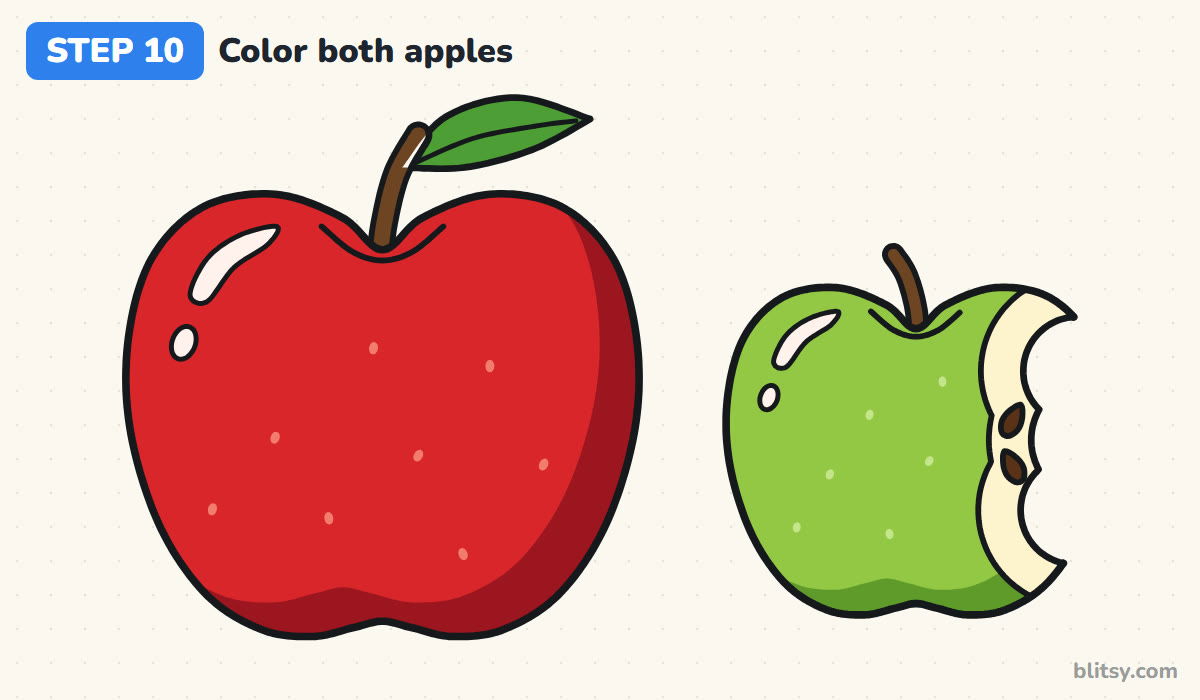
Fill the red apple with a solid red, then add dark red along the right side and across the bottom. Leave the shine white. Color the green apple light green and give it a darker green edge along the bottom. Use cream for the bite and brown for the seeds and stems, and finish the leaf in a fresh green. Tiny light dots on the skin are optional, but they make the fruit look real.
💡 Tip: Color the shading in short curved strokes that follow the apple's roundness, not straight across.
Why an Apple Can End Up Looking Like a Tomato
- No dip at the top. A smooth round top turns the apple into a tomato or a ball. Keep the small V where the two circles meet.
- A bottom as wide as the top. Apples taper a little. Curve the sides inward below the guide circles.
- Shine in the middle. A white blob in the center looks like a sticker. Move it up and toward the edge.
- A bite with smooth edges. One big curve looks like a missing slice. Use several scoops so the tooth marks show.
- One flat red all over. Without the darker side, the apple looks cut out of paper. Shade the side away from the shine.
Apple Ideas to Try Once You Know the Shape
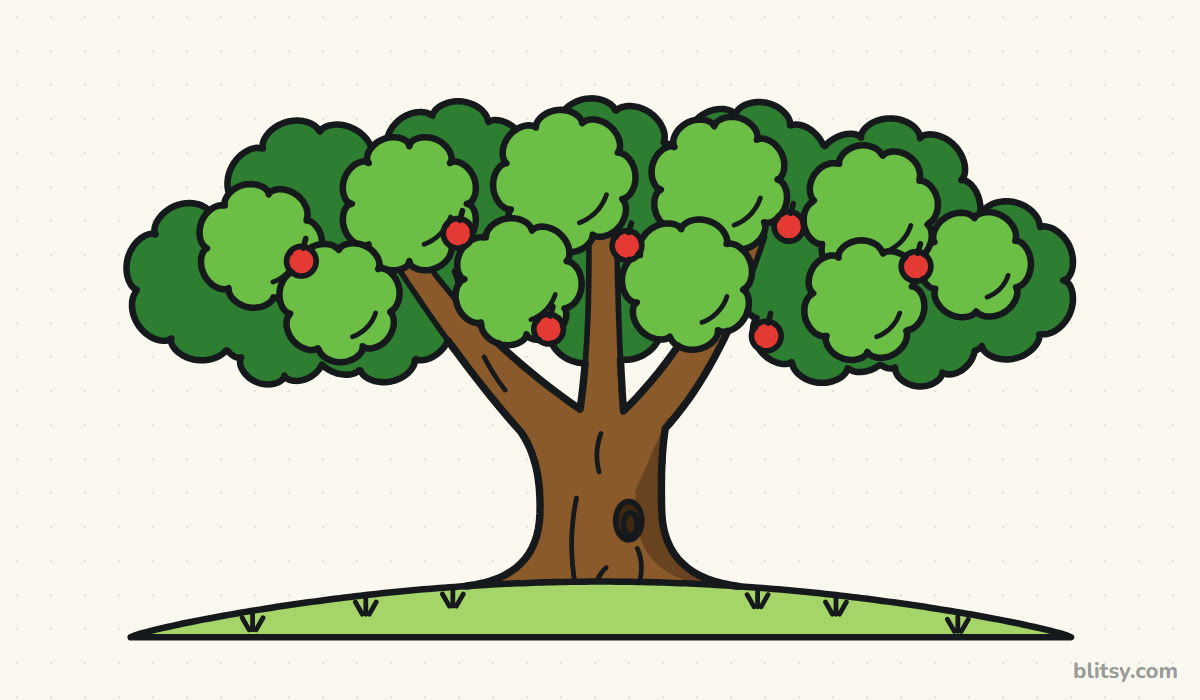
The two-circle trick works for every apple you'll ever draw. Try a yellow apple with orange blush, an apple core with only the top and bottom left, or a wedge cut from the side so the star of seeds shows. When you're ready for a full fruit bowl, the fruit drawing tutorial has plenty of company for your apples, and if you'd rather see where apples come from, try the tree drawing tutorial and hang a few red dots in the branches.
Printable Apple Coloring Page and Drawing Guide
Need something for a rainy afternoon or a classroom table? The apple coloring page has a small colored example at the top with each color named, and below it a big, thick outline of both apples that's easy to stay inside. The step-by-step guide PDF holds all 10 steps and tips, two steps per page, and prints on Letter or A4.
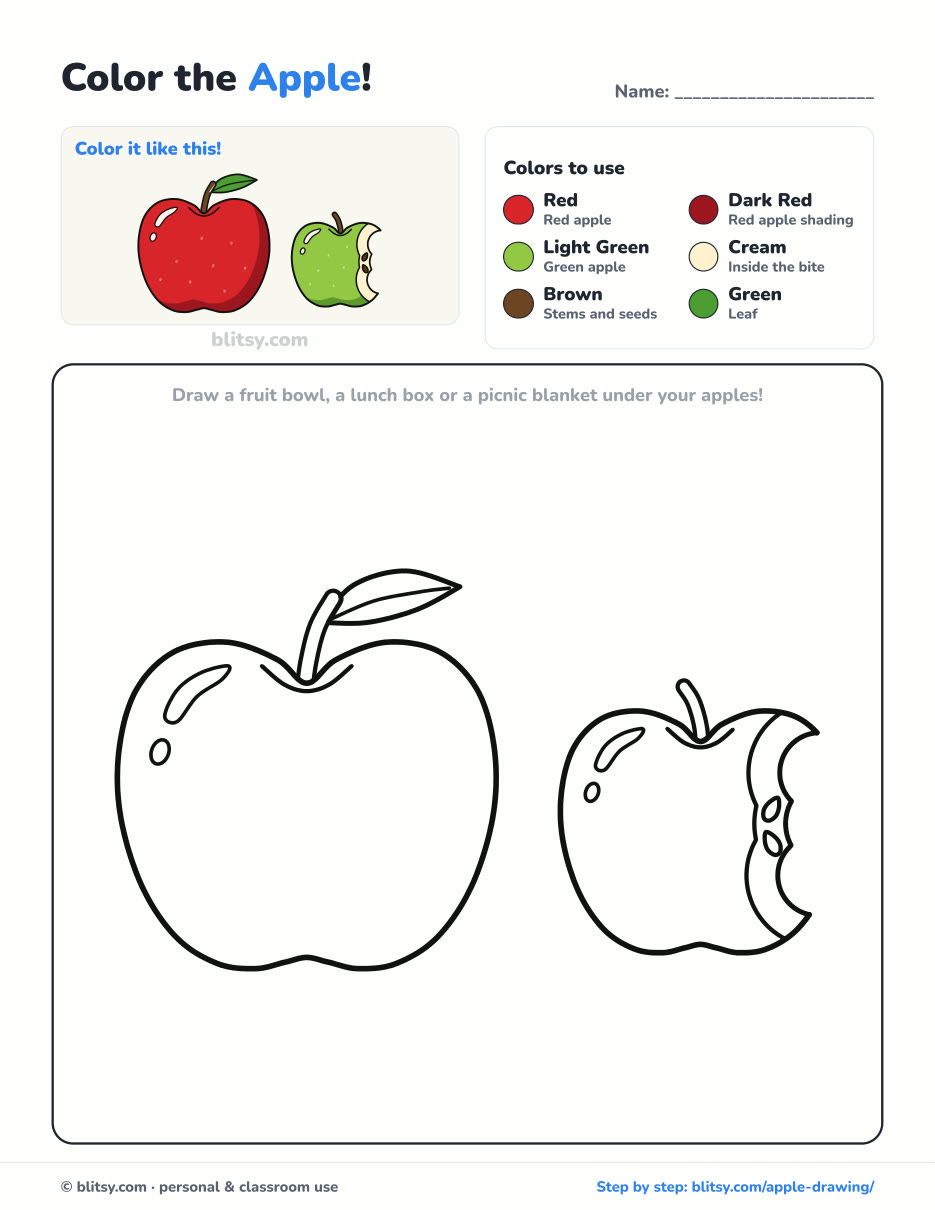
Black outlines with a colored example and the color names at the top. Ready to print and color.
⬇️ Download Coloring Page



Every step picture with its instructions and tips, to keep beside your paper while you draw.
⬇️ Download Drawing Guide📱 On a phone? Tap a download button, then open the file and choose Share → Save to Files or Print. On a computer, the PDF opens or saves straight to your Downloads folder.
An Apple Cheat Sheet for Pinterest
What People Ask About Drawing Apples
What is the easiest way to draw an apple?
Draw two overlapping circles, then wrap one outline around them with a dip at the top and a slightly narrower bottom. Add a stem in the dip and you have an apple.
How do you make a drawn apple look shiny?
Leave a curved white stripe high on one shoulder and a small white dot below it, then shade the opposite side darker. The contrast does the work.
How do you draw an apple with a bite?
Cut into one side with three curved scoops, then draw a line inside them at an even distance. Color that band cream and add a seed or two.
Can young kids draw this apple?
Yes. Kids around 5 or 6 can manage the red apple alone. The bitten green apple has more small parts, so older kids usually enjoy it more.
Grab a real apple from the kitchen, set it next to your paper and see how close your drawing gets. 🍎
Related posts:
 How to Draw a Tree Step by Step (Easy Leafy Apple Tree)
 Realistic Drawing Step by Step (Shade a Shiny Apple)
 How to Draw a Whale Step by Step (Easy for Beginners)
 How to Draw Lungs Step by Step (Easy Science Diagram)
 How to Draw a Pineapple Step by Step (Easy Crown and Slice)
 How to Draw Iron Man Step by Step (Easy Chibi for Kids)
 How to Draw a Dress Step by Step (Easy Party Dress)
 How to Draw a Chicken Step by Step (Easy for Beginners)
 How to Draw a UFO Step by Step (Cute Alien Saucer)
 How to Draw Flames Step by Step (Easy Campfire Drawing)
 How to Draw a Moon Step by Step (Sleepy Crescent + Phases)
 How to Draw a Tiger Step by Step (Easy Walking Pose)

