
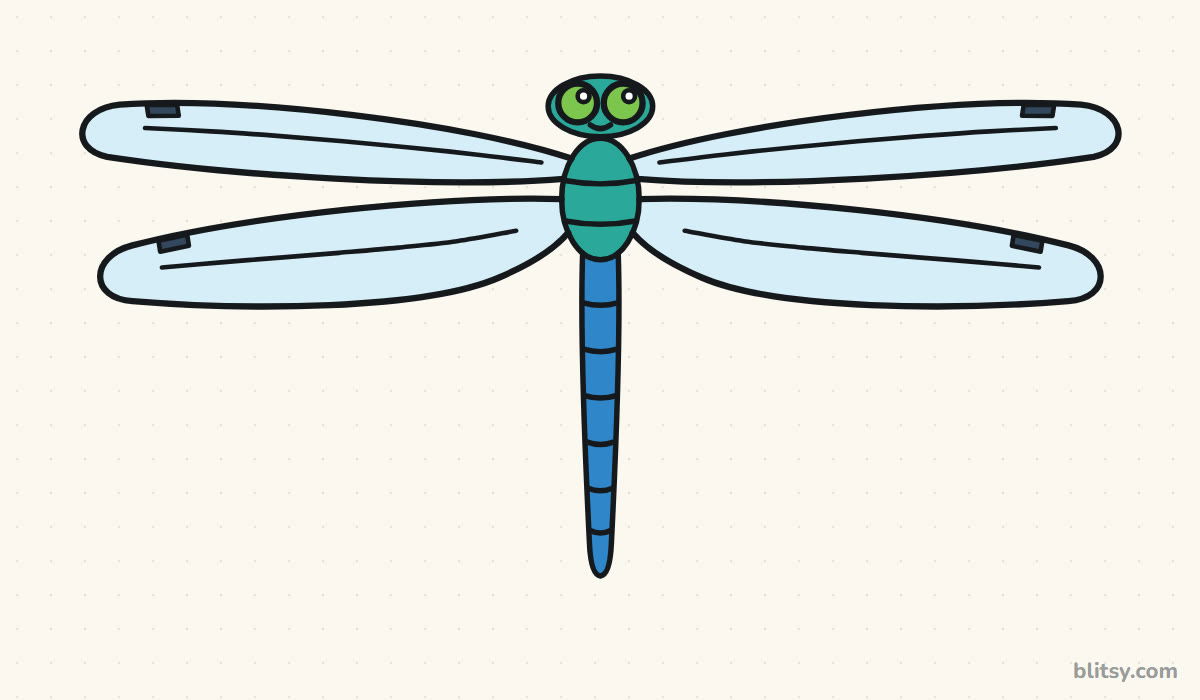
Dragonflies are one of the kindest subjects for a new artist. Seen from above, the whole insect is mirror-symmetrical, so every wing you draw on one side simply repeats on the other. In this lesson I'll show you how to draw a dragonfly step by step, from a single straight guide line to a finished, colored dragonfly with big green eyes. You only need a pencil and a little patience with the wings.
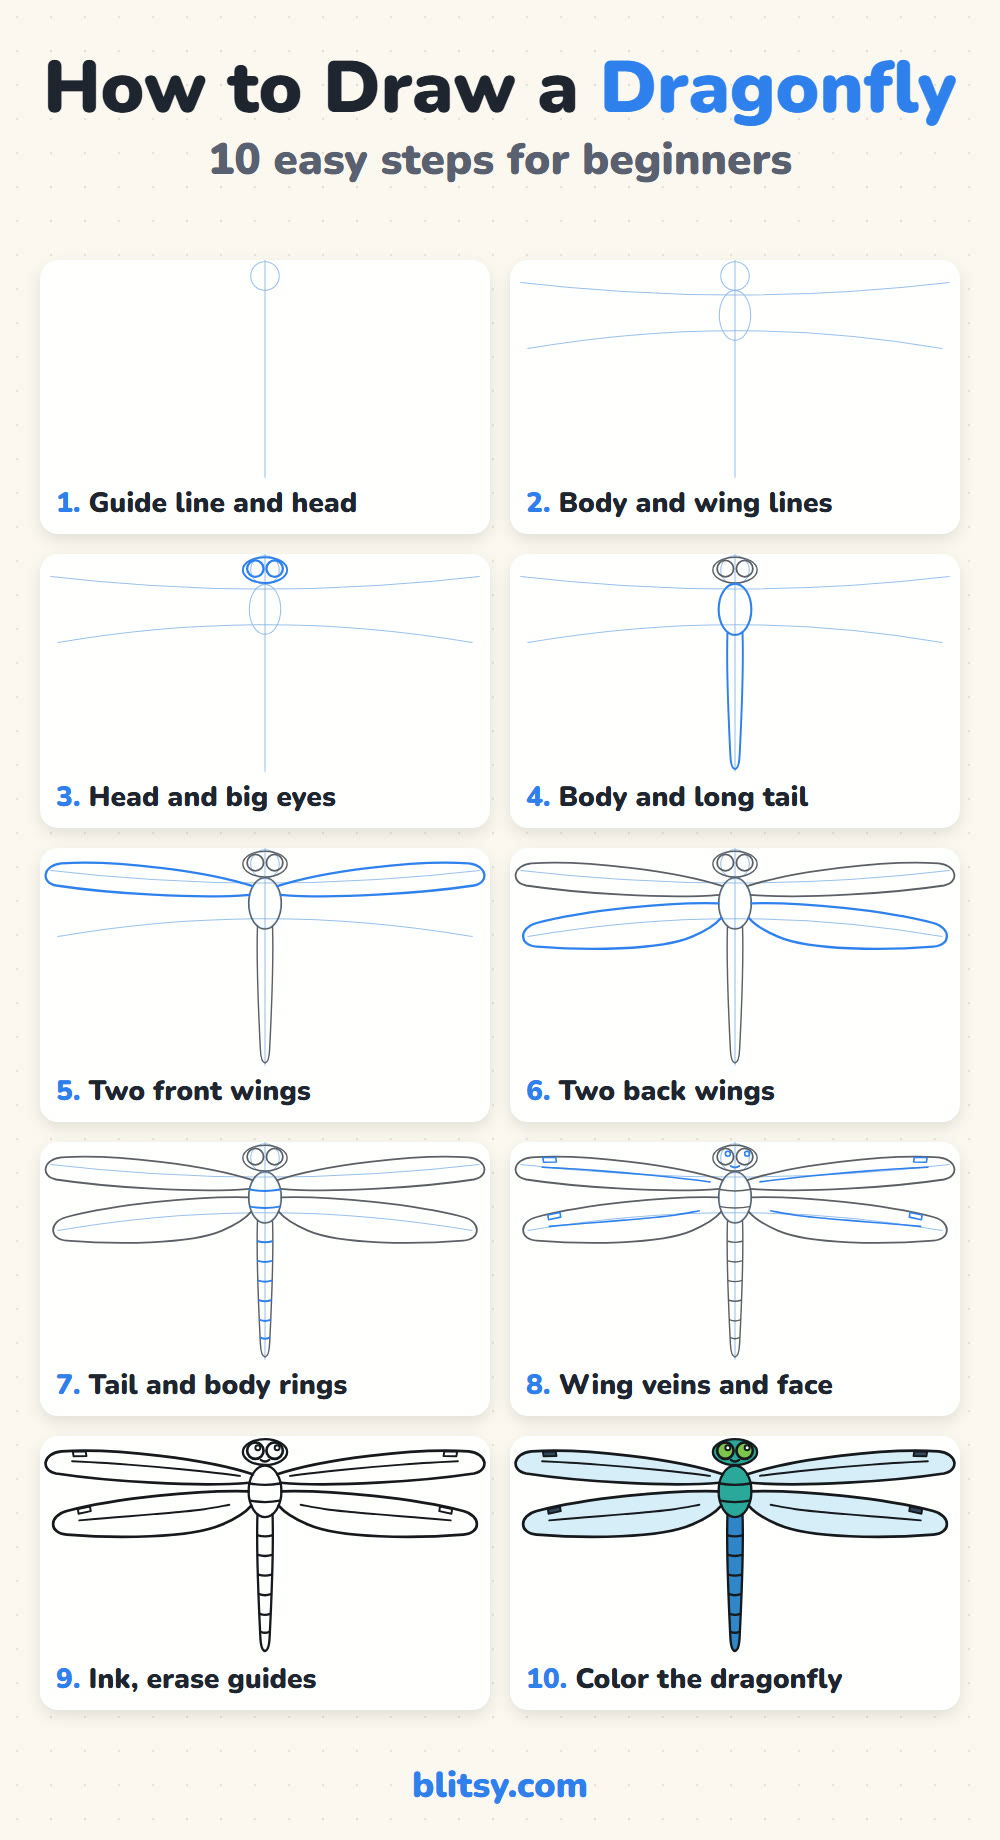
Look for the blue in each picture. Blue lines are the ones you add in that step, while gray lines are already on your paper from the steps before. The very light blue lines are guides, so keep them faint because they disappear in step 9.
Quick overview
⏱️ Time: about 20 to 30 minutes
🎯 Level: easy, good for kids aged 6 and up
✏️ Steps: 10
🌿 You'll draw: a dragonfly seen from above, wings fully open
Pencils and Paper for Your Dragonfly
- A pencil (an HB is fine for light guides)
- An eraser, ideally a soft white one
- A black fineliner or felt-tip pen for the final lines
- Colored pencils or markers in blues and greens
- A ruler if you want a perfectly straight center line
Use your paper sideways, because a dragonfly is much wider than it is tall once the wings are open.
How to Draw a Dragonfly Step by Step
Step 1: Draw a guide line and a head circle
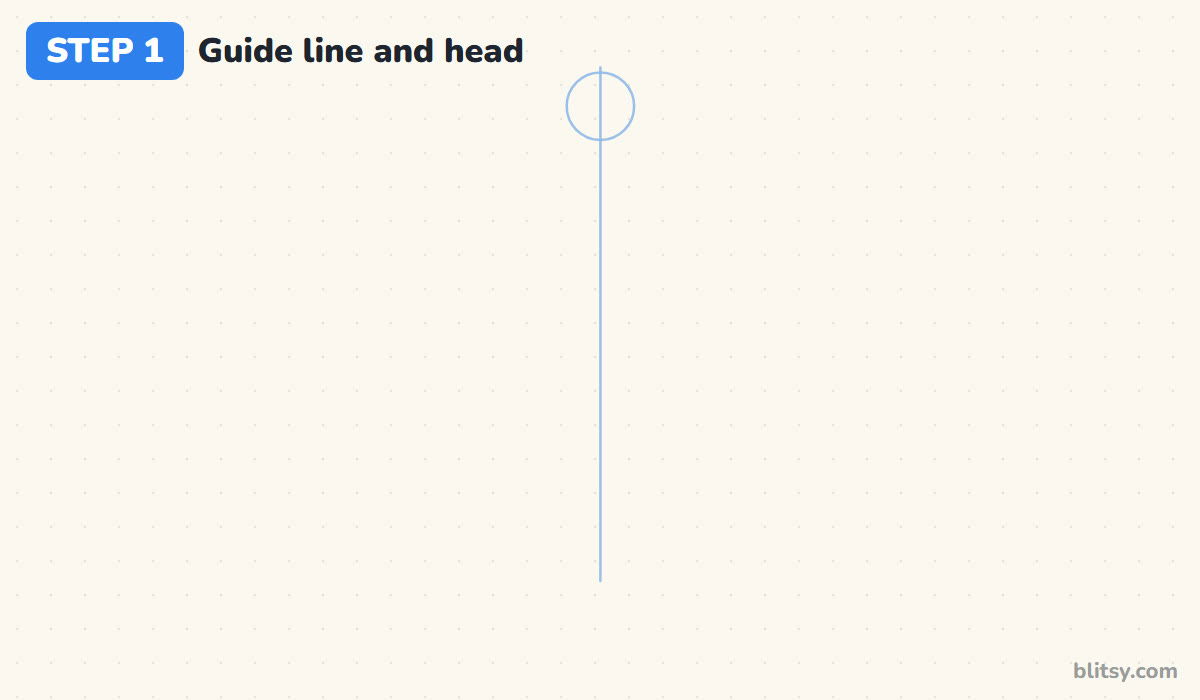
Start with one straight vertical line down the middle of your paper, from near the top to near the bottom. Everything else is built around it. At the very top of the line, sketch a small circle for the head. I keep this circle small on purpose: a dragonfly's head is only a little wider than its body.
💡 Tip: Use a ruler for the center line if your hand wobbles. Nobody will see it after step 9.
Step 2: Add the body oval and two wing lines
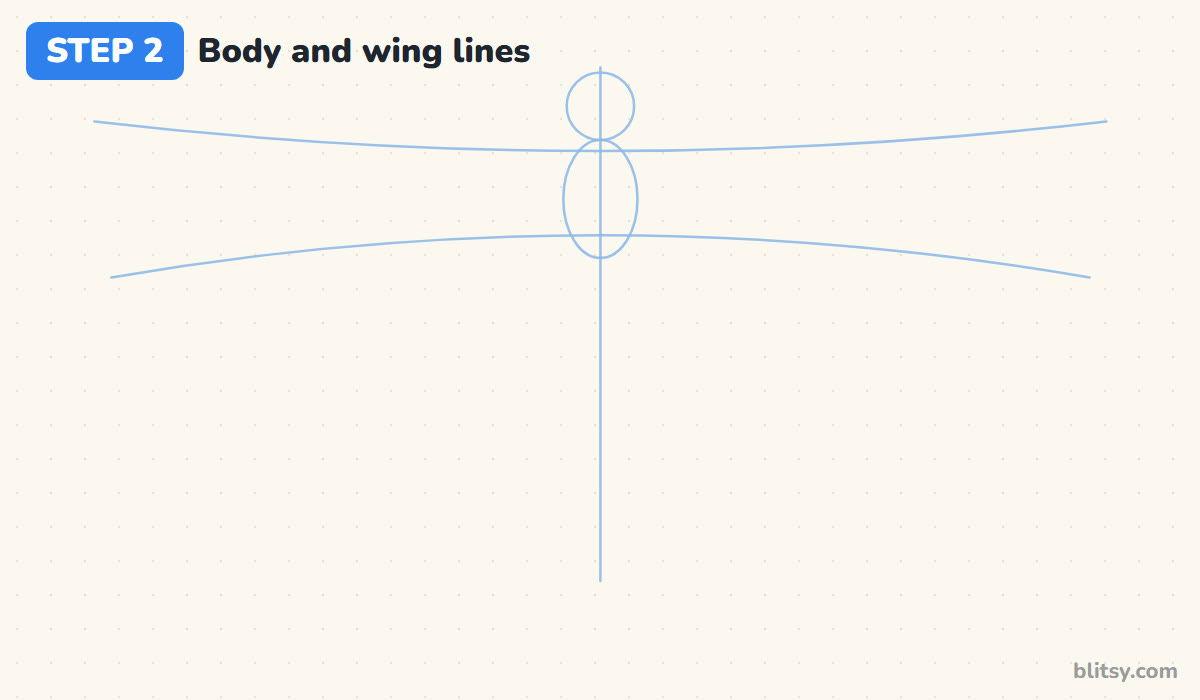
Right under the head, draw a tall oval centered on the line. This chunky part is the thorax, where all four wings attach. Next, draw two long curved lines across the paper. The upper one crosses the top of the oval and bends gently down in the middle. The lower one crosses near the bottom of the oval and arches the other way.
💡 Tip: Stretch the wing lines almost to the paper's edges. Short guides lead to short, stubby wings.
Step 3: Draw the head and big eyes
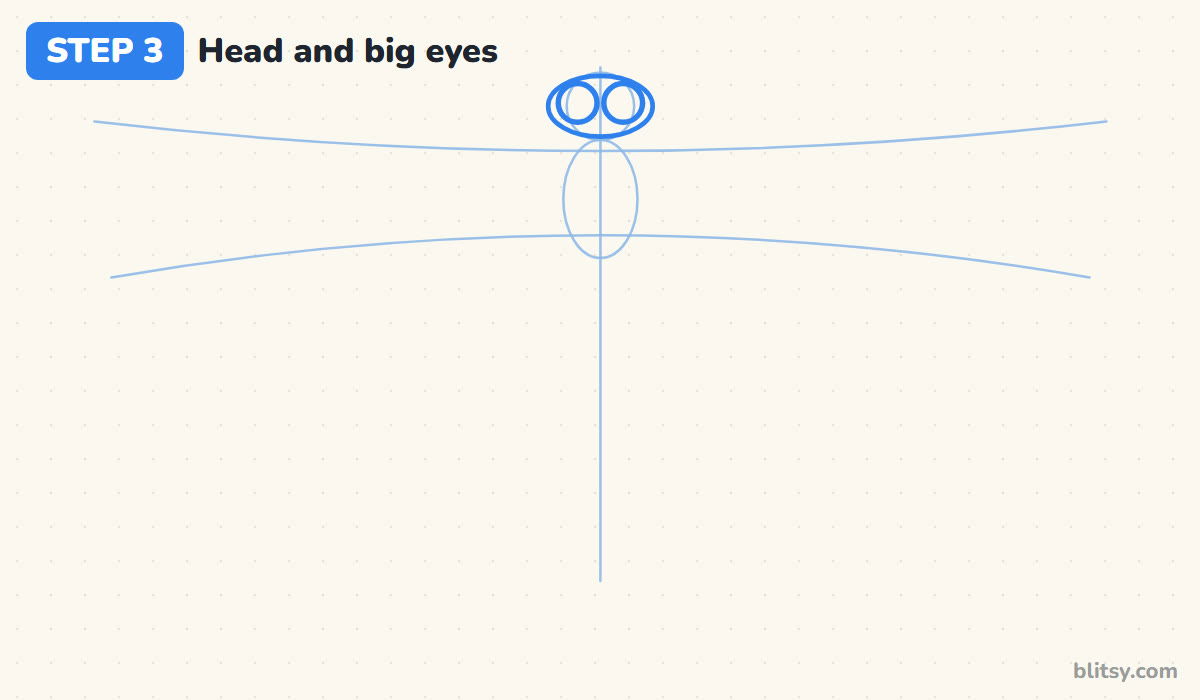
Turn the head circle into a wider oval, a bit like a flattened egg lying on its side. Inside it, draw two large round eyes side by side so they nearly fill the head. Real dragonflies have enormous eyes that wrap around their face, so it's fine if yours almost touch the edges.



💡 Tip: Draw the left eye, then the right one at the same height. Matching heights keeps the face friendly.
Step 4: Outline the body and the long tail
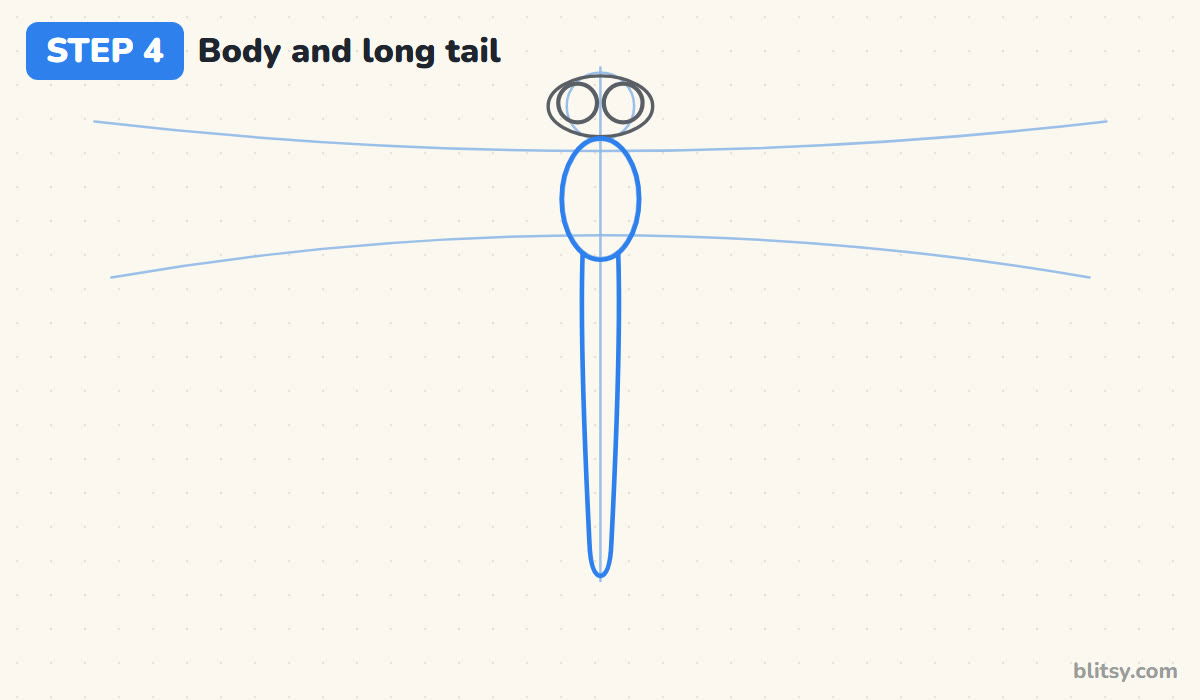
Go over the oval guide with a confident line to make the thorax. From its bottom, draw the tail as two long lines running down beside the center line, close together. Let them come a little closer as they go down, and join them with a small rounded tip at the bottom. The tail should be roughly as long as one wing.
💡 Tip: Draw each long tail line in one smooth pull of your arm, not in short scratchy bits.
Step 5: Draw the two front wings
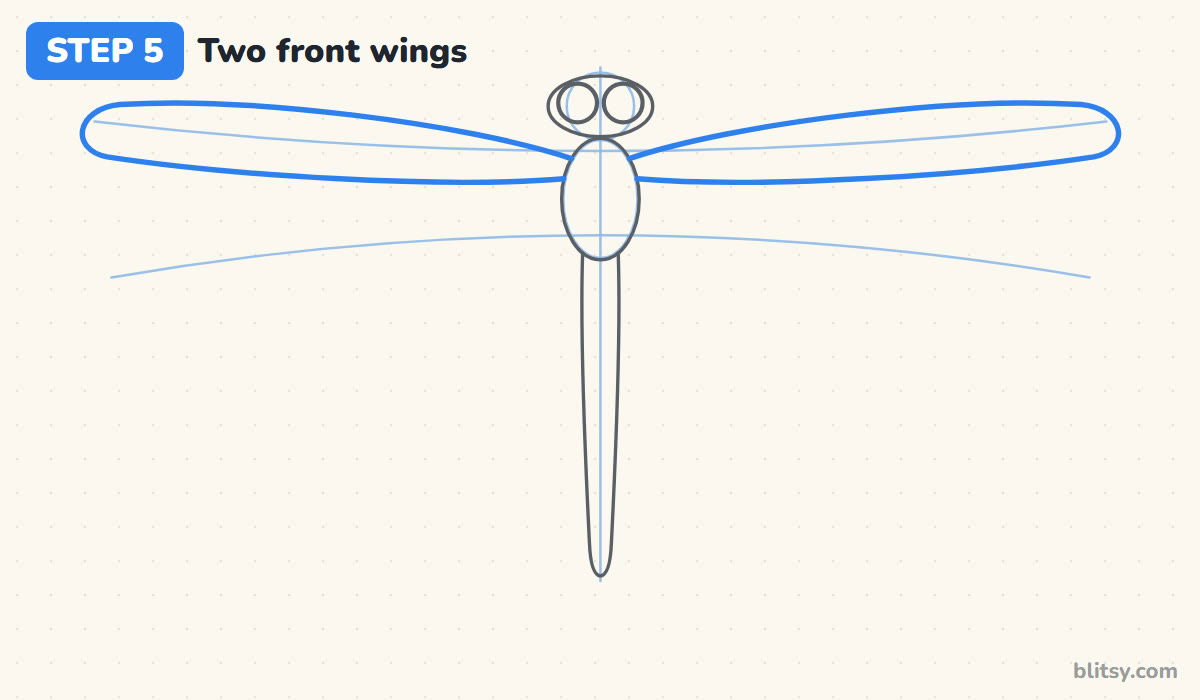
Each front wing starts at the top half of the body and follows the upper wing line outward. Make the wing long and slim, with a rounded tip at the end, and bring the bottom edge back to the body. Then draw the matching wing on the other side. I check the two tips against each other before moving on, because uneven wings are the first thing people notice.
💡 Tip: Turn your paper upside down for a second. Any wing that's longer or fatter jumps right out.
Step 6: Draw the two back wings
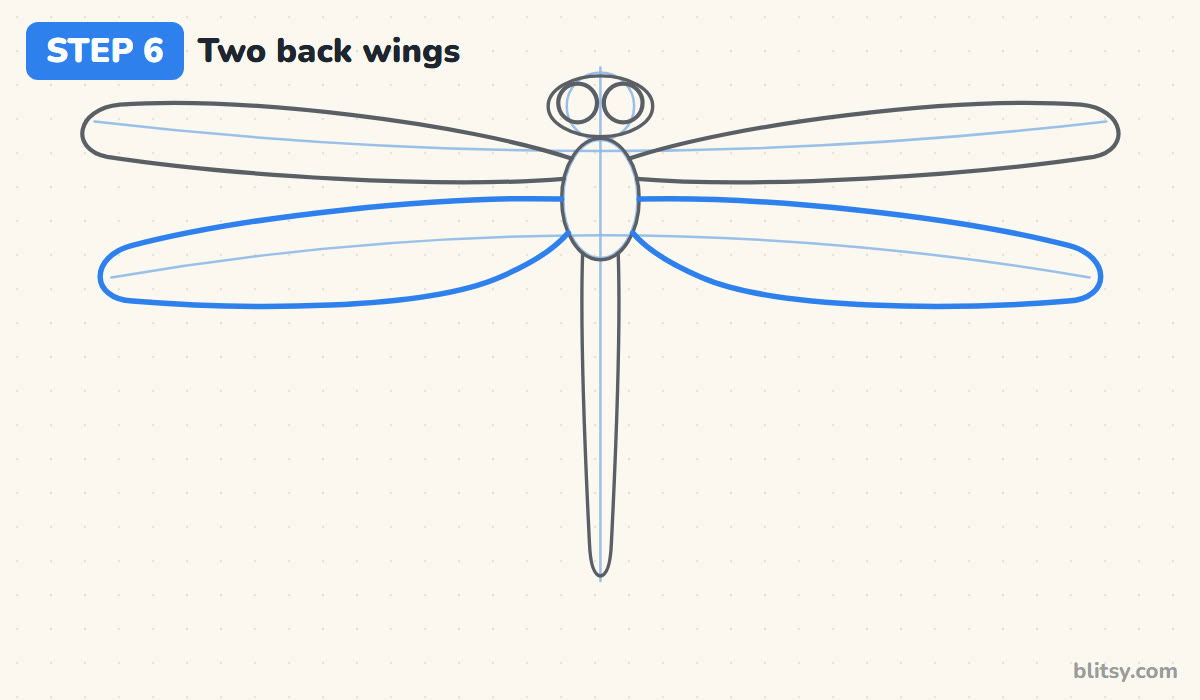
The back wings attach just below the front ones, along the lower guide line. Make them a little shorter but wider near the body, so their bottom edge swoops in a soft curve back to the thorax. I always leave a small gap between each front and back wing. That gap is what makes four separate wings instead of one big blob.
💡 Tip: If the back wings touch the front ones, nudge their top edge down rather than redrawing everything.
Step 7: Add rings to the tail and body
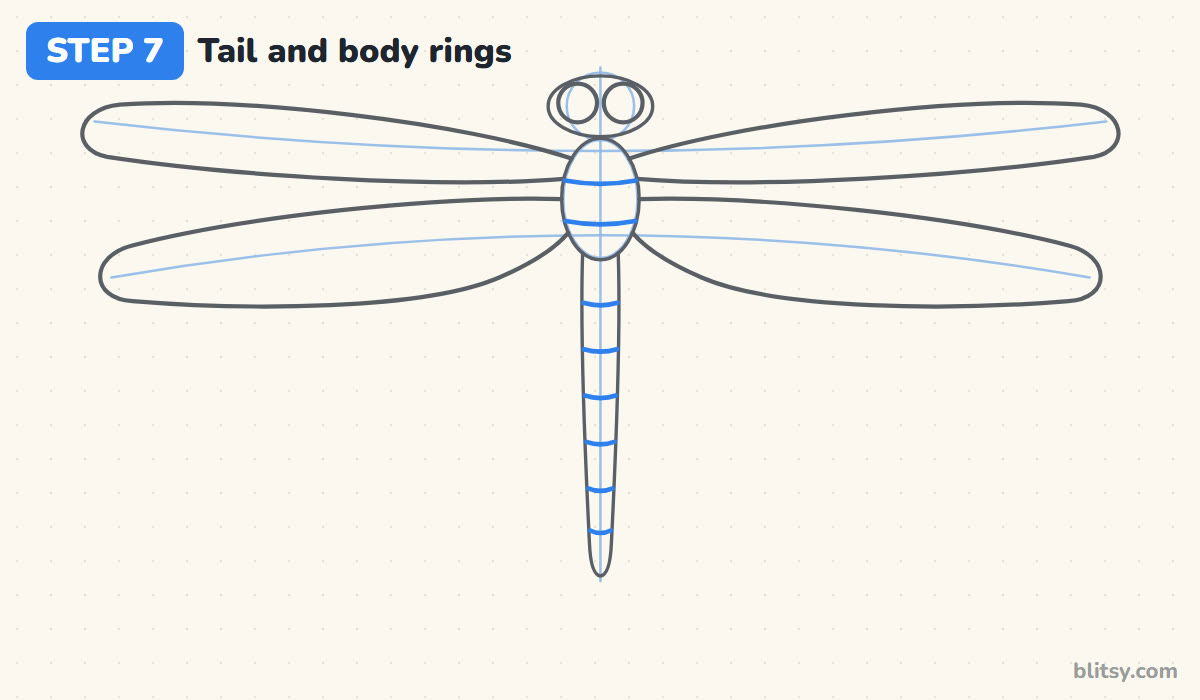
Now draw short curved lines across the tail, spaced evenly from the body to the tip. These show the segments a dragonfly's tail is made of. Six or seven rings look right at this size. Add two more curved stripes across the thorax so it matches the tail.


💡 Tip: Curve every ring slightly downward. Flat rings make the tail look like a ladder.
Step 8: Add wing veins, spots and a face
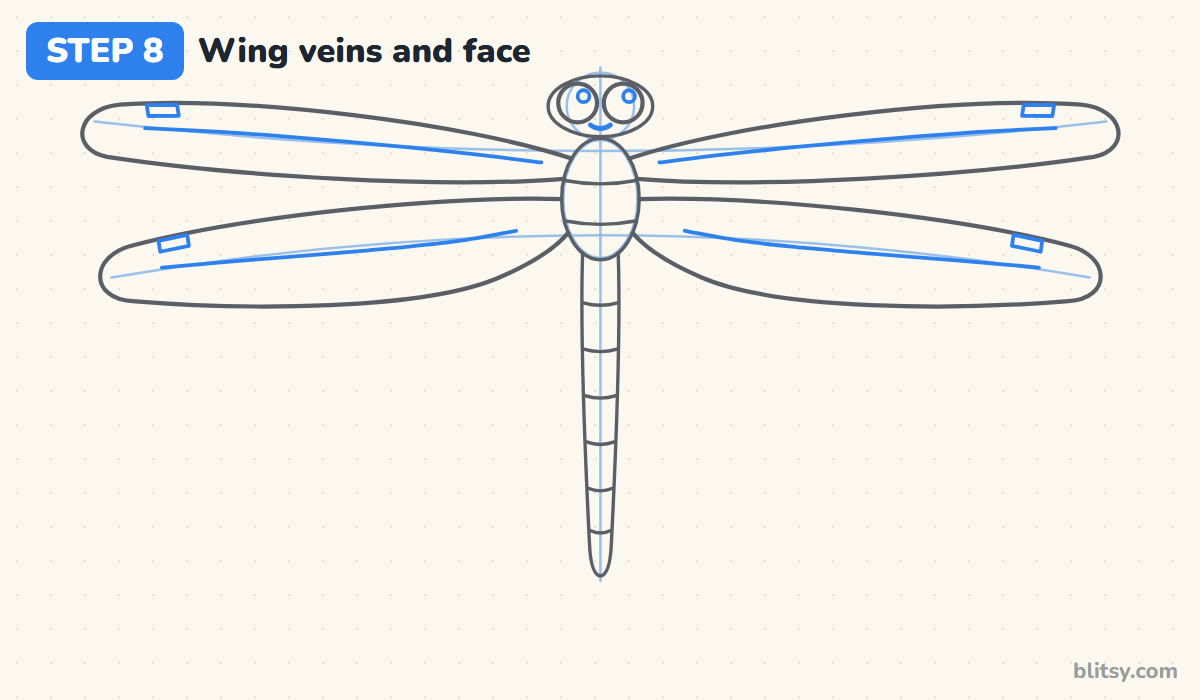
Inside each wing, draw one long thin vein running from the body toward the tip. Near the tip, along the top edge, add a tiny four-sided spot. Real dragonflies have that dark mark on every wing, and it makes yours look right even in a simple drawing. Finish the face with a small shine circle in each eye and a little smiling mouth under them.
💡 Tip: Put the eye shine on the same side in both eyes, as if light comes from one direction.
Step 9: Ink the lines and erase the guides
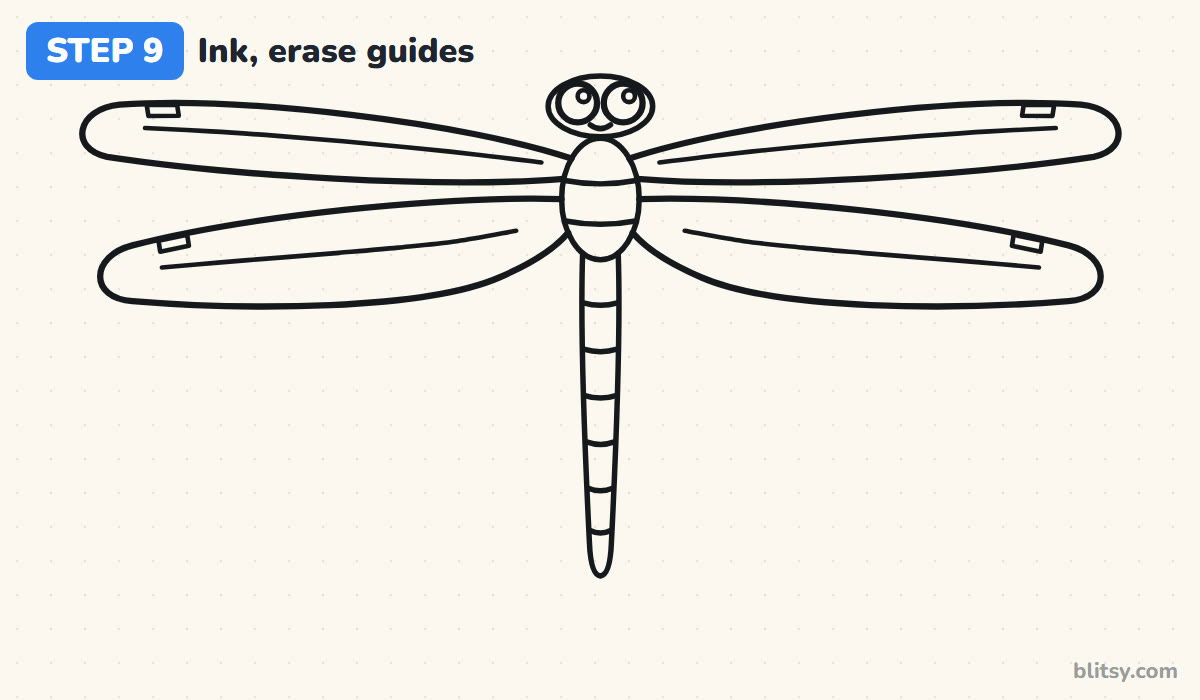
Trace every line you want to keep with a black pen. Go a little slower on the wing tips, where the curve turns tightly. I skip the center line, the head circle, the body oval and the two wing guides. Once the ink is dry, erase all the pencil, and your dragonfly suddenly looks clean and finished.
💡 Tip: Wait a full minute before erasing. Fineliner ink smears more easily than you'd expect.
Step 10: Color your dragonfly
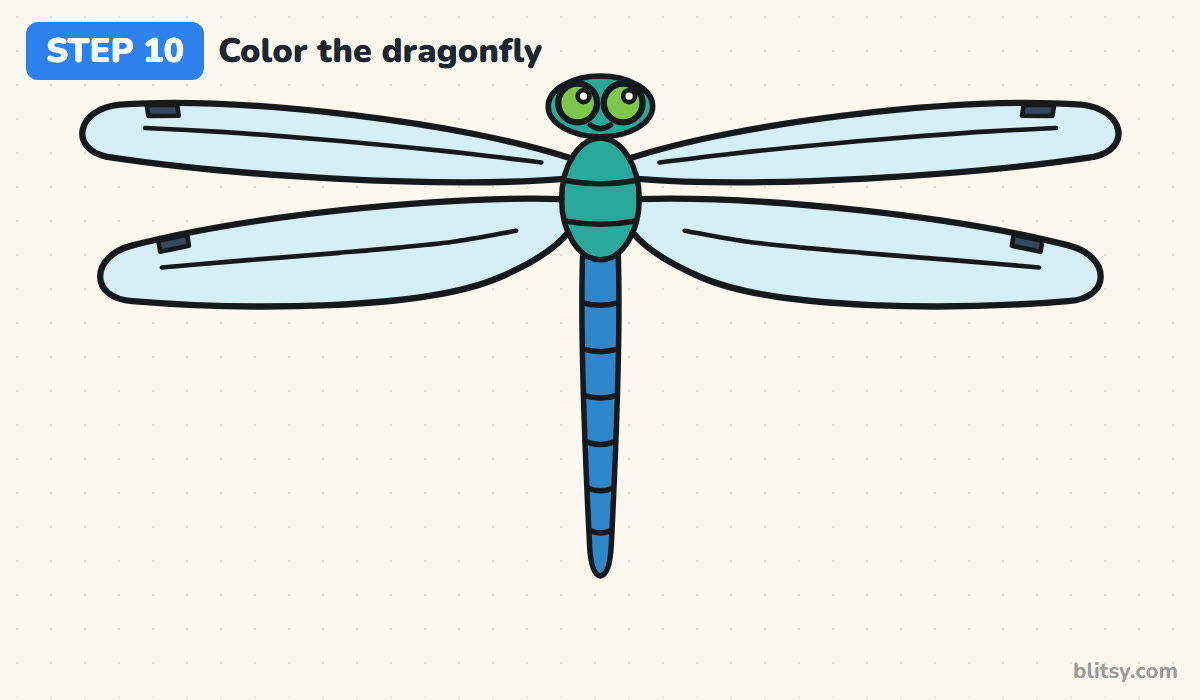
Give the wings a very pale blue, almost white, so they look see-through. Color the four wing spots dark blue. Use teal for the head and body, and a brighter blue for the tail. Make the eyes green and leave the little shine circles white. My favorite part is the tail, where a slightly darker blue near each ring adds depth without any extra lines.
💡 Tip: Press very lightly on the wings. Heavy color makes them look solid instead of glassy.
Why Some Dragonfly Drawings Look Off
- Wings that don't match. One long wing and one short wing make the dragonfly look broken. Draw one side, then measure the other against it with your pencil.
- Wings glued together. When the front and back wings touch, they read as one shape. Leave a thin gap of paper between them.
- A tail that's too thick. A wide tail makes it look like a bee. Keep the two tail lines close and let them narrow toward the tip.
- Wings drawn from the head. All four wings grow from the chunky middle body, not the head. Check where yours start.
- Dark, heavy wing color. Thick color hides the veins and loses the light, glassy look. Use the palest blue you have.
New Ideas for Your Next Dragonfly
After a couple of tries, change it up. Bend the tail into a gentle curve so the dragonfly looks like it's turning, or perch it on a reed stem over a pond. You can also color the wings with soft rainbow stripes, or try a red dragonfly with orange wings for a late-summer look. Younger kids can leave out the veins and the rings and still end up with a clear dragonfly. For another winged insect, our butterfly drawing tutorial is a good next lesson, and the bee coloring page set makes a fun rainy-day activity.
Printable Dragonfly Coloring Page and Step Guide
If you'd rather draw and color on paper, download the free dragonfly coloring page. It shows a colored example at the top with a simple key, so kids know which color goes on the wings, the body and the eyes. The step-by-step PDF guide holds all 10 steps and tips, ready for regular Letter or A4 paper.
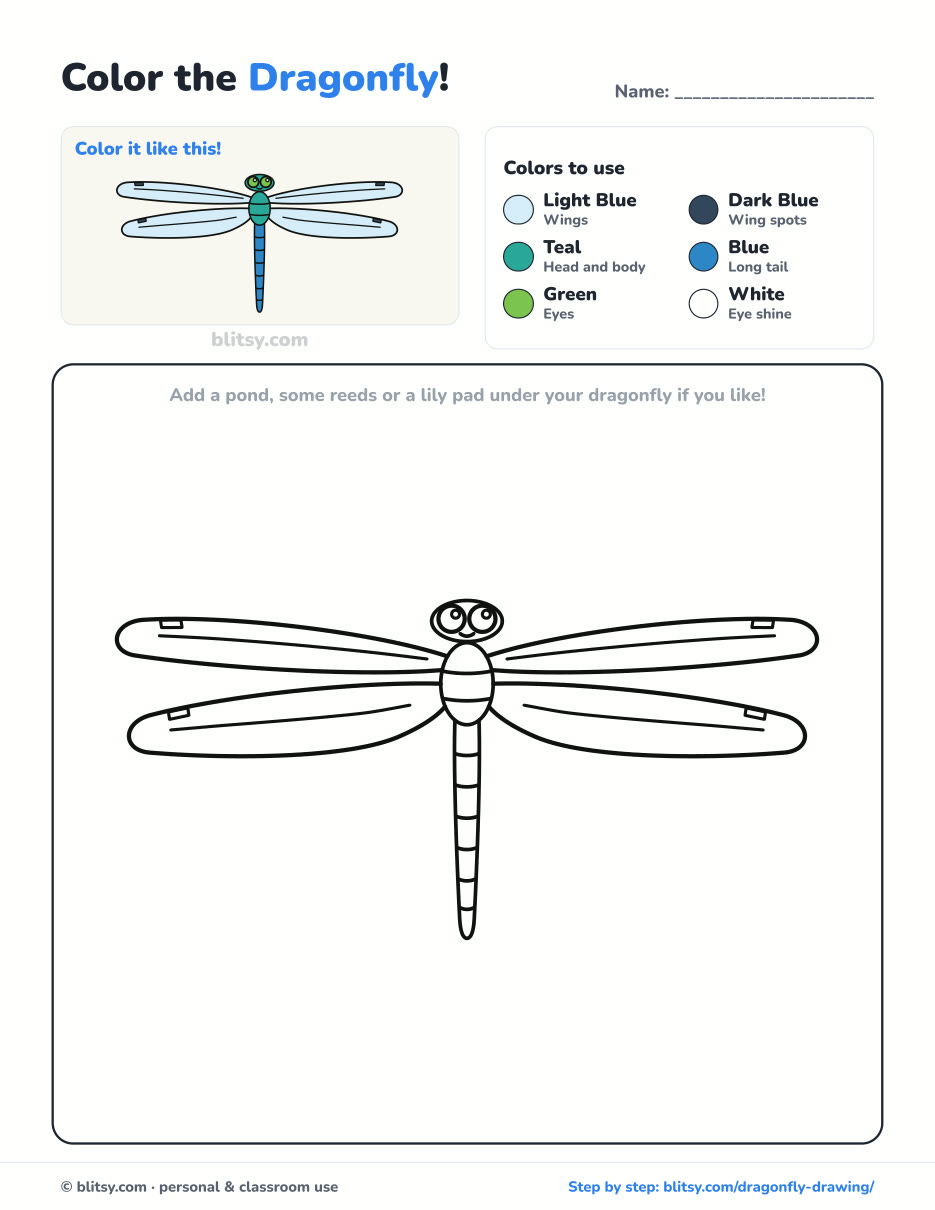
Black outlines with a colored example and the color names at the top. Ready to print and color.
⬇️ Download Coloring Page
Every step picture with its instructions and tips, to keep beside your paper while you draw.
⬇️ Download Drawing Guide📱 On a phone? Tap a download button, then open the file and choose Share → Save to Files or Print. On a computer, the PDF opens or saves straight to your Downloads folder.
Keep These Dragonfly Steps on Pinterest
Dragonfly Finished? Try These Animal Tutorials Next
Every link below opens a full step-by-step tutorial, with numbered pictures to follow from the first guide shape to the last bit of color.
- Rat Drawing: Start with the nose and finish with a curled tail in this how to draw a rat step by step lesson, which ends on a curious gray rat.
- Ant Drawing: Three ovals turn into a red ant with its antennae up in this easy ant drawing tutorial, all six feet planted.
- King Kong Drawing: Draw the giant gorilla with his fists down and mouth open, ready to roar, using this King Kong drawing tutorial.
- Puppy Drawing: Here the goal is a pup with its tongue out and collar on. Follow the puppy drawing step by step guide to get there in eleven steps.
- Narwhal Drawing: Take a narwhal from blank paper to tusk-up swimming pose with this how to draw a narwhal tutorial.
- Miraculous Ladybug Drawing: Mask on and yo-yo ready, the chibi heroine comes together in this Miraculous Ladybug drawing tutorial.
- Whale Drawing: Ten steps build a happy blue whale, spout included, in our easy whale drawing tutorial.
- Kitten Drawing: A ginger kitten sitting politely is the finish line of this how to draw a kitten step by step lesson.
- Godzilla Drawing: Two ovals grow into a friendly kaiju over ten steps in the Godzilla drawing tutorial.
- Sloth Drawing: If slow and smiley is more your speed, the sloth drawing step by step guide leaves you with a sloth hanging from a branch.
- Arctic Fox Drawing: Learn how to draw an arctic fox sitting with its cheek tufts out and its tail curled to one side.
- Realistic Drawing: Ready for shading? This realistic drawing tutorial walks you through one shiny apple under a single lamp, light to shadow.
- Paw Print Drawing: A dog print and a cat print with a little heart between them make up this short paw print drawing tutorial.
- Penguin Drawing: Rosy cheeks and flippers out for balance: that is the penguin waiting at the end of this how to draw a penguin step by step lesson.
Dragonfly Drawing Questions from Beginners
What is the easiest way to draw a dragonfly?
Draw it from above. Start with a straight center line, a small head and an oval body, then add two long wings on each side and a thin tail. Because both sides match, you only have to work out each shape once.
How do you draw a dragonfly for kids?
Keep it to the main shapes: head, two eyes, body, four wings and a tail with a few rings. Skip the veins and spots, and use thick markers. Bright colors work great, and the eyes can be any color kids like.
How many wings does a dragonfly have?
Four. There are two on each side, a front pair and a back pair, and all of them attach to the middle part of the body. The back wings are usually a little wider near the body.
How long does it take to draw a dragonfly?
Most beginners finish in 20 to 30 minutes, including inking and coloring. The wings take the longest, since you'll want both sides to match.
Sharpen that pencil, draw one straight line, and see how your dragonfly turns out. 💙✏️
Related posts:
 How to Draw a Car Step by Step (Easy Drawing for Beginners)
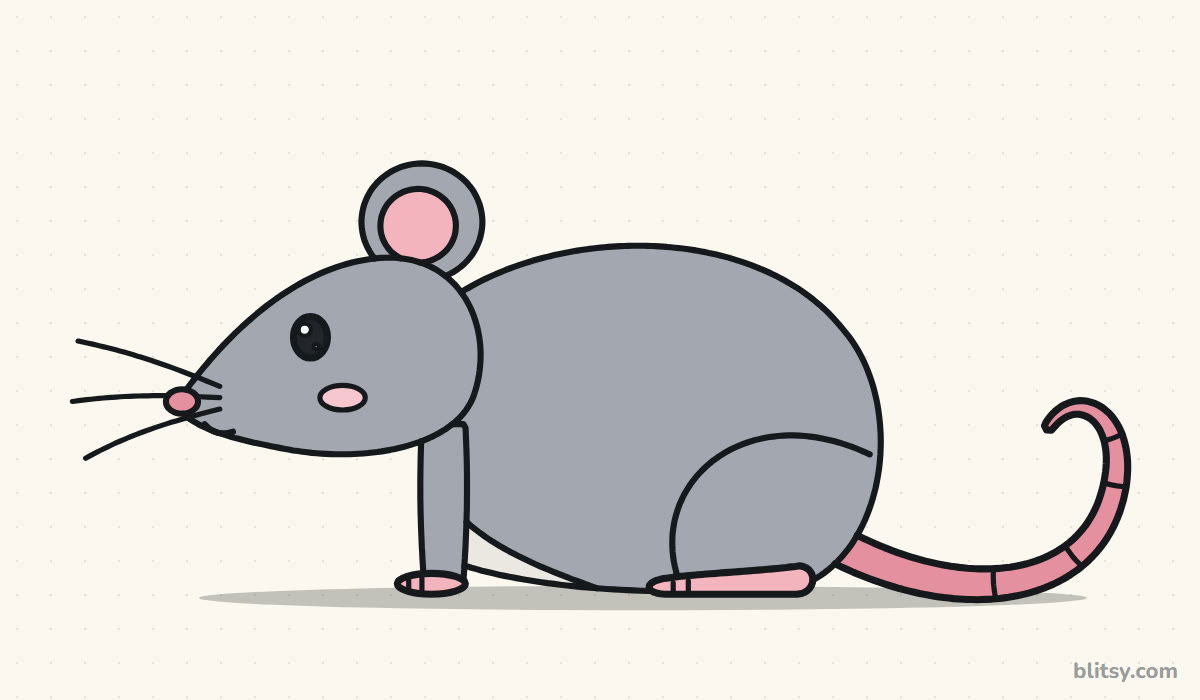 How to Draw a Rat Step by Step (Easy for Beginners)
 How to Draw a Sloth Step by Step (Easy for Beginners)
 How to Draw a Puppy Step by Step (Easy for Beginners)
 How to Draw a Rose Step by Step (Spiral Method for Beginners)
 How to Draw Olaf Step by Step (Easy for Beginners)
 How to Draw a Ladybug Step by Step (Easy for Beginners)
 How to Draw a Dog Step by Step (Easy Side View for Beginners)
 How to Draw a Leopard Step by Step (Easy for Beginners)
 How to Draw a Light Bulb Step by Step (Easy for Beginners)
 How to Draw a Crow Step by Step (Easy for Beginners)
 How to Draw an Eagle Step by Step (Easy for Beginners)

