
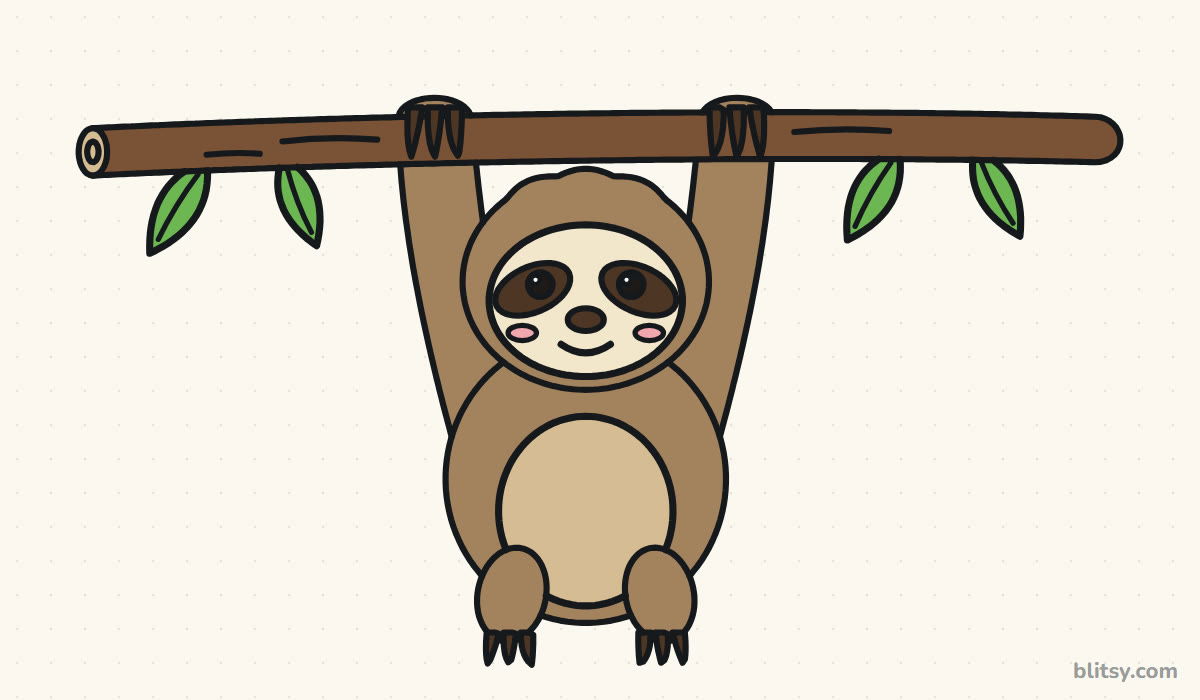
Sloths move slowly, and that's good news for anyone learning to draw one. There are no running legs or tricky poses to figure out, just a round little animal hanging from a branch with a calm face. In this lesson I'll walk you through how to draw a sloth step by step, from two light ovals to a finished, colored sloth with dark eye patches and a gentle smile. If you can draw a circle and a straight line, you have every skill this needs.
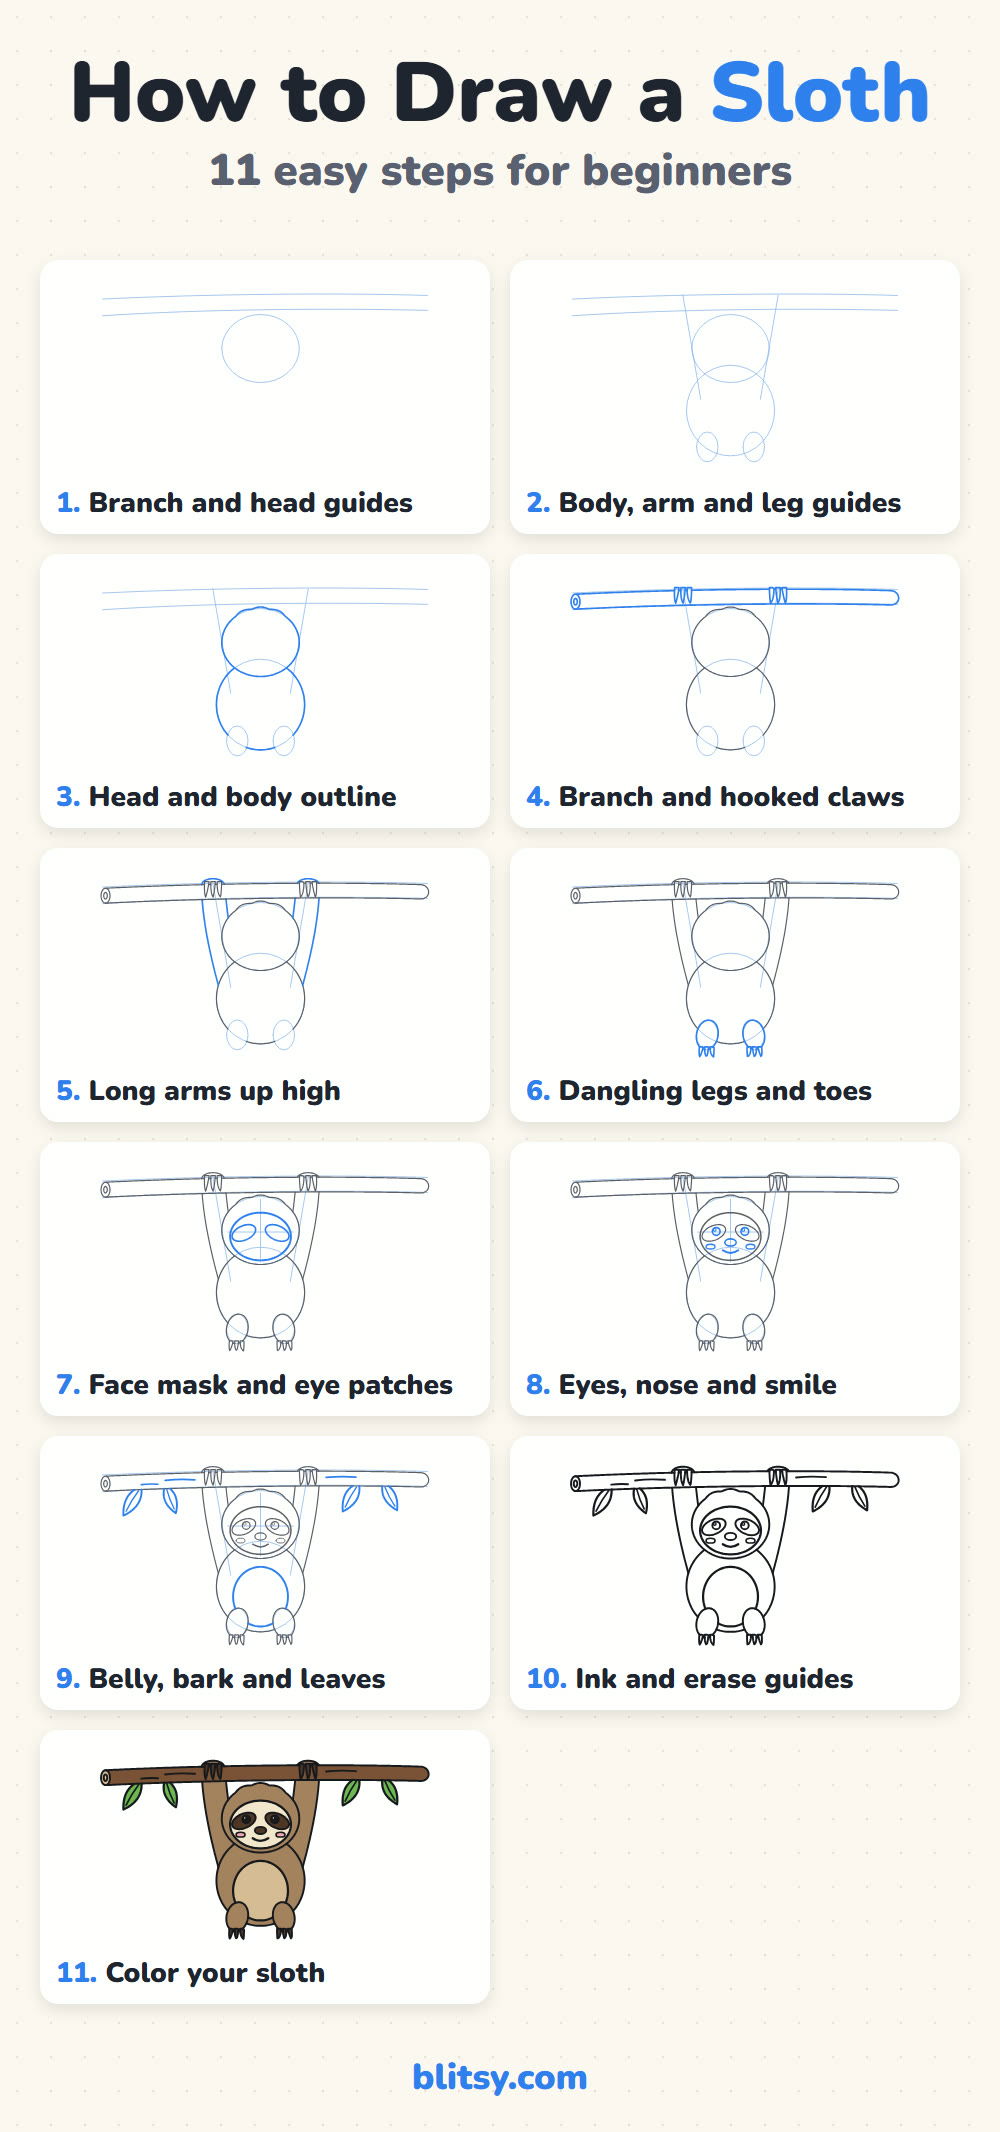
Each picture adds a little more to the drawing. The lines in bright blue are the new ones for that step, so those are the only lines you copy. Gray lines are already on your paper from before, and the pale blue ones are light guides you'll erase later.
Quick overview
⏱️ Time: about 25 to 35 minutes
🎯 Level: easy, good for kids from about 6 up
✏️ Steps: 11
🦥 You'll draw: a smiling sloth hanging from a branch with four leaves
Pencil Box Checklist for a Sleepy Sloth
- An HB or 2B pencil
- A soft eraser
- A black marker or fineliner for the final lines
- Colored pencils or markers: light brown, brown, dark brown, cream, green and pink
- A sheet of paper turned sideways
The branch runs nearly the full width of the page, so landscape paper keeps both ends from getting cut off.
How to Draw a Sloth Step by Step
Step 1: Sketch the branch and head guides
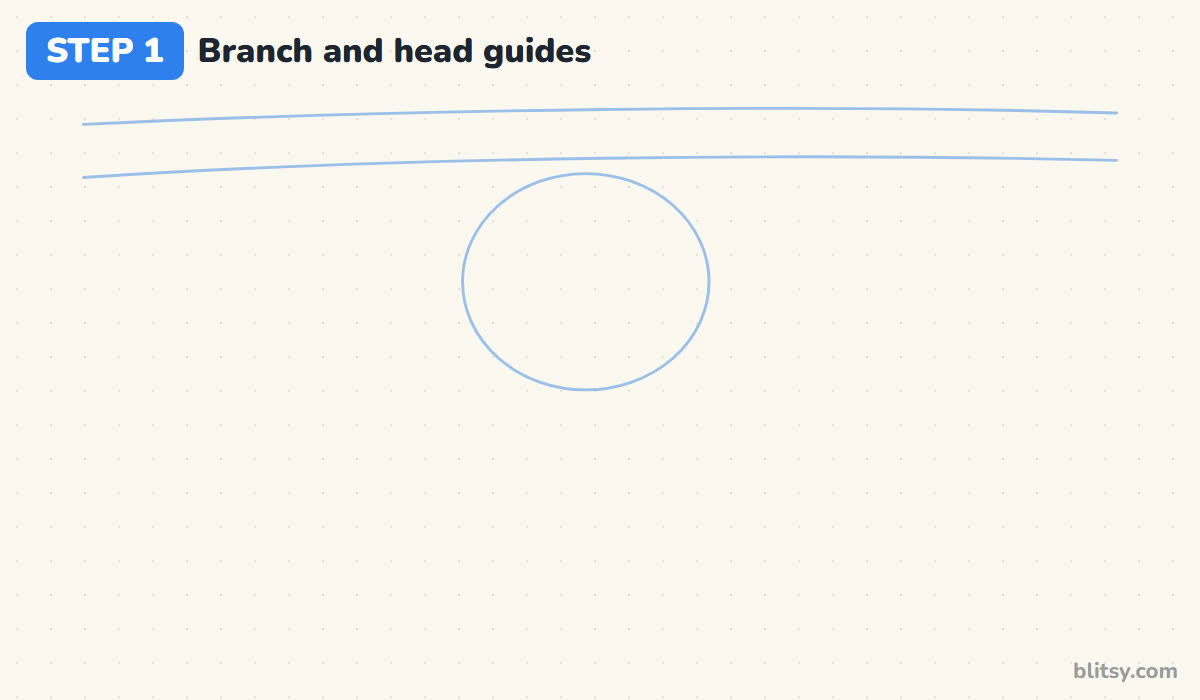
Near the top of your paper, draw two long lines across the page, about a finger's width apart. That's the branch. Just under its middle, draw an oval that's a little wider than it is tall for the head. Leave a small gap between the head and the branch, because the arms need room to reach up.
💡 Tip: Press so lightly that you can barely see the lines. Guides are meant to disappear.
Step 2: Add guides for the body and limbs
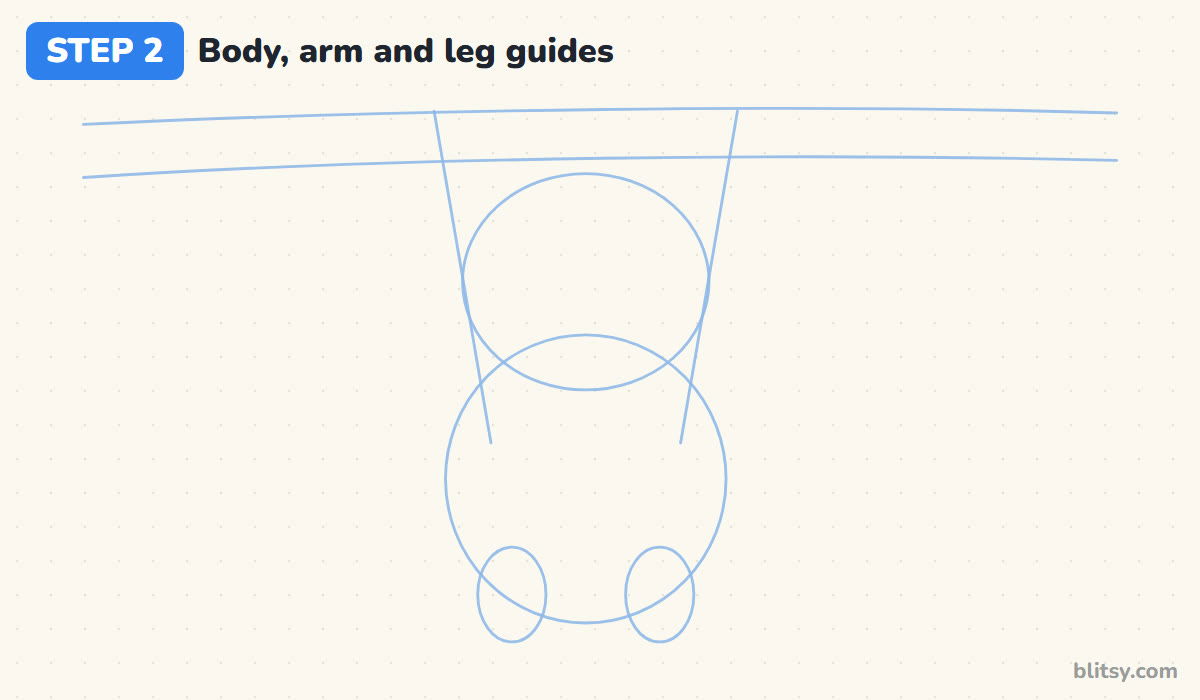
Below the head, draw a bigger circle for the body so it overlaps the bottom of the head a bit. Then draw two straight lines from the branch down to the sides of the body, leaning in like a tall letter A without the crossbar. Finish with two small upright ovals at the bottom of the body for the legs.
💡 Tip: Check that the two arm lines lean in by the same amount before moving on.
Step 3: Draw the head and body outline
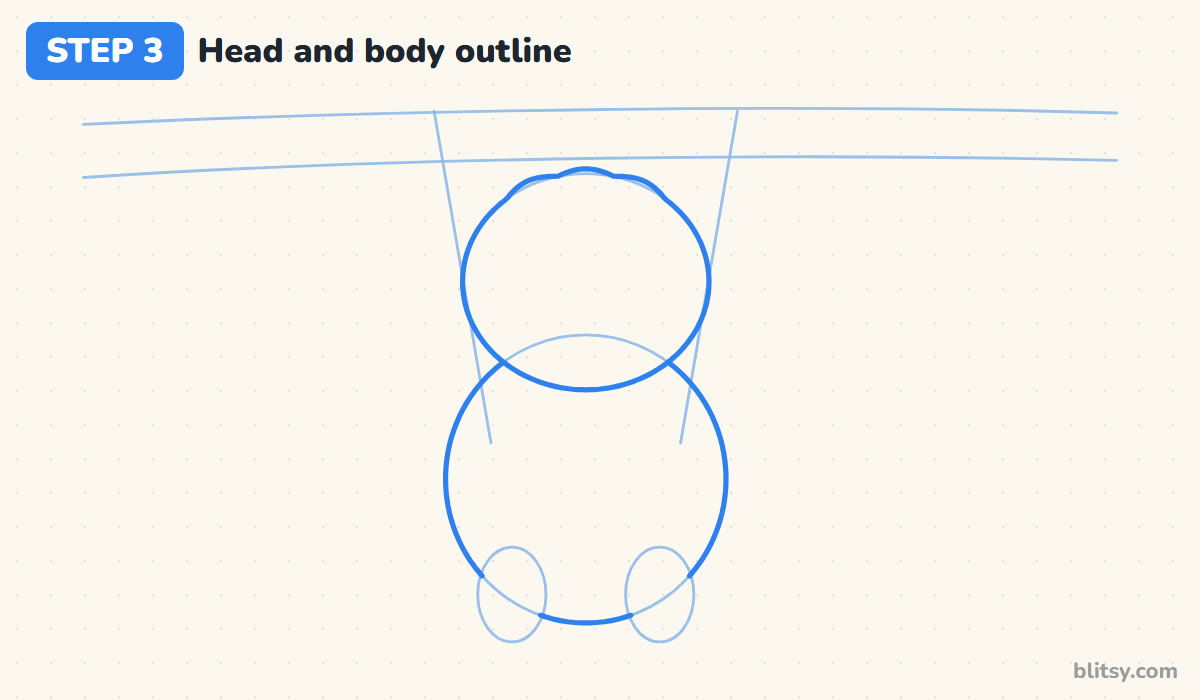
Trace over the head oval with a firmer line, and give the top three soft little bumps for fluffy fur. I like the bumps small, since big ones start to look like a crown. Next, trace the body circle, but stop where the head sits in front of it and where the leg ovals cross it.




💡 Tip: Turn your paper as you go around a circle so your hand always pulls the line toward you.
Step 4: Draw the branch and the hooked claws
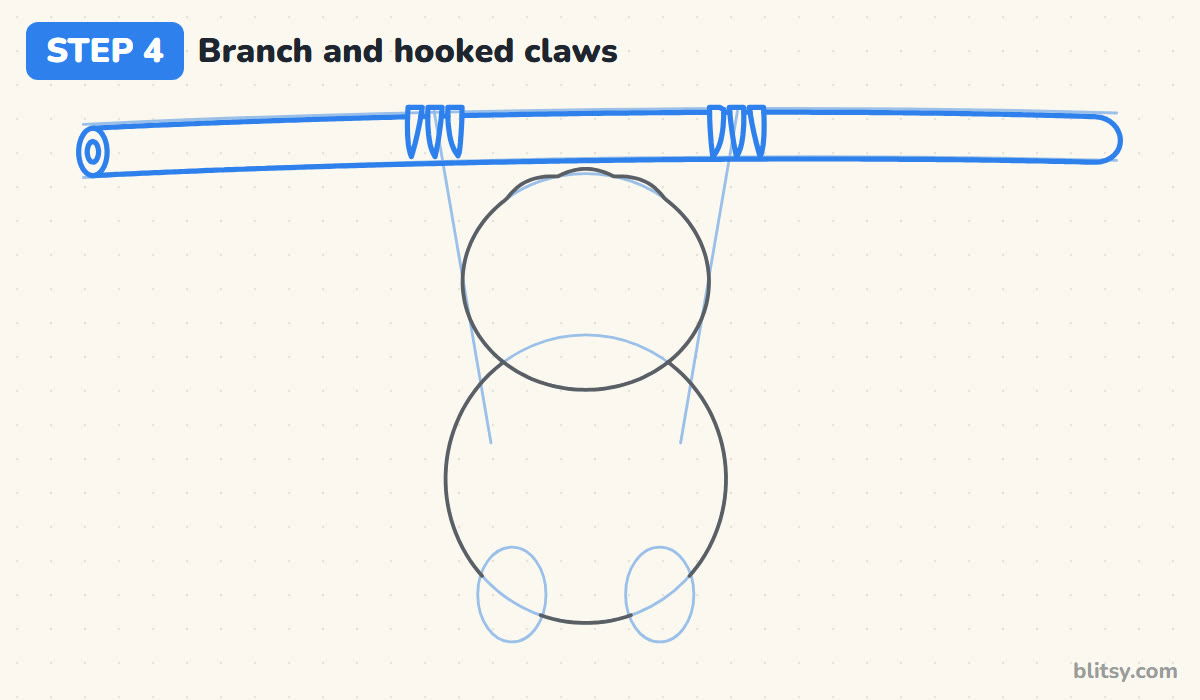
Go over the two branch guides and close the right end with a rounded curve. On the left end, draw a small upright oval with a tiny one inside it, so the branch looks like it was cut. Then, where each arm line meets the branch, add three long curved claws hanging over the front of the wood.
💡 Tip: Make the claws longer than you think. Sloth claws are one of the things people recognise first.
Step 5: Draw the long arms
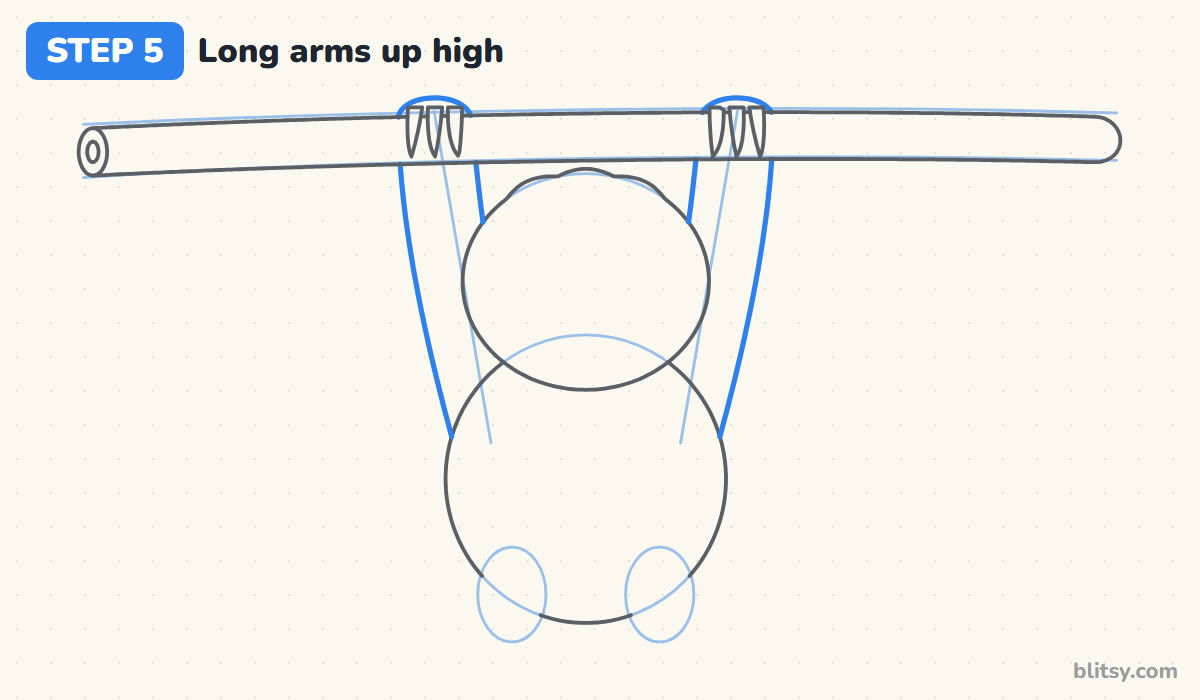
Each arm is a long tube from the branch down to the body. Start on the outside edge and draw a gentle curve that widens slightly near the shoulder. Draw the inside edge too, stopping where it meets the head. Above the branch, add a small rounded bump behind the claws for the paw. The arm lines simply stop at the branch, because the wood is in front of them.
💡 Tip: Keep both arms about as thick as the claws are wide, or the paws will look tiny.
Step 6: Add the dangling legs and toes
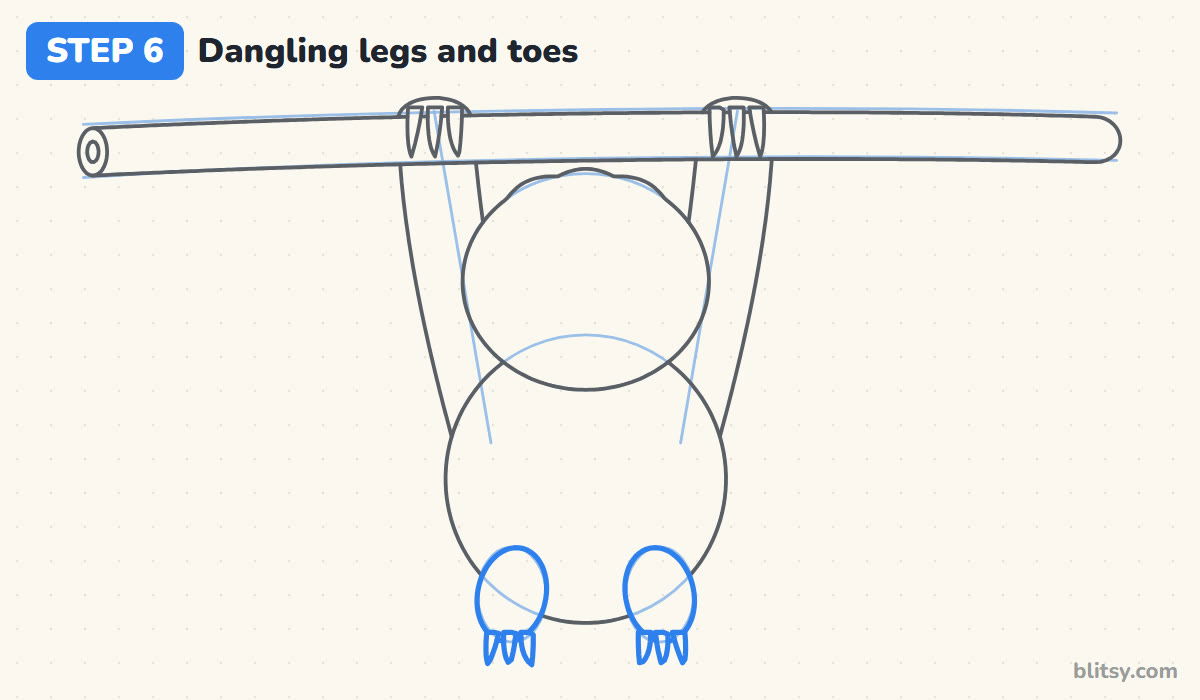
Trace the leg ovals into round, slightly tilted shapes hanging from the bottom of the body. Most beginners make the legs too long here. A sloth's back legs are short and chunky when it hangs like this. Under each leg, add three short claws pointing down.
💡 Tip: Draw the middle toe claw first, then one on each side. It keeps them evenly spaced.
Step 7: Draw the face mask and eye patches
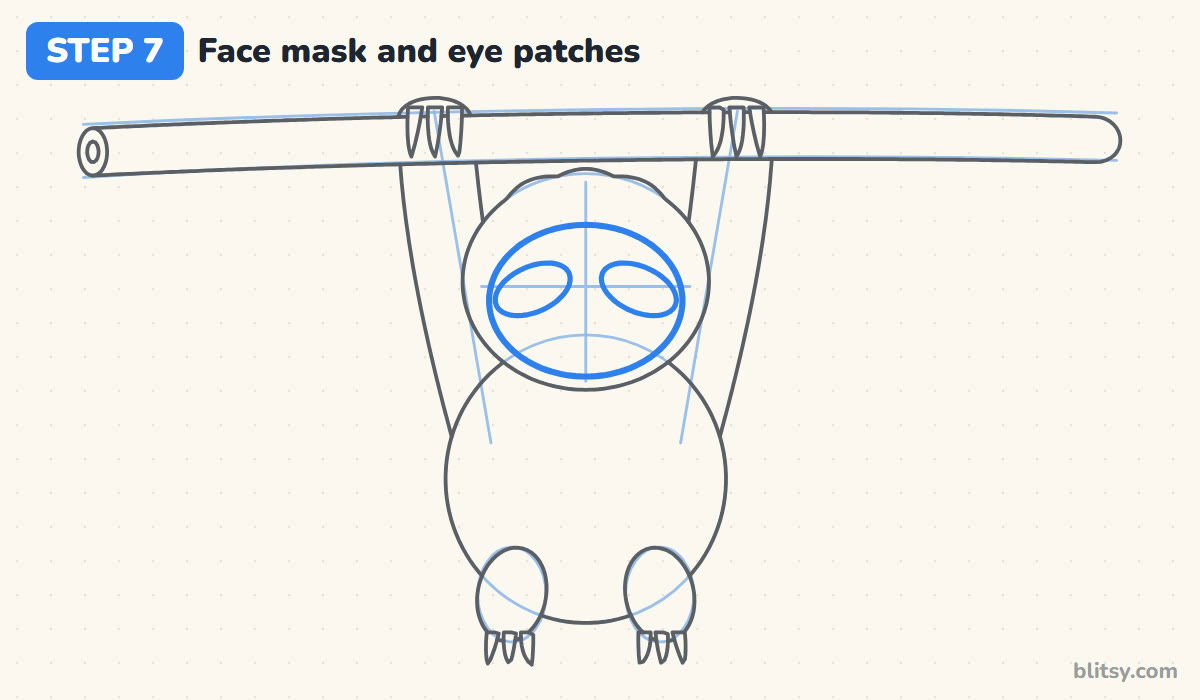
Lightly mark a cross on the head: one line down the middle and one across, a bit above the center. Around that cross, draw a wide oval for the pale face. On the across line, draw two flat ovals that tilt down toward the outside. Those dark patches give a sloth its famous sleepy look.

💡 Tip: Tilt the outer ends of both patches downward. Tilting them up makes the face look cross.
Step 8: Give it eyes, a nose and a smile
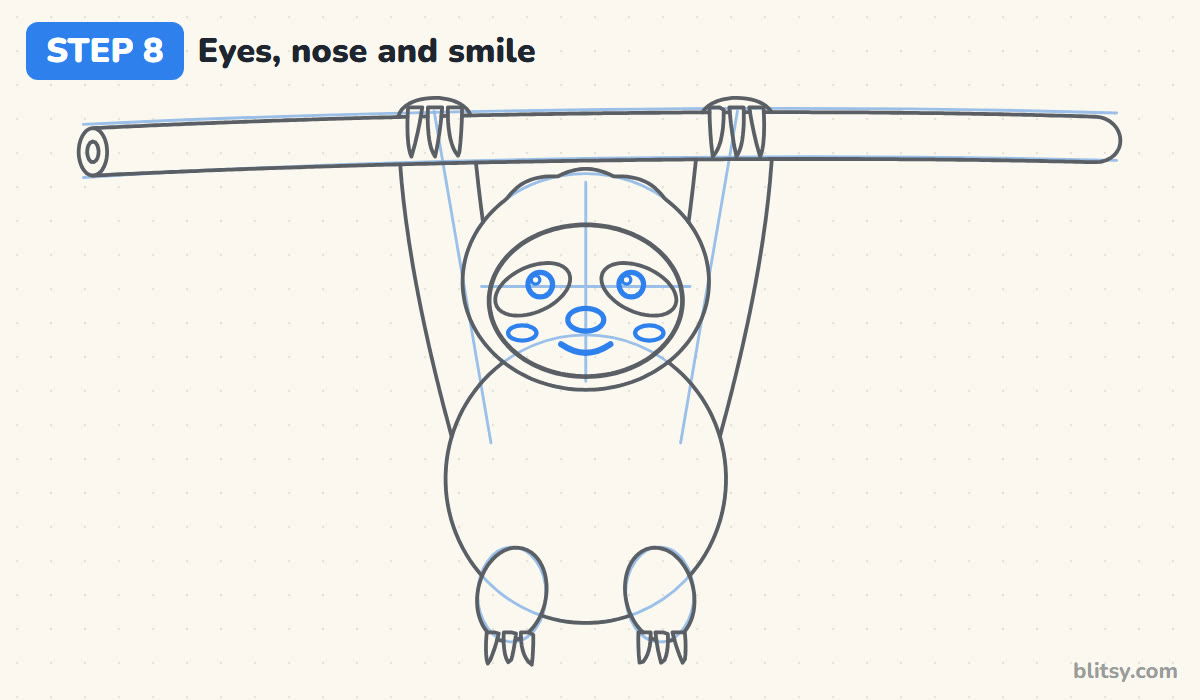
Inside each patch, close to the nose side, draw a small circle with an even smaller one in it for the shine. Under the cross, add a short wide oval for the nose. A small curve below it makes the smile. I put two tiny ovals on the cheeks as well, just outside the patches.
💡 Tip: Put both eye shines on the same side. Different sides make the eyes look like they point in two directions.
Step 9: Add the belly, bark lines and leaves
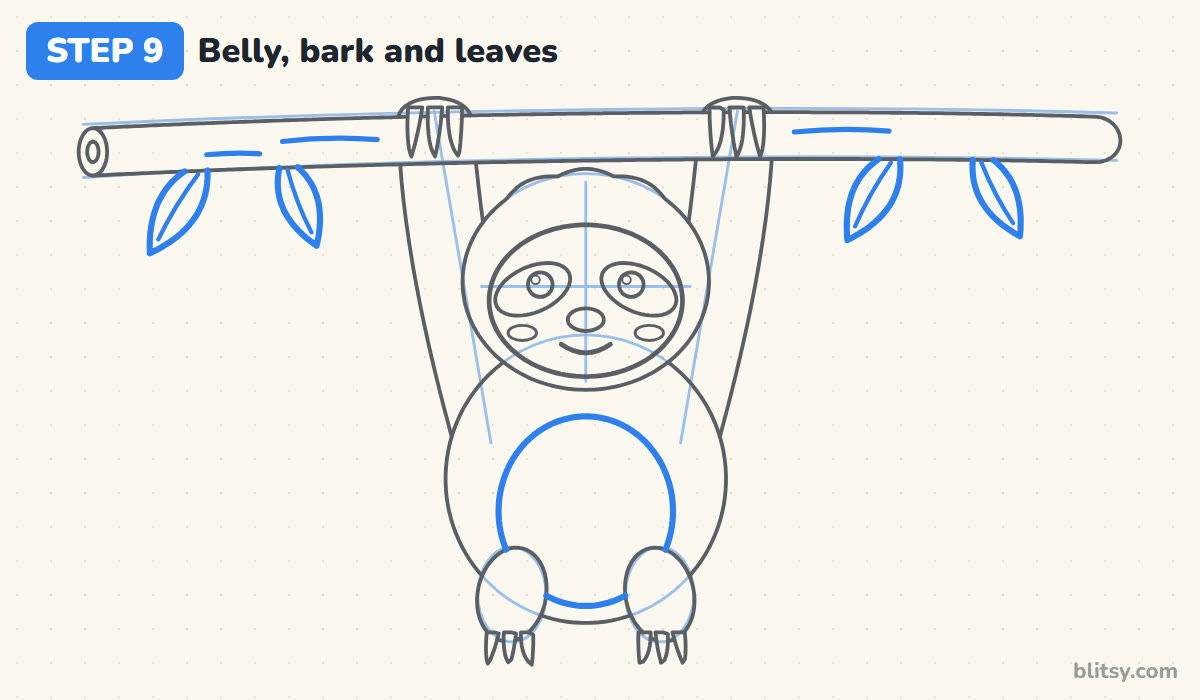
Draw a tall oval in the middle of the body for the lighter belly, stopping where the legs cover it. Add three or four short strokes along the branch for bark. Then hang four narrow leaves from the bottom edge of the branch, two on each side, each with a line down its middle.
💡 Tip: Point the leaves in slightly different directions so they don't look like a row of teeth.
Step 10: Ink the lines and erase the guides
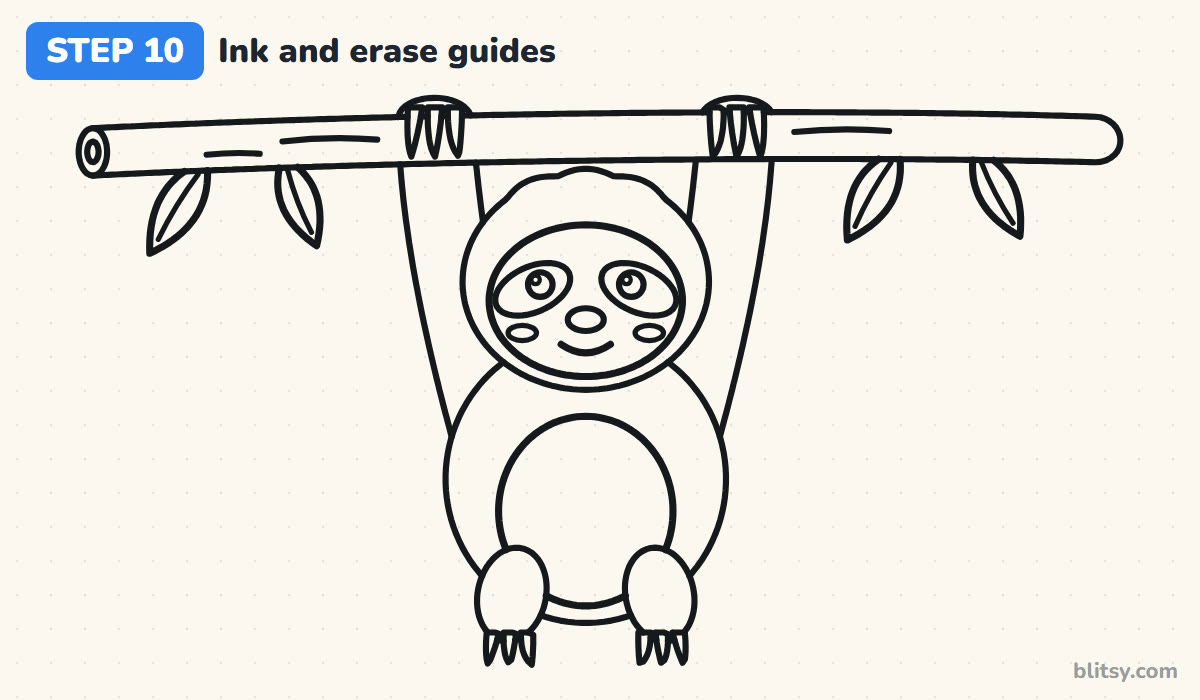
Now trace every line you want to keep with your black marker. I start with the face, while my hand is fresh, and leave the long branch for last. Skip all the guide lines, including the cross on the face. Give the ink a minute to dry, then erase every bit of pencil.
💡 Tip: Rest the side of your hand on a scrap of paper so it doesn't smudge the fresh ink.
Step 11: Color your sloth
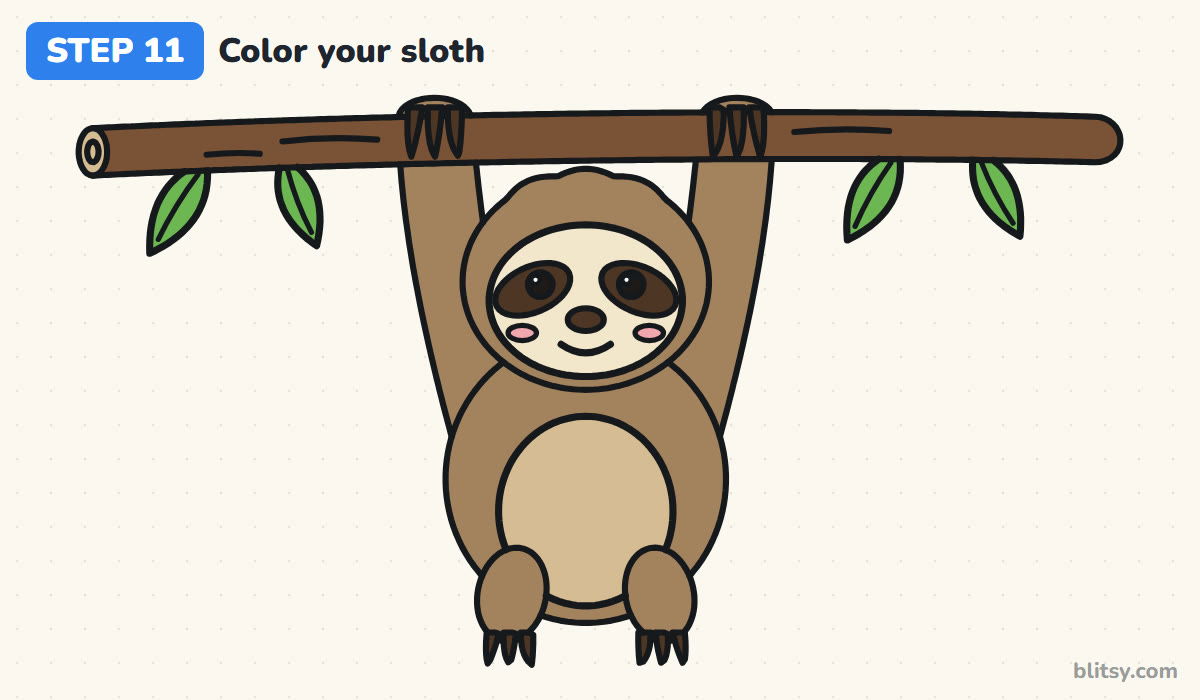
Real sloths are a soft grayish brown, so a light brown works well for the head and body, plus the arms and legs. Use cream for the face and a tan for the belly and the cut end of the branch. The branch itself gets a deeper brown, and the leaves get green. Finish with dark brown for the eye patches, then the nose and claws, black eyes and pink cheeks.
💡 Tip: Color the fur in short strokes that follow the shape. It looks a little fuzzy, which suits a sloth.
What Turns a Sloth Into a Bear or a Monkey
- Round, upright eye patches. They make the face look like a panda or a raccoon. Make them flat and tilt the outer ends down.
- Short arms. A sloth's arms are long, so the body should hang well below the branch. If the head touches the wood, the arms are too short.
- Tiny claws. Without big hooked claws the animal could be a monkey or a bear cub. Let them curl right over the branch.
- A busy face. Too many lines inside the cream mask hide the calm expression. A small nose and one short smile are enough.
- Coloring before inking. Markers smear pencil guides into gray streaks. Ink, wait, erase, then color.
Fresh Ideas for Your Hanging Sloth
After a first try, play with the pose. Draw a baby sloth clinging to the belly of the big one, using the same shapes at half the size. Wrap a few vines around the branch, put a tiny flower behind one ear, or close the eyes into two curved lines for a sloth that has fallen asleep mid-hang. Little kids can leave out the bark and the leaves and still end up with a happy sloth. For a calmer afternoon, print a few free sloth coloring pages, or turn your favorite version into yarn with these crochet sloth patterns.
Sloth Coloring Page and Step-by-Step PDF
Prefer paper? The free sloth coloring page has a colored example at the top and a key that names each color and the part it goes on, with a large outline underneath for coloring. The PDF drawing guide collects all 11 steps with their tips, ready to print on Letter or A4.
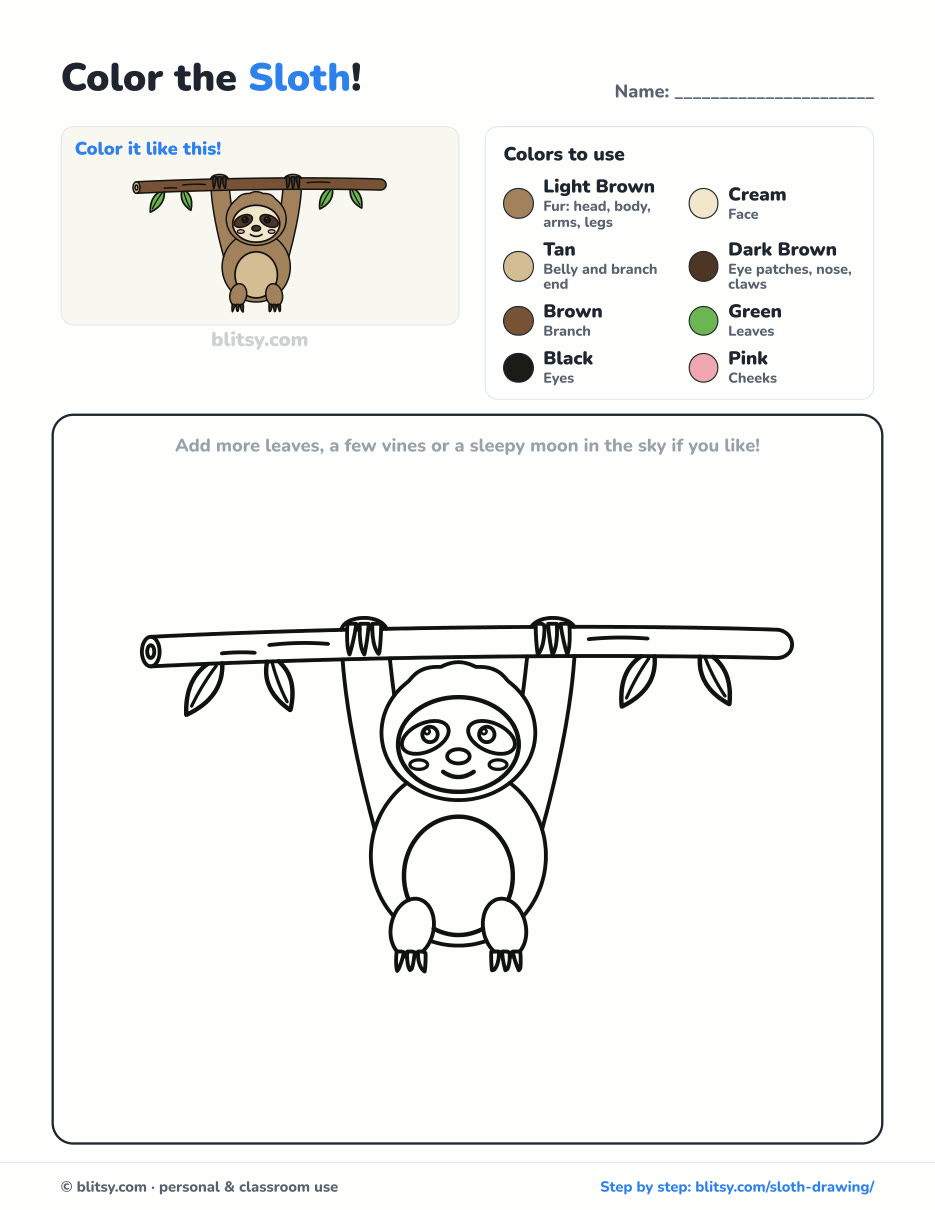
Black outlines with a colored example and the color names at the top. Ready to print and color.
⬇️ Download Coloring PageEvery step picture with its instructions and tips, to keep beside your paper while you draw.
⬇️ Download Drawing Guide📱 On a phone? Tap a download button, then open the file and choose Share → Save to Files or Print. On a computer, the PDF opens or saves straight to your Downloads folder.
One Long Pin With All 11 Sloth Steps
Sloth Finished? Try These Animal Tutorials Next
Every link below opens a step-by-step tutorial, so you can pick one animal and draw it from the first guide shape to the last bit of color.
- Dragonfly Drawing: Start with one straight line and add four long wings and a ringed tail in this how to draw a dragonfly step by step lesson.
- Penguin Drawing: This easy penguin drawing tutorial ends with rosy cheeks, a tiny tuft and flippers held out for balance.
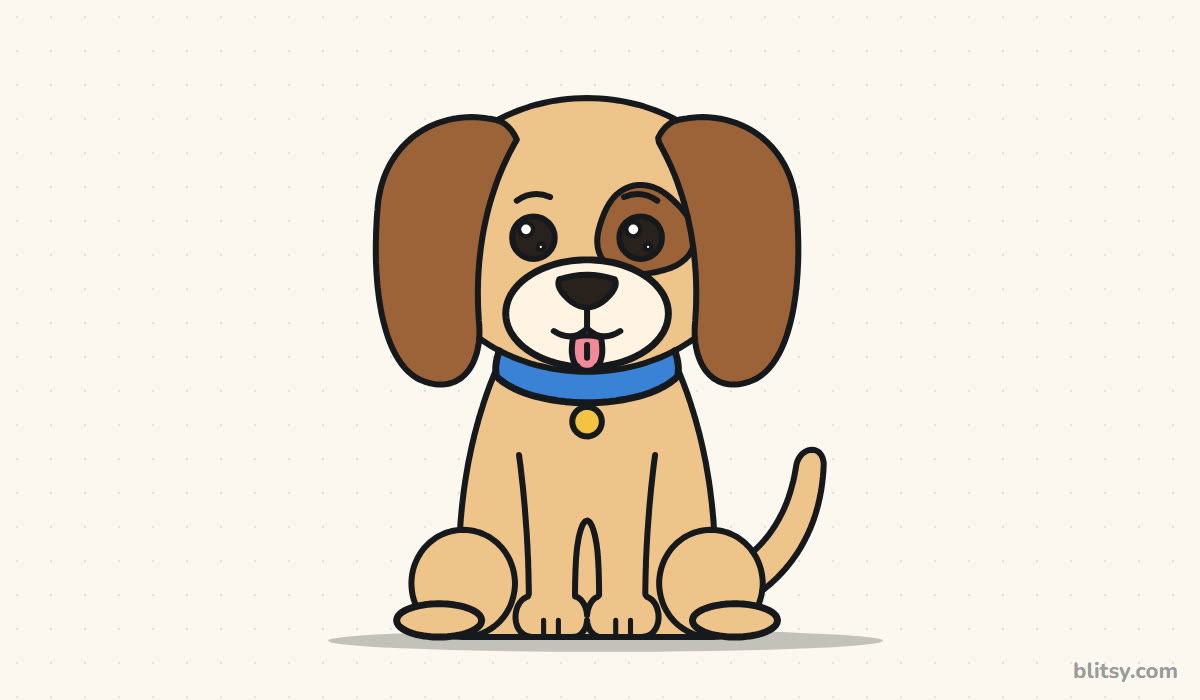
- Puppy Drawing: Draw a sitting pup with floppy ears, an eye patch and a pink tongue using the puppy drawing step by step guide.
- Narwhal Drawing: Your narwhal swims tusk up by the end of this narwhal drawing tutorial.
- Miraculous Ladybug Drawing: Give the superhero a chibi body, her mask and her yo-yo with this Miraculous Ladybug drawing tutorial.
- Ant Drawing: Three ovals turn into a red ant with its antennae up in the how to draw an ant lesson.
- Godzilla Drawing: Kids who like monsters can build a friendly kaiju from two ovals with this Godzilla drawing step by step guide.
- Arctic Fox Drawing: The arctic fox drawing tutorial shows a sitting fox with cheek tufts and a tail curled to one side.
- Whale Drawing: Draw a happy blue whale, spout included, in the easy whale drawing tutorial.
- Kitten Drawing: A ginger kitten sits politely at the end of this how to draw a kitten step by step lesson.
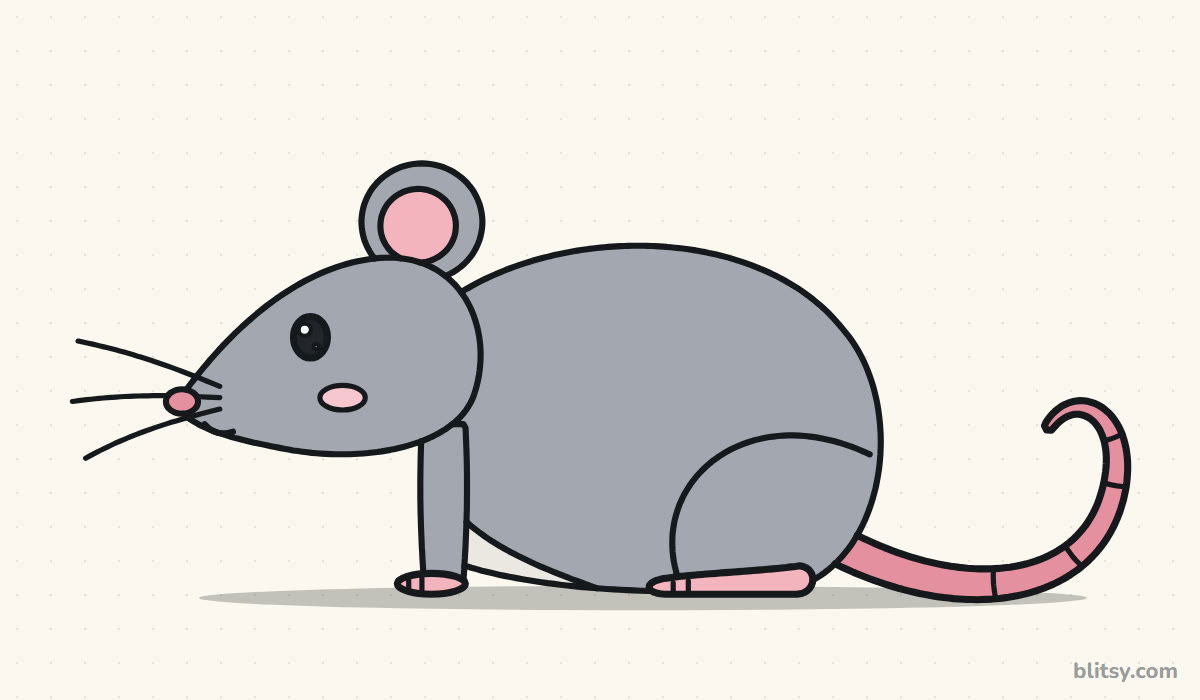
- Rat Drawing: Follow the rat drawing tutorial for a curious gray rat seen from the side, tail curled up behind.
- Realistic Drawing: Ready for shading? This realistic drawing step by step lesson teaches light and shadow on a single shiny apple.
- Paw Print Drawing: Learn the difference between a dog print and a cat print in the paw print drawing tutorial.
- King Kong Drawing: The how to draw King Kong lesson builds a giant gorilla with fists down and mouth open in a roar.
Sloth Drawing Questions Kids and Parents Ask
What is the easiest way to draw a sloth?
Start with an oval head and a round body, then add two long arms reaching up to a branch. Once those shapes are in place, the face mask and eye patches turn it into a sloth right away.
How do you draw a cute sloth for kids?
Keep the head big, the legs short and the face simple: two small eyes inside tilted patches, a little nose and a small smile. Pink cheeks add a lot of charm for very little effort.
How long does it take to draw a sloth?
Plan on 25 to 35 minutes, including inking and coloring. The shapes go quickly, and the claws and face take the most care.
What colors is a sloth?
Most sloths are grayish brown with a pale face and dark brown stripes running back from the eyes. Some look greenish because tiny algae grow in their fur, so a touch of green in the brown is a fun, true detail.
Take it slow, the way a sloth would, and enjoy watching yours appear one line at a time. 🦥🌿
Related posts:
 How to Draw a Car Step by Step (Easy Drawing for Beginners)
 How to Draw a Whale Step by Step (Easy for Beginners)
 How to Draw a Rat Step by Step (Easy for Beginners)
 How to Draw a Puppy Step by Step (Easy for Beginners)
 How to Draw a Rose Step by Step (Spiral Method for Beginners)
 How to Draw Olaf Step by Step (Easy for Beginners)
 How to Draw a Ladybug Step by Step (Easy for Beginners)
 How to Draw a Dog Step by Step (Easy Side View for Beginners)
 How to Draw a Leopard Step by Step (Easy for Beginners)
 How to Draw a Light Bulb Step by Step (Easy for Beginners)
 How to Draw a Crow Step by Step (Easy for Beginners)
 How to Draw an Eagle Step by Step (Easy for Beginners)

