
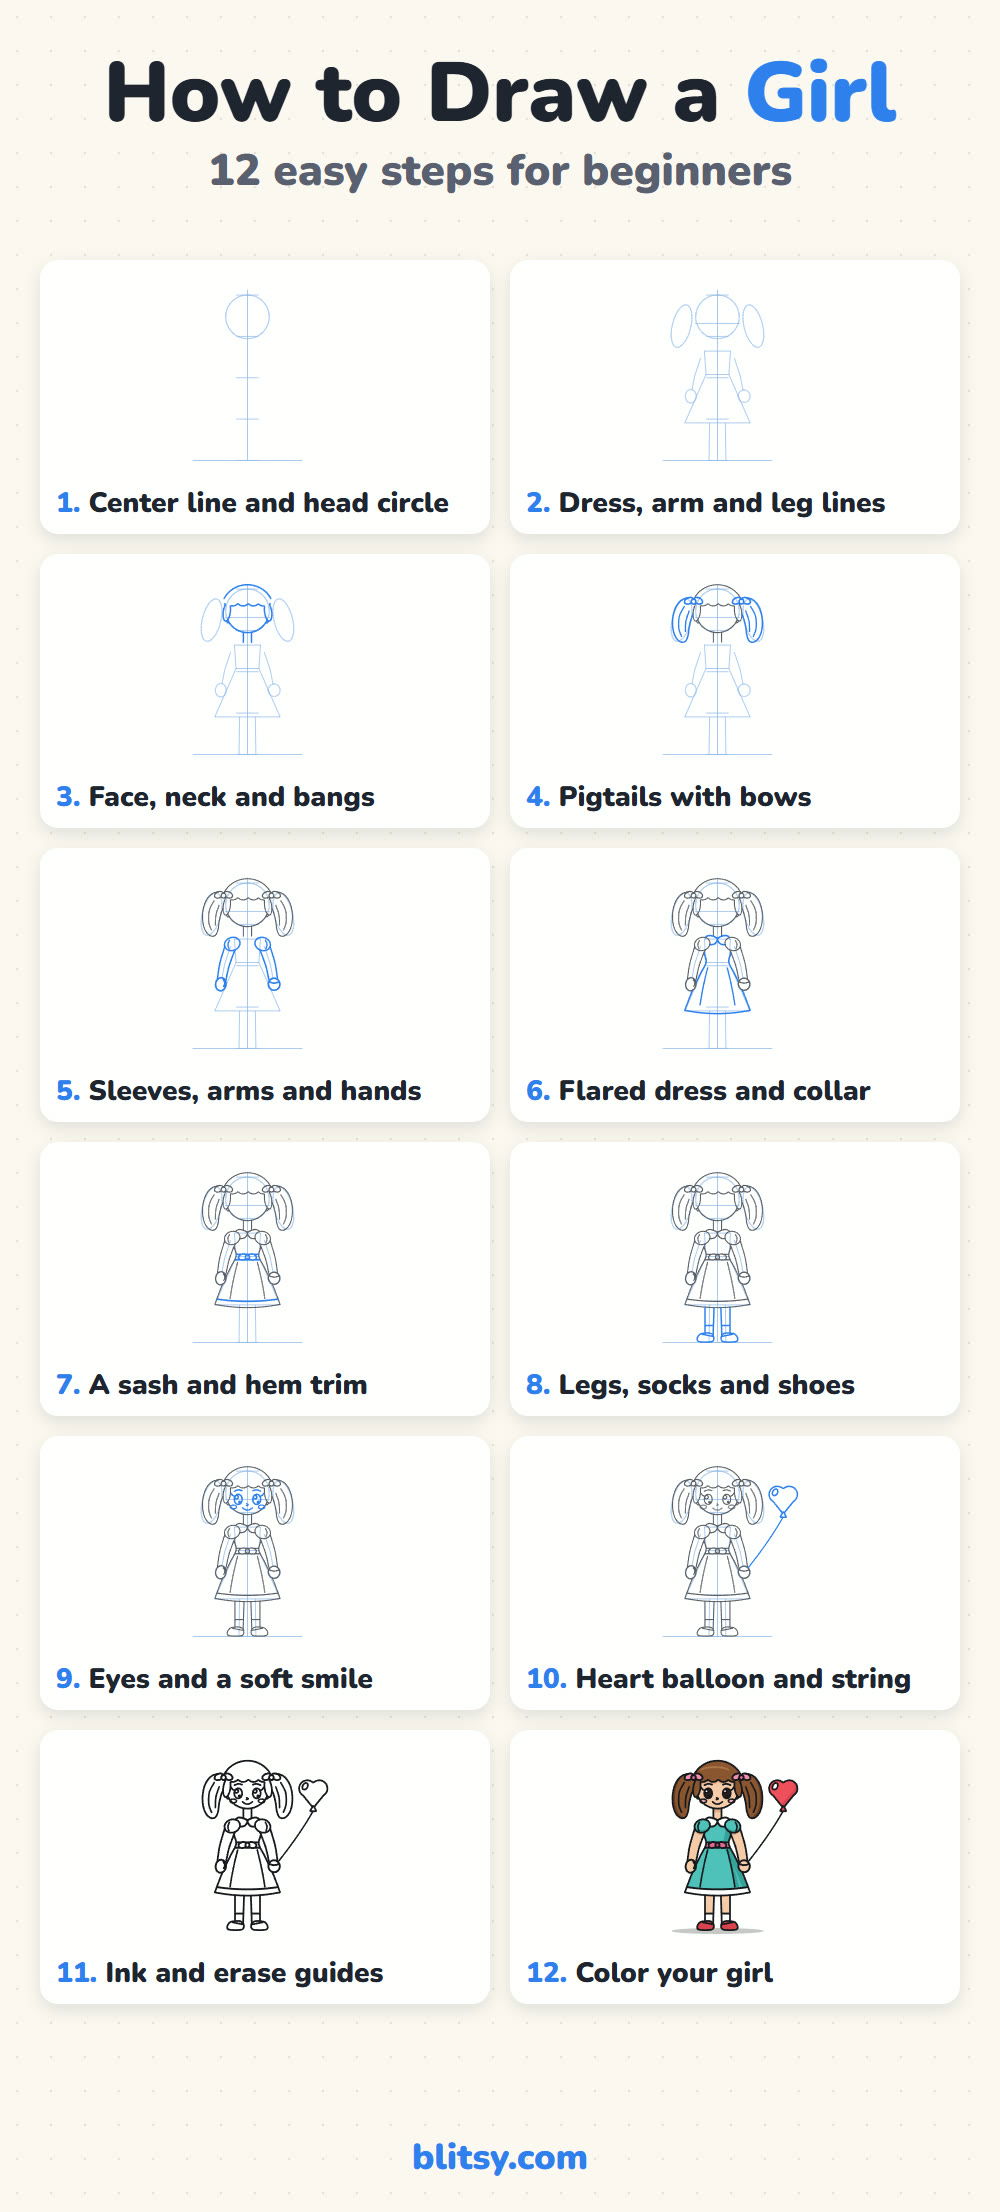
Ask a room full of kids what they want to draw and someone always says "a girl, like me." People feel harder than animals, because we all know what a body should look like. In this lesson I'll show you how to draw a girl step by step using her own head as a ruler, so the body comes out the right size without any guessing. She has two bouncy pigtails, a turquoise dress and a red heart balloon, and every part starts as a plain shape.
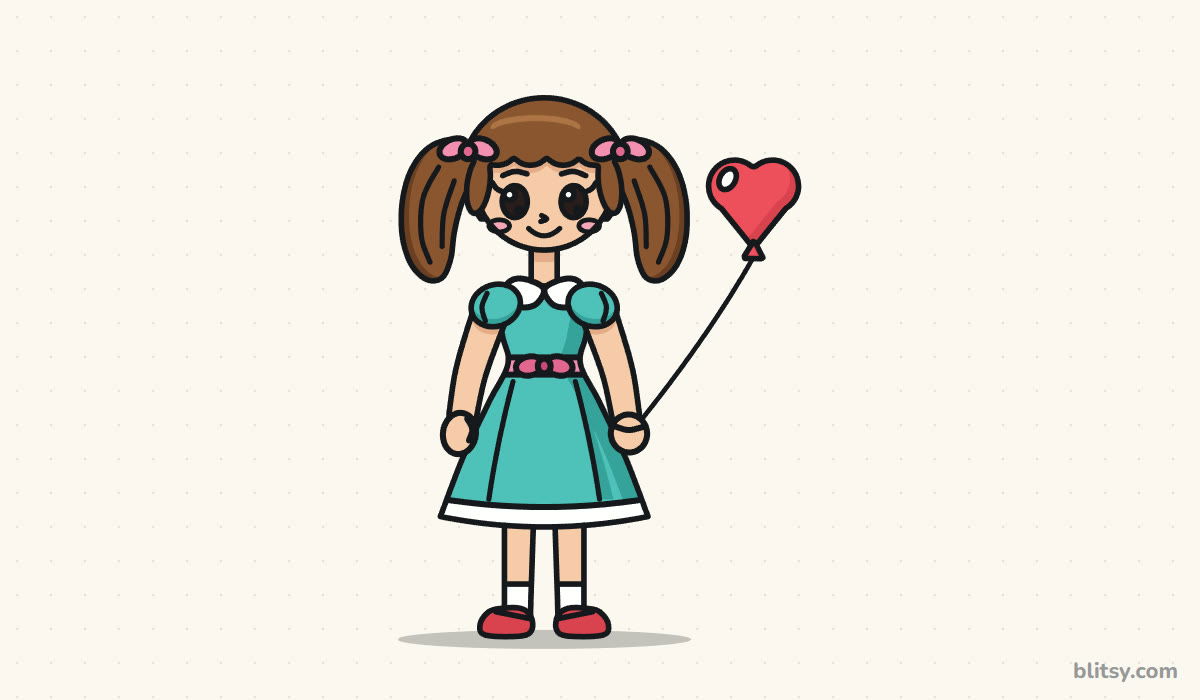
In every picture the new lines are blue and the lines you already drew are gray. Copy only the blue part, check it against the picture, then move to the next step.
Quick overview
⏱️ Time: about 30 to 40 minutes, coloring included
🎯 Level: easy, good for kids around 6 and up
✏️ Steps: 12
👧 You'll draw: a standing cartoon girl holding a heart balloon
Paper and Pencils for Drawing Her
- A pencil for light sketching (HB works well)
- A soft eraser that doesn't smudge
- A black marker or fineliner for the final outline
- Colored pencils or crayons in brown, peach, turquoise, pink plus red
- A sheet of plain white paper, held upright
Leave some room on the right side of the page, because the balloon floats out past her shoulder.
How to Draw a Girl Step by Step
Step 1: Draw a center line, head marks and the head circle
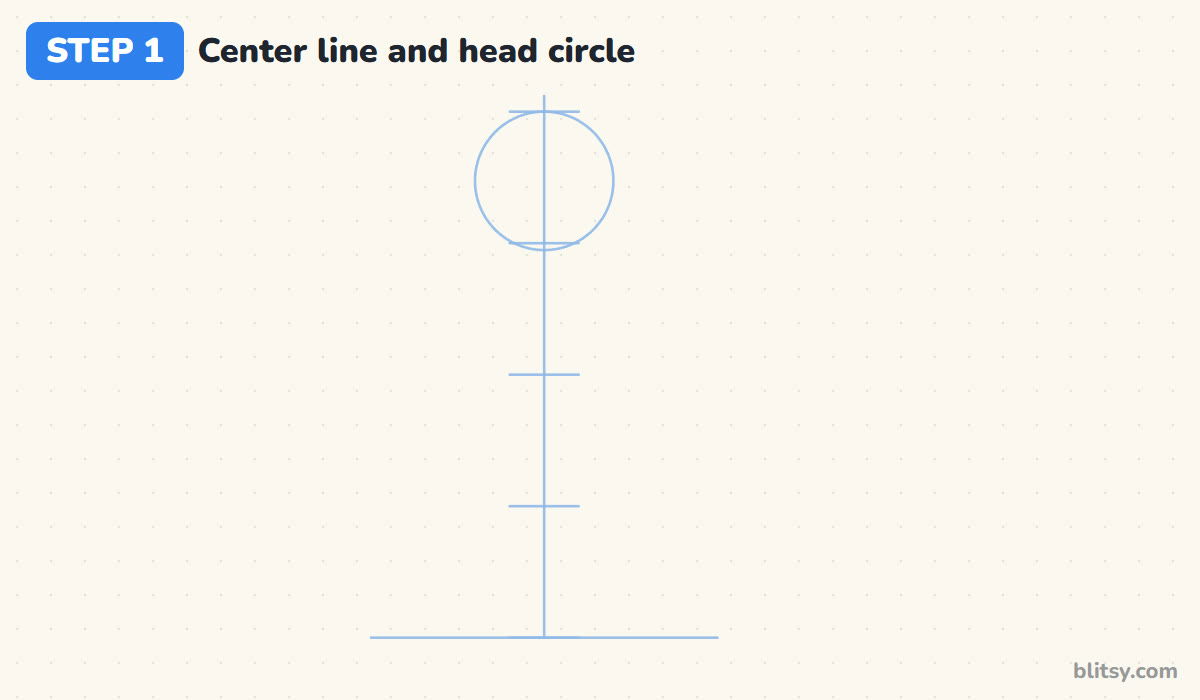
Draw a light ground line near the bottom of the page and a straight line up through the middle. Split that line into four equal parts with short marks across it. The top part is for the head, so draw a circle that fills it from the top mark to the second one. She'll end up four heads tall, which is a cute, kid-like size.
💡 Tip: Press very lightly. Every line in this step gets erased at the end.
Step 2: Sketch guides for the dress and limbs
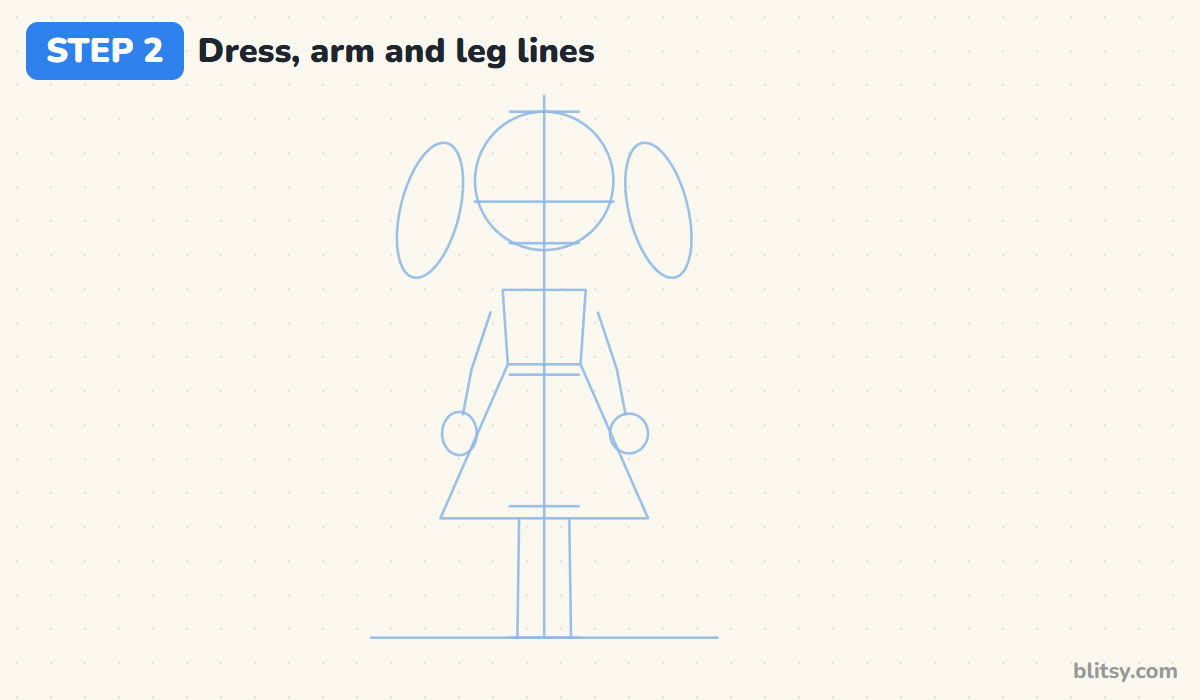
Put a cross line through the head, a little below the middle, for the eyes. Add a tall oval on each side of the head for the pigtails. Under the head, draw a small box for the top of the dress that ends at the third mark, then a wide triangle for the skirt. Stick lines with a bend at the elbow make the arms, with a small circle for each hand, and two straight lines run down to the ground for the legs.
💡 Tip: Let the hands reach about halfway down the skirt. Kids' arms are shorter than you'd think.
Step 3: Draw the face, the neck and soft bangs
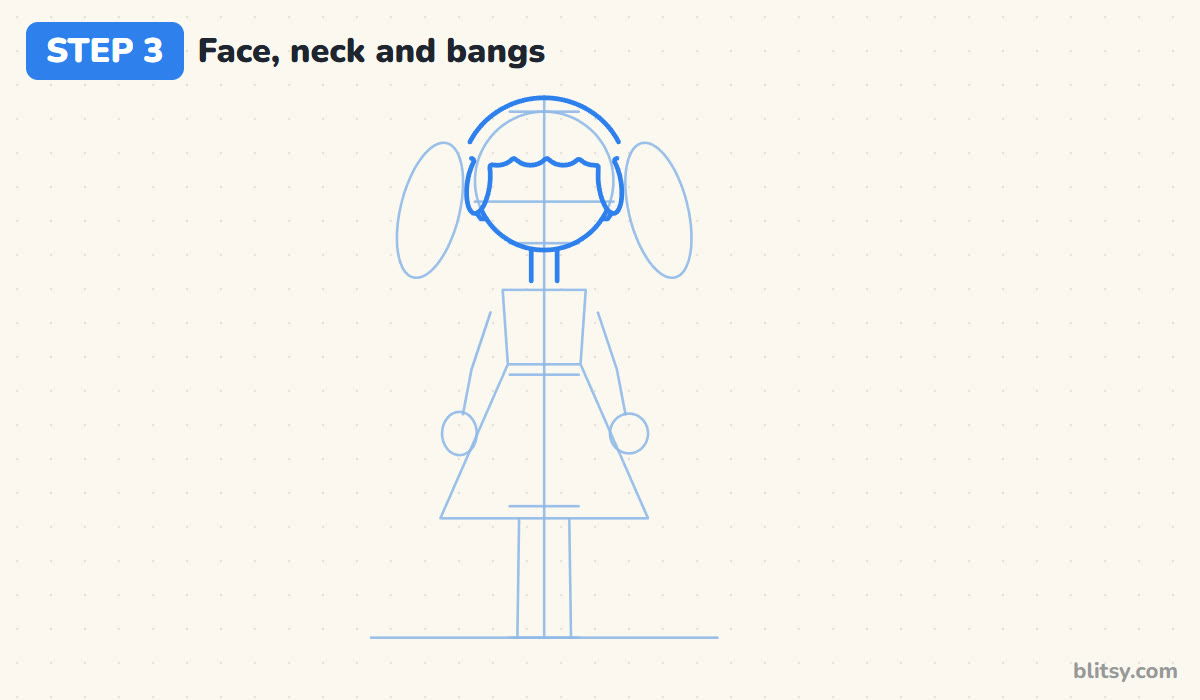
Trace the head circle with a firmer line and add a short, wide neck under it. Over the top of the head, draw the hair a little outside the circle, then finish its lower edge with four round bumps across the forehead. Two thin locks come down the sides of the face.
💡 Tip: Make the neck as wide as the space between the eyes. A thin neck makes the head look stuck on.


Step 4: Add two pigtails with bows
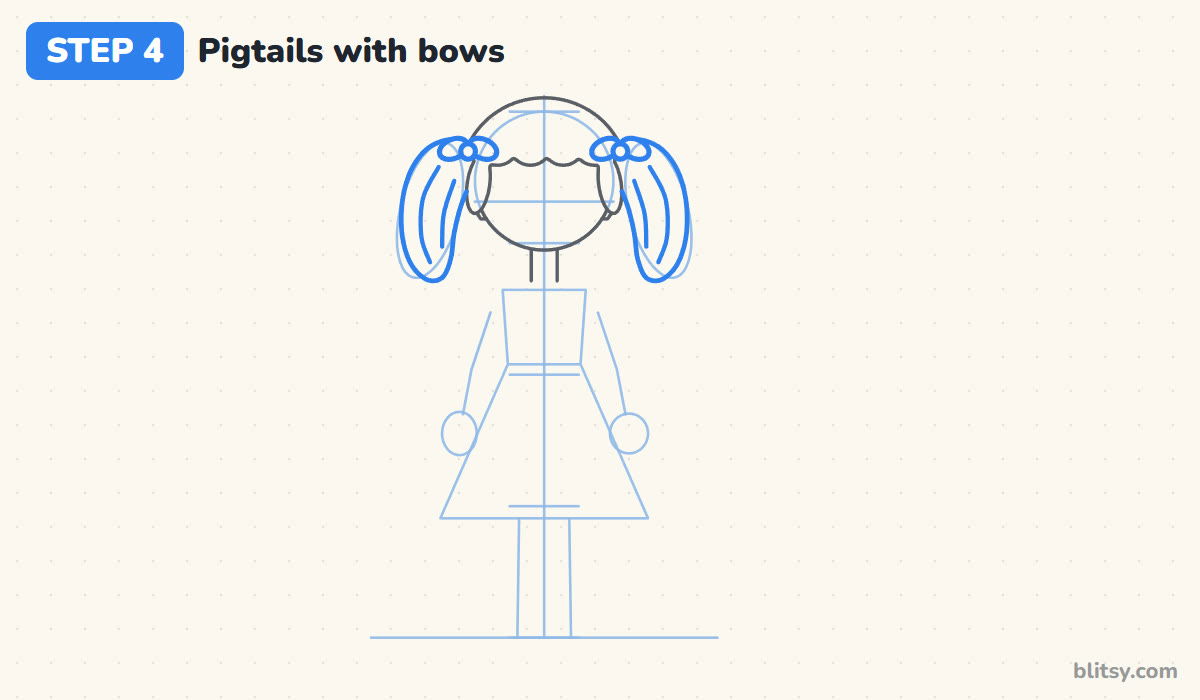
Each pigtail starts at the side of the head, just under the hairline, and puffs out into a round shape that drops to about chin height. I draw the outer edge first, then the inner edge. Two curved lines inside each pigtail show the hair strands. Finish with a small bow on top of each one: two loops and a round knot.
💡 Tip: Draw one pigtail, then turn the paper upside down to check the second one matches.
Step 5: Draw puffy sleeves, soft arms and mitten hands
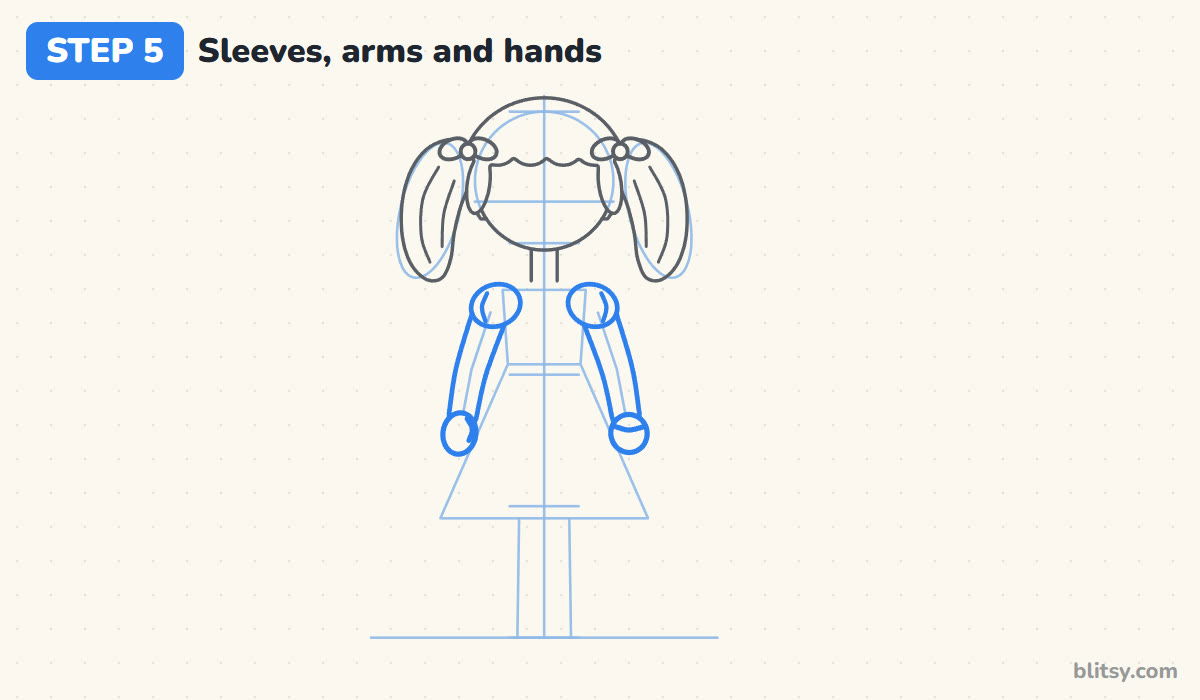
Draw a round puffed sleeve on each shoulder. From under each sleeve, follow the stick arm with two lines, a little wider near the top. Round the hands like mittens, with a thumb line on one and a finger line on the other, which is curled around the balloon string.
💡 Tip: Give the arms real width. Single lines look like a stick figure, not a girl.
Step 6: Outline a flared dress and a round collar
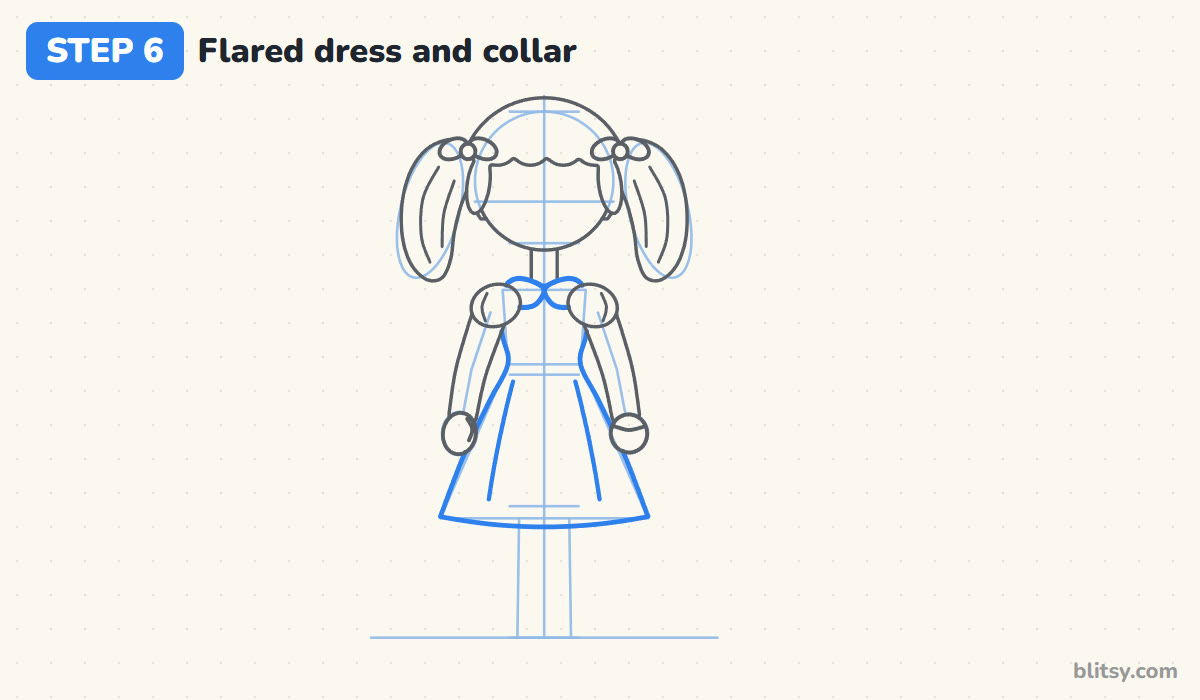
Start the dress at the neck with a soft curved neckline. The sides come down fairly straight to the waist and then flare out along the triangle guide to a curved hem just below the fourth mark. Stop the line wherever an arm or a sleeve sits in front. Under the neck, two small rounded flaps meet in the middle for a collar, and two long curves on the skirt make soft folds.
💡 Tip: Curve the hem down slightly in the middle so the skirt looks round instead of flat.
Step 7: Add a sash and a hem trim
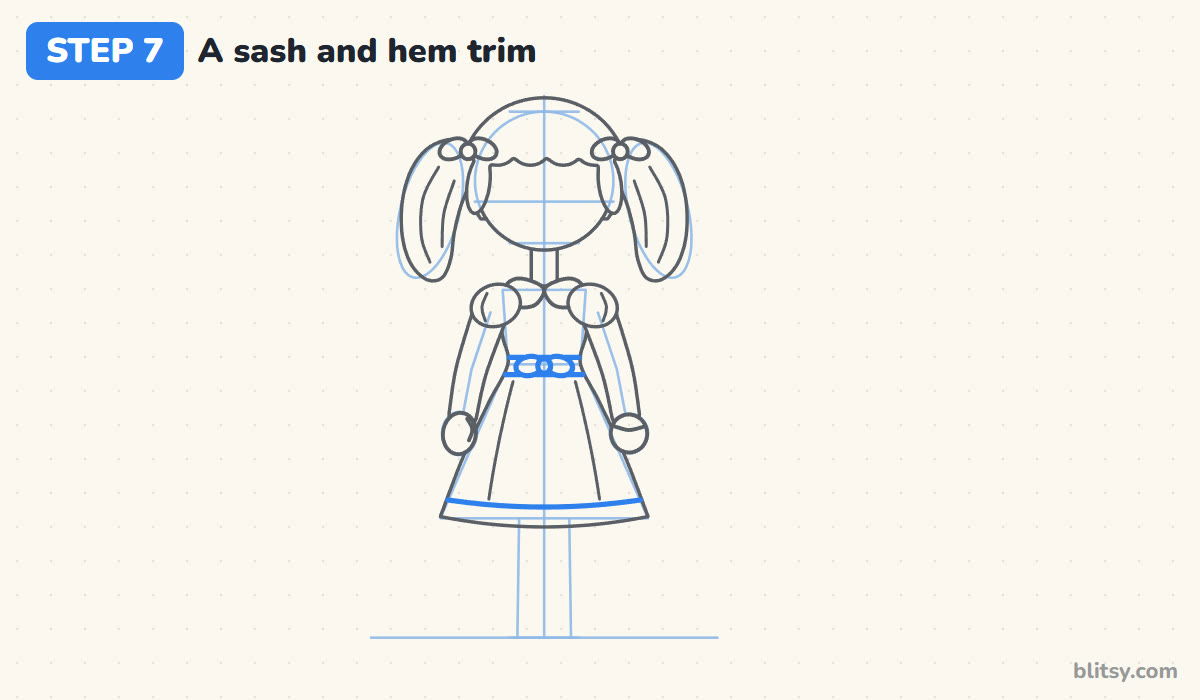
At the waist, two lines across the dress make a sash, with a little bow in the center. Near the bottom, draw one more curve that follows the hem. That band becomes the white trim.
💡 Tip: Keep the sash thin. A wide band cuts the dress in half and makes the skirt look short.


Step 8: Draw the legs and shoes
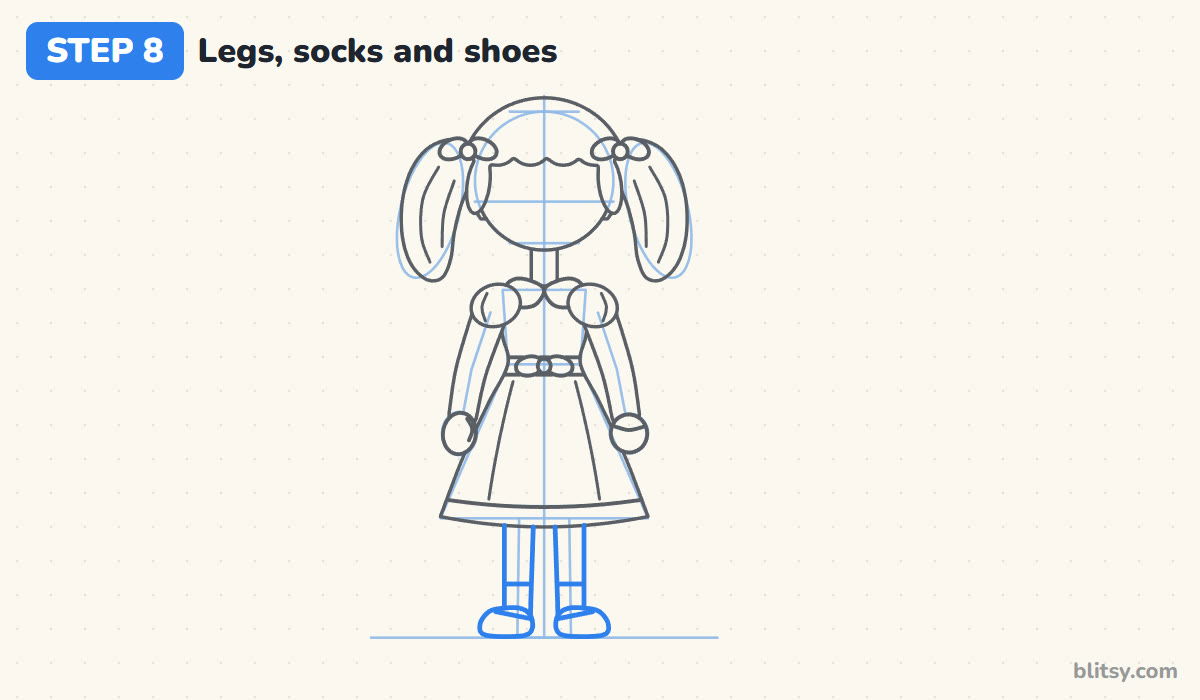
Two straight legs come down from under the skirt to the ground, with a small gap between them. A line across each leg near the bottom makes the top of a white sock. The shoes are rounded shapes that point slightly outward, with a strap line across the top of each.
💡 Tip: Turn the toes out a little. Feet that point straight down make her look like she's floating.
Step 9: Give her big eyes and a soft smile
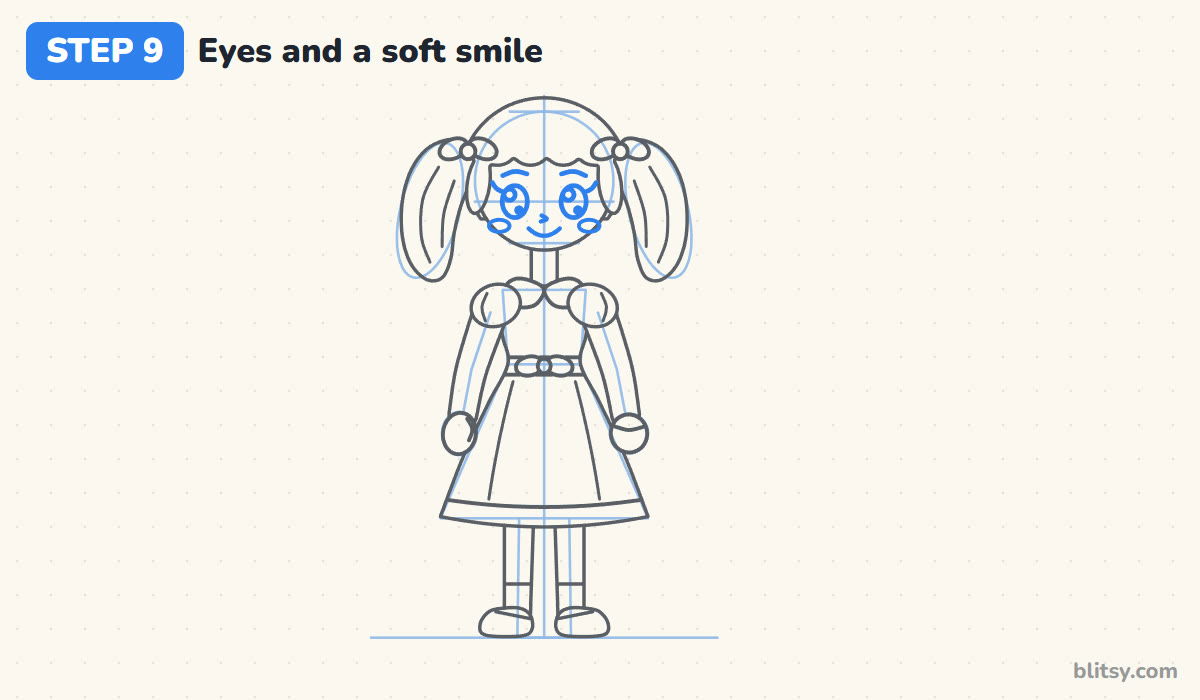
Sit two tall oval eyes on the cross line, about one eye width apart. Leave a big and a small shine circle in each. Add a short lash at the outer corner of each eye and gentle brows above them. A tiny hook makes the nose, a simple curved line makes the smile, and two small ovals go on the cheeks.
💡 Tip: Keep the smile small and close to the nose. A wide grin low on the chin reads as a different face.
Step 10: Draw a heart balloon on a string
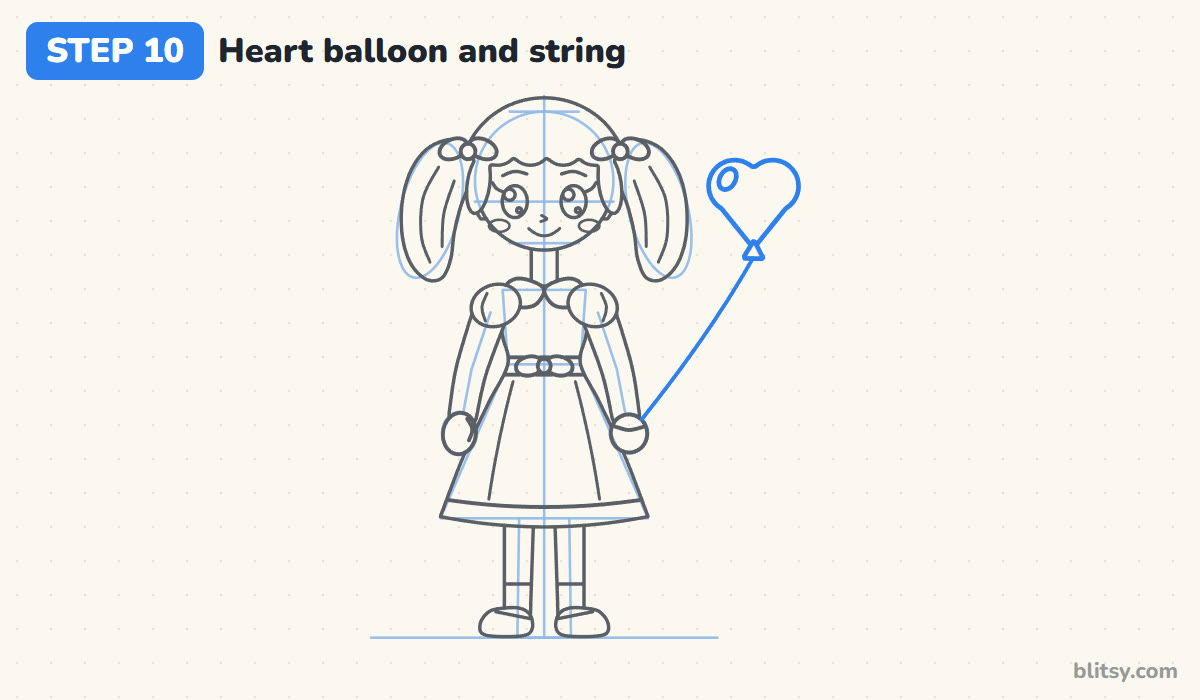
Up to the right of her head, draw a heart shape for the balloon with a tiny triangle knot at the bottom. Add a small shine oval. Then pull one long, gently curved string from the knot down into her hand.
💡 Tip: A slight curve in the string makes the balloon look like it's floating on a breeze.
Step 11: Ink the drawing and erase the guides
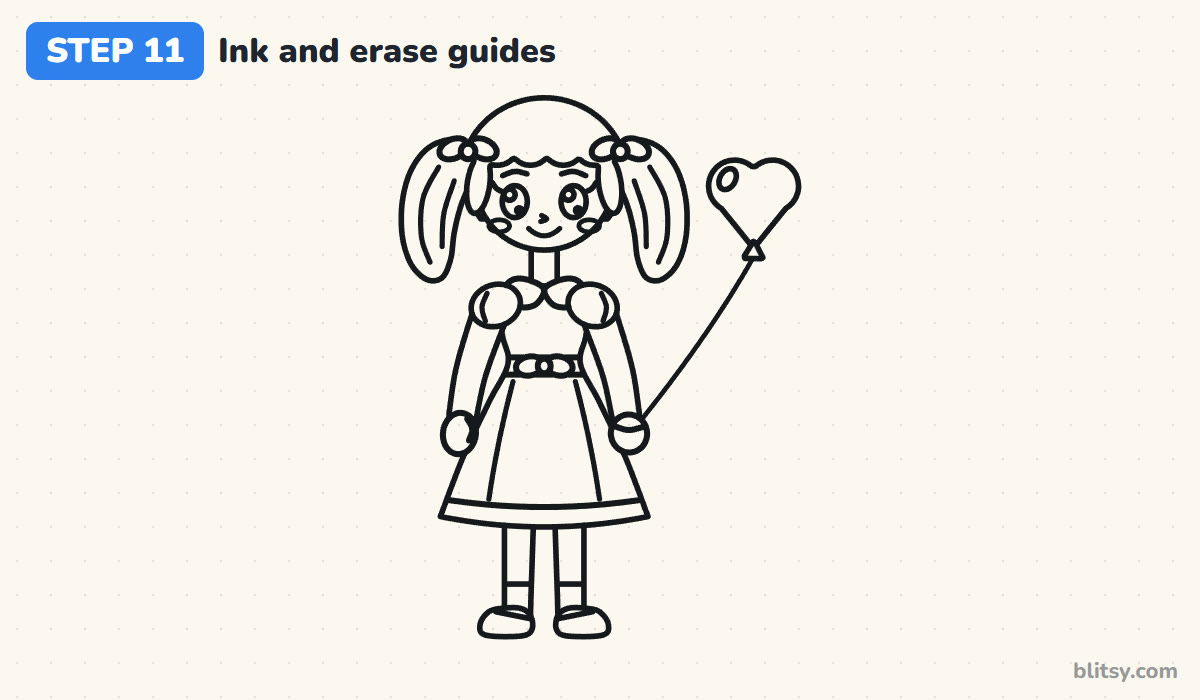
Trace every keeper line with the black marker. I go over the face first while my hand is steady, then the hair, the dress, and the legs last. When the ink is dry, erase every guide.
💡 Tip: Wait a full minute before you erase. Wet marker smears across the whole face.


Step 12: Color your girl
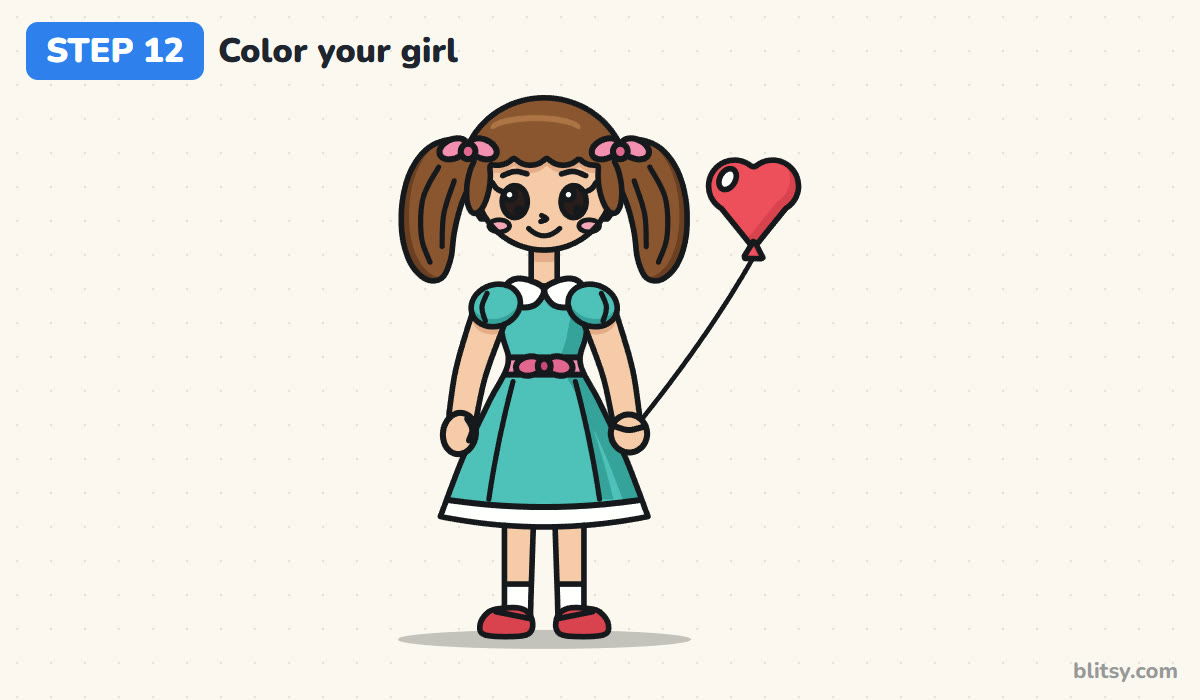
Color the hair and pigtails brown and the skin peach. The dress and sleeves are turquoise, with a slightly darker turquoise down the right side for shade. Pink goes on the bows and the sash, red on the shoes and the balloon. Leave the collar, socks plus the hem trim white, fill the eyes black and add soft pink cheeks.
💡 Tip: Color the darker side of the dress first, then blend the lighter turquoise into it.
Why Girl Drawings Can Look Stiff
- Stick arms and legs. Thin lines turn her into a stick figure. Draw every limb with two lines and a little width.
- A head that's too small. Real proportions look odd in a cartoon. Keep the head big, about a quarter of her height.
- Eyes placed too high. Eyes go a little below the middle of the head, not at the top under the hair.
- Hands that hang below the skirt. Use the guide circles so the fingertips stop around the middle of the skirt.
- Pigtails that don't match. One big and one small pigtail look accidental. Check them side by side before inking.
Pigtails Today, a Ponytail Tomorrow
Once the head marks feel easy, she can become anyone. Swap the pigtails for one high ponytail or a short bob, trade the dress for a T-shirt with leggings, or give her a backpack for the first day of school. Younger kids can skip the sash and trim. For a friend to stand next to her, the how to draw a boy tutorial uses the same head marks. If you'd like to practice bigger expressions, the face drawing step by step lesson zooms in on the features.
Free Girl Coloring Page and Printable Steps
The free girl coloring page has a colored example at the top and a key that matches each color to a part of the drawing, with a big outline below for your own colors. The step-by-step PDF guide holds all 12 steps with pictures and tips, so you can draw without a screen. Both print on Letter or A4 paper.
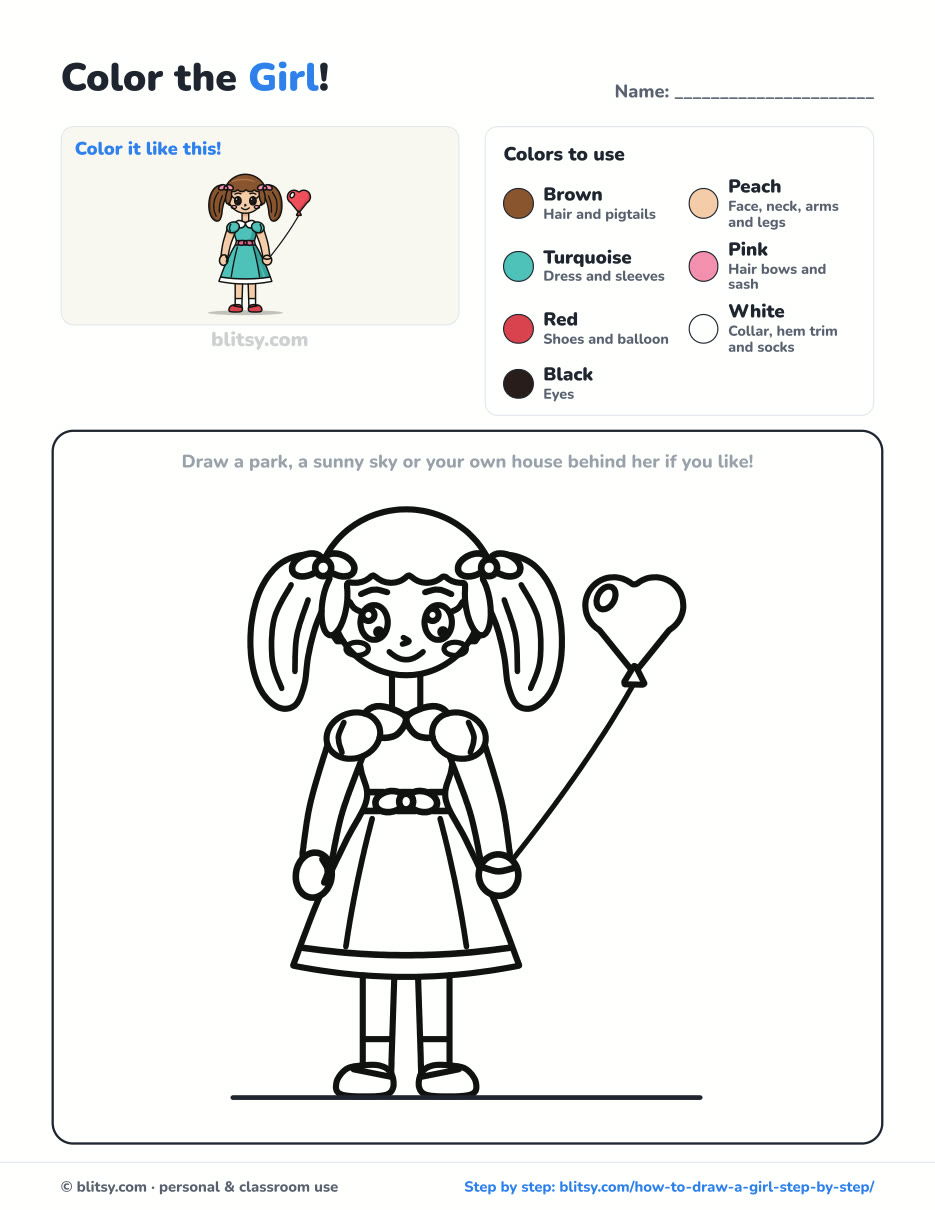
Black outlines with a colored example and the color names at the top. Ready to print and color.
⬇️ Download Coloring PageEvery step picture with its instructions and tips, to keep beside your paper while you draw.
⬇️ Download Drawing Guide📱 On a phone? Tap a download button, then open the file and choose Share → Save to Files or Print. On a computer, the PDF opens or saves straight to your Downloads folder.
Pin the Pigtail Girl for Later
Other People and Characters to Draw Next
Each one below is a full step-by-step tutorial with a picture for every stage, so the head-mark method carries straight over.
- Princess Drawing: A cartoon princess with a jeweled crown, a long braid and a bell-shaped ball gown in this how to draw a princess step by step lesson.
- Anime Girl Drawing: Big purple eyes, layered pink bangs and a sailor collar, built from one circle in this anime girl drawing tutorial.
- Chibi Drawing: A tiny kid in a cat-ear hoodie holding a boba drink, drawn with the 2-head method in this chibi drawing tutorial.
- Fairy Drawing: A small fairy with a petal skirt and see-through wings sits on a spotted toadstool in this fairy drawing step by step guide.
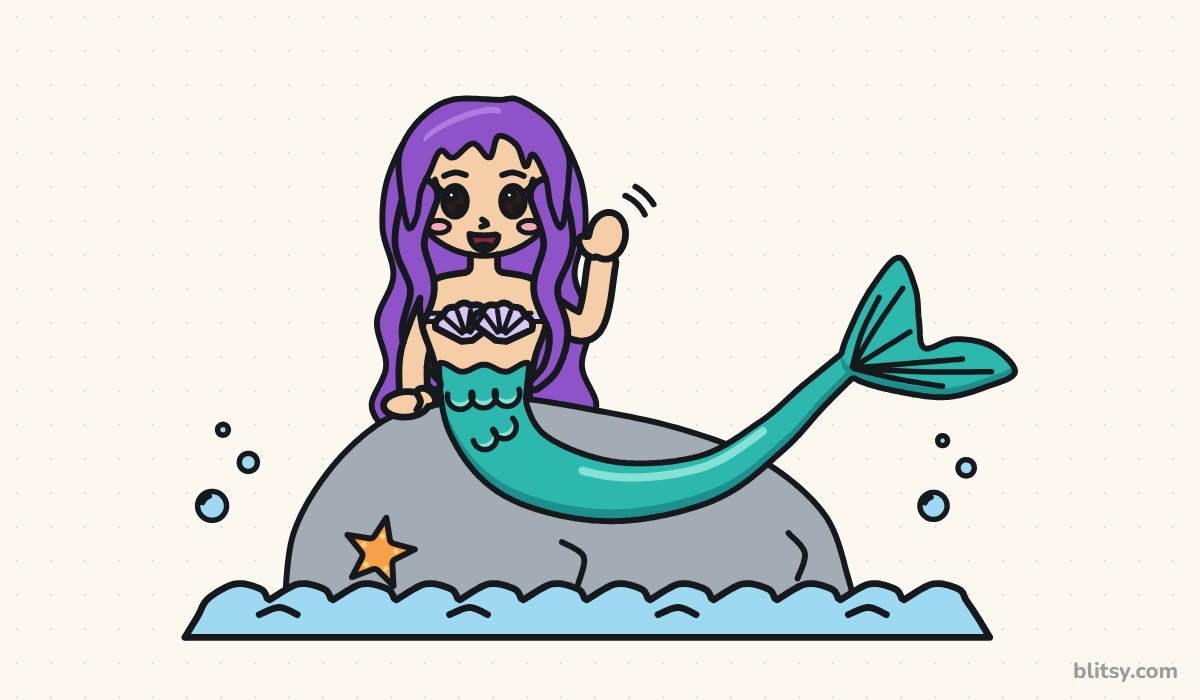
- Mermaid Drawing: A friendly mermaid waves from her rock in this how to draw a mermaid tutorial, built from one S-shaped tail line.
Girl Drawing Questions From Parents and Kids
How do you draw a girl for kids?
Start with a big circle for the head and a triangle for a dress. Add arms and legs with a little width, two pigtails and a simple smile. A cartoon girl is just a few simple shapes stacked together.
How do you draw a girl's body in proportion?
Measure with the head. For a cartoon kid, make her about four heads tall: one for the head, one for the top of the dress, one for the skirt and one for the legs.
How do you draw cute hair for a girl?
Draw the hair a little outside the head circle so it looks thick, then add round bumps for bangs. Pigtails, a ponytail or a bob are all easy for beginners.
How long does it take to draw a girl?
Most kids finish in about 30 to 40 minutes with coloring. The pigtails and the hands take the most care.
She starts as one light circle, so put it on the page and see who she becomes. 👧✏️
Related posts:
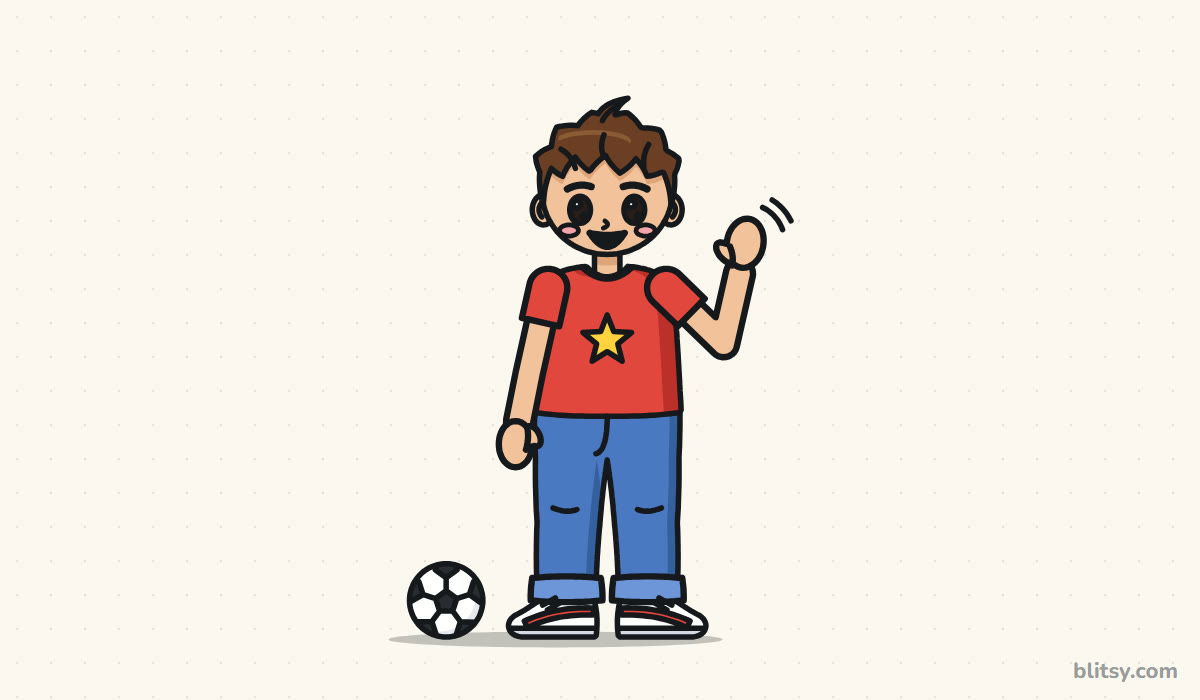 How to Draw a Boy Step by Step (Easy Full-Body Cartoon)
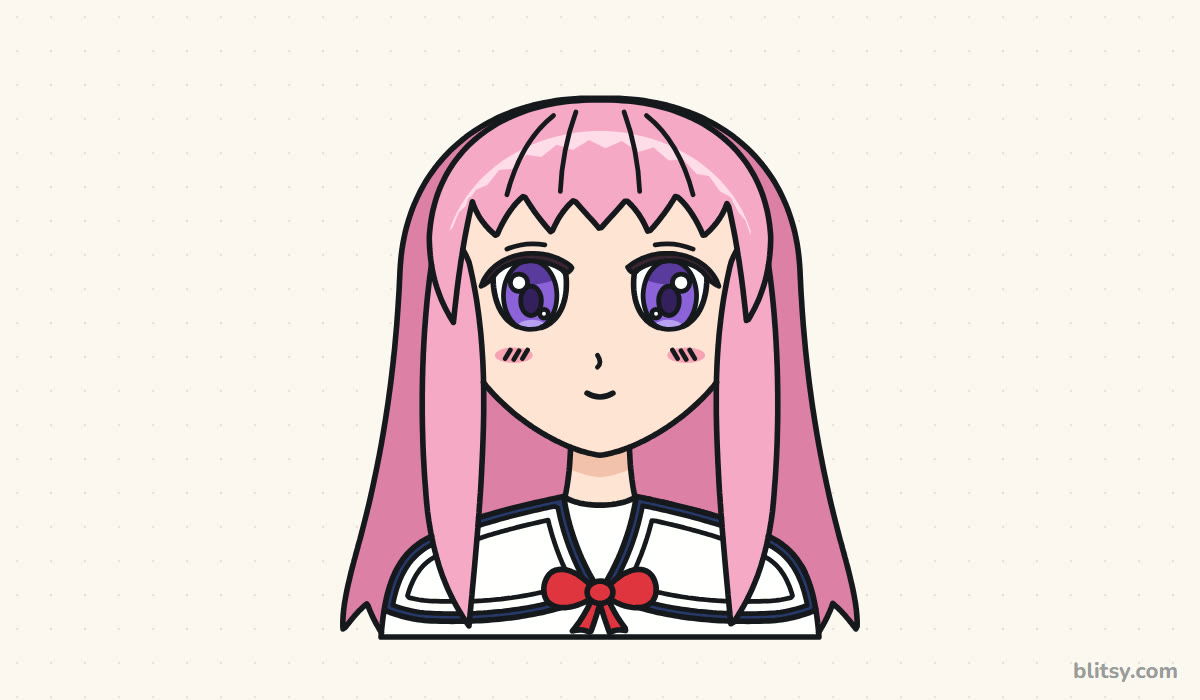 How to Draw an Anime Girl Step by Step (Easy Face Guide)
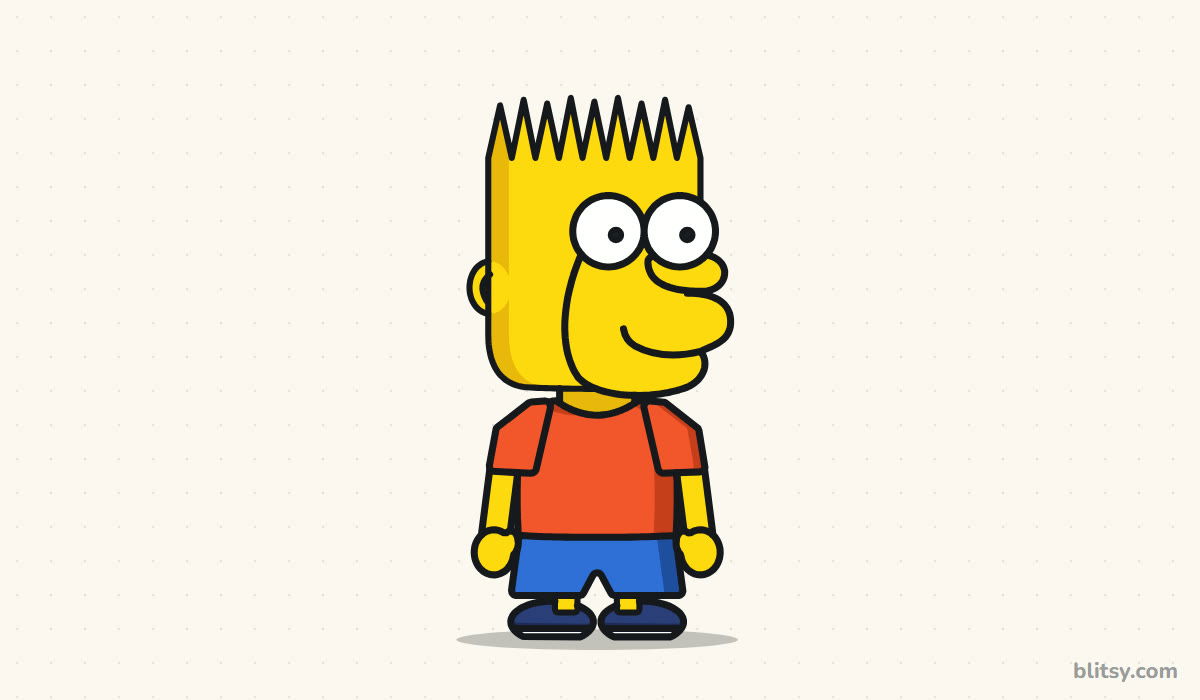 How to Draw Bart Simpson Step by Step (Easy Cartoon)
 How to Draw a Tank Step by Step (Easy Cartoon Tank)
 How to Draw a Bee Step by Step (Easy Cartoon Bee)
 How to Draw a Mermaid Step by Step (Easy Cartoon for Kids)
 How to Draw a Family Step by Step (Easy Cartoon Portrait)
 How to Draw a Princess Step by Step (Easy Ball Gown Cartoon)
 How to Draw a Cowboy Step by Step (Easy Cartoon Kid)
 How to Draw a Woman Step by Step (Easy Body Proportions)
 How to Draw a Whale Step by Step (Easy for Beginners)
 How to Draw Lungs Step by Step (Easy Science Diagram)

