
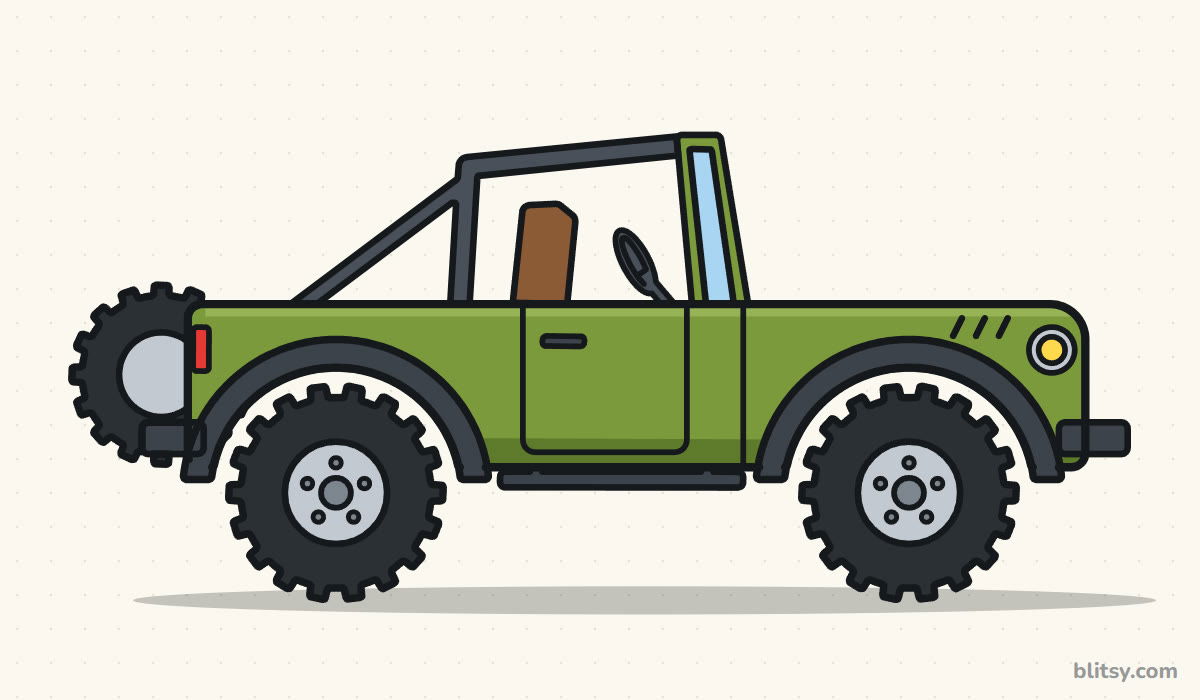
Almost every part of a jeep is a box or a circle, which makes it one of the friendliest vehicles to draw. Flat hood, flat sides, upright windshield, big round tires. In this lesson I'll show you how to draw a jeep step by step, starting from a ground line and two light circles and ending with a muddy-trail-ready 4x4 with an open top and a spare tire on the back. It's a generic jeep-style off-roader, not any one company's model, so there's no logo or grille to copy.
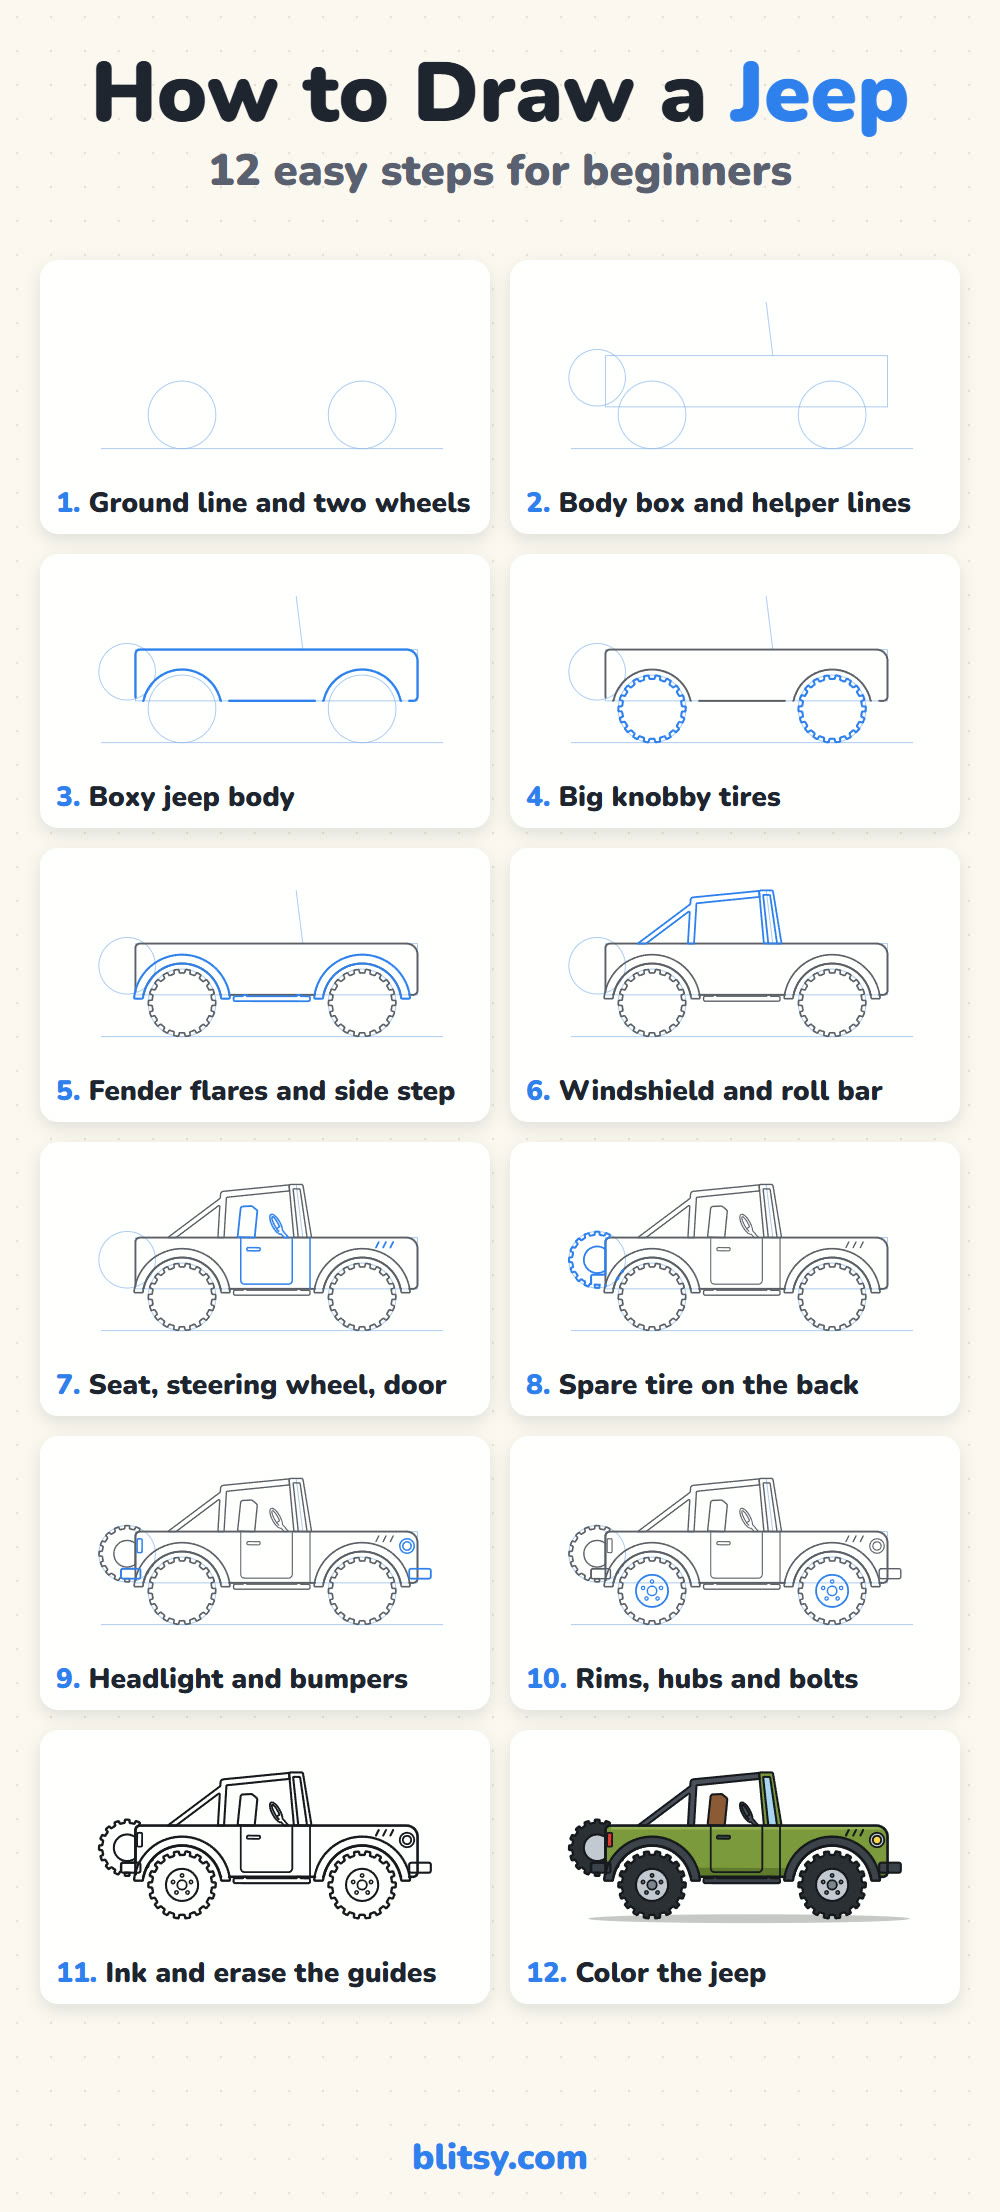
In each picture the new lines are blue and everything you drew earlier is gray. Add only the blue part, check it against the picture, then move to the next step.
Quick overview
⏱️ Time: about 30 to 40 minutes
🎯 Level: easy, fine for kids from about 7
✏️ Steps: 12
🚙 You'll draw: an open-top 4x4 in side view with a spare tire
Gear for an Off-Road Sketch
- A pencil you can keep light (an HB works well)
- An eraser that doesn't smudge
- A black marker or fineliner for the final outline
- Crayons or colored pencils: olive green, dark gray, black, light gray, light blue, brown, yellow and red
- Plain paper, turned sideways
A ruler is handy for the long top line of the body, but a slow freehand line looks friendlier.
How to Draw a Jeep Step by Step
Step 1: Draw a ground line and two wheel circles
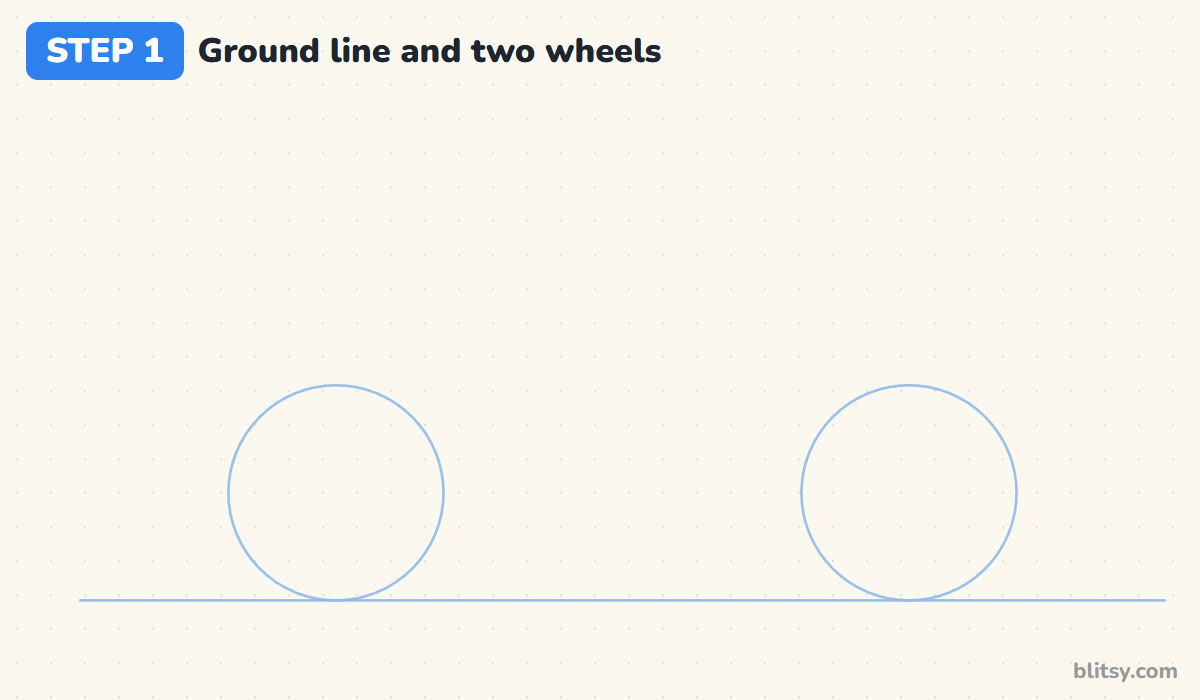
Near the bottom of the page, draw a long, light ground line. Sit two circles on it, one toward the left and one toward the right, with a gap between them of roughly two and a half circles. These are the outside edges of the tires, so make them big. Jeeps have large wheels for their size.
💡 Tip: Trace around a coin or a lid if your circles keep coming out lumpy.
Step 2: Add the body box and two helper lines
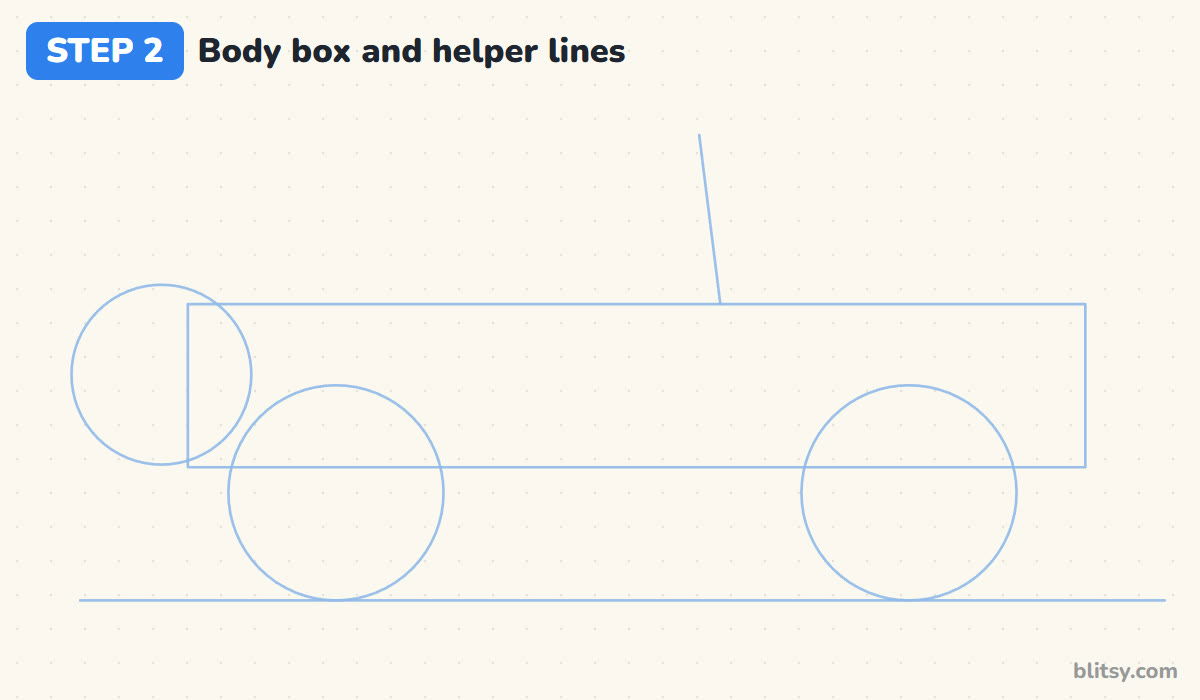
Draw a long rectangle over the wheels. Its bottom edge cuts through the upper part of both circles, and it should stick out a little past each wheel. Add one slanted line rising from the top of the box, just behind the front wheel, for the windshield, and a circle hanging off the back for the spare tire.
💡 Tip: Keep the box long and low. A tall box turns the jeep into a van.
Step 3: Outline the boxy body with wheel arches
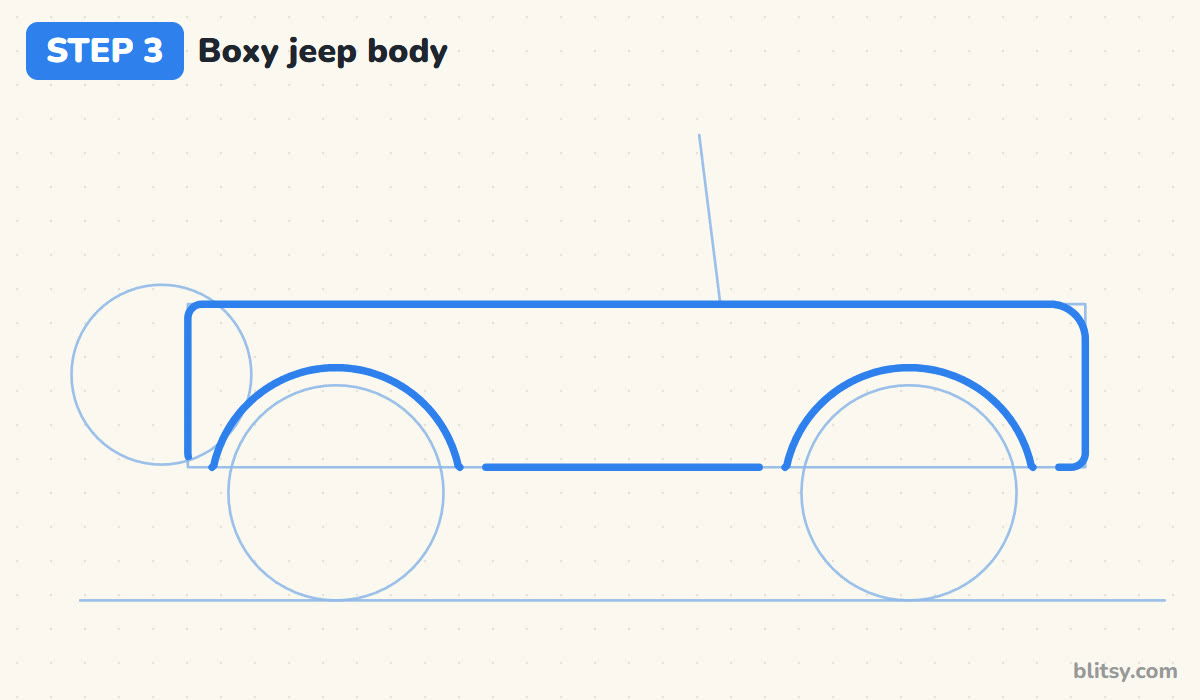
Now go over the box with a firmer line. Round the back corners a little and the front top corner a bit more. Over each wheel circle, draw a big arch that leaves a small gap above the circle, so the tire has room to bounce. The bottom edge of the body runs only between the arches and at the very ends.
💡 Tip: Draw each arch in one smooth sweep, starting from the bottom on one side.




Step 4: Turn the circles into knobby tires
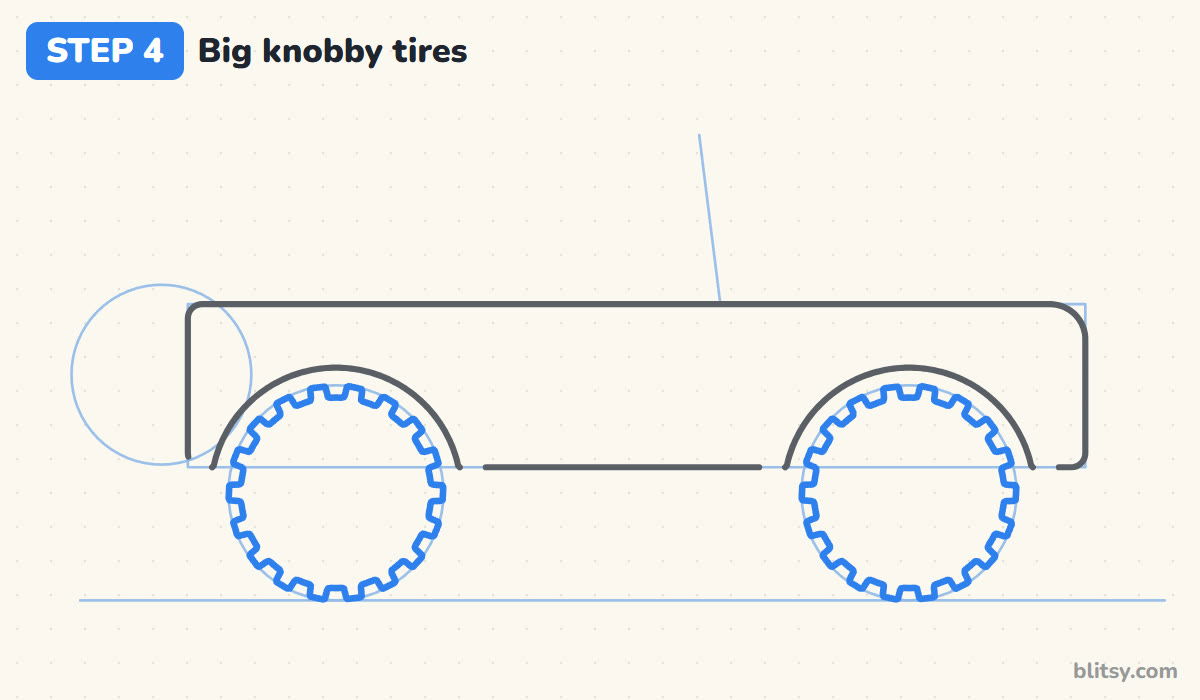
Draw a slightly smaller circle inside each wheel guide, then add square bumps all the way round it, like the teeth of a gear. Those bumps are the tread blocks that grip mud and rocks. I go for about eighteen per tire and try to keep the gaps even.
💡 Tip: Put one bump at the top, one at the bottom, one on each side, then fill in between.
Step 5: Add fender flares and a side step
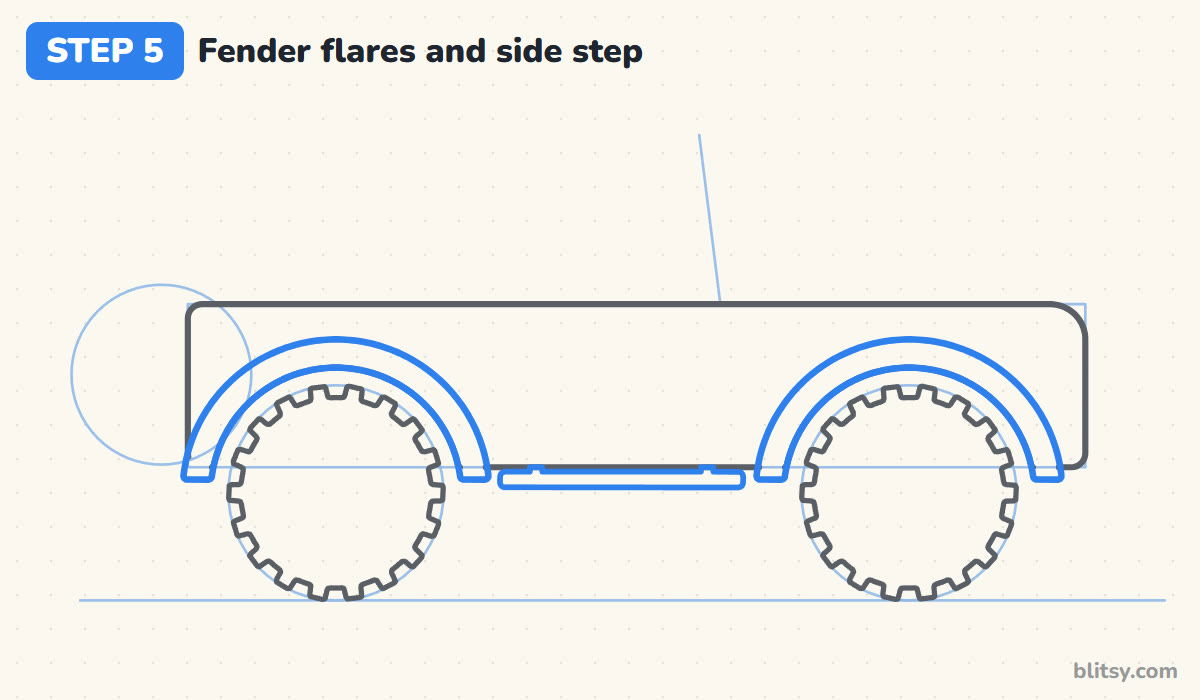
Around each arch, draw a second, bigger curve about a finger width outside the first, and close the ends with short flat lines just below the body. This thick band is the fender flare, a big part of the tough look. Between the wheels, under the body, draw a long thin bar for the side step.
💡 Tip: Make both flares the same thickness so the jeep doesn't look lopsided.
Step 6: Draw the windshield and the roll bar
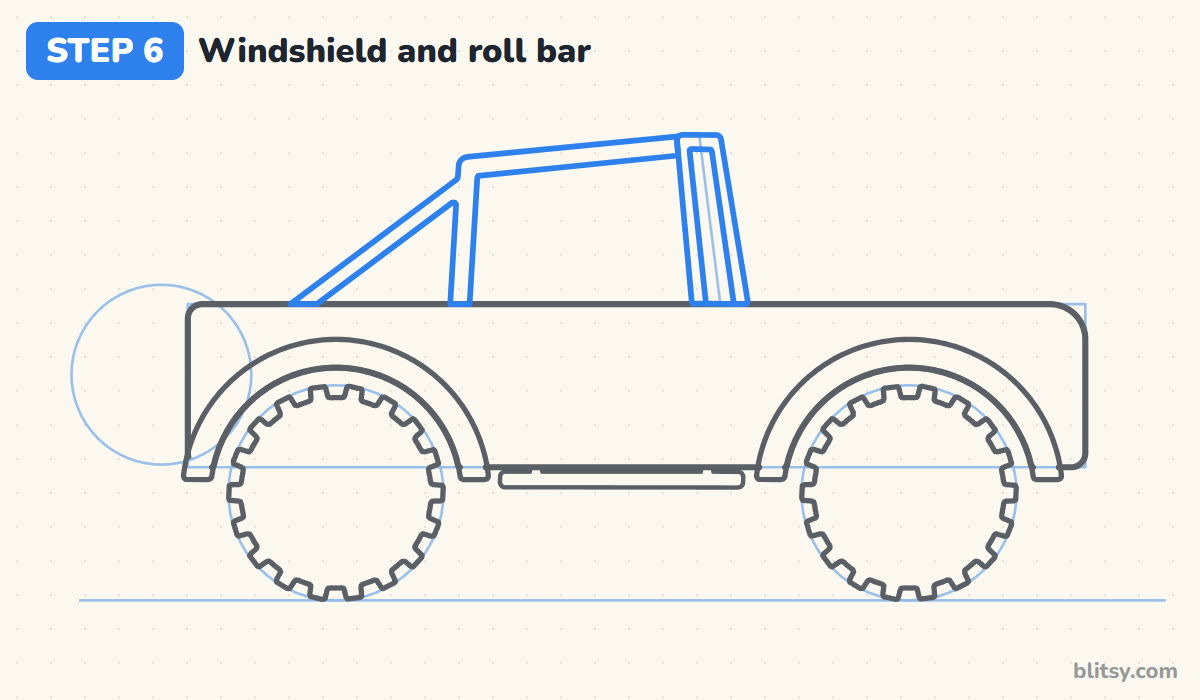
Follow the slanted helper line with a narrow frame shaped like a tall, thin box, with a skinny window inside. Behind it, draw the roll bar: one tube rising from the middle of the body, a top tube running forward to the windshield frame, and a slanted brace back down toward the rear. Draw each tube as two lines close together.
💡 Tip: Keep the windshield almost straight up. Jeeps look boxy partly because the glass hardly leans.
Step 7: Add a seat, a steering wheel and the door
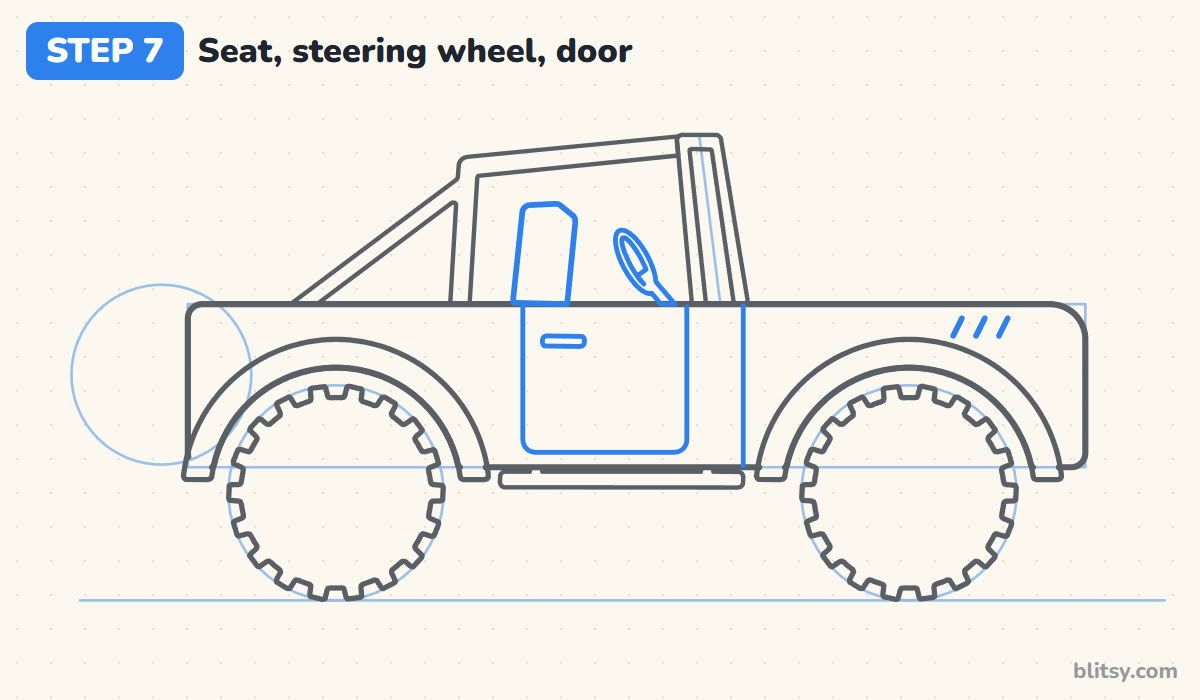
With no roof, you can see inside. Draw a seat back peeking over the side, just in front of the roll bar post, and a small tilted oval ring for the steering wheel near the windshield, with a short column line. On the side, draw a door with rounded corners and a short handle, plus a line down from the windshield where the hood starts. Three slanted dashes on the hood make vents.
💡 Tip: Draw the steering wheel as a ring, not a solid blob, or it reads as a spoon.




Step 8: Hang the spare tire on the back
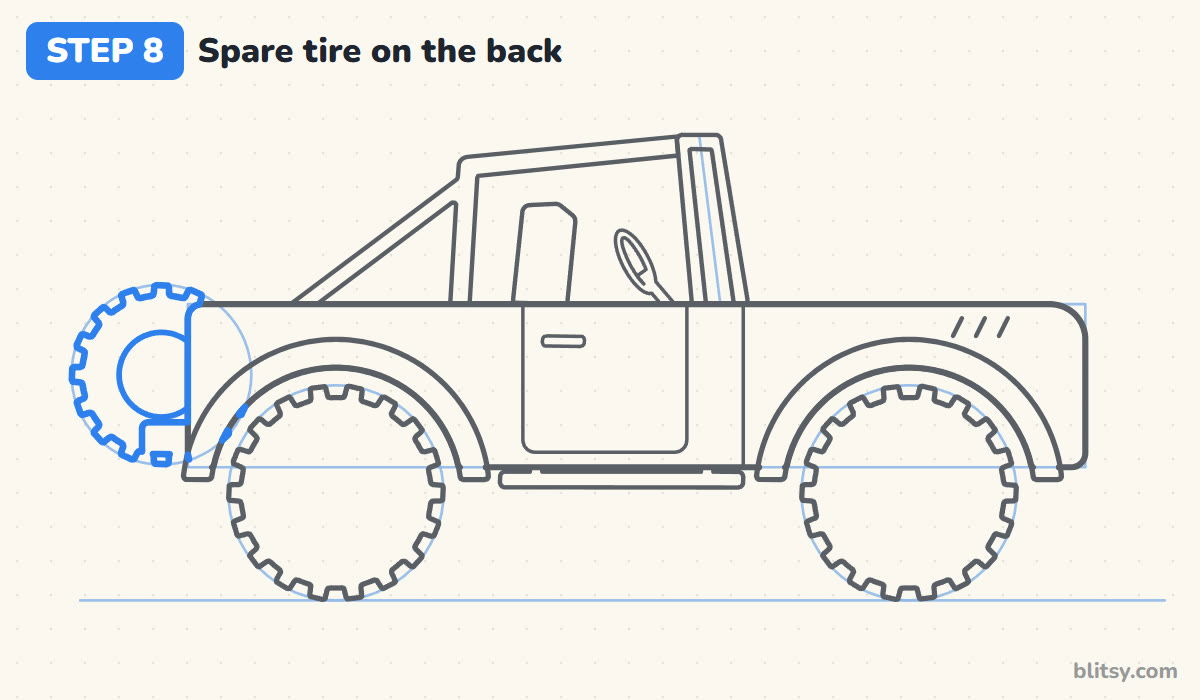
Use the circle behind the jeep as your guide. Draw the same knobby edge you used on the big tires, but only on the part that shows behind the body. Add a smaller rim circle inside it. The rest of the spare is hidden behind the jeep, so stop your lines where they meet the body.
💡 Tip: Make the spare a little smaller than the road tires so it doesn't steal the show.
Step 9: Draw the headlight, bumpers and tail light
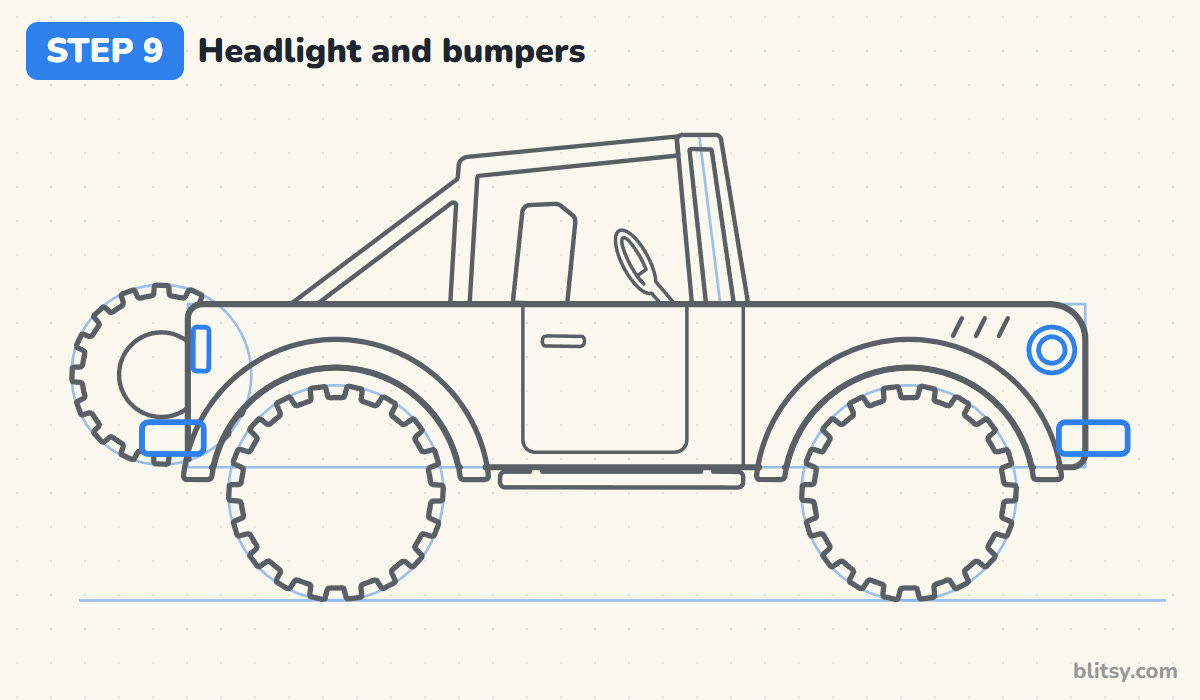
Near the front top corner, draw a round headlight with a smaller circle inside it. Low at the front and back, add a short rounded bumper that sticks out past the body. The back bumper overlaps the spare, so erase the spare lines behind it. Finish with a small upright tail light on the back edge.
💡 Tip: Put the headlight close to the front edge. Too far back and it looks like a porthole.
Step 10: Add rims, hubs and bolts
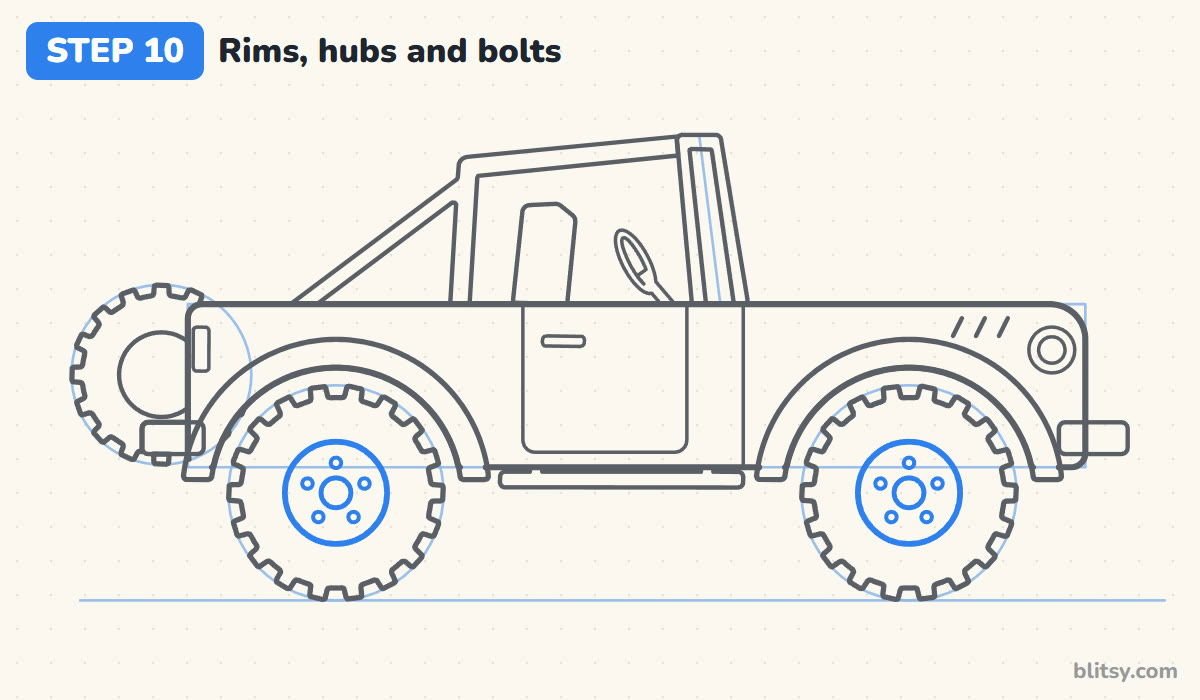
Inside each tire, draw a rim circle about half the size of the tire, a small hub circle in its center, and five tiny bolt circles around the hub. Space the bolts like the points of a star. This small detail makes the wheels look solid and heavy.
💡 Tip: Put the first bolt straight above the hub and the rest fall into place.
Step 11: Ink the jeep and erase the guides
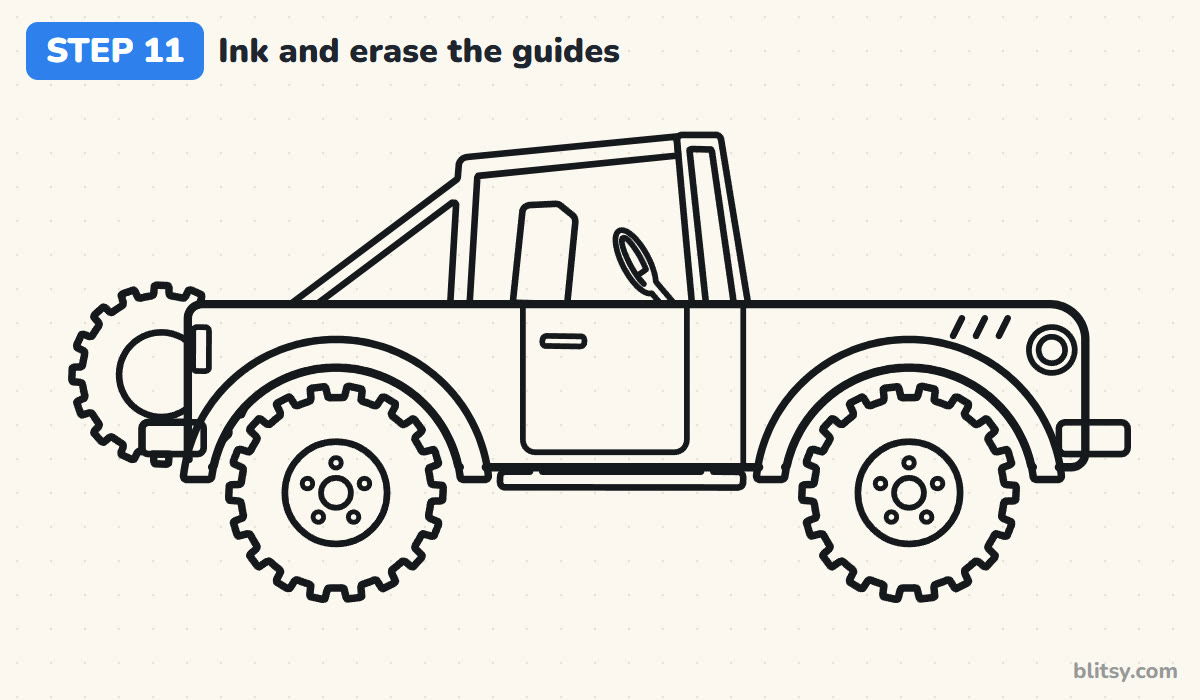
Go over all the keeper lines with a black marker. I do the tires first, since all those little bumps need a fresh, steady hand, then the body and the roll bar. Skip the guide circles, the box and the helper line. Once the ink is dry, erase every pencil mark.
💡 Tip: Turn the paper while you ink the tread bumps so your hand always pulls the same way.


Step 12: Color your jeep
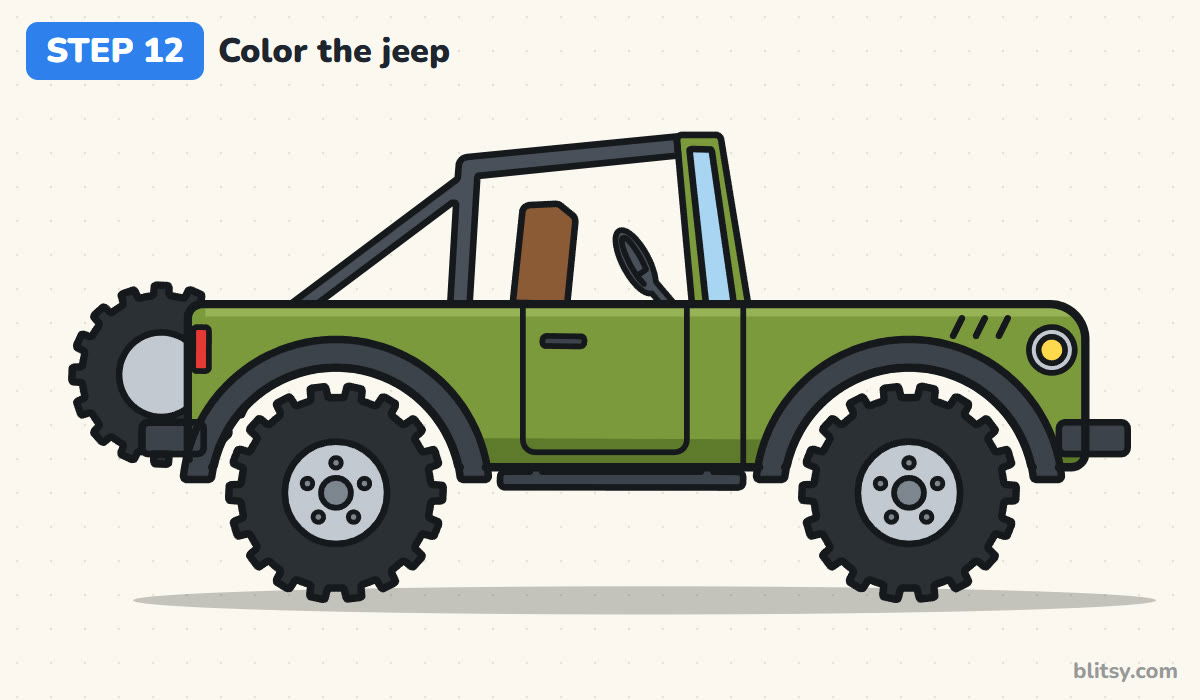
Olive green goes on the body and the windshield frame, with a darker green band along the bottom for shade. Fender flares, bumpers, step, roll bar and steering wheel are dark gray. Tires are black, rims light gray, the glass light blue and the seat brown. A yellow headlight, a red tail light and a soft gray shadow under the tires finish the job.
💡 Tip: Bright orange is a fun swap for the olive green. Keep the flares dark either way.
Where Jeep Sketches Start Looking Like Vans
- Tiny wheels. Small tires make it a city car. Let the tires reach well above the bottom of the body.
- A curvy body. Rounded hoods and sloping roofs belong on sports cars. Keep the top line flat and the corners only slightly rounded.
- A leaning windshield. If the glass slants back a lot, the jeep loses its upright, rugged look. Stand it nearly straight.
- Flares that hug the tire. Leave a small gap between the tire and the arch, then add the thick flare outside it.
- Forgetting the spare. The spare on the back is one of the quickest clues that this is an off-roader, so don't skip it.
Ideas for Your Next Off-Roader
Paint it bright orange, sandy tan or fire-engine red and the same lines feel like a brand new vehicle. Add mud splashes along the flares or a row of round lights on the top bar. Younger kids can skip the seat and steering wheel and it still reads as a jeep. If you'd like to practice a simpler side-view vehicle first, the how to draw a car step by step lesson uses the same two-circle start. For even bigger tires, the monster truck drawing tutorial lifts a pickup high above its wheels.
Free Jeep Coloring Page and Step Guide PDF
The free jeep coloring page shows the colored jeep at the top with a key for every part, plus a big clean outline to color in. Leave room around it for a trail or some mountains. The step-by-step PDF guide has all 12 steps with pictures and tips, so you can draw without a screen. Both fit Letter and A4 paper.
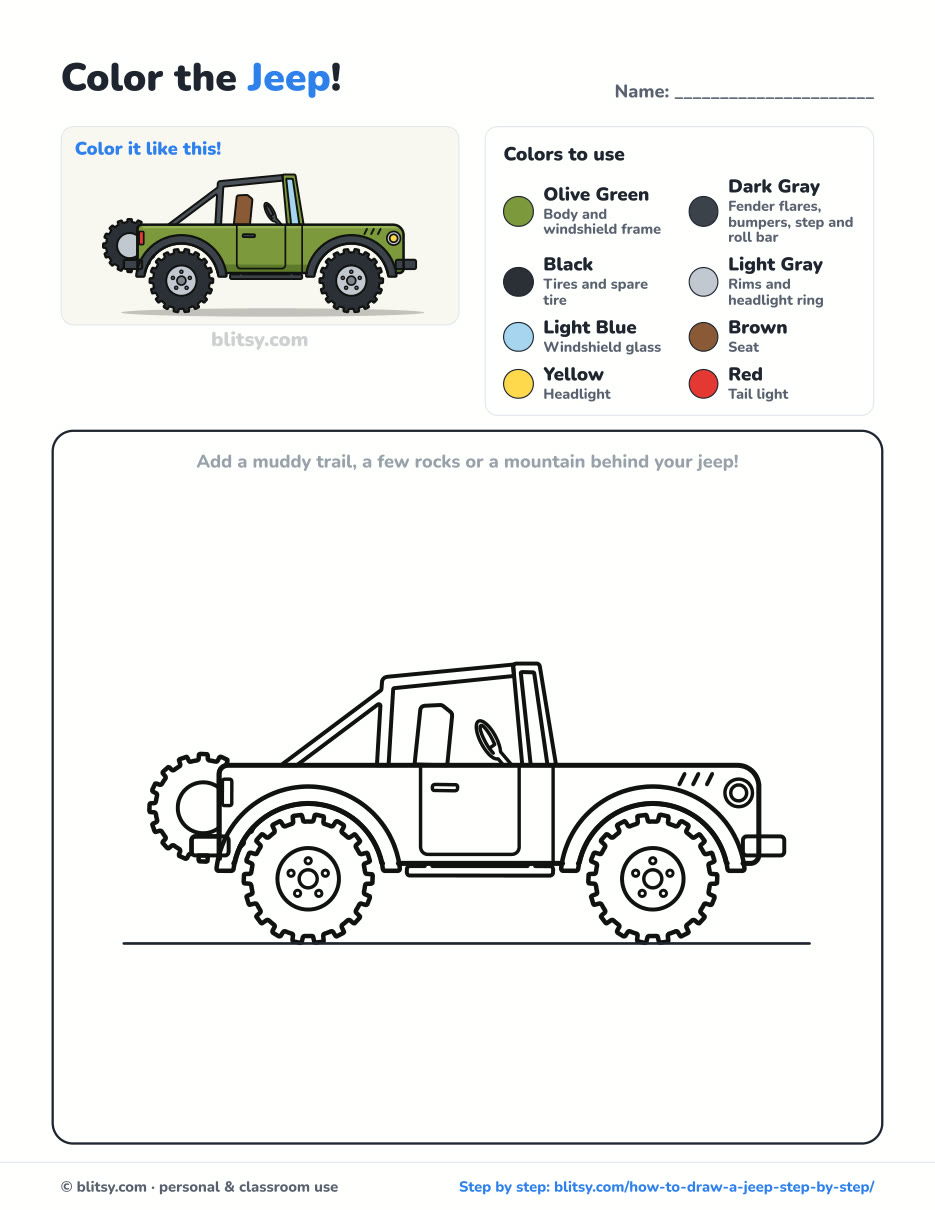
Black outlines with a colored example and the color names at the top. Ready to print and color.
⬇️ Download Coloring PageEvery step picture with its instructions and tips, to keep beside your paper while you draw.
⬇️ Download Drawing Guide📱 On a phone? Tap a download button, then open the file and choose Share → Save to Files or Print. On a computer, the PDF opens or saves straight to your Downloads folder.
Keep the Jeep Steps on Your Board
More Wheels to Draw After the Jeep
Each of these is a full step-by-step lesson with a picture for every stage, and most start with two circles too.
- Car Drawing: Learn the basic side-view car shape in this how to draw a car step by step tutorial.
- Monster Truck Drawing: A lifted red pickup with giant treaded tires, coil springs and orange flames fills this monster truck drawing tutorial.
- Police Car Drawing: Draw a black-and-white patrol car with a flashing light bar and a gold star on the door in this police car drawing step by step lesson.
- Race Car Drawing: A low formula race car with wings at both ends and a driver in a blue helmet takes 12 steps in this race car drawing tutorial.
- Tank Drawing: Another olive green vehicle, this friendly cartoon tank rolls on road wheels and a long track in this tank drawing step by step guide.
Jeep Drawing Questions From Young Artists
What is the easiest way to draw a jeep?
Start with two circles on a line and a long box over them. Cut wheel arches into the box, then add knobby tires, an upright windshield and a spare tire.
How do you draw jeep tires?
Draw a circle, then add square bumps all the way round it like gear teeth. Put a smaller circle inside for the rim and a tiny one for the hub.
How long does it take to draw a jeep?
Most kids finish in about 30 to 40 minutes with coloring. The tread bumps take the longest, so give them a little patience.
What color should I make my jeep?
Olive green and bright orange are classic off-road colors, but red, yellow, blue or tan all work. Keep the flares and bumpers dark gray so the body color stands out.
Grab a pencil, draw two circles on a line and see where your jeep wants to drive today. 🚙✏️
Related posts:
 How to Draw a Whale Step by Step (Easy for Beginners)
 How to Draw Lungs Step by Step (Easy Science Diagram)
 How to Draw a Pineapple Step by Step (Easy Crown and Slice)
 How to Draw Iron Man Step by Step (Easy Chibi for Kids)
 How to Draw a Dress Step by Step (Easy Party Dress)
 How to Draw a Chicken Step by Step (Easy for Beginners)
 How to Draw a UFO Step by Step (Cute Alien Saucer)
 How to Draw Flames Step by Step (Easy Campfire Drawing)
 How to Draw a Moon Step by Step (Sleepy Crescent + Phases)
 How to Draw a Sunflower Step by Step (Big and Bright)
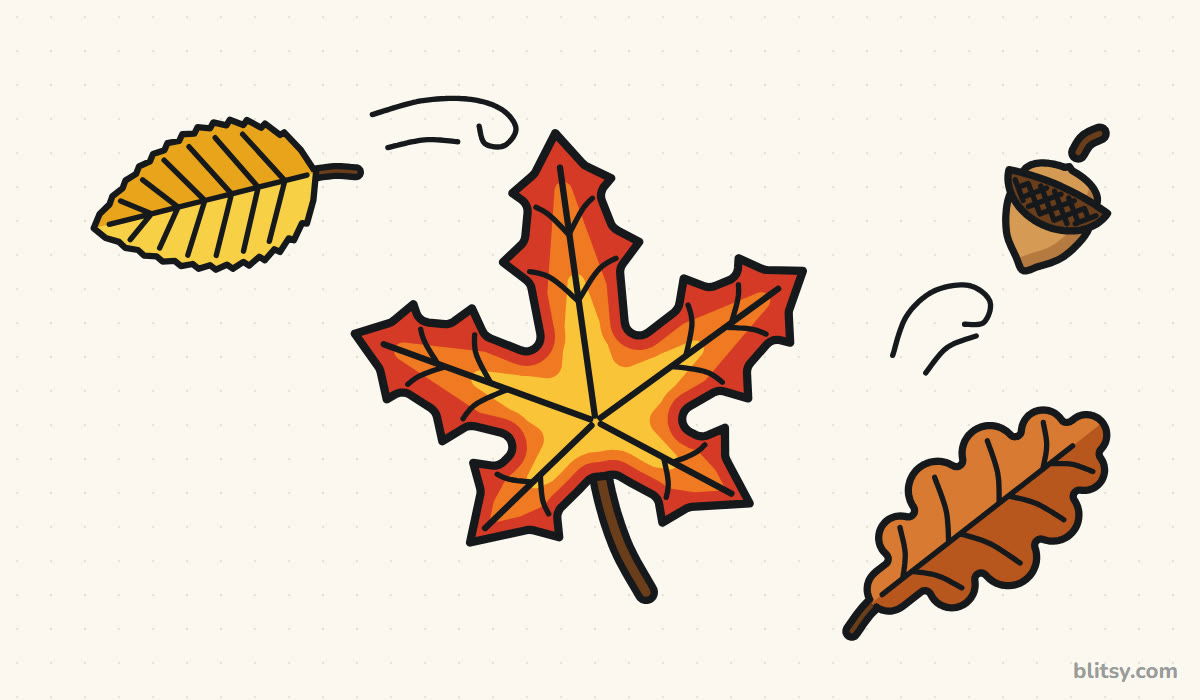 How to Draw a Fall Leaf Step by Step (Maple, Oak and Birch)
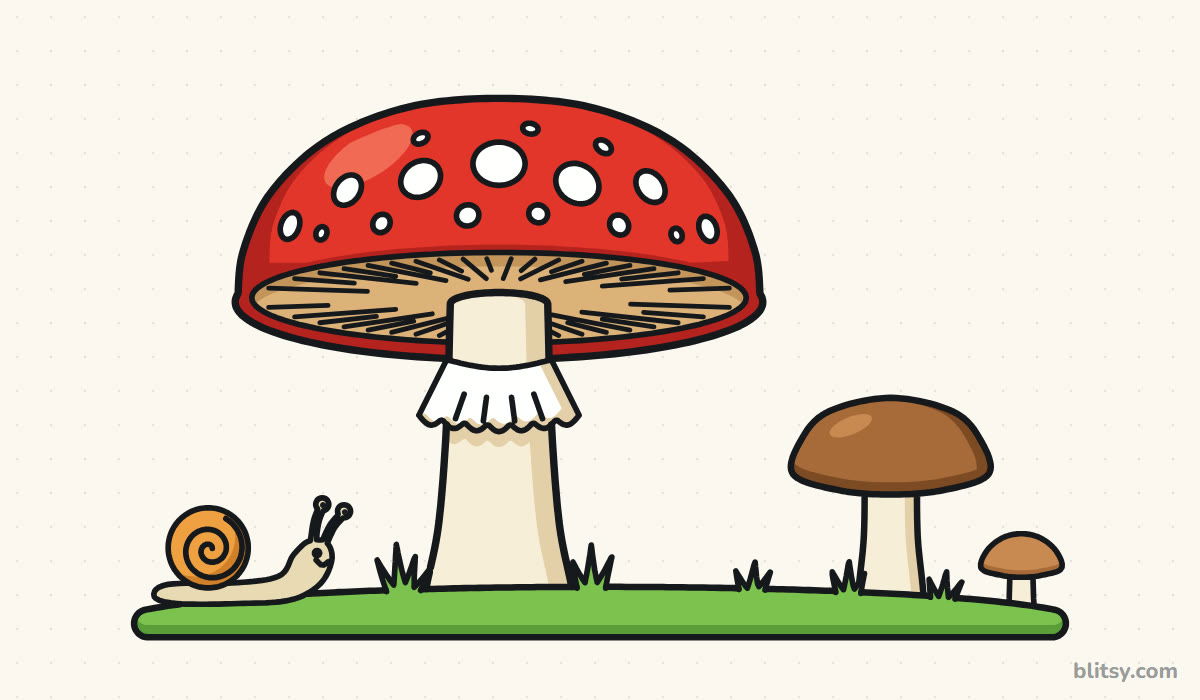 How to Draw a Mushroom Step by Step (Easy Storybook Toadstool)

