
Have you ever wanted to draw a car that actually looks like a car? The good news: you don't need to be an artist. In this tutorial you'll learn how to draw a car step by step, starting with two circles and a box, and finishing with a clean, colored family car you'll be proud of.
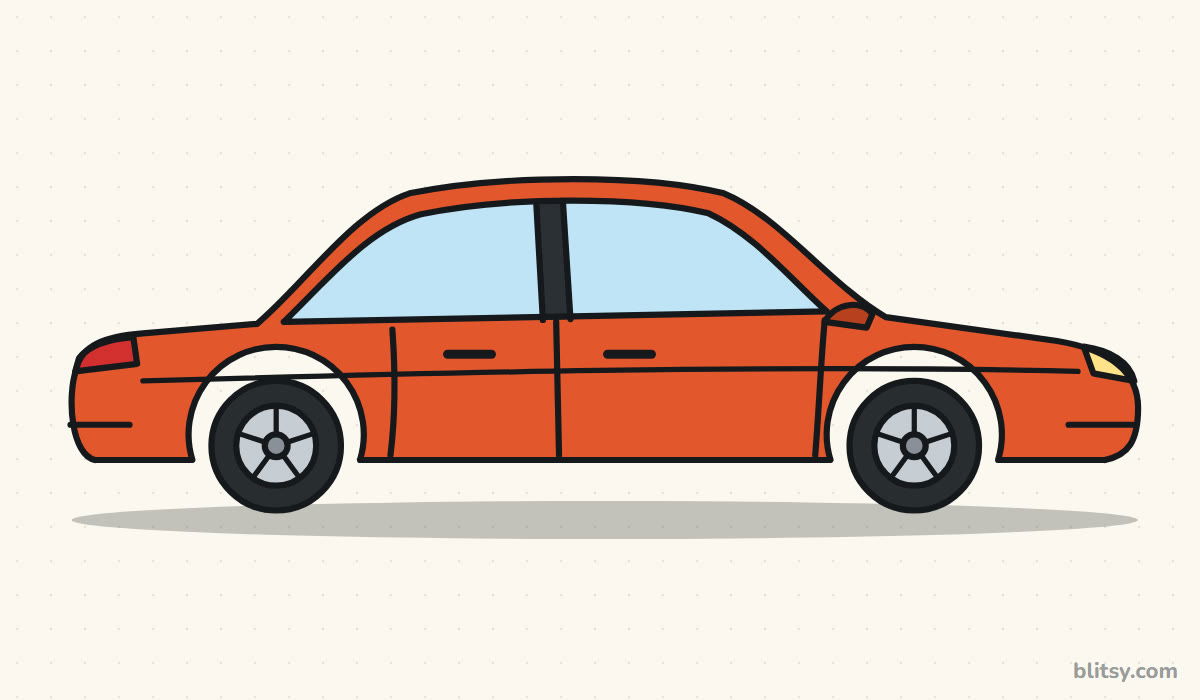
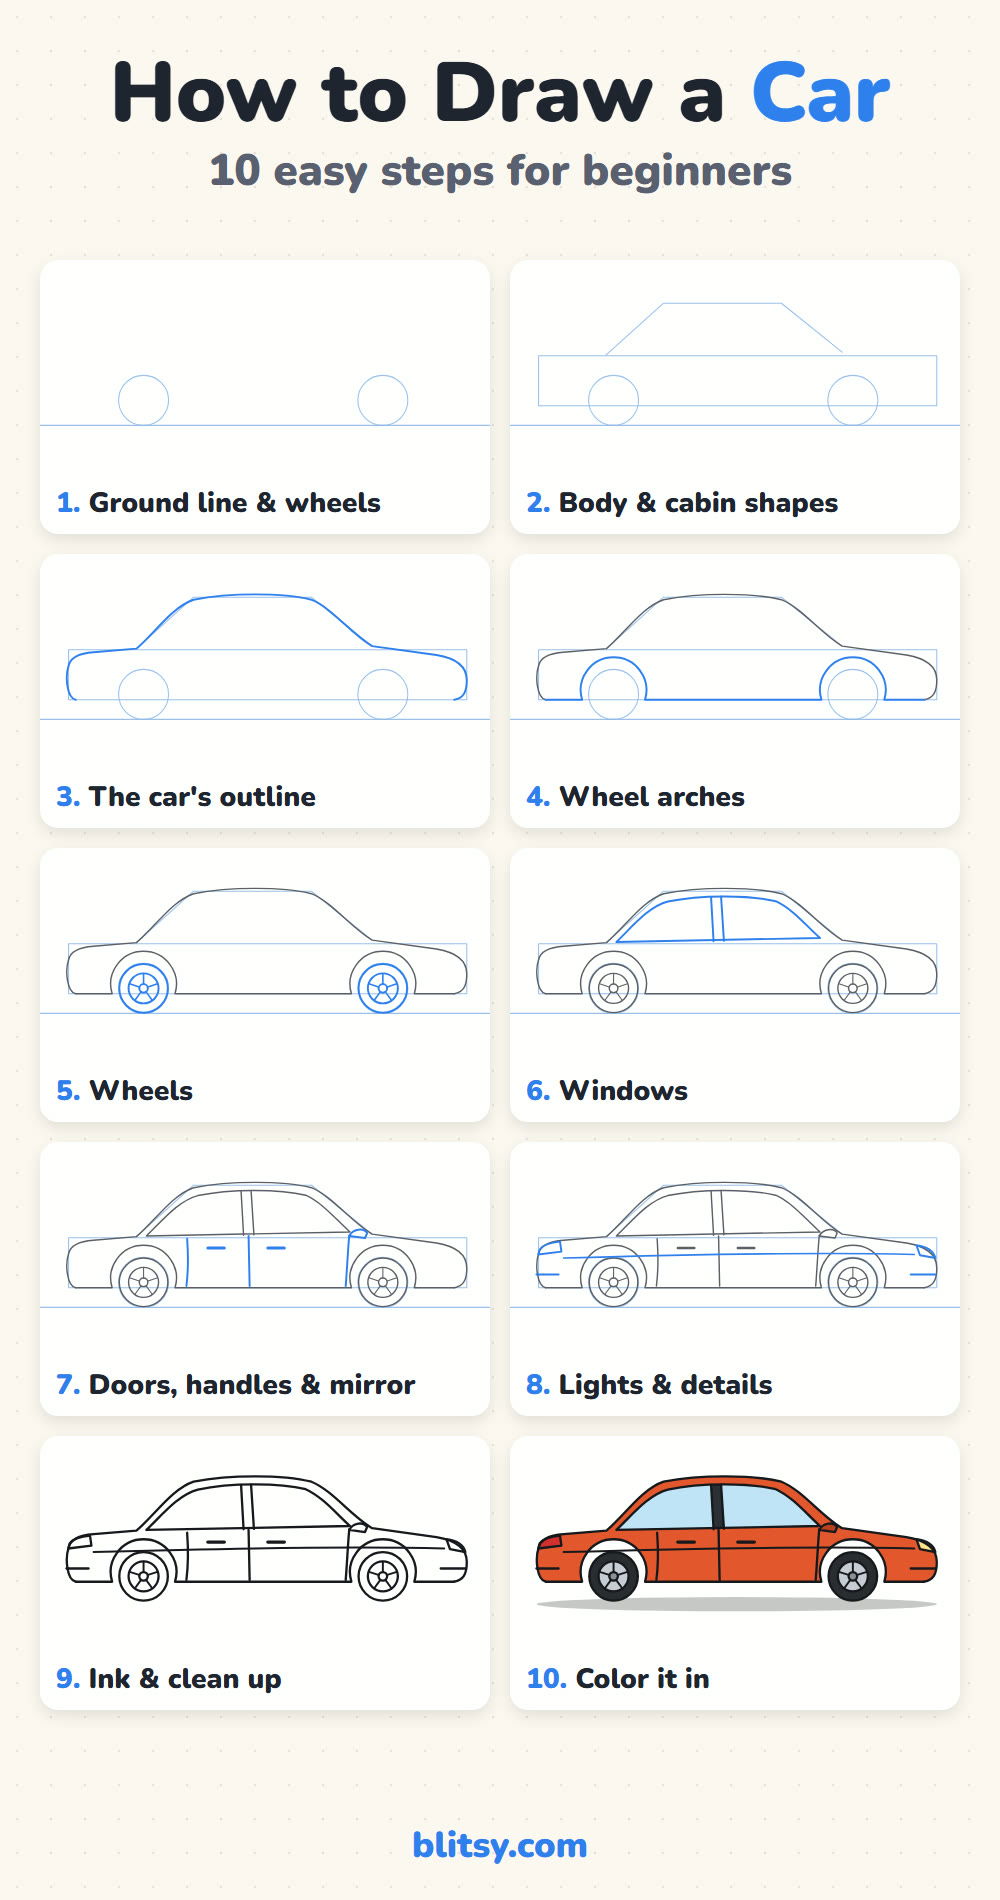
Every step has its own picture. The new lines for each step are shown in blue, and the lines you've already drawn are gray, so you always know exactly what to add next. Grab a pencil and draw along!
Quick overview
⏱️ Time: about 20–30 minutes
🎯 Level: easy, great for beginners and kids
✏️ Steps: 10
🚗 You'll draw: a family car (sedan), side view
What You'll Need
- A pencil (a regular HB pencil is perfect)
- An eraser
- A black pen or fine marker
- Colored pencils or markers
- A sheet of paper
That's it! No ruler or special tools needed. If you want straight lines, you can use a ruler for the ground line, but freehand is great practice.
How to Draw a Car Step by Step
Step 1: Draw the ground line and the wheels
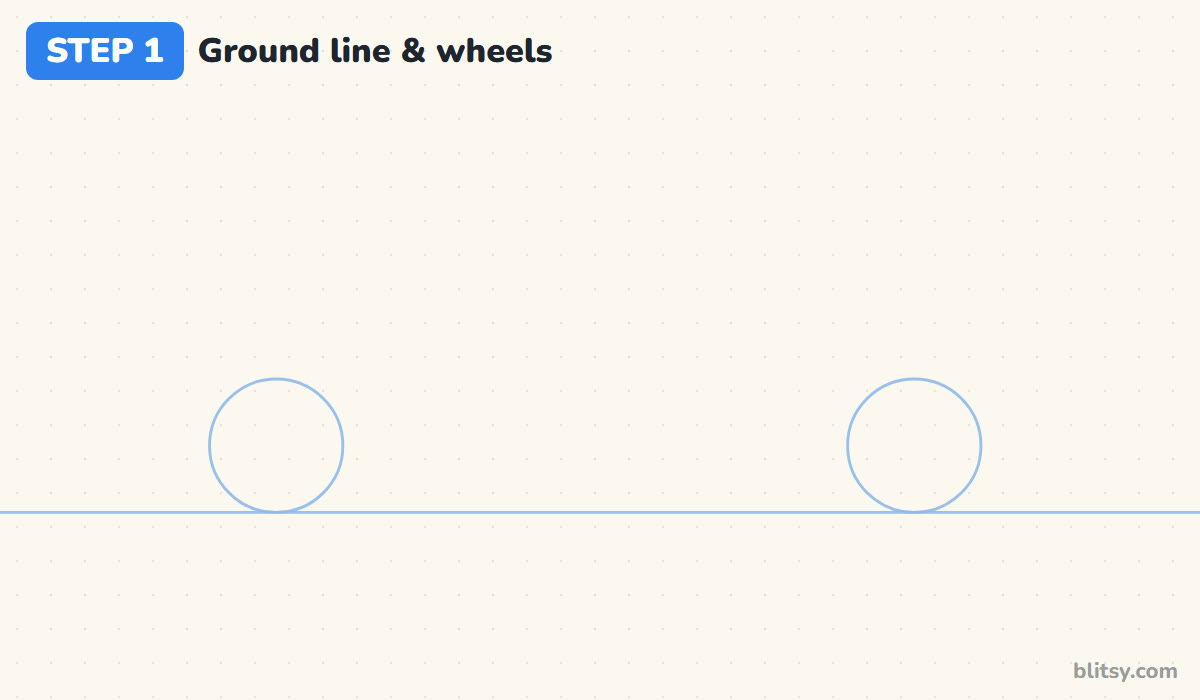
Start with a light, straight line across your paper. This is the ground your car will sit on. Then draw two circles resting on the line. These are the wheels. Leave a big gap between them, about four wheels wide, so the car has room for its doors.
💡 Tip: Press lightly! These are guide lines, and you will erase them later.
Step 2: Add the body and cabin shapes
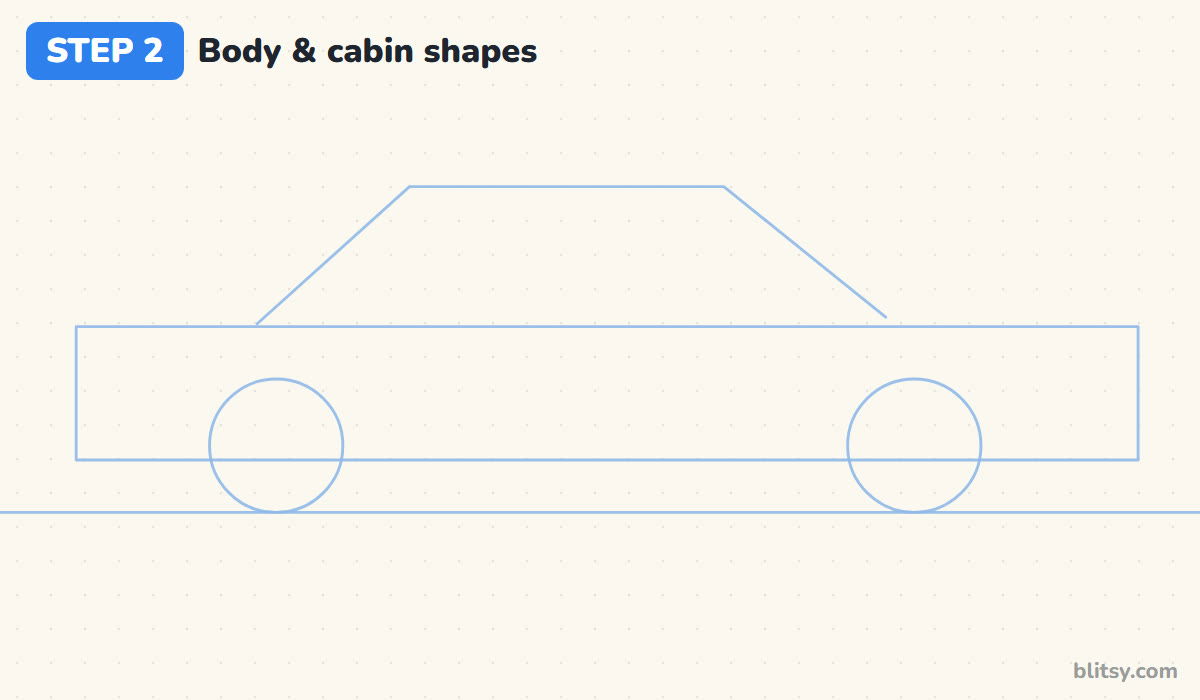
Draw a long rectangle around the wheels. It should start a little behind the back wheel and end a little in front of the front wheel. This box is the body of the car. On top, draw a smaller shape with slanted sides, like a trapezoid. That is the cabin, where the people sit.
💡 Tip: Simple shapes first, details later. That is the secret to every good drawing.
Step 3: Draw the outline of the car
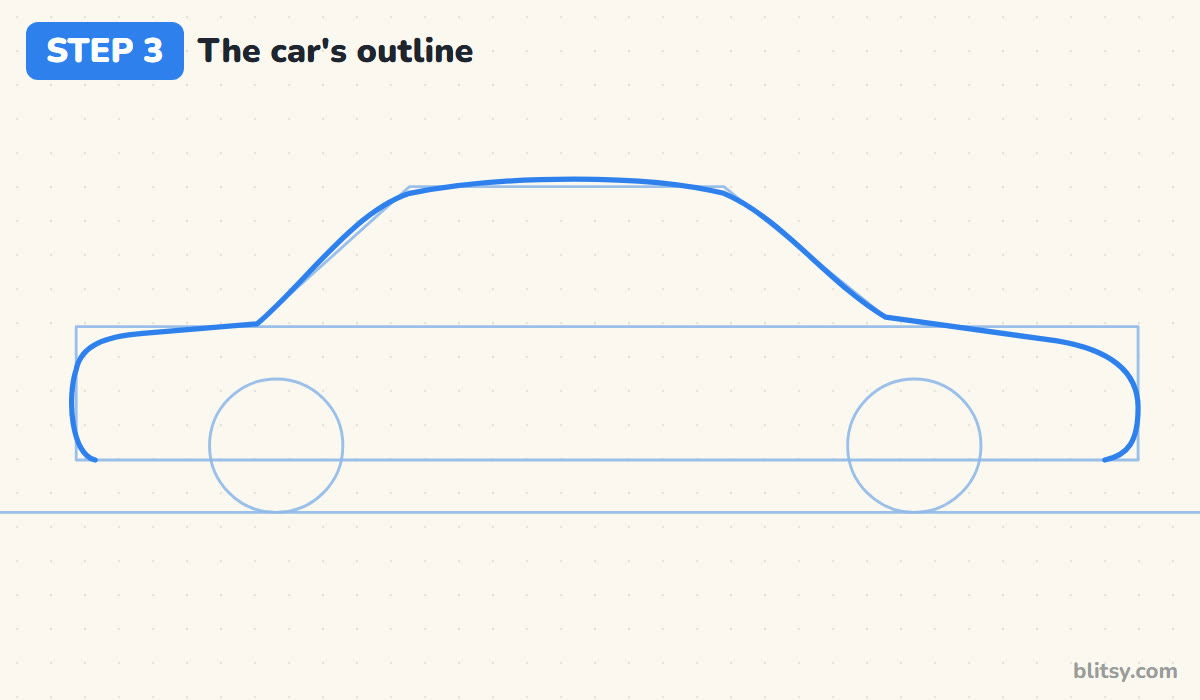
Now the fun part. Start at the back bottom corner and round it off. Follow the top of the box along the trunk, go up the slope of the back window, along the roof, down the windshield, along the hood, and round off the nose at the front. Use your guide shapes, but make the corners soft and curved.




💡 Tip: Keep the outline just inside your guide box, so it looks smooth and not boxy.
Step 4: Shape the wheel arches
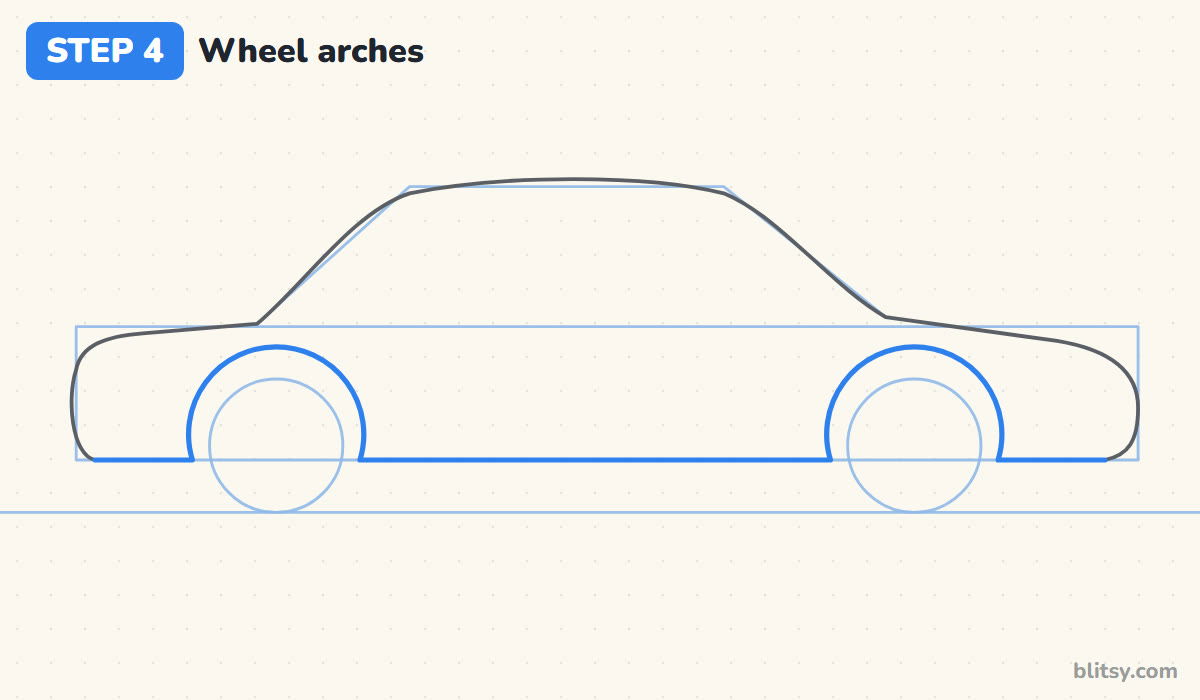
Next, draw the bottom of the car. Draw a short line under the front, then a curve over the front wheel. Continue straight along the bottom of the doors, then add another curve over the back wheel, and finish with a short line under the trunk.
💡 Tip: Leave a small gap between each arch and its wheel, the way real cars have.
Step 5: Draw the wheels
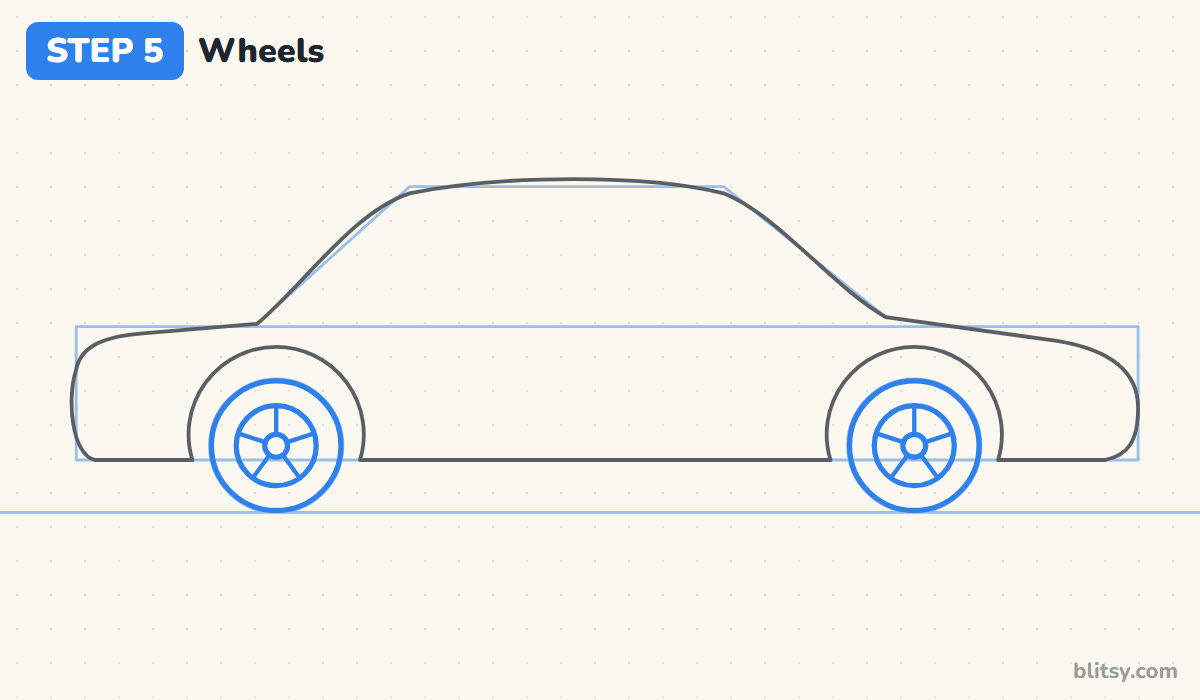
Go over each wheel circle to make the tire. Inside it, draw a smaller circle for the rim. Add a tiny circle in the middle for the hub, then draw five short spokes from the hub to the rim, like a star.
💡 Tip: Turn your paper as you draw circles. Your hand moves more naturally, and the circles get smoother.
Step 6: Add the windows
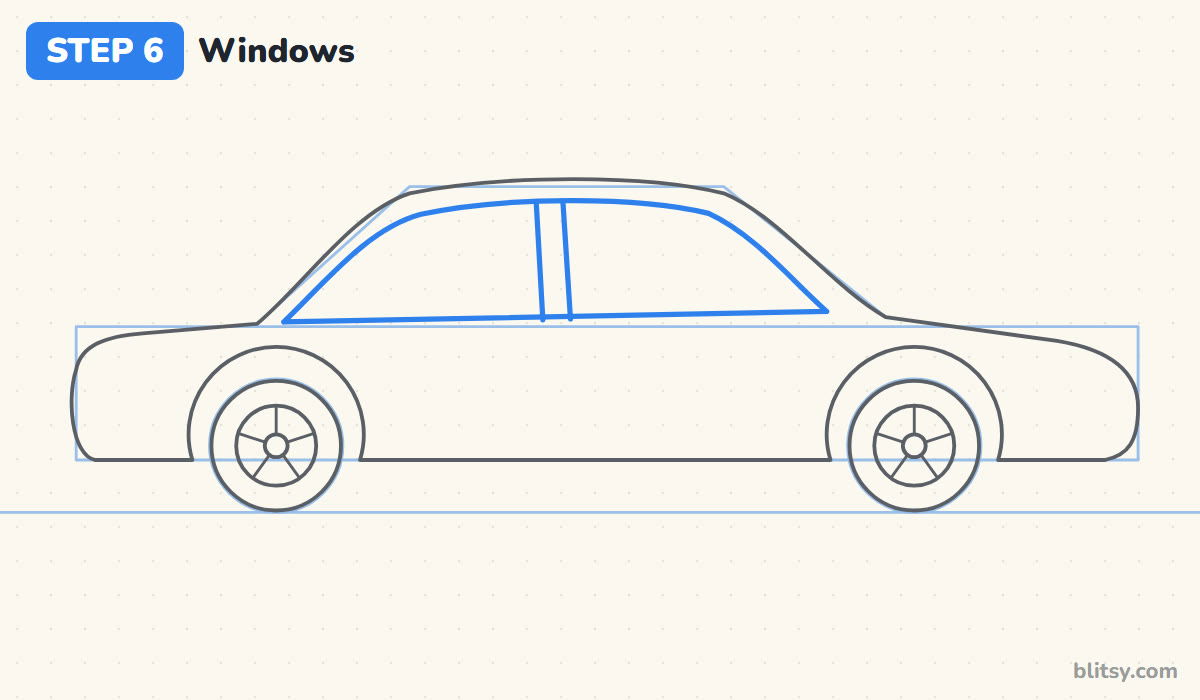
Follow the shape of the roof and draw the window line a little inside it, so there is an even frame around the glass. Then draw two close vertical lines in the middle. This thick line is the pillar between the front and back windows.
💡 Tip: Keep the same gap from the roof all the way around the windows.
Step 7: Draw the doors, handles and mirror
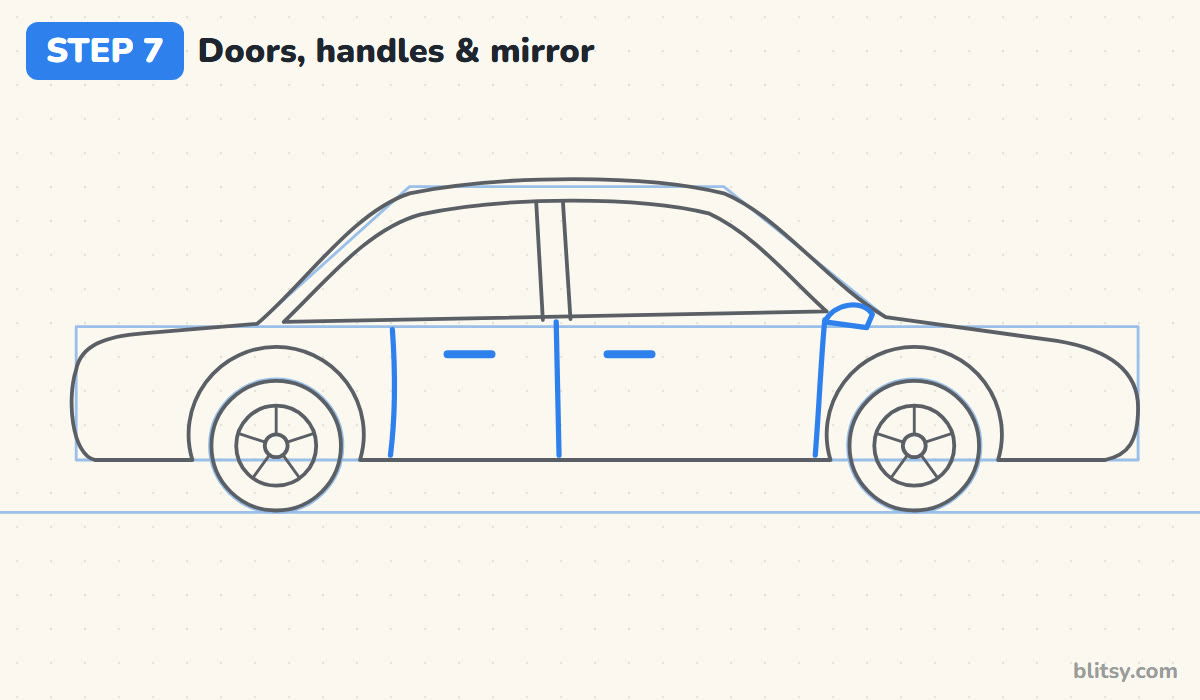
Draw one line behind the back door, one in the middle under the window pillar, and one at the front, just behind the front wheel. Add two short thick lines for the door handles, and a small side mirror where the windshield meets the hood.




💡 Tip: The middle door line should line up with the window pillar. It makes the car look right.
Step 8: Add the lights and details
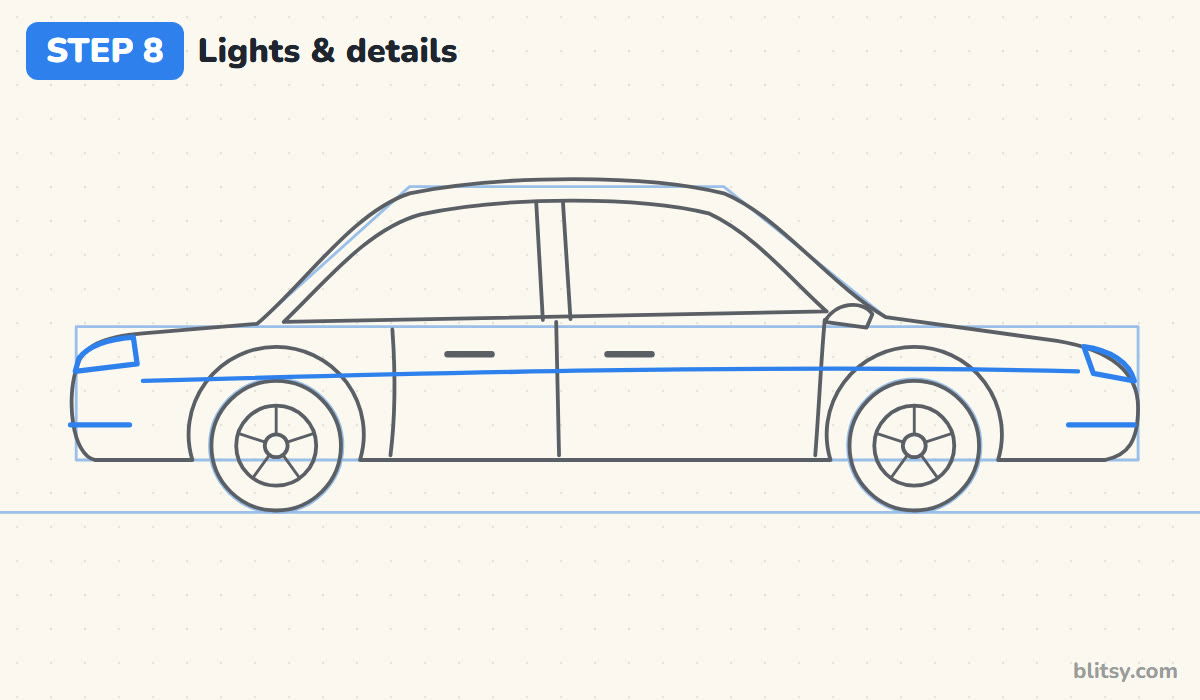
Draw a small headlight shape at the front of the hood, and a tail light at the back. Add one long, gentle line along the side of the car for a bit of style, and two short lines for the front and back bumpers.
💡 Tip: Take your time here. Pause, compare with the picture, and catch up before you move on.
Step 9: Ink the lines and clean up
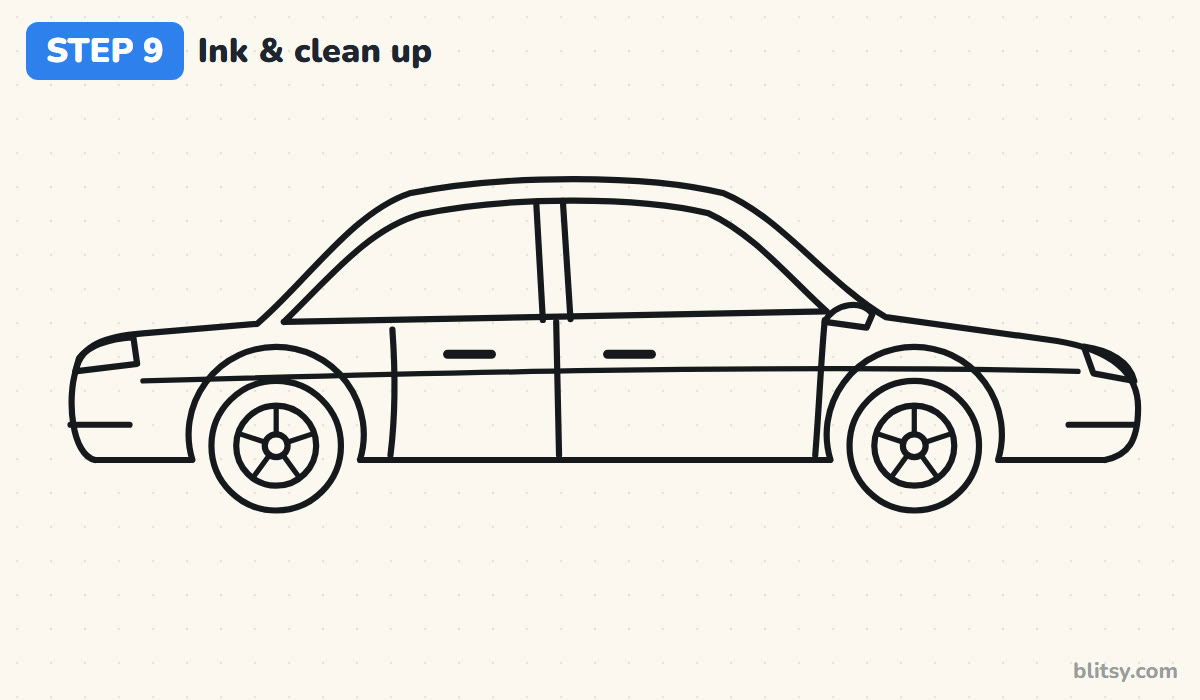
Take a black pen or fine marker and carefully trace every line you want to keep: the outline, wheels, windows, doors, handles, mirror, lights and bumpers. Go slowly and keep your hand steady. When the ink is dry, erase all the light pencil guide lines, the ground line, the circles and the boxes.
💡 Tip: Let the ink dry for a minute before erasing, so it doesn't smudge.
Step 10: Color your car
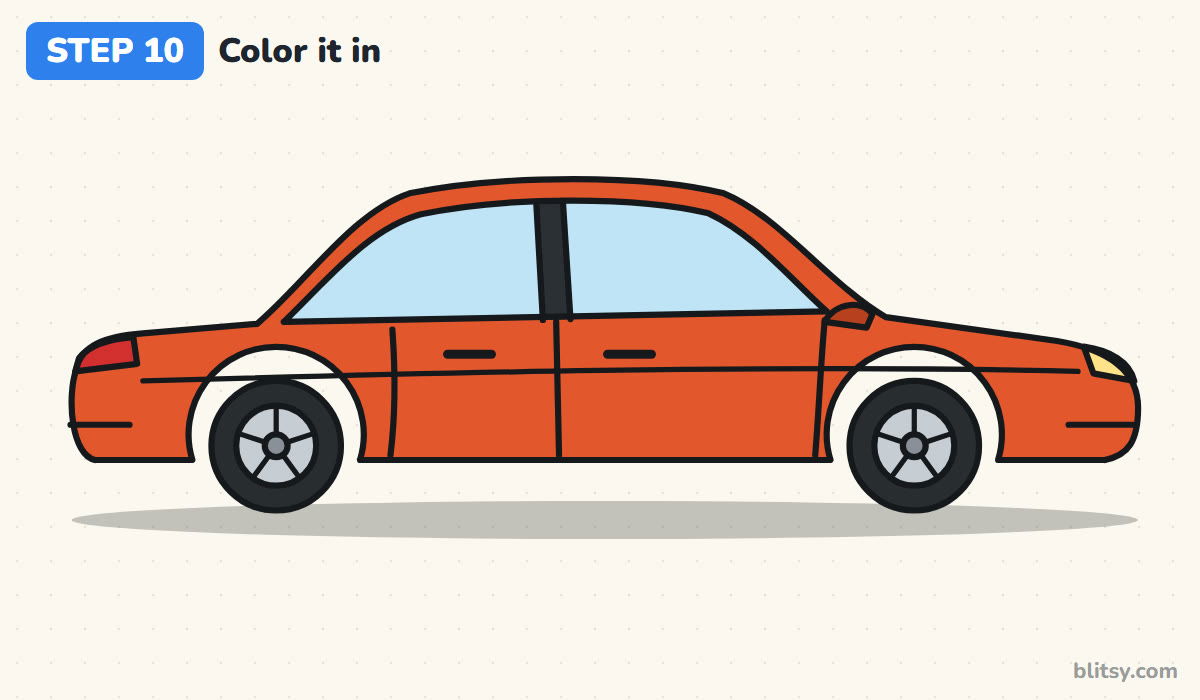
Now bring it to life! Color the body in a bright color, like red. Use light blue for the windows, dark gray for the tires and silver for the rims. Make the headlight yellow and the tail light red. Finish with a soft gray shadow under the car so it sits on the ground.
💡 Tip: Color in one direction, and press a little harder in the darker spots for a smooth finish.
Common Beginner Mistakes (and Easy Fixes)
- Wheels too close together. Leave about four wheels of space between them, so the doors fit.
- Pressing too hard at the start. Dark guide lines are hard to erase. Sketch lightly, ink later.
- A boxy outline. Round off every corner of the body; real cars have soft curves.
- Windows touching the roof. Keep an even frame of body color around the glass.
- Erasing wet ink. Wait a minute after inking, then erase the pencil lines.
Make It Your Own
Once you can draw this car, try changing it: make it a taxi with a yellow body and a roof sign, a police car with blue and white colors, or a race car with stripes and a big number on the door. Want more coloring practice? Print a few free car coloring pages and try a new color scheme on each one.
Free Printables: Car Coloring Page + PDF Drawing Guide
Want to practice offline? Download the free car coloring page (a color key at the top) with a colored example to copy and the color names for each part, and the step-by-step PDF guide with all 10 steps and tips. They work on your phone, tablet, laptop or PC, and print on regular Letter or A4 paper.
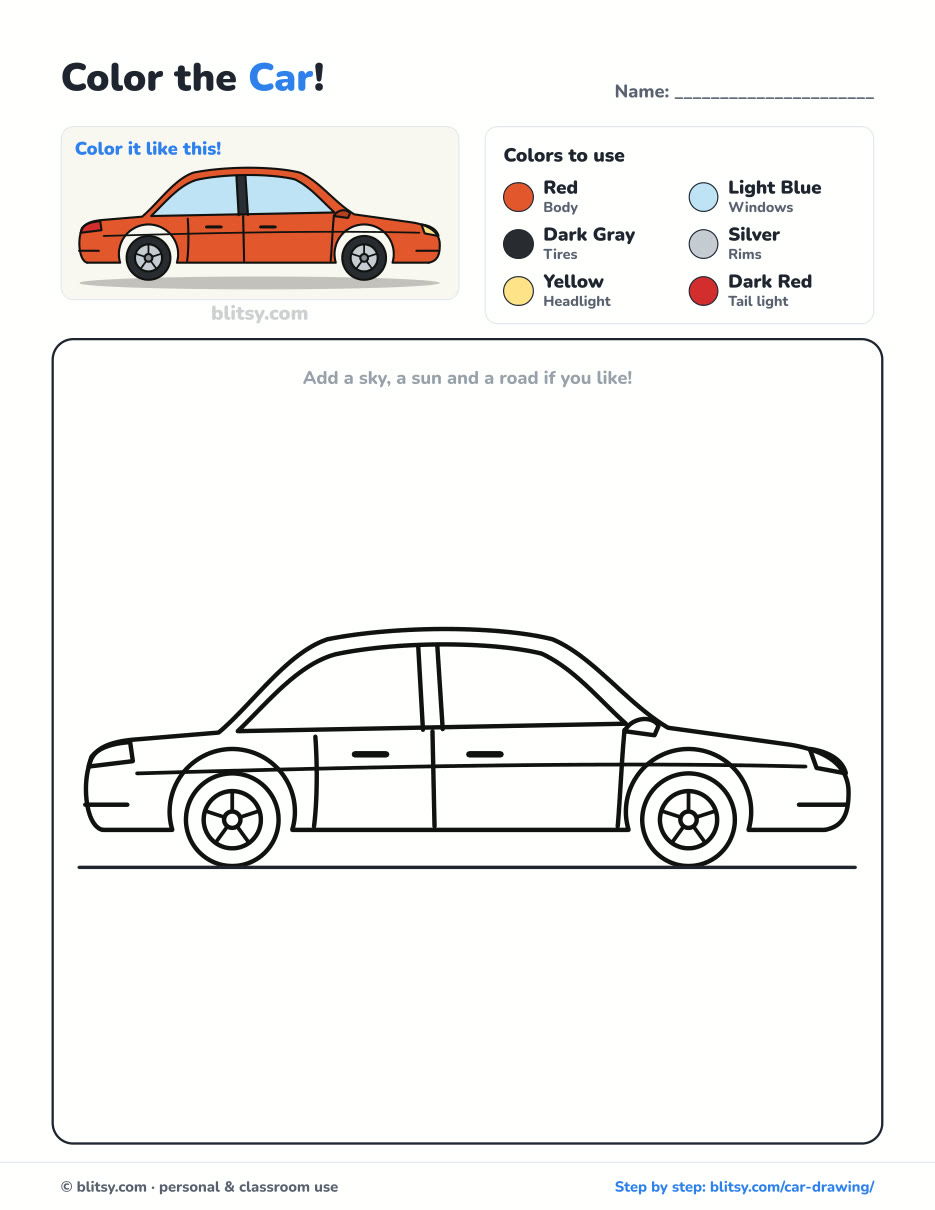
Black outlines with a colored example and the color names at the top. Ready to print and color.
⬇️ Download Coloring Page

Every step picture with its instructions and tips, to keep beside your paper while you draw.
⬇️ Download Drawing Guide📱 On a phone? Tap a download button, then open the file and choose Share → Save to Files or Print. On a computer, the PDF opens or saves straight to your Downloads folder.
Save the Steps for Later
Next Drawings for Young Car Fans
These are full step-by-step tutorials too, each with step pictures and a free coloring page.
- Earth Drawing: Draw a globe with real continents, the Moon and stars in this how to draw the Earth tutorial.
- House Drawing: Give your car somewhere to park with this easy house drawing tutorial, a cozy two-story home with a 3D look.
- Tree Drawing: Add some shade beside the road with this tree drawing step by step guide for a leafy apple tree.
Frequently Asked Questions
What is the easiest way to draw a car?
Start with simple shapes: a ground line, two circles for the wheels and a box for the body. Then shape the outline around those guides, add windows and doors, and finish with details. Building on basic shapes is the easiest way for beginners.
How do you draw a car for kids?
Follow the same 10 steps, but keep the details simple: skip the side line and the bumper lines, and use thick markers for the outline and bright colors to fill it in.
How long does it take to draw a car?
About 20 to 30 minutes for most beginners, including inking and coloring. Your second car will be faster.
What do I need to draw a car?
Just a pencil, an eraser, a black pen or marker, colored pencils or markers, and paper.
Now it's your turn! Draw your car, pick your favorite color, and have fun. Happy drawing! ✏️🚗
Related posts:
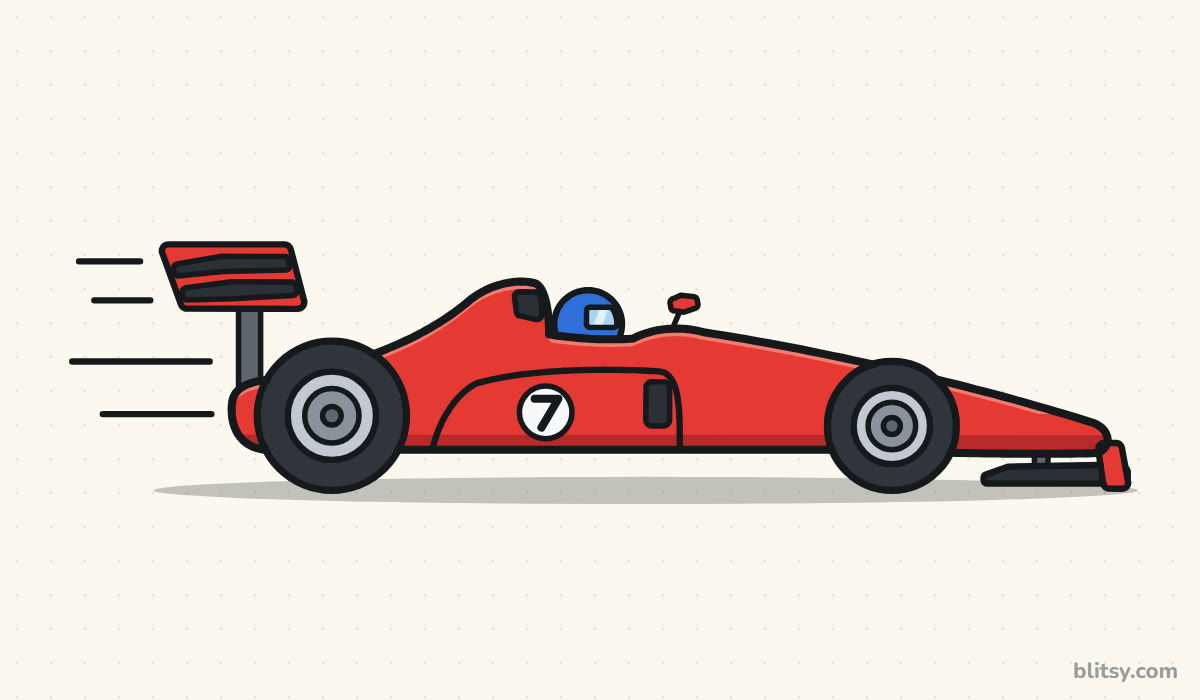 How to Draw a Race Car Step by Step (Easy Formula Car)
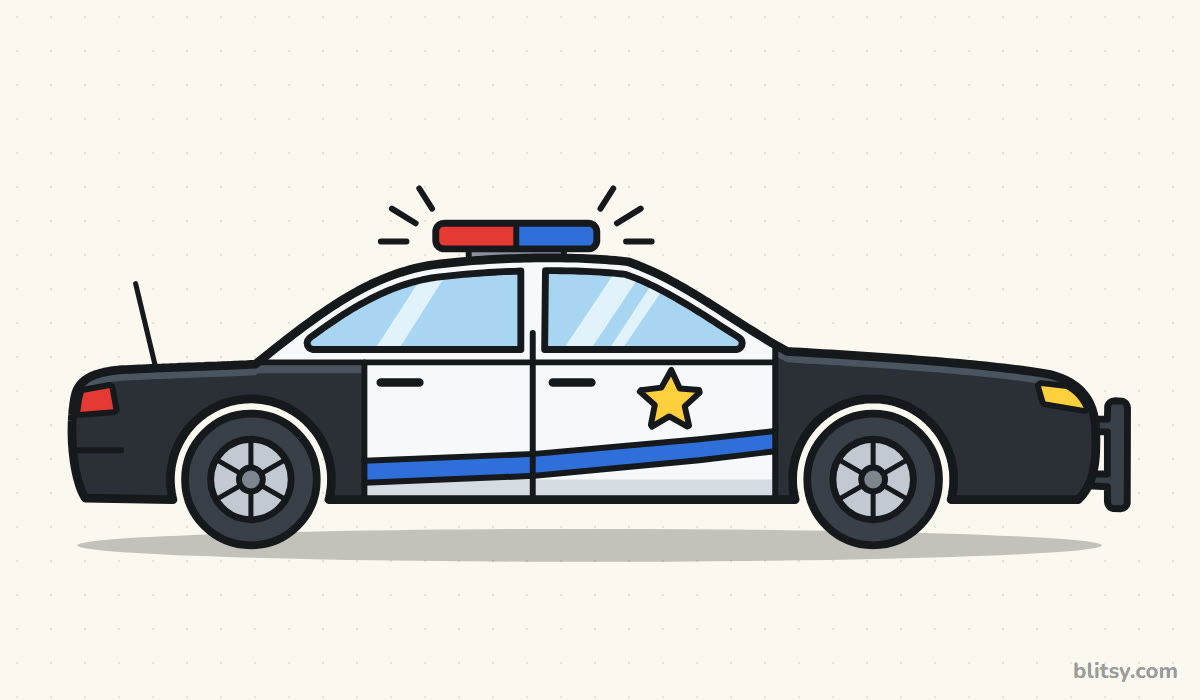 How to Draw a Police Car Step by Step (Easy for Kids)
 Oil Pastel Drawing Step by Step (Easy Sunset for Beginners)
 Summer Drawing Step by Step (Easy Beach Scene for Beginners)
 How to Draw Godzilla Step by Step (Easy Kaiju for Beginners)
 How to Draw a Rat Step by Step (Easy for Beginners)
 How to Draw a Puppy Step by Step (Easy for Beginners)
 How to Draw Olaf Step by Step (Easy for Beginners)
 How to Draw a Ladybug Step by Step (Easy for Beginners)
 How to Draw a Dog Step by Step (Easy Side View for Beginners)
 How to Draw a Light Bulb Step by Step (Easy for Beginners)
 How to Draw a Crow Step by Step (Easy for Beginners)

