
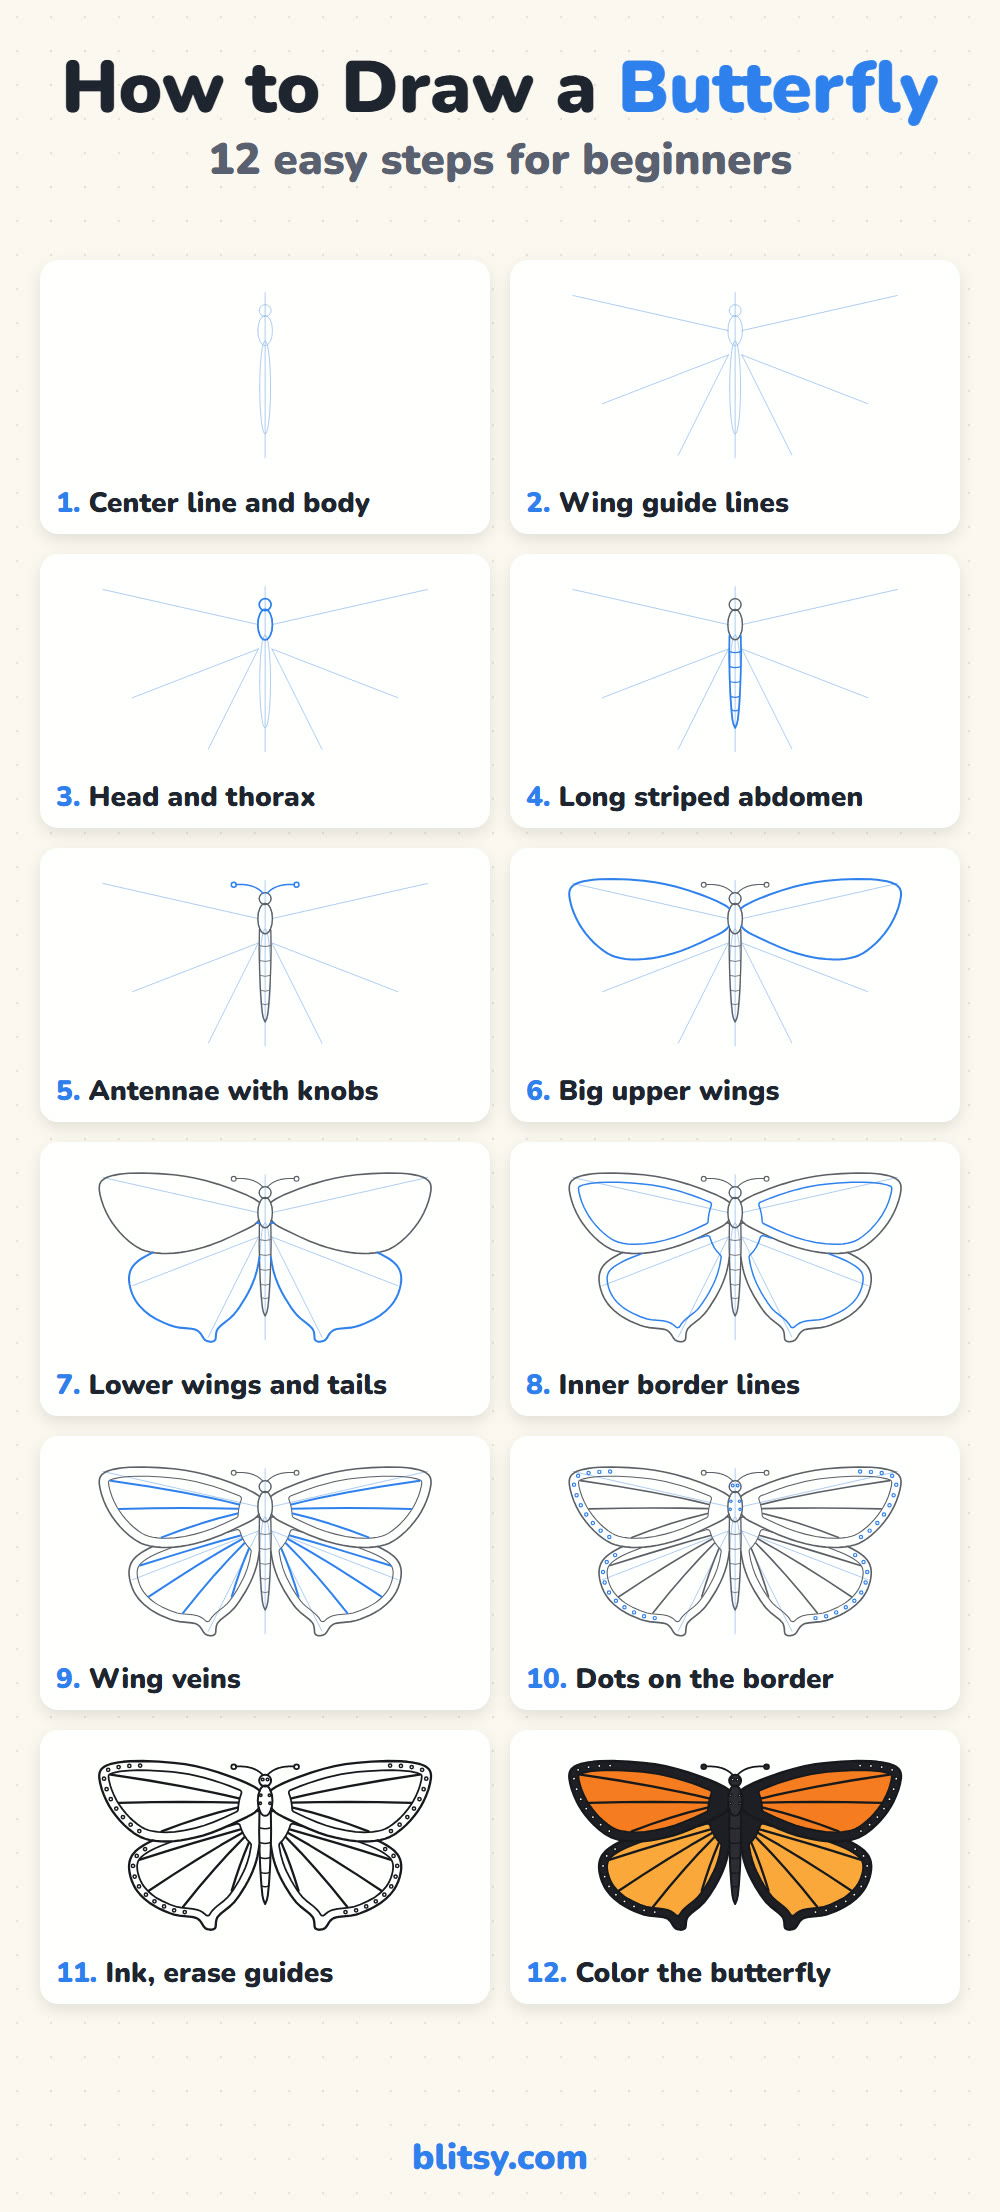
Butterflies look tricky because the two sides have to match. Here's the good news: once you learn how to draw a butterfly step by step with a center line, the matching gets much easier, since you draw one side and then copy it across. We'll make a big orange butterfly inspired by the monarch, with black veins and a dotted border. It takes patience more than talent.
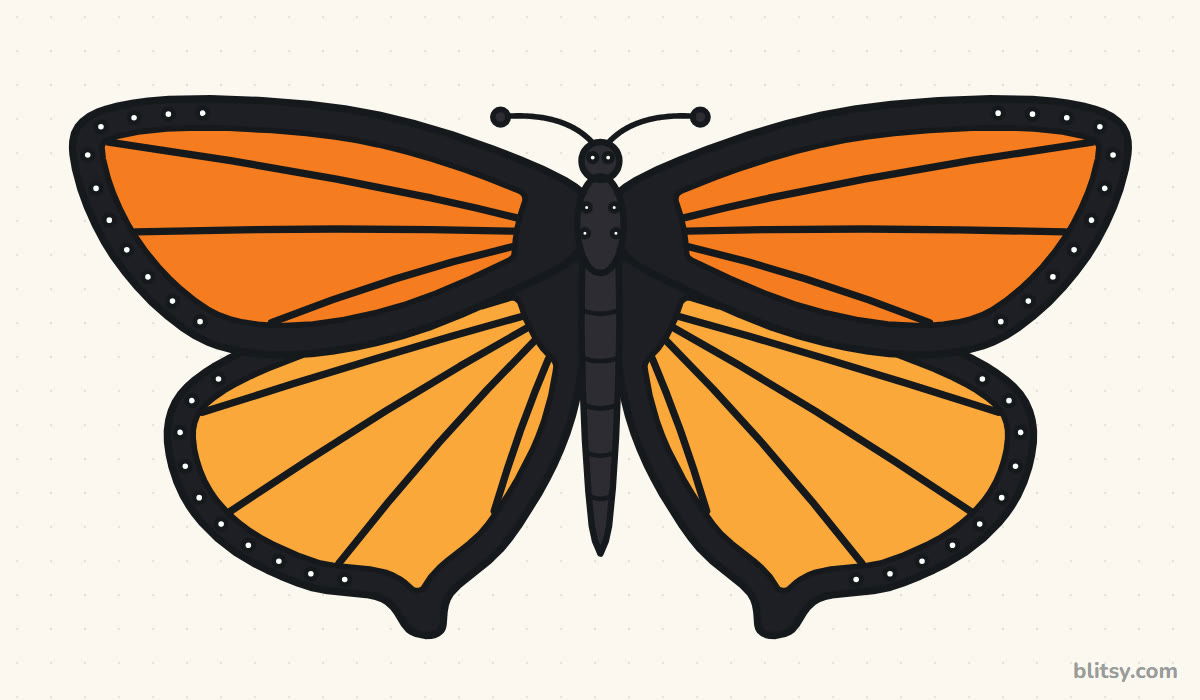
Think of the pictures as a before and after: the blue lines are new in that step. Gray lines are from the steps before, so check your paper against the gray first, then add the blue.
Quick overview
⏱️ Time: around 30 to 40 minutes, coloring included
🎯 Level: easy to medium, good for kids from about 7
✏️ Steps: 12
🦋 You'll draw: an orange butterfly with black veins and a white-dotted border
Butterfly Drawing Supplies, From Pencil to Orange
- A sharp pencil for light guide lines
- A soft eraser that won't smudge
- A black marker or fineliner
- An orange crayon or colored pencil, plus a lighter yellow-orange
- A black crayon or marker for the borders
- A ruler for the center line (optional)
- Plain paper, turned sideways
A white gel pen is handy for the dots if you color the border first, but leaving them blank works too.
How to Draw a Butterfly Step by Step
Step 1: Draw a center line and body ovals
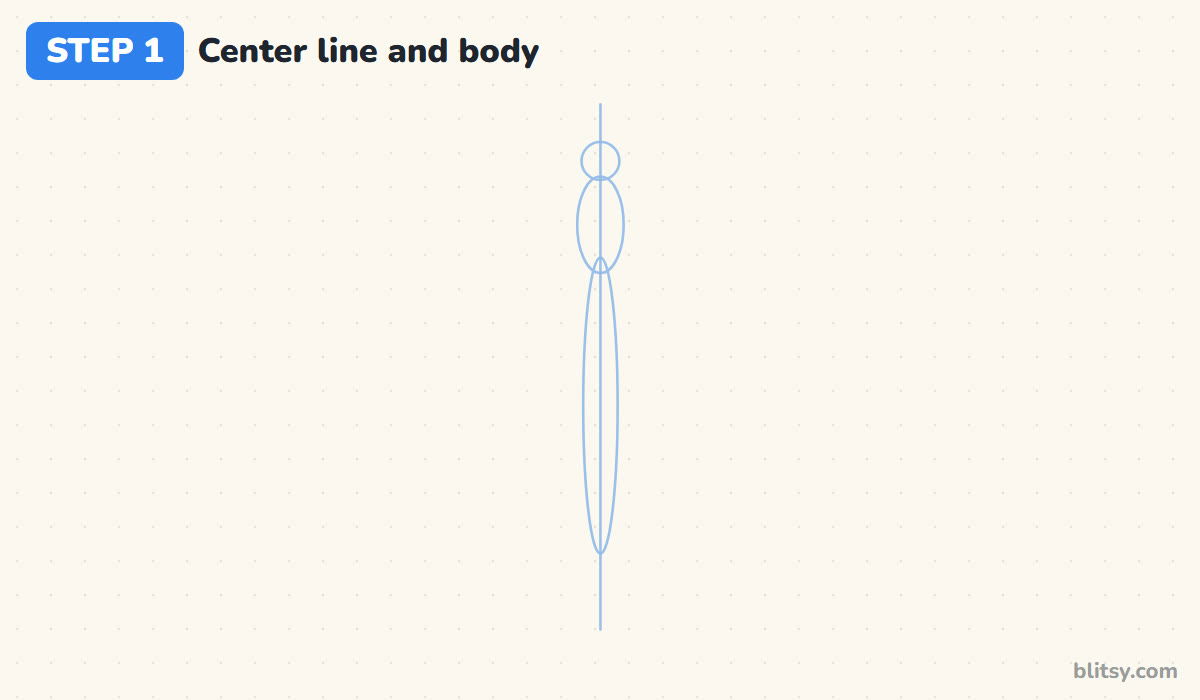
Turn the paper sideways and draw a straight vertical line down the middle. This center line is the most useful line in the whole drawing, because every wing gets measured from it. On the line, sketch a small circle for the head, an oval below it for the thorax, and a long, thin oval for the abdomen. Keep all of it very light.
💡 Tip: A ruler makes the center line straight, and a straight line makes mirroring much easier later.
Step 2: Add the wing guide lines
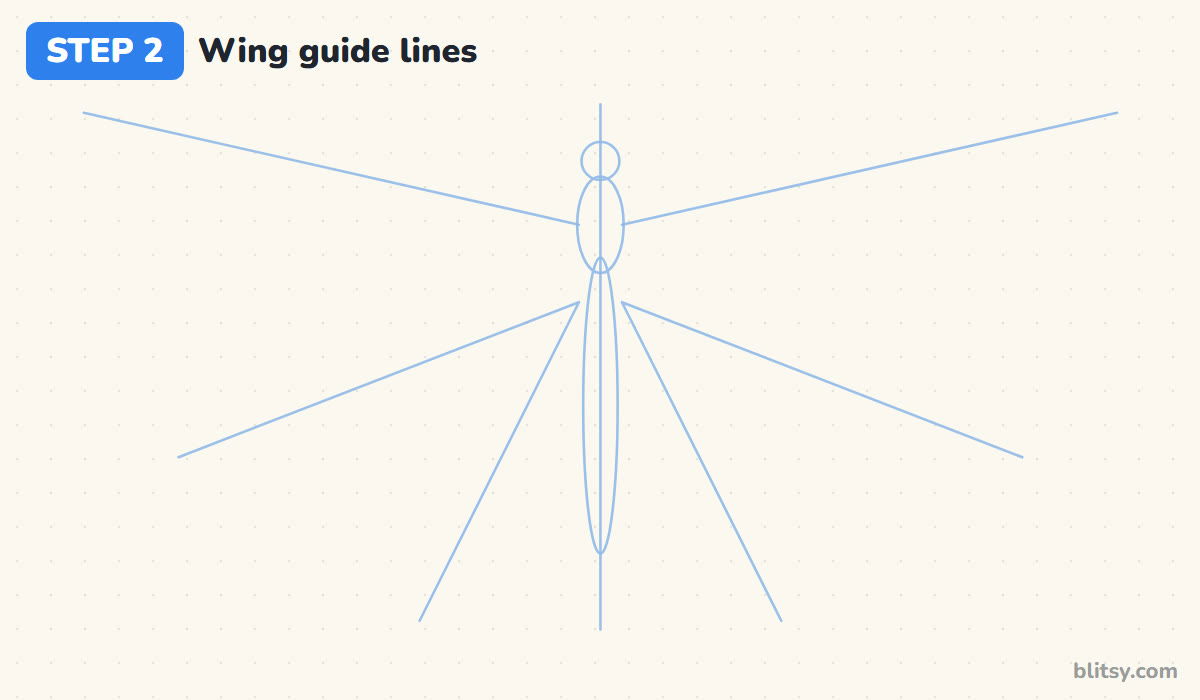
From the thorax, draw two long lines that rise toward the top corners of your paper. They show where the tips of the upper wings will go. Then, from a point a little lower, draw two lines out to the sides and two that slant down. These four lines mark the edges of the lower wings. Check that each line on the left mirrors its partner on the right.
💡 Tip: Hold the paper up to a window and look through the back. Lopsided guide lines jump out right away.
Step 3: Outline the head and thorax
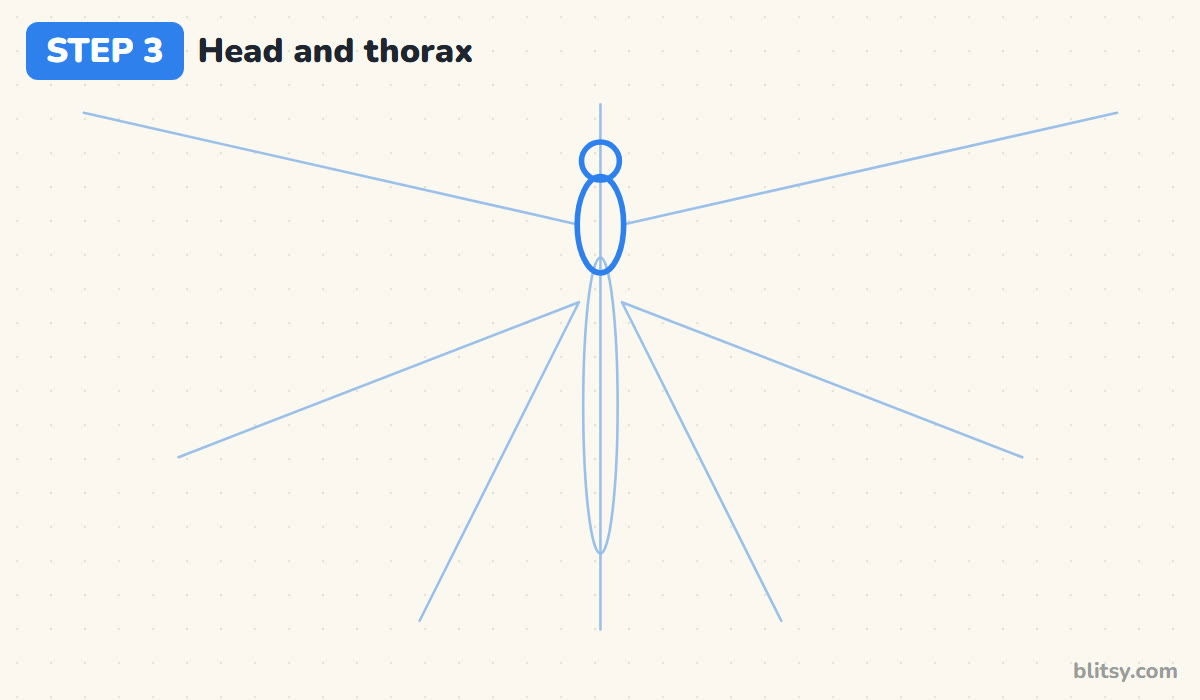
Go over the small circle and the oval with a firmer line. I keep the head small, about half the width of the thorax, because a big round head makes a butterfly look like a bug from a cartoon. Two tiny circles inside the head will become the eyes later.




💡 Tip: Draw each oval in two halves, left then right, so both sides come out the same size.
Step 4: Draw the long striped abdomen
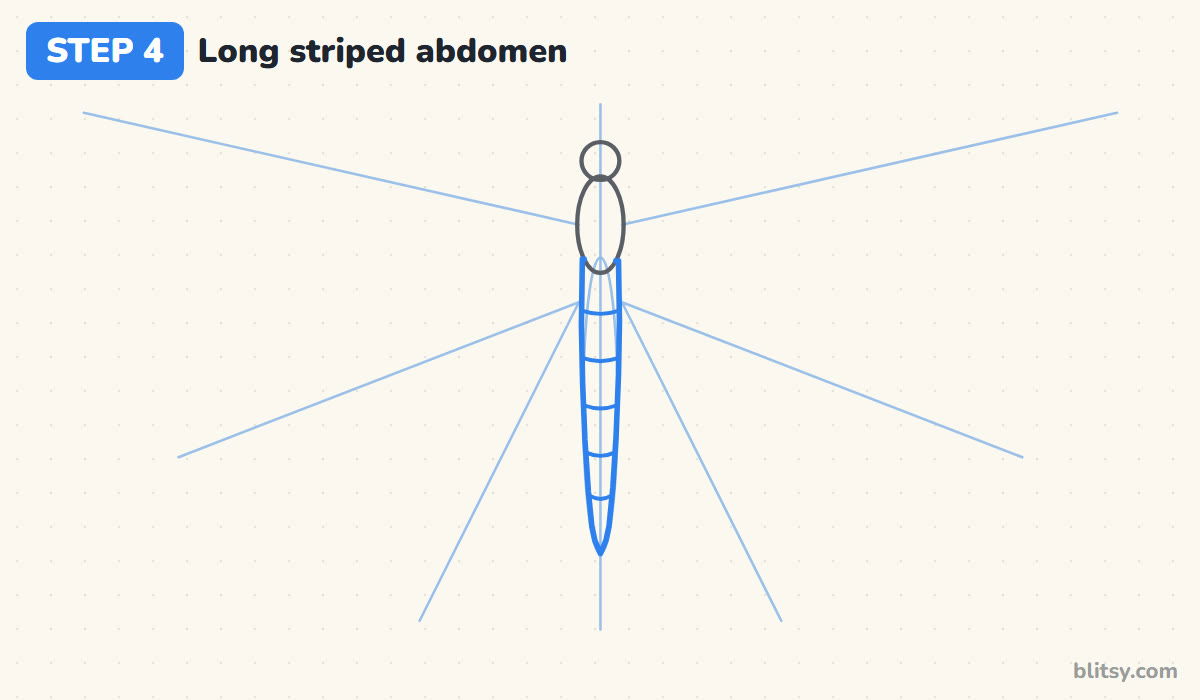
Trace the long oval below the thorax, letting it narrow to a soft point at the bottom. Its top tucks just under the thorax, so start the line where it touches the oval. Then add five gently curved stripes across it, spaced evenly. Those stripes are the body segments, and curving them slightly downward makes the body look round instead of flat.
💡 Tip: Space the stripes by eye first with tiny tick marks, then join each pair of marks.
Step 5: Add antennae with round knobs
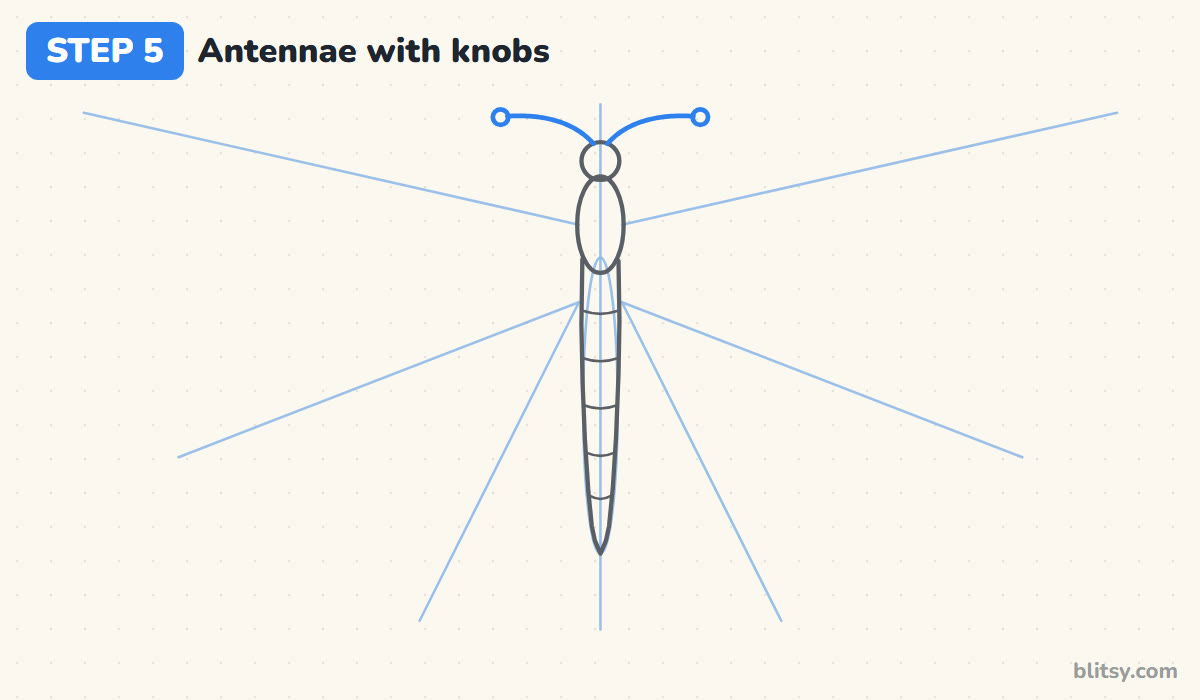
From the top of the head, pull two thin curved lines up and outward, bending them toward the sides like the handles of a bow. Finish each one with a small circle. Butterflies really do have these little clubs, which is one way to tell them from most moths.
💡 Tip: Draw the antennae in one smooth flick rather than several short strokes.
Step 6: Draw the big upper wings
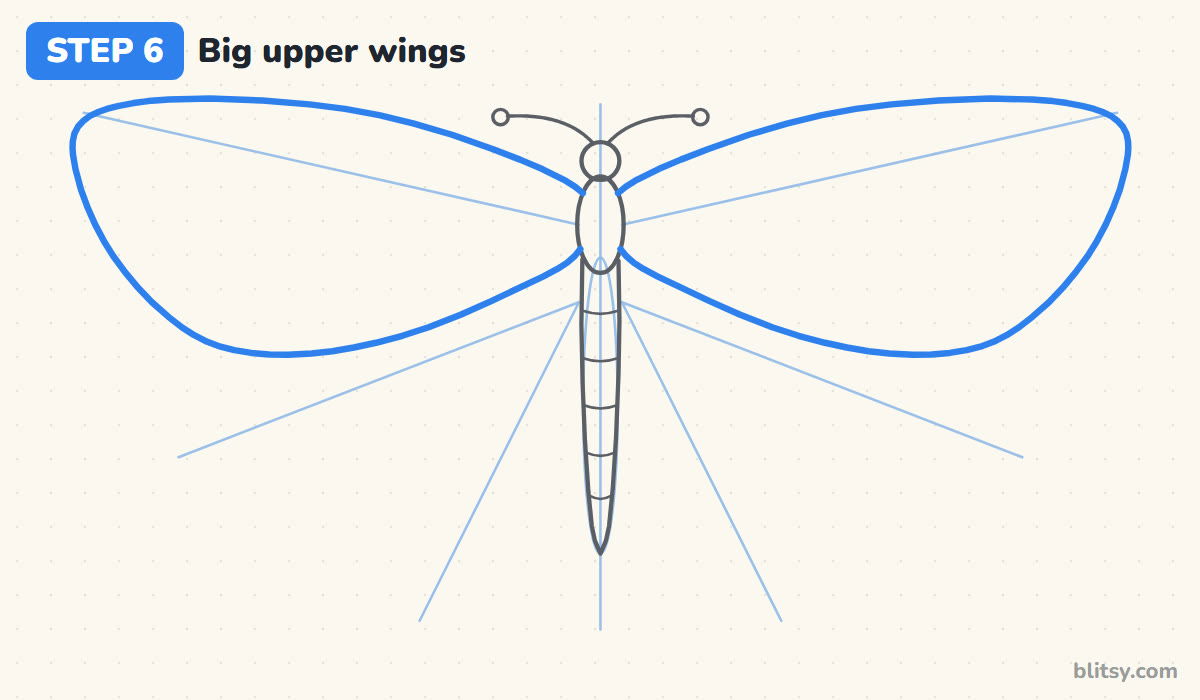
Start with the right wing. Begin at the thorax, follow the guide line up to a rounded tip, then curve down the outer edge and sweep back to the body. Now do the left wing as a mirror copy. Count how far the tip sits from the center line on the right, and place the left tip the same distance away.
💡 Tip: If one wing comes out bigger, fix the bigger one. Shrinking is easier than stretching.
Step 7: Add lower wings with tail tips
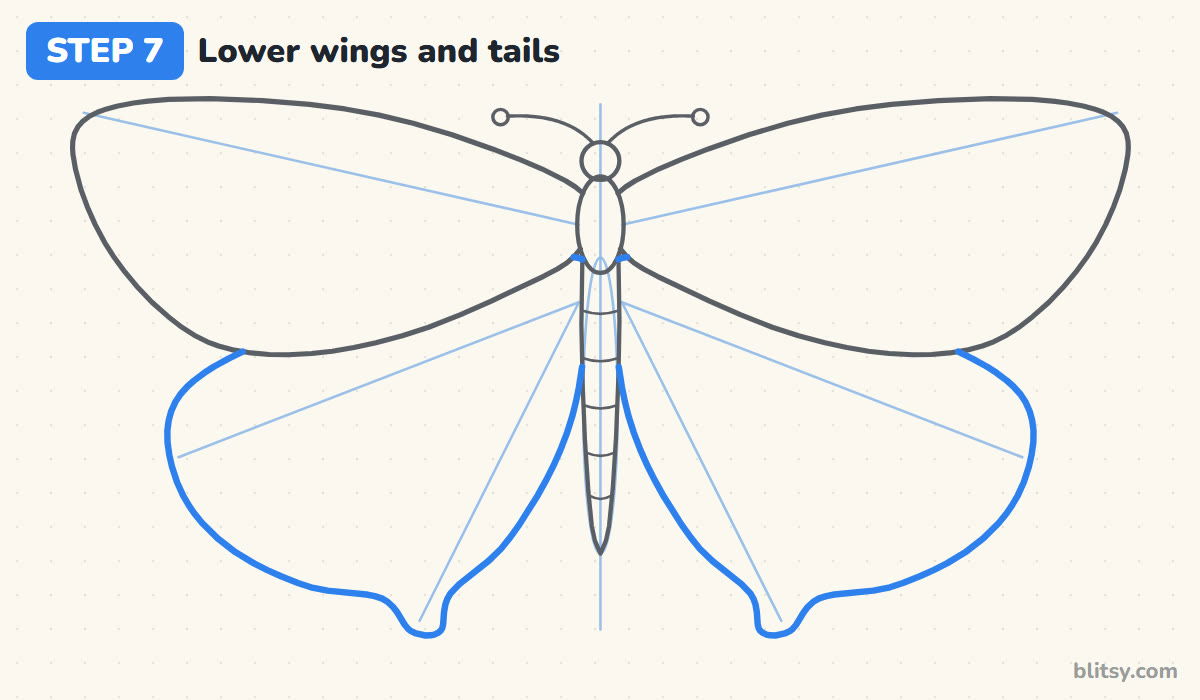
Each lower wing starts under the upper wing's bottom edge, so you only draw the part that peeks out. Round it out along your guide lines, then add a short tail tip near the bottom. A real monarch has rounded lower wings without tails, so skip the tails if you'd like a true monarch. I add them because they give the shape a nice finish.

💡 Tip: Stop the lower wing line where it meets the upper wing. Don't draw through it.
Step 8: Draw the inner border lines
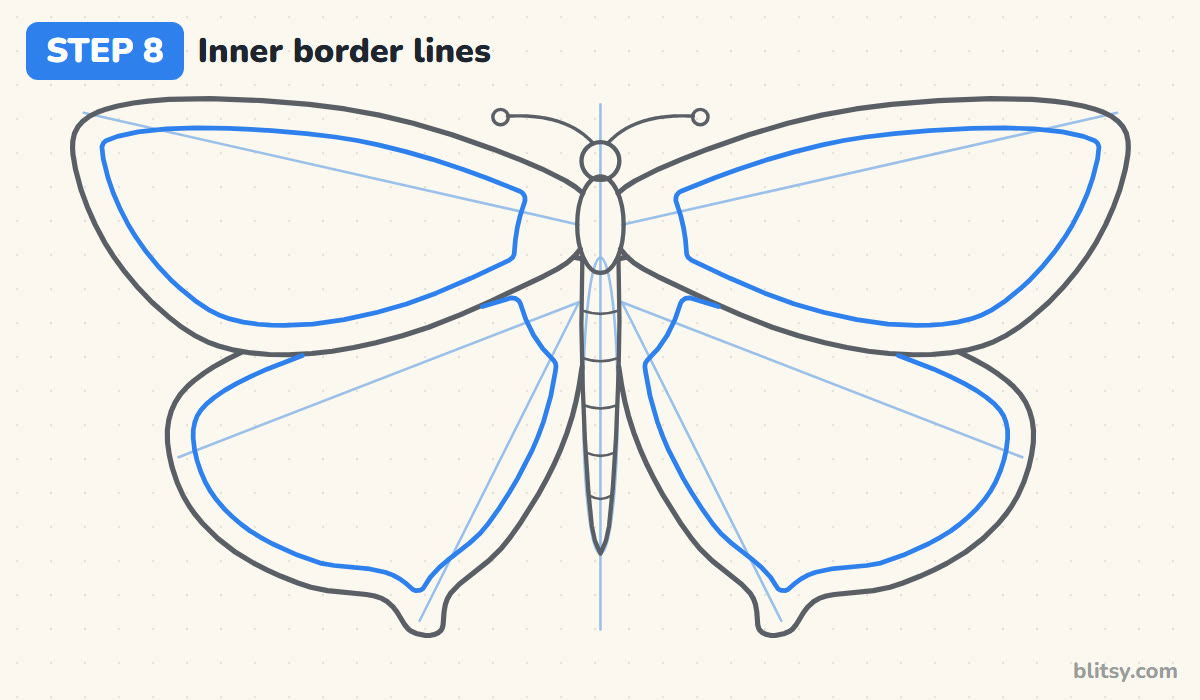
Inside every wing, draw a second line that follows the outer edge about a finger width in. The space between the two lines becomes the black border, and the inside becomes the orange panel. Near the body, curve the inner line around so the base of each wing stays dark. Keep the border the same thickness all the way around, or the wings look dented.
💡 Tip: Rest your little finger on the paper outside the wing and let it slide along the edge as a guide.
Step 9: Fan out the wing veins
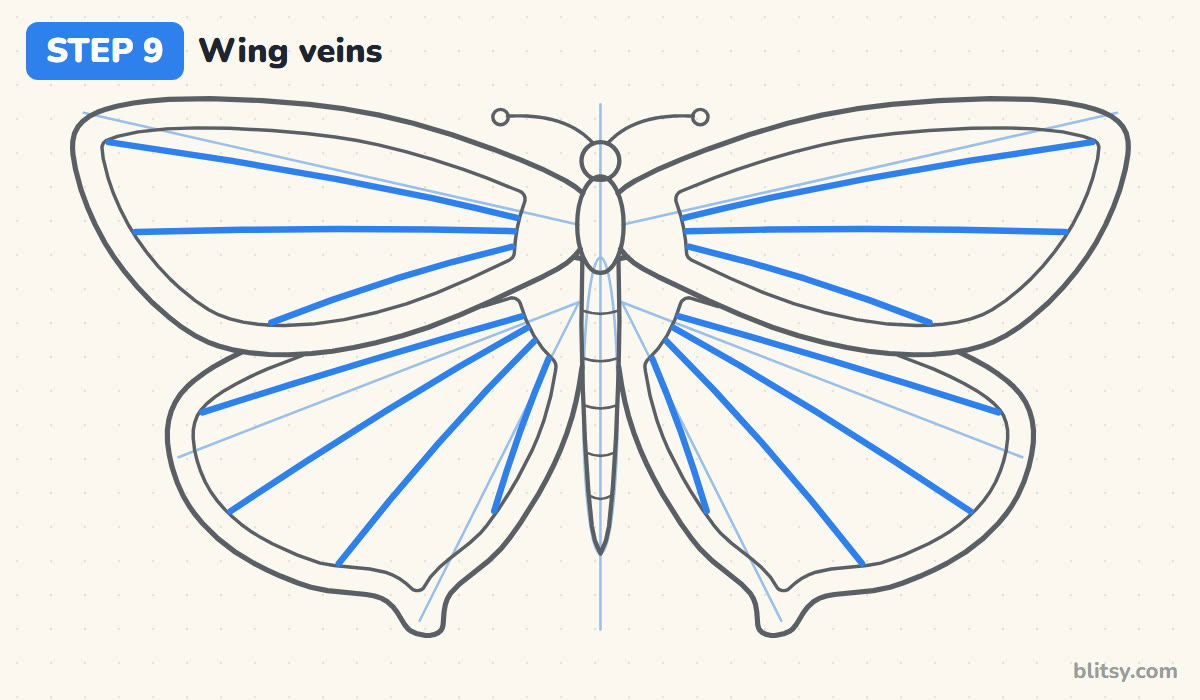
Veins start near the body and spread outward like the ribs of a fan. Draw three on each upper wing and four on each lower wing, running from the dark base to the inner border line. Most beginners draw them straight and parallel. A slight curve, getting wider apart toward the edge, looks far more natural.
💡 Tip: Draw the matching vein on the other wing right away instead of finishing one side first.
Step 10: Place dots along the border
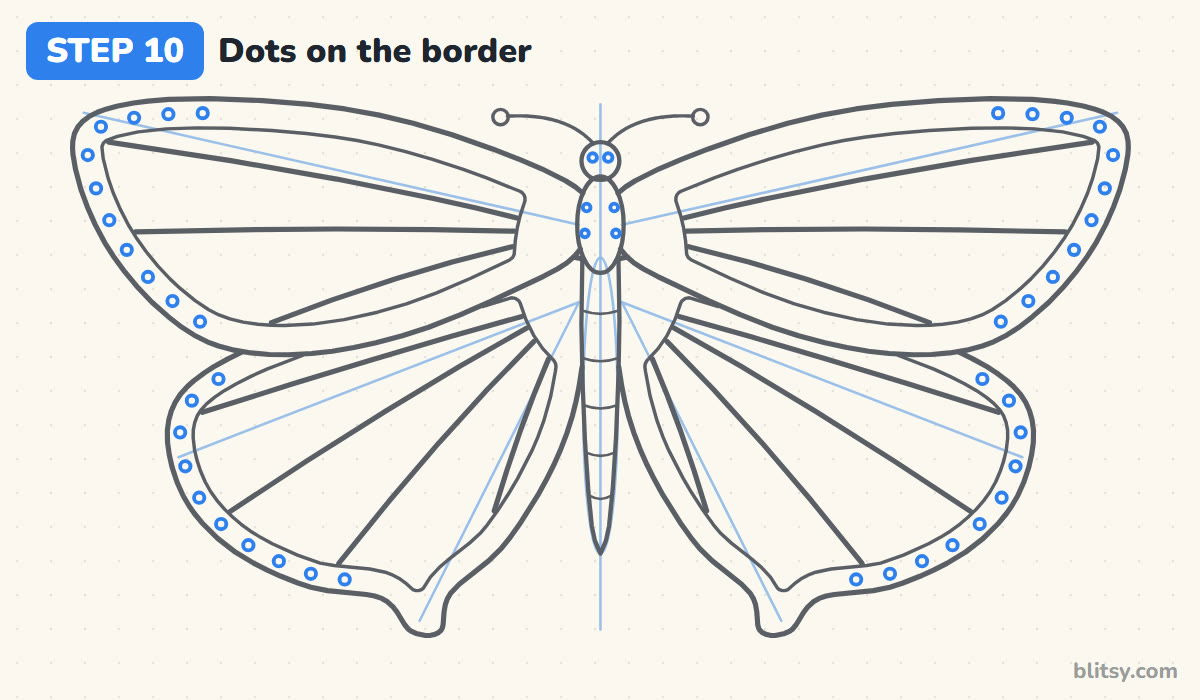
Monarchs have rows of small white dots in their black borders. Draw small circles down the middle of the border strip, starting at the wing tips and working around the outer edges. Leave the dots out near the body. Add four tiny dots on the thorax too, and the two little eyes on the head.
💡 Tip: Place one dot at the start and one at the end of each edge, then fill the gap between them.
Step 11: Ink your lines and erase guides
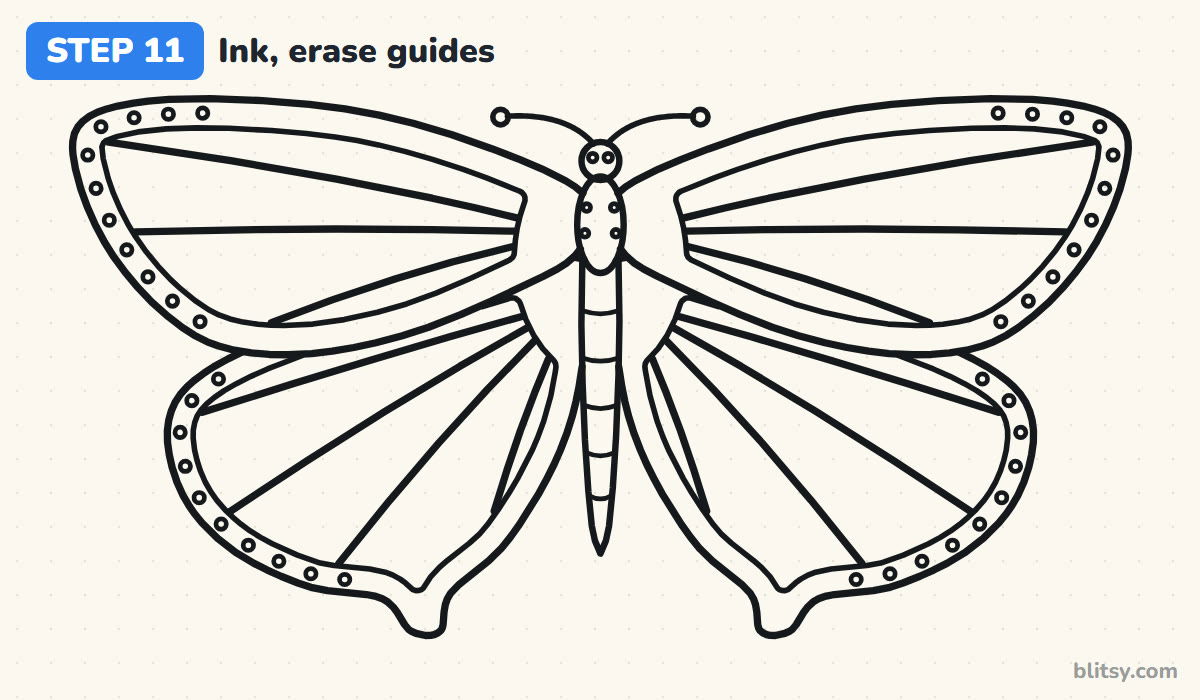
Trace every final line with a black marker, skipping the guide lines and the center line. Go slowly around the dots. Wait for the ink to dry, then erase all the pencil.
💡 Tip: Turn the paper as you ink the curves so your hand always pulls the line toward you.
Step 12: Color the butterfly
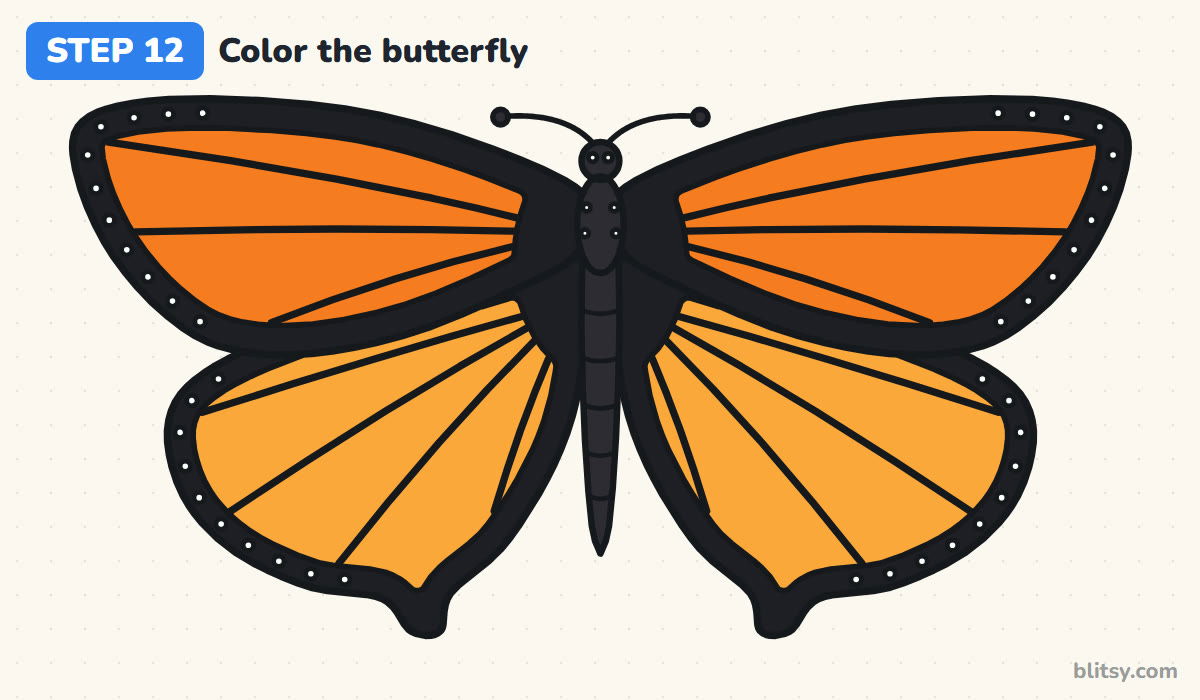
Color the upper wing panels bright orange and the lower panels a lighter yellow-orange. Fill the borders, the dark wing bases and the veins with black, working around the white dots. The body gets dark gray, so it stands apart from the black wings. If you're using markers, color the orange first and the black last, because black smears into light colors.
💡 Tip: Color each orange panel in strokes that run the same way as its veins.
Where Butterfly Wings Usually Go Lopsided
- Wings that don't match. Measure from the center line. Each tip, bump and tail should sit the same distance out on both sides.
- The lower wing drawn over the upper one. The upper wing overlaps it. Stop the lower outline where it meets the upper wing's edge.
- A border that changes thickness. A thin spot on one side looks like a bite out of the wing. Keep the gap between the two lines even.
- Veins that run in straight rows. Real veins fan out from the body. Start them close together and let them spread.
- White dots colored over. Once a dot is black, it's hard to save. Color around the dots slowly, or add them back with a white gel pen.
Swap the Colors, Keep the Shape
This wing outline works for lots of butterflies. Fill the panels with bright blue and draw round black spots instead of veins, or try pink and purple with teardrop shapes near the edges. For a younger child, I'd skip the veins and the dots and let them color big patches instead. A butterfly also looks great resting on a bloom from this easy flower drawing tutorial, and if you enjoy symmetric insects, the dragonfly drawing tutorial uses the same center-line trick.
Butterfly Coloring Page and Step Guide to Print
The free butterfly coloring page shows the colored butterfly at the top as an example, with a key that names each crayon and the part it goes on. Below is a large outline for your own colors. The printable step-by-step guide has all 12 steps with pictures and tips, and it fits Letter or A4 paper.
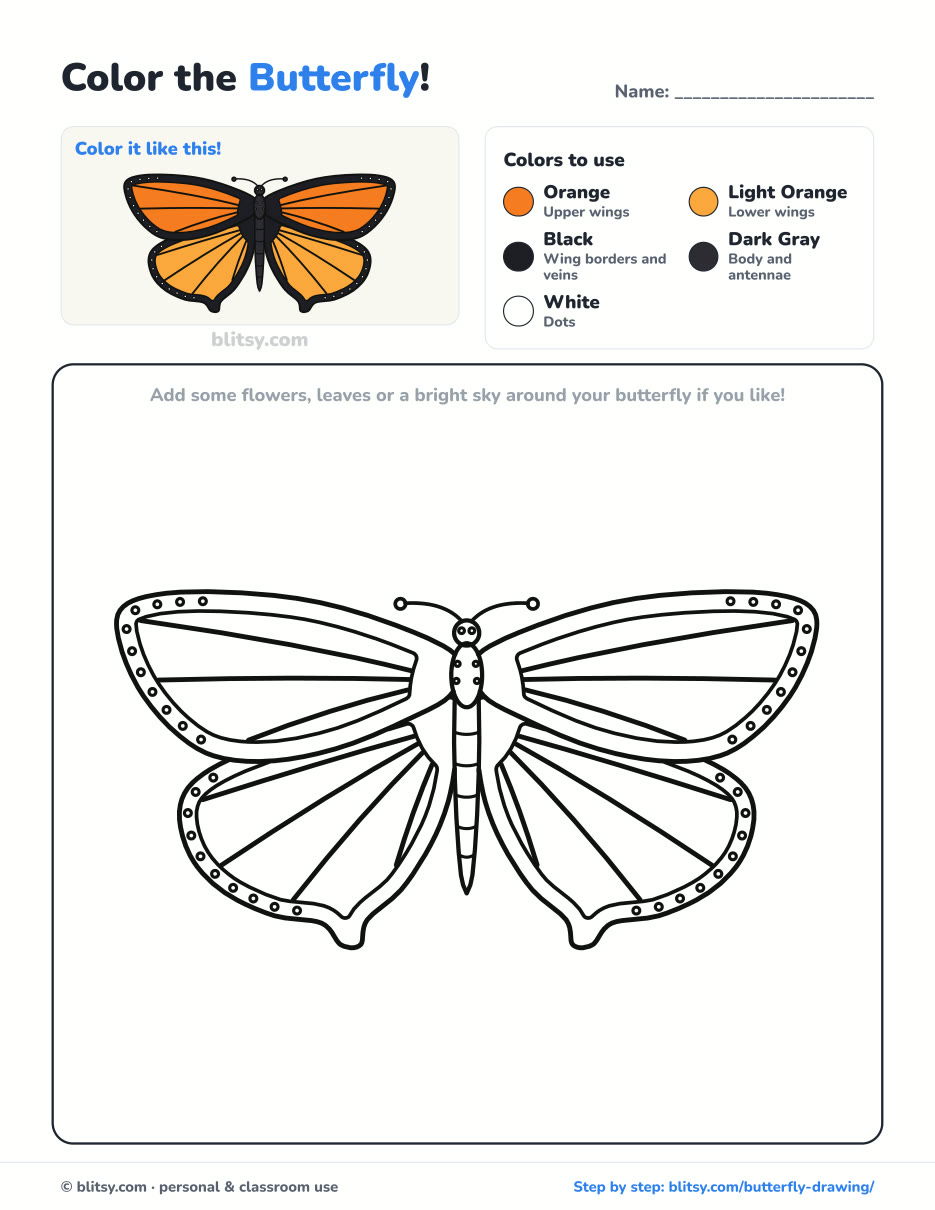
Black outlines with a colored example and the color names at the top. Ready to print and color.
⬇️ Download Coloring PageEvery step picture with its instructions and tips, to keep beside your paper while you draw.
⬇️ Download Drawing Guide📱 On a phone? Tap a download button, then open the file and choose Share → Save to Files or Print. On a computer, the PDF opens or saves straight to your Downloads folder.
All Twelve Butterfly Steps in One Pin
Butterfly Finished? Meet These Animal Tutorials
These links open step-by-step tutorials. Most are friendly animals, and each starts from a few light shapes.
- Cat Face Drawing: One circle and a cross guide a gray tabby face in this how to draw a cat face step by step lesson.
- Bunny Drawing: A sitting bunny eyes its carrot at the end of the bunny drawing tutorial.
- Peppa Pig Drawing: Draw Peppa in her red dress, standing in a muddy puddle, with the Peppa Pig drawing tutorial.
- Gorilla Drawing: The gorilla drawing step by step guide shows a calm silverback sitting with a banana.
- Alligator Drawing: Two ovals and a tail curve become a smiling gator in this alligator drawing tutorial.
- Family Drawing: A cartoon family holds hands in a row in the how to draw a family lesson.
- Simba Drawing: Draw the lion cub with a tilted head and big amber eyes using the Simba drawing tutorial.
- Peacock Drawing: Rows of eye feathers fill the fanned tail in the peacock drawing step by step lesson.
- Mouse Drawing: A field mouse sits up with a wedge of cheese in this mouse drawing tutorial.
- Leopard Drawing: The how to draw a leopard lesson gives a sitting cartoon leopard a dozen tidy rosettes.
- Chalk Art: Take your colors outside with the chalk art step by step guide to hopscotch and a rainbow.
Butterfly Drawing Questions I Get Asked
What is the easiest way to draw a butterfly?
Draw a center line, put a small body on it, then draw one wing and copy it on the other side. Two big wings on top and two smaller ones below give you the basic shape.
How many wings does a butterfly have?
Four: two upper wings and two lower wings. Like all insects, a butterfly also has six legs, though from above they stay hidden under the body.
How do I make both sides of a butterfly the same?
Use a center line and guide lines, and draw matching parts one after the other instead of finishing one whole side first. Folding a tracing paper copy in half also works.
How long does it take to draw a butterfly?
Around 20 minutes for the drawing and another 15 or so for coloring. The border dots and the black areas take the longest.
Pick your orange, take your time on those dots, and pin your finished butterfly somewhere sunny. 🦋✏️
Related posts:
 How to Draw a Car Step by Step (Easy Drawing for Beginners)
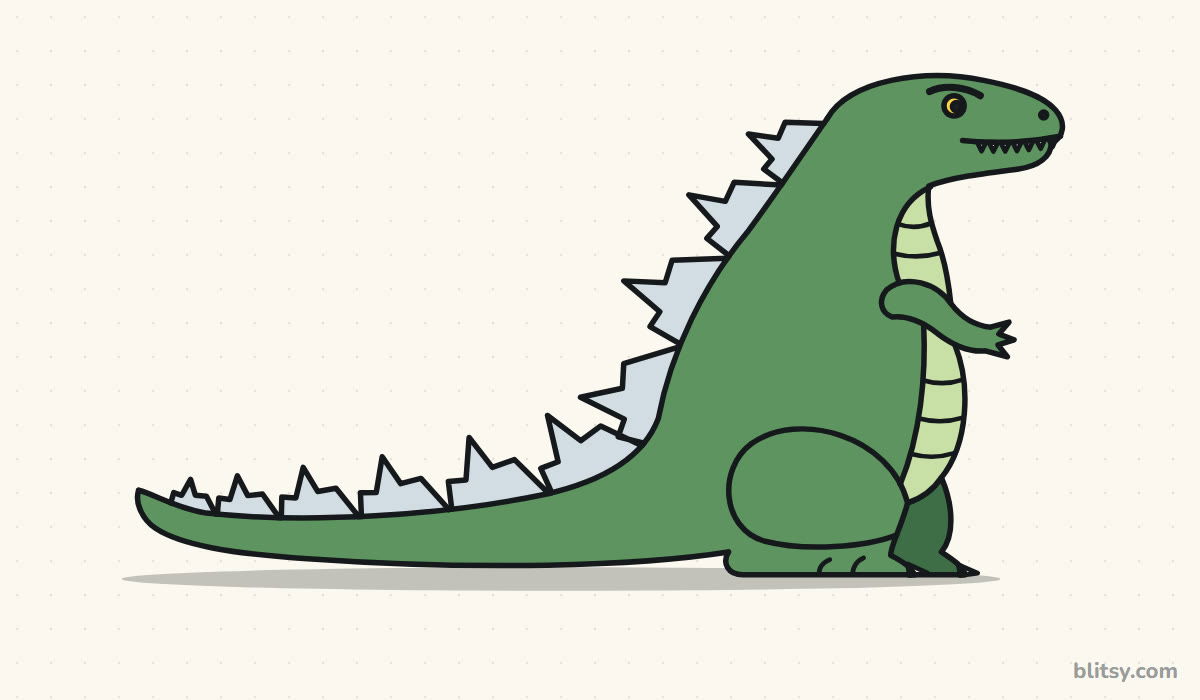 How to Draw Godzilla Step by Step (Easy Kaiju for Beginners)
 How to Draw a Whale Step by Step (Easy for Beginners)
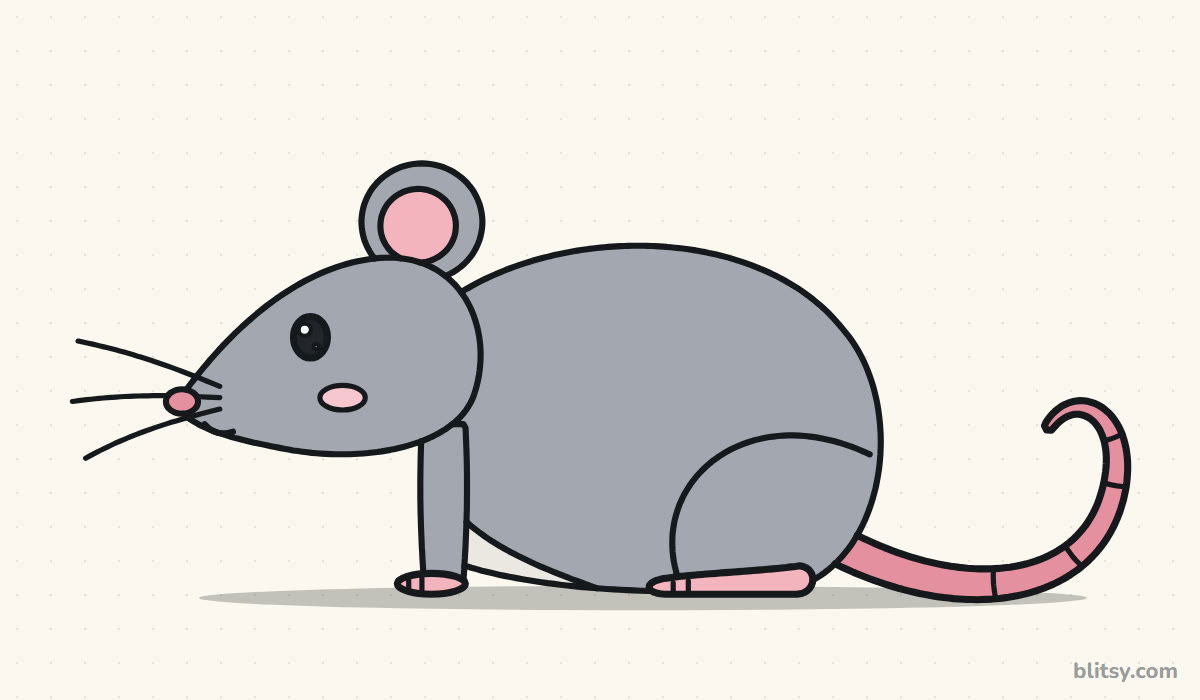 How to Draw a Rat Step by Step (Easy for Beginners)
 How to Draw an Arctic Fox Step by Step (Easy for Beginners)
 How to Draw a Shark Step by Step (Easy for Beginners)
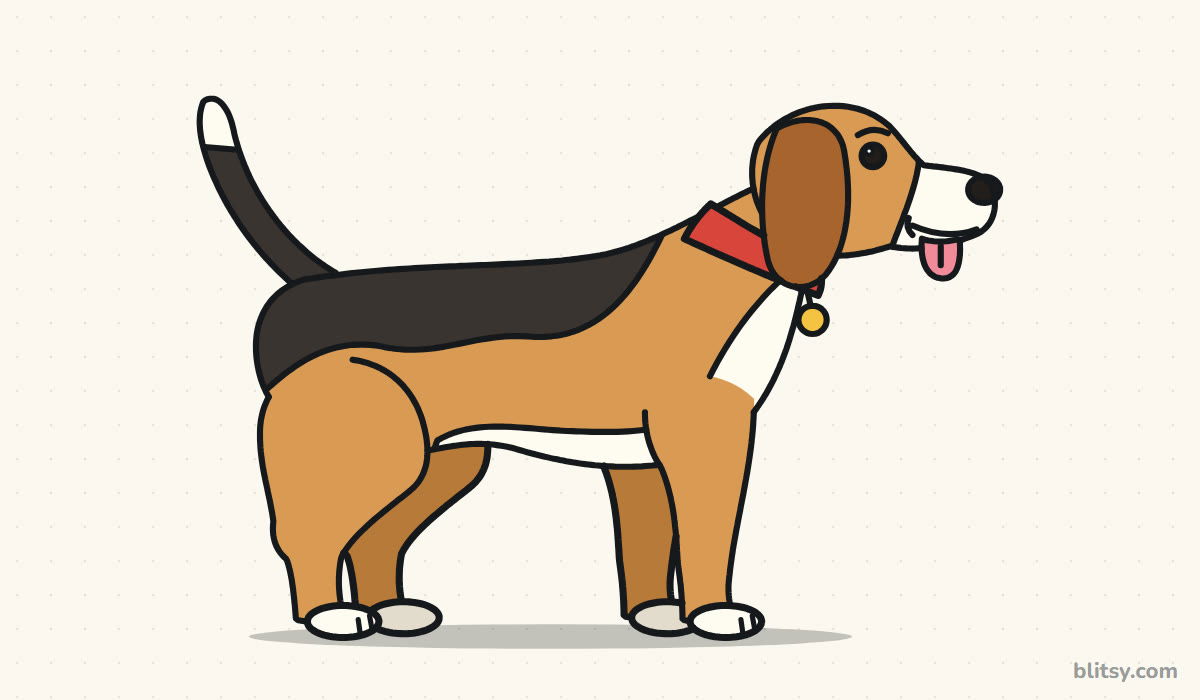 How to Draw a Dog Step by Step (Easy Side View for Beginners)
 How to Draw a Chicken Step by Step (Easy for Beginners)
 How to Draw a Leopard Step by Step (Easy for Beginners)
 How to Draw a Light Bulb Step by Step (Easy for Beginners)
 How to Draw a Crow Step by Step (Easy for Beginners)
 How to Draw an Eagle Step by Step (Easy for Beginners)

