
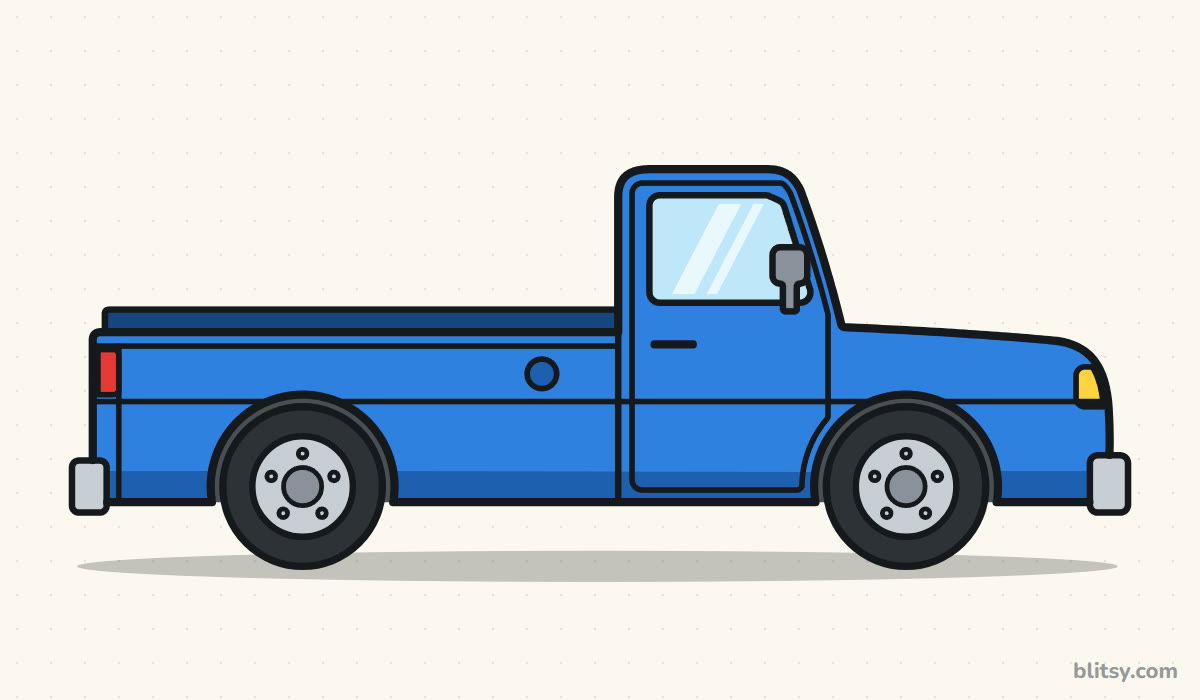
Hand a kid a pencil and say "truck", and you'll very often get a pickup: a tall cab up front, a long empty bed behind it and two chunky wheels. That's the truck we're making today. This lesson shows you how to draw a truck step by step, starting from two circles on a line and two plain boxes. Every part after that is a rounded rectangle or a circle, so it's a great first vehicle for beginners.
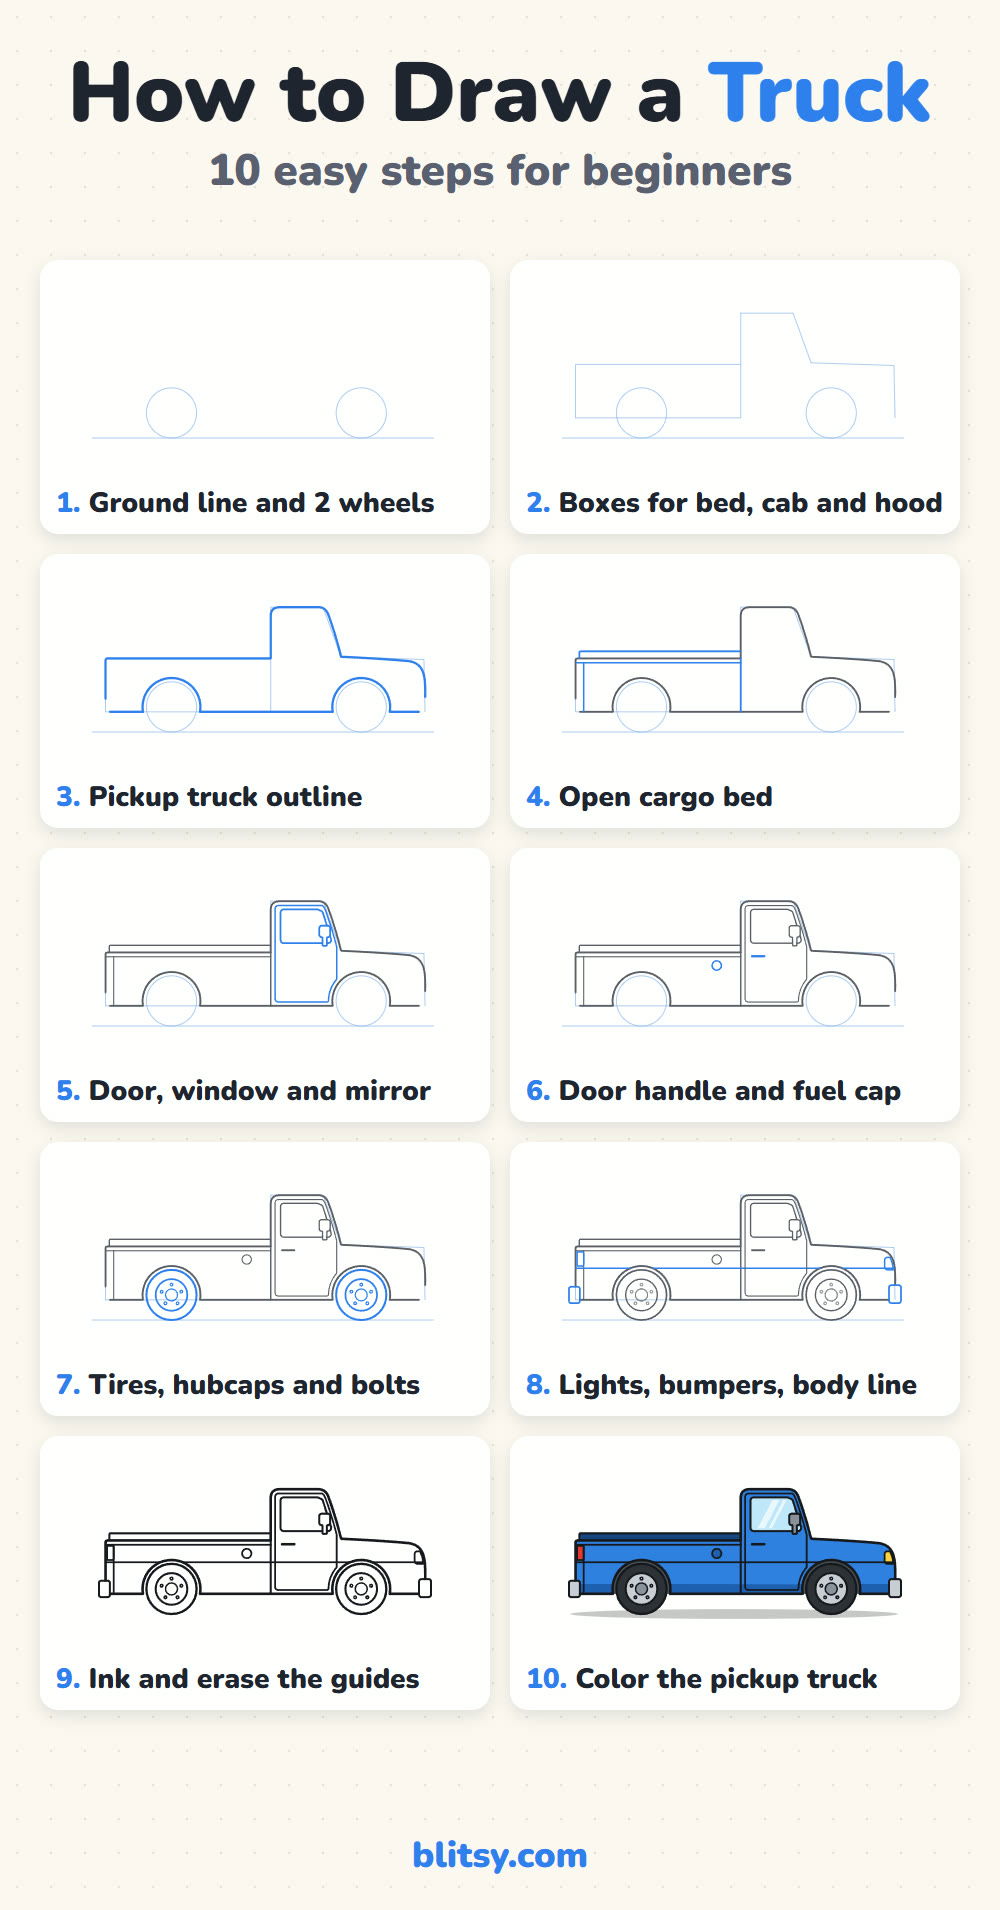
Truck drivers follow road signs, and these pictures do the same job: the blue lines are this step's job, and the gray ones are already on your paper. Copy the blue, compare, then keep driving.
Quick overview
⏱️ Time: about 25 to 30 minutes with coloring
🎯 Level: easy, good for kids from about 6 up
✏️ Steps: 10
🛻 You'll draw: a classic pickup truck in side view
Gear to Load Up Before You Start
- A pencil you can press lightly (HB works well)
- A soft eraser
- A ruler, if you like straight bed lines
- A black marker or fineliner for the final outline
- Colored pencils or markers: blue, dark blue, light blue, gray, black, yellow and red
- A sheet of plain paper turned sideways
A ruler is optional; a slightly wobbly truck still looks like a truck, and freehand lines often look friendlier.
How to Draw a Truck Step by Step
Step 1: Draw a ground line and two wheels
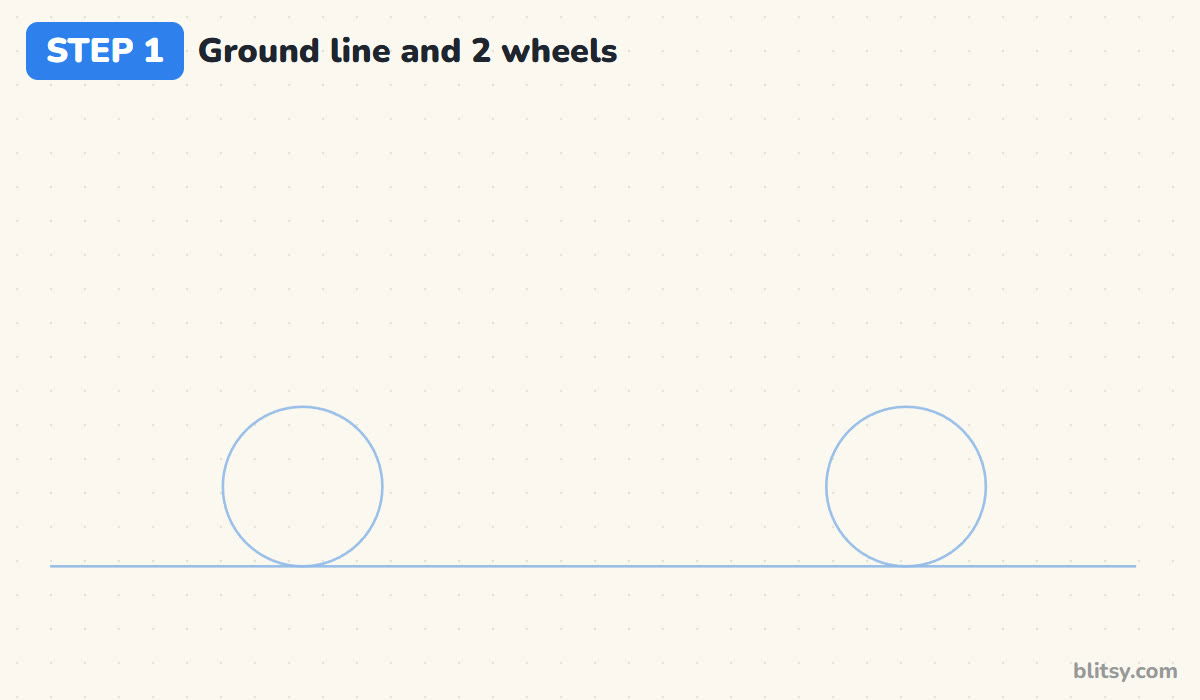
Draw a long, light line across the lower part of the page. Sit two circles on it, one near the left end and one near the right, so they just touch the line. Leave a big gap between them, roughly three wheels wide, because the whole truck stretches across that space.
💡 Tip: Trace around a coin or a bottle cap if your circles keep coming out lumpy.
Step 2: Sketch boxes for the bed, the cab and the hood
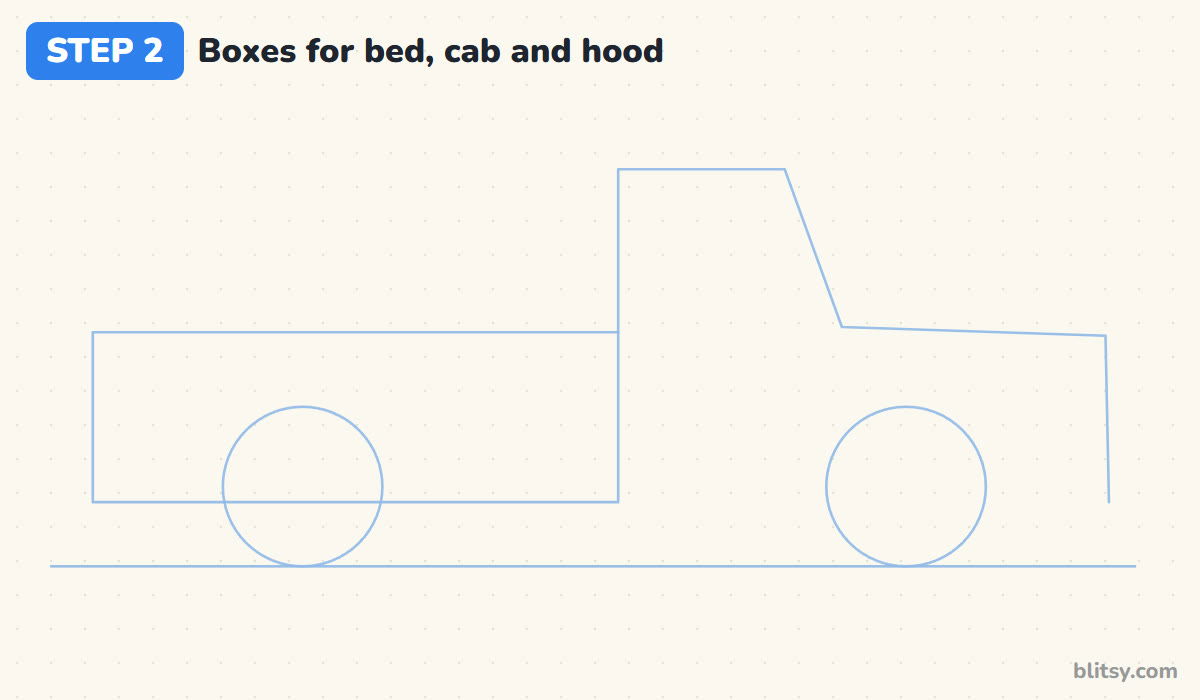
Draw a long, low rectangle from just behind the back wheel to a little past its middle point; that's the cargo bed. Its bottom edge runs through the middle of both wheels. Next, at the right end of that box, raise a tall cab with a slanted front edge, then run a long flat hood forward and drop it down in front of the front wheel.
💡 Tip: Keep the cab roof well above the bed. That height difference is what makes it read as a pickup.
Step 3: Trace the outline of the pickup
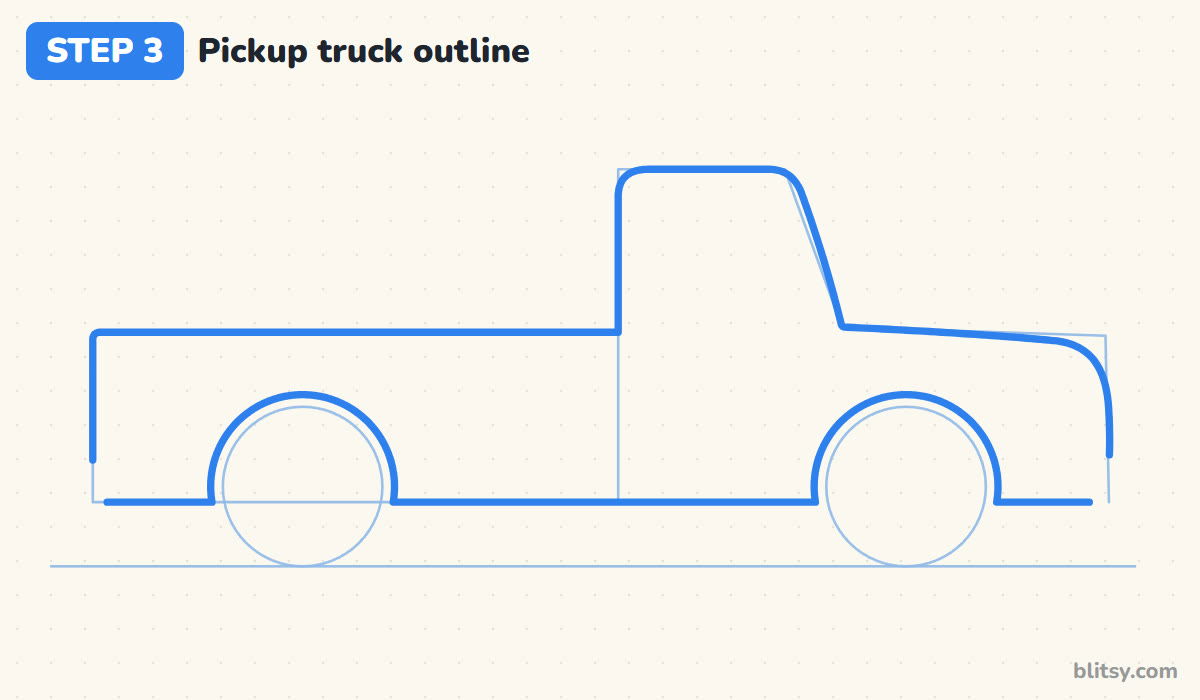
Now go around the boxes with one smooth line. Round off the roof corners, curve the nose down at the front, and swing a half circle over each wheel for the wheel arches. I leave a small gap between the arch and the tire. Without it, the wheels look glued onto the body instead of tucked under it.
💡 Tip: Draw each wheel arch a bit bigger than its circle, like a loose hood over the tire.


Step 4: Show the open cargo bed
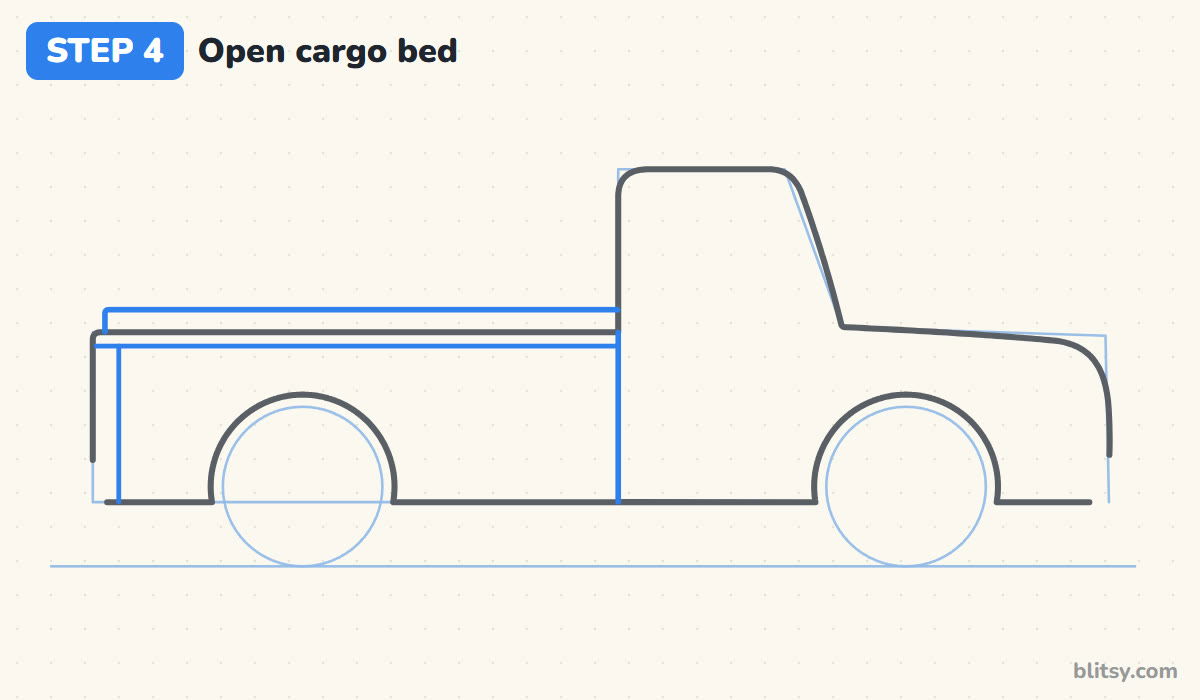
Above the bed's top edge, add a thin strip that stops at the cab. It's the inside of the far bed wall, and later it gets a darker color so the bed looks open and empty. Draw a straight line down where the bed meets the cab, then a rail line just under the bed top and a short upright line near the back for the tailgate.
💡 Tip: Don't make the strip thick. A thin sliver is enough to show you're looking into an empty bed.
Step 5: Add the door, the window and the side mirror
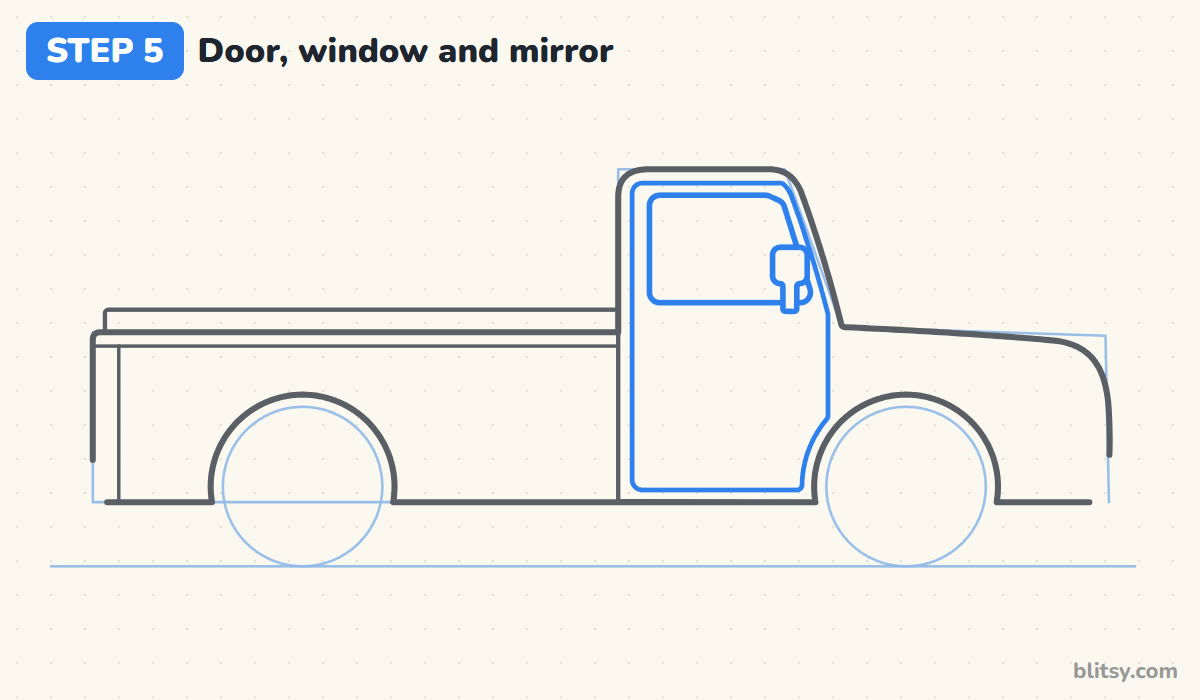
Draw a tall rounded rectangle inside the cab for the door, letting its front bottom corner curve around the wheel arch. Up top, put a big window with a slanted front edge that copies the windshield line. Where the window's front corner sits, add a small rounded mirror on a short stem.
💡 Tip: Match the slant of the window to the slant of the windshield so the cab doesn't look twisted.
Step 6: Draw the door handle and a fuel cap
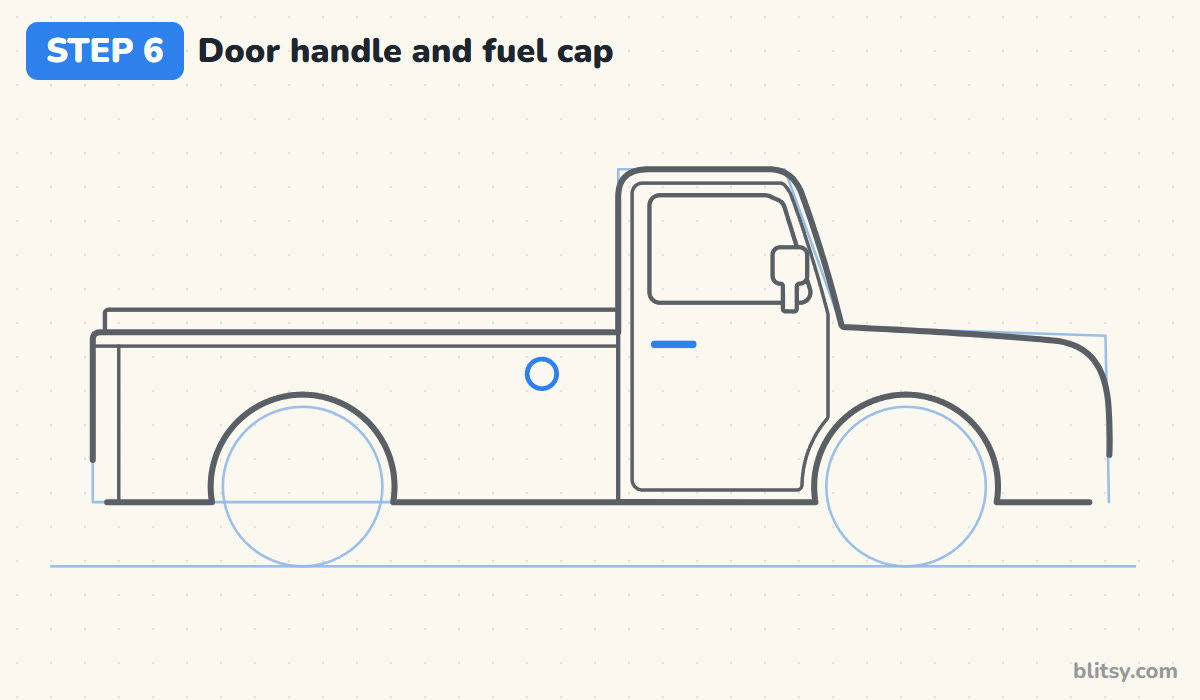
A short, thick line just under the window makes the door handle. Put it near the back of the door, because that's where a real handle sits. On the bed side, about a hand width behind the cab, draw a small circle for the fuel cap. These two tiny details make the truck look much more real for almost no work.
💡 Tip: Press a little harder for the handle so it stands out as a solid bar.
Step 7: Turn the circles into tires with hubcaps
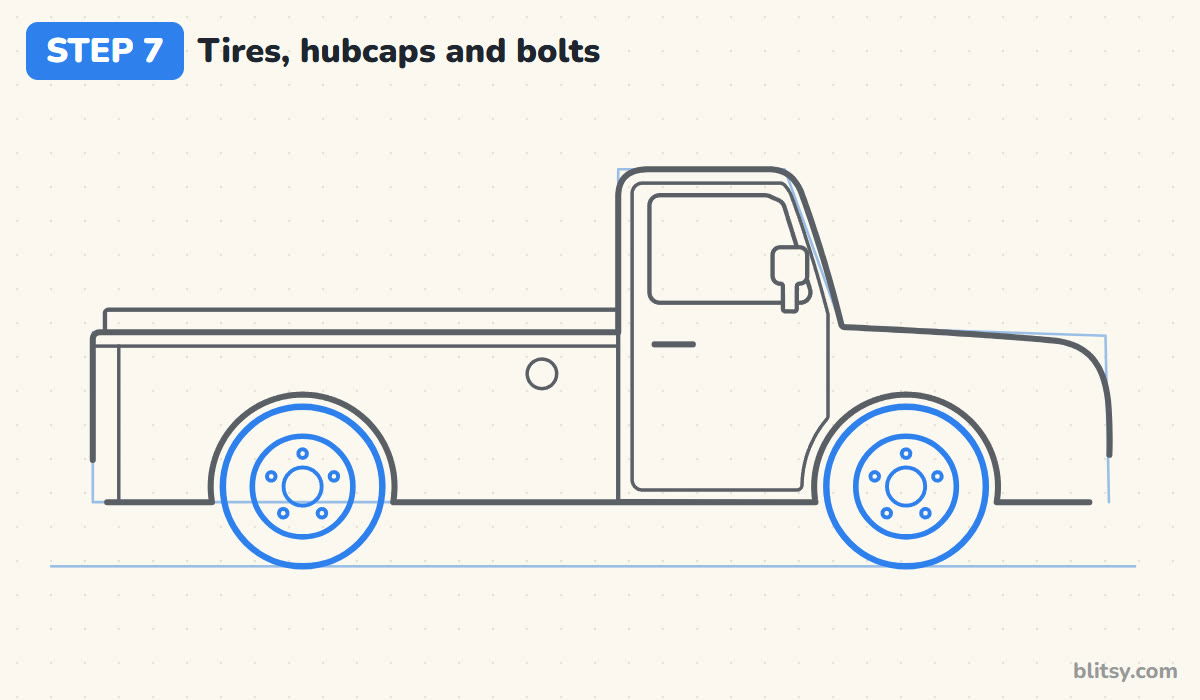
Trace over each wheel circle firmly for the tire. Inside it, draw a smaller circle for the rim, then a small one right in the middle for the hubcap. Around the hubcap, space five little dots evenly for the bolts. If five dots feel fussy, three work fine, and small kids can skip them completely.
💡 Tip: Place the bolts like the points of a star: top first, then the two sides, then the two bottom ones.



Step 8: Add the lights, the bumpers and a body line
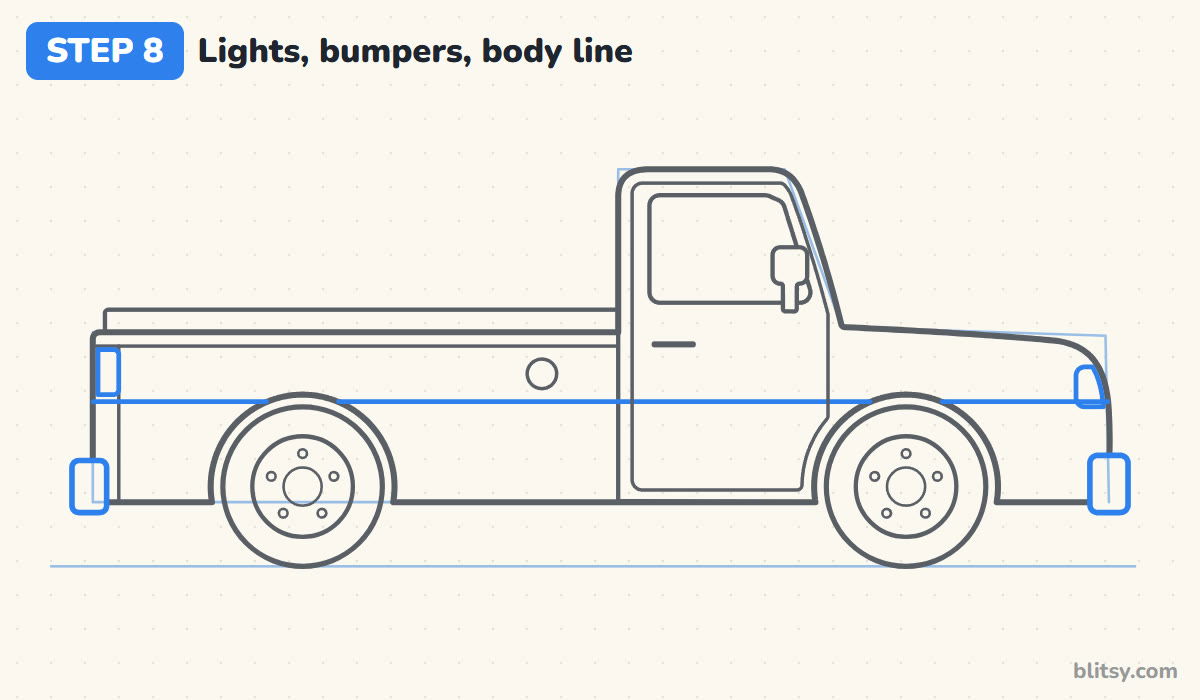
At the very front, under the curve of the nose, draw a rounded headlight. At the back, add a narrow tail light near the top of the bed. Stick a small rounded block onto each end, low down, for the bumpers; they poke out past the body a little. Finish with one long straight line along the side, about halfway up, from the tailgate to the headlight.
💡 Tip: Line up the two bumpers at the same height or the truck will look like it's tipping.
Step 9: Ink the lines and erase the guides
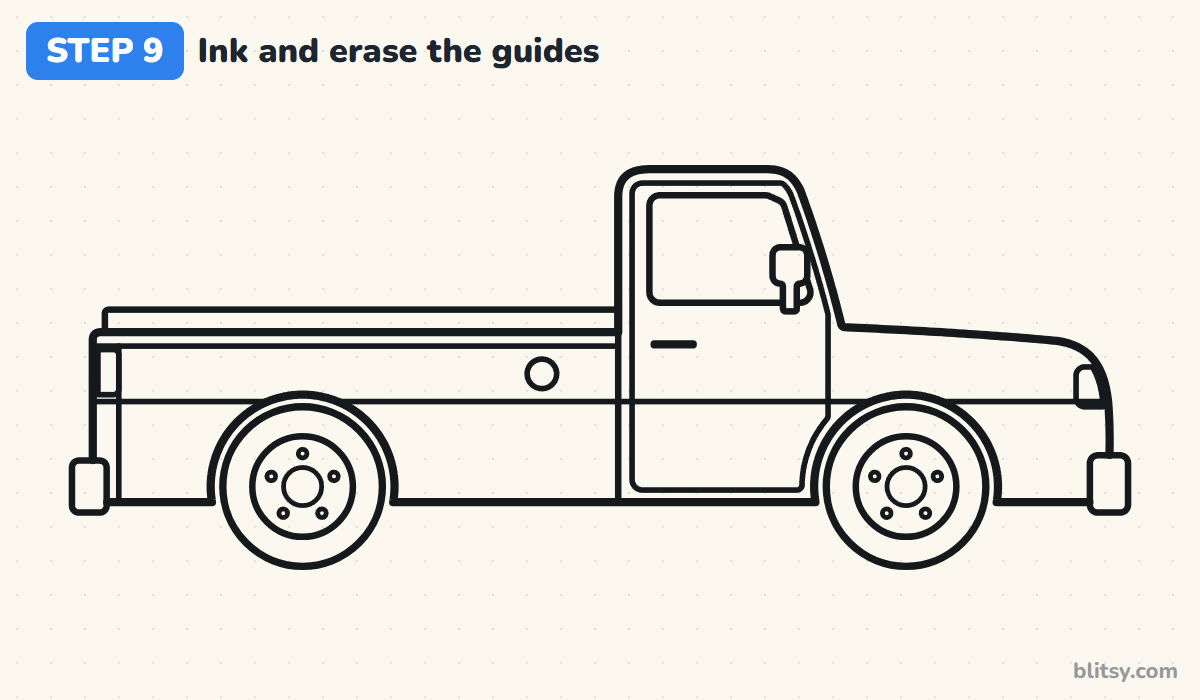
Go over every line you want to keep with the black marker. I like to start with the big outline, then the door and window, and save the wheels for last because their circles need a steady hand. Let the ink dry for a minute, then erase the boxes and the ground line.
💡 Tip: Turn the paper as you ink the round tires so your hand always pulls the marker toward you.
Step 10: Color the pickup truck
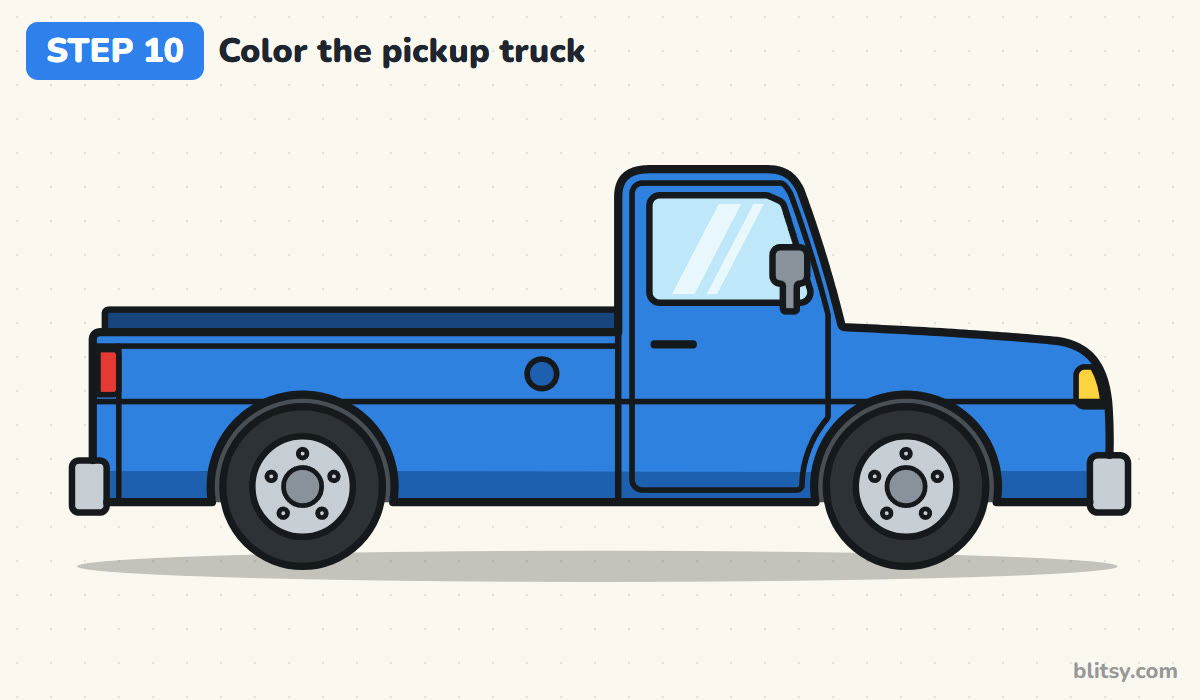
Color the body blue and add a darker blue band along the bottom for a bit of shading. The strip inside the bed gets dark blue, and so does the fuel cap. Light blue fills the window, with two white streaks left for shine. Make the bumpers, rims and mirror gray, the tires black, the headlight yellow and the tail light red.
💡 Tip: Color the big blue body with long strokes in one direction. It looks smoother, like real paint.
Pickup Trouble Spots and Quick Repairs
- The cab and the bed are the same height. Then it looks like a van. Keep the bed top low, well under the window.
- Wheels that are too small. Tiny wheels make a truck look like a toy car. Each tire should be about as tall as the bed side.
- No gap around the tires. When the arch touches the tire all the way round, the wheel looks stuck. Leave a thin space between them.
- A straight up and down windshield. Slant it back a little and the cab looks ready to drive.
- Forgetting the open bed. Without the darker strip, the back reads as a closed box. That one sliver of shadow tells everyone it's a pickup.
Customizing Your Pickup Truck
Once the basic pickup feels easy, try a red or green paint job, a white stripe along the body line, or a farm truck with hay bales stacked in the bed. You can also load it up with a Christmas tree, a surfboard or a sleepy dog. I sometimes add a roof light bar and turn it into a rescue truck. Want bigger wheels? Lift the body high above giant tires with this monster truck drawing step by step lesson, which uses the same pickup shape. For a smaller vehicle, the car drawing tutorial keeps the same wheel trick, and the fire truck drawing tutorial is a fun step up with a ladder and a hose reel.
Free Truck Coloring Page and Printable Step Guide
The free truck coloring page has a small colored pickup at the top to copy, a key that names each color and the part it goes on, and a big outline below with lots of space for a road and a sky. The step-by-step PDF guide holds all 10 steps with pictures and tips, which is handy for a classroom or a quiet afternoon away from the screen. Both print on Letter or A4 paper.
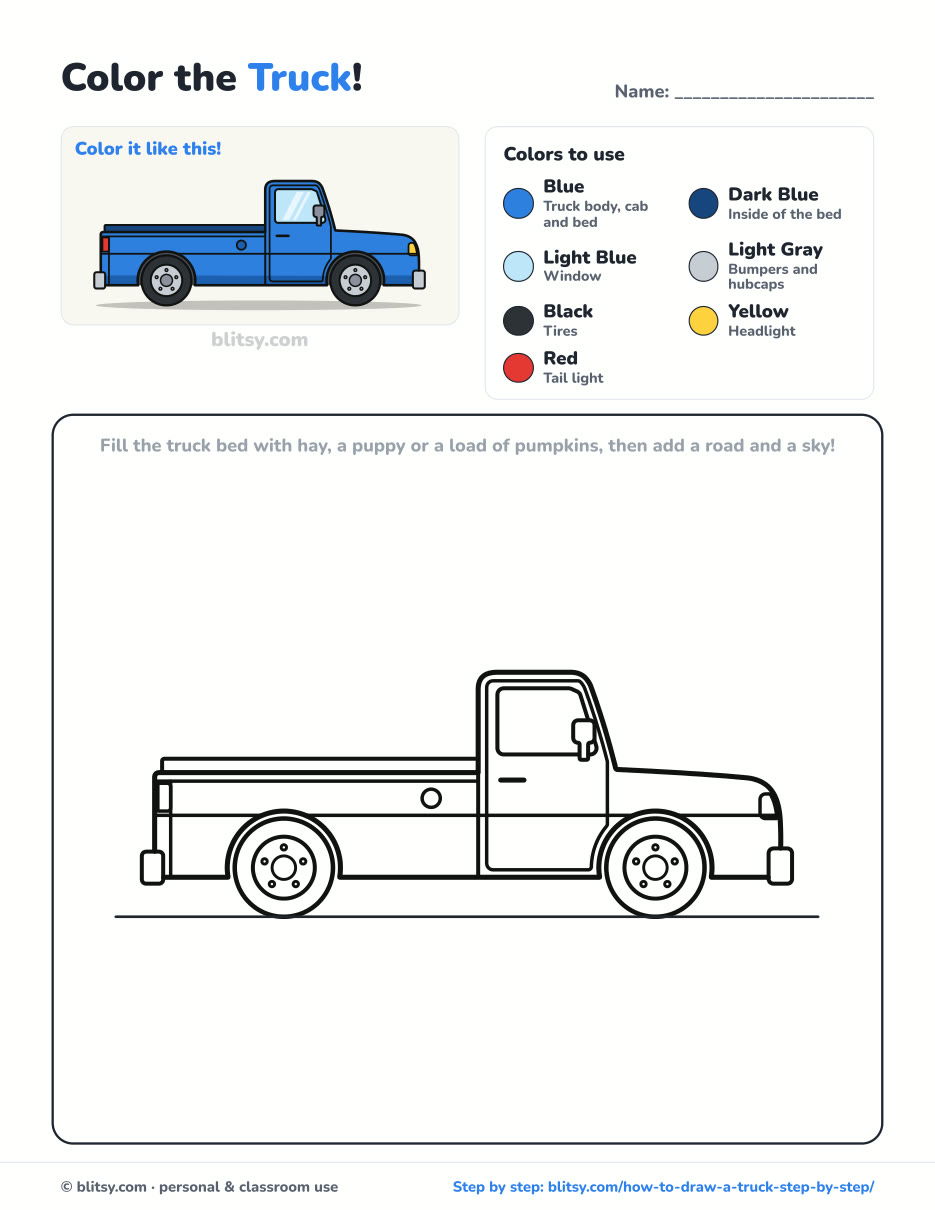
Black outlines with a colored example and the color names at the top. Ready to print and color.
⬇️ Download Coloring PageEvery step picture with its instructions and tips, to keep beside your paper while you draw.
⬇️ Download Drawing Guide📱 On a phone? Tap a download button, then open the file and choose Share → Save to Files or Print. On a computer, the PDF opens or saves straight to your Downloads folder.

Park These Pickup Steps on Pinterest
More Wheels and Rides to Draw Next
Each of these is a full step-by-step tutorial with a picture for every stage, so you can keep practicing vehicles with the same method.
- Police Car: A black-and-white patrol car with a flashing light bar and a gold star on the door in this police car drawing step by step lesson.
- Race Car: Draw a low, pointy formula car with wings at both ends and a driver in a blue helmet with this race car drawing tutorial.
- Train: A cheerful red and blue steam engine pulls its coal tender along the rails in this how to draw a train step by step guide.
- Tank: Build a friendly olive cartoon tank with road wheels and a round turret in this tank drawing tutorial.
- Airplane: A passenger jet climbs past the clouds, starting from one long capsule shape, in this airplane drawing step by step lesson.
Truck Drawing Questions from Young Drivers
What is the easiest way to draw a truck?
Start with two circles on a ground line for the wheels. Add a long low box for the bed, a taller box for the cab and a flat hood in front, then round the corners and cut arches over the wheels.
How do you draw a pickup truck for kids?
Keep it to big simple shapes: two wheels, a low bed and a tall cab with one window. Younger kids can leave out the bolts, the fuel cap and the body line and it still looks like a pickup.
How long does it take to draw a truck?
Most beginners need about 25 to 30 minutes, coloring included. The outline and the wheels take the most care.
What colors should I use for a pickup truck?
Any bright body color works. This one uses blue with dark blue shading, light blue glass, gray bumpers and hubcaps, black tires, a yellow headlight and a red tail light.
Grab a pencil, park two wheels on a line and see where your pickup ends up driving. 🛻✏️
Related posts:
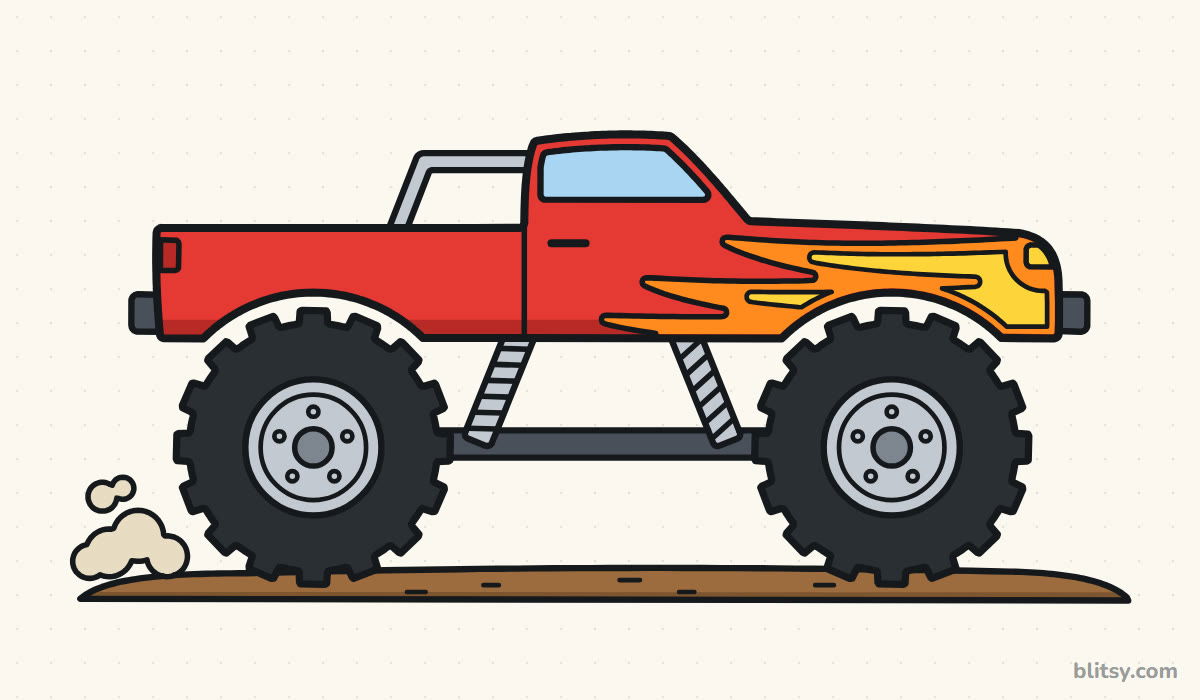 How to Draw a Monster Truck Step by Step (Easy for Kids)
 How to Draw a Fire Truck Step by Step (Easy for Kids)
 How to Draw a Tooth Step by Step (Cute and Easy for Kids)
 How to Draw Wonder Woman Step by Step (Chibi for Kids)
 How to Draw Iron Man Step by Step (Easy Chibi for Kids)
 How to Draw a Police Car Step by Step (Easy for Kids)
 How to Draw a Boat Step by Step (Easy Sailboat for Kids)
 How to Draw a Care Bear Step by Step (Cute Fan Art for Kids)
 How to Draw Hello Kitty Step by Step (Easy for Kids)
 How to Draw a Valentine Step by Step (Easy Card Set for Kids)
 How to Draw a Vampire Step by Step (Easy and Friendly for Kids)
 How to Draw a Bat Step by Step (Cute Cartoon Bat for Kids)

