
Rainbows look simple until the bands start getting fat on one side and skinny on the other. The fix I always teach is an old one: every arc grows from the same center point, and the spaces are marked before a single curve goes down. This lesson shows how to draw a rainbow step by step that way, with all seven colors in the right order, two puffy clouds hiding the ends and a tiny sun in the corner. It works for kids as young as five with a bit of help on the arcs.
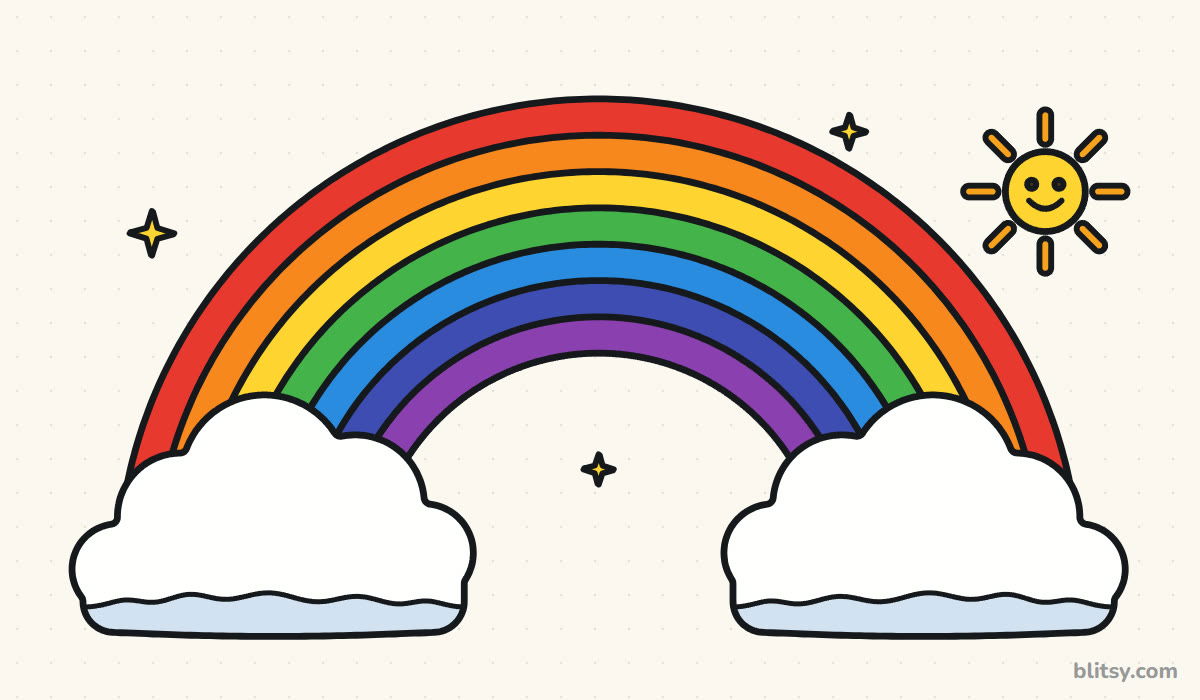
Rainbow arcs pile up fast, so each picture paints only the new lines blue and turns older ones gray. The pale blue marks are light helper lines that get erased near the end.
Quick overview
⏱️ Time: about 25 to 30 minutes with coloring
🎯 Level: very easy, good for kids from about 5 up
✏️ Steps: 12
🌈 You'll draw: a seven-color rainbow on two clouds, with a sun and sparkles
Supplies for a Seven-Color Rainbow
- A pencil you can press lightly with
- A soft eraser
- A ruler (helpful for the baseline and the even marks)
- A black marker or fineliner
- Colored pencils, crayons or markers in red, orange, yellow, green, blue, dark blue and purple
- A sheet of plain paper, turned sideways
No indigo pencil in the box? A dark navy blue works fine, and that's what most crayon sets have anyway.
How to Draw a Rainbow Step by Step
Step 1: Draw a baseline and a center point
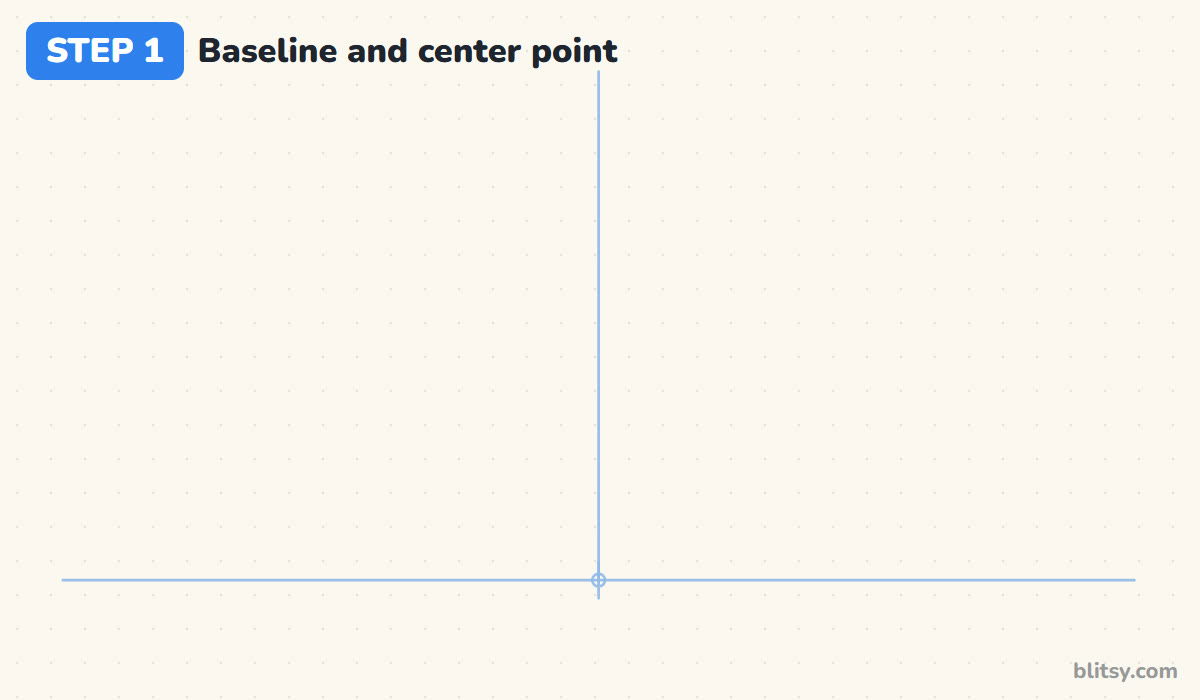
Draw a long, light line across the lower part of your page. Put a small dot right in the middle of it. That dot is the center of every arc you'll draw, so it matters more than anything else on the page. A light line straight up from the dot helps you keep both sides of the rainbow even.
💡 Tip: Leave a good margin under the baseline. The clouds will hang a little below it.
Step 2: Mark eight evenly spaced points
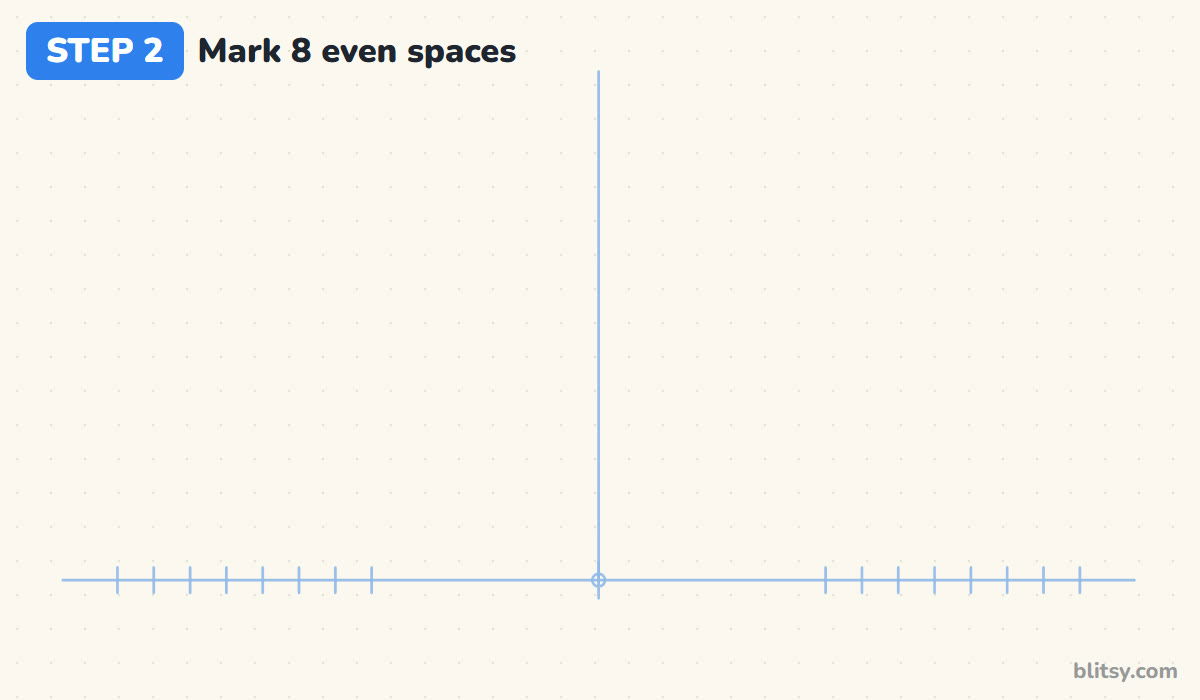
On the left side of the baseline, near the end, make eight small tick marks with the same gap between each one. Then measure the same distances from the center dot on the right side and copy them. Eight marks give you seven bands, one for each color. I use a ruler here and put the marks about a finger width apart.
💡 Tip: Count the marks out loud. Seven or nine is the most common slip, and it only shows up when you color.
Step 3: Sketch the outer and inner arcs
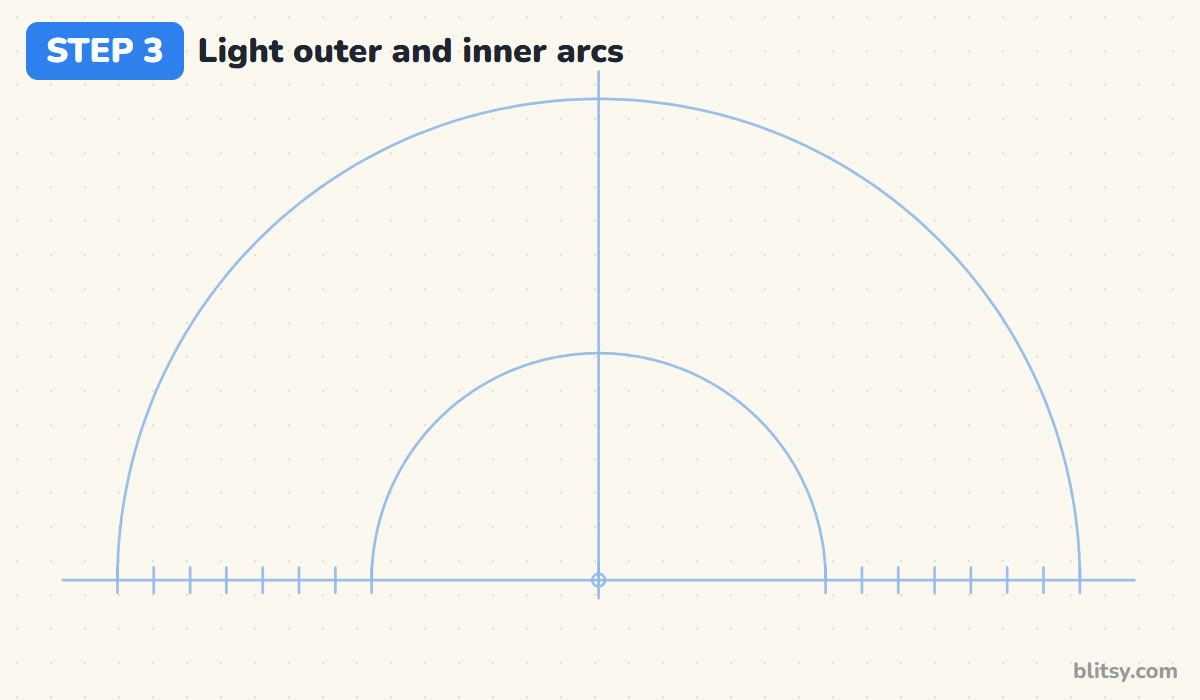
Join the outermost left mark to the outermost right mark with a big, light half circle. Its top should cross the center line. Do the same with the two innermost marks for a much smaller arc. I always get these two right first, because then the rest just fit between them.
💡 Tip: Turn the paper as you curve, or tie a string to the pencil and pin the other end on the center dot like a compass.



Step 4: Fill in the six arcs between
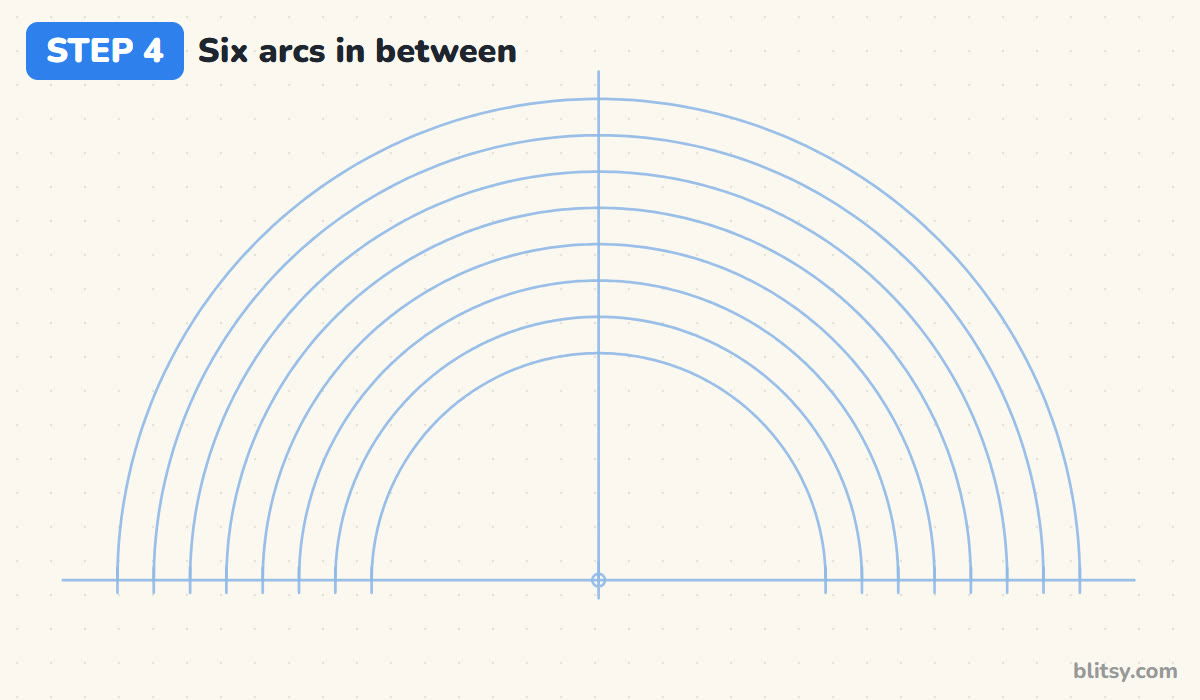
Now connect each remaining pair of marks with its own half circle, working from the outside in. Each new arc should stay the same distance from the one above it all the way around. If two arcs start to squeeze together near the top, lift that arc a little and redraw it lightly.
💡 Tip: Check the gaps where the arcs cross the center line. They should match the gaps on the baseline.
Step 5: Add two fluffy clouds over the ends
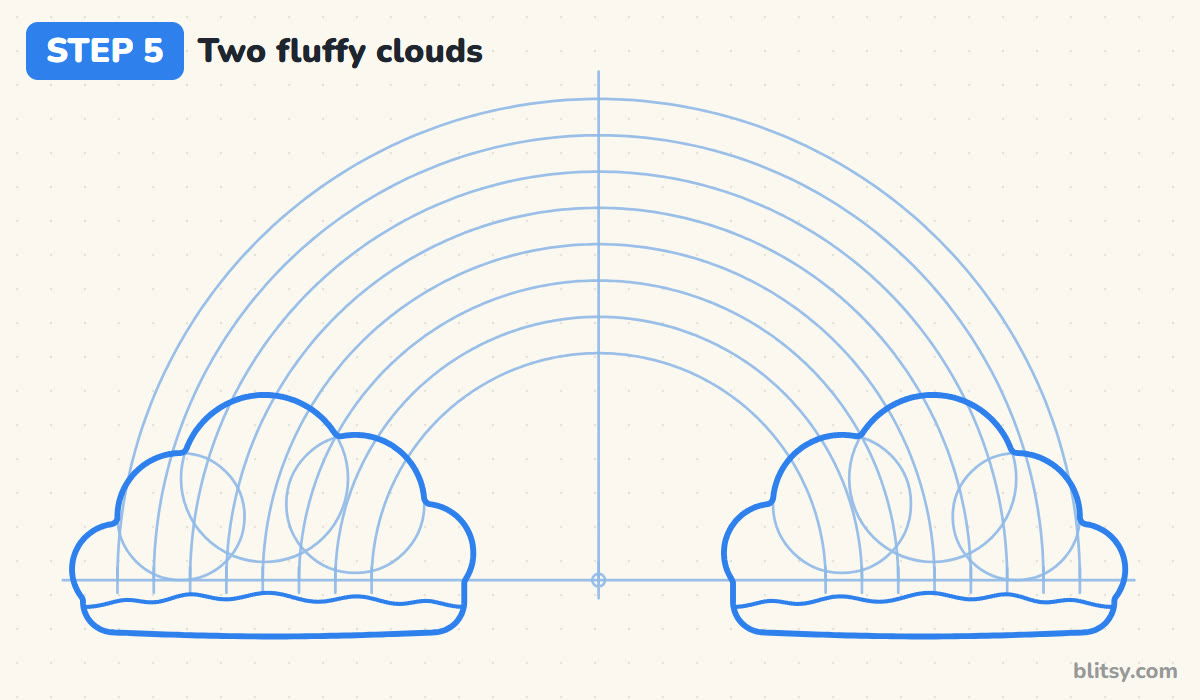
Sketch three overlapping circles over each end of the rainbow, the middle one biggest. Then draw one bumpy outline around the outside of each group, with a flat bottom that sits a little below the baseline. A wavy line near the bottom of each cloud marks a soft shadow. The clouds hide the rainbow's feet, so you don't have to worry about how the bands end.
💡 Tip: Make the clouds wide enough to cover every band, from the outer arc to the inner one.
Step 6: Trace the arcs firmly between the clouds
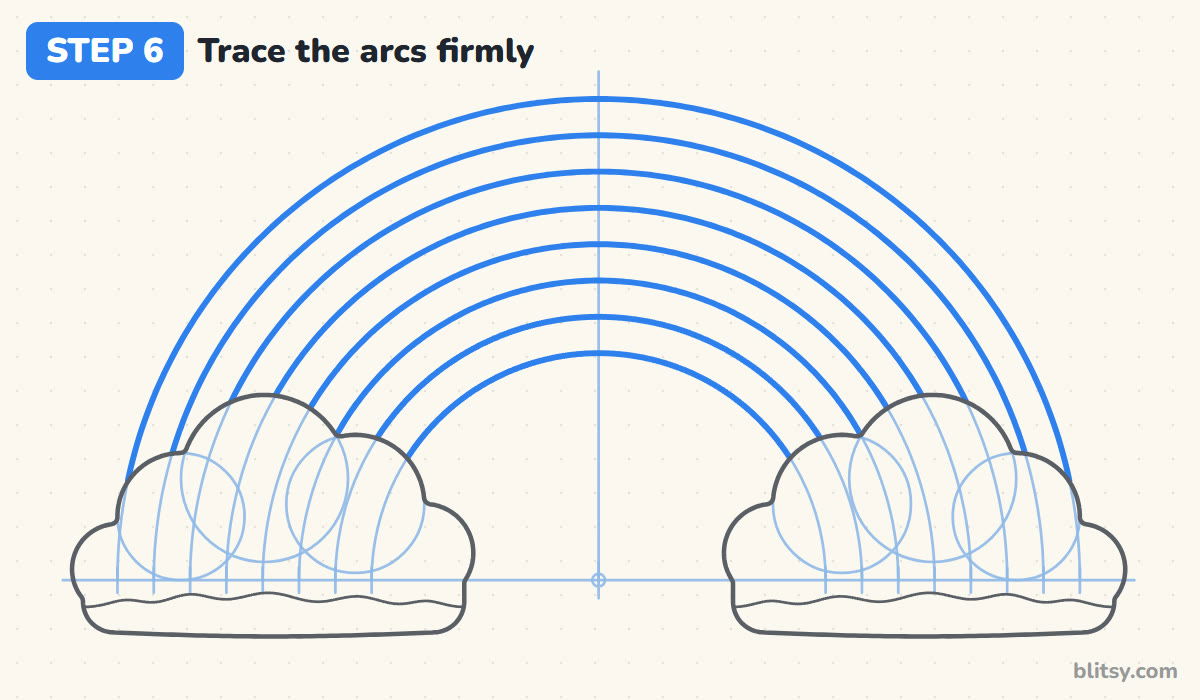
Go over each light arc with a firmer pencil line, starting at the top of one cloud and ending at the top of the other. Stop at the cloud's edge every time. The parts of the arcs inside the clouds stay light so you can erase them later. I like to start each curve from the left cloud, since that's how my hand moves most comfortably.
💡 Tip: Rest the side of your hand on the paper and pull the curve toward you. It wobbles less than pushing.
Step 7: Draw a small smiling sun
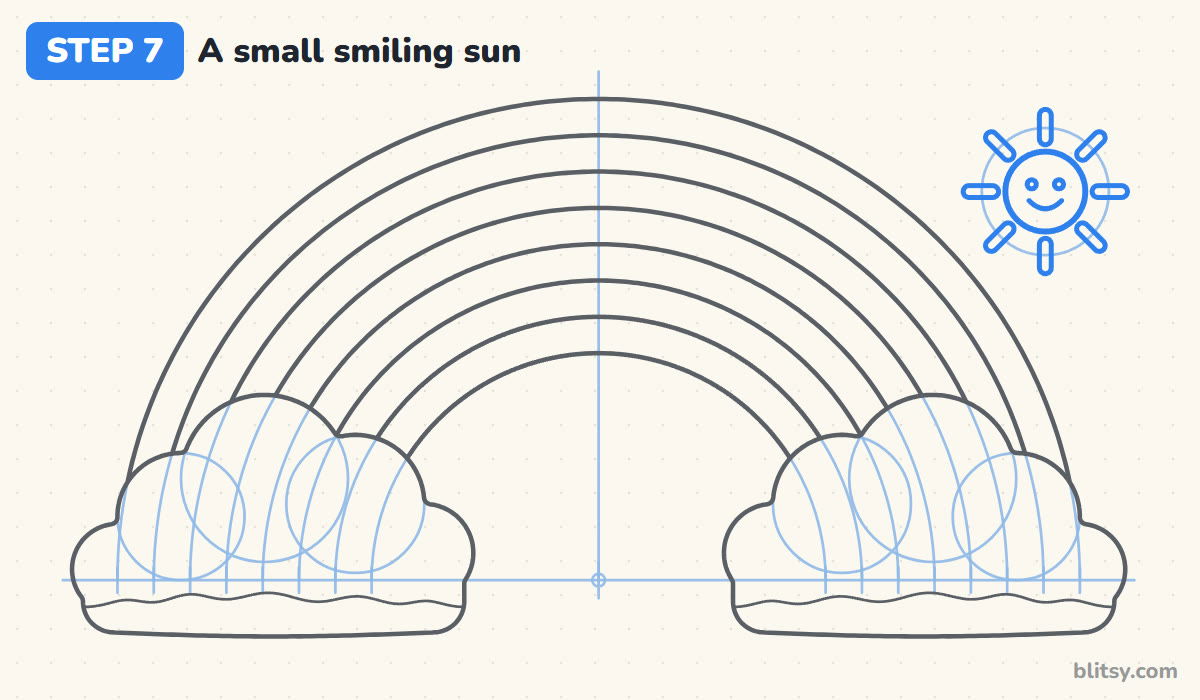
In the top right corner, away from the rainbow, sketch a light circle as a guide. Inside it, draw a smaller circle for the sun. Add eight short rounded rays around it, four pointing straight up and down and out to the sides, then four more in the gaps. Two dot eyes and a little smile finish the face.
💡 Tip: Keep the sun small. A big sun pulls the eye away from the rainbow.



Step 8: Add a few sparkles
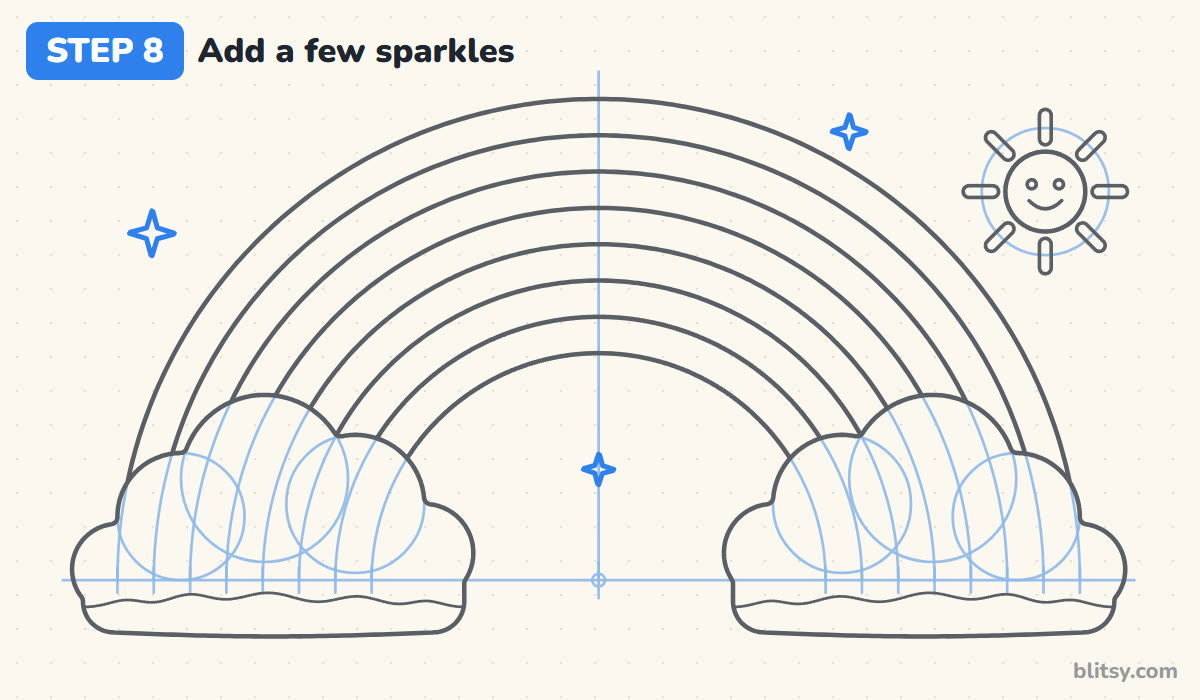
Sparkles are four-pointed stars with curved, pinched sides. Put one up on the left, one near the top of the rainbow and a tiny one under the arch. Three is plenty, and different sizes look more natural than three matching ones.
💡 Tip: Draw the tall point first, then the short sideways one. The star stays balanced that way.
Step 9: Ink the lines and erase the guides
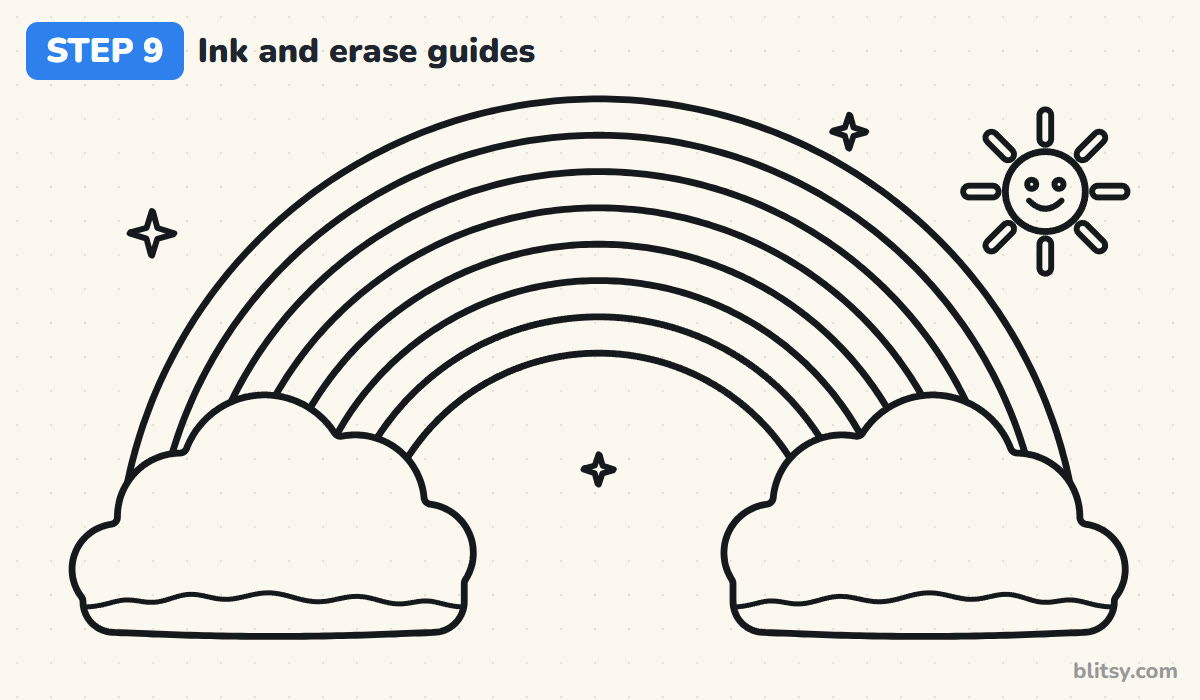
Trace every keeper line with a black marker: the eight arcs, the clouds, the sun and the sparkles. Skip the baseline, the tick marks, the center line and the light circles. Let the ink dry for a minute, then erase all the pencil. The bits of arc inside the clouds disappear too.
💡 Tip: Ink the arcs in one smooth pass each. Stopping halfway leaves a little blob where you started again.
Step 10: Color the four warm bands
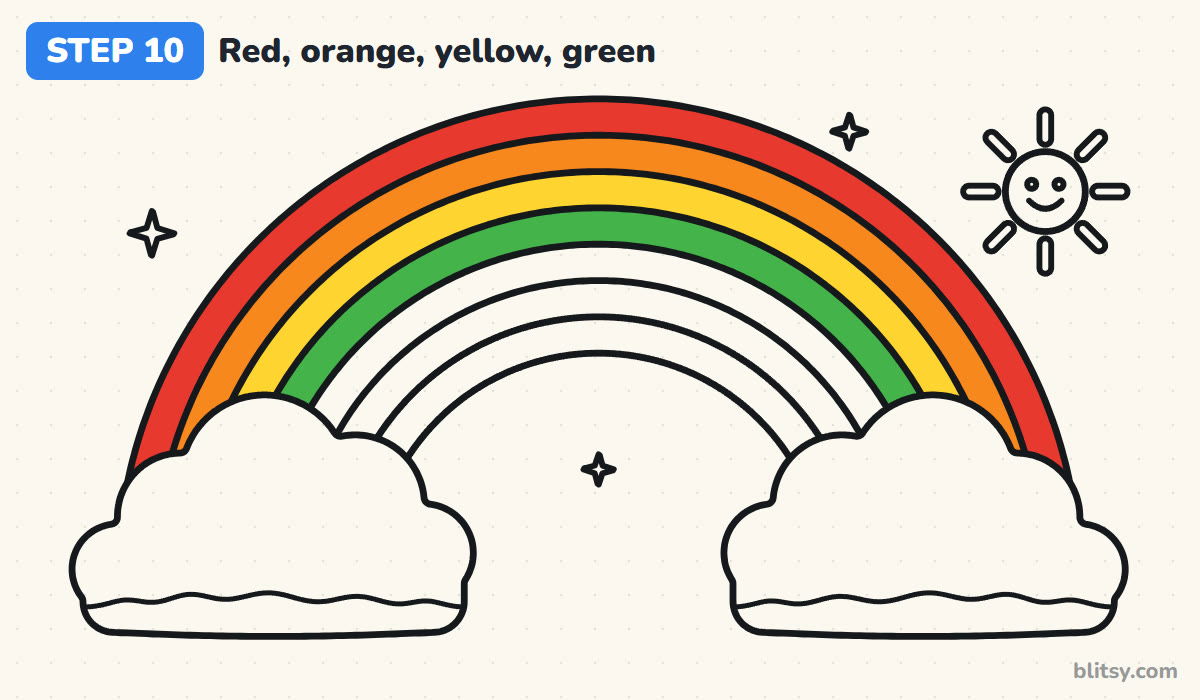
The order always runs from the outside in. Red goes in the top band, then orange, then yellow, then green in the middle. Color each band along its curve rather than across it, and stay inside the black lines.
💡 Tip: Remember the order with the name ROY G BIV: red, orange, yellow, green, blue, indigo, violet.
Step 11: Finish the three cool bands
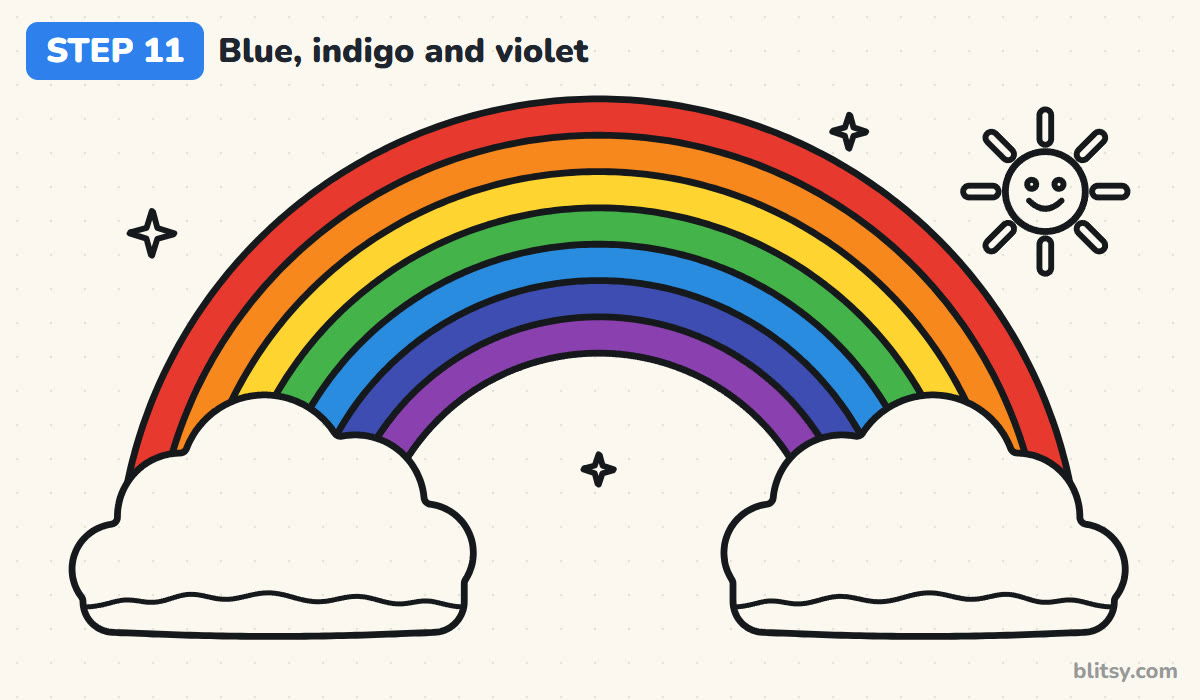
The last three bands are the cool colors. Use a bright blue for the fifth band, a darker blue for indigo and purple for violet, the smallest band at the bottom. Indigo and violet sit next to each other, so make sure they look clearly different.
💡 Tip: If your blue and dark blue look too alike, press harder on the dark one to deepen it.


Step 12: Color the clouds and the sun
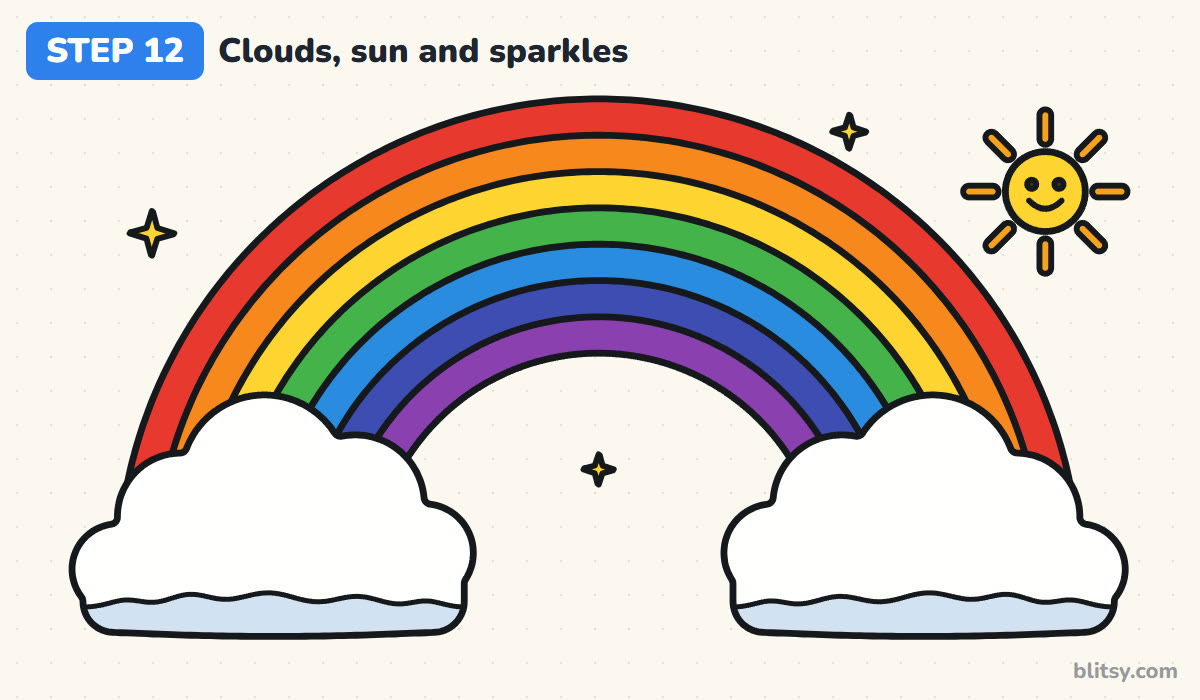
Leave the clouds white and add pale blue under the wavy shadow lines. Color the sun yellow with orange rays, fill in its eyes, and make the sparkles yellow too. That bit of blue under each cloud makes them look puffy instead of flat.
💡 Tip: Color lightly under the clouds. A soft shadow looks fluffier than a dark one.
Why Rainbow Bands Come Out Uneven
- Each arc has its own center. The bands then pinch at the top or bulge at the sides. Draw every arc around the same dot.
- Guessing the spacing. Bands of different widths are hard to fix later. Mark the spaces on the baseline before drawing any curve.
- Colors in the wrong order. Red always sits on the outside and violet on the inside. Write ROY G BIV in the corner if it helps.
- Pressing hard on the first arcs. Dark sketch lines won't erase cleanly from inside the clouds. Keep them light until step 6.
- Clouds that are too small. If the clouds don't cover every band, the ends of the rainbow poke out. Stretch each cloud from the outer arc to the inner one.
Rainbow Variations Worth Trying
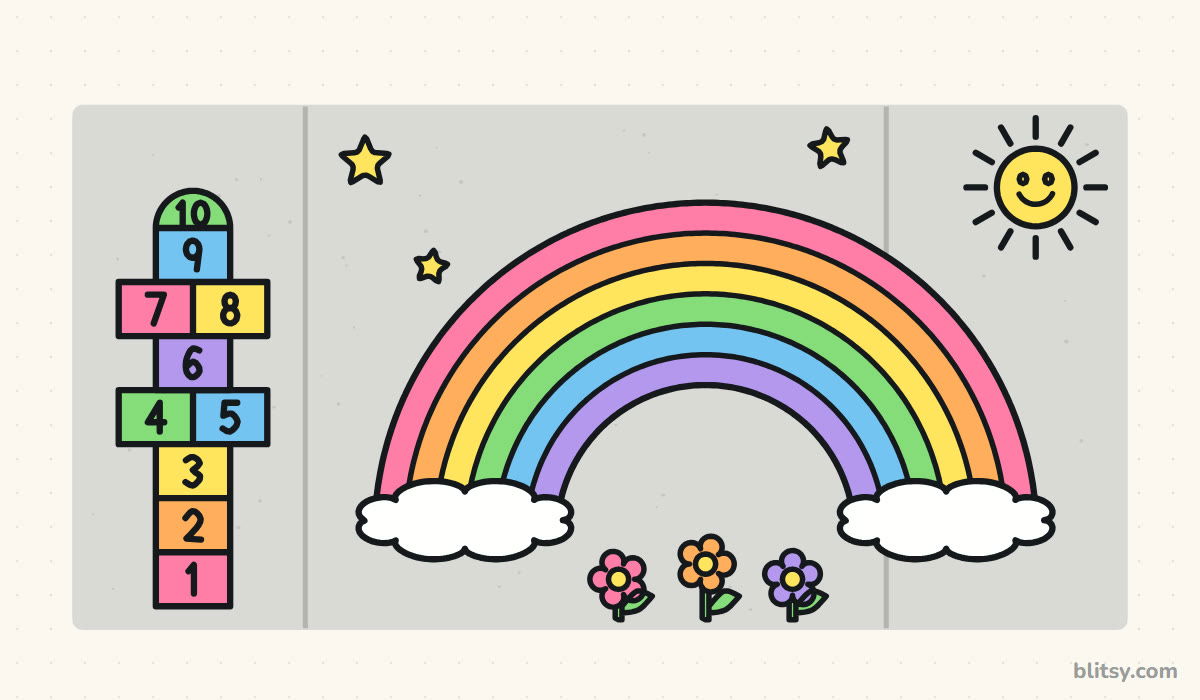
Once the arcs come out even, you can play. Drop the sun and add raindrops under a gray cloud for a rainy-day rainbow, or draw a pot of gold at one end instead of a cloud. Small kids can use three or four wide bands instead of seven and it still looks great. To take the same rainbow outside in giant size, follow the chalk art hopscotch and rainbow tutorial. For puffier clouds with faces, try the cloud drawing step by step lesson, and if your sun deserves more attention, the sun drawing tutorial goes into it in more detail.
Free Rainbow Coloring Page and Printable Guide
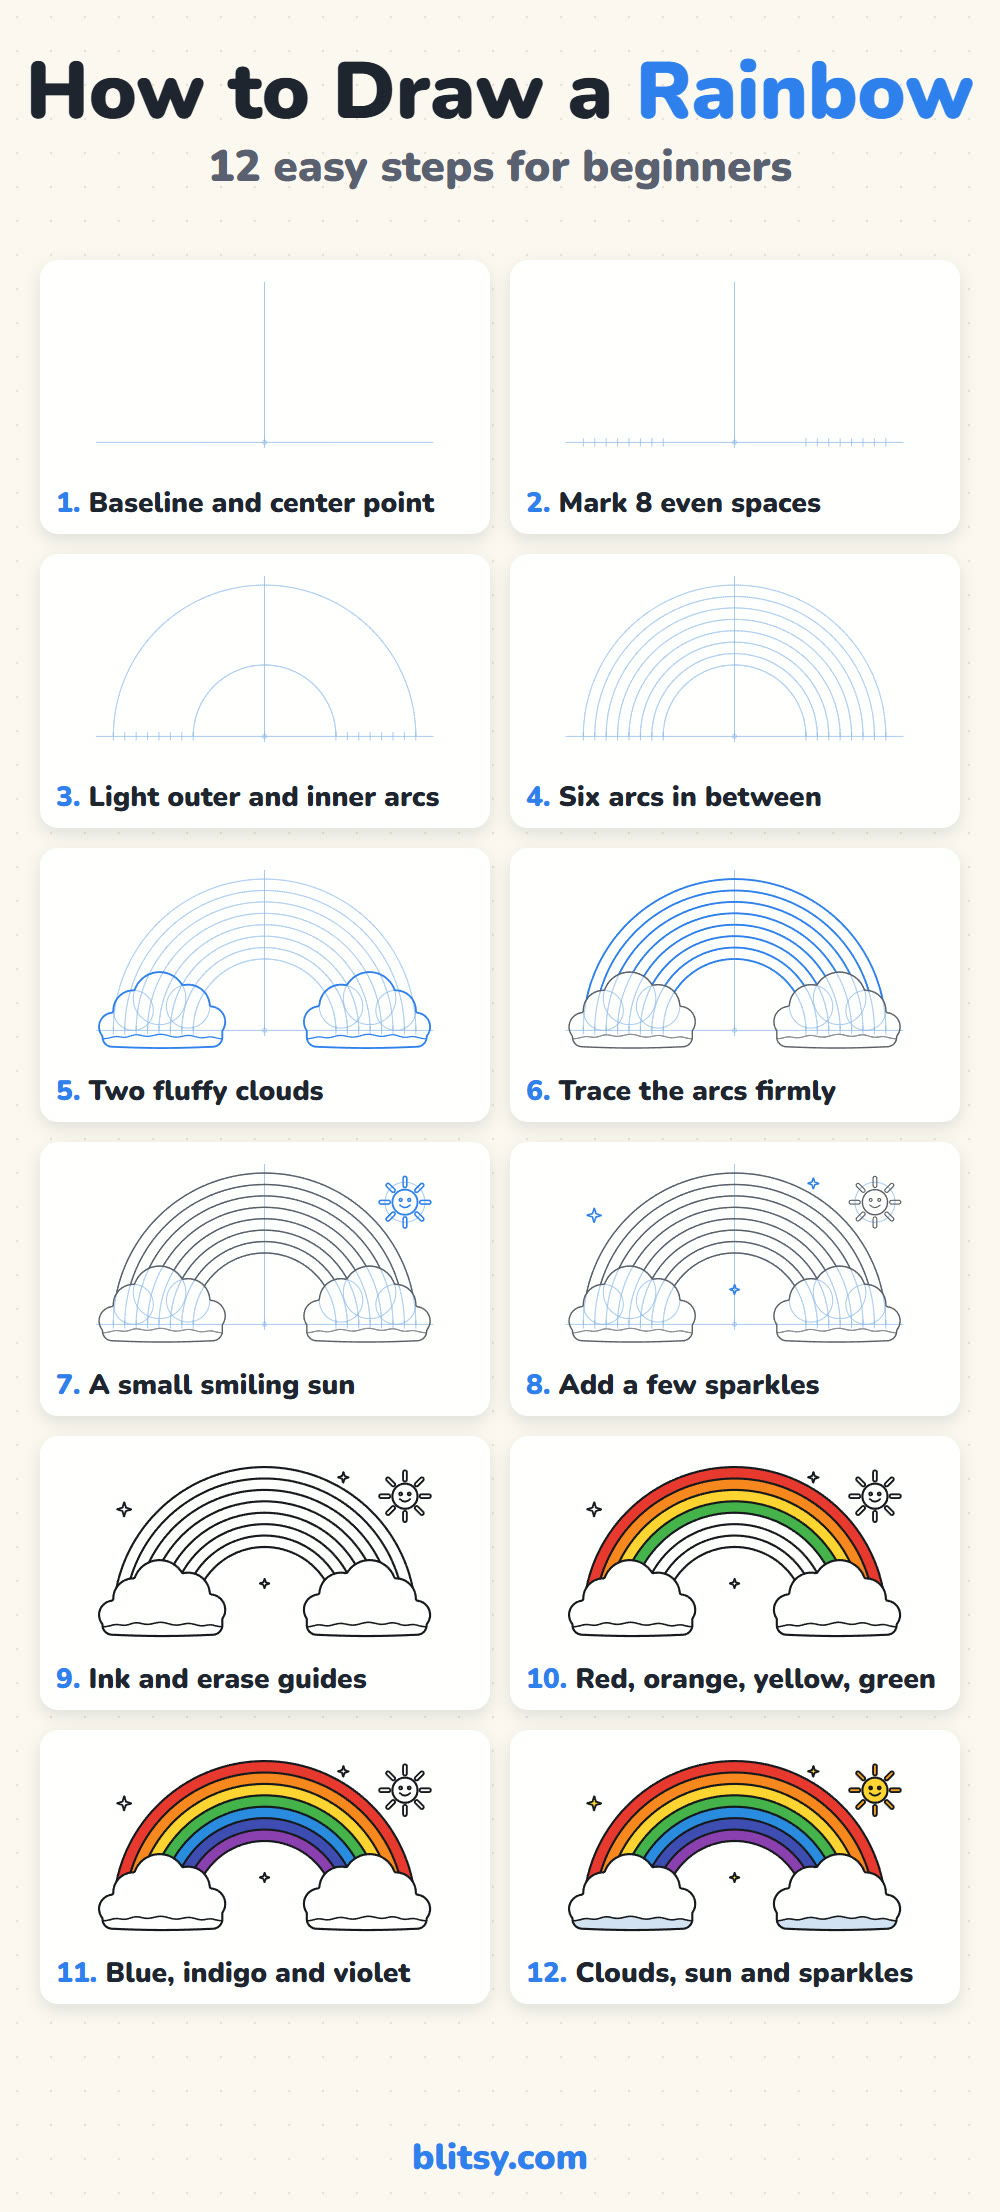
The free rainbow coloring page has a colored rainbow at the top to copy and a color key that lists each band in order, plus a large outline to color below. The step-by-step PDF guide holds all 12 steps with their pictures and tips, so you can draw without a screen nearby. Both print on Letter or A4 paper.
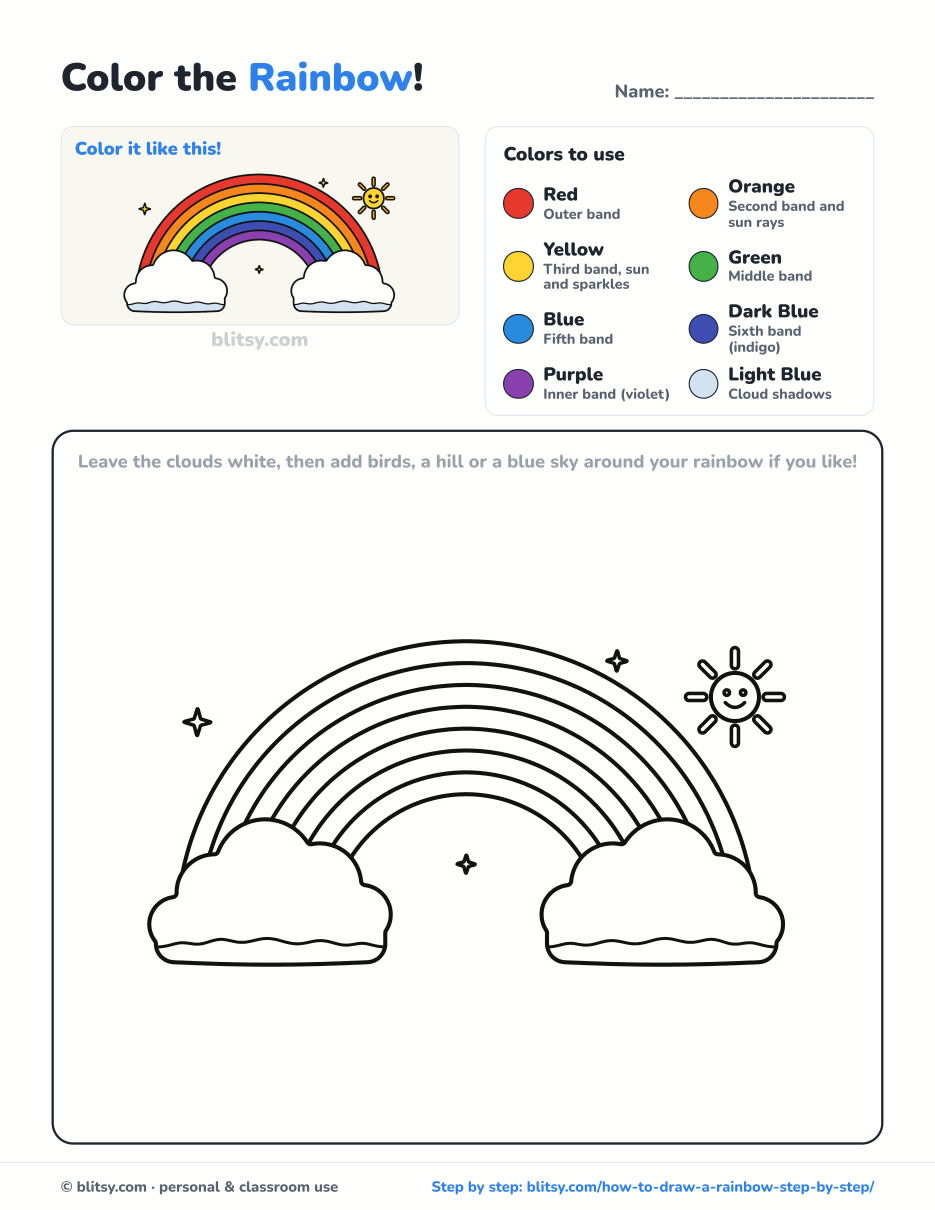
Black outlines with a colored example and the color names at the top. Ready to print and color.
⬇️ Download Coloring PageEvery step picture with its instructions and tips, to keep beside your paper while you draw.
⬇️ Download Drawing Guide📱 On a phone? Tap a download button, then open the file and choose Share → Save to Files or Print. On a computer, the PDF opens or saves straight to your Downloads folder.
Keep the Rainbow Steps on One Page
More Sky and Sunshine Drawings to Try Next
Every link below is a full lesson with a picture for each step, so the same easy method carries over.
- Unicorn Drawing: Give a cute unicorn a rainbow mane of its own with this how to draw a unicorn step by step lesson.
- Umbrella Drawing: A rainy-day umbrella makes a fine partner for a rainbow in this umbrella drawing tutorial.
- Star Drawing: Learn to draw a neat five-point star with this star drawing step by step guide.
- Butterfly Drawing: Bright symmetric wings are good color practice in this butterfly drawing tutorial.
- Balloon Drawing: Round party balloons with curly strings come together quickly in this balloon drawing step by step lesson.
Rainbow Drawing Questions from Kids and Parents
What is the order of colors in a rainbow?
From the outside in: red, orange, yellow, green, blue, indigo, then violet. The name ROY G BIV helps you remember it.
How do you draw a rainbow evenly?
Put one center dot on a baseline, mark evenly spaced points on both sides, and draw every arc around that same dot. The equal marks give equal bands.
What is the easiest way for a kid to draw a rainbow?
Draw the biggest arc first, then add smaller arcs inside it, each one a finger width lower. Clouds over the ends hide any messy edges.
What color can I use for indigo?
A dark navy blue works well. Indigo should look darker than the blue band next to it but bluer than the purple violet band.
Grab a pencil, find your center dot, and see how even your first rainbow turns out. 🌈✏️
Related posts:
 How to Do Chalk Art Step by Step (Hopscotch and Rainbow)
 How to Draw a Car Step by Step (Easy Drawing for Beginners)
 How to Draw a Whale Step by Step (Easy for Beginners)
 How to Draw an Arctic Fox Step by Step (Easy for Beginners)
 How to Draw a Shark Step by Step (Easy for Beginners)
 How to Draw a Chicken Step by Step (Easy for Beginners)
 How to Draw a Snowman Step by Step (Easy for Beginners)
 How to Draw an Airplane Step by Step (Easy Jet for Beginners)
 How to Draw a Mouse Step by Step (Easy for Beginners)
 How to Draw a T-Rex Step by Step (Easy for Beginners)
 How to Draw a Pig Step by Step (Easy for Beginners)
 How to Draw a Minion Step by Step (Easy for Beginners)

