
Kids wave at fire engines for a reason: they're huge, shiny and loaded with gear. In this lesson you'll learn how to draw a fire truck step by step, starting from three circles and two plain boxes. It carries lots of parts, but almost every one is a rectangle or a circle. Draw them in the right order and the whole engine lines up on its own.
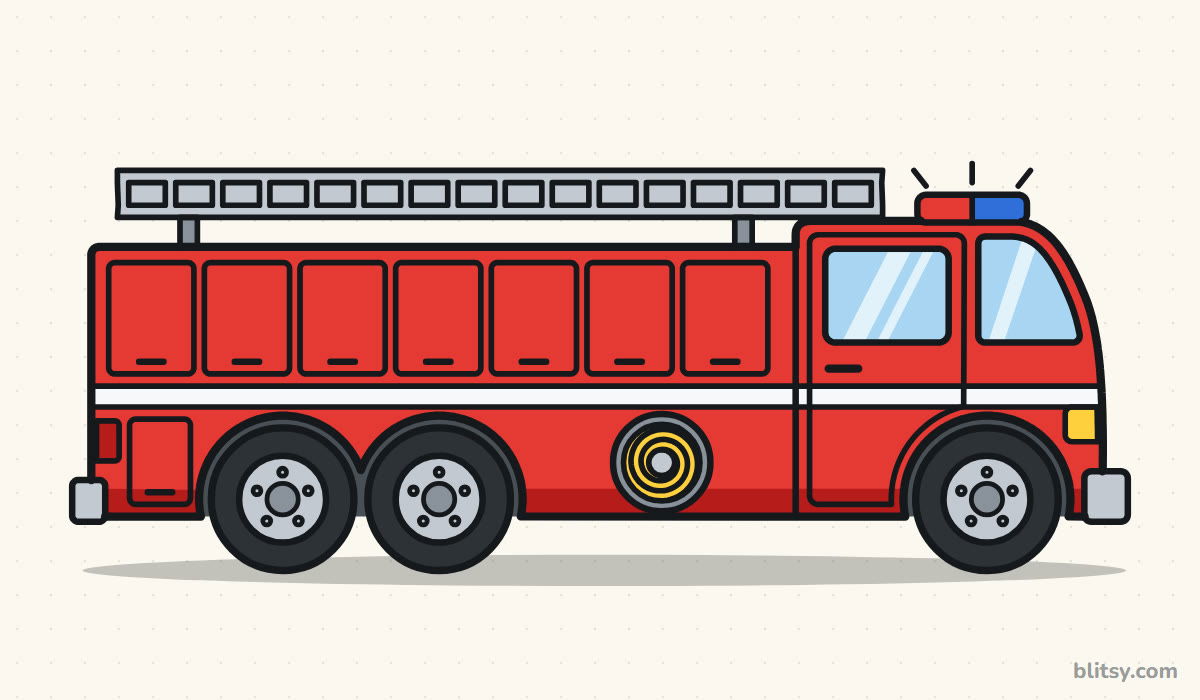
Every new part shows up in blue, and the lines you already drew turn gray, so you always know what to add next. Steps 1 and 2 are only helper shapes: draw them faintly and rub them out later.
Quick overview
⏱️ Time: about 40 minutes, coloring included
🎯 Level: easy, good for kids from about 6
✏️ Steps: 12
🚒 You'll draw: a red fire engine with a ladder, a hose reel, a light bar and three wheels
Gear to Grab Before the Engine Rolls Out
- A regular pencil for light sketching
- A soft eraser
- A ruler, since this truck is full of straight lines
- A black marker or fineliner for the final lines
- Crayons, markers or colored pencils in red, yellow, gray, black and light blue, plus one blue
- A sheet of paper turned sideways, because the truck is long
No ruler? A book edge or a piece of card works fine for the ladder and the stripe.
How to Draw a Fire Truck Step by Step
Step 1: Draw a ground line and three wheels
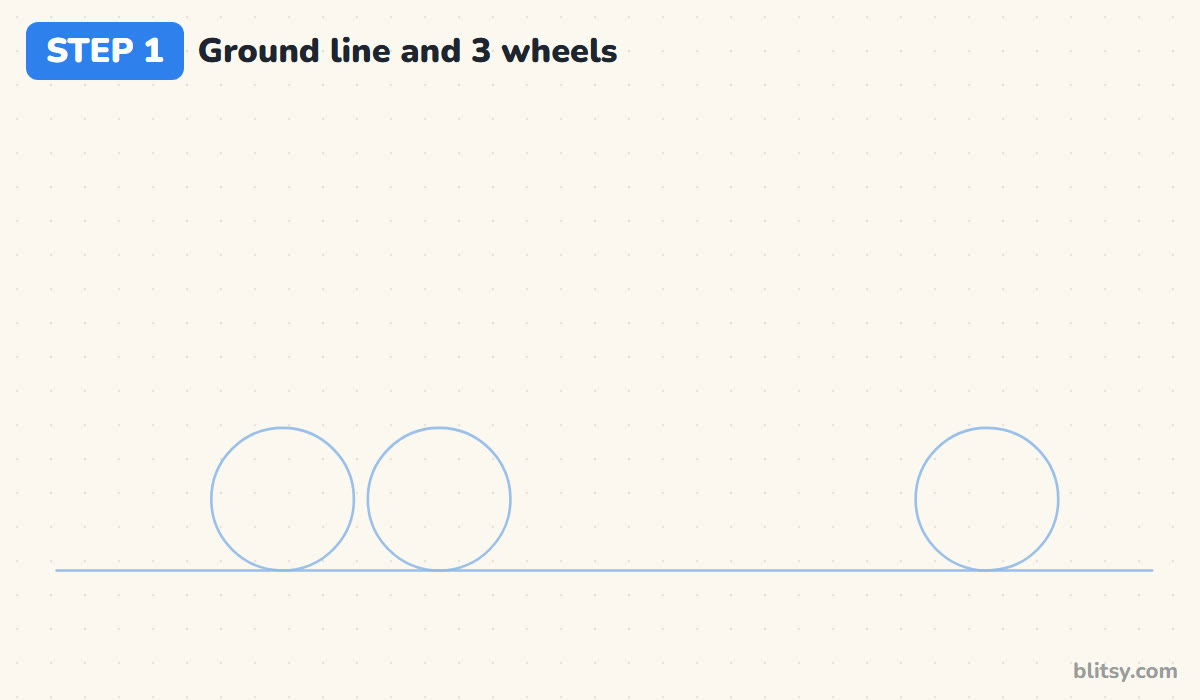
Rule a long line across the lower part of your page. Stand three circles of the same size on it: two nearly touching on the left, and one alone far to the right. The pair holds up the heavy back end; the single wheel sits under the cab. I leave a gap of about three wheels before the front one, because a fire engine is long.
💡 Tip: Trace a bottle cap or a coin so all three wheels match.
Step 2: Sketch boxes for the body, the cab and the ladder
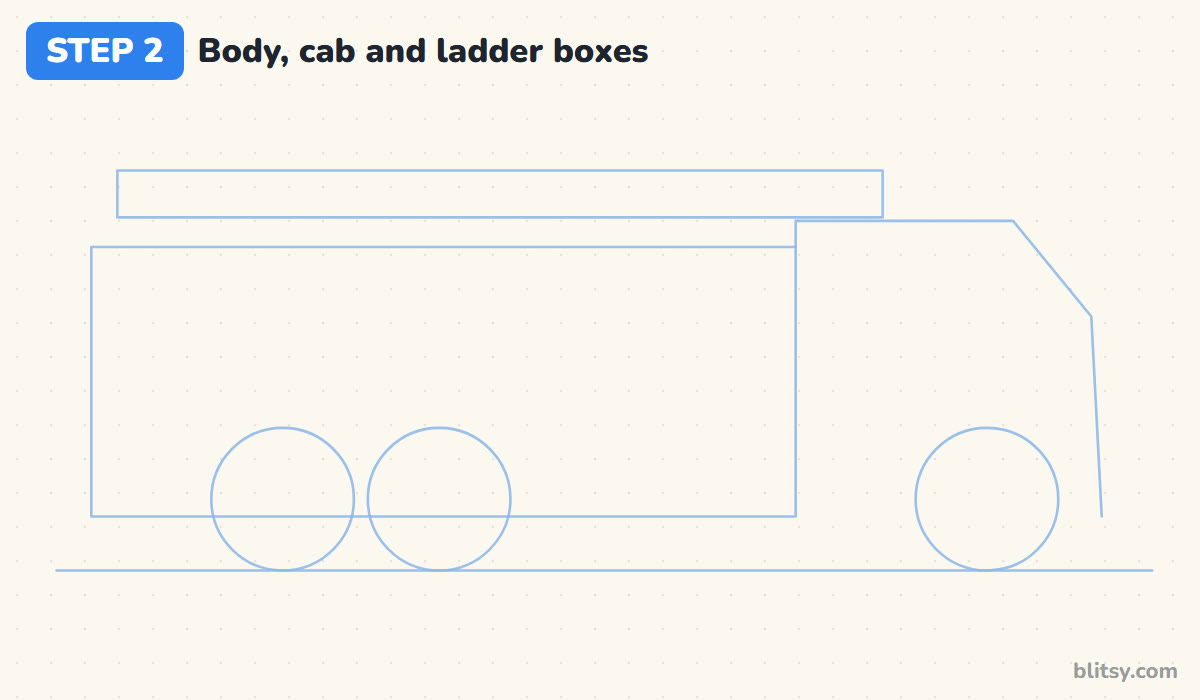
Draw a long rectangle that covers most of the page width, with its bottom edge running through the middle of the back wheels. On the right, add the cab: a taller box with a sloped corner at the front where the windshield goes. Above the long box, sketch a thin flat rectangle for the ladder. Keep all three very light, since they will disappear soon.
💡 Tip: Make the cab roof a little higher than the body, so the two parts read as separate.
Step 3: Trace the outline of the fire truck
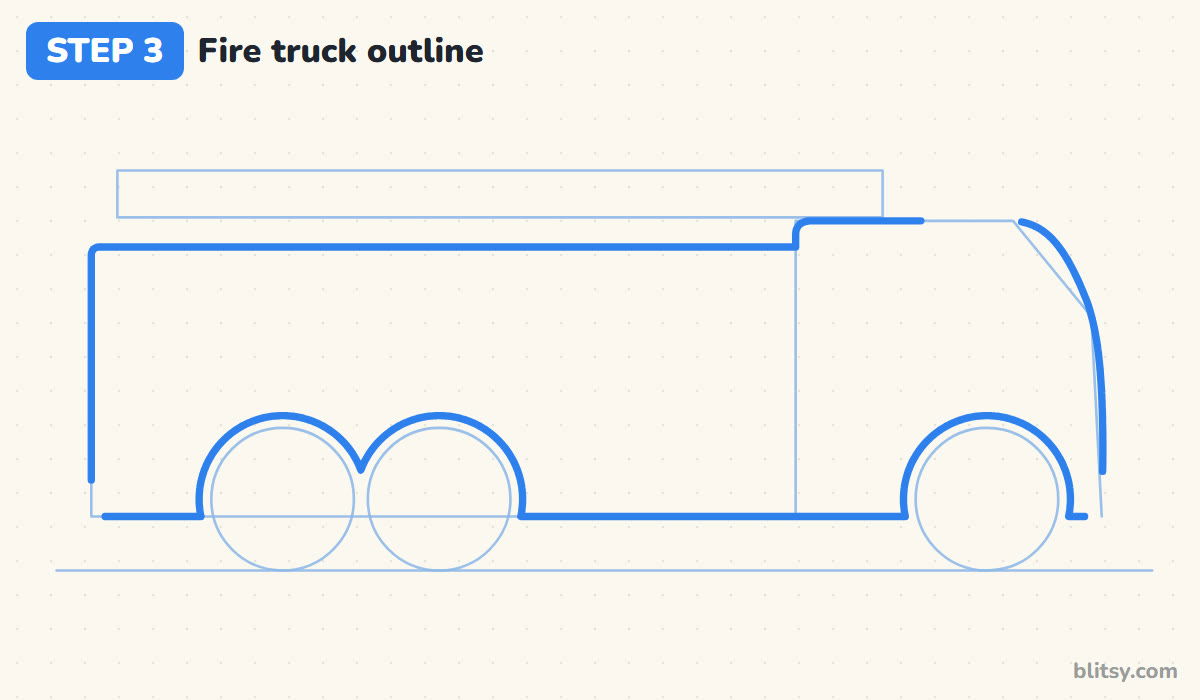
Now go over the boxes with a darker line. Round the corners slightly, curve the windshield into a smooth bend, and lift the lower edge into an arch over each wheel. Over the back pair the arches join, like a wide letter M. Leave a little space between every arch and its circle; that gap makes the wheel look tucked inside.



💡 Tip: Leave small breaks where the bumpers and the light bar will cover the outline.
Step 4: Turn the circles into tires with rims
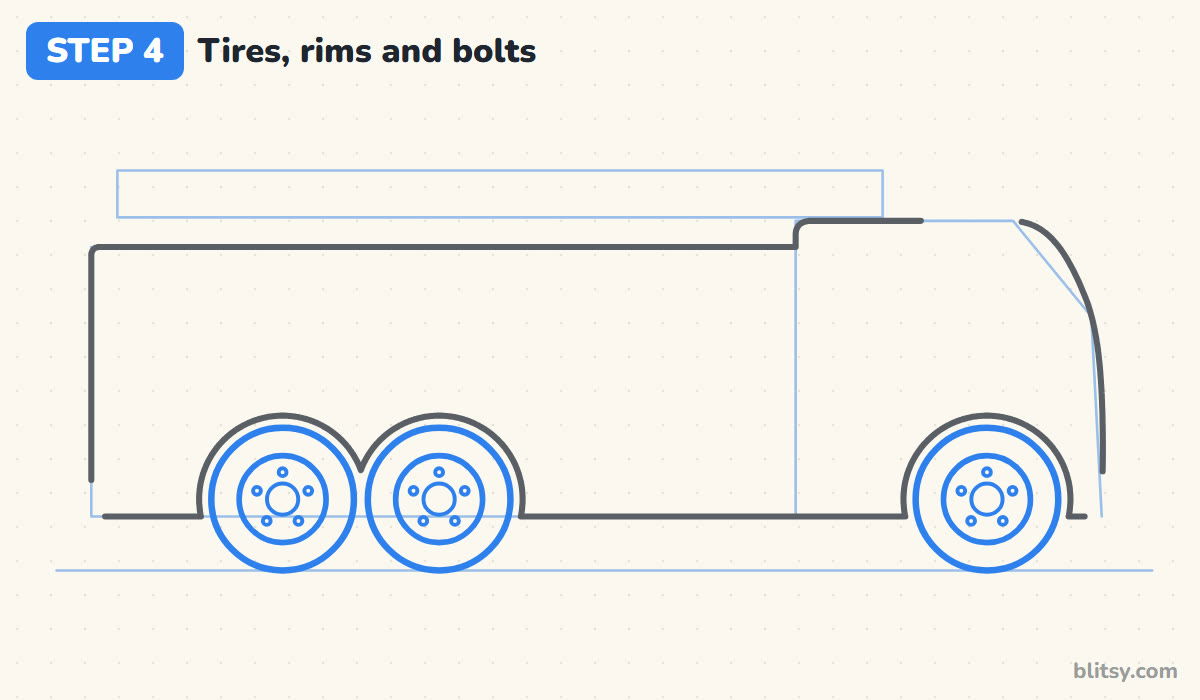
Inside every wheel, draw a smaller circle a bit more than half as wide for the rim. Put a tiny circle in the very middle for the hub, then add five small dots around it for the bolts. Big rubber tires with small rims make the engine look strong and heavy.
💡 Tip: Place the bolts like the points of a star so they stay evenly spaced.
Step 5: Add the cab door and the windows
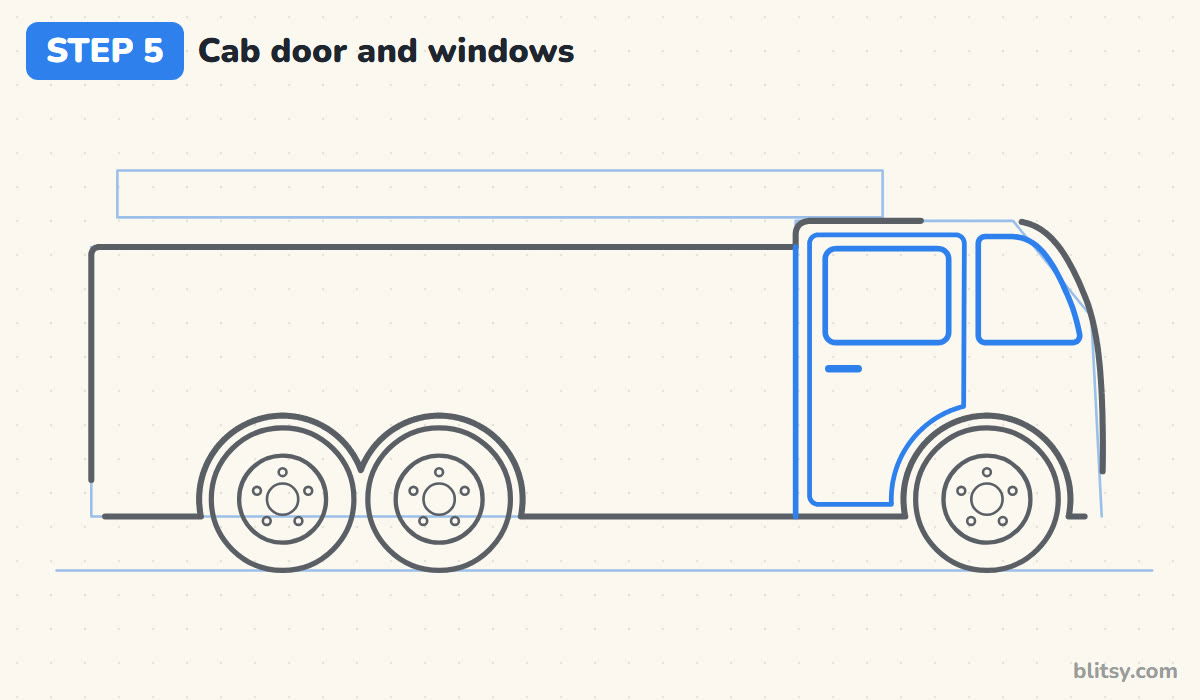
Draw a straight line down where the cab meets the body. Inside the cab, outline a tall door whose lower front corner curves around the wheel arch. Near the top of the door, add a big rounded window. In front of it, draw a second window that follows the slope of the windshield. Finish with a short thick handle under the big window.
💡 Tip: Keep the tops of both windows level with each other.
Step 6: Draw the compartment doors on the body
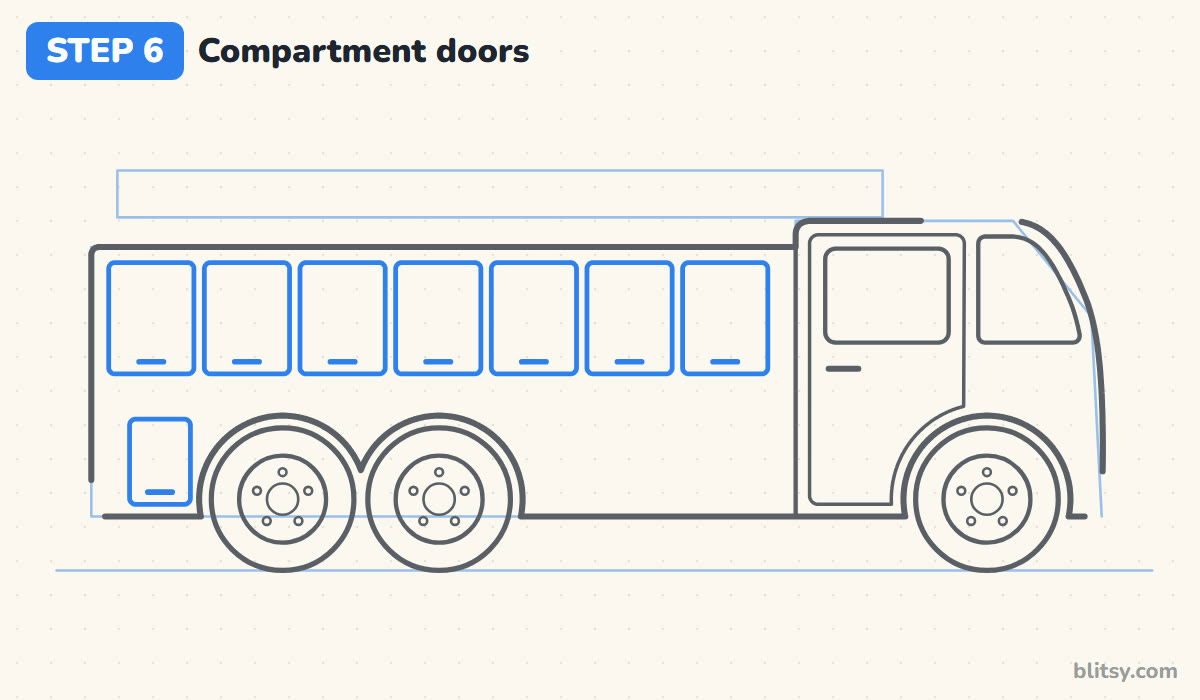
Firefighters store their tools behind these doors, so a real engine has lots of them. Draw a row of seven tall rounded rectangles across the upper part of the body, with a thin gap between each. Add one smaller door low down behind the back wheels. A short line near the bottom of every door makes the handle.
💡 Tip: Mark the middle door first, then fit three on each side of it.
Step 7: Run a stripe along the side
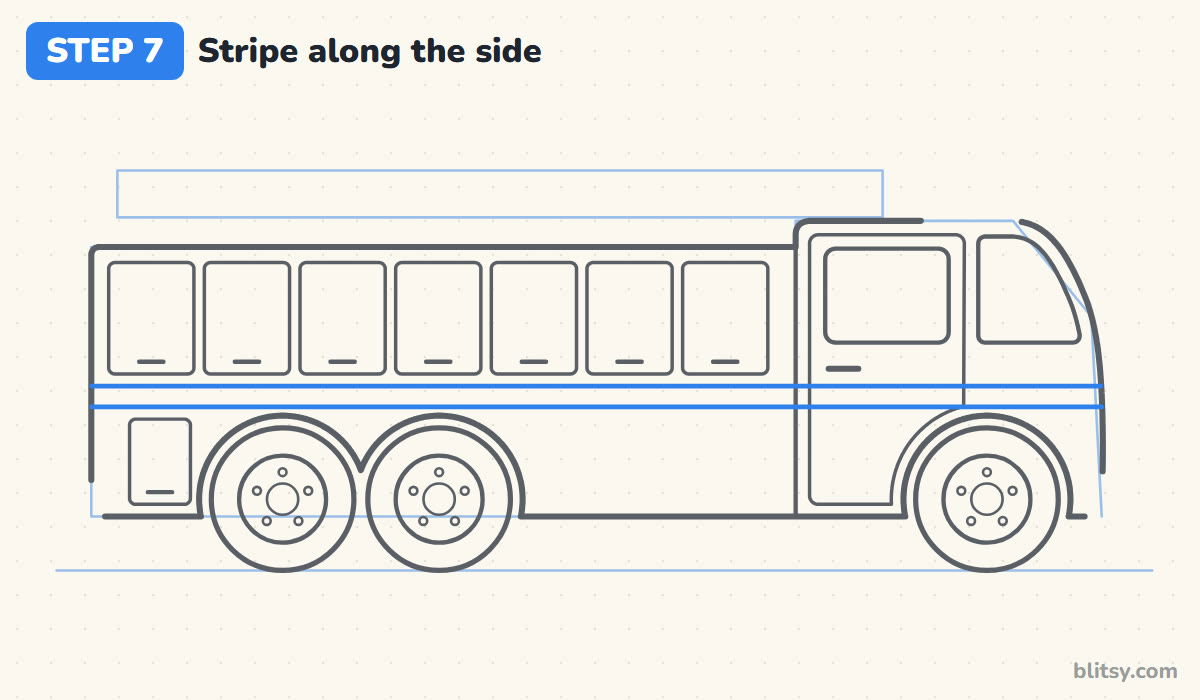
Just under the row of doors, draw two straight lines that run the full length of the truck, from the back end to the nose. This band becomes the white stripe. I always use a ruler here. A wavy stripe stands out more than almost any other wobble in the picture.



💡 Tip: Keep the stripe above the wheel arches so it never gets cut off.
Step 8: Lay the ladder on the roof
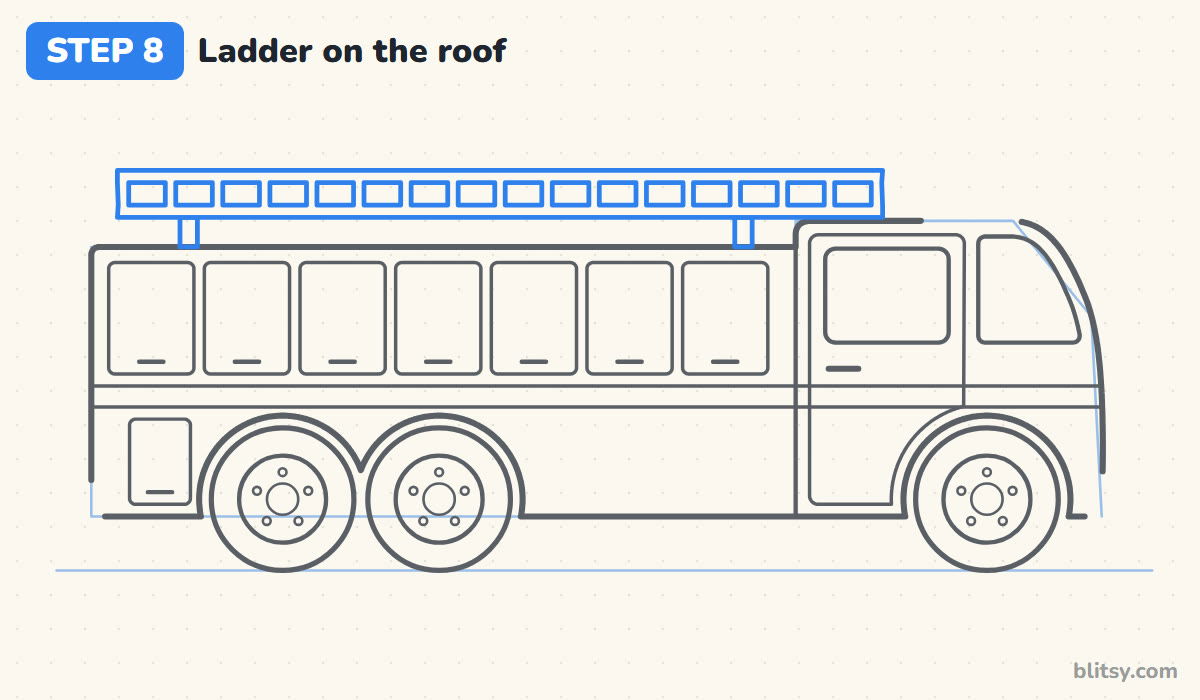
Inside the thin box on top, draw two long rails, one at the top and one at the bottom. Join them with short upright rungs spaced evenly from end to end, like a train track standing on its side. Under the ladder, add two small posts so it rests on the roof instead of floating in the air.
💡 Tip: Draw the two end rungs first, then one in the middle, and fill the spaces between them.
Step 9: Add the light bar, the lights and the bumpers
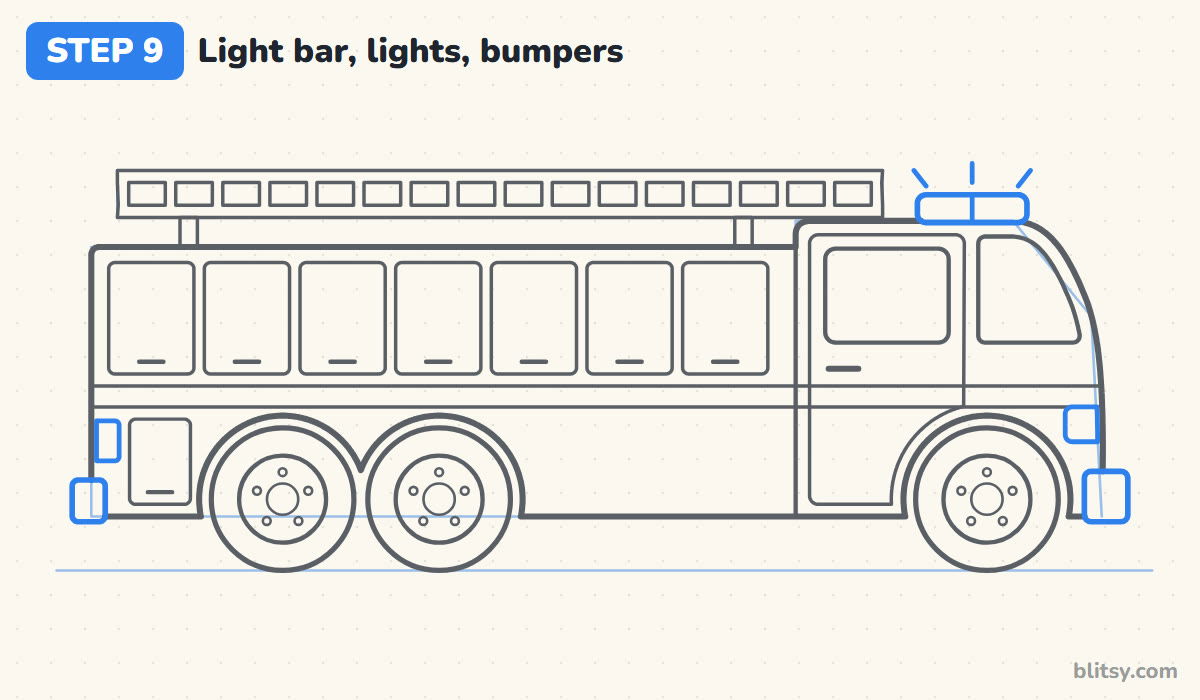
On the front of the cab roof, draw a rounded light bar with a line through its middle. Three short dashes above it show the lights flashing. Put a small square headlight low on the nose and a narrow tail light at the back, then add a chunky bumper at each end.
💡 Tip: Draw the flash dashes leaning outward, like rays from the sun.
Step 10: Draw the rolled hose reel
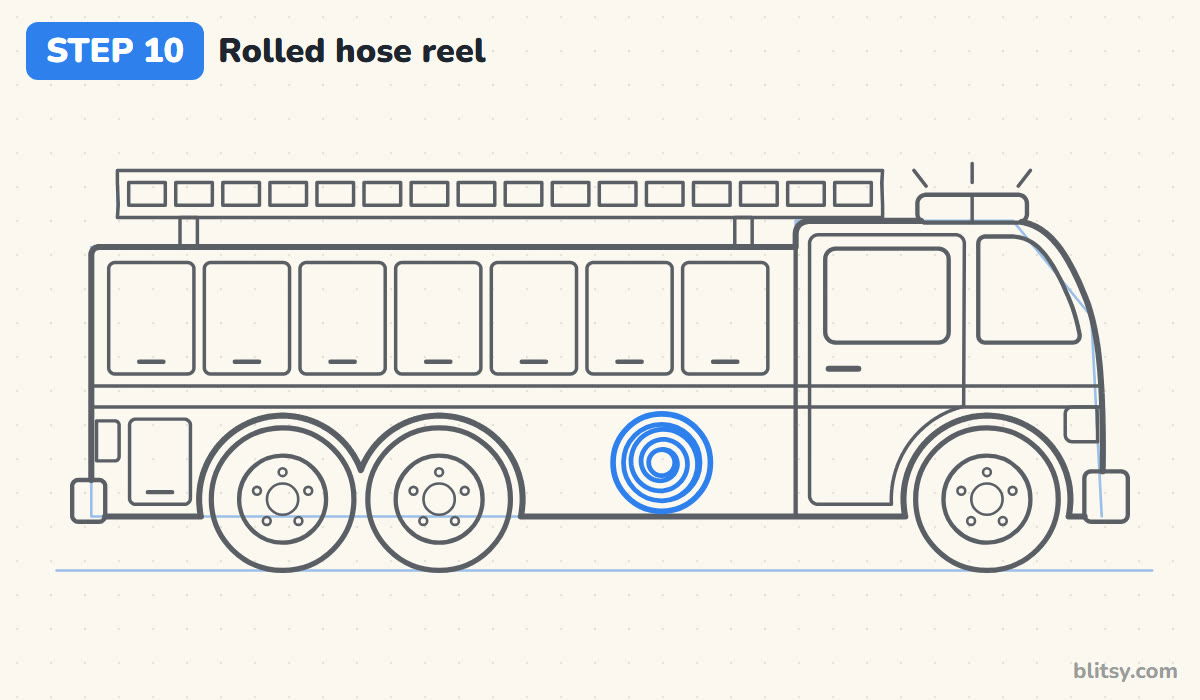
In the open space between the back wheels and the cab, draw a circle for the reel. Inside it, add a slightly smaller circle, then spiral a line inward toward the center, as if the hose were wound up tight. Add a tiny hub in the middle. Younger kids can draw three rings instead.
💡 Tip: Turn your paper slowly as you draw the spiral instead of twisting your wrist.
Step 11: Ink the lines and erase the guides
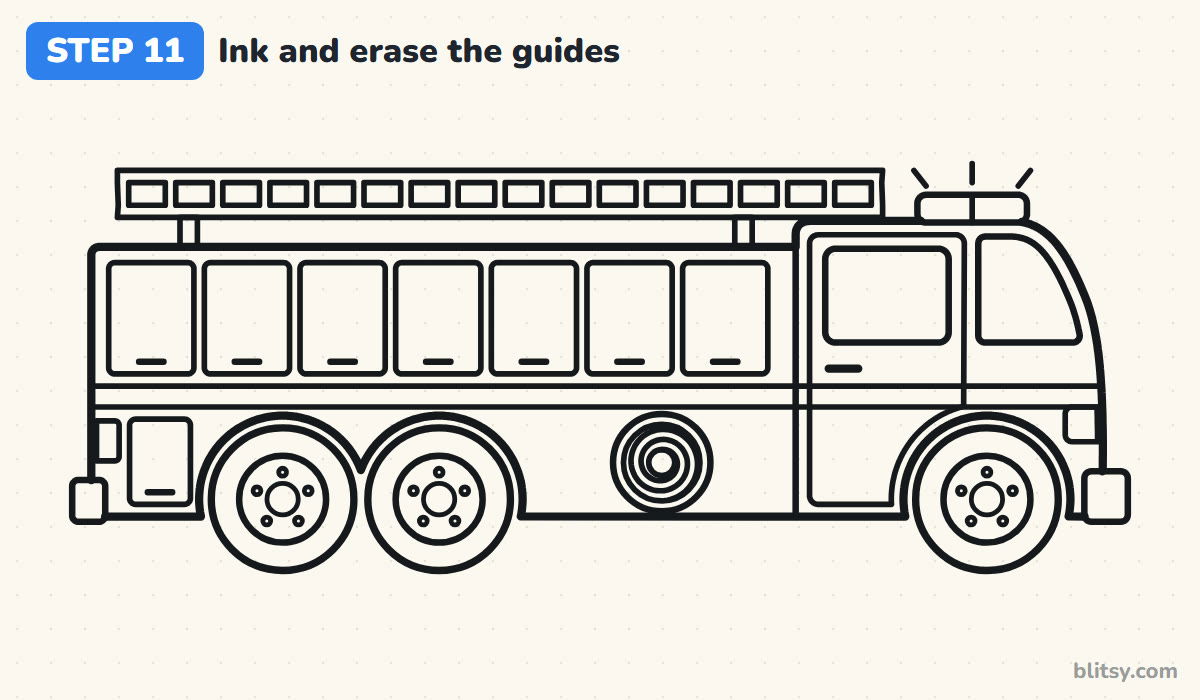
Trace every line you want to keep with your black marker. I start with the long outline and save the small bolts and the spiral for the end. Give the ink a minute to dry, then erase the ground line, the boxes and the original wheel circles.


💡 Tip: Use the ruler with the marker too, but lift it straight up so the ink doesn't smear.
Step 12: Color the fire truck
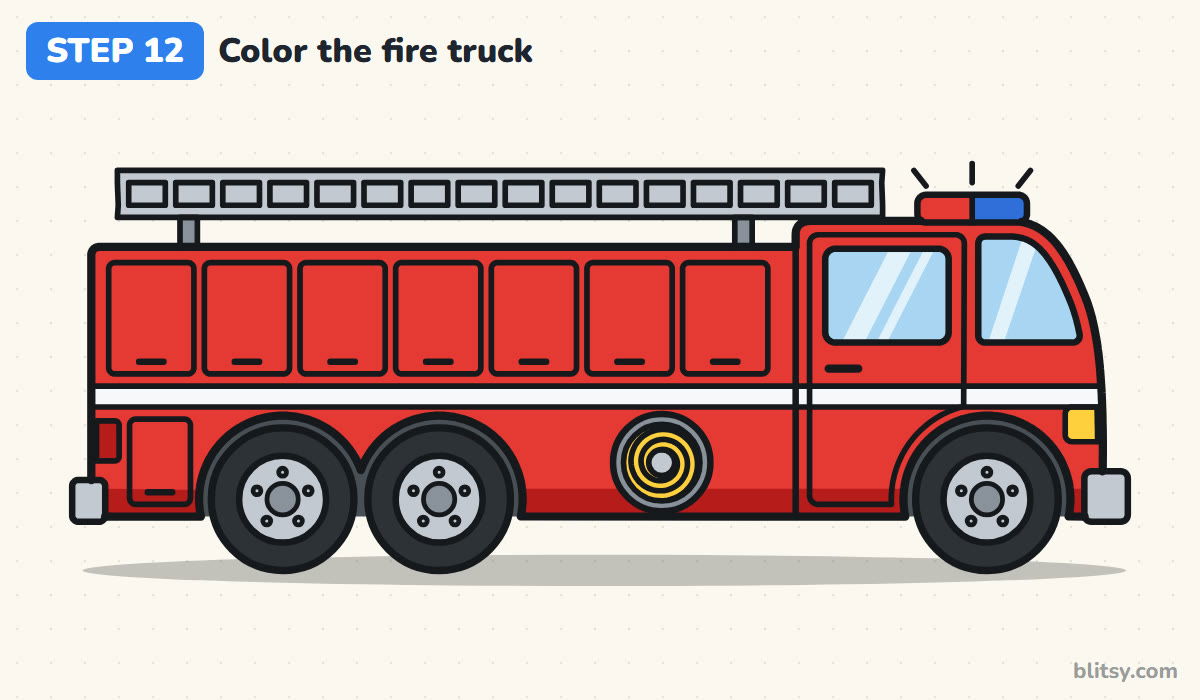
Fill the body and cab with bright red, and press harder along the bottom edge for a darker shadow. Leave the stripe white. Color the windows light blue, the hose and headlight yellow, and the ladder, bumpers and rims light gray. The back half of the light bar is red and the front half blue. Tires go black last.
💡 Tip: Leave a thin white streak on each window so the glass looks shiny.
Where Fire Engine Sketches Usually Slip
- A truck that's too short. It ends up looking like a van. Space the front wheel far from the back pair before you draw anything else.
- Ladder rungs at random distances. The ladder looks broken. Place the end rungs and the middle one first, then split each gap in half.
- Wheels glued to the body. Without a gap the tires look flat and painted on. Keep a small space between each arch and its tire.
- Pressing hard on the boxes. Dark guides leave ghost lines after erasing. Sketch the first two steps as lightly as you can.
- Coloring over the stripe. Red is hard to cover with white. Color around the band first, then fill the rest of the body.
Ways to Give Your Engine Its Own Look
Once the basic engine feels easy, play with it. Raise the ladder at an angle so it reaches toward a burning building, add a firefighter standing on the back step, or let a stream of water curl out of the hose. I also like adding a fire station behind it. If your young artist wants another vehicle with flashing lights, the police car drawing tutorial is a natural next step, and the train drawing tutorial is great practice for long shapes with lots of wheels.
Free Fire Truck Coloring Page and Step Guide PDF
Need something for a quiet hour? The fire truck coloring page has a colored sample and a color key at the top, so kids know which part gets which crayon, and a big bold outline below with room for a station or a street. The step-by-step PDF guide holds all 12 steps with their tips, ready to print on Letter or A4 paper.
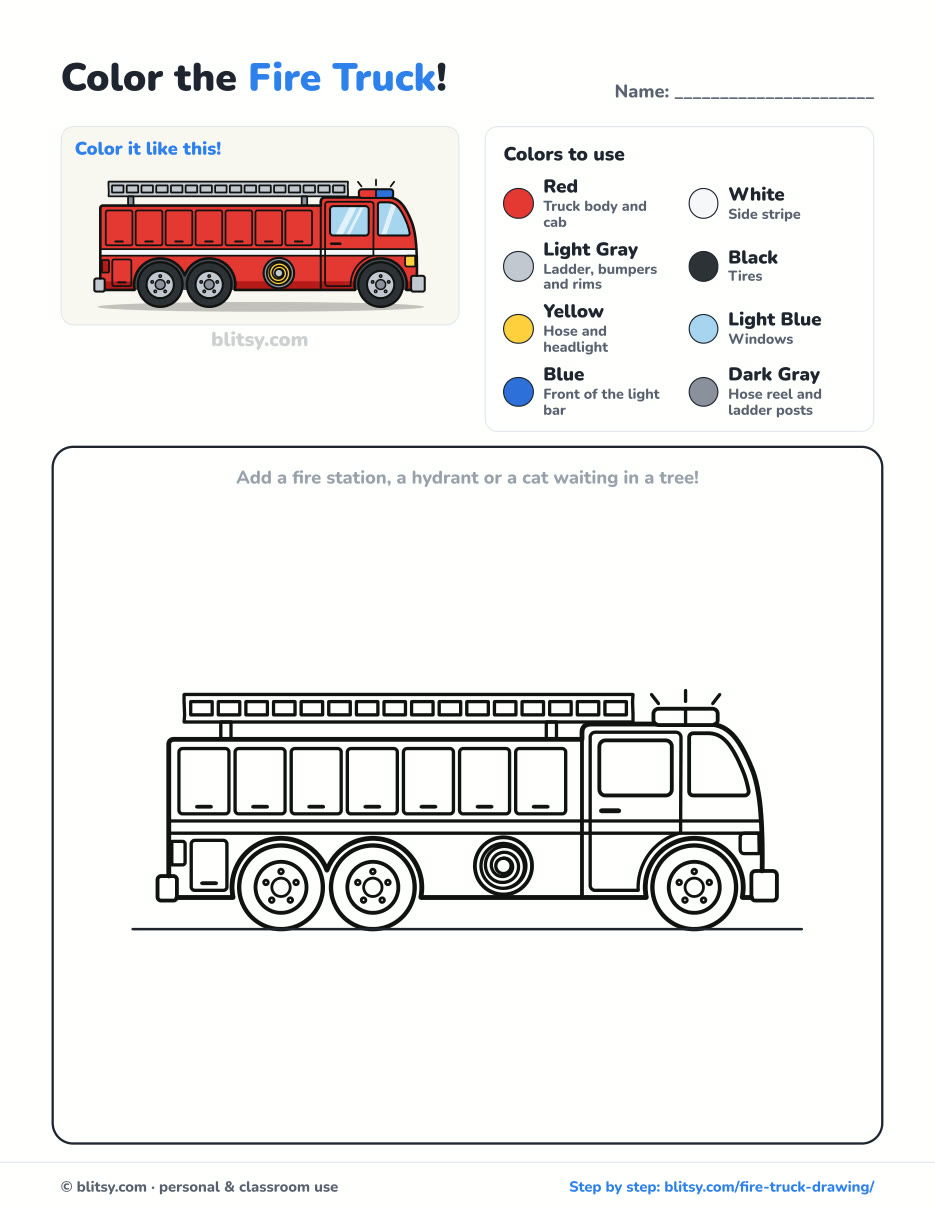
Black outlines with a colored example and the color names at the top. Ready to print and color.
⬇️ Download Coloring PageEvery step picture with its instructions and tips, to keep beside your paper while you draw.
⬇️ Download Drawing Guide📱 On a phone? Tap a download button, then open the file and choose Share → Save to Files or Print. On a computer, the PDF opens or saves straight to your Downloads folder.
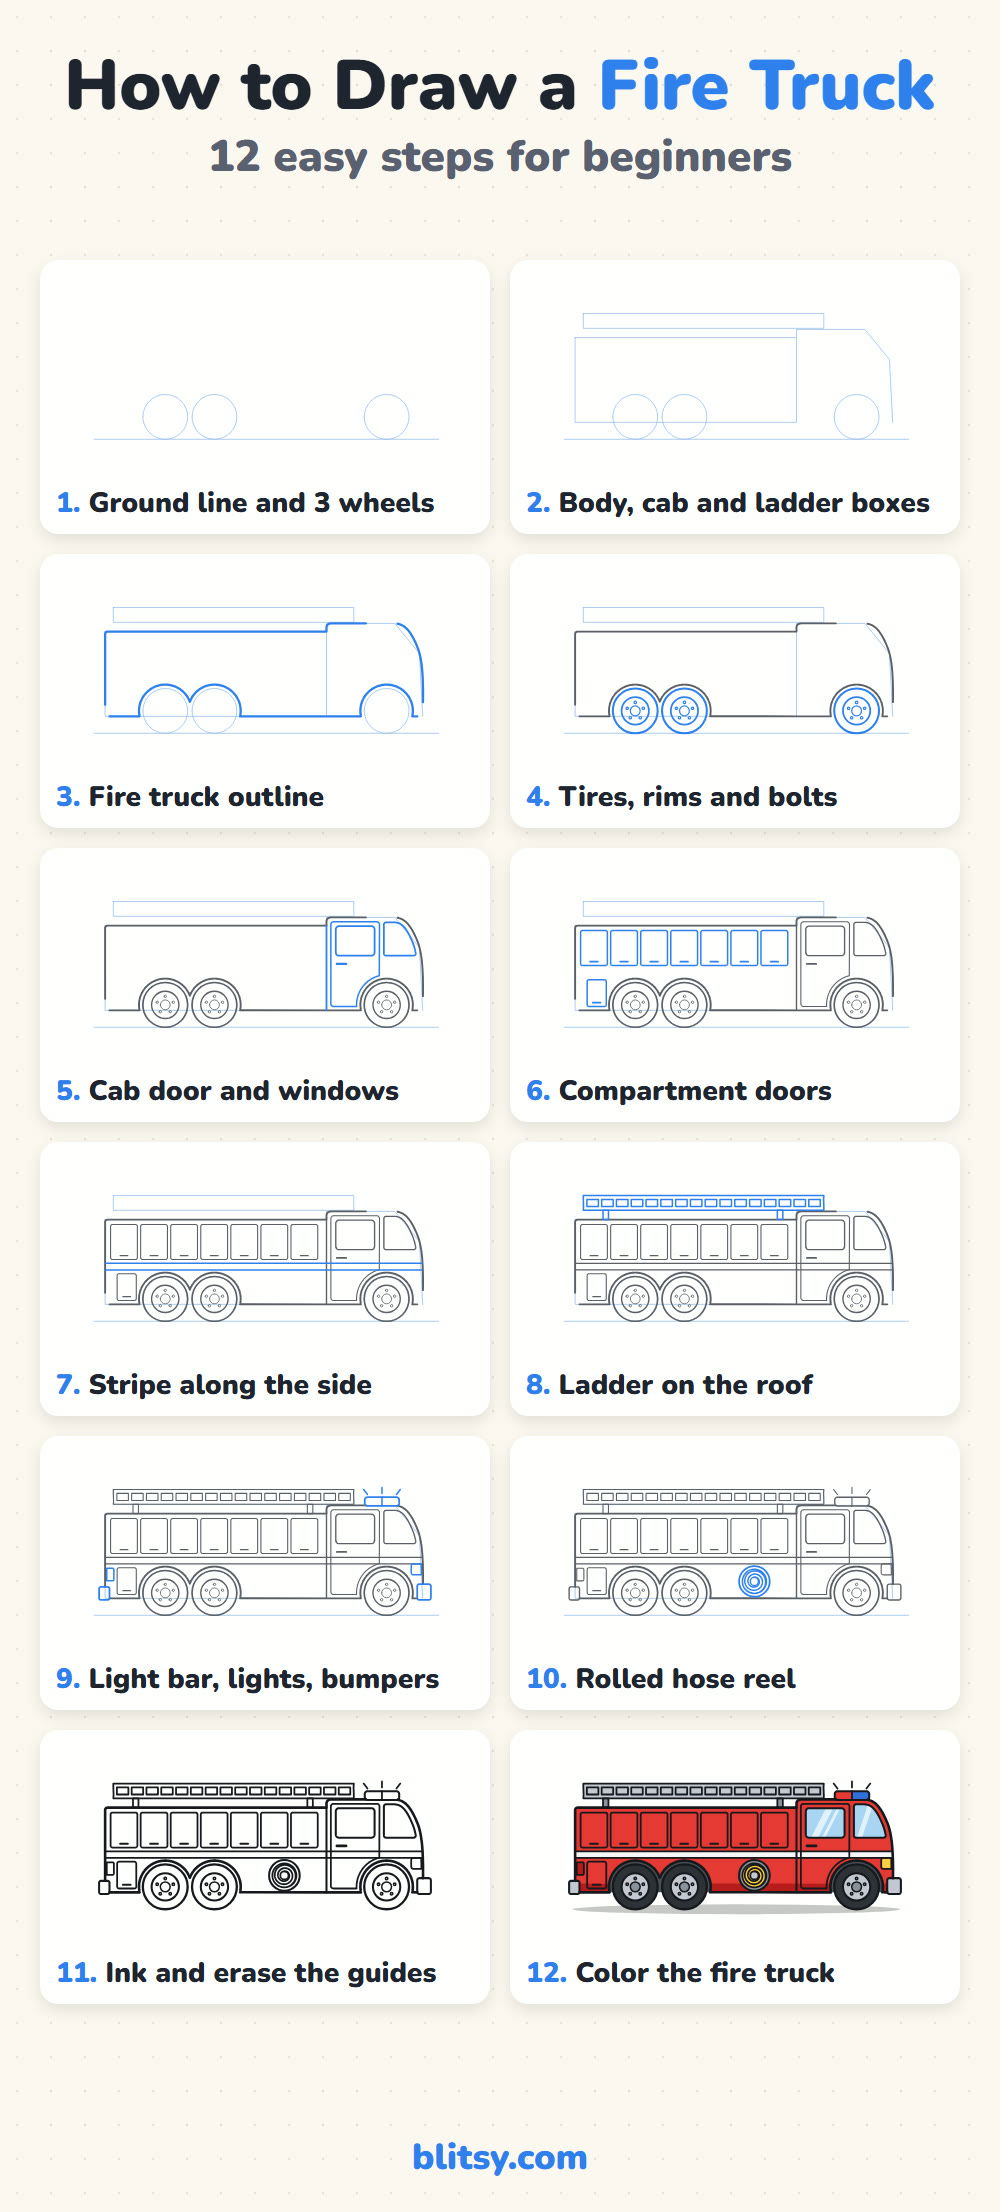
Keep the Fire Engine Steps on Pinterest
Sirens Off, Pencils Up: More Tutorials
These are step-by-step tutorials, one subject each, including a few more vehicles and buildings for a busy town page.
- Race Car Drawing: The race car drawing tutorial builds a red number 7 formula car from two circles.
- Room Drawing: Learn how to draw a room in one-point perspective, starting with a single vanishing point.
- Summer Drawing: A beach with an umbrella and toys in the sand fills this summer drawing step by step lesson.
- Diamond Drawing: Straight lines become a sparkling gem in the diamond drawing tutorial.
- Volcano Drawing: Draw an island volcano in full eruption, palm trees included, with the volcano drawing tutorial.
- School Drawing: The school drawing tutorial draws a brick schoolhouse with a bell tower and a fence.
- Police Car Drawing: Another vehicle with lights waits in the police car drawing tutorial.
- Halloween Drawing: A haunted house with a witch-hat tower is the subject of this Halloween drawing tutorial.
- Solar System Drawing: Learn how to draw the solar system, every planet on its own curved path.
- Realistic Drawing: The realistic shading tutorial teaches light and shadow on one shiny apple.
Fire Truck Drawing Help for Kids and Parents
What is the easiest way to draw a fire truck?
Start with three wheel circles on a line, then draw a long box for the body and a taller box for the cab. A ladder on top and a red color are enough to make anyone say fire truck.
How do you draw a fire truck ladder?
Draw two long parallel lines, then connect them with short rungs at equal spaces. Putting the two end rungs and the middle one in first keeps the spacing even.
How long does it take to draw a fire truck?
Most kids need around 40 minutes including coloring. The doors and the ladder take longest.
What colors do I need for a fire truck drawing?
Red is the main one, plus white for the stripe, gray for the ladder and bumpers, black for the tires and yellow for the hose. A little blue and red finish the light bar.
Hang your finished engine on the fridge, and next time try drawing it racing to a call with the lights blazing. 🚒
Related posts:
 How to Draw a Monster Truck Step by Step (Easy for Kids)
 How to Draw a Phoenix Step by Step (Easy Fire Bird)
 How to Draw Todoroki Step by Step (Easy Fire and Ice Guide)
 How to Draw a Tooth Step by Step (Cute and Easy for Kids)
 How to Draw a Mother and Daughter Step by Step (Easy for Kids)
 How to Draw Wonder Woman Step by Step (Chibi for Kids)
 How to Draw Iron Man Step by Step (Easy Chibi for Kids)
 How to Draw a Police Car Step by Step (Easy for Kids)
 How to Draw a Mermaid Step by Step (Easy Cartoon for Kids)
 How to Draw a Boat Step by Step (Easy Sailboat for Kids)
 How to Draw a Care Bear Step by Step (Cute Fan Art for Kids)
 How to Draw Hello Kitty Step by Step (Easy for Kids)

