
Rockets are a favorite with kids who love space, and the good news is that a cartoon rocket is really just a long oval with a point on top. In this lesson you'll learn how to draw a rocket step by step, from the first light guide oval to a fiery launch with smoke rolling out underneath. I've broken it into small jobs, so you only ever think about one part at a time. Every shape here is something you already know: ovals, circles, a few curved triangles and some bumpy clouds.

Each new step's lines show up in blue, so you always know what to add. Gray lines are the parts you drew before. The pale blue helper shapes in steps 1 and 2 should be drawn very softly, because you'll erase them once the rocket is inked.
Quick overview
⏱️ Time: roughly 25 to 30 minutes
🎯 Level: easy, fine for kids from about 6
✏️ Steps: 12
🚀 You'll draw: a rocket blasting off past a little planet
Launch Kit for Your Rocket Sketch
- A regular pencil (HB is fine)
- A soft eraser that doesn't smudge
- A black marker or fineliner for the final lines
- Colored pencils or markers: the warm flame colors plus blue, purple and two grays
- A sheet of plain paper turned upright
- A coin or bottle cap for the round window (optional)
If you're missing a color, swap it: a green planet or a blue stripe looks just as good.
How to Draw a Rocket Step by Step
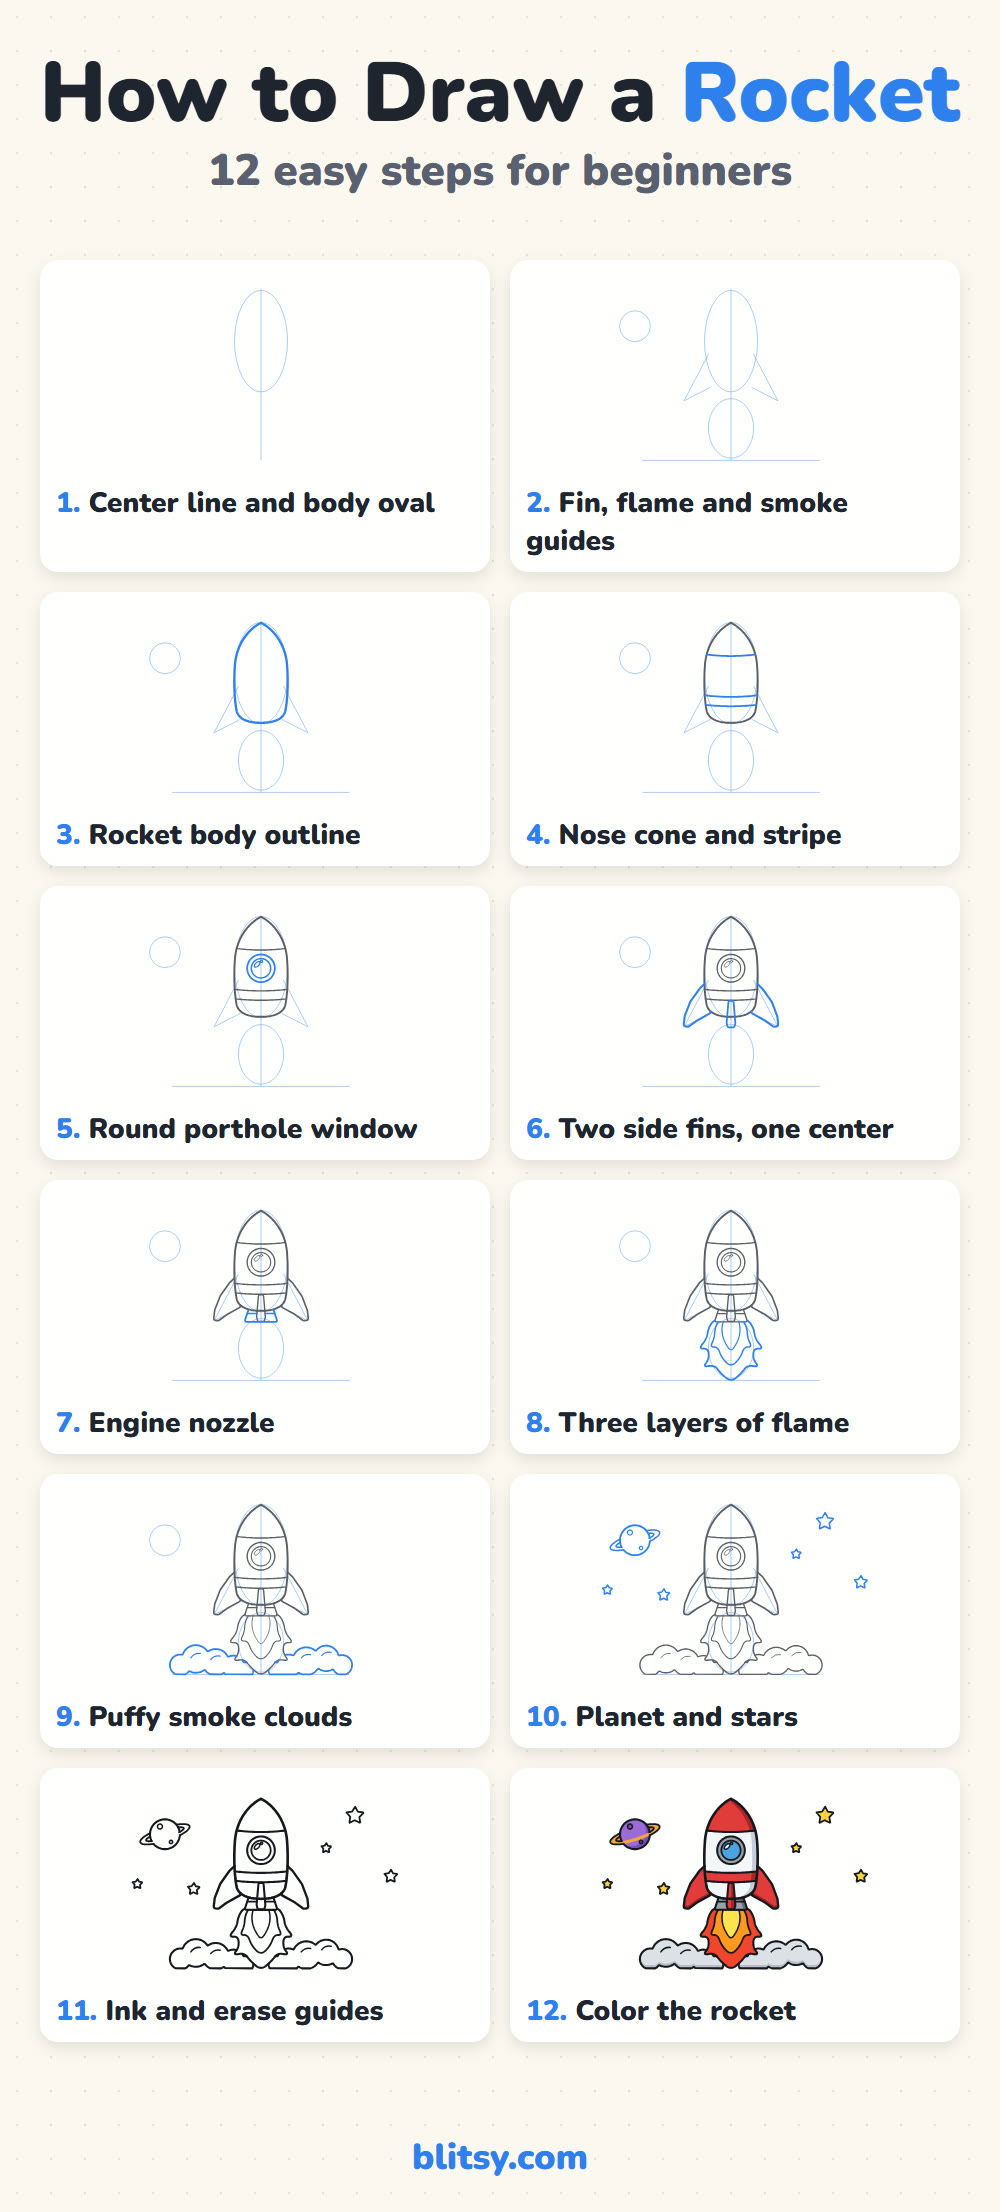
Step 1: Draw a center line and a tall body oval
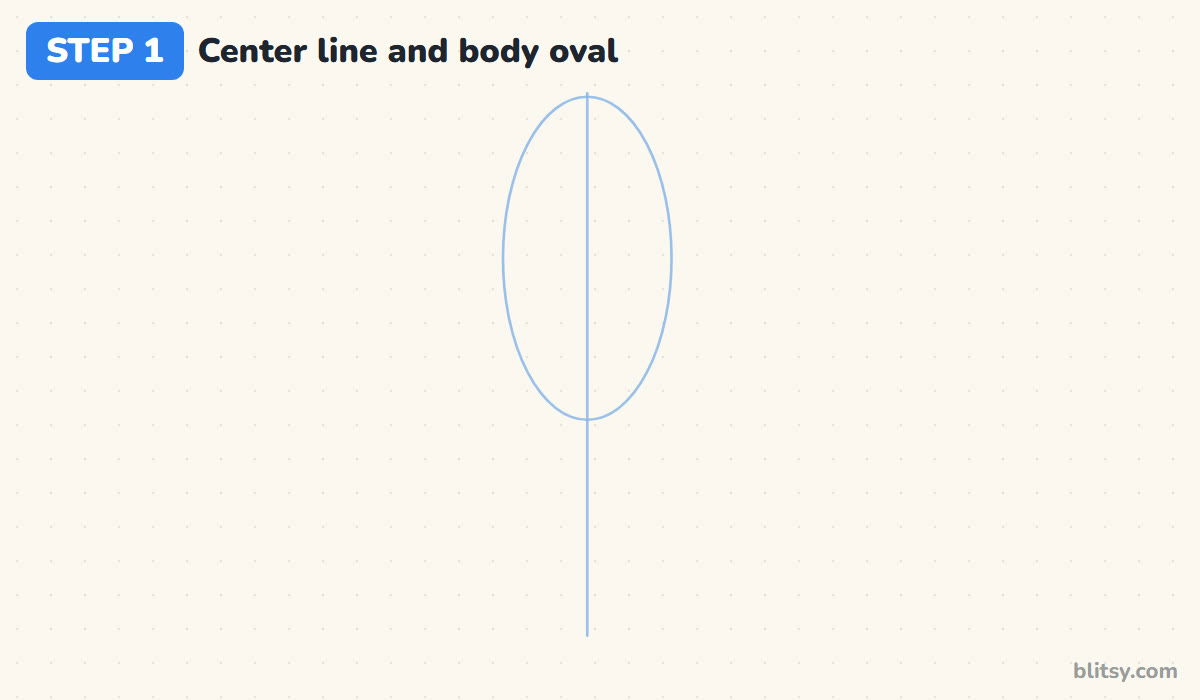
Start with a straight vertical line down the middle of your page, running almost from top to bottom. Then draw a tall, narrow oval over the top half of that line. This oval sets the size of the whole rocket, so keep it about three times taller than it is wide.
💡 Tip: Press so lightly that you can barely see the line.
Step 2: Add guides for fins, flame and smoke
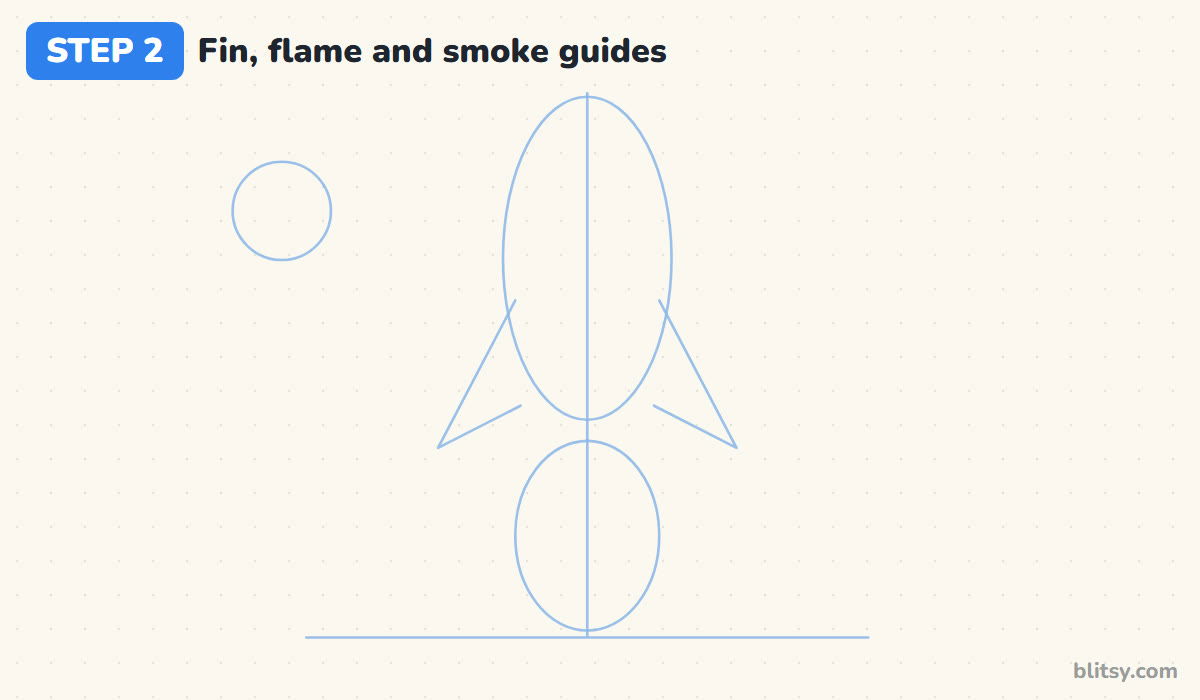
On each side of the oval's lower half, draw a slanted triangle that points down and outward. Those are your fin guides. Under the oval, draw a smaller upright oval for the flame, then a flat line along the bottom of the page where the smoke will sit. I also put a small circle in the top left corner now, so I remember to leave space for a planet.
💡 Tip: Make both fin triangles the same size by checking them against the center line.
Step 3: Trace the rocket body
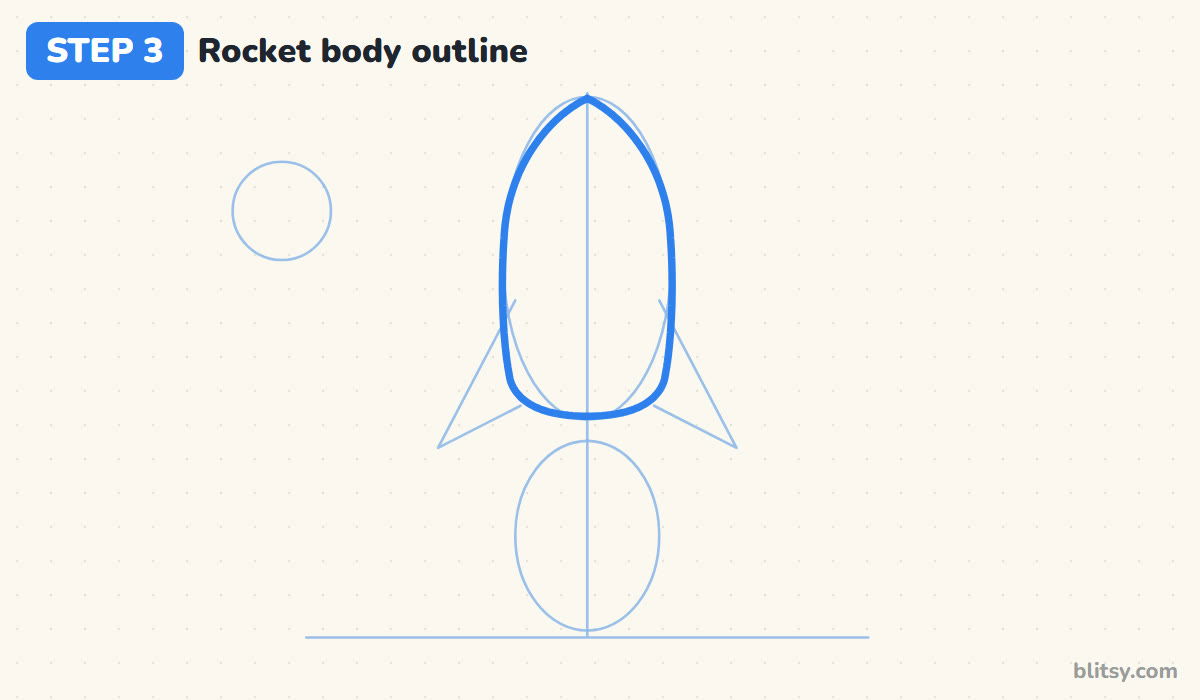
Now draw the real body over the big oval. Begin at the top of the center line with a sharp point, then curve outward like the tip of a bullet. Let the sides run almost straight down, and round off the bottom into a gentle curve. The body should end up a little slimmer than the guide at the top and fuller near the bottom, which makes it look strong and steady.




💡 Tip: Draw one side, stop, then mirror it on the other side.
Step 4: Mark the nose cone and a stripe band
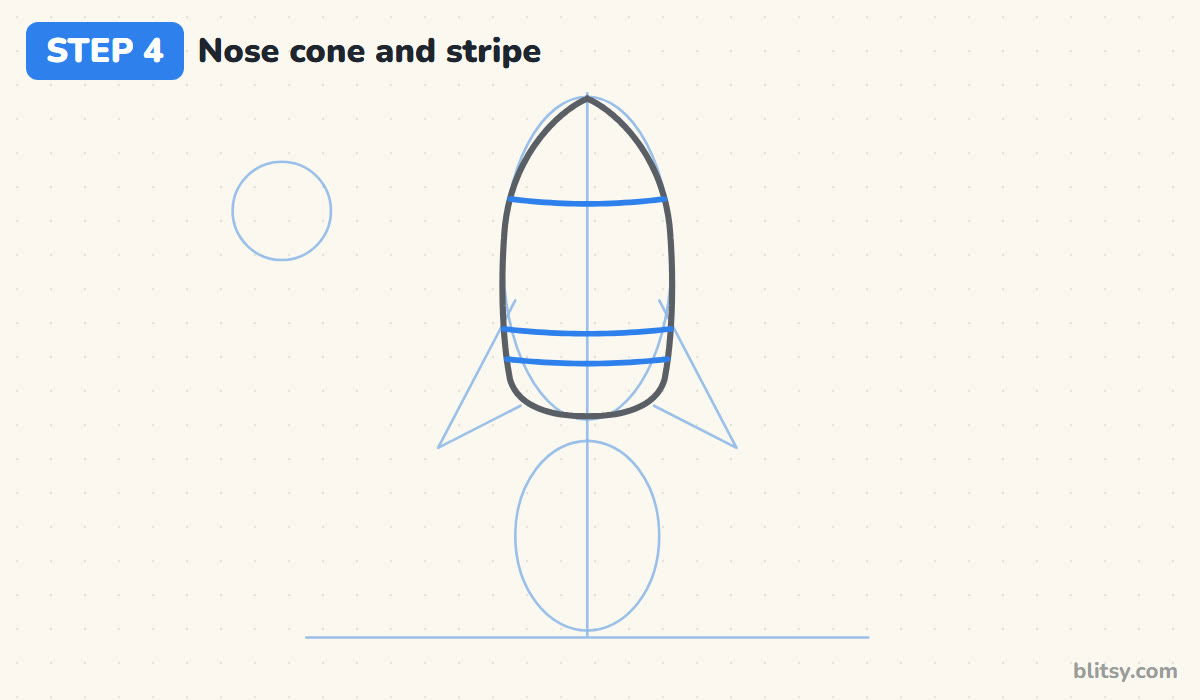
About a quarter of the way down, draw a line across the body that dips slightly in the middle. Everything above it becomes the red nose cone. Lower down, below where the window will go, add two more dipping lines close together for a stripe. That small dip makes the body look round like a tube.
💡 Tip: Keep all three lines curving the same way so the body looks round.
Step 5: Add the round porthole window
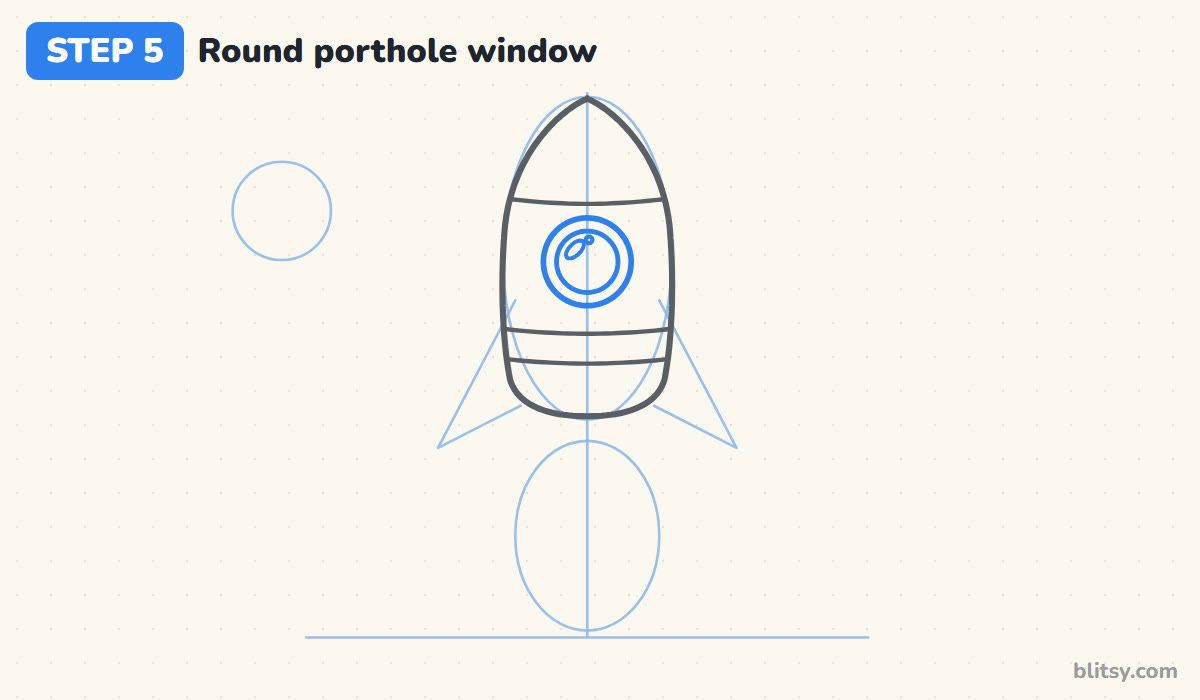
Halfway between the nose line and the stripe, draw a circle on the center line. Inside it, draw a second, smaller circle to make a thick rim. Finish with a tiny slanted oval and a dot near the top left of the glass. That shine is what makes it read as glass.
💡 Tip: Trace around a coin if your circles keep coming out lumpy.
Step 6: Draw two side fins and one center fin
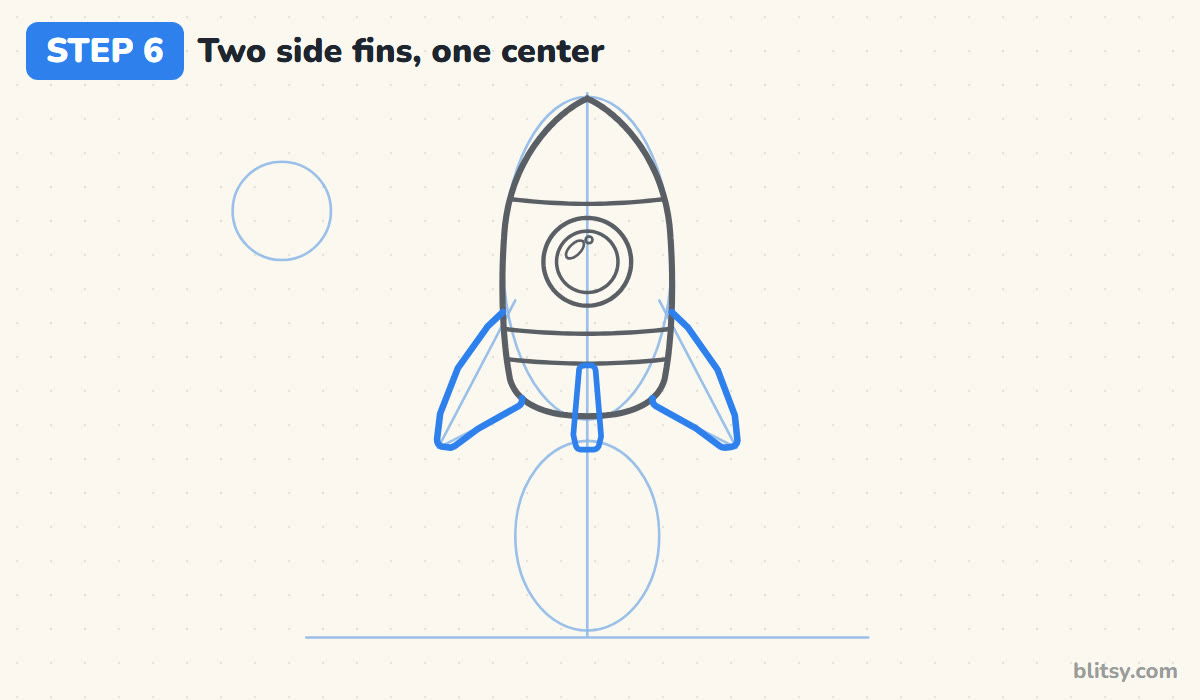
Use the triangle guides to draw a curved fin on each side. Each one starts on the body near the stripe, sweeps out and down to a rounded tip, then comes back in at the bottom of the body. Then add a thin, rounded fin down the middle. It looks narrow because it points straight at you.
💡 Tip: Give the fin tips soft corners; sharp points look like arrows.
Step 7: Add the engine nozzle
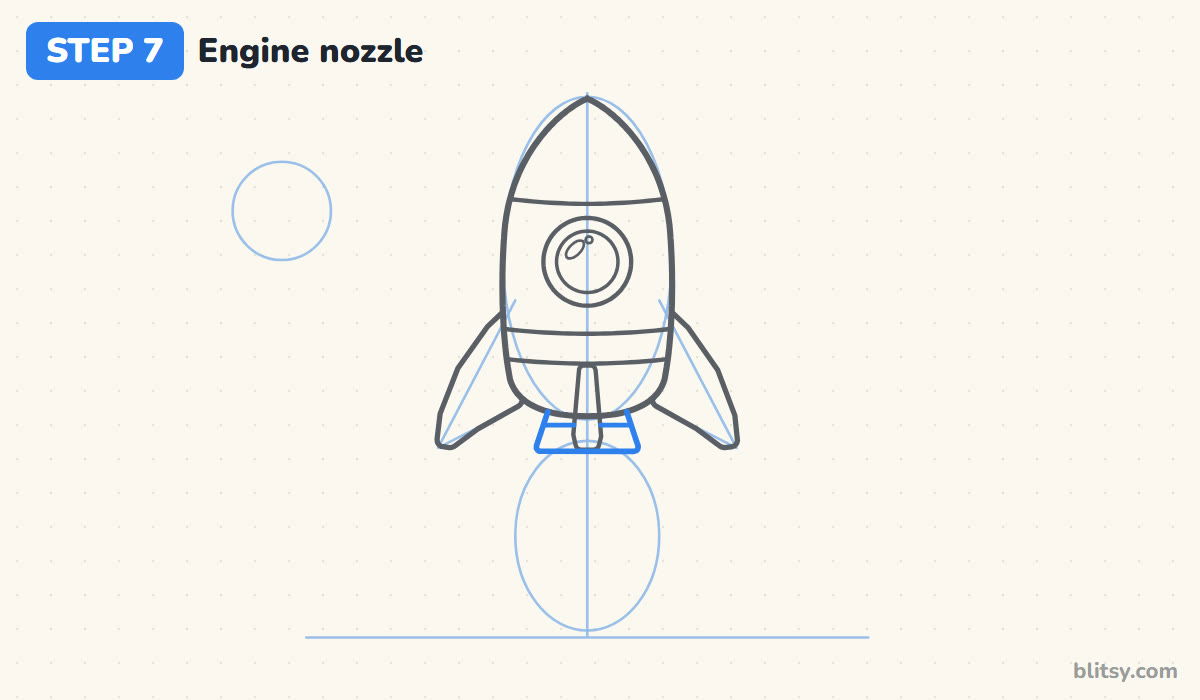
Under the rocket, draw a short shape that flares out toward the bottom, a bit like an upside-down bucket. Keep it narrower than the body. Add one line across its middle for a metal ridge. The middle fin covers part of the nozzle, so stop your lines where they meet the fin.



💡 Tip: Stop your pencil at the fin edge so the fin stays in front.
Step 8: Draw the flame in three layers
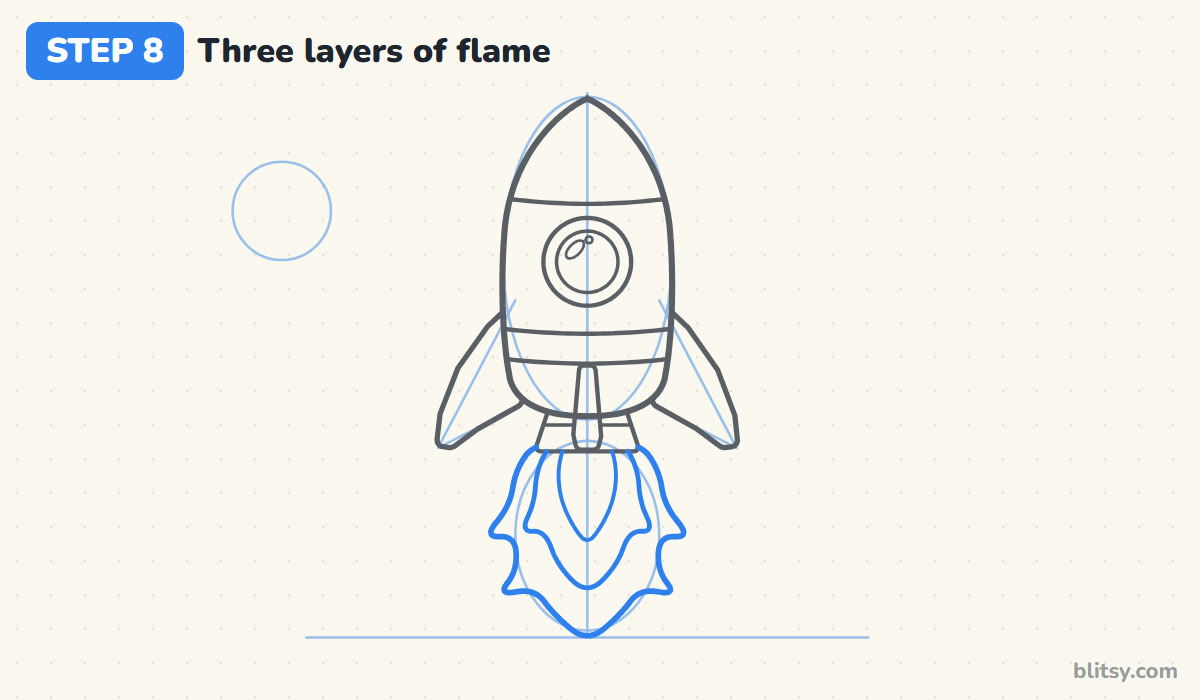
From the bottom of the nozzle, draw a big flame that widens, then narrows to a point near the smoke line. Give each side two wavy flicker tongues so it looks alive. Inside it, draw a smaller flame with one tongue per side, and inside that, a simple teardrop. I always start with the outside flame, since smaller layers are easier to fit into a space you can see.
💡 Tip: Leave a clear gap between the three flame layers for coloring.
Step 9: Build the puffy smoke clouds
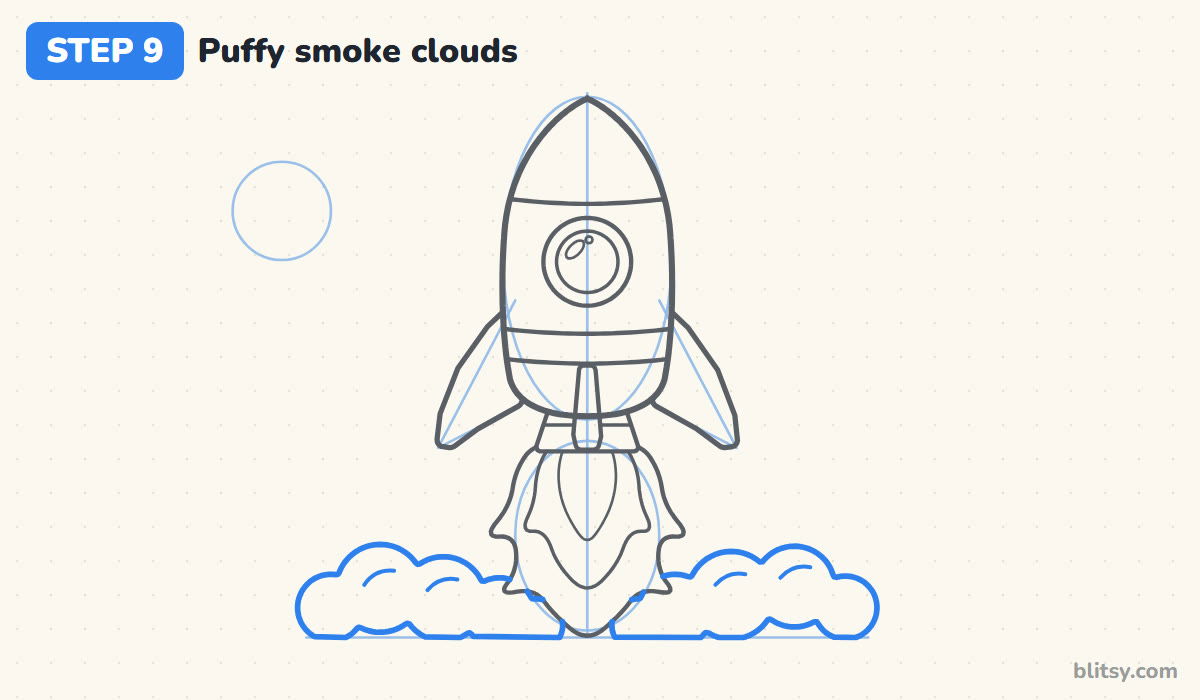
On both sides of the flame, draw a row of bumpy cloud shapes resting on the flat smoke guide. Mix big and small bumps, and let them tuck behind the flame. Honestly, uneven clouds look more natural than neat ones. Add a few short curved strokes inside the clouds to make them look puffy.
💡 Tip: Draw the bumps as half circles that overlap a little.
Step 10: Add a ringed planet and some stars

Turn the small circle in the corner into a planet. Draw a flat, tilted oval ring around it, but let the back of the ring disappear behind the planet. Add two little craters. Then scatter five stars around the rocket in different sizes. Younger kids can draw simple dots or plus signs instead of five-pointed stars.
💡 Tip: Keep the stars away from the rocket so it stays the star of the page.
Step 11: Ink your lines and erase the guides
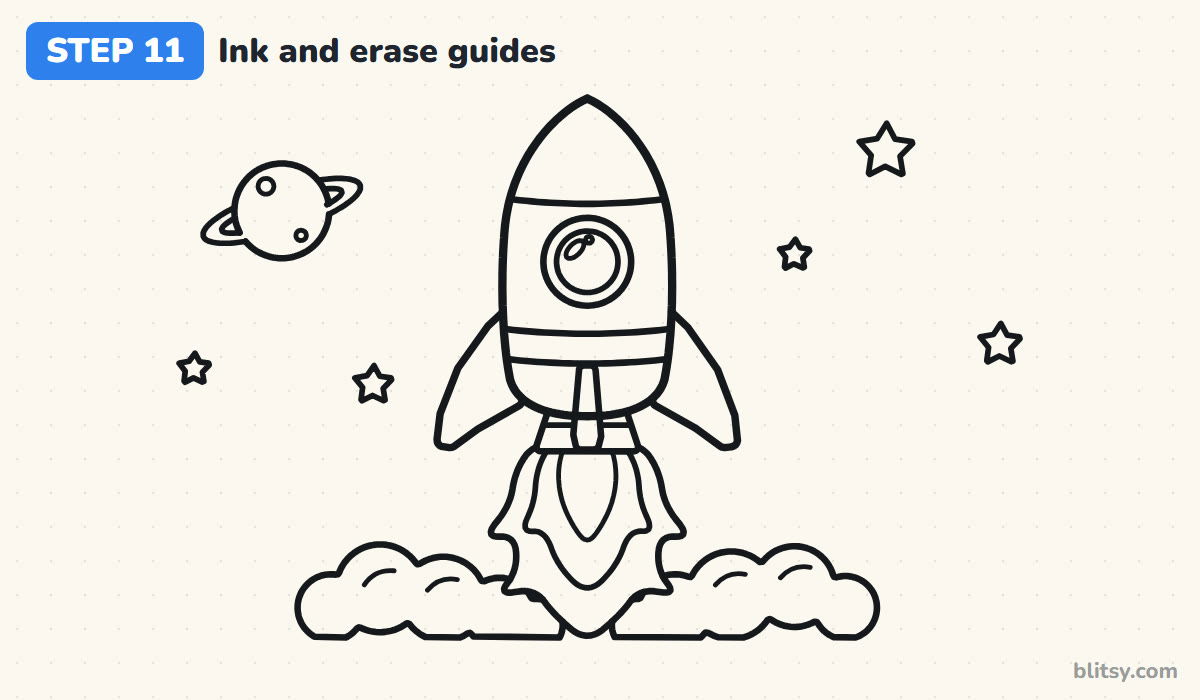
Go over every keeper line with your black marker: the body, nose line, stripe, window, fins, nozzle, all three flame layers, the clouds, the planet and the stars. Once the ink is dry, erase the ovals, the triangles, the center line and the long smoke guide.



💡 Tip: Ink the small details with a lighter hand than the outline.
Step 12: Color the rocket and the sky

Leave the body white, but shade a narrow strip down its right side with light gray. Color the nose cone red, along with the stripe and the fins, adding darker red on the right edges. The window gets blue glass with a gray rim, and the nozzle is gray. For the flame, go red outside, orange in the middle and bright yellow in the core. Finish with gray smoke, a purple planet with an orange ring, and yellow stars.
💡 Tip: Color the yellow core first so the red never smears into it.
Rocket Drawing Troubles and How to Fix Them
- A lopsided body. One side bulges and the rocket looks like it will tip over. Draw the center line first and keep checking that both sides sit the same distance from it.
- A flat, blunt nose. A rounded top makes the rocket look like a bottle. Bring both sides together into a clear point on the center line.
- Fins that are too small. Tiny fins make the body look heavy. Let the side fins reach well past the body and down to the bottom of the nozzle.
- A flame that's one solid blob. Without layers, the fire looks flat. Draw three nested flames and color them from yellow in the middle to red outside.
- Smoke drawn in front of the flame. Covering the fire hides the action. Keep the flame on top, with the clouds tucked behind it.
Ways to Customize Your Space Rocket
Once this version feels comfortable, change the mission. Draw two or three windows in a row for a bigger spaceship, or put a smiling astronaut face in the porthole. You could also draw it tilted across the page, zooming past the planet. If you'd like a pilot for your rocket, try the astronaut drawing tutorial, and for the whole neighborhood of planets, the solar system drawing tutorial makes a great next project.
Rocket Coloring Page and Printable Drawing Steps
For a screen-free afternoon, print the rocket coloring page. It shows a small colored example and a color key at the top, plus a big bold outline underneath for crayons or markers. The step-by-step PDF guide holds all 12 steps with their tips. Both fit on Letter or A4 paper.
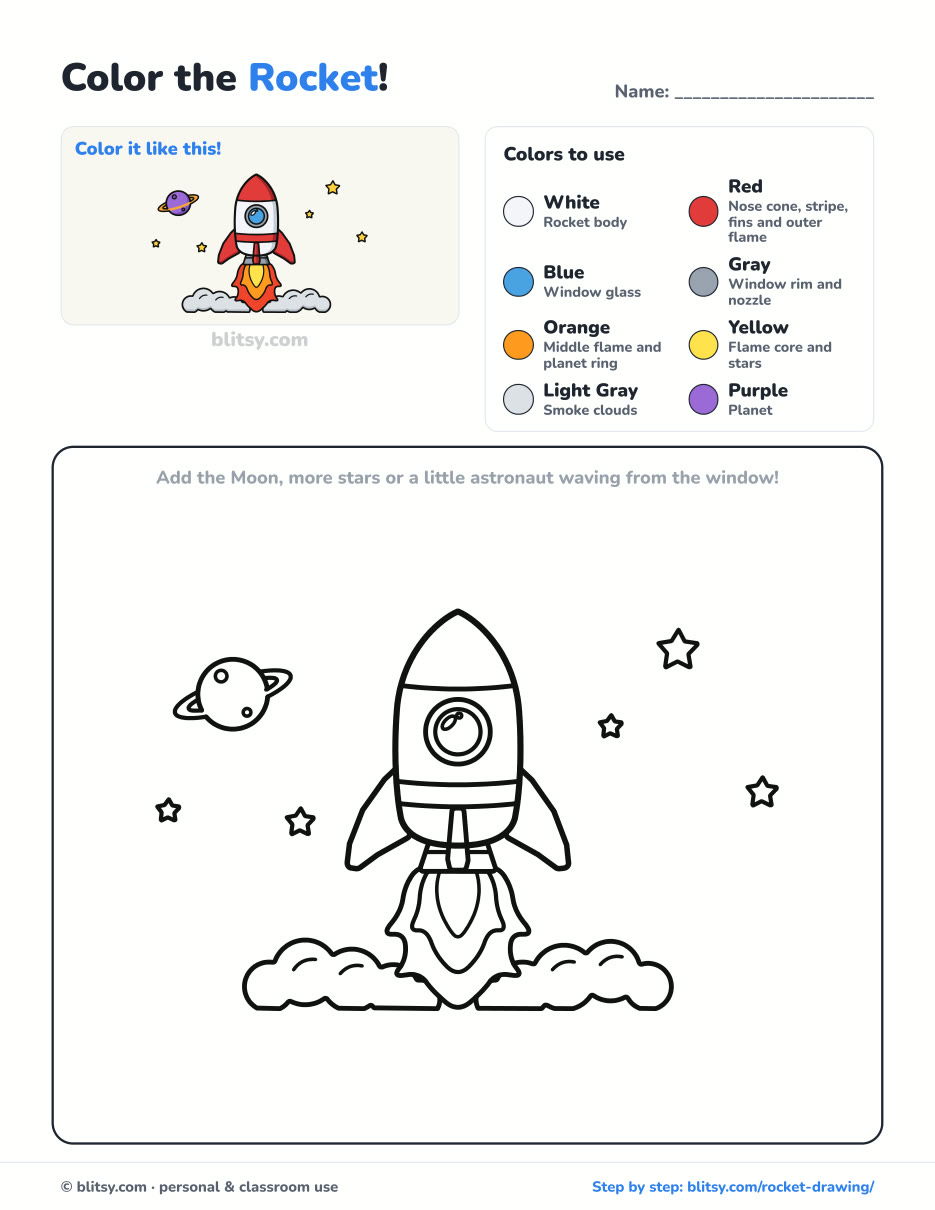
Black outlines with a colored example and the color names at the top. Ready to print and color.
⬇️ Download Coloring PageEvery step picture with its instructions and tips, to keep beside your paper while you draw.
⬇️ Download Drawing Guide📱 On a phone? Tap a download button, then open the file and choose Share → Save to Files or Print. On a computer, the PDF opens or saves straight to your Downloads folder.
Pin These Rocket Steps for Next Time
Rocket Launched? Vehicles and Shapes to Draw Next
Below are single-subject step-by-step tutorials. Several are vehicles that use the same simple shapes as this rocket.
- UFO Drawing: The UFO drawing tutorial draws a saucer with its beam on and an alien on board.
- Baseball Bat Drawing: A wooden bat, a glove and a ball make a small still life in the baseball bat drawing tutorial.
- Train Drawing: Learn how to draw a steam train with a red boiler, spoked wheels and puffs of steam.
- Castle Drawing: Three towers and a drawbridge over the moat take 12 steps in the fairy-tale castle drawing tutorial.
- Diamond Drawing: The diamond drawing step by step lesson builds a faceted gem from straight lines.
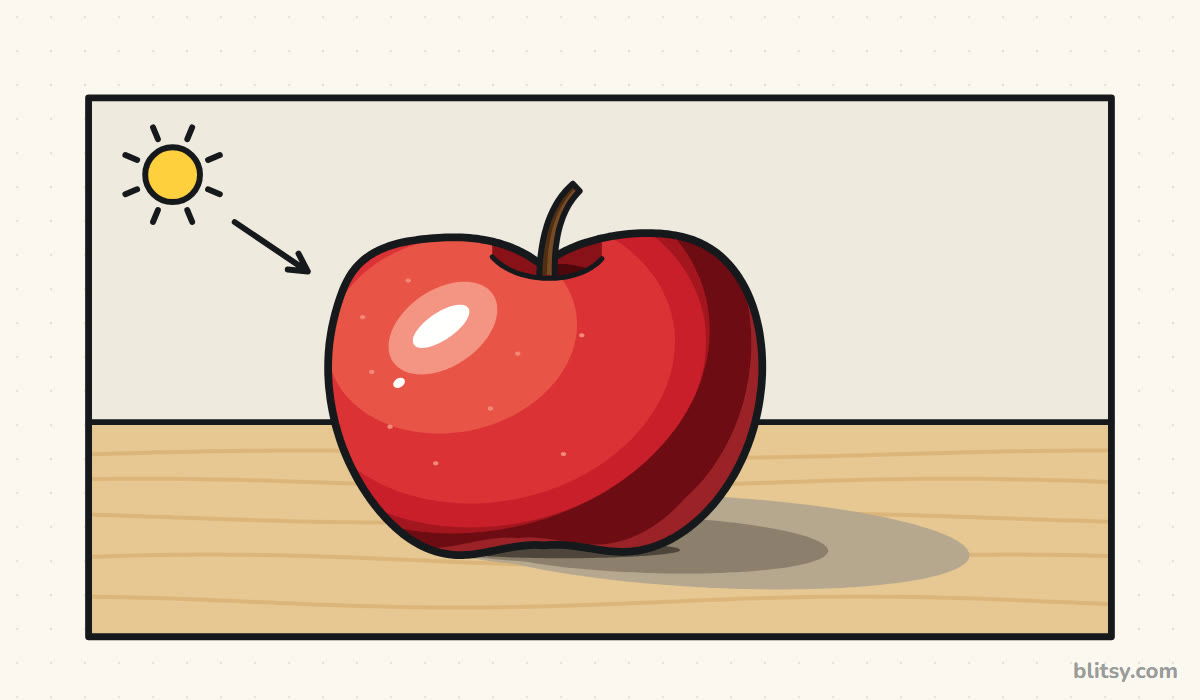
- Realistic Drawing: Shade one shiny apple under a lamp with the realistic drawing tutorial.
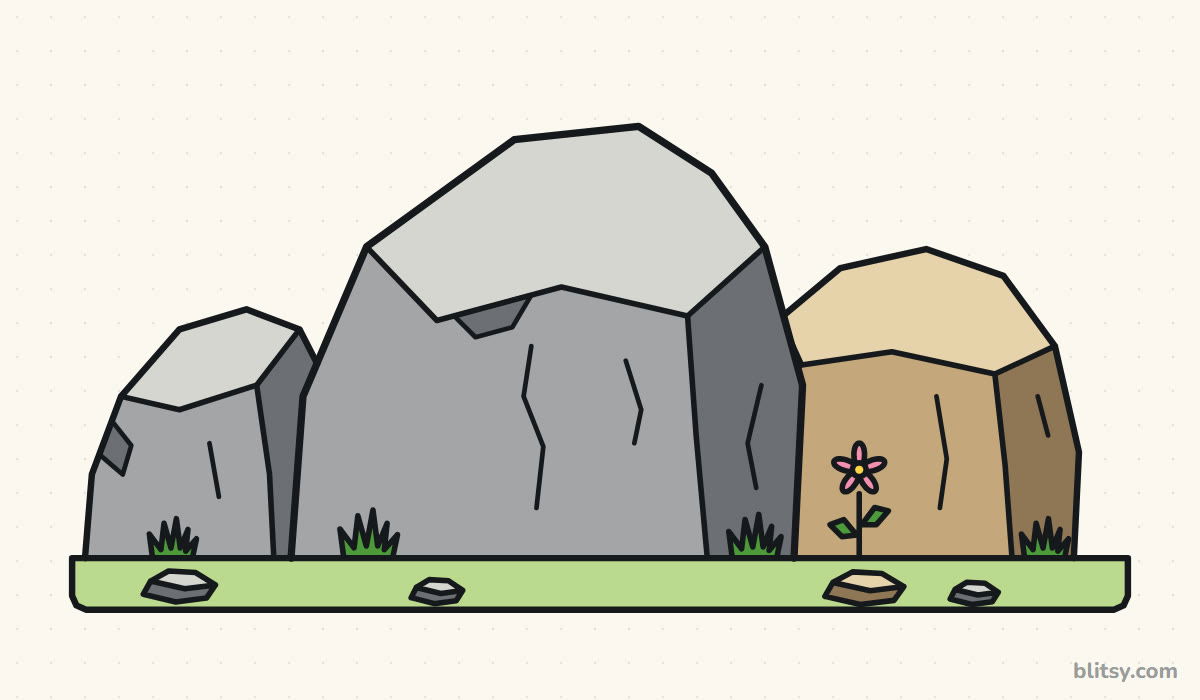
- Rock Drawing: A gray boulder and two neighbors take shape in the rocks drawing tutorial.
- Tank Drawing: Draw a cartoon tank with a round turret and a long track loop using the tank drawing tutorial.
- Monster Truck Drawing: The monster truck drawing tutorial rolls a flame-painted truck over a dirt mound.
- Bed Drawing: Learn how to draw a 3D bed, made up with two pillows and a star duvet.
Rocket Drawing Questions Parents and Kids Ask
What is the easiest way to draw a rocket?
Draw a tall oval with a pointed top, add a circle for the window and two triangle fins at the bottom. A zigzag flame underneath is enough to show it's taking off.
How do you draw a rocket for kids?
Stick to big, simple shapes and skip the small extras. Children can leave out the nozzle ridge and the cloud curls, and draw the flame as one teardrop instead of three.
How long does it take to draw a rocket?
Most beginners need about 25 to 30 minutes, including coloring. The flame and smoke take the most patience.
What colors should a rocket be?
The classic cartoon look is a white body with red nose and fins, a blue window and a red, orange and yellow flame. There's no rule, though, so pick any colors you enjoy.
Countdown complete: tape your rocket to the wall, and next time try drawing it flying sideways past the Moon. 🚀
Related posts:
 How to Draw a Car Step by Step (Easy Drawing for Beginners)
 How to Draw Rocks Step by Step (Easy Boulder Drawing)
 How to Draw Flames Step by Step (Easy Campfire Drawing)
 How to Draw a Scarecrow Step by Step (Easy Fall Drawing)
 Oil Pastel Drawing Step by Step (Easy Sunset for Beginners)
 Summer Drawing Step by Step (Easy Beach Scene for Beginners)
 Halloween Drawing Step by Step (Cute Haunted House for Kids)
 Realistic Drawing Step by Step (Shade a Shiny Apple)
 Love Drawing Step by Step: Two Hugging Bears (Easy)
 How to Draw a Whale Step by Step (Easy for Beginners)
 How to Draw Lungs Step by Step (Easy Science Diagram)
 How to Draw a Pineapple Step by Step (Easy Crown and Slice)

