
Goats have more personality than almost any other farm animal: the beard, the swept-back horns, that odd sideways pupil. None of it is hard once the body is in place. This lesson shows you how to draw a goat step by step, from a long oval on a ground line to a cheerful spotted goat chewing a bit of grass. When I teach it, kids usually laugh at the grass snack first.
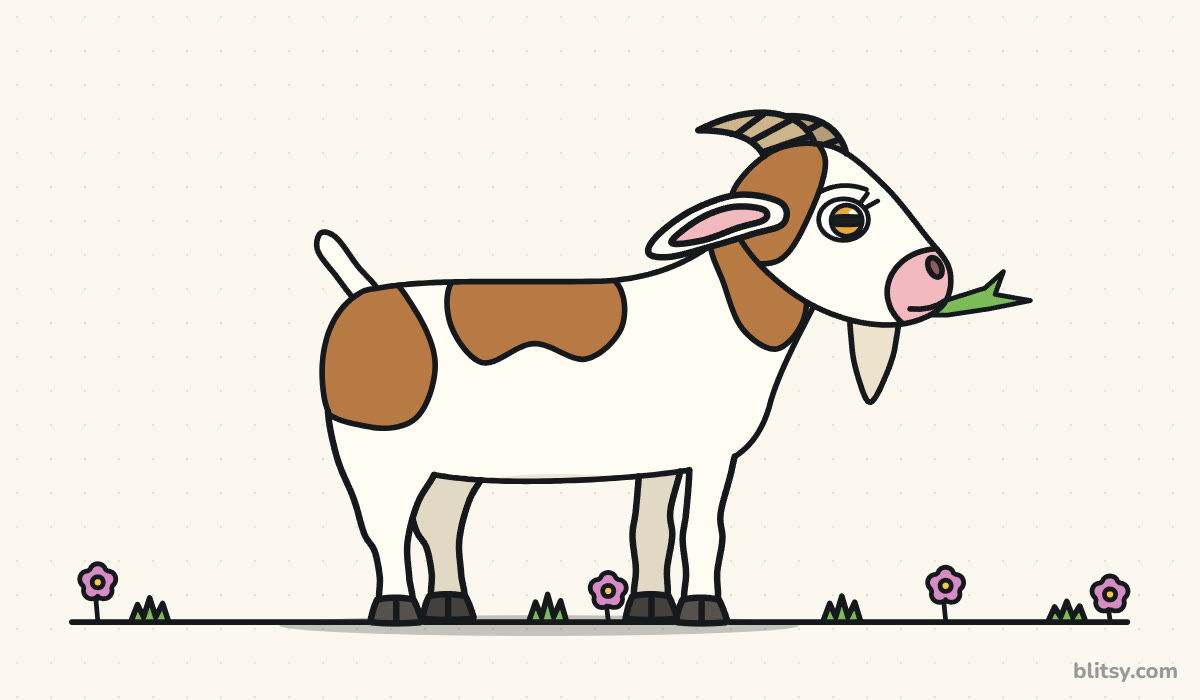
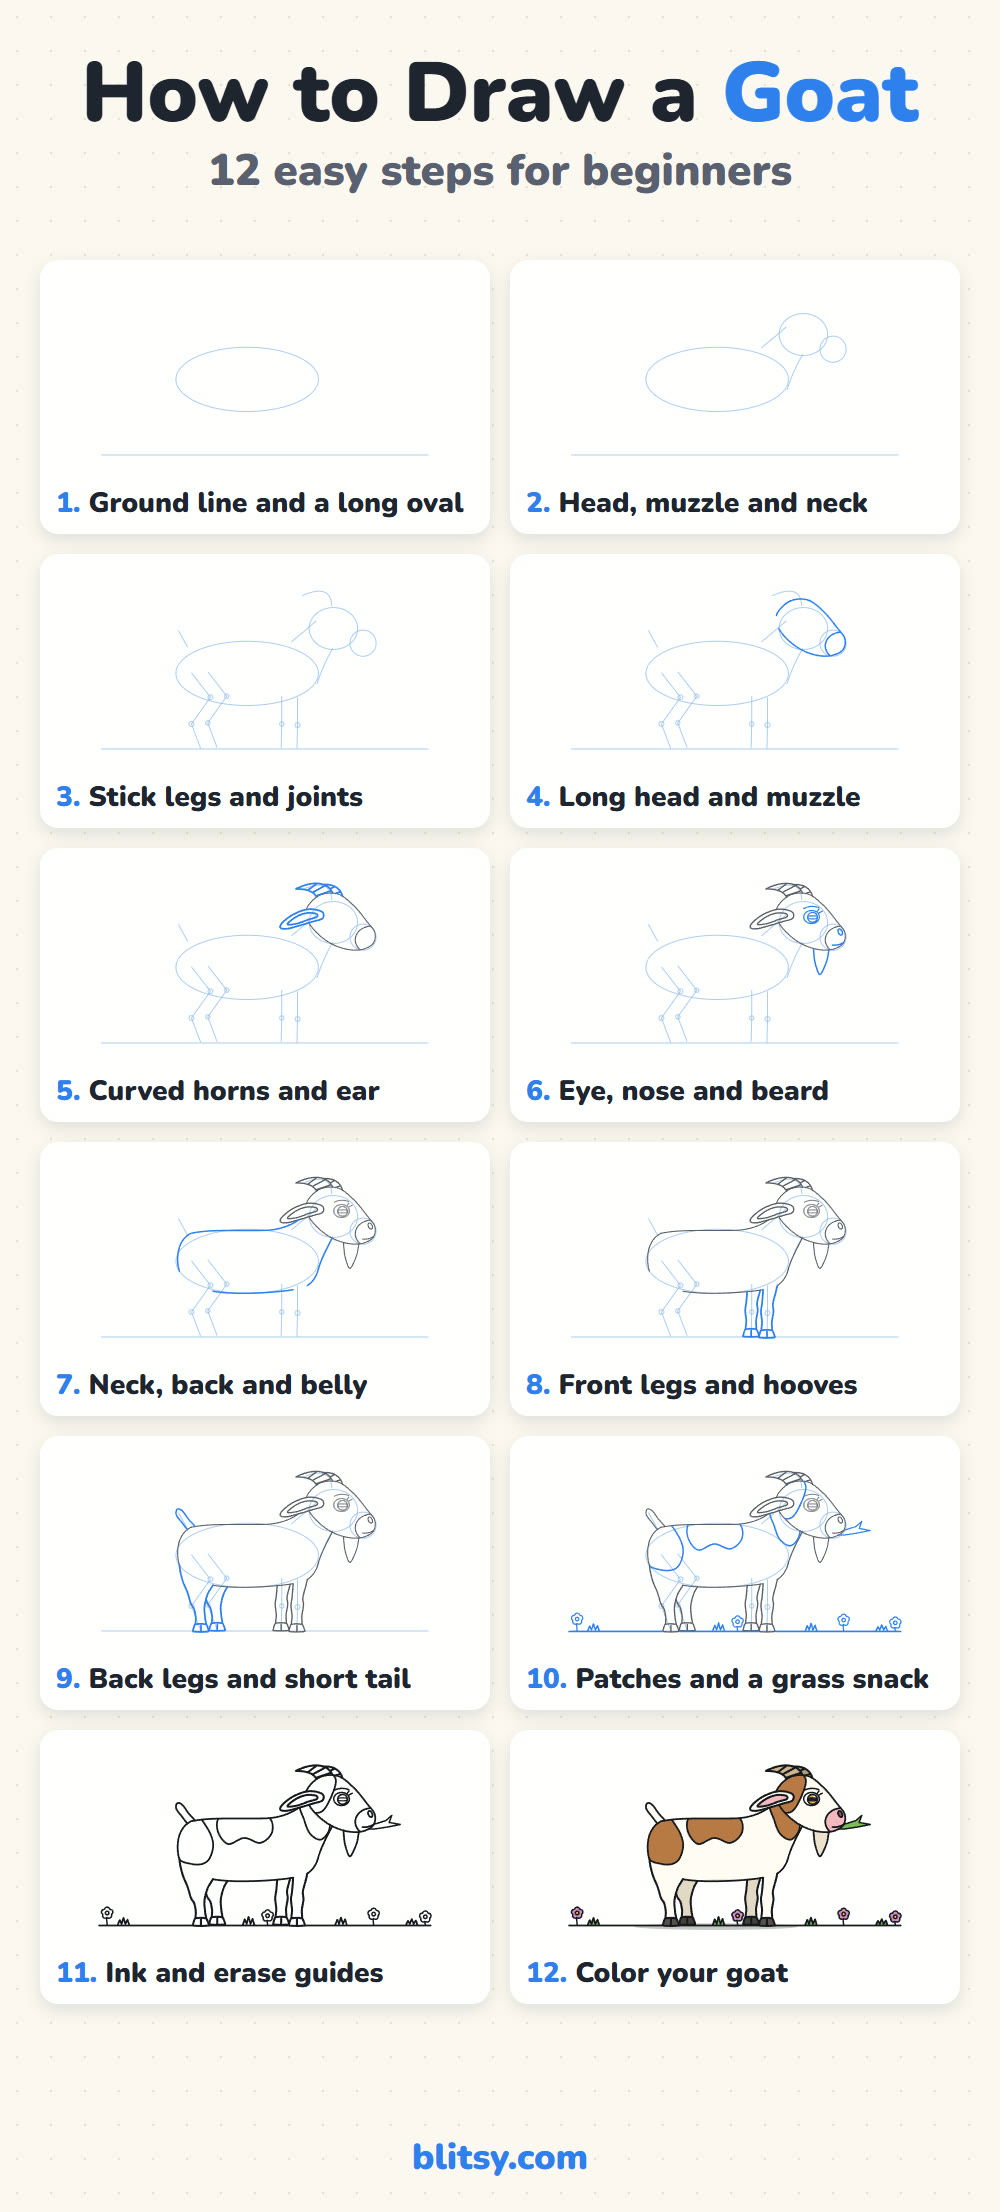
New lines for a step are blue in its picture, so you always know what to add. Gray lines are already on your page, and the pale guide shapes get erased near the end.
Quick overview
⏱️ Time: roughly 30 to 40 minutes with coloring
🎯 Level: easy, fine for kids around 6 and up
✏️ Steps: 12
🐐 You'll draw: a cream goat with brown patches, standing in the grass
Goat Sketching Supplies
- A pencil you can press lightly with (HB is fine)
- A soft eraser for the guide lines
- A black marker or fineliner for the final outline
- Crayons or colored pencils in brown, tan, pink, orange, gray and green
- A sheet of plain paper, turned sideways
Turned sideways, the paper gives the goat's long body room and leaves space above the head for the horns.
How to Draw a Goat Step by Step
Step 1: Sketch a ground line and a long oval
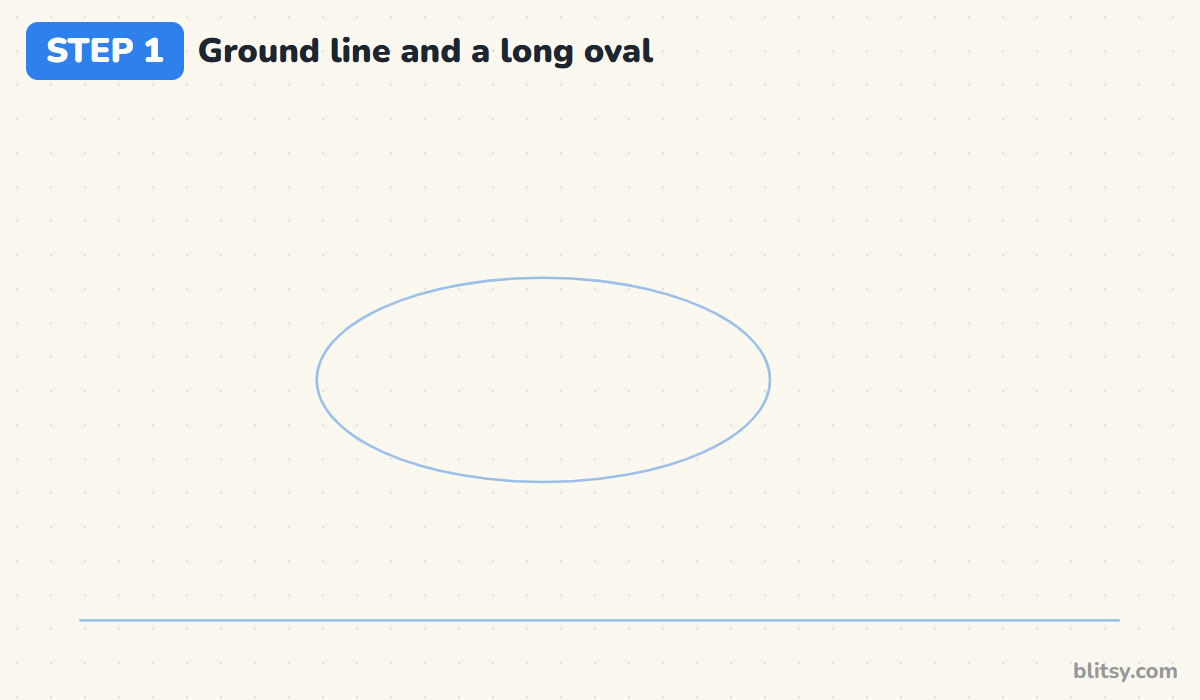
Draw a light, straight line near the bottom of the page. Above it, a little left of center, sketch a long flat oval for the body. I leave a gap under the oval about two thirds as tall as the oval itself, because that's where the legs go.
💡 Tip: Keep the oval to the left. The head and its horns need the space on the right side of the page.
Step 2: Add circles for the head and muzzle, then the neck
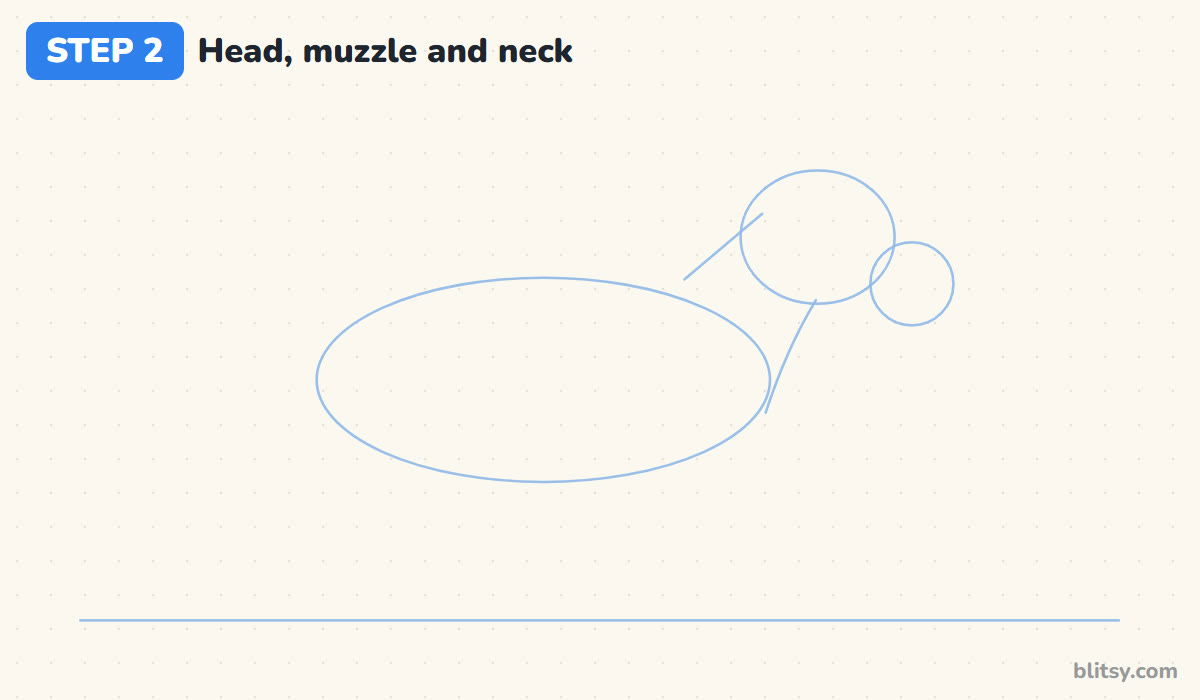
Up and to the right of the body, draw a circle for the head so its bottom sits about level with the top of the oval. Overlap a smaller circle at its lower right for the muzzle. Then join the head to the body with two lines that lean forward.
💡 Tip: A goat holds its head high. If the head circle drops down next to the body, the goat looks tired.
Step 3: Draw stick legs with joint dots
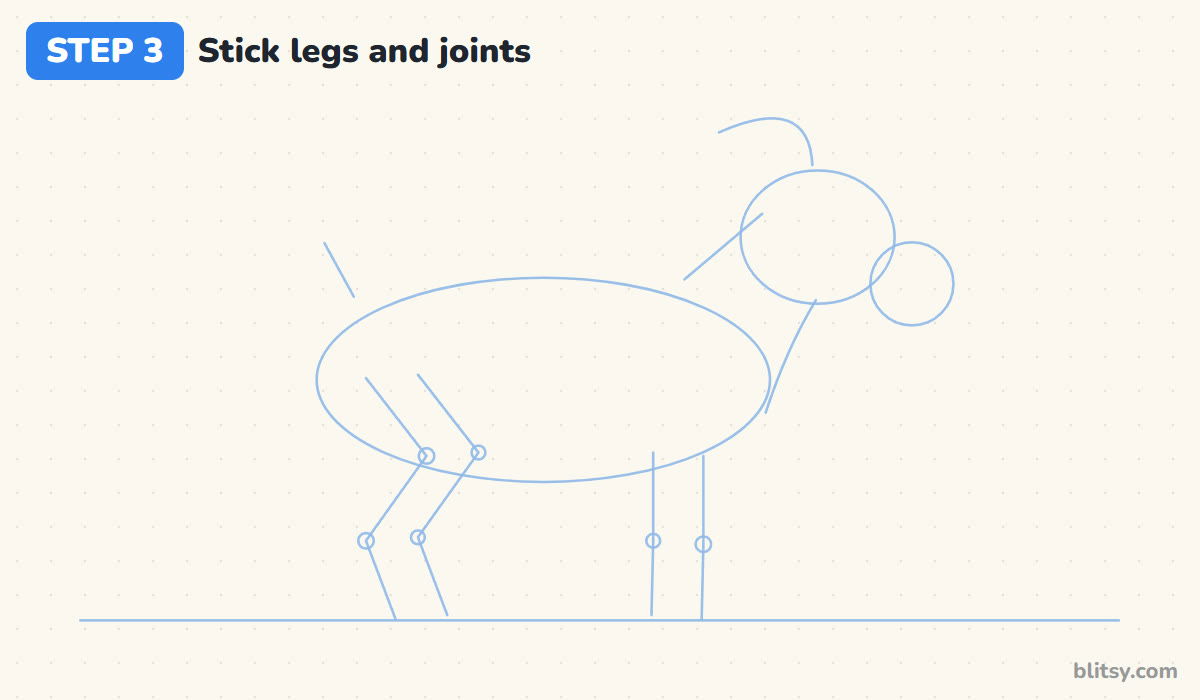
Drop two nearly straight lines from the front of the oval to the ground, with a knee dot halfway down. The back legs slant forward to a dot, bend back to a second dot, then go down again. Add a short tail line up from the rump and a curve above the head for the horns.
💡 Tip: That backward bend in the hind leg is the hock. Every hoofed animal has it, and it makes the legs look right instantly.


Step 4: Outline the long head and the muzzle
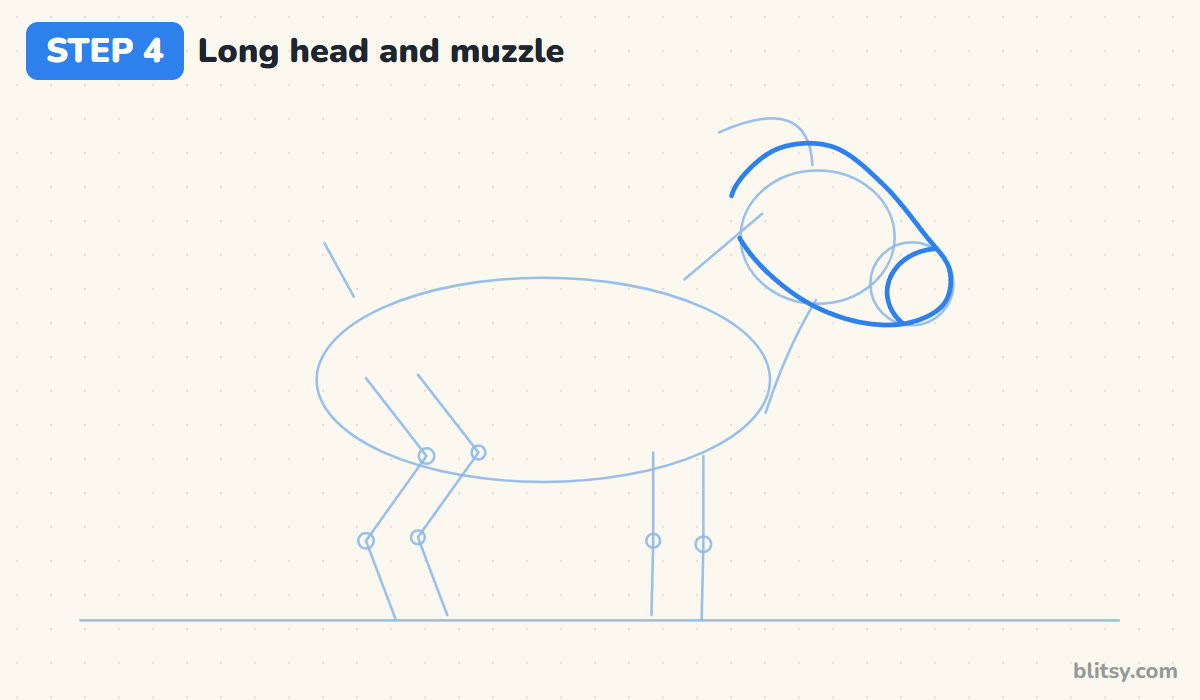
Now wrap one smooth line around both head circles. Start at the back of the head, run along a fairly flat forehead, slope down a long nose bridge and round off at the muzzle. Come back along the chin and jaw. Then draw a curved line across the muzzle to separate the soft nose area from the face.
💡 Tip: I make a goat's face longer than a cow's or a dog's. A short, round face starts to look like a lamb.
Step 5: Draw curved horns and a floppy ear
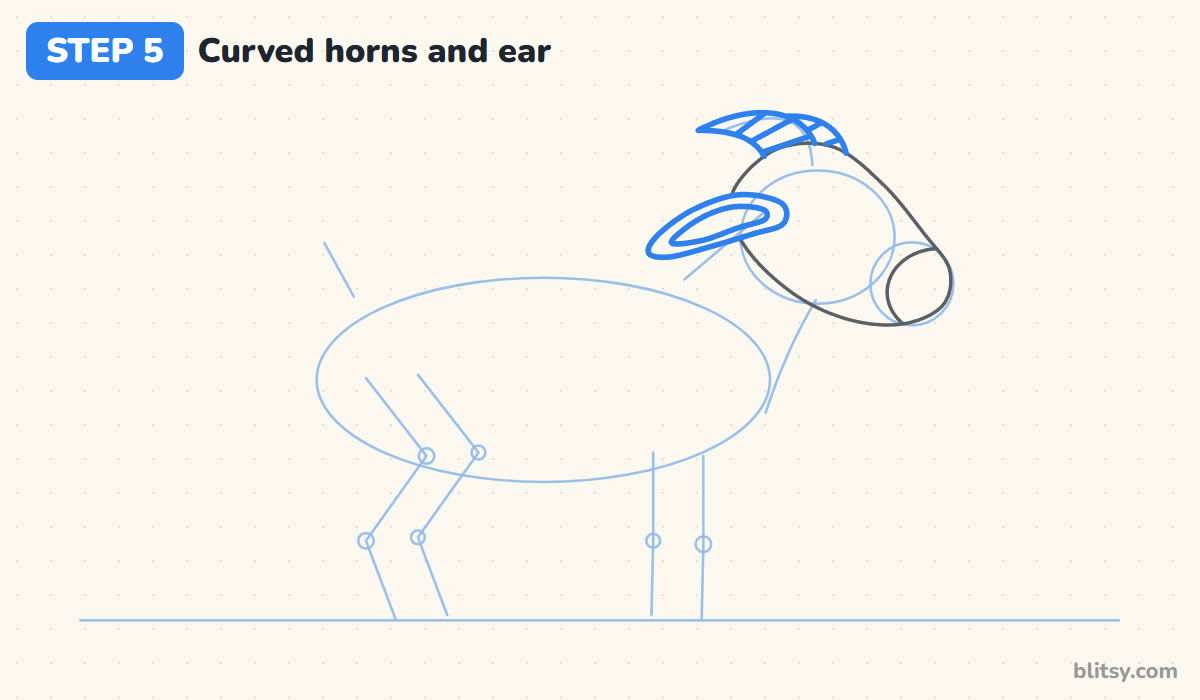
From the top of the head, draw a horn that rises and sweeps backward to a point, like a thick crescent moon. Add a second horn just behind it, peeking out to the right, and give each one three short ridge lines. Below the horns, draw a long leaf-shaped ear sticking out sideways, with a smaller leaf inside.
💡 Tip: Draw the horns wide where they meet the head and thin at the tip. Same width all the way looks like a bent stick.
Step 6: Add the eye, nose and beard
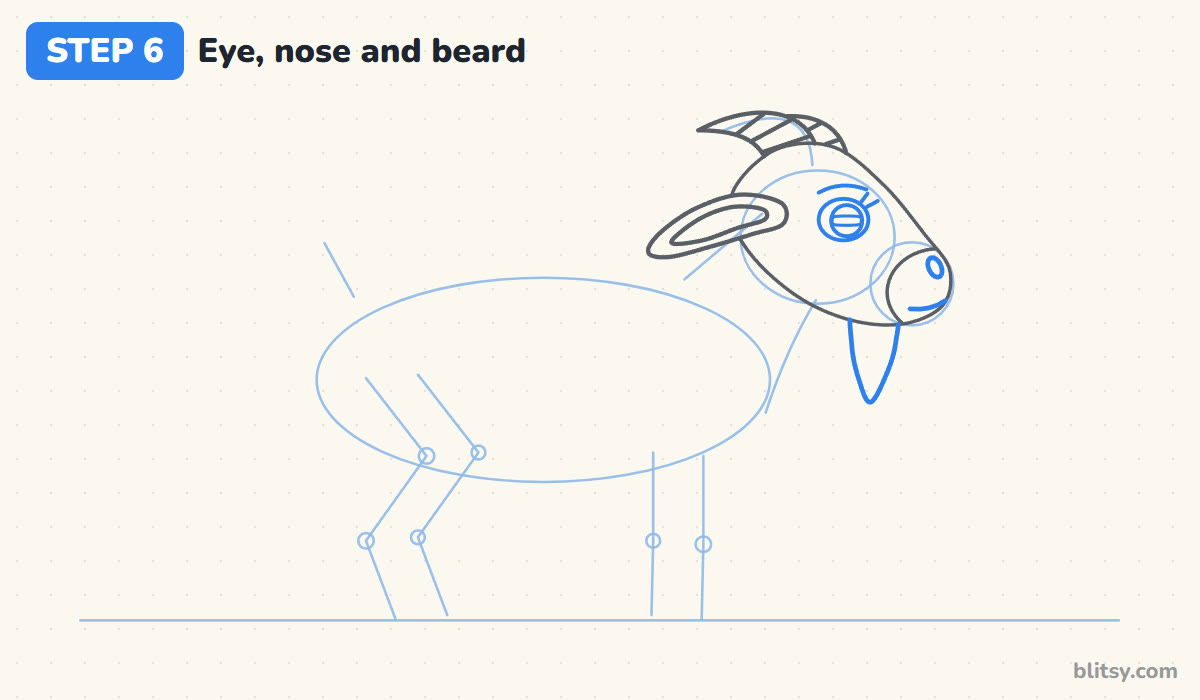
Place a big oval eye high on the face, about halfway between the ear and the nose. Inside it, draw a round iris and a short, flat rectangle for the pupil. I add a small eyebrow arch and two lashes to make it friendly. Finish with a tiny nostril, a short smile line and a pointed beard under the chin.
💡 Tip: That sideways pupil is the detail people recognize first, so keep it. Rounding its corners stops it from looking spooky.
Step 7: Outline the neck, back and belly
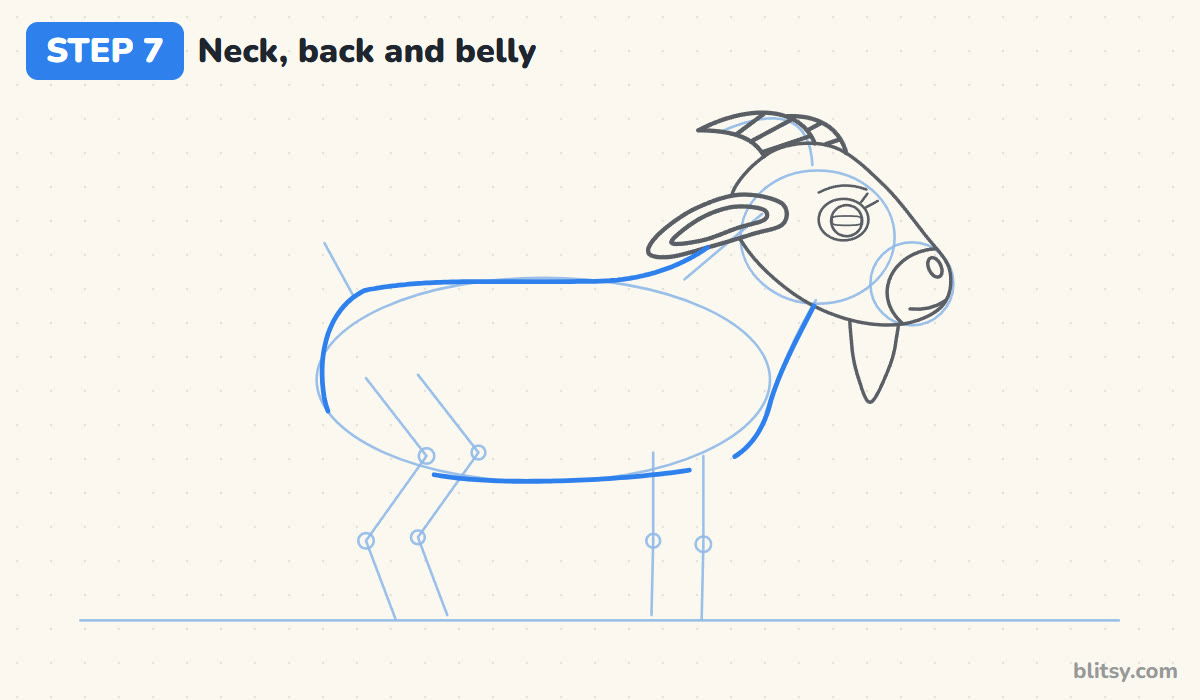
Starting at the back of the head, draw the top of the neck sloping down into a long, almost straight back, then round the rump and bring the line under it. On the other side, trace the throat down to a rounded chest and connect it to the rump with a gently curved belly line.
💡 Tip: Make the back nearly flat. A big dip or hump changes the animal, and a goat's spine is fairly level.


Step 8: Draw the front legs and hooves
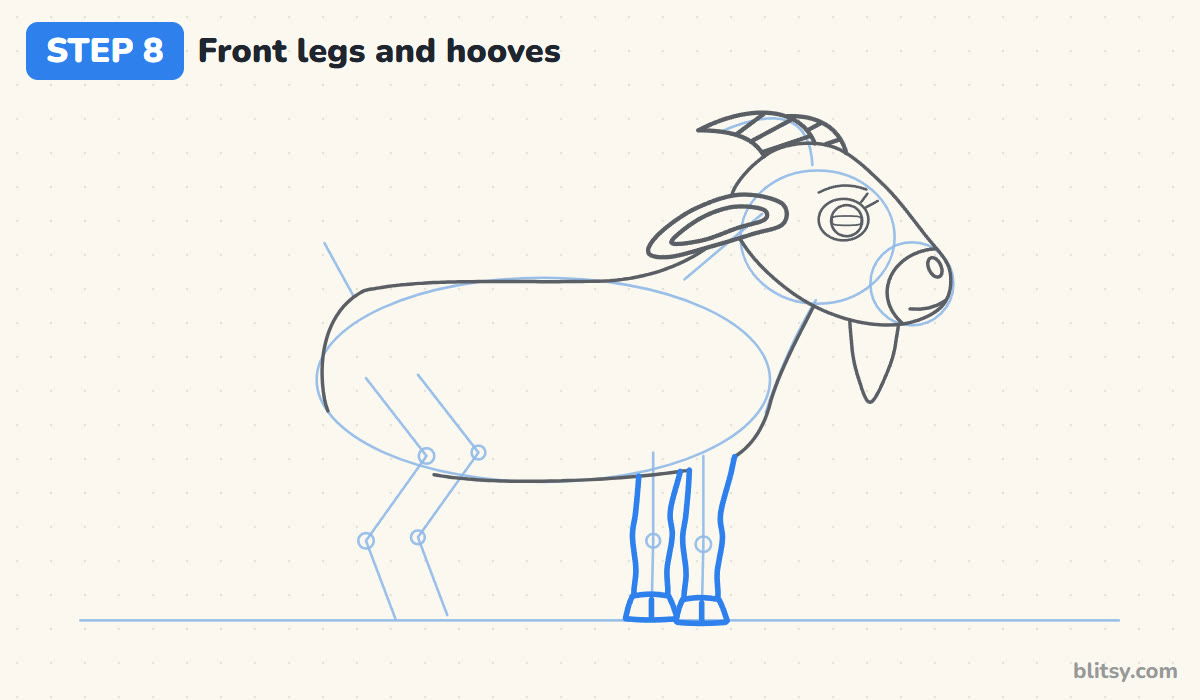
Around the front stick line, draw a slim leg with a small bump at the knee and a narrow ankle. Finish it with a little hoof, and split the hoof with one short line up the middle. Draw the far front leg just to the left of it, slightly higher, so it looks like it's standing behind.
💡 Tip: Goat legs are thin. Aim for a leg about as wide as the hoof at the bottom.
Step 9: Add the back legs and the short tail
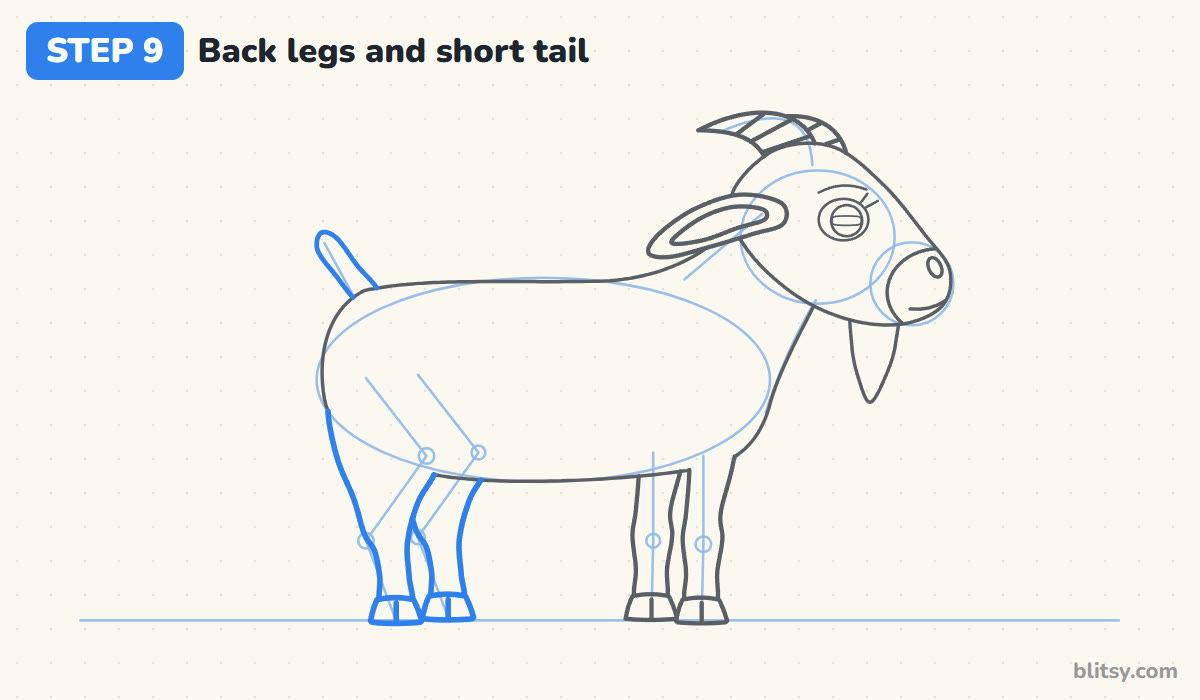
Follow the bent guide for the back leg: a wide thigh, a narrowing shape that pokes back at the hock, then a straight lower leg to a split hoof. Add the far back leg slightly to the right. On top of the rump, I draw a short, upright tail like a small rounded flag.
💡 Tip: Goat tails point up, not down. A droopy tail is one of the quickest ways to accidentally draw a sheep.
Step 10: Draw patches, a grass snack and the ground
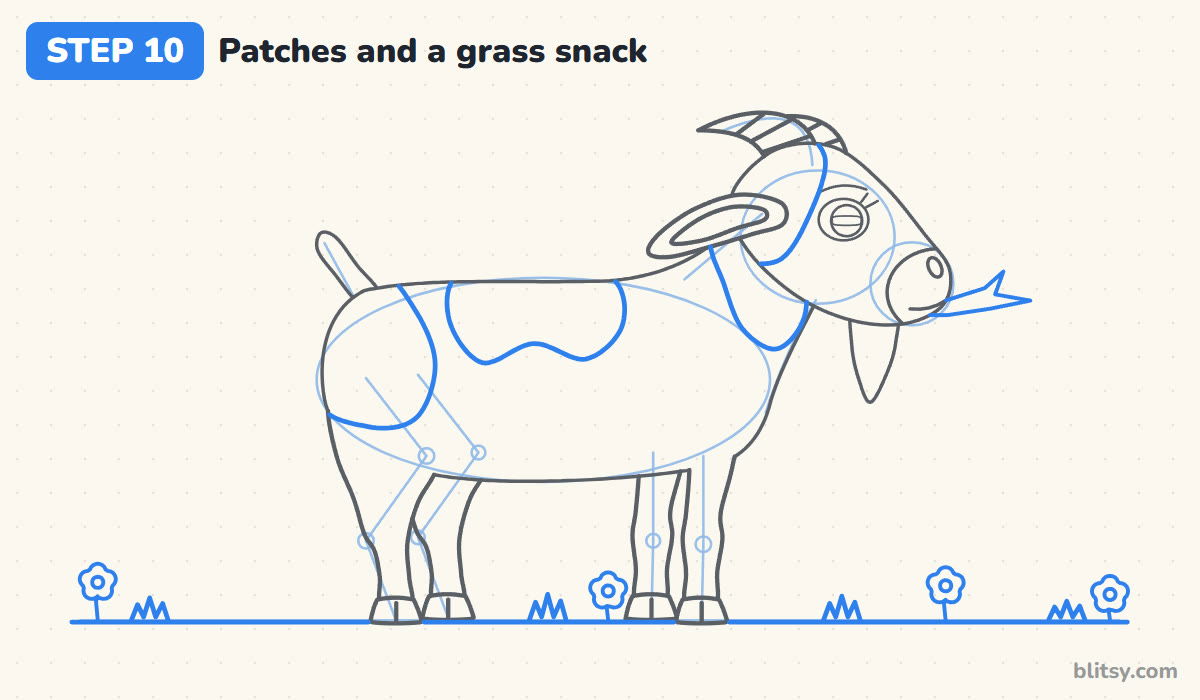
Add a few soft brown patches: one on the back of the head and neck, a saddle on the back, and a round one over the rump. Two blades of grass sticking out of the mouth make the goat look mid-chew. Finish the ground with grass tufts and small flowers.
💡 Tip: Let the patches run off the edge of the body outline. Little islands floating in the middle look like stickers.
Step 11: Ink the outline and erase the guides
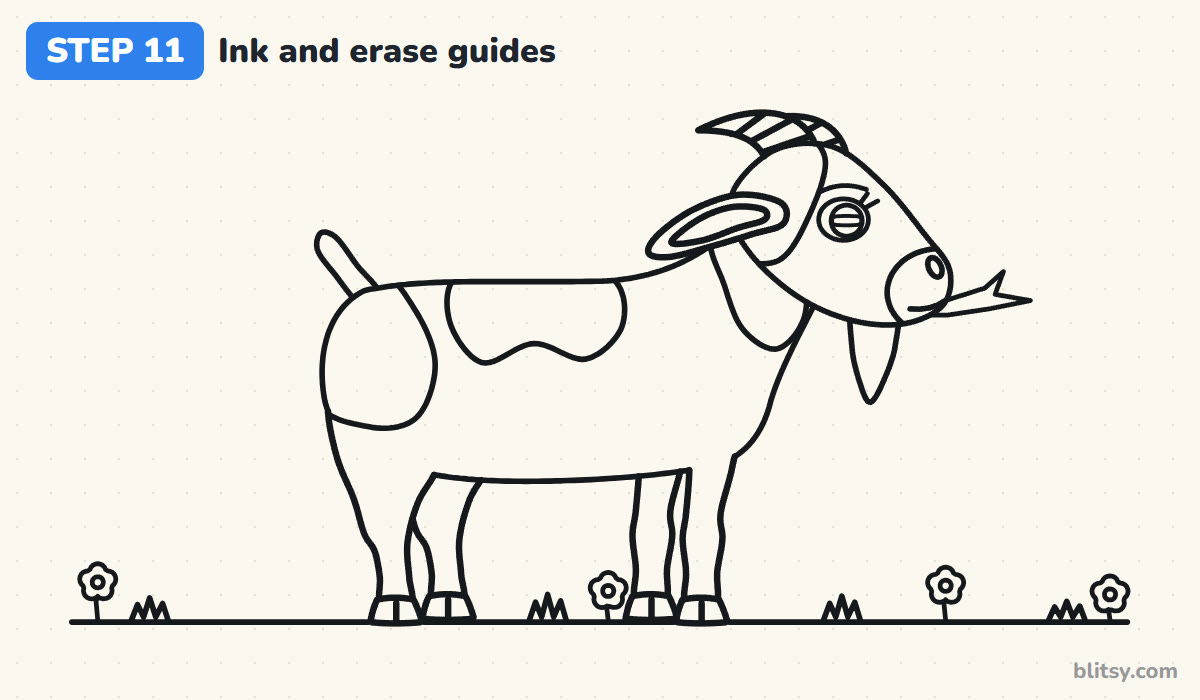
Trace over every keeper line with your marker. I go slowly around the horns and hooves because those small curves are easy to wobble. Wait a minute for the ink to dry, then erase all the circles, the oval and the stick legs.
💡 Tip: Erase in one direction with a clean eraser. Scrubbing back and forth can smear fresh ink.

Step 12: Color your goat
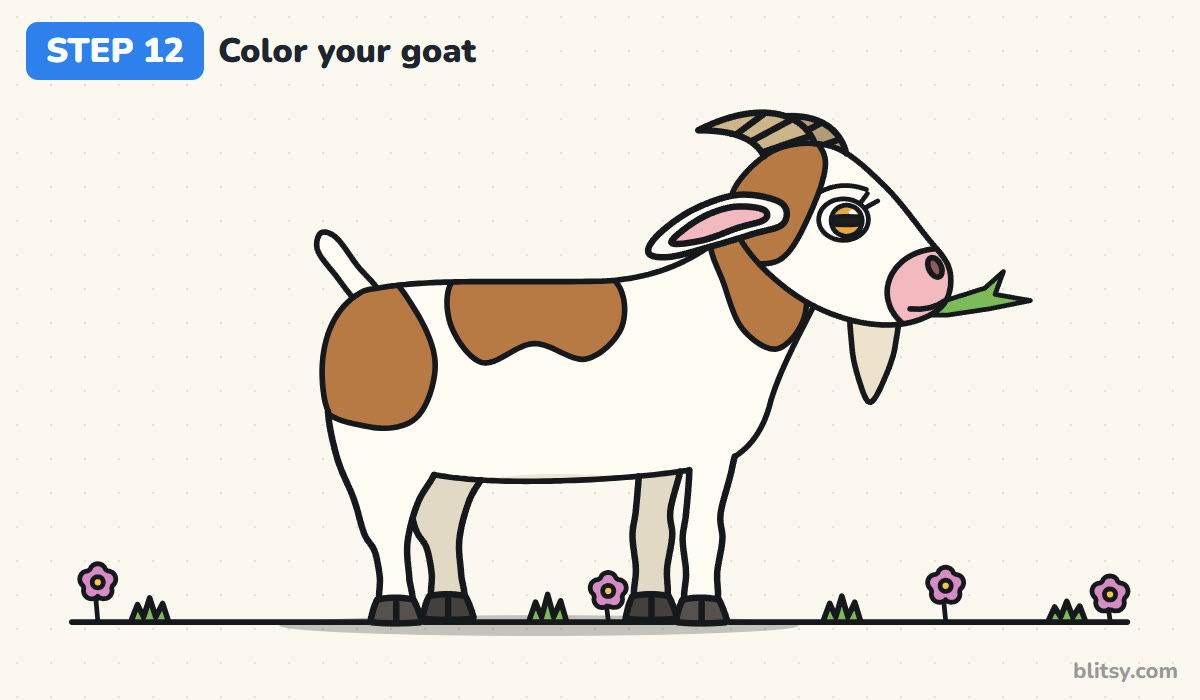
I leave most of the coat white or very light cream and color the patches warm brown. Use tan for the horns, pink for the nose and inner ear, and orange for the eye. Gray hooves, slightly grayer far legs and green grass finish it off.
💡 Tip: Color the far legs a little darker than the near ones. That small change makes them sit behind the body.
Goat Drawing Slip-Ups and How to Fix Them
- The horns point straight up. Bend them backward over the head. Upright horns look more like a devil costume than a goat.
- The face is too short. Stretch the nose bridge so the muzzle sits well in front of the eye.
- The tail hangs down. Draw it short and standing up from the top of the rump.
- Thick, straight back legs. Thin them out and add the backward bend at the hock.
- A round pupil. It's fine, but a flat rectangle is what makes people say "that's a goat" right away.
Turning Your Goat Into a Kid or a Billy
The body plan here is close to my how to draw a cow step by step lesson, only slimmer and with longer legs, so the two make a good pair. For a baby goat (a kid), shrink the body, keep the head big, and swap the horns for two small bumps. A billy goat gets longer horns and a bigger beard. I also like an all-white goat with no patches. Want a full farm scene? Put it next to the horse drawing tutorial and add a few birds from the chicken drawing lesson.
Free Goat Coloring Page and Printable Step Guide
The goat coloring page shows the finished goat to copy, a color key for every part, and a large outline with space for a fence or a hill. The step-by-step PDF guide holds all 12 steps with pictures and tips. Print either one on Letter or A4 paper.
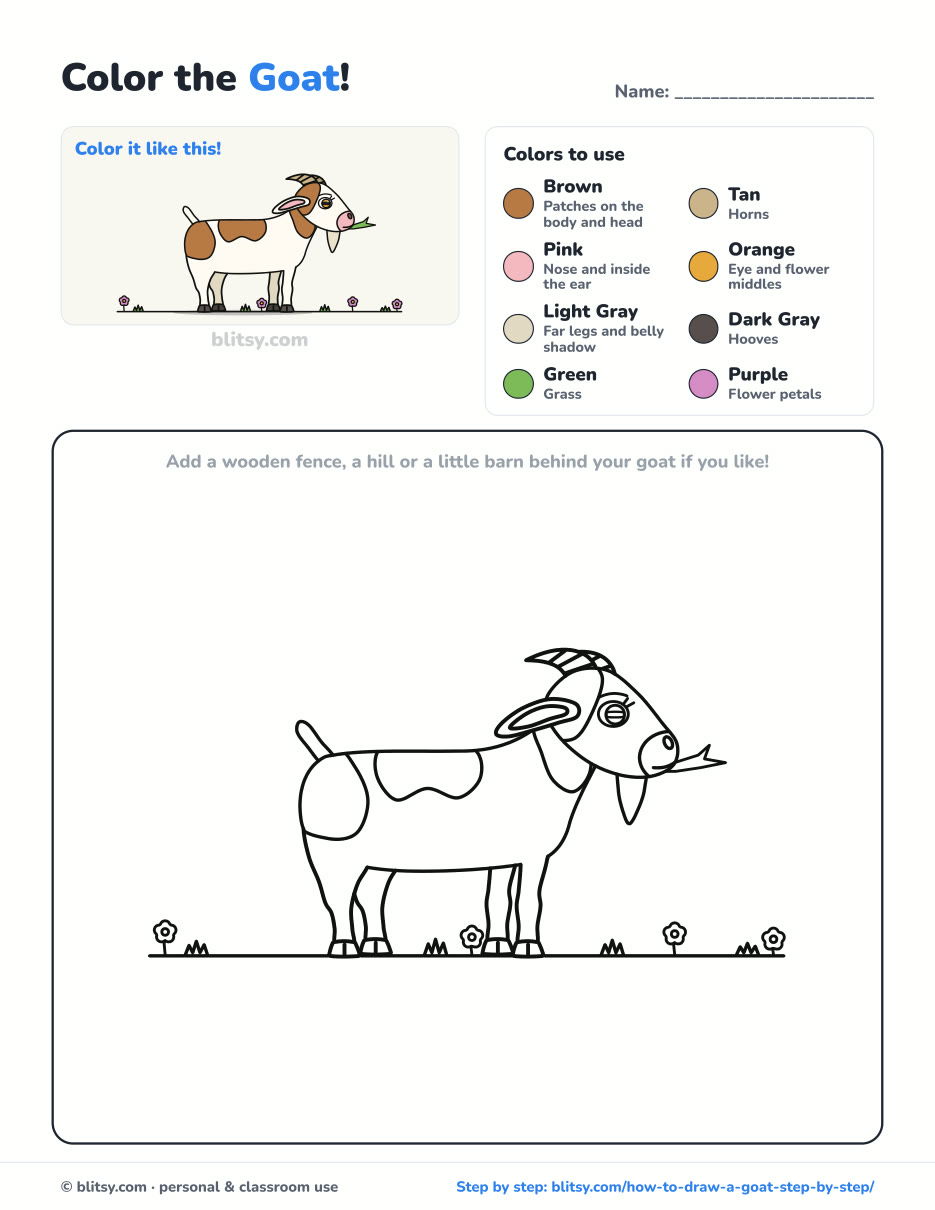
Black outlines with a colored example and the color names at the top. Ready to print and color.
⬇️ Download Coloring PageEvery step picture with its instructions and tips, to keep beside your paper while you draw.
⬇️ Download Drawing Guide📱 On a phone? Tap a download button, then open the file and choose Share → Save to Files or Print. On a computer, the PDF opens or saves straight to your Downloads folder.
Your Goat Steps on One Pinterest Image
More Farm Animals to Draw Next
Each one is a full lesson with a picture for every step, and they all start from the same simple guide shapes you used for the goat.
- Cow Drawing: A black and white dairy cow with a bell in the how to draw a cow step by step lesson.
- Horse Drawing: Long legs and a flowing mane in this horse drawing tutorial.
- Chicken Drawing: A round little hen with a red comb in the chicken drawing step by step guide.
- Duck Drawing: A mallard floating on a pond in this how to draw a duck tutorial.
Goat Drawing Questions From Beginners
What is the easiest way to draw a goat?
Start with simple guide shapes: a long oval for the body, a circle for the head and a smaller one for the muzzle. Add stick legs, then trace the outline around them. Every step builds on those shapes.
How do you draw goat horns?
Draw each horn as a thick crescent that rises from the top of the head and curves backward to a point. Keep it wide at the base and thin at the tip, then add a few short lines across it for the ridges.
Why do goats have rectangular pupils?
Their wide, flat pupils give them a broad view of the ground around them, which helps them spot danger while grazing. In a drawing, that shape tells people it's a goat at a glance.
How is drawing a goat different from drawing a sheep?
A goat has a smooth coat, a longer face, a beard, back-curving horns and a tail that points up. A sheep has a fluffy wool body, a shorter face and usually a hanging tail.
Start with that long oval, keep your pencil light, and see how much character your goat ends up with. 🐐✏️
Related posts:
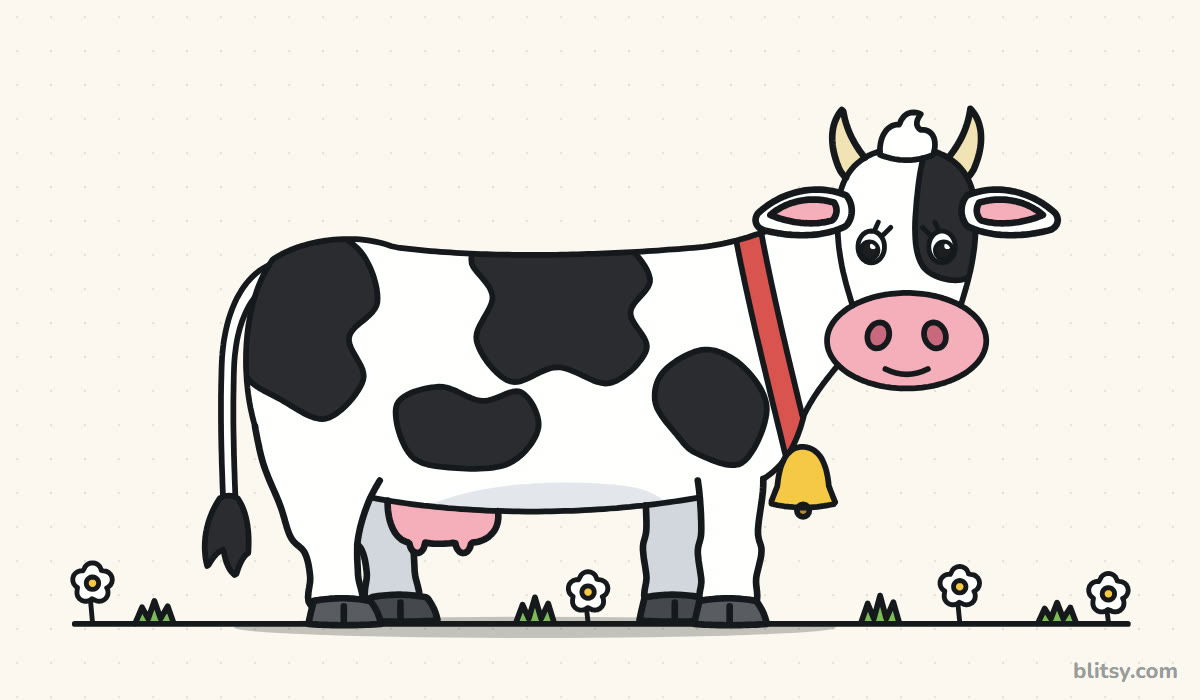 How to Draw a Cow Step by Step (Easy Farm Animal)
 How to Draw a Cell Step by Step (Easy Animal Cell Diagram)
 How to Draw a Tooth Step by Step (Cute and Easy for Kids)
 How to Draw Wonder Woman Step by Step (Chibi for Kids)
 How to Draw Iron Man Step by Step (Easy Chibi for Kids)
 How to Draw a Police Car Step by Step (Easy for Kids)
 How to Draw a Valentine Step by Step (Easy Card Set for Kids)
 How to Draw a Bat Step by Step (Cute Cartoon Bat for Kids)
 How to Draw a Rainbow Step by Step (Easy for Kids and Beginners)
 How to Draw a Yeti Step by Step (Easy and Cute for Kids)
 How to Draw a Ninja Step by Step (Easy Chibi Ninja for Kids)
 How to Draw Batman Step by Step (Easy Chibi for Kids)

