
A white bear on white paper sounds like a trick question, but it's one of the friendliest animals you can draw. The secret is in the outline and a little pale blue shading, not in the fur color. In this lesson you'll learn how to draw a polar bear step by step, sitting on a chunk of floating ice with its back paws turned toward you so the black pads show. I built it from a circle, an oval and a flat box, which keeps the whole bear balanced from the first line.
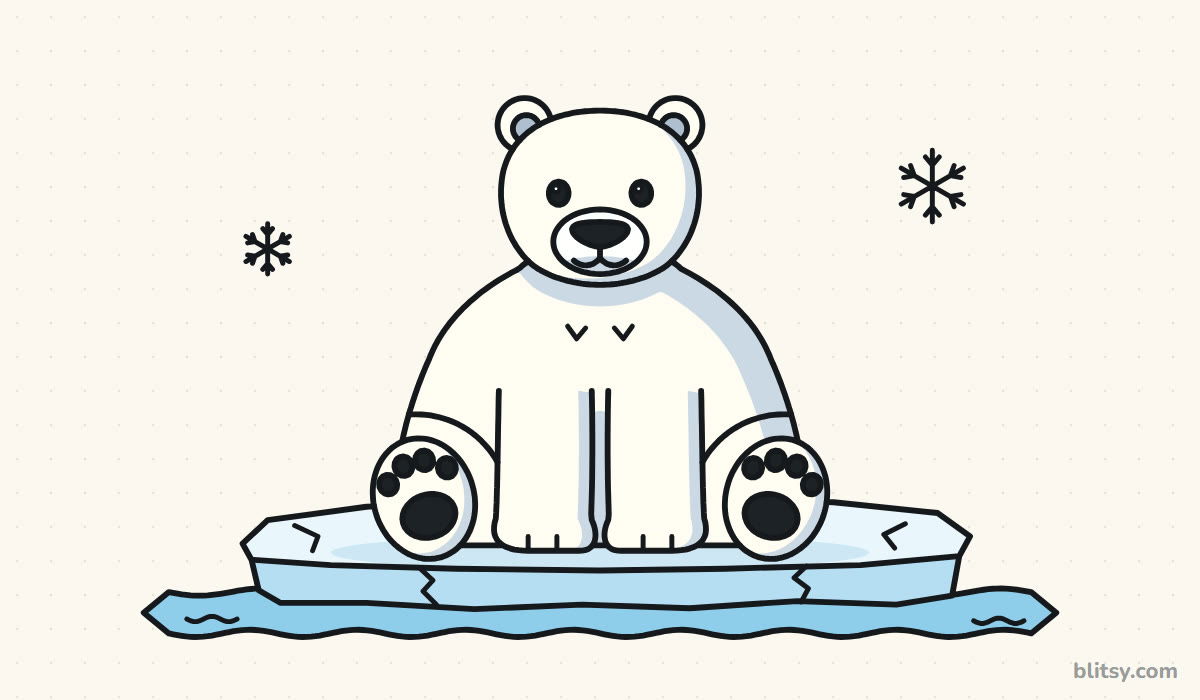
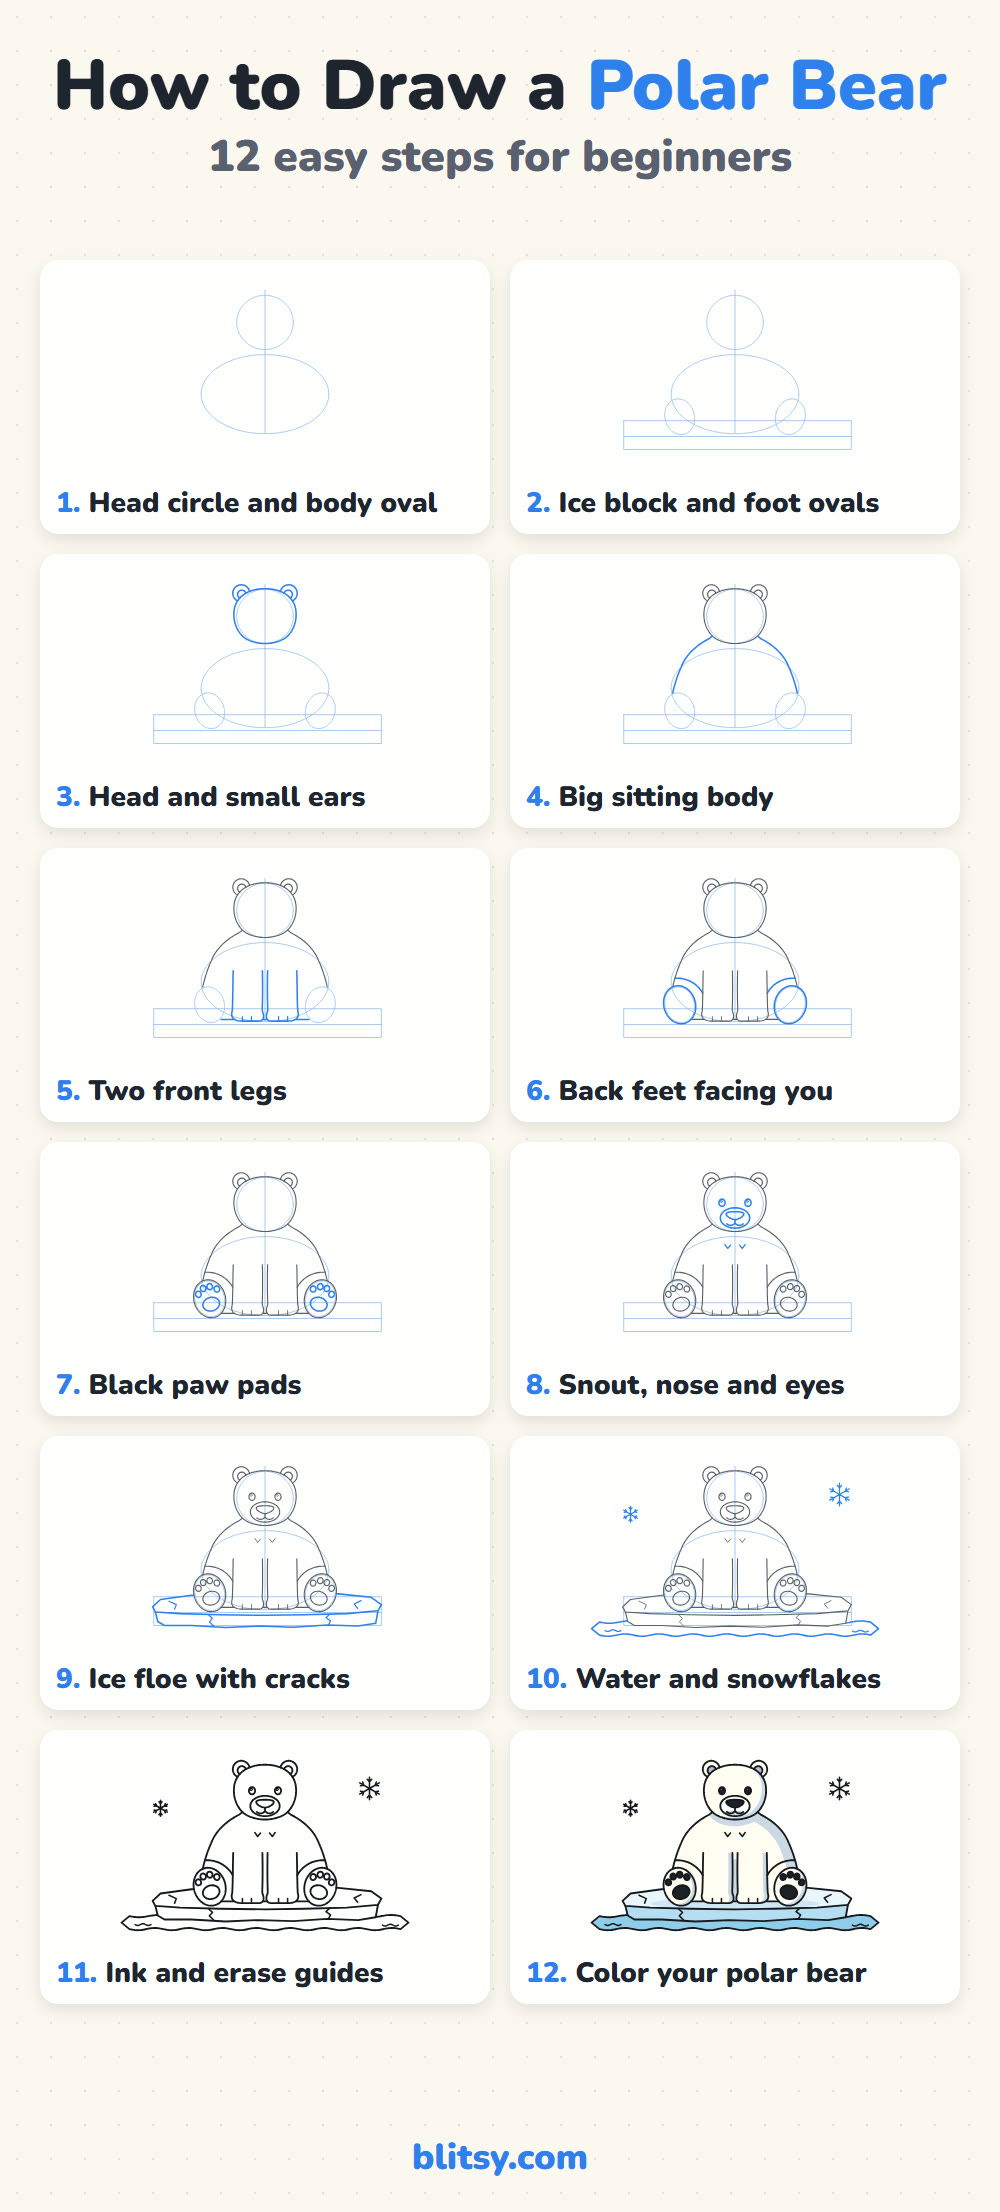
Bright blue marks what's new in every picture. Gray shows the finished lines from before, and the faint light blue shapes are guides you'll rub out near the end.
Quick overview
⏱️ Time: about 30 to 40 minutes
🎯 Level: easy, good for kids from about 6
✏️ Steps: 12
🐻❄️ You'll draw: a sitting polar bear with black paw pads, on an ice floe with water and snowflakes
Arctic Art Kit for a Chubby Bear
- An HB pencil for light guide lines
- A soft eraser
- A black fineliner or thin marker
- Colored pencils: light blue-gray, light blue, sky blue, gray blue and black
- A sheet of plain white paper, turned sideways
- A ruler, only if you want a neat ice block guide
You don't need a cream or white pencil at all, since the paper can be the fur.
How to Draw a Polar Bear Step by Step
Step 1: Sketch a head circle and a body oval
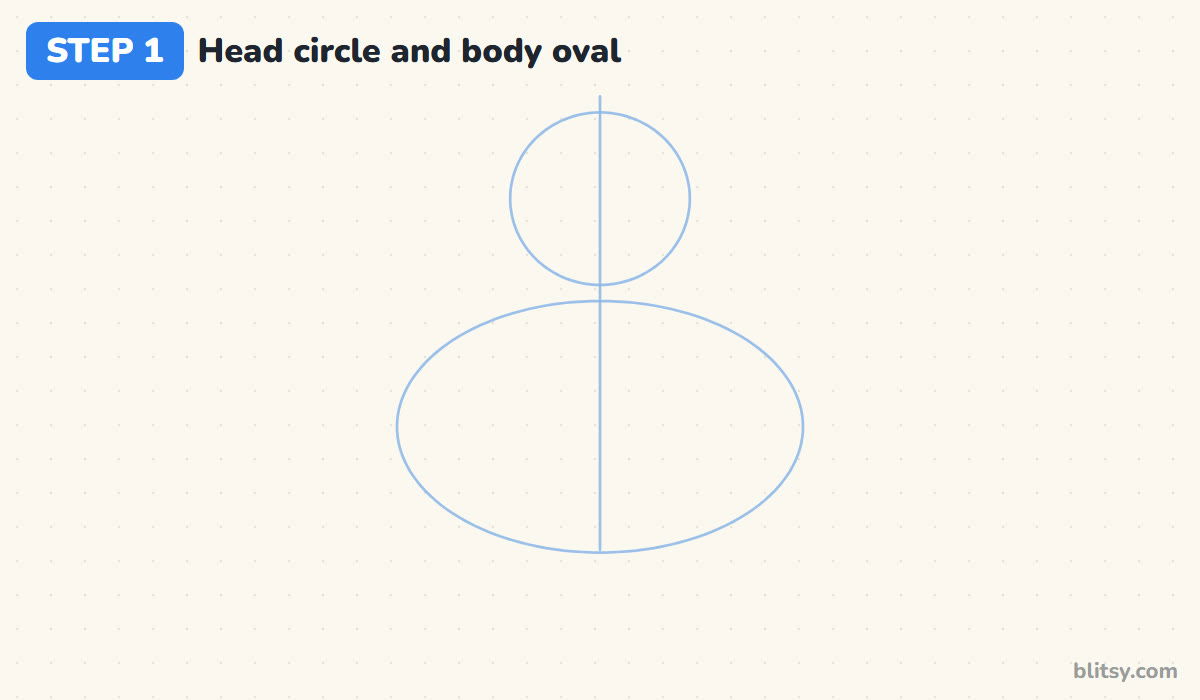
Near the top center of your paper, draw a circle for the head. Under it, draw a wide oval about twice as wide as the circle. Then run a straight line down through both. I never skip that center line on a front view, because it keeps the face and legs even.
💡 Tip: Keep your pencil pressure feather light so these shapes erase without leaving dents.
Step 2: Add the ice block and two foot ovals
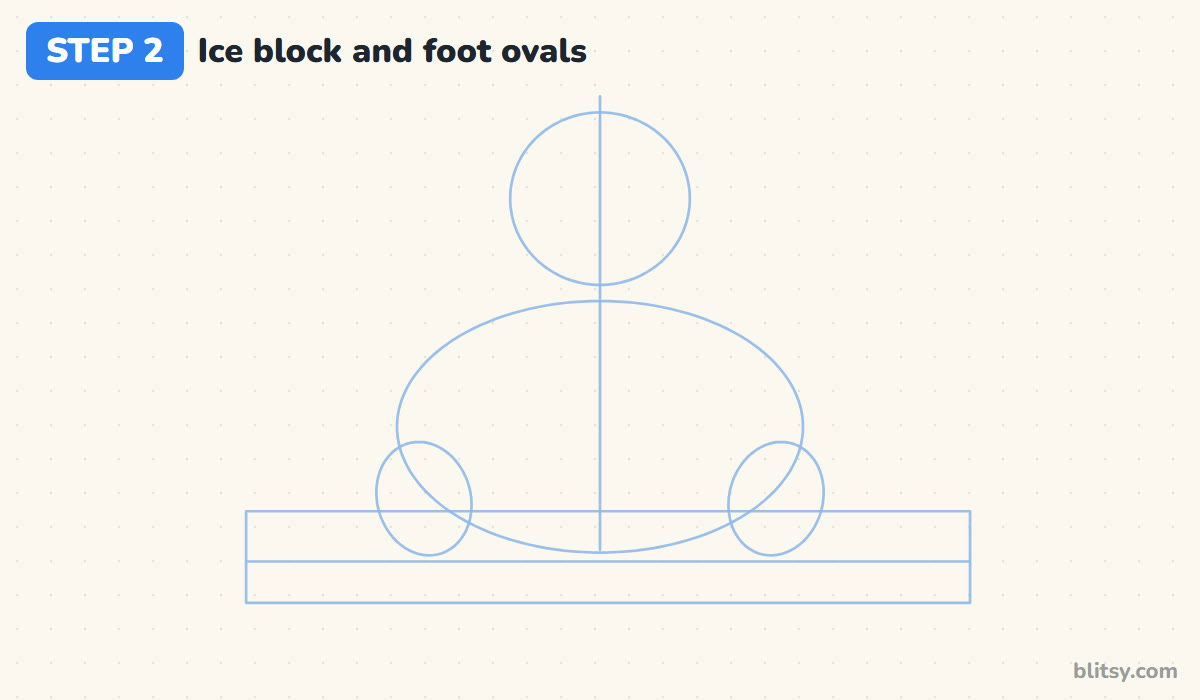
Draw a long, flat box under the body oval, much wider than the bear, with a line across its middle. The top half is the top of the ice and the bottom half is its side. Now place two upright ovals on the lower corners of the body oval for the back feet, tilted out a little at the top.
💡 Tip: Let the foot ovals overlap the body oval. Feet that float apart from the body look glued on.
Step 3: Draw the head and small ears
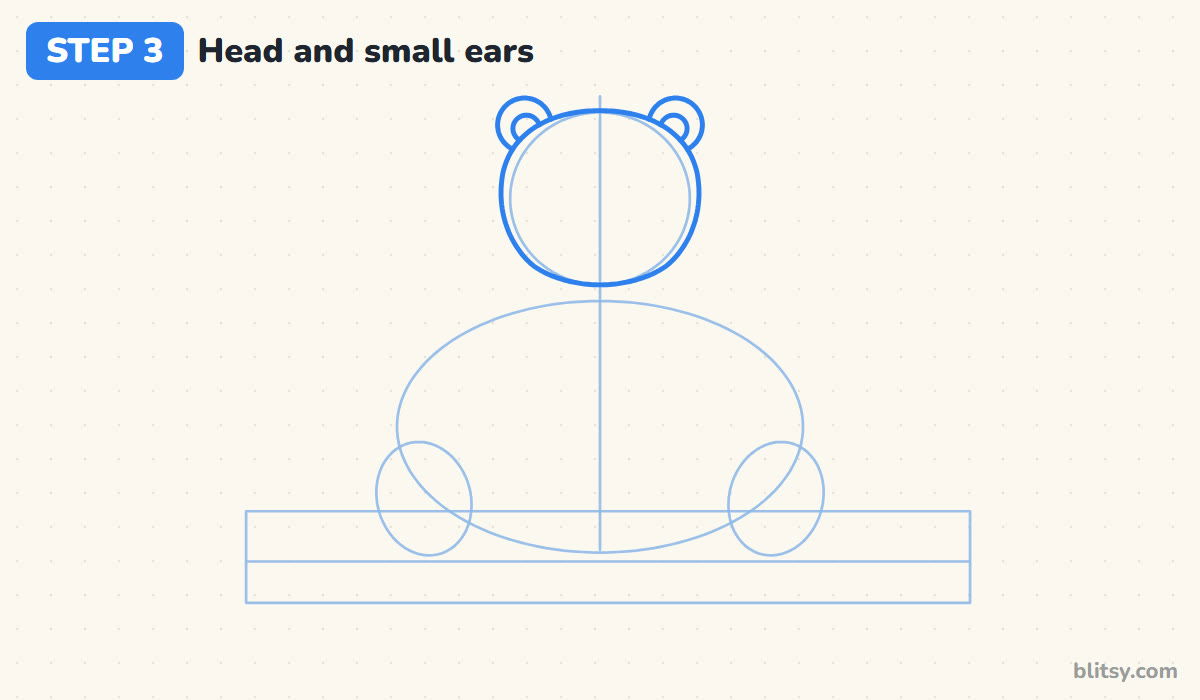
Go around the head circle with a slightly fuller line, flatter on top and a bit wider at the cheeks. Polar bears have short, round ears, so keep them small. I set them at the upper corners of the head, with only the top half showing, and add a smaller circle inside each one.



💡 Tip: If the ears look like a teddy bear's, shrink them. Tiny ears are one of the clearest polar bear clues.
Step 4: Draw the big sitting body
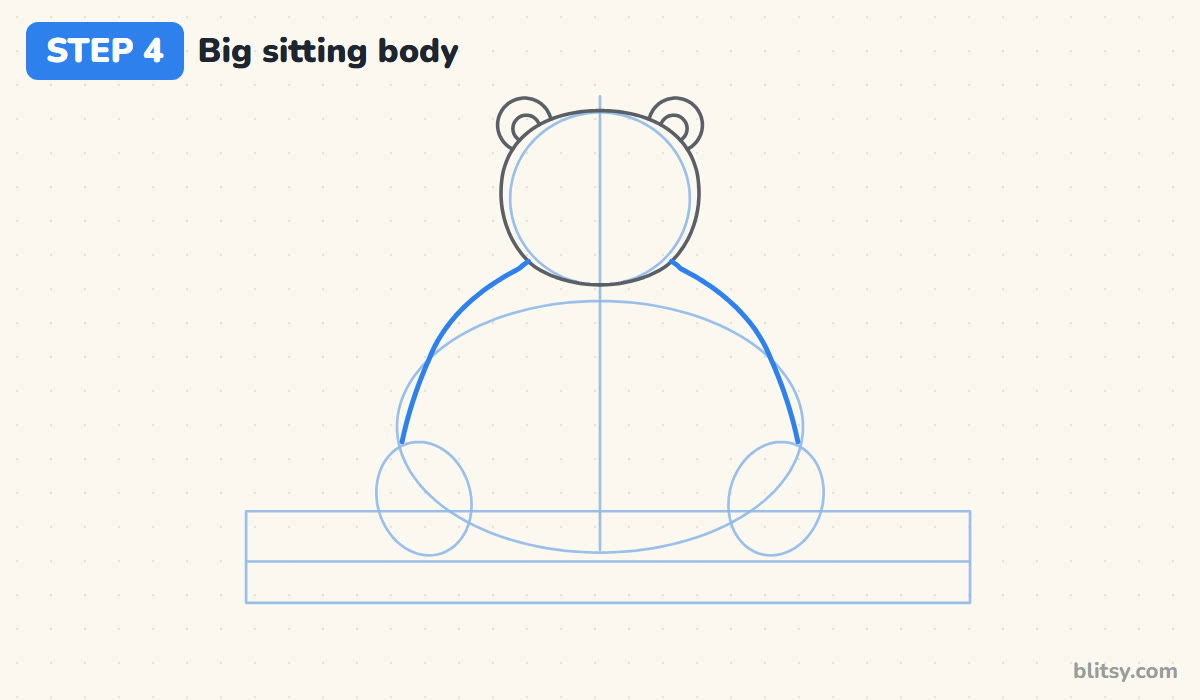
Start each side of the body just under the cheeks. Curve the line out and round over the shoulders, then down along the edge of the oval until it reaches the foot ovals. This is a heavy animal, so give it full shoulders instead of a narrow cone. Stop the lines where they meet the feet.
💡 Tip: Round shoulders make the bear look strong. Straight sloping sides turn it into a tent.
Step 5: Add the two front legs
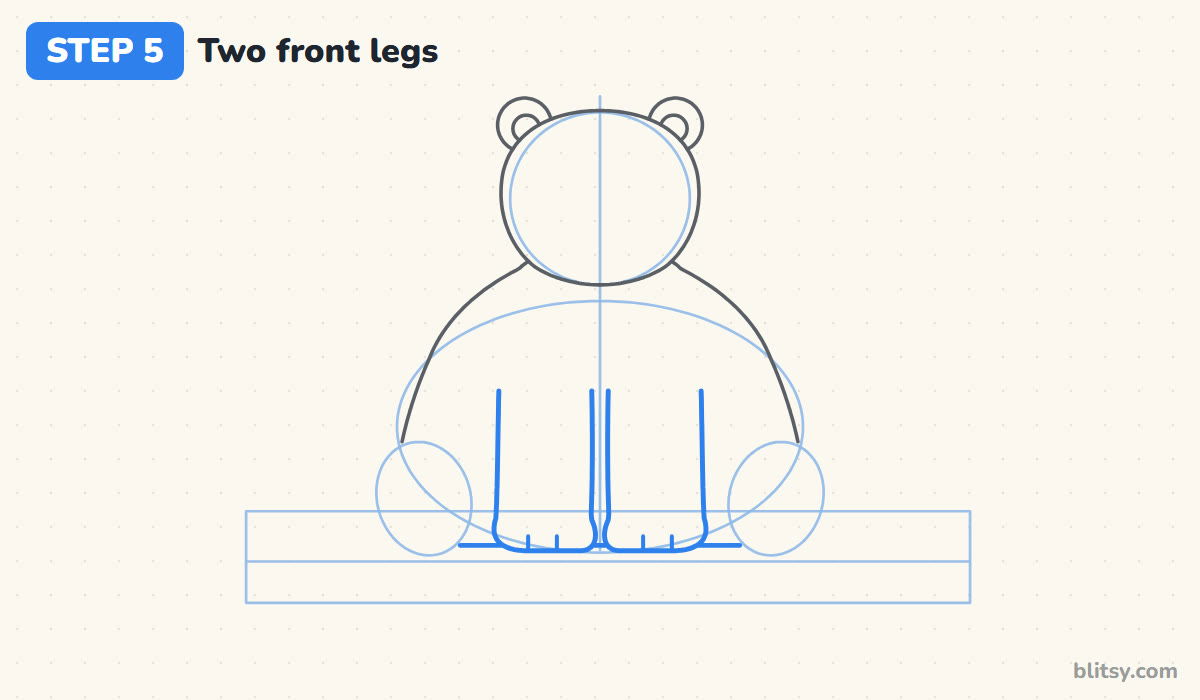
Drop two thick legs from the middle of the chest to the ice, with a thin gap between them. Round off the bottoms into paws, add two short toe lines on each, and draw a little ground line from each paw out to the feet.
💡 Tip: Start the leg lines partway down the chest and leave the tops open, since fur hides where the leg begins.
Step 6: Draw the back feet facing you
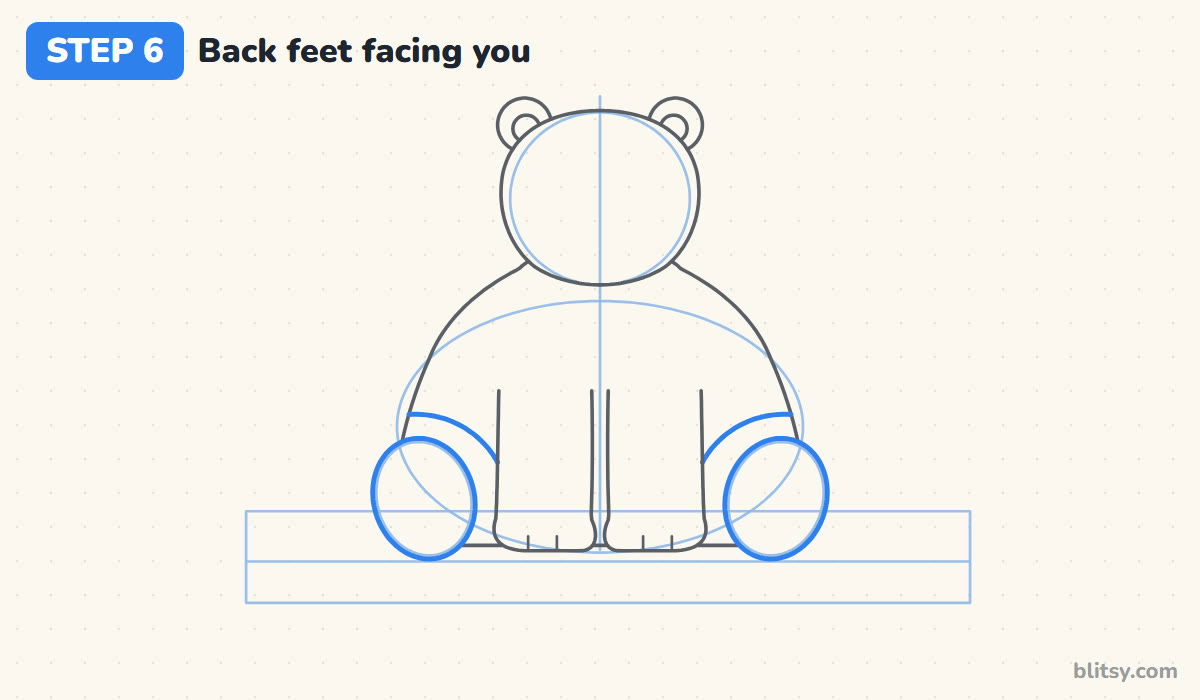
Trace over the foot ovals with a firm line. Because the bear is sitting with its legs forward, we see the bottoms of its feet. Next, draw a curved thigh line from the side of the body down toward each front leg. Two simple curves show the folded back legs without any extra shapes.
💡 Tip: Keep both feet the same size. One big foot pulls the whole drawing off balance.
Step 7: Add the black paw pads
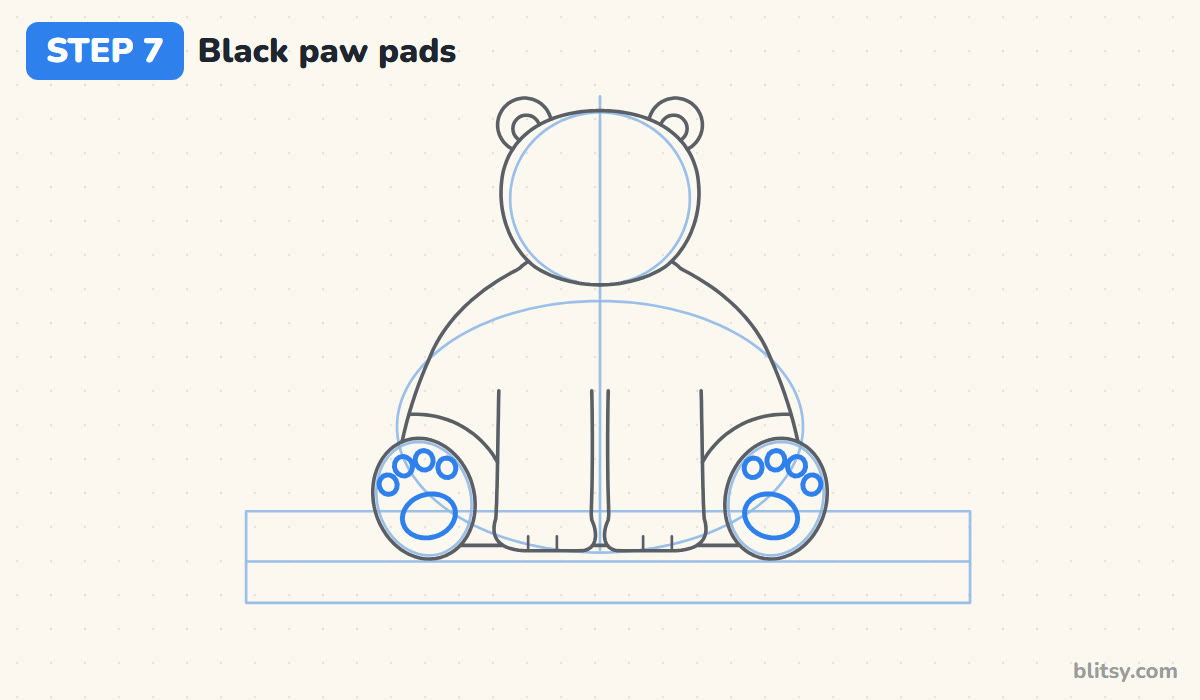
Inside each foot, draw one wide oval pad in the lower half. Above it, in a gentle arc, draw four small toe pads. Real polar bears have five toes, but I use four because it reads more clearly at this size. These pads are what make the pose so cute.



💡 Tip: Space the toe pads evenly first, then make the middle two a touch higher than the outer two.
Step 8: Draw the snout, nose and eyes
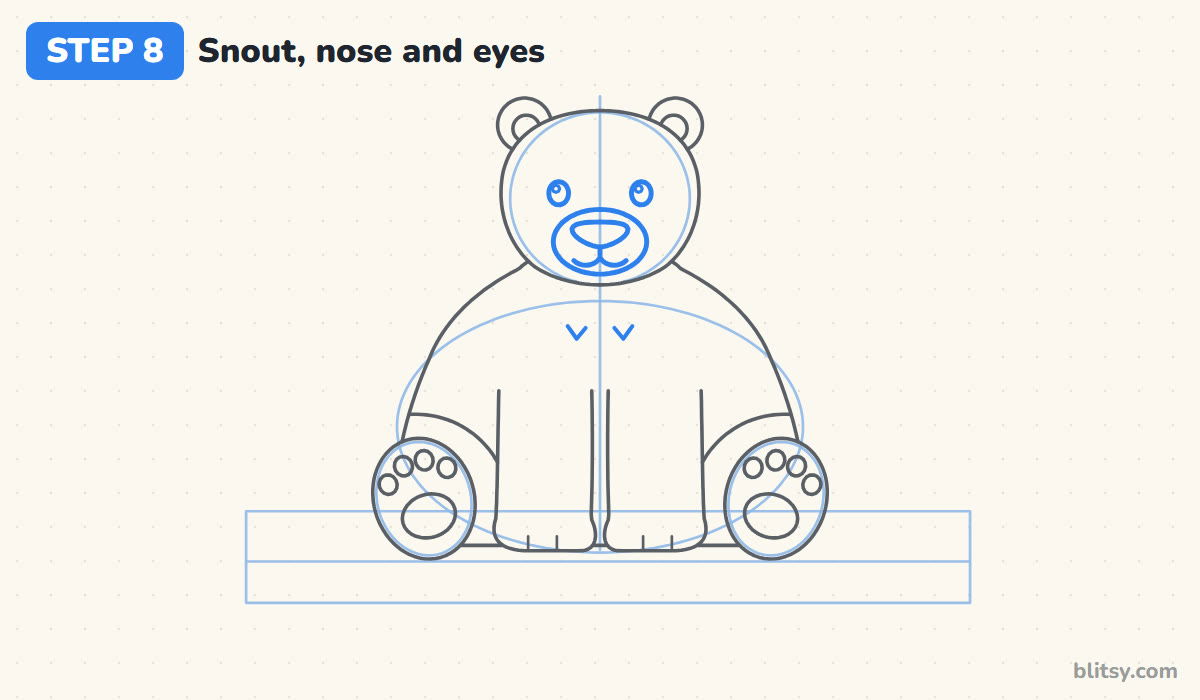
In the lower half of the face, draw a wide oval for the snout. Put a rounded triangle nose at its top, then a short line down and a soft W for the mouth. Place two small oval eyes above the snout with a dot of shine in each. Finish with two little V marks on the chest for fur.
💡 Tip: Small eyes set wide apart look more like a polar bear than big cartoon eyes do.
Step 9: Turn the box into an ice floe
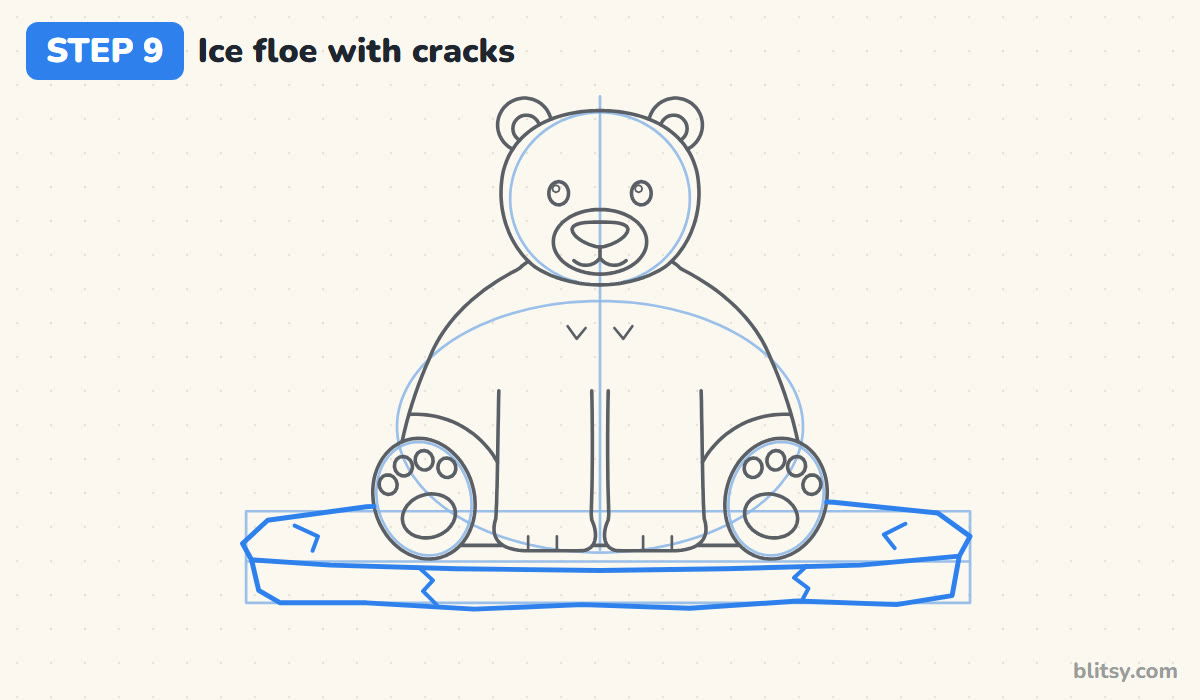
Use the box as a rough guide only. Make the back edge of the ice bumpy and slanted at the ends, then draw the front edge and the side below it with a slightly wavy bottom. Add short zigzag cracks on the side and a couple of bent lines on top.
💡 Tip: Stop the ice lines where they touch the bear. The bear sits on top, so it hides the ice behind it.
Step 10: Add water and snowflakes
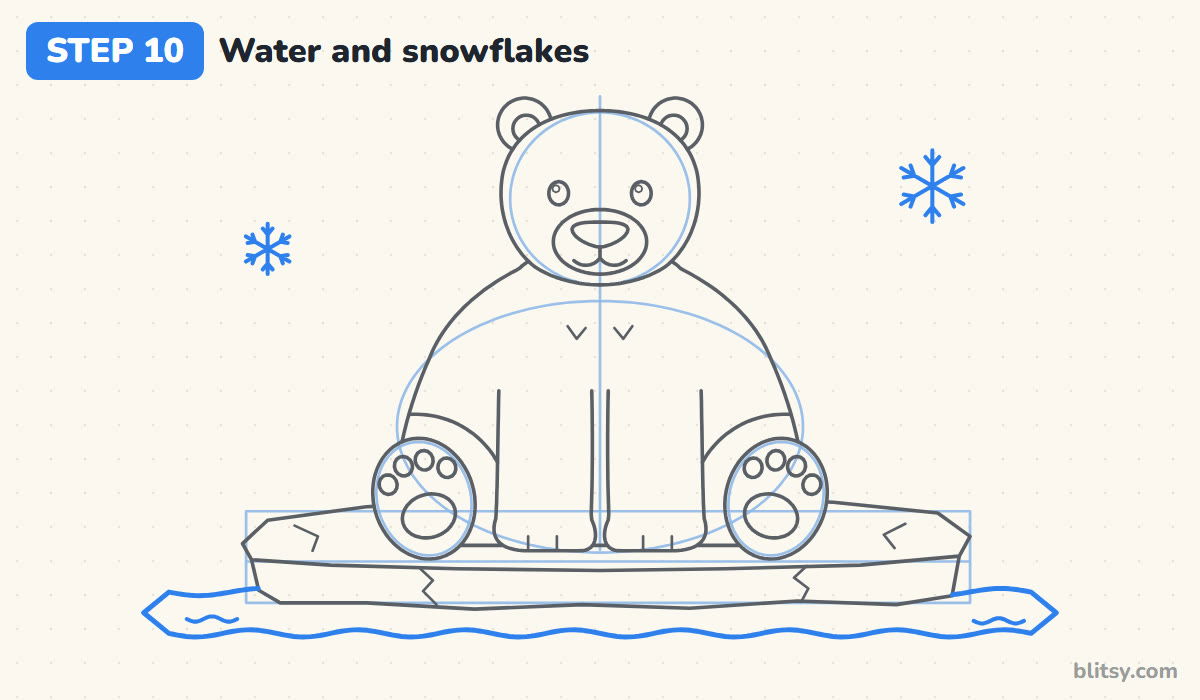
Below the ice, draw a wavy band of water that reaches past both ends of the floe and narrows to a point at each side. A short wiggle on each end shows ripples. In the sky, draw two snowflakes, one big and one small, each with six arms and a little V on every arm.
💡 Tip: Draw the three long lines of a snowflake first, crossing in the middle, then add the V shapes.
Step 11: Ink your lines and erase the guides
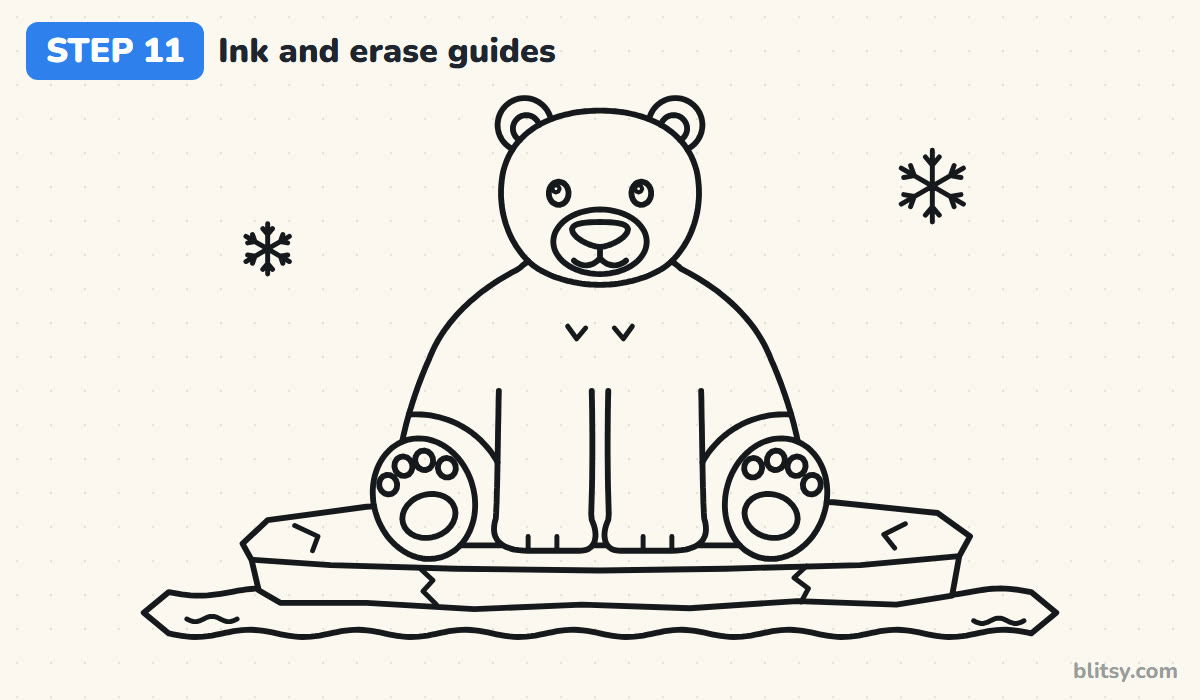
Go over every keeper line with the black pen: the bear, the ice, the water and the flakes. Skip the circle, the oval, the box, the center line and the foot guides. Give the ink a minute to dry, then erase. I always erase in one direction across the page so the paper stays smooth.
💡 Tip: Use a thinner pen, or a lighter hand, for the cracks, ripples and chest fur.
Step 12: Color your polar bear
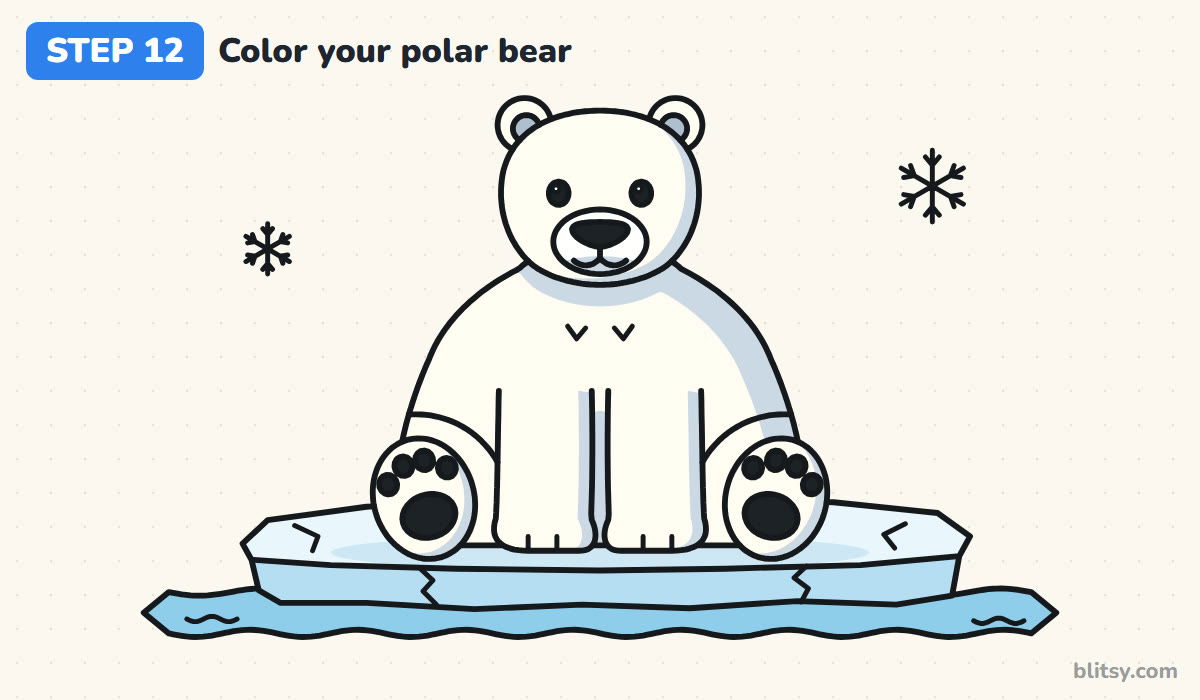
Leave most of the fur as white paper. With a light blue-gray, shade a band under the chin, along the right side of the head and body, and down one side of each leg. Fill the paw pads, eyes and nose black. Color the ice top very pale blue, its side light blue and the water sky blue.
💡 Tip: Shade only one side of the bear. Picking a single light direction makes the white fur look round.
Why Polar Bear Sketches End Up Looking Like Teddies
- Big round ears on top of the head. That's a teddy bear look. Keep the ears small and set low on the upper corners.
- Coloring the fur yellow or bright white. A strong yellow looks dirty, and pure white vanishes. Leave the paper and add pale blue-gray shadows.
- A head as wide as the body. Polar bears have fairly small heads for their size. Keep the body about twice as wide as the head.
- Forgetting the black pads. Without them, the back feet read as two blobs. The dark pads tell the eye these are paws.
- Drawing the ice behind the bear's bottom. Lines that run through the body make it look see-through. Stop every ice line where it meets the fur.
New Ideas for Your Ice Floe Bear
When I want a quick variation, I change the scene, not the bear. Put a small cub beside it on the ice, hang a scarf around its neck for a holiday card, or drop a fish in the water. For a brown cousin, the bear drawing tutorial walks you through a different body shape, and how to draw a penguin fits right into another icy picture.
Printable Polar Bear Coloring Page and Lesson PDF
Prefer paper over a screen? The polar bear coloring page has a small colored example and a color key at the top, so kids can see which pencil goes where, plus a large clean outline below. The step-by-step PDF guide holds all 12 steps with their tips. Both print on Letter or A4.
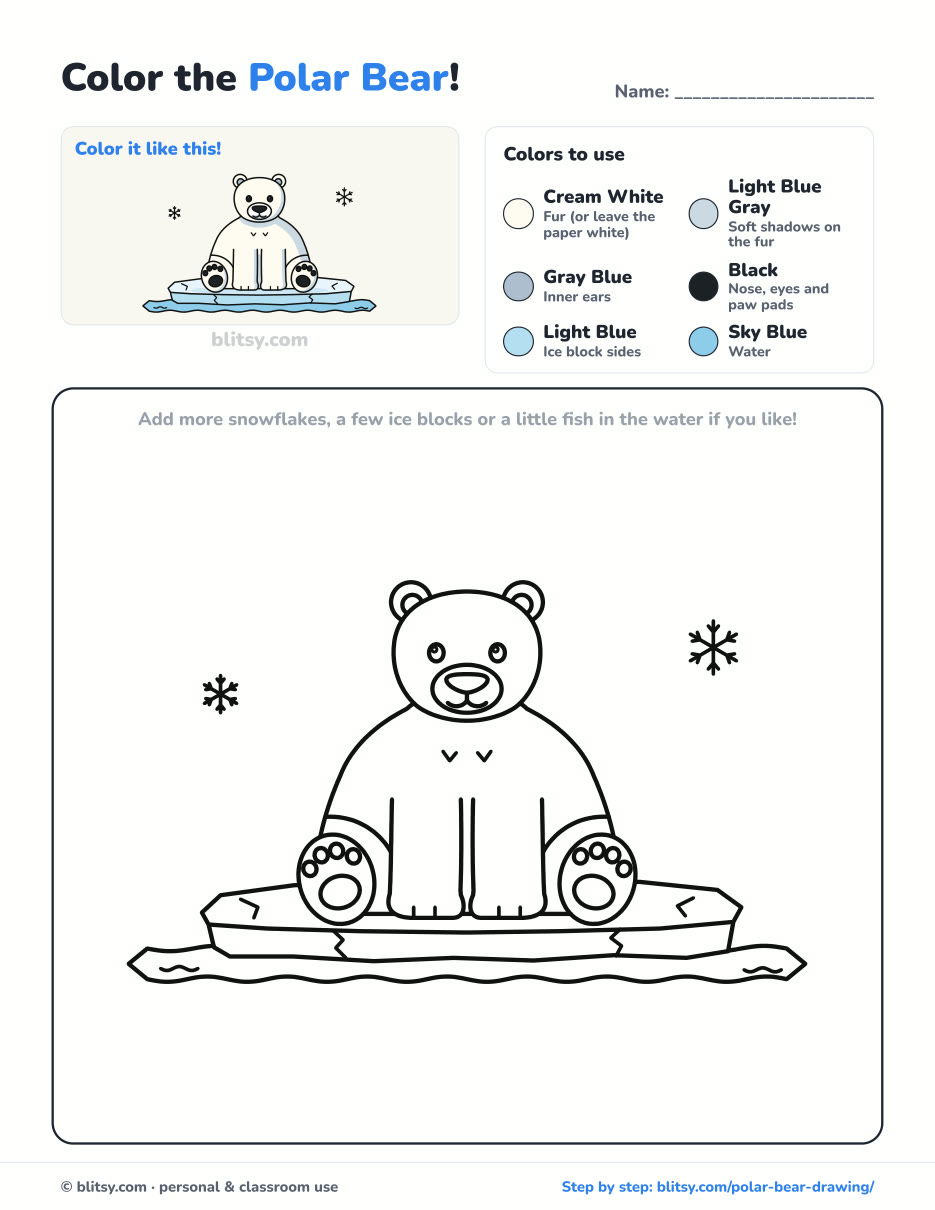
Black outlines with a colored example and the color names at the top. Ready to print and color.
⬇️ Download Coloring PageEvery step picture with its instructions and tips, to keep beside your paper while you draw.
⬇️ Download Drawing Guide📱 On a phone? Tap a download button, then open the file and choose Share → Save to Files or Print. On a computer, the PDF opens or saves straight to your Downloads folder.
Twelve Ice Floe Bear Steps on a Single Pin
Polar Bear Done? Try These Animals and Plants
Every link opens a step-by-step tutorial like this one, so you can keep going one small step at a time.
- Flower Drawing: A potted bouquet with a pink flower, purple bluebells and a yellow star flower is the goal of this flower drawing tutorial.
- Simba Drawing: Learn how to draw Simba step by step, from two ovals to a curious lion cub face.
- Parrot Drawing: Draw a scarlet macaw with a striped wing and a long tail in the parrot drawing tutorial.
- Magnolia Flower Drawing: One open magnolia, a half-closed one and a furry bud share the branch in this magnolia flower drawing step by step guide.
- Alligator Drawing: Two ovals turn into a walking, smiling gator with the how to draw an alligator lesson.
- Grass Drawing: Grow a meadow patch from one bending blade in the grass drawing tutorial.
- Butterfly Drawing: An orange butterfly with wings spread wide takes twelve steps in this butterfly drawing step by step lesson.
- Cat Eye Drawing: Zoom in on one feature with the cat eye drawing tutorial, which shows a slit pupil and a round one.
- Cat Face Drawing: A gray tabby looks straight at you at the end of this how to draw a cat face guide.
- Snow Leopard Drawing: Another cold-weather animal waits in the snow leopard drawing tutorial, resting on a mountain rock.
- Leopard Drawing: Draw a sitting leopard with amber eyes in this leopard drawing step by step lesson.
- Peppa Pig Drawing: Give Peppa a muddy puddle to splash in with the Peppa Pig drawing tutorial.
Polar Bear Drawing Questions From Young Artists
What is the easiest way to draw a polar bear?
Start with a circle for the head and a wide oval for the body, then build the outline over them. A front sitting pose is easier than a walking one because both sides match.
How do you color a polar bear on white paper?
Leave the fur as plain paper and add light blue-gray shadows on one side. A dark outline and blue ice or water around the bear make the white fur stand out.
What makes a polar bear look different from other bears in a drawing?
Small rounded ears, a smaller head for its body size, a longer snout and white fur. Placing it on ice or snow helps too.
How long does this polar bear drawing take?
Most beginners need 30 to 40 minutes with coloring. The paw pads and the ice edges take the longest.
Sharpen that blue-gray pencil, give your bear its little black pads, and maybe add a cub to keep it company on the ice. 🐻❄️❄️
Related posts:
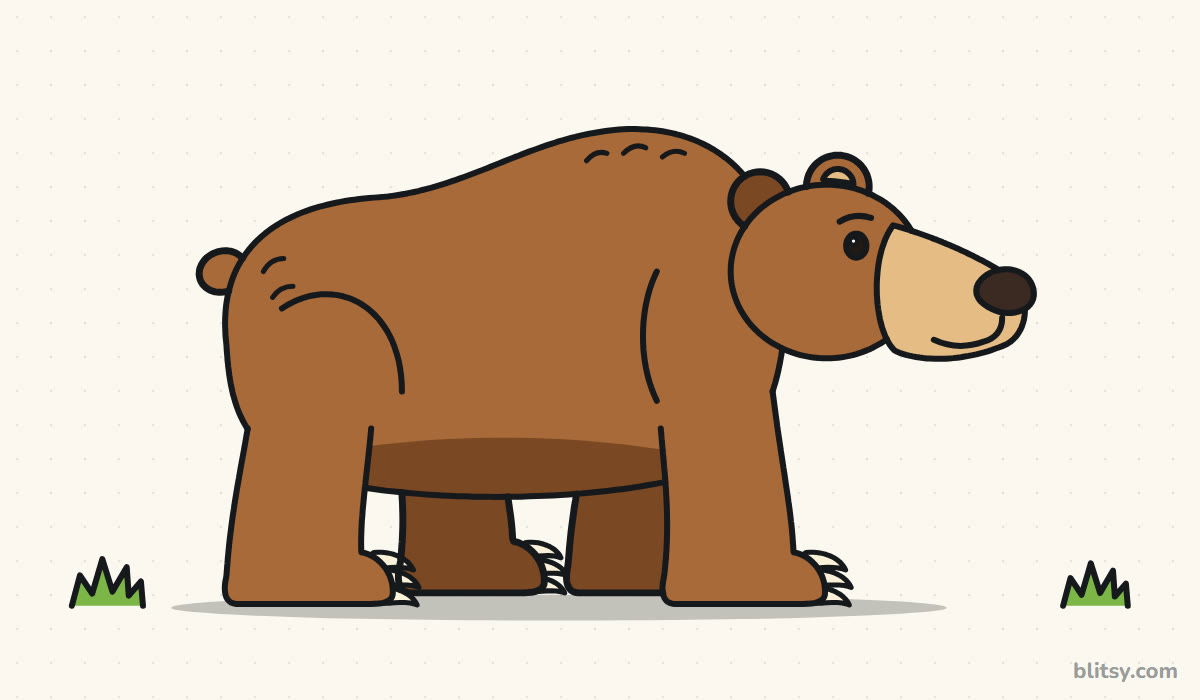 How to Draw a Bear Step by Step (Easy for Beginners)
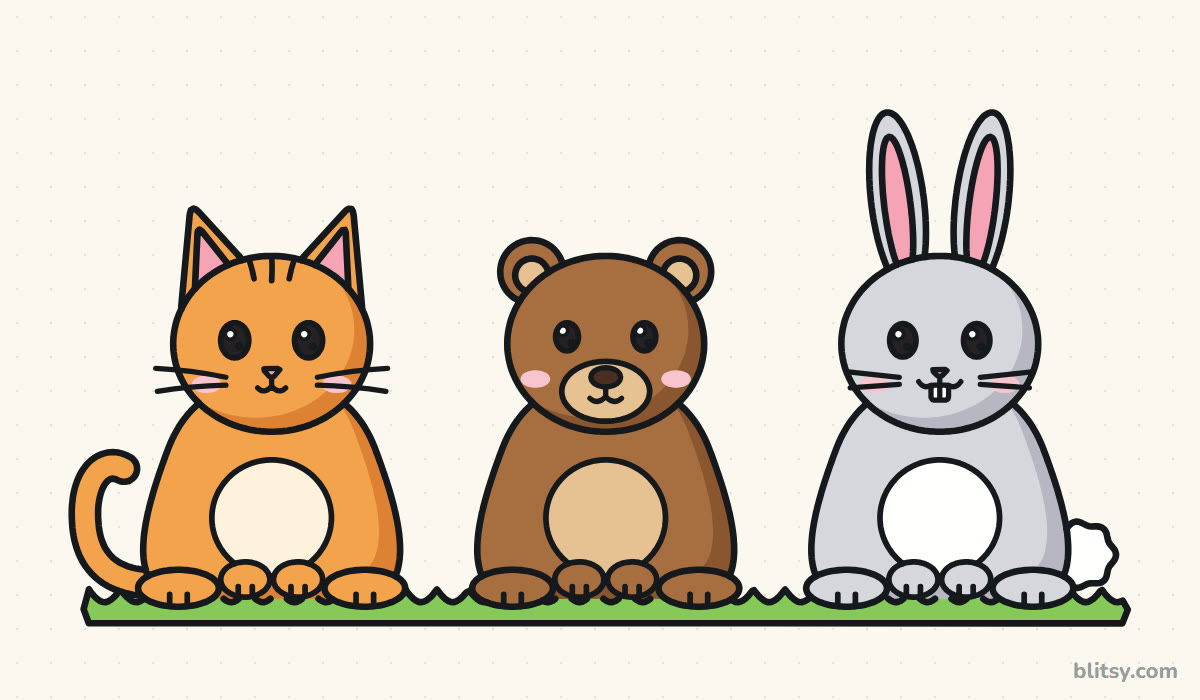 How to Draw Cute Animals Step by Step (Cat, Bear & Bunny)
 How to Draw a Care Bear Step by Step (Cute Fan Art for Kids)
 How to Draw a Car Step by Step (Easy Drawing for Beginners)
 How to Draw a Whale Step by Step (Easy for Beginners)
 How to Draw an Arctic Fox Step by Step (Easy for Beginners)
 How to Draw a Shark Step by Step (Easy for Beginners)
 How to Draw a Chicken Step by Step (Easy for Beginners)
 How to Draw a Leopard Step by Step (Easy for Beginners)
 How to Draw a Light Bulb Step by Step (Easy for Beginners)
 How to Draw a Crow Step by Step (Easy for Beginners)
 How to Draw an Eagle Step by Step (Easy for Beginners)

