
Draw a yellow oval and most people will guess it's an egg. Give it two little pointed tips, a leaf and a slice sitting in front, and suddenly nobody can mistake it for anything but a lemon. This lesson shows you how to draw a lemon step by step, with one whole lemon lying on its side and a fresh round slice standing next to it. It's a calm, simple subject, so it works for kids, for beginners and for anyone who wants a bright page in their sketchbook.
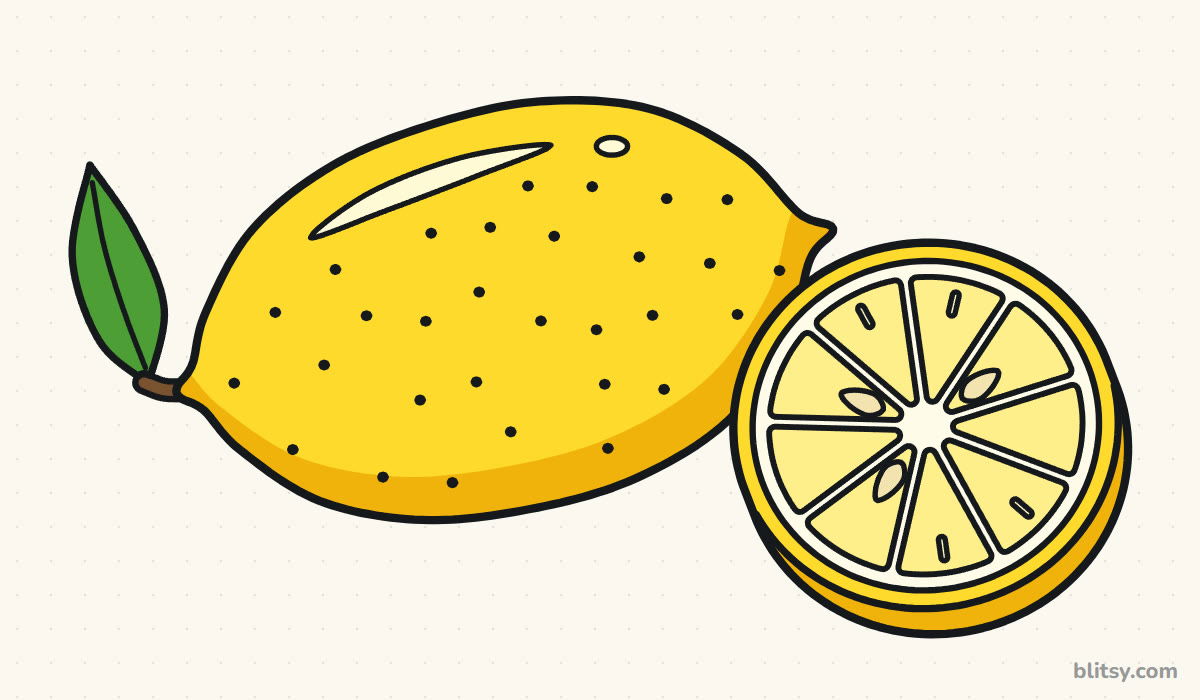
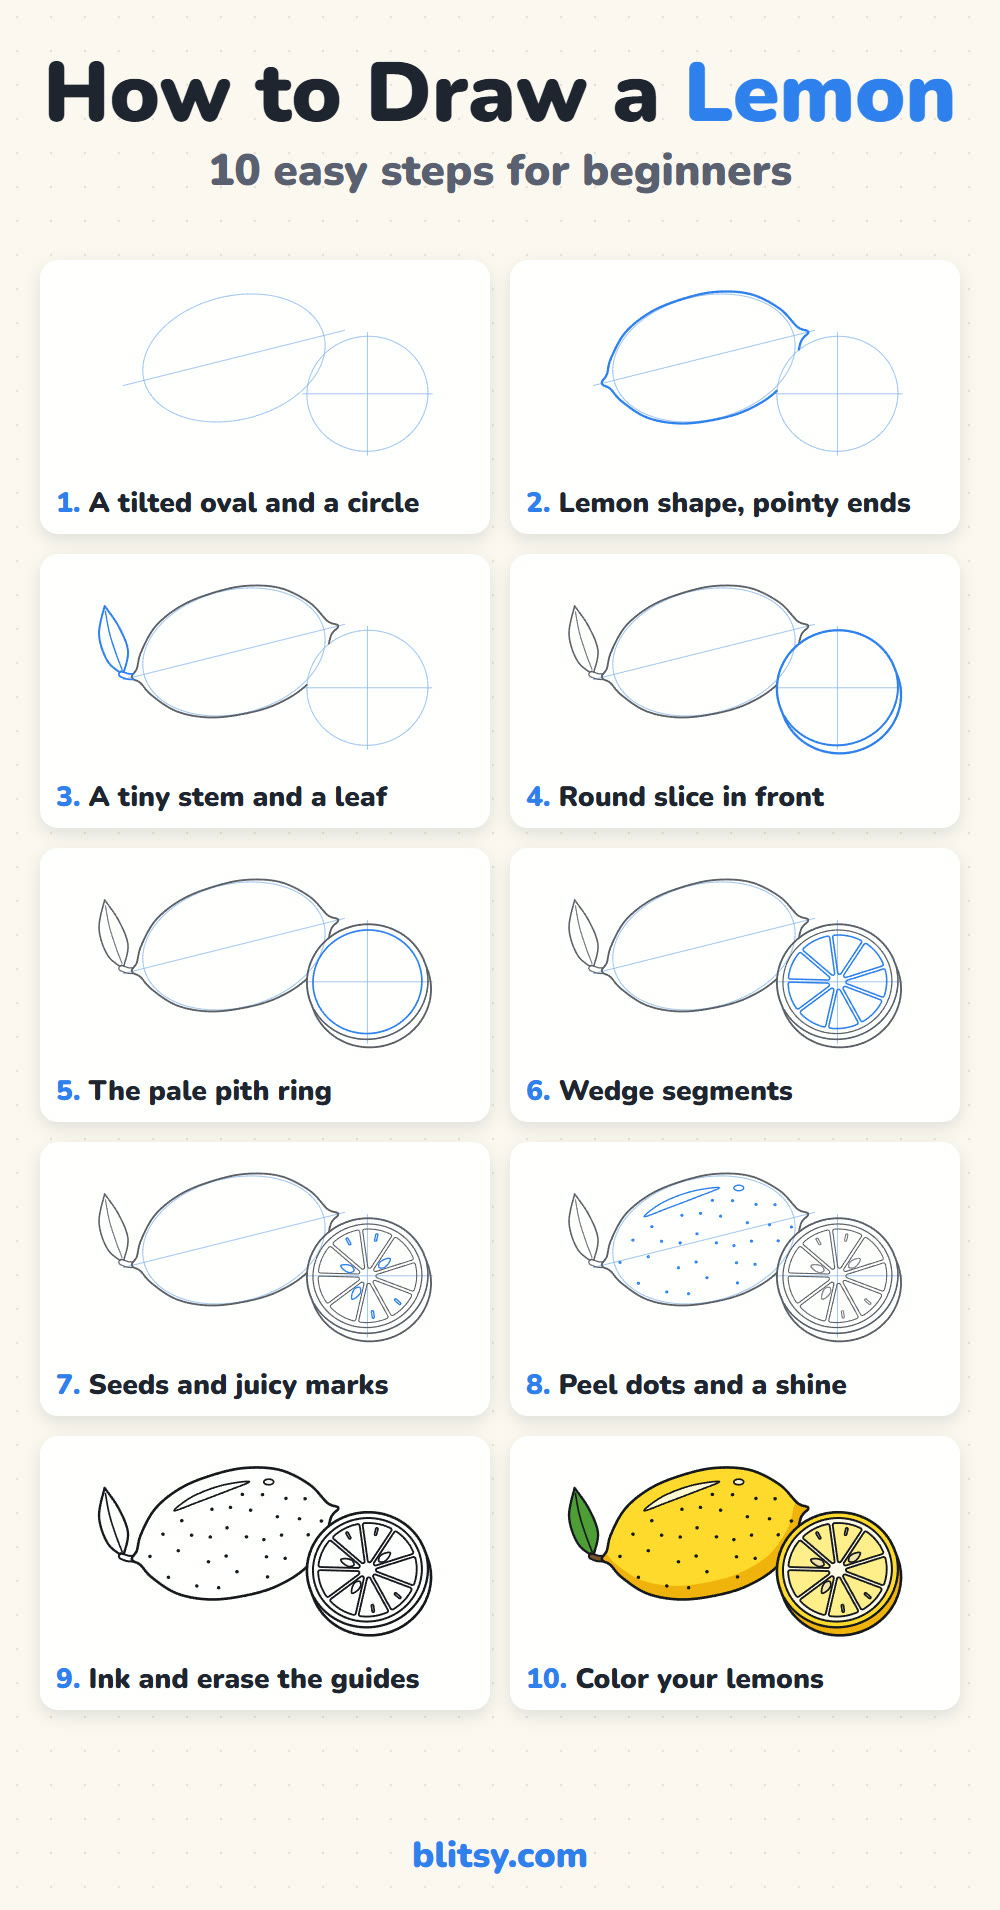
Each picture adds just one idea. Lines in blue are the ones to draw now, and the gray lines are already on your page from the steps before. Draw the blue part, check it against the picture, then move on.
Quick overview
⏱️ Time: about 20 to 30 minutes with coloring
🎯 Level: easy, fine for kids from about 6 up
✏️ Steps: 10
🍋 You'll draw: a whole lemon with a leaf and a round lemon slice
Lemon Sketching Kit for a Sunny Page
- A pencil you can press lightly with
- A soft eraser
- A black marker or fineliner for the final lines
- Colored pencils or crayons: yellow, golden yellow, light yellow, green and brown
- Plain white paper
You don't need a white pencil. Leaving the paper bare gives the pith ring and the center of the slice their clean white color.
How to Draw a Lemon Step by Step
Step 1: Sketch a tilted oval and a circle
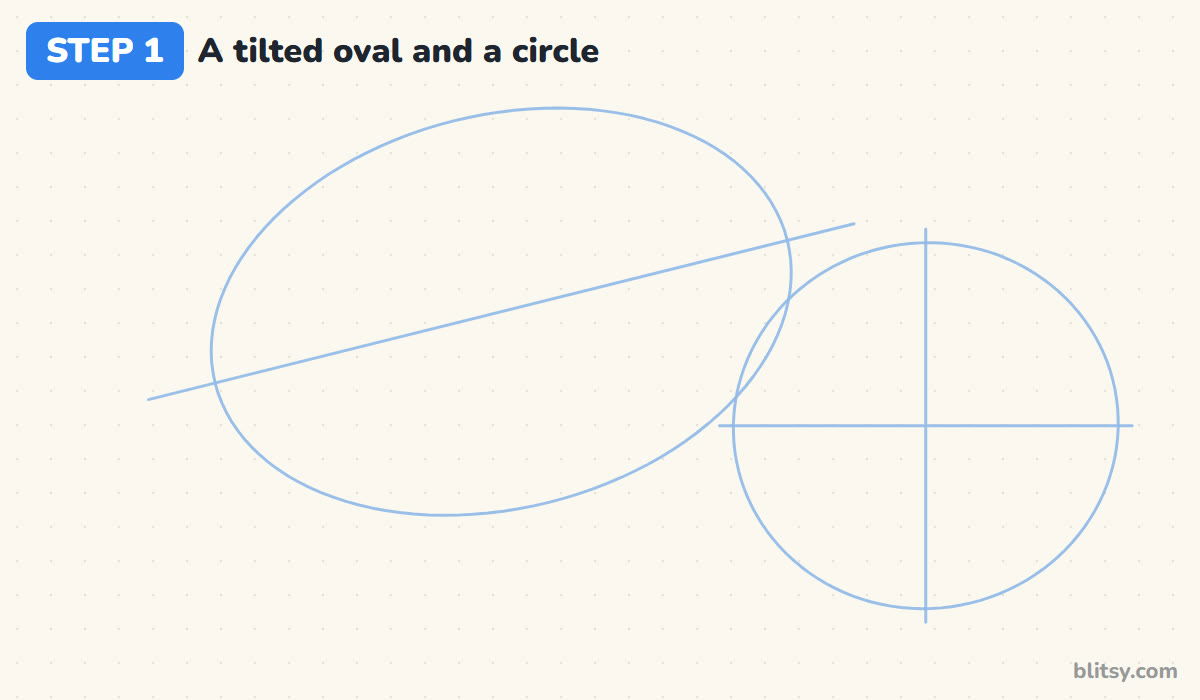
Draw a wide oval on the left, tipped so its right end sits a little higher than its left. I like that tilt because a lemon lying perfectly flat looks stiff. Run a light line through it from end to end; that line tells you where the two pointed tips go. On the right, overlapping the oval's lower corner, draw a circle with a cross through it for the slice.
💡 Tip: Keep the oval about one and a half times as wide as it is tall. Any rounder and it starts to look like an orange.
Step 2: Shape the lemon with pointy ends
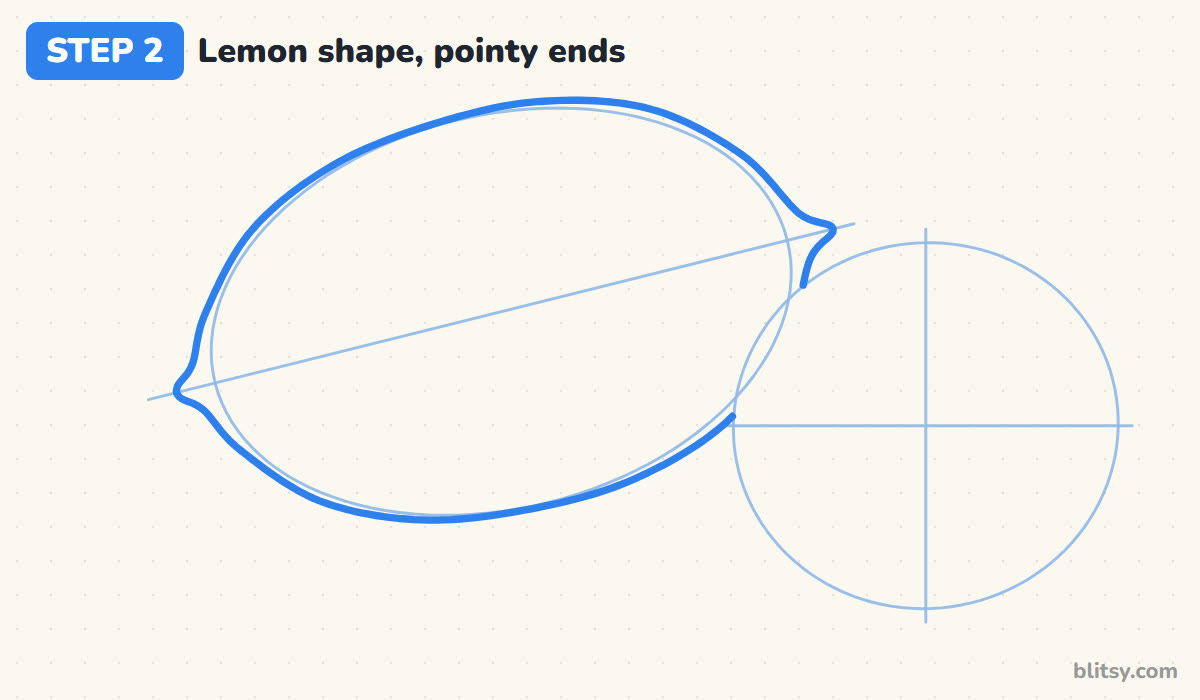
Now trace around the oval with your real lemon line. Where the line meets the guide at each end, pinch it out into a small bump. I make the right tip a bit sharper than the left, because real lemons are rarely even. Stop the line where it reaches the circle, since the slice will sit in front.
💡 Tip: The tips should be tiny. If they stick out like a football's points, the whole fruit turns into a lime or a melon.
Step 3: Add a tiny stem and a leaf
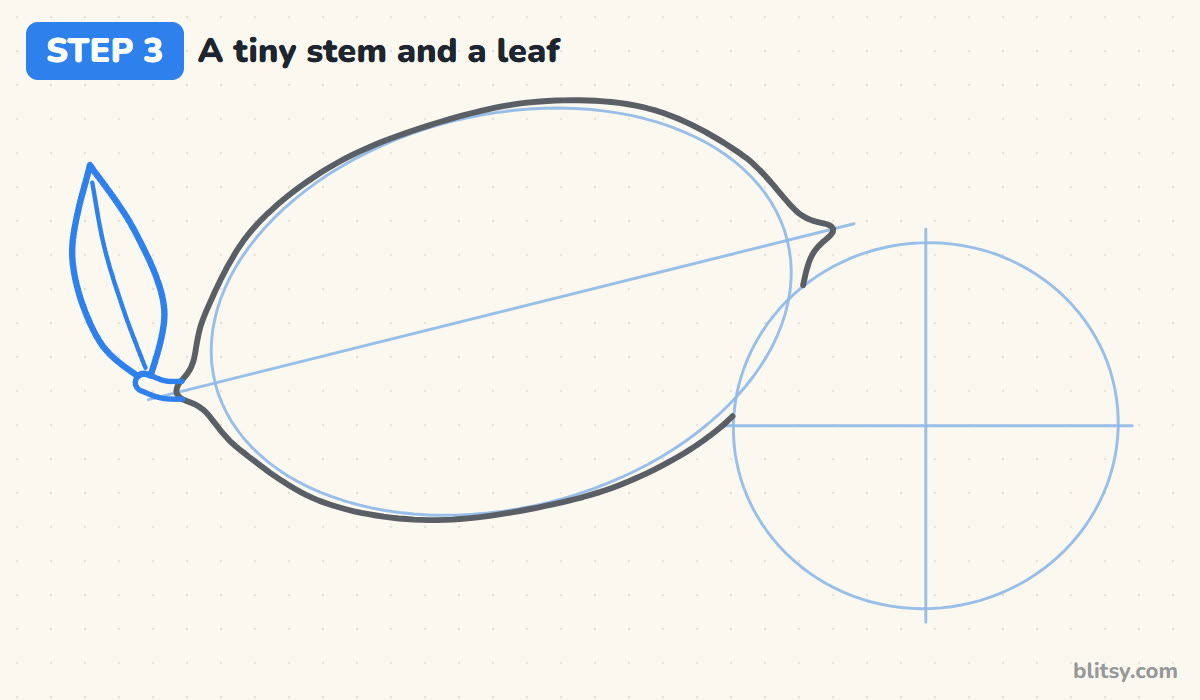
At the left tip, draw a short stubby stem pointing out and slightly up. From the end of the stem, draw a slim leaf that rises up and away from the fruit. Add one curved line down its middle for the vein.
💡 Tip: Let the leaf lean out, away from the lemon. A leaf lying flat on the peel hides the nice pointed tip.




Step 4: Draw the round slice
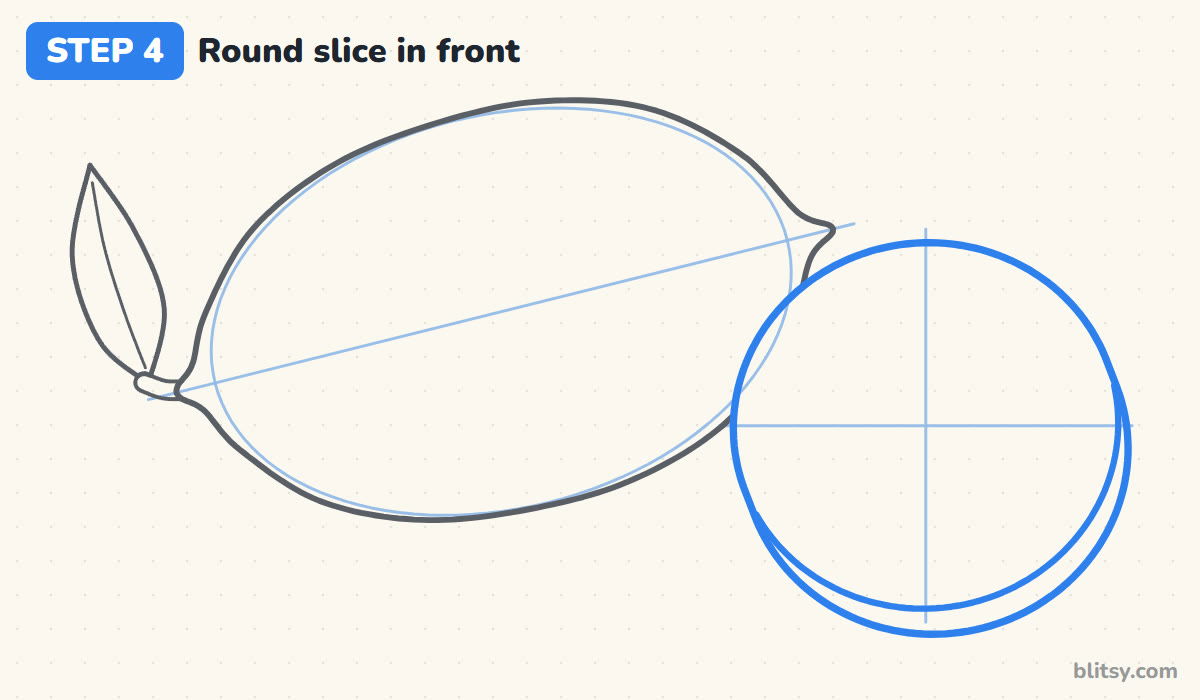
Go over your guide circle with a firm line. Then draw a second curve just below it, following the bottom half and joining up at the sides. That thin band is the thickness of the slice, and it's what makes it stand up instead of looking like a flat sticker.
💡 Tip: Keep the band thin, about the width of your fingertip on the page. Thicker and it reads as a whole lemon cut in half.
Step 5: Draw the pale pith ring
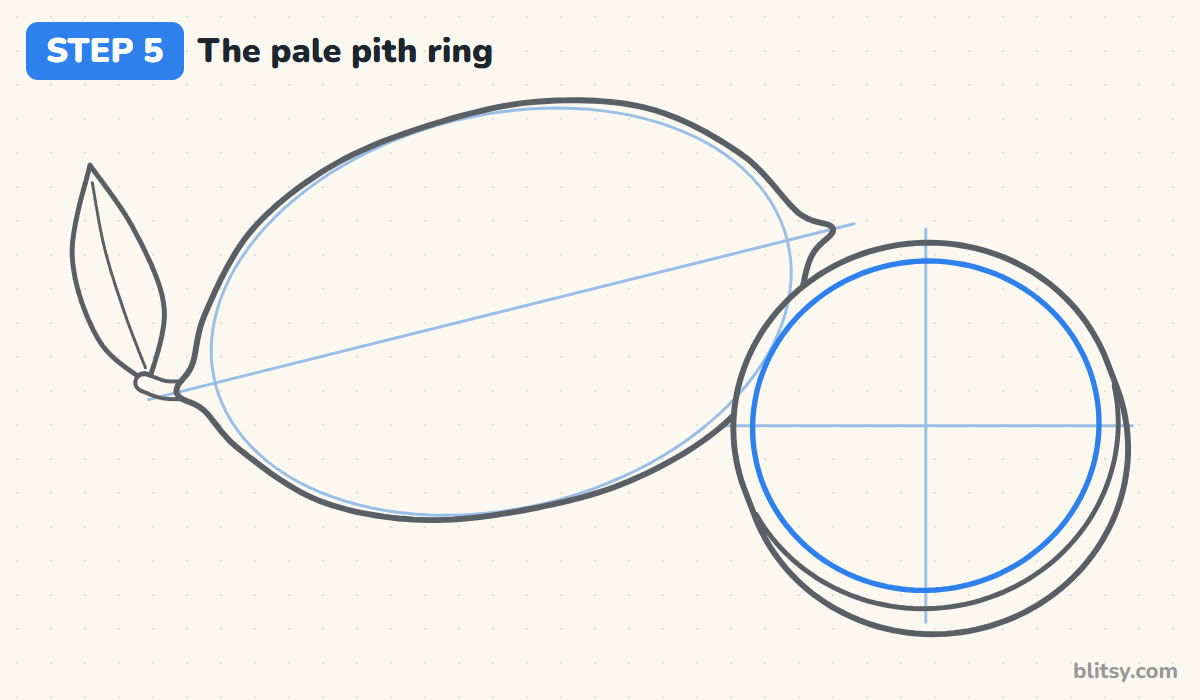
Inside the slice, draw a second circle close to the edge. The narrow gap between the two lines will be the yellow rind. Everything inside this new circle is where the pith and the juicy wedges go.
💡 Tip: Turn your paper as you go. A circle is much easier to keep even when your hand is moving in its most comfortable direction.
Step 6: Fill the slice with wedge segments
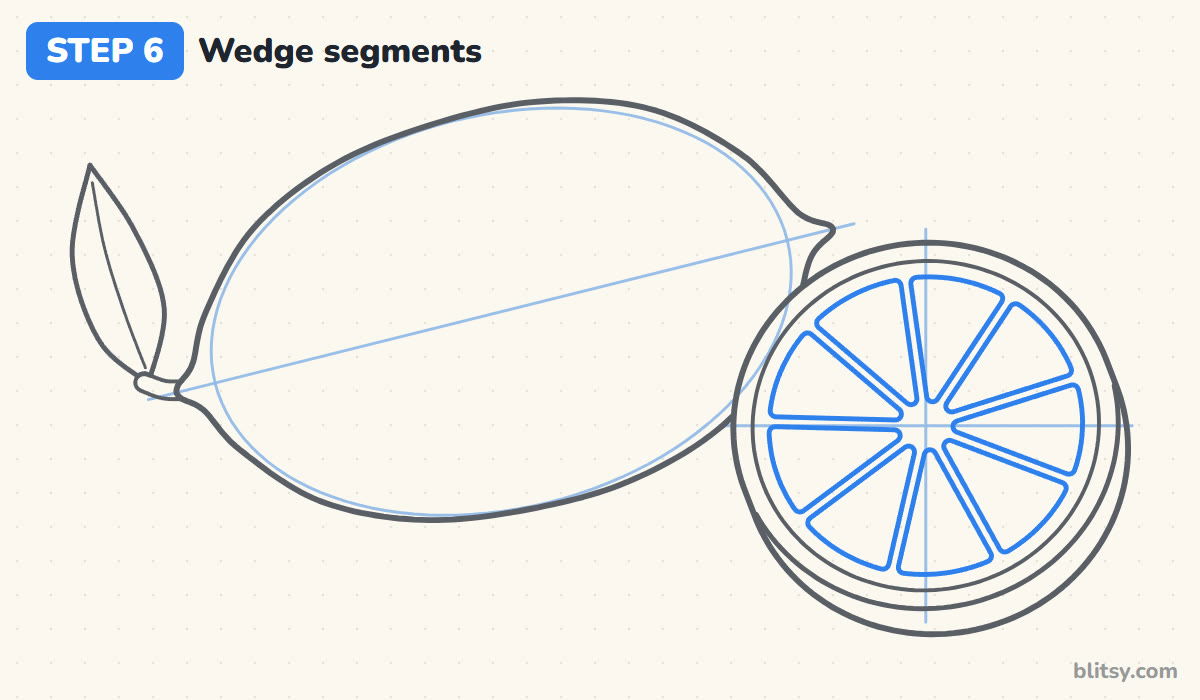
Mark a small dot in the center. Around it, draw nine long, skinny wedges, like slices of a pie with rounded corners. When I teach this, I always point out the gaps: leave a thin space between every wedge and at the outer edge too, because that white space is the pith.
💡 Tip: Draw the top, bottom, left and right wedges first, then fit the others in between. Your spacing stays much more even that way.
Step 7: Add seeds and juicy marks
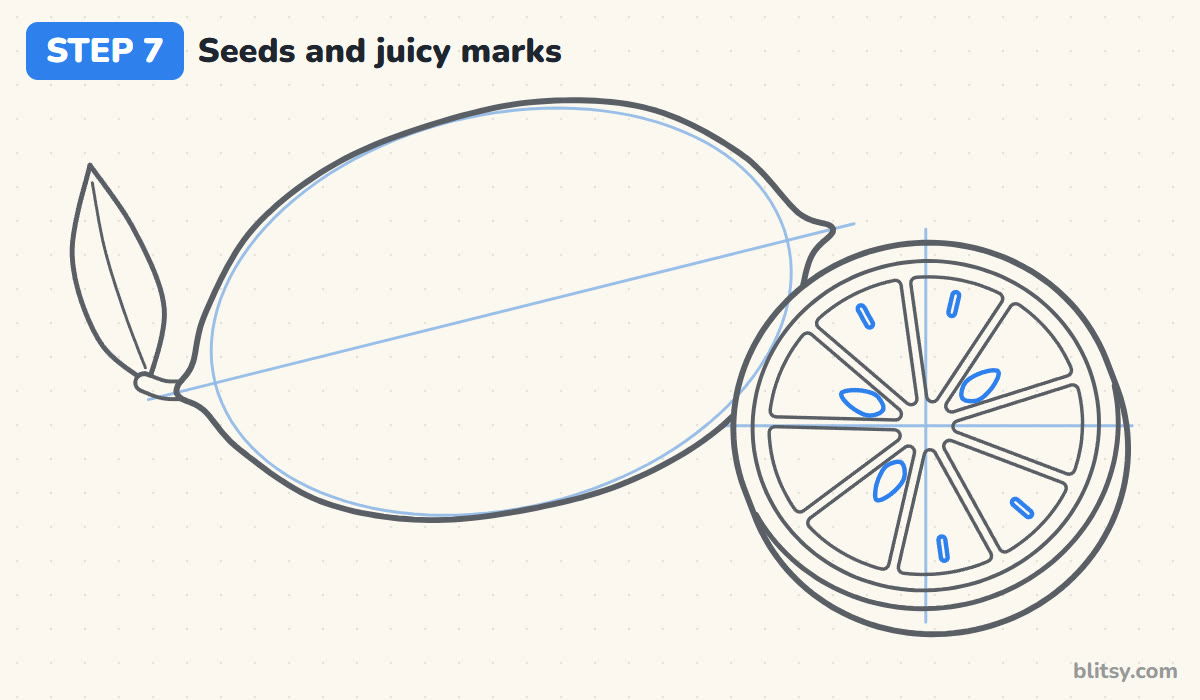
Pick two or three wedges and draw a small teardrop seed near the center, with the pointed end toward the middle. In some of the other wedges, add one short straight dash. Those little dashes look like the shine on juicy pulp.
💡 Tip: Three seeds is plenty. With a seed in every wedge, the slice starts to look like a watermelon.




Step 8: Dot the peel and add a shine
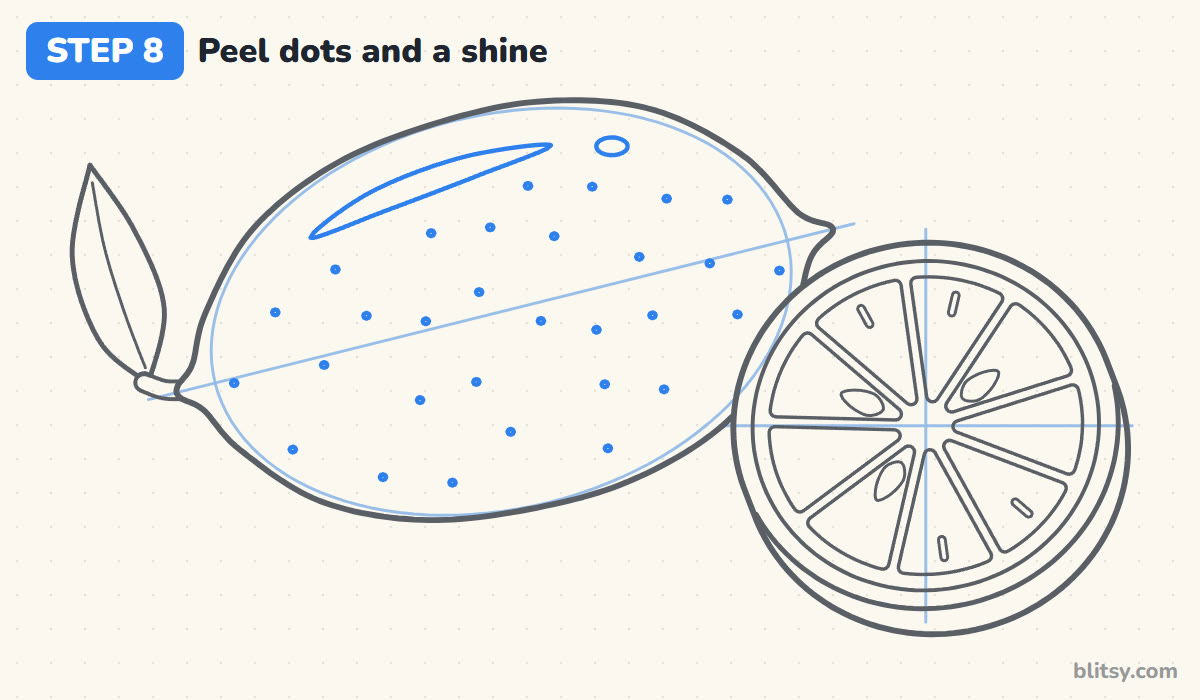
Sprinkle small dots over the whole lemon. Real lemon peel is covered in tiny pits, and these dots are what turn a smooth yellow shape into textured skin. Near the top, draw a long thin shine shape and one small oval beside it. I keep the dots away from the shine so it stays clean.
💡 Tip: Space the dots unevenly, some closer and some farther apart. Neat rows of dots look like a pattern on fabric.
Step 9: Ink the lines and erase the guides
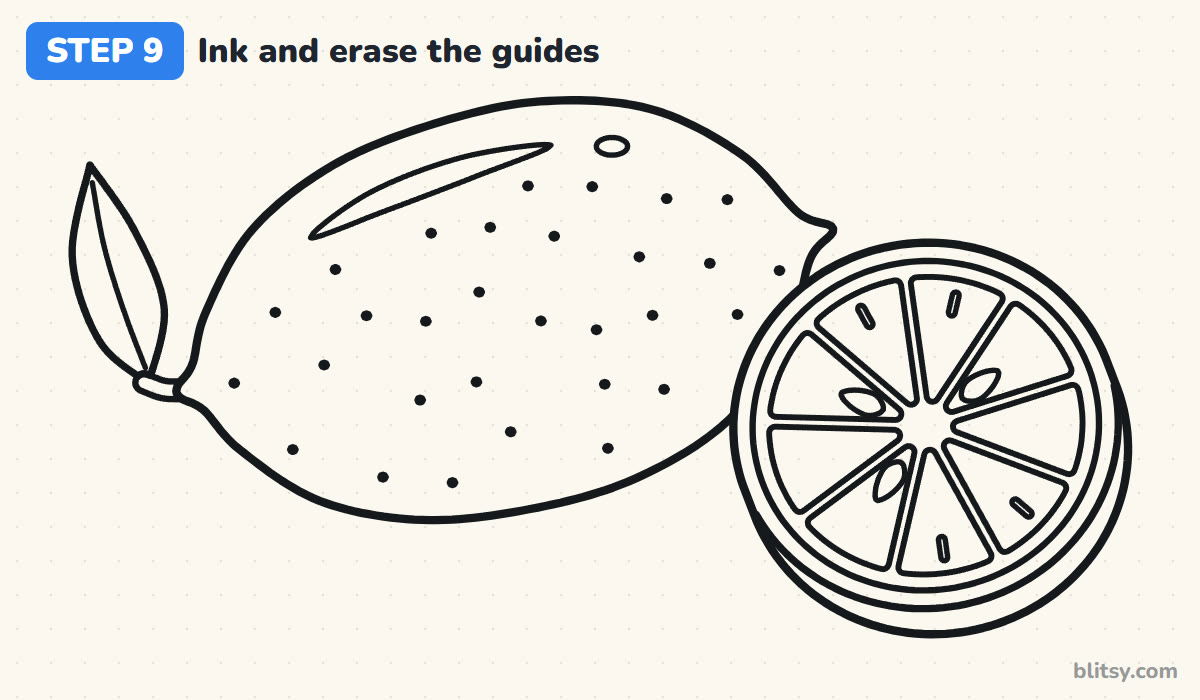
Trace every keeper line with a black marker: the lemon, the stem and leaf, the slice, the wedges, the seeds and the dots. Give the ink a minute to dry. Then erase all of the oval, the circle and the cross lines.
💡 Tip: Ink the big outlines first and the dots last, so your hand doesn't drag through wet marker.
Step 10: Color your lemons
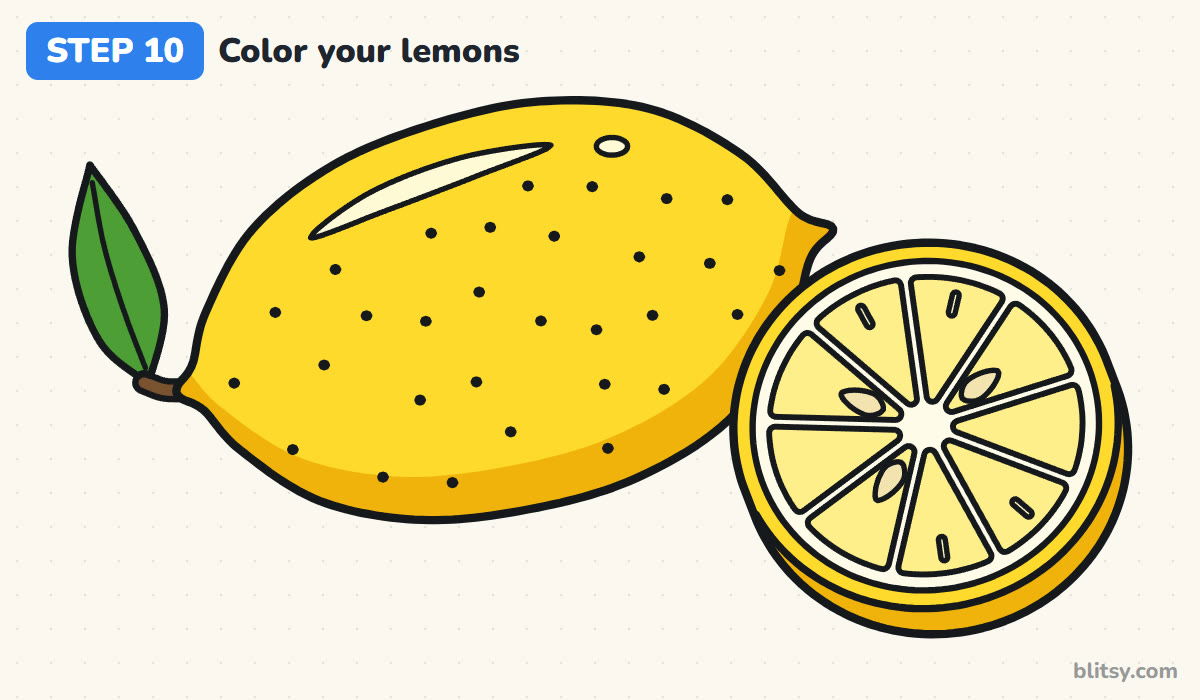
Color the peel and the rind ring yellow. Add golden yellow along the bottom of the whole lemon and on the thin band under the slice; that shading gives both of them weight. Fill the wedges with a light yellow, leave the pith and the shine white, then color the leaf green and the stem brown.
💡 Tip: Color the light yellow wedges with soft pressure. Pressing hard makes them as strong as the peel, and the slice loses its fresh look.
Why a Lemon Sketch Can Look Like an Egg
- Leaving the ends round. A plain oval looks like an egg. Two small pinched tips are the single detail that says lemon.
- Making the slice flat. Without the thin band under the circle, the slice looks pasted on. Add the second curve along the bottom.
- Wedges touching each other. If the segments have no gaps, the white pith disappears. Leave a thin space around every wedge.
- Coloring everything the same yellow. Use a lighter yellow inside the slice and a deeper golden yellow on the shaded side, so the parts don't melt together.
- Dots in neat rows. Peel texture is random. Scatter the dots and leave the shine area clear.
Lemon Variations to Try Next
Once the shapes feel easy, play with them. Color the same drawing green and you have a lime. Cut a notch into the slice and hang it on the rim of a glass of lemonade, or draw three slices in a row on a little cutting board. Small kids can leave out the seeds and the juice marks and keep just the wedges. The cut fruit idea here works a lot like the one in my peach drawing step by step lesson, so that's a good next fruit to practice. For another slice with a pattern inside, try the pineapple drawing tutorial, and if you'd like to group your lemon with other fruit, the fruit bowl drawing shows how to arrange a still life.
Free Lemon Coloring Page and Printable Step Guide
The free lemon coloring page has a colored model at the top, a color key that matches each crayon to its part, and a big outline underneath for kids to fill in. The step-by-step PDF guide holds all 10 steps with pictures and tips, so you can practice without a screen. Both fit Letter and A4 paper.
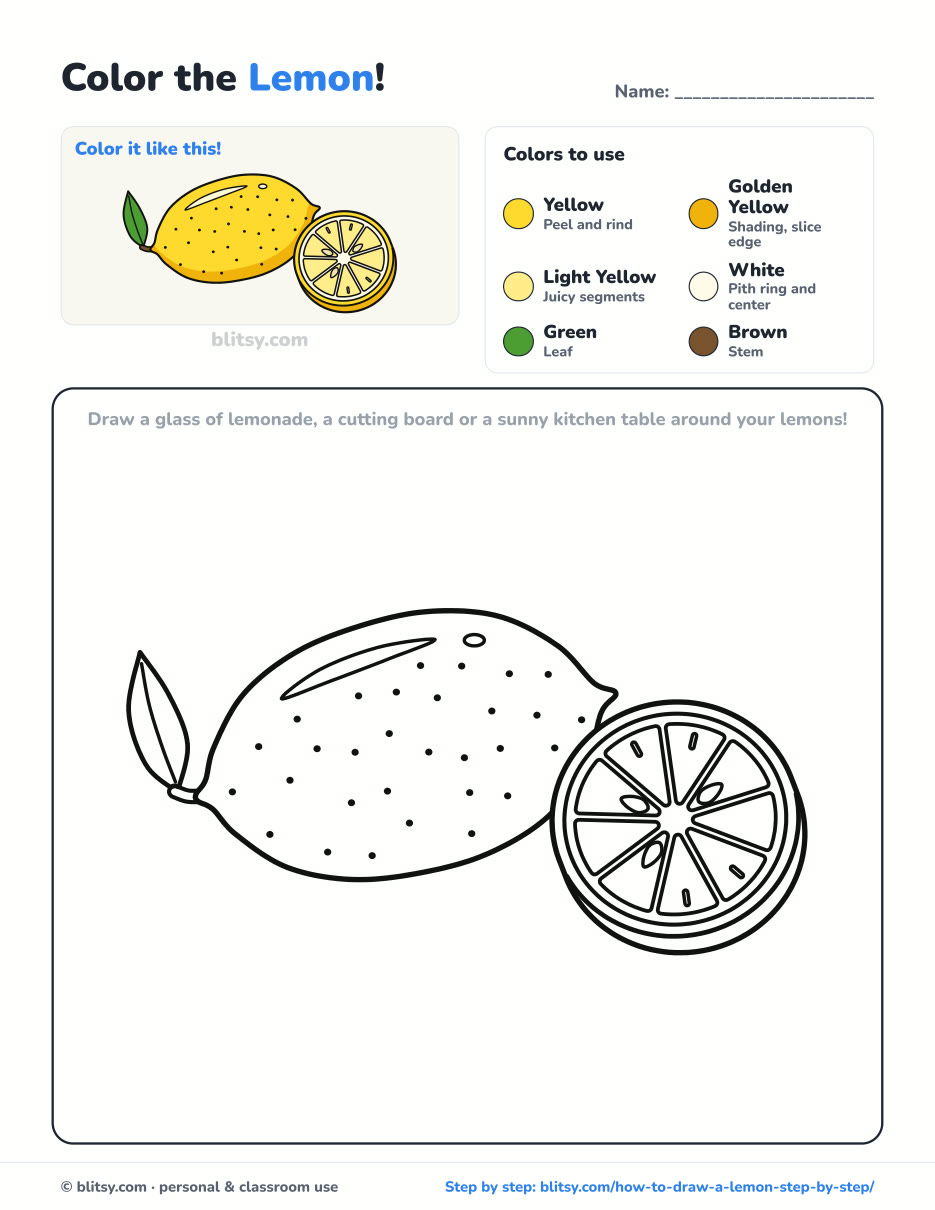
Black outlines with a colored example and the color names at the top. Ready to print and color.
⬇️ Download Coloring PageEvery step picture with its instructions and tips, to keep beside your paper while you draw.
⬇️ Download Drawing Guide📱 On a phone? Tap a download button, then open the file and choose Share → Save to Files or Print. On a computer, the PDF opens or saves straight to your Downloads folder.




Save the Lemon Steps to a Pinterest Board
Fill a Fruit Basket After Your Lemon
Each tutorial below has a picture for every stage, so you can keep drawing fruit with the same easy method.
- Peach Drawing: A round peach with its soft crease and a cut half showing golden flesh and a grooved pit in this peach drawing step by step lesson.
- Pineapple Drawing: Draw a whole pineapple with a leafy crown and a round slice beside it in this pineapple drawing tutorial.
- Strawberry Drawing: A plump strawberry with a leafy cap and seeds, plus a cut half showing its pale center, starts from a circle and a soft V in this strawberry drawing step by step guide.
- Fruit Drawing: Five fruits built from circles and ovals sit in a blue bowl in this how to draw fruit still life tutorial.
- Apple Drawing: Draw a shiny red apple and a green apple with a bite taken out in this apple drawing tutorial.
Lemon Drawing Questions Kids Often Ask
How do you draw a lemon easily?
Start with a wide oval, pinch a small point at each end and add a leaf at one tip. A few dots on the peel finish it.
How do you draw a lemon slice?
Draw a circle with a second circle just inside it, then fill the middle with skinny wedges around a center dot. Leave white gaps between the wedges for the pith.
What colors do you need for a lemon drawing?
Yellow for the peel, golden yellow for shading, a light yellow for the inside of the slice, plus green for the leaf and brown for the stem.
How is drawing a lemon different from drawing an orange?
A lemon is longer than it is tall and has small pointed tips at both ends, while an orange is round. Lemon wedges are usually paler, too.
Put a real lemon next to your paper next time and compare the tips and the dots. 🍋✏️
Related posts:
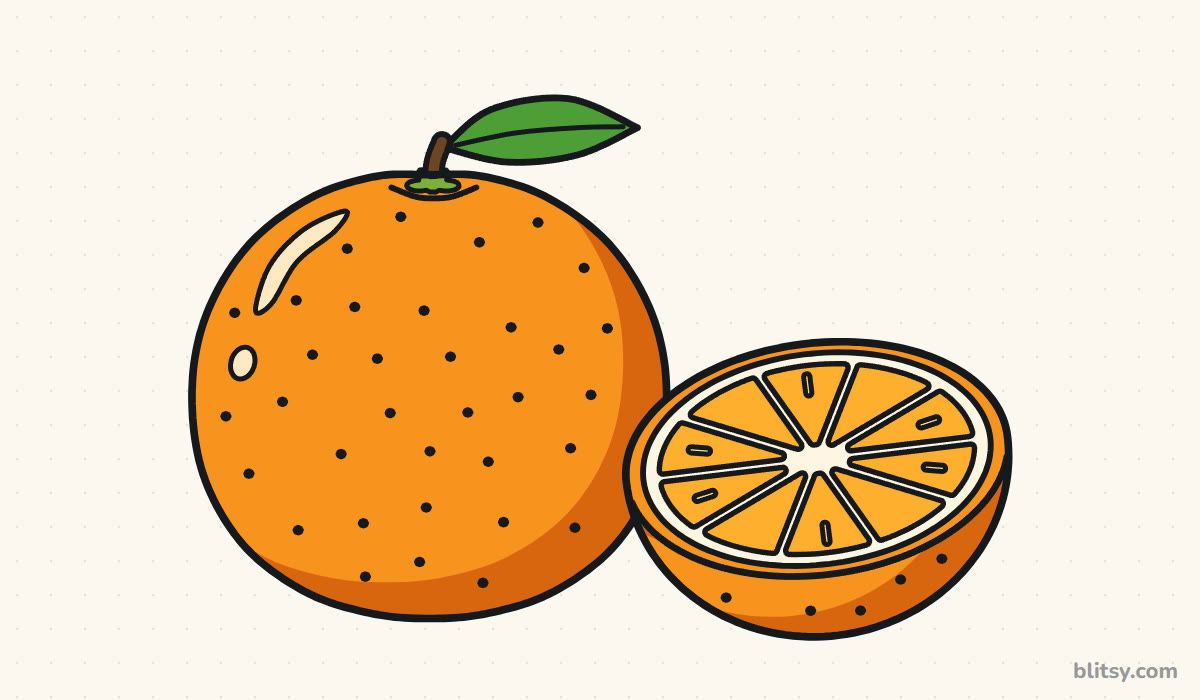 How to Draw an Orange Step by Step (Whole Fruit and Juicy Half)
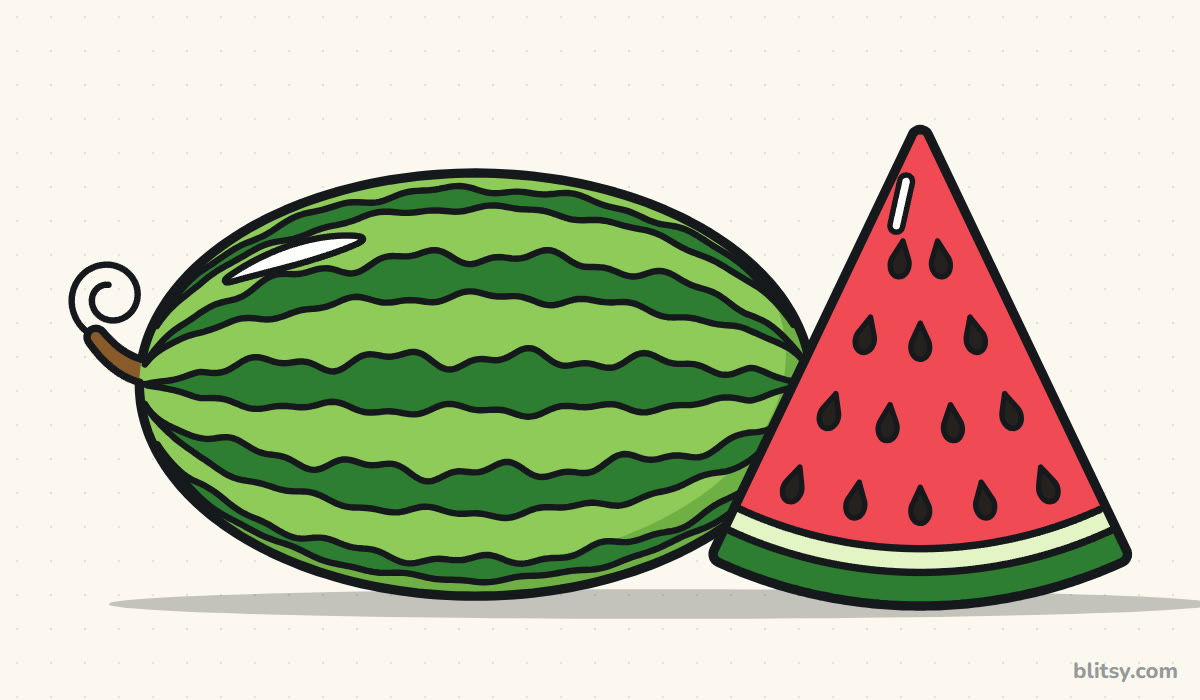 How to Draw a Watermelon Step by Step (Whole Melon and Slice)
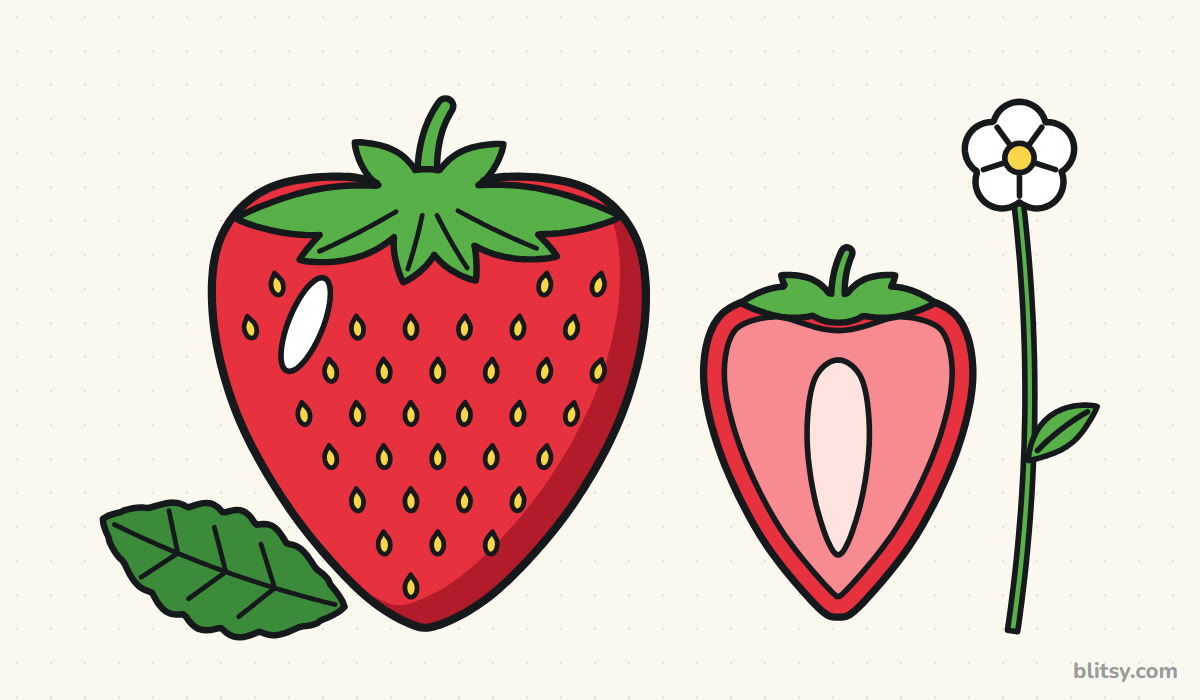 How to Draw a Strawberry Step by Step (Whole Berry + Cut Half)
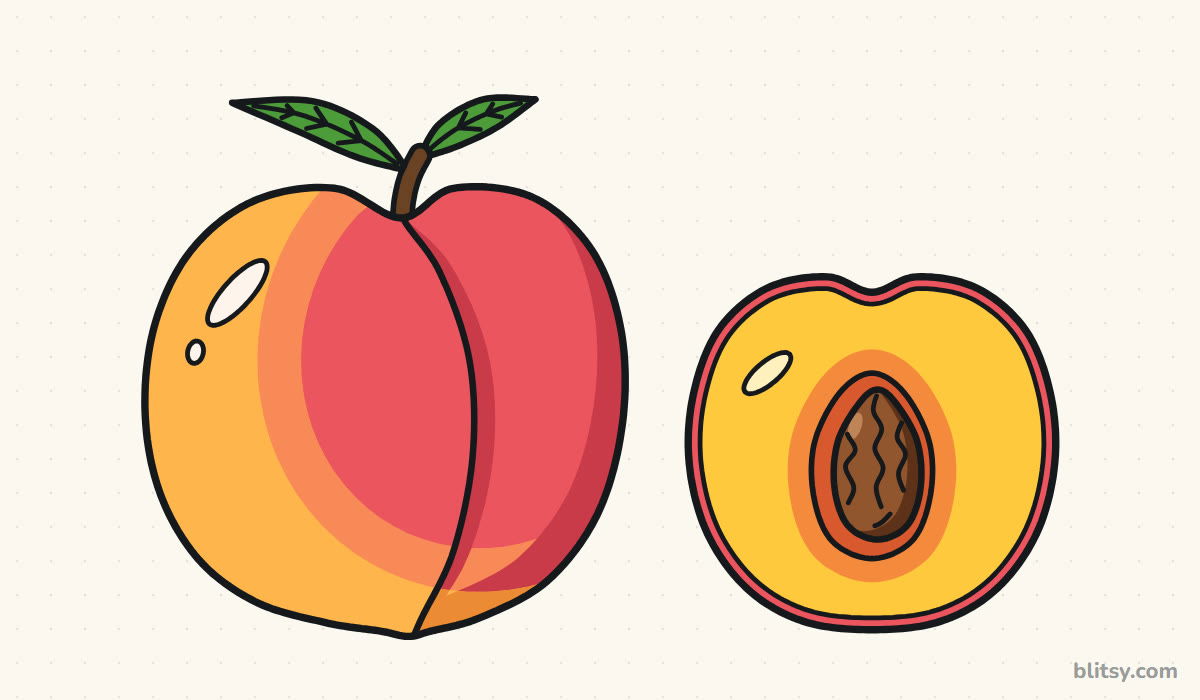 How to Draw a Peach Step by Step (Whole Fruit + Cut Half)
 How to Draw a Pizza Step by Step (Easy, with a Cheesy Slice)
 How to Draw a Pineapple Step by Step (Easy Crown and Slice)
 How to Draw a Whale Step by Step (Easy for Beginners)
 How to Draw Lungs Step by Step (Easy Science Diagram)
 How to Draw Iron Man Step by Step (Easy Chibi for Kids)
 How to Draw a Dress Step by Step (Easy Party Dress)
 How to Draw a Chicken Step by Step (Easy for Beginners)
 How to Draw a UFO Step by Step (Cute Alien Saucer)

