
An orange looks like the easiest fruit in the world to draw, until you notice it's just a circle. What turns that circle into an orange is the small stuff: a speckled peel, a little leaf on top and, best of all, a cut half that shows off its juicy wheel of segments. In this lesson you'll learn how to draw an orange step by step, one whole fruit and one sliced half sitting in front of it. Kids can follow along easily, and grown-ups who want a cheerful fruit sketch will enjoy it too.
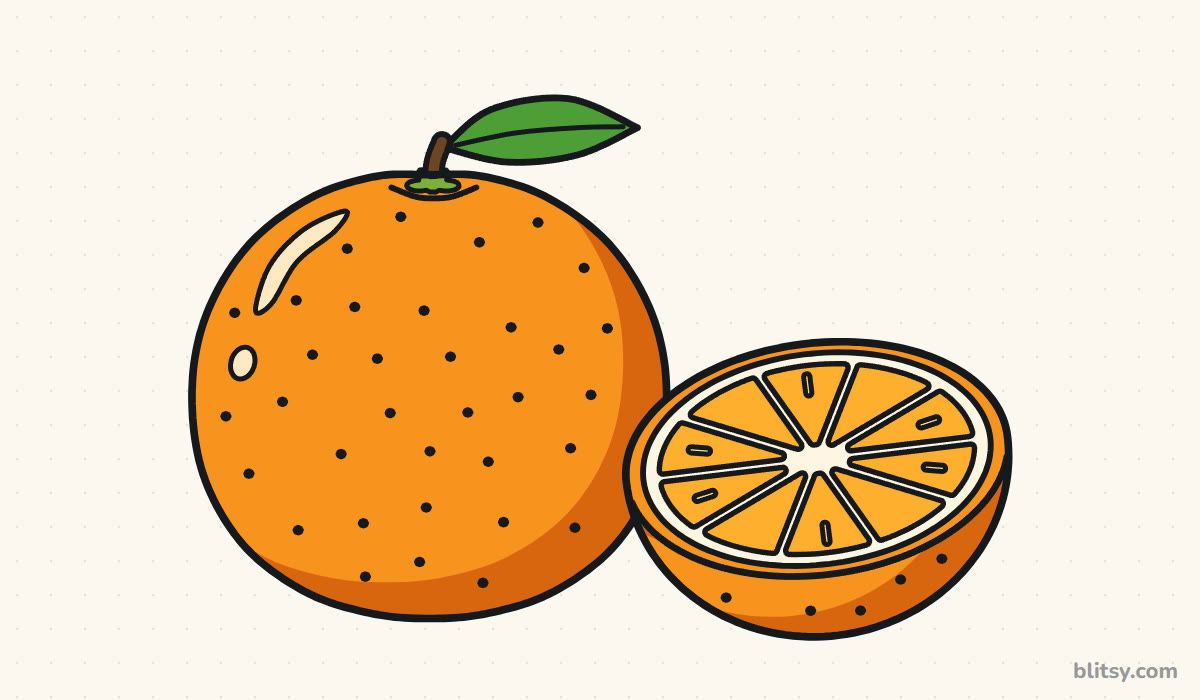
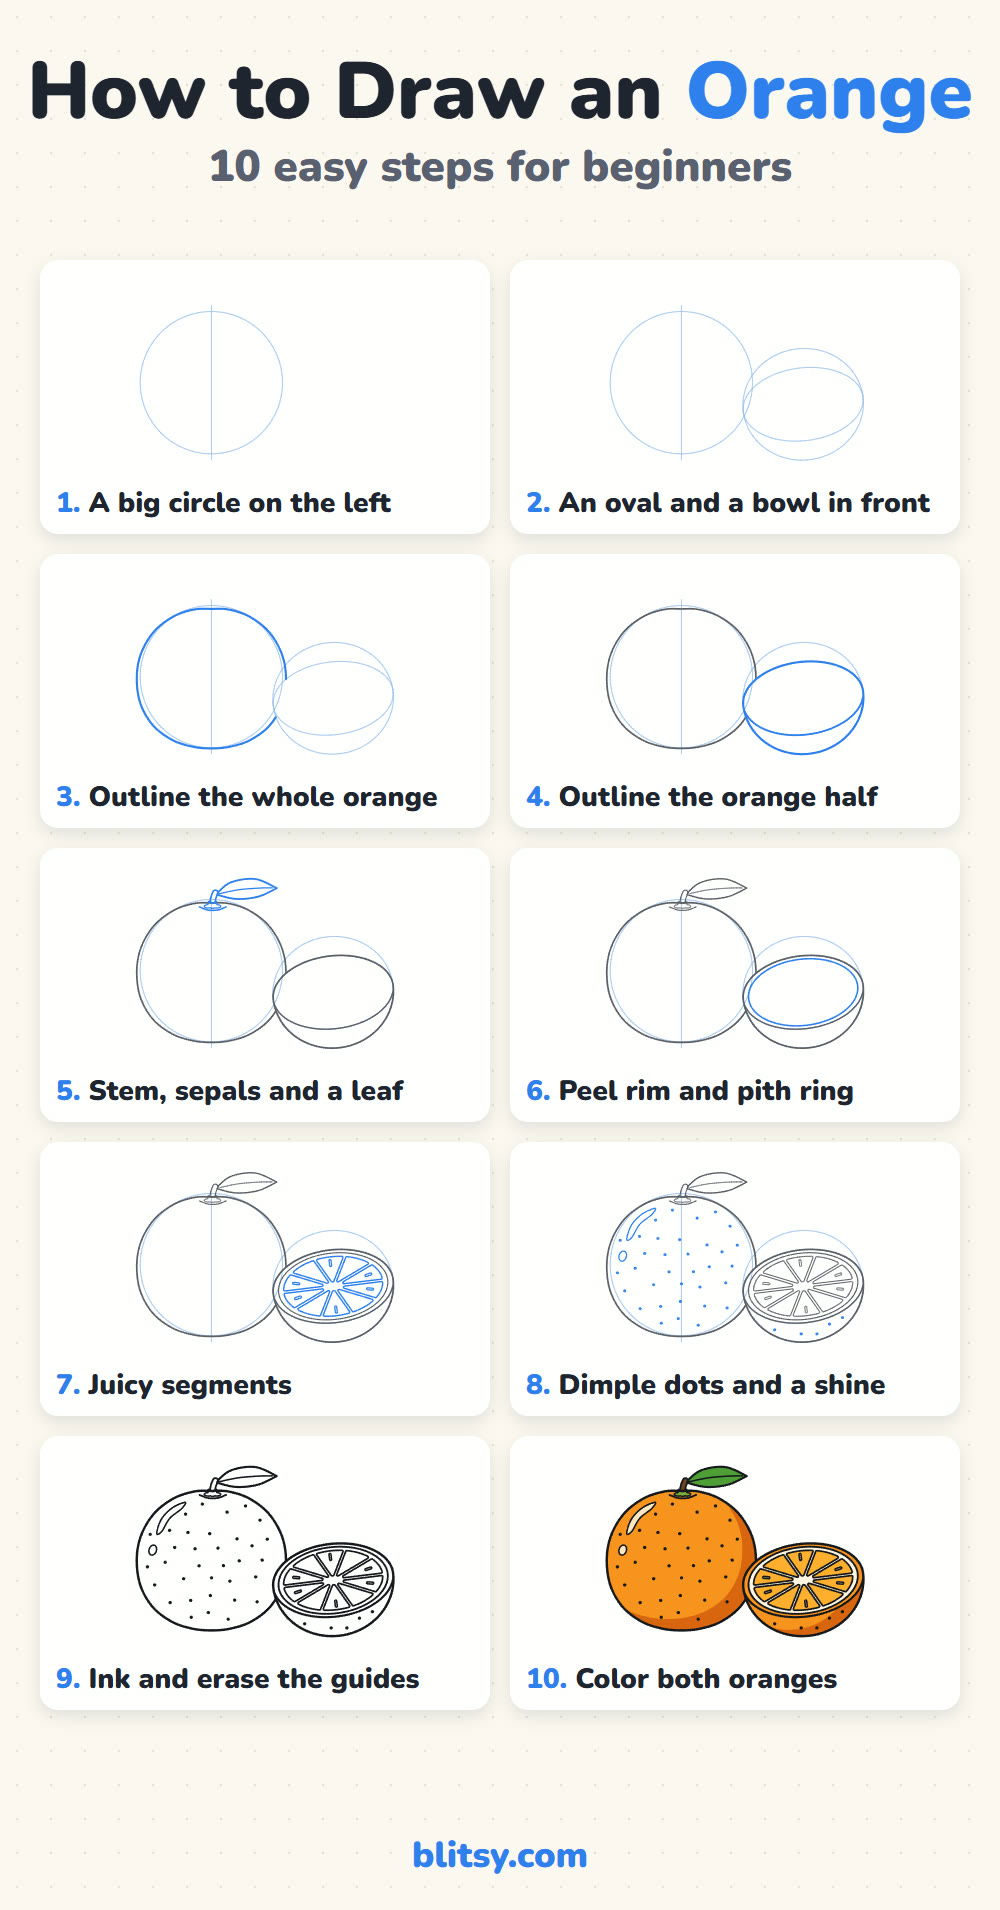
Segment by segment, the pictures add only a little at a time: the blue lines are new in that step, and the gray ones are what you drew earlier. Copy the blue, compare, then keep going.
Quick overview
⏱️ Time: about 25 to 30 minutes with coloring
🎯 Level: easy, good for kids from about 6 up
✏️ Steps: 10
🍊 You'll draw: a whole orange with a leaf and a cut orange half
Orange Drawing Supplies From Your Desk
- A pencil you can press lightly with
- An eraser that doesn't smudge
- A black marker or fineliner for the final lines
- Colored pencils or crayons: orange, dark orange, yellow orange, green and brown
- Plain white paper
Leave the white pencil out. The paper itself makes the best white for the pith ring.
How to Draw an Orange Step by Step
Step 1: Draw a big circle on the left
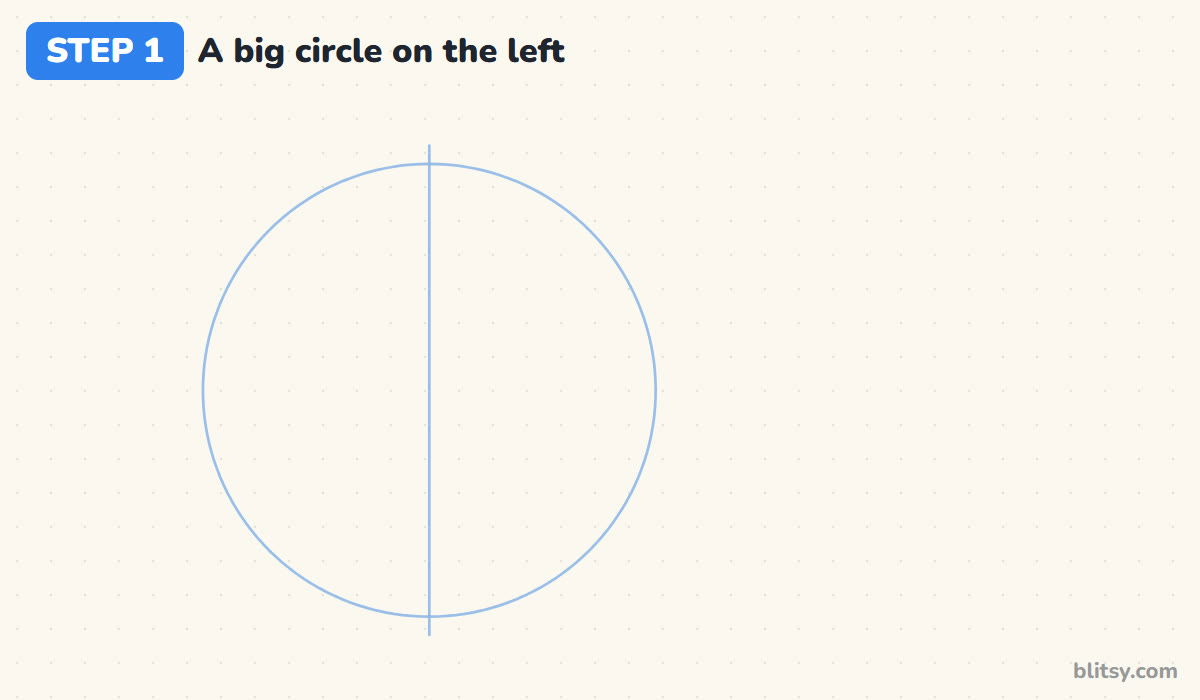
Start on the left half of the page with a large, light circle. This is the whole orange, so I make it big, about half the width of the paper. Add a straight line down the middle. It marks where the stem goes later and helps you keep the fruit round.
💡 Tip: Draw the circle with a few light, quick passes rather than one slow line. Light passes come out rounder.
Step 2: Add an oval and a bowl shape in front
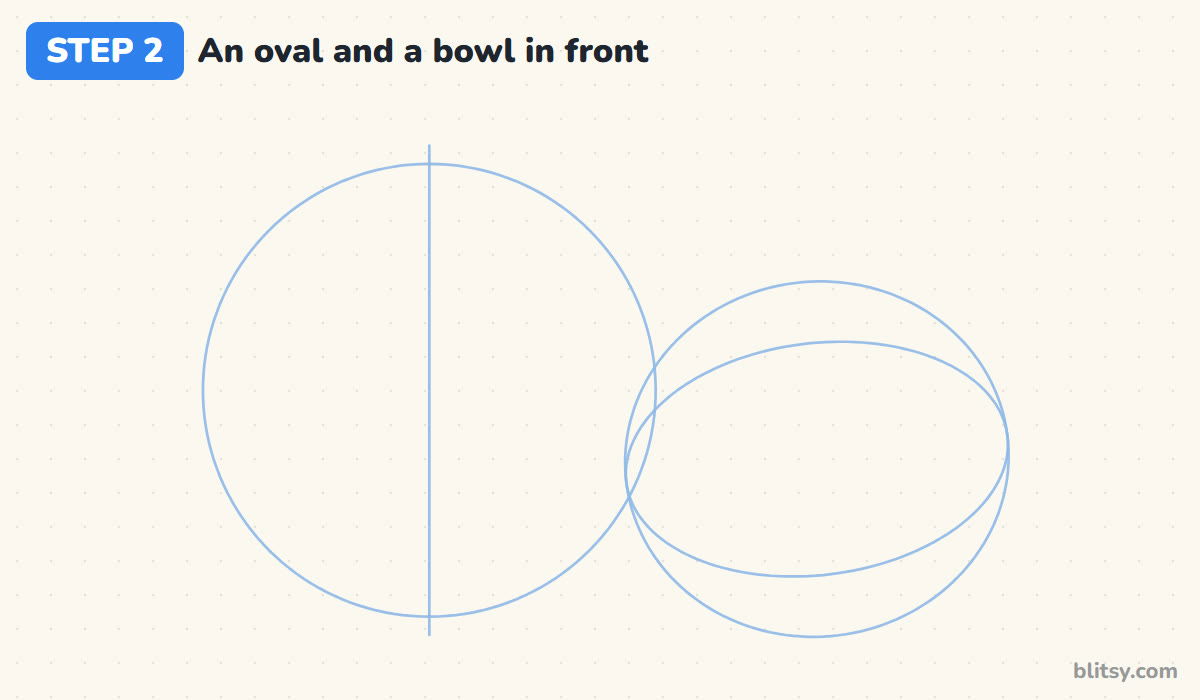
To the right, overlapping the big circle a little, draw a wide oval that tilts slightly downward on the left. That oval will be the cut face of the orange half. Around it, sketch a rounder shape that dips below the oval like a bowl. I only care about the bottom part of that bowl, because it becomes the peel underneath.
💡 Tip: Make the oval flatter than you think. A tall oval looks like a plate standing up instead of a slice lying down.
Step 3: Outline the whole orange
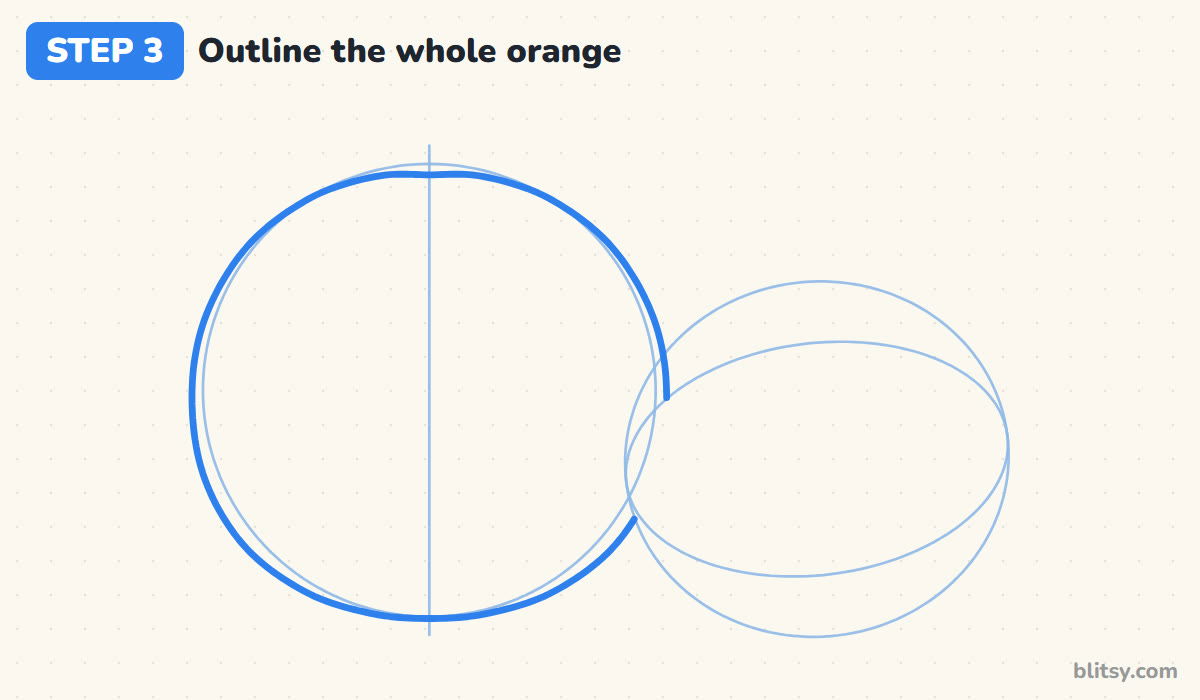
Trace around the big circle with a firm line. I let the outline bulge out a tiny bit on the sides and flatten a little at the top, because real oranges are rarely perfect balls. Stop the line where it meets the oval on the right. The half sits in front, so that part of the whole orange is hidden.
💡 Tip: If your circle came out lopsided, fix it now. Everything else sits on this shape.

Step 4: Outline the orange half
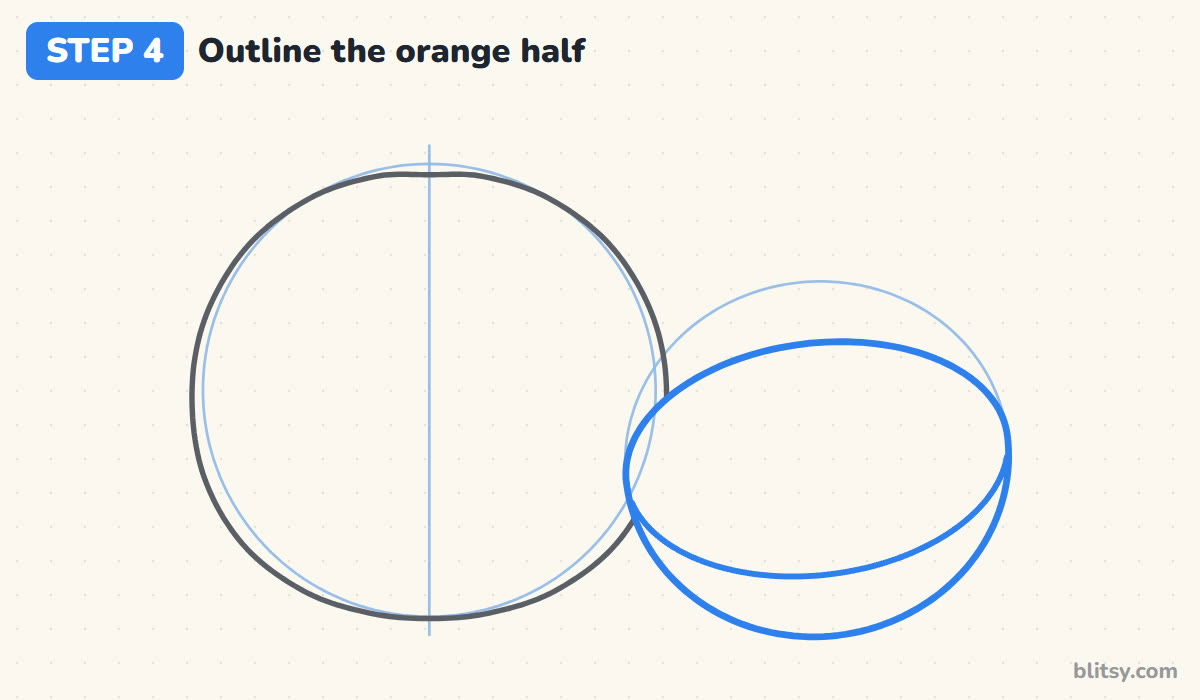
Go over the tilted oval to make the cut face. Then trace the bottom curve of the bowl so it joins the oval at both ends. Together they look like a cup with a lid, and that's exactly how a cut orange half reads from the side.
💡 Tip: Make sure the bowl curve meets the oval right at its widest points, not above them.
Step 5: Add the stem, sepals and a leaf
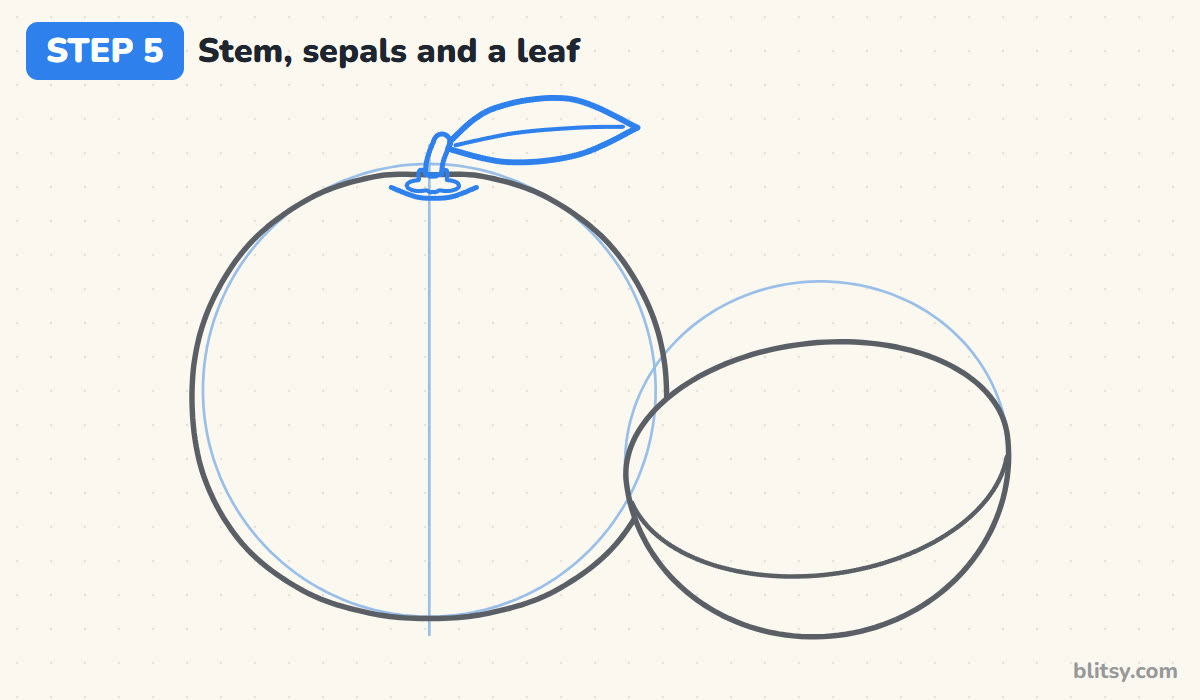
At the top of the whole orange, draw a short curved line for a little dip where the stem sits. In the middle of it, add a tiny star shape made of small rounded bumps. Those are the sepals. A short, thick stem rises from them, and one pointed leaf grows out to the right with a single line down its middle for the vein.
💡 Tip: Keep the stem short and stubby. When I draw it long, the orange starts to look like a cherry or an apple.
Step 6: Draw the pith ring inside the cut face
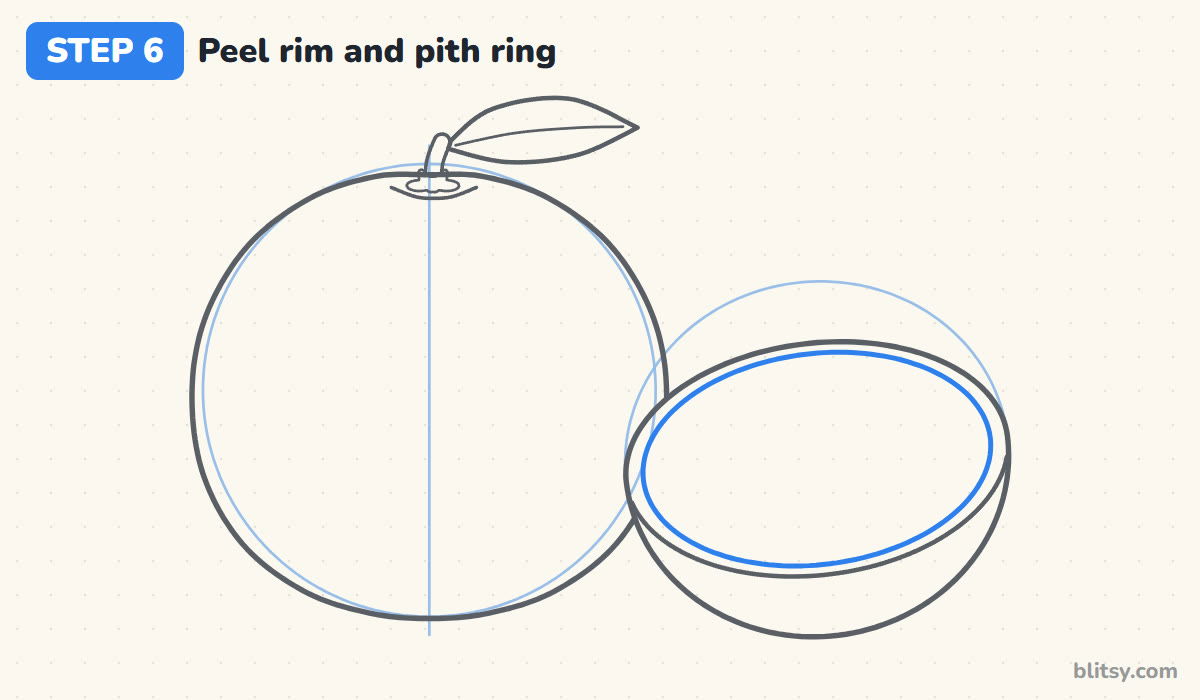
Inside the cut oval, draw a second oval a little smaller, following the same tilt. The thin band between the two lines is the orange peel you see on the edge of a slice. The space inside the new oval will hold the white pith ring and the segments.
💡 Tip: Keep the gap even all the way around, just a few millimeters wide.
Step 7: Draw the juicy segments
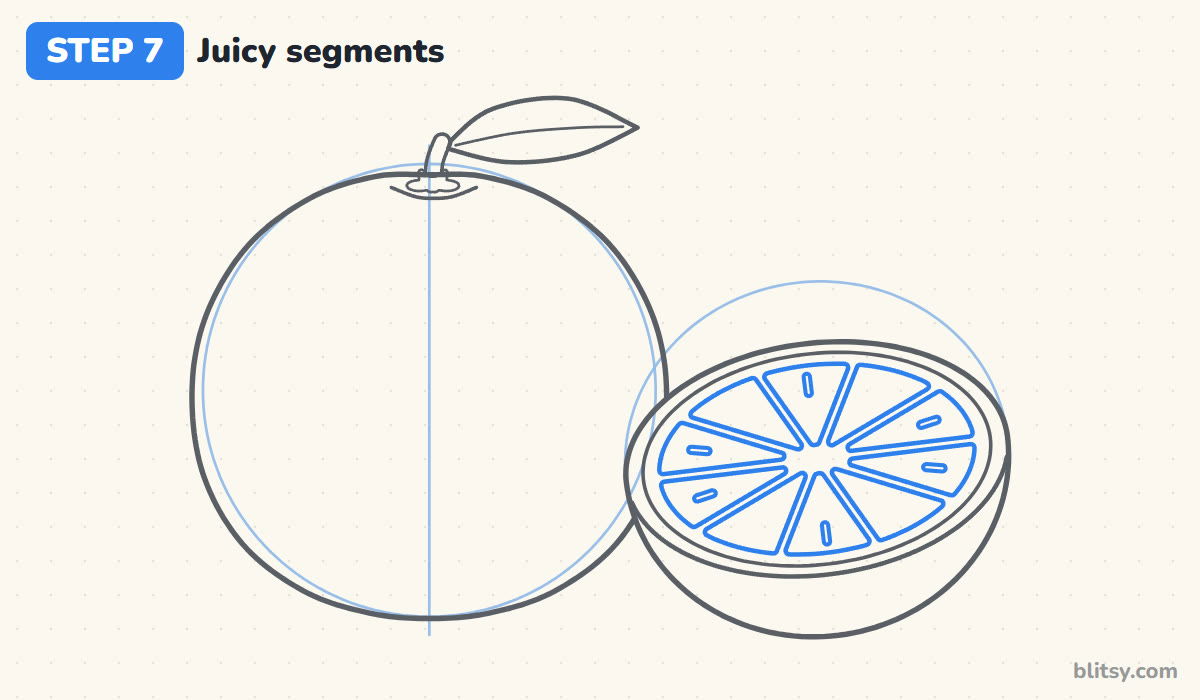
This is my favorite part. Picture a wheel with ten spokes coming out from a small center point. Between each pair of spokes, draw a long rounded wedge, pointed toward the middle and wide at the outside. Leave a thin white gap between neighbors and a small white space in the center. Inside a few wedges, add a short line for a juicy shine.
💡 Tip: Draw the top, bottom, left and right wedges first, then fill in the ones between. They stay evenly spaced that way.



Step 8: Add dimple dots and a shine
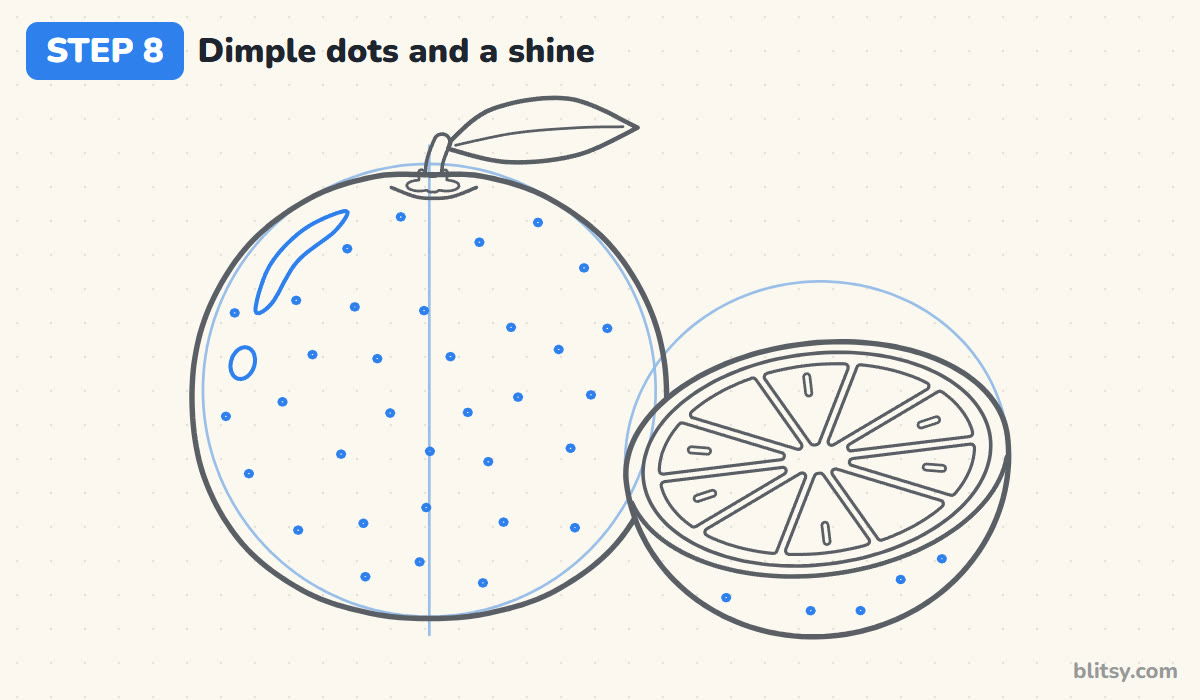
An orange peel is covered in tiny pits, and dots are the easy way to show them. I sprinkle small dots over the whole orange, spaced out so they don't touch, and add a few on the peel under the half. Then draw a long curved shine mark on the upper left of the whole orange with a small oval below it.
💡 Tip: Don't line the dots up in rows. A loose, uneven scatter looks more like real peel.
Step 9: Ink the lines and erase the guides
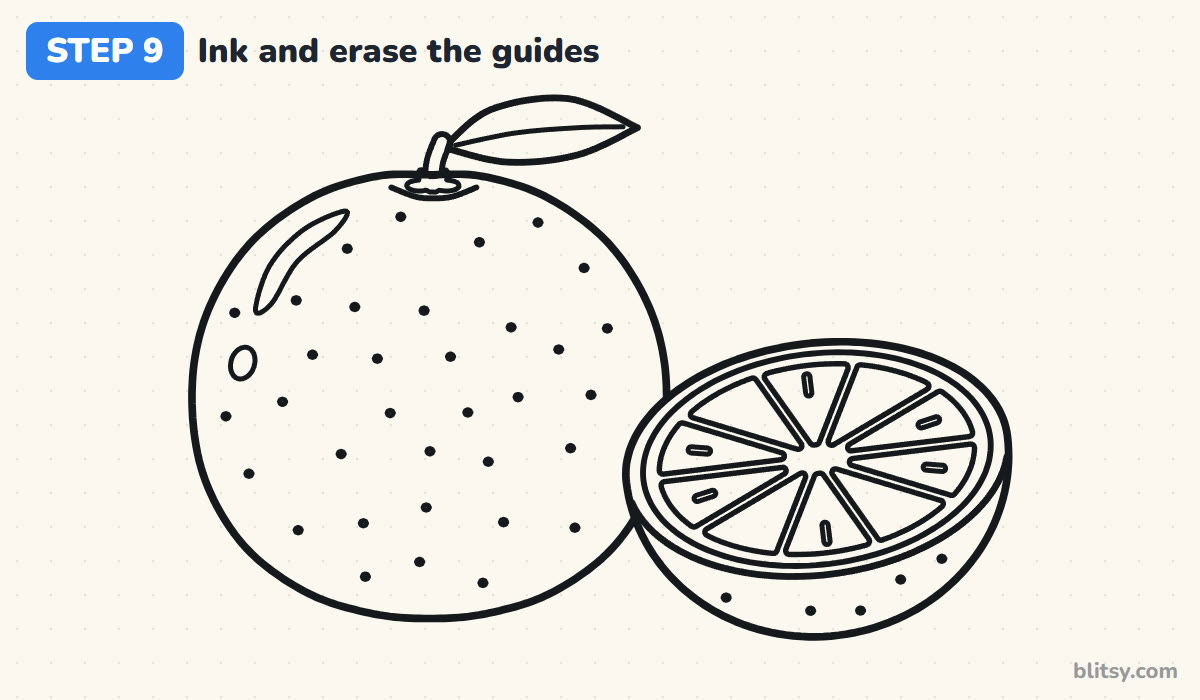
Trace every keeper line with your black marker. I start with the big outlines, then the leaf and stem, and save the segments and dots for last while my hand is steady. Let the ink dry for a minute before you erase the circle, the middle line and the bowl guide.
💡 Tip: Ink each dot with a quick tap instead of a little circle. Tapped dots look neater.
Step 10: Color your oranges
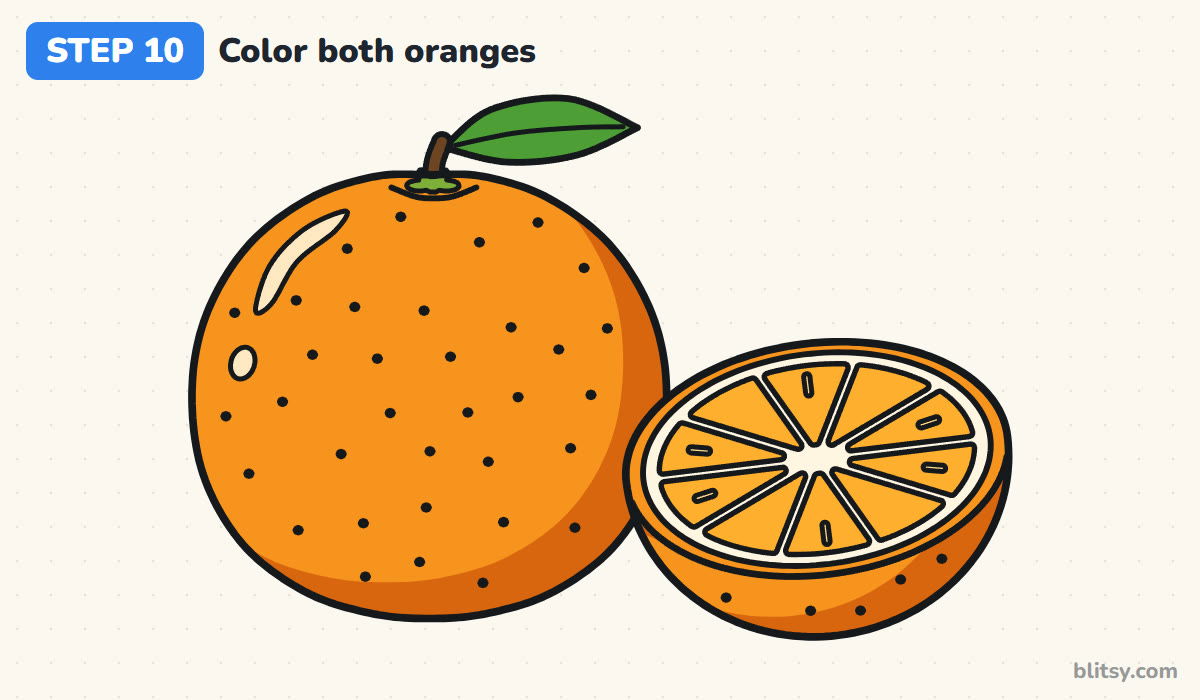
Color both peels bright orange. Add dark orange along the right side and bottom of the whole orange and on the right of the peel bowl, which makes the fruit look round. The segments get a yellow orange, the pith ring stays white, the leaf is green and the stem is brown. Leave the shine marks white or very pale.
💡 Tip: Press harder with the orange near the dark edge and softer toward the shine for a smooth fade.
Orange Drawing Slip-Ups That Turn It Into a Ball
- A plain circle with nothing on it. Without dots, a leaf or a shine, an orange looks like a basketball. Add at least the dots and the leaf.
- A cut face that stands upright. If the oval is too round, the half looks like a coin. Squash it into a wide, flat oval.
- Segments that meet the peel. The juicy wedges should stop before the edge, leaving a white pith ring around them.
- Dots packed too tightly. Hundreds of crowded dots turn the peel gray. I keep mine small and about a finger width apart.
- Coloring the pith orange. The white ring is what makes the slice look fresh, so leave it light.
Orange Twists for a Fruity Sketchbook Page
Swap the colors and the same shapes become a lemon (pale yellow, a little oval) or a lime (green all over). You can also cut the half into a thin round slice and stand it on the rim of a glass of juice. Younger kids can skip the juicy shine lines and use fewer dots. The cut half here is drawn a lot like the one in my peach drawing step by step lesson, so that's a good next fruit. To put your orange in a group, try the fruit bowl drawing tutorial, or practice a shiny round fruit with the apple drawing tutorial.
Free Orange Coloring Page and Step Guide PDF
The free orange coloring page shows a colored orange at the top as a model, with a key that matches each color to its part, and a large outline underneath to color in. The step-by-step PDF guide has all 10 steps with pictures and tips, so you can practice away from the screen. Both print well on Letter or A4 paper.
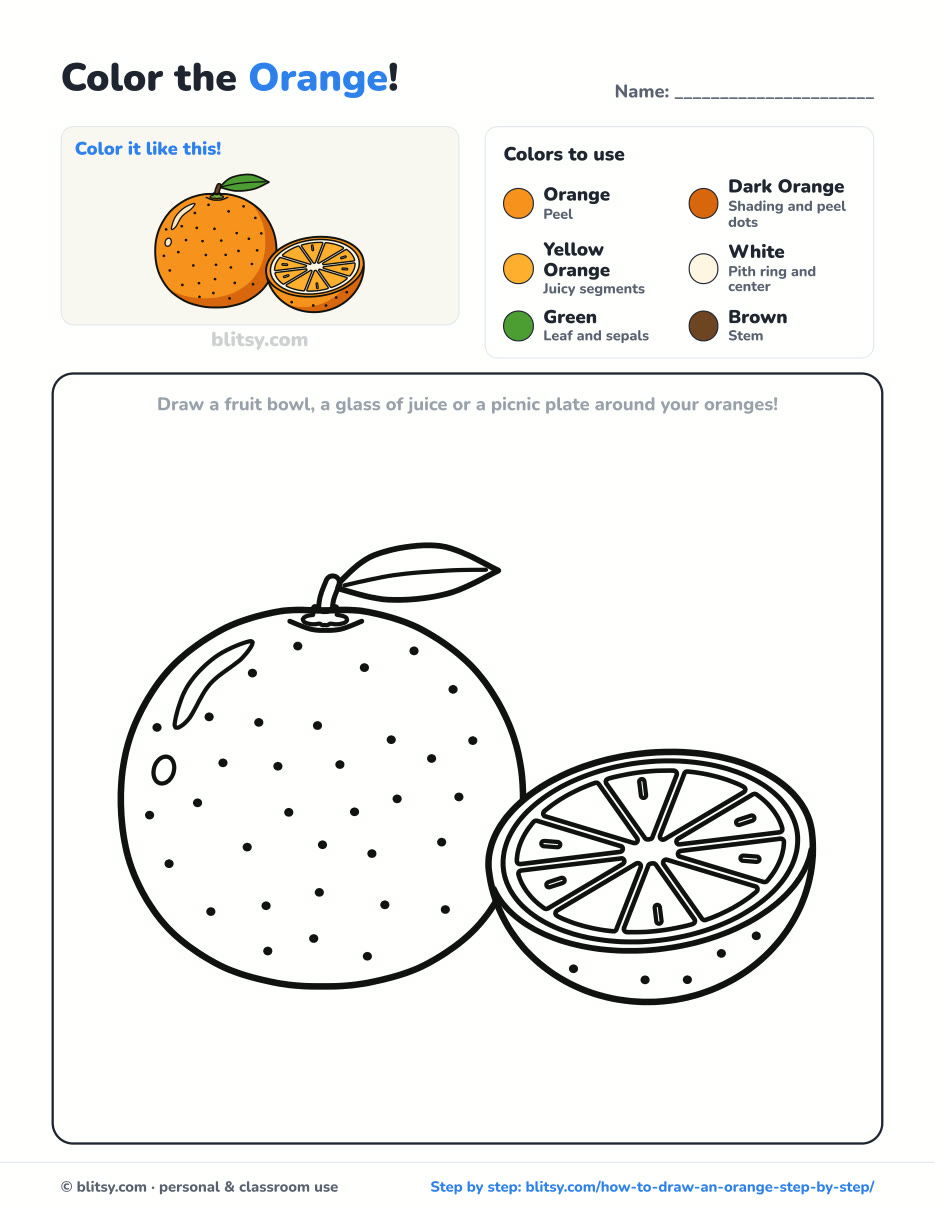
Black outlines with a colored example and the color names at the top. Ready to print and color.
⬇️ Download Coloring PageEvery step picture with its instructions and tips, to keep beside your paper while you draw.
⬇️ Download Drawing Guide📱 On a phone? Tap a download button, then open the file and choose Share → Save to Files or Print. On a computer, the PDF opens or saves straight to your Downloads folder.




Keep the Orange Steps on Your Pinterest Board
More Fruit to Draw After Your Orange
Every link below is a full step-by-step tutorial with a picture for each stage, so you can keep filling your fruit basket.
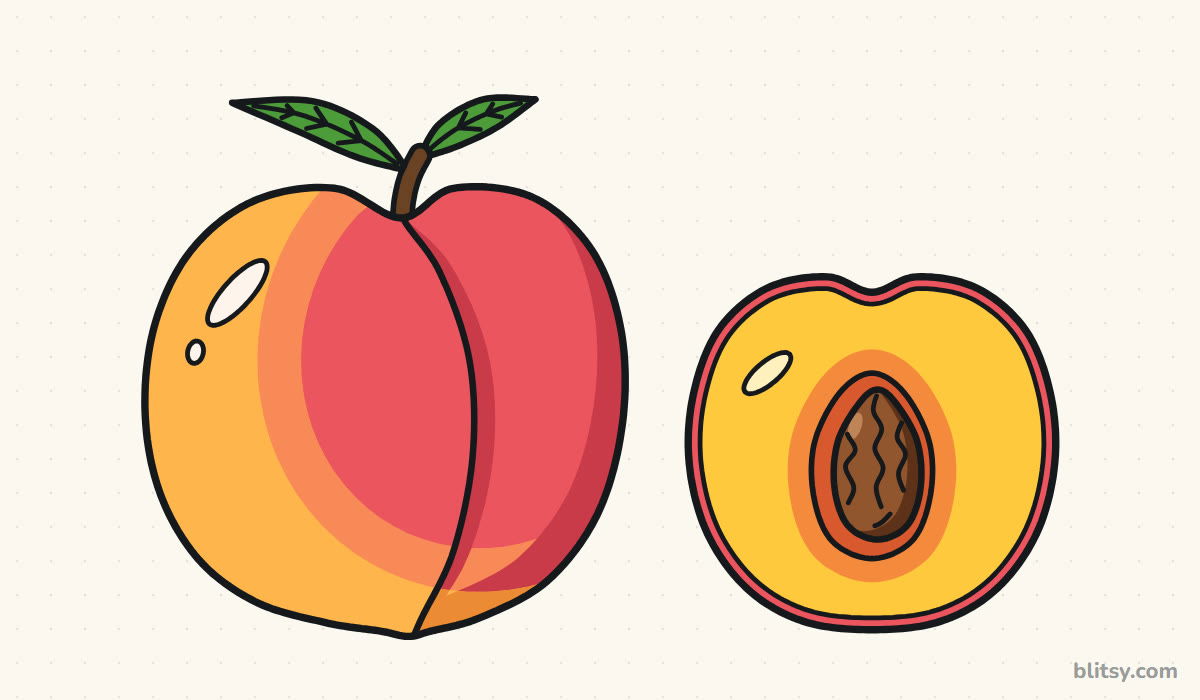
- Peach Drawing: A soft round peach with its crease and a cut half with golden flesh and a grooved pit in this peach drawing step by step lesson.
- Apple Drawing: Draw a shiny red apple and a green apple with a bite out of it in this apple drawing tutorial.
- Pineapple Drawing: A leafy two-row crown on a whole pineapple, plus a round slice beside it, in this how to draw a pineapple step by step guide.
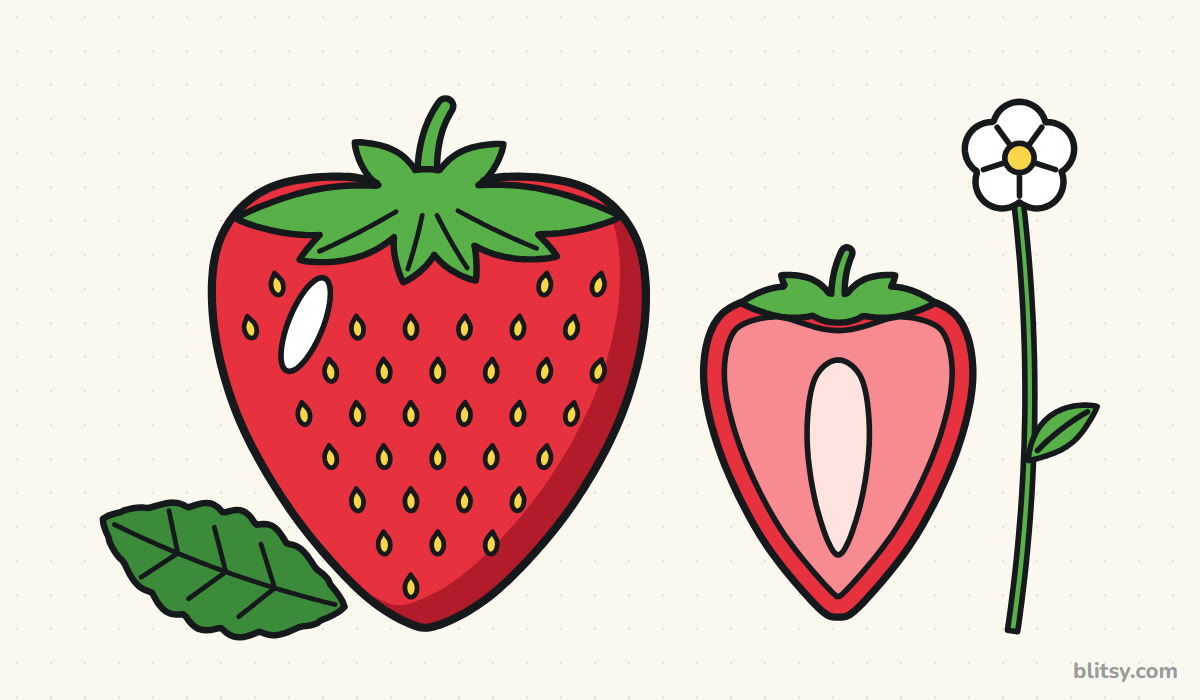
- Strawberry Drawing: A plump berry with staggered seeds and a cut half showing its pale center in this strawberry drawing tutorial.
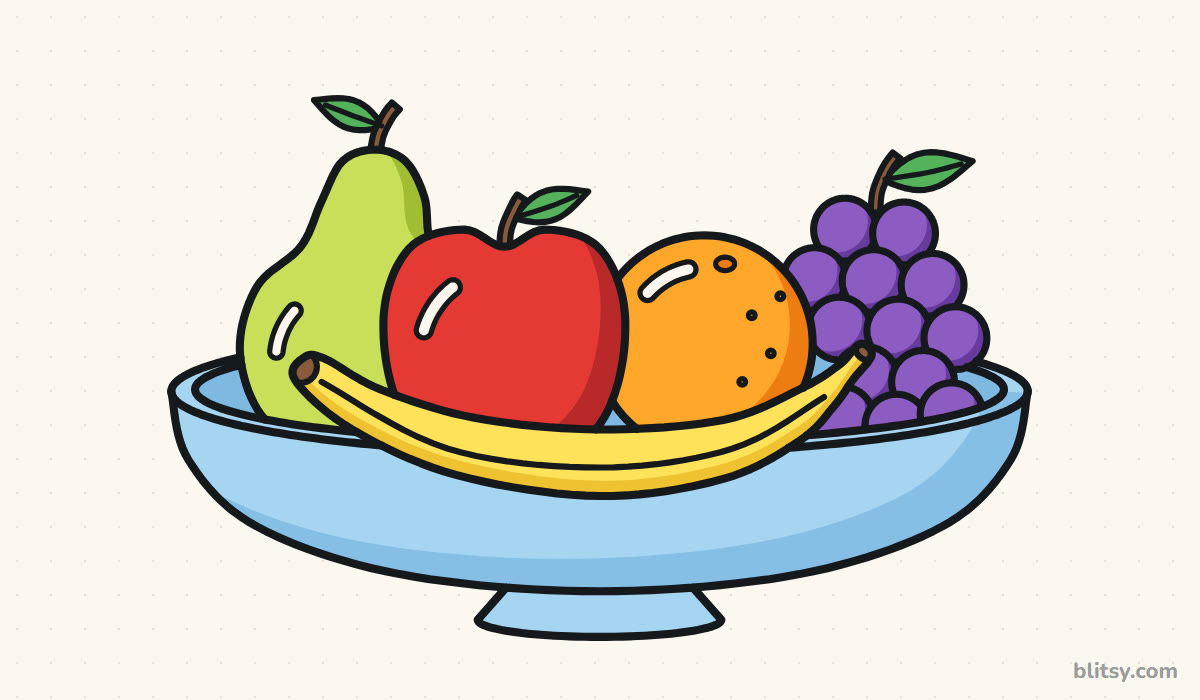
- Fruit Drawing: Five fruits built from circles and ovals sit in a blue bowl in this fruit bowl drawing step by step lesson.
Orange Drawing Questions From Kids and Parents
How do you draw an orange easily?
Draw a big circle, add a short stem and a leaf on top, and scatter small dots over the peel. Those three details make any circle read as an orange.
How do you draw the inside of an orange?
Draw a flat oval for the cut face, a thin ring just inside its edge, and then a wheel of rounded wedges around a small center. Leave white gaps between the wedges.
What colors do you need to draw an orange?
Orange and dark orange for the peel, a yellow orange for the segments, green for the leaf and brown for the stem. The white of the paper works for the pith.
How many segments does an orange have?
Most oranges have about 10 segments, which is why this drawing uses ten. The exact number can vary a little from fruit to fruit.
Grab an orange from the kitchen, set it next to your paper and see how close your drawing comes. 🍊✏️
Related posts:
 How to Draw a Peach Step by Step (Whole Fruit + Cut Half)
 How to Draw a Strawberry Step by Step (Whole Berry + Cut Half)
 How to Draw Fruit Step by Step (Easy Fruit Bowl Still Life)
 How to Draw a Watermelon Step by Step (Whole Melon and Slice)
 How to Draw a Whale Step by Step (Easy for Beginners)
 How to Draw Lungs Step by Step (Easy Science Diagram)
 How to Draw a Pineapple Step by Step (Easy Crown and Slice)
 How to Draw Iron Man Step by Step (Easy Chibi for Kids)
 How to Draw a Dress Step by Step (Easy Party Dress)
 How to Draw a Chicken Step by Step (Easy for Beginners)
 How to Draw a UFO Step by Step (Cute Alien Saucer)
 How to Draw Flames Step by Step (Easy Campfire Drawing)

