
A closed book is just a box, so it's the open one people really want to draw. The trick is in the pages: they swoop up out of the middle and bend back down, and once you see that curve, it gets much easier. This lesson shows you how to draw a book step by step, starting from one straight line and a lopsided box and ending with a colorful open storybook, a ribbon bookmark and two closed books stacked beside it.
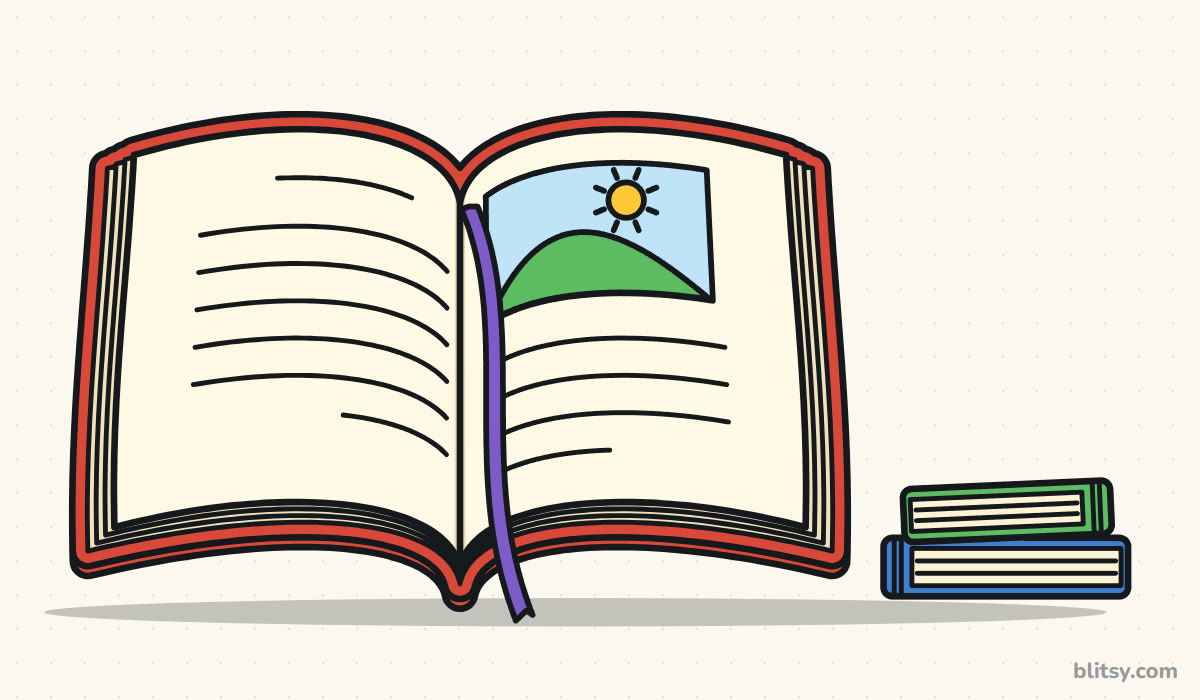
Color is the clue here: whatever is blue is new in that step, and gray lines are already done.
Quick overview
⏱️ Time: around 30 minutes, coloring included
🎯 Level: easy, fine for kids from about 7 and up
✏️ Steps: 12
📖 You'll draw: an open book with a bookmark, plus two closed books
Book Sketching Supplies
- A pencil you can keep light (HB works well)
- An eraser that doesn't smudge
- A black fineliner or thin marker for the final outline
- Colored pencils or markers in red, cream, light tan, purple, light blue, yellow, green and blue
- Plain white paper, turned sideways
A ruler is handy for the stack of books, but the open book looks better drawn freehand because every edge bends a little.
How to Draw a Book Step by Step
Step 1: Draw a spine line and a wide box
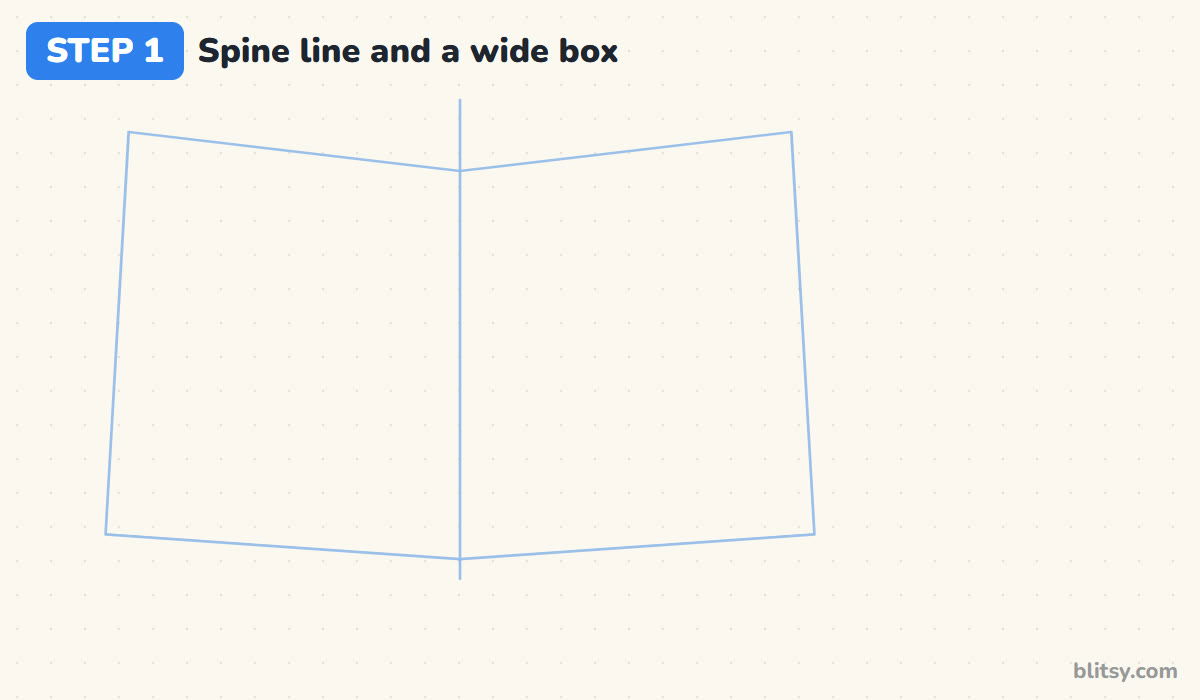
Draw one light vertical line in the middle of the left half of your paper. That's the spine. Around it, sketch a wide box whose top edge dips down to the spine from both sides, like a very flat V, and whose bottom does the same. Make the bottom a little wider than the top, so the book looks like it's lying on a table.
💡 Tip: Leave a hand's width of empty paper on the right. The little stack of books goes there later.
Step 2: Draw the curved left page
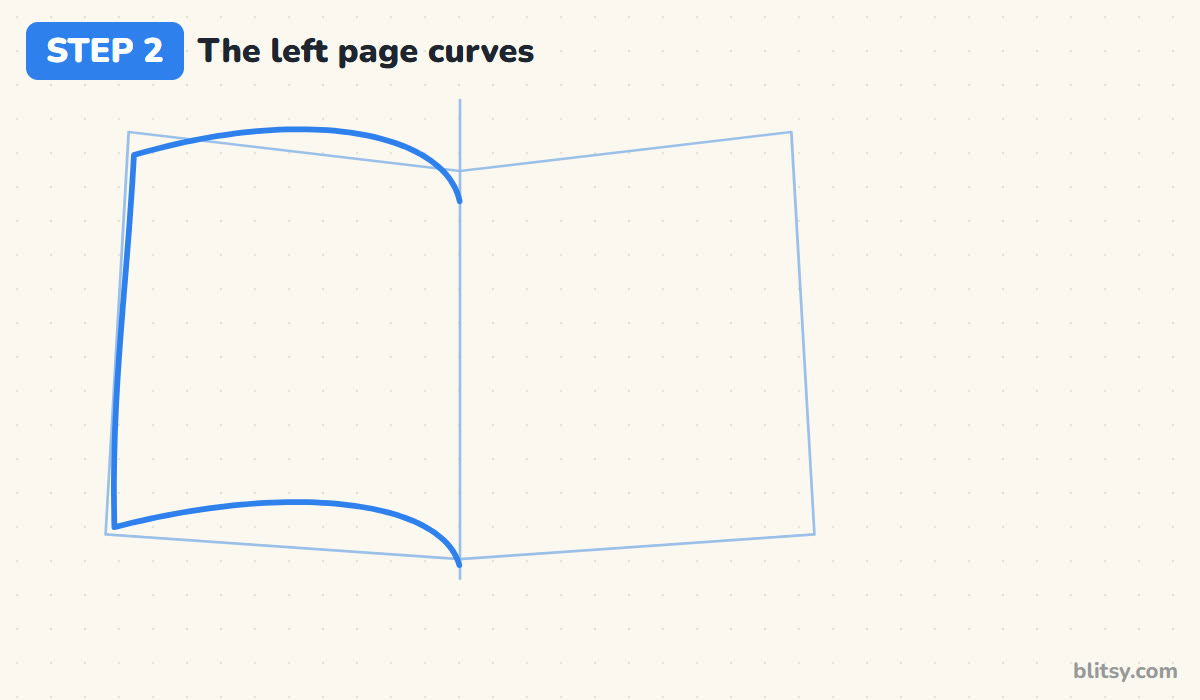
Start at the spine, a little below the top of your box. Pull the top edge up in a quick hump, then let it run long and gentle down to the outer corner. The outer edge goes almost straight down. The bottom edge copies the top: it rises out of the spine and flattens toward the corner. I tell kids the page looks like a wave that just broke.
💡 Tip: Make the hump near the spine, not in the middle of the page. That's where real paper lifts.
Step 3: Mirror it for the right page
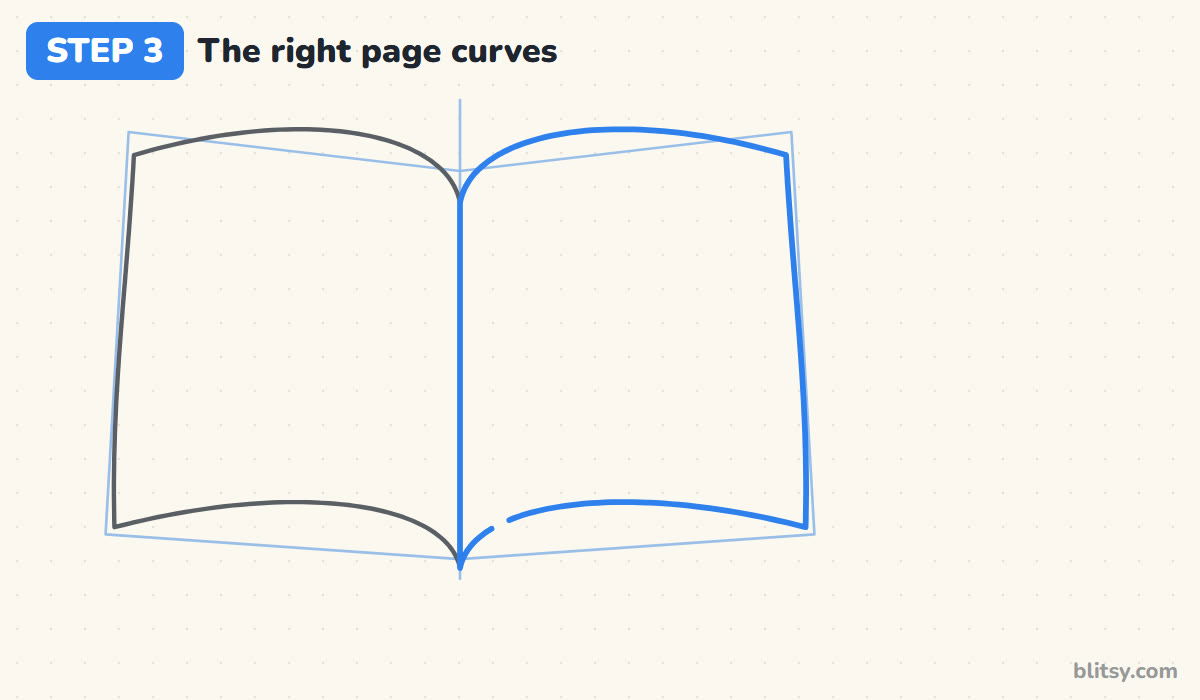
Repeat the same shape on the other side so the two pages meet at the spine. The tops form a soft dip in the middle and the bottoms meet in a little point. Trace the spine line firmly between them, and check that both outer edges lean out by about the same amount.
💡 Tip: Turn the paper upside down for a second. Lopsided pages are much easier to spot that way.




Step 4: Add the fanned page edges
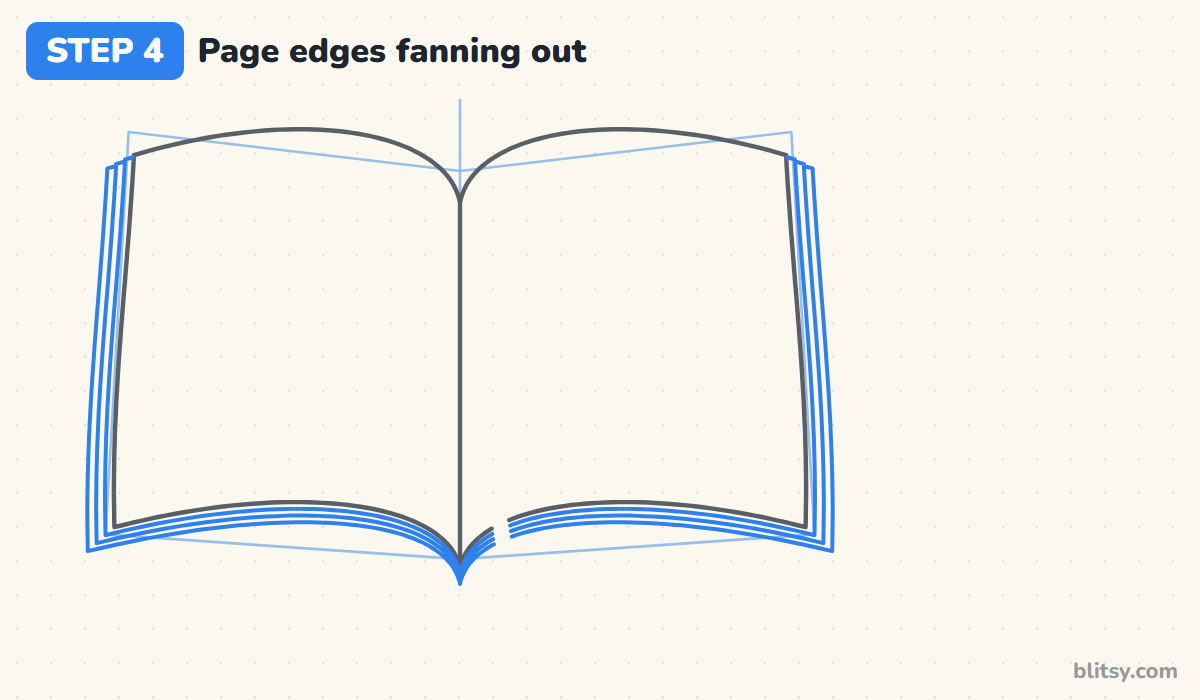
More pages sit under each top page, peeking out along the outside and the bottom. Draw three thin lines that follow each page outline, each a little farther out than the last, all curving down to meet near the bottom of the spine. Skip the top, since the top page hides that part.
💡 Tip: Keep the gaps between these lines thin and even, or the pages look like cardboard.
Step 5: Draw the hard cover underneath
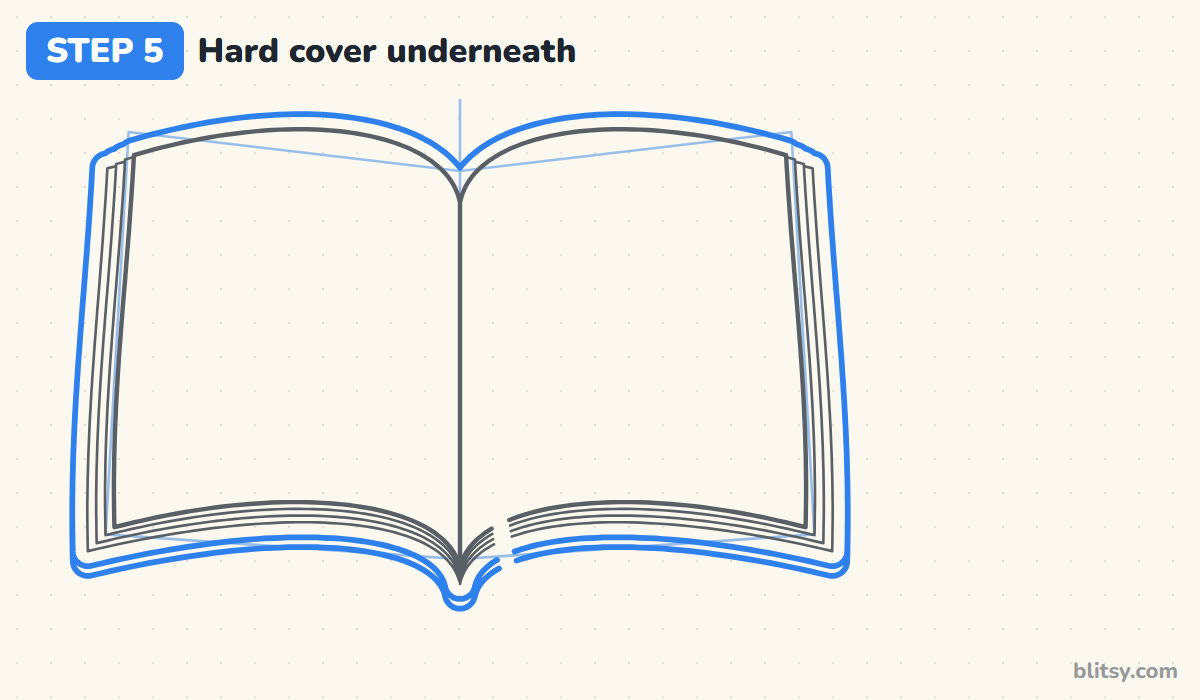
The cover is a bit bigger than the pages, so draw one smooth outline all the way around, just outside the last page line, with slightly rounded corners. Add a second line a little below it at the bottom. That shows the thickness of the hard cover, which only shows along the bottom from this angle.
💡 Tip: Draw the cover rim the same thickness all the way round. A thin top and thick sides looks wrong at once.
Step 6: Add the crease and a ribbon bookmark

Go over the spine once more so the crease stands out. For the ribbon, draw two close lines that start at the top of the crease, swing gently over the right page and hang down past the cover. Cut the end into a V notch. The ribbon sits on top, so skip any lines underneath it.
💡 Tip: Give the ribbon one easy S bend. A ribbon that's ruler straight looks like a stick.
Step 7: Draw text lines that bend with the paper
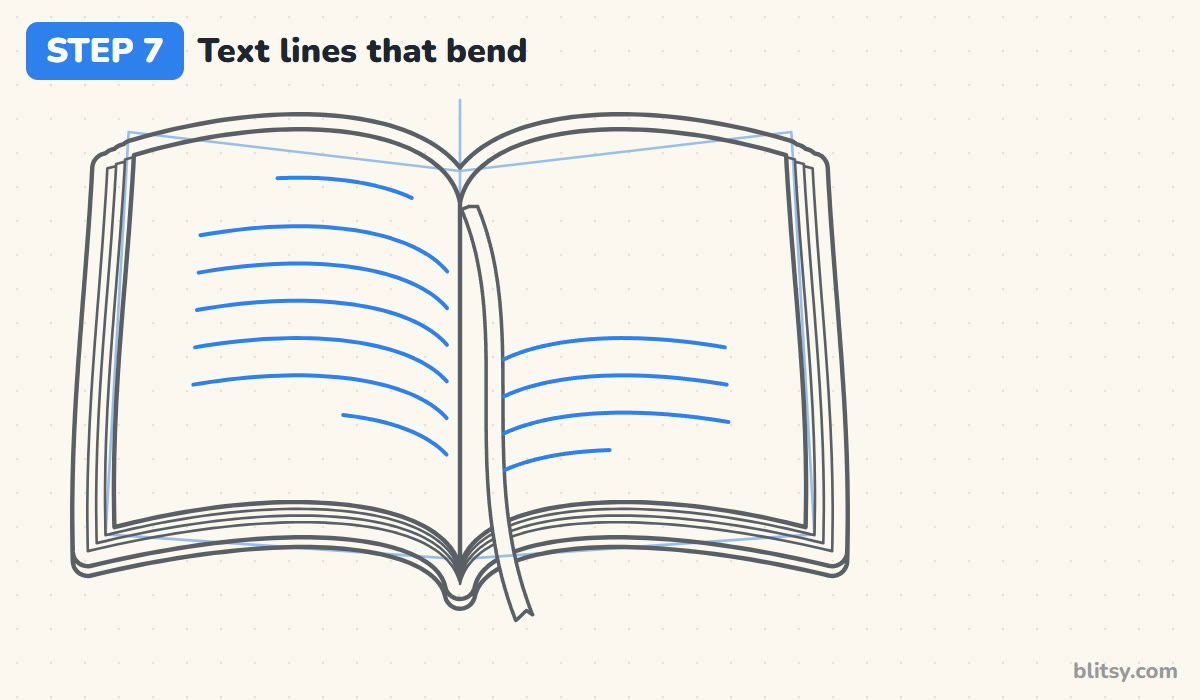
This step sells the curve. On the left page, add a short title line near the top and six longer lines below it, each bending downward as it nears the spine. Make the last one shorter, like the end of a paragraph. On the right page, add four lines in the lower half, clear of the ribbon.
💡 Tip: Space the lines evenly first and worry about straightness later. Even spacing matters more.




Step 8: Add a little picture doodle
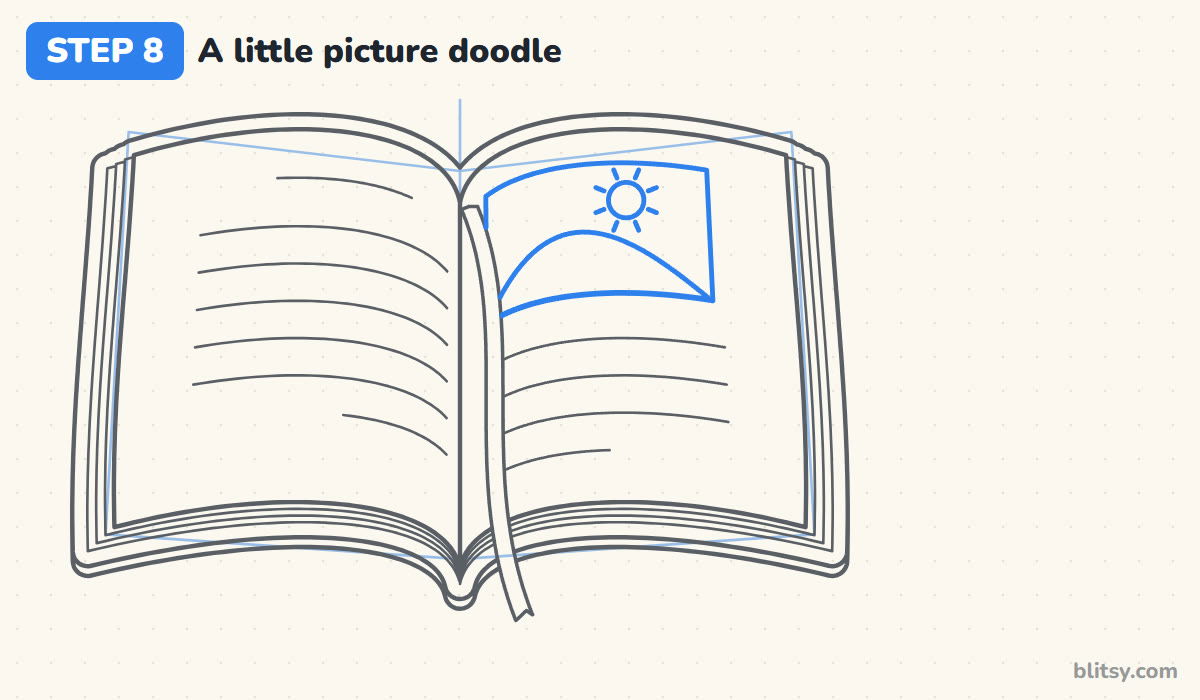
Every storybook needs a picture. In the top half of the right page, draw a small frame whose top and bottom curve like the text lines. Inside, draw a rounded hill and a small sun with short rays. Keep it simple, so it reads as a picture in the book and doesn't compete with the book itself.
💡 Tip: Anything works here: a cat, a castle or a rocket. Just keep it inside the frame.
Step 9: Draw a stack of two closed books
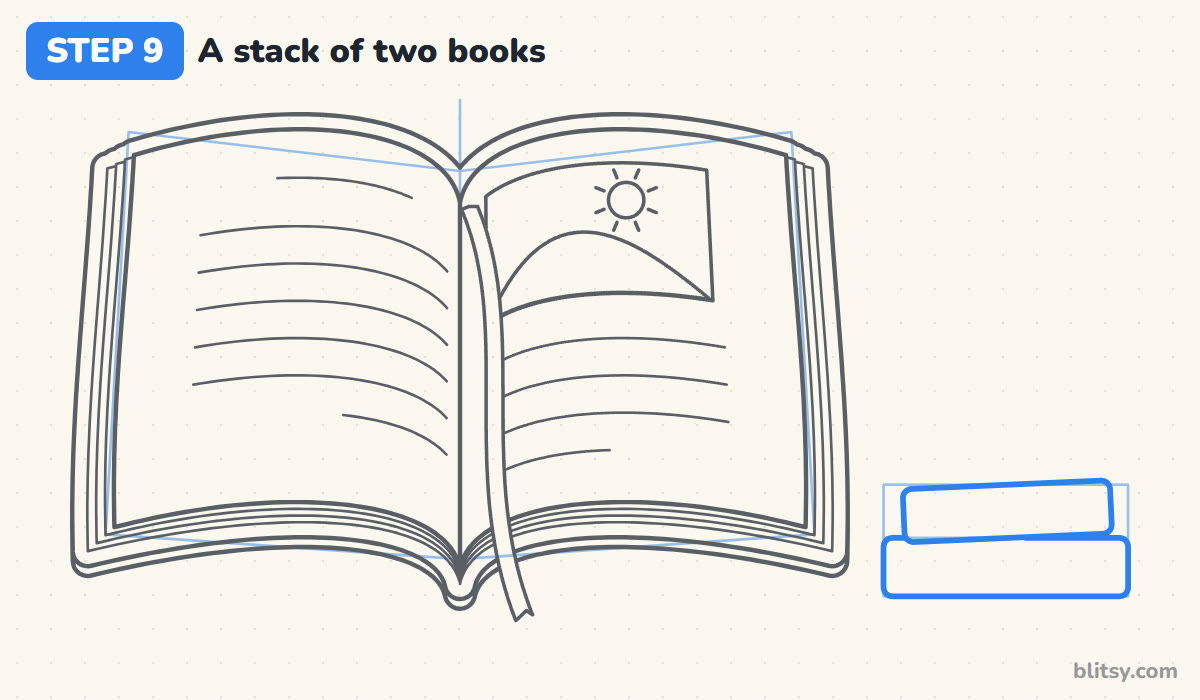
In the empty space on the right, draw a long rounded rectangle lying on the table for the bottom book, seen from the side. Put a shorter one on top and tilt it very slightly so the stack looks casual. Line up the stack's bottom with the open book so everything sits on one table.
💡 Tip: Smaller kids can skip the stack. The open book is the main subject.
Step 10: Add pages and spines to the stack
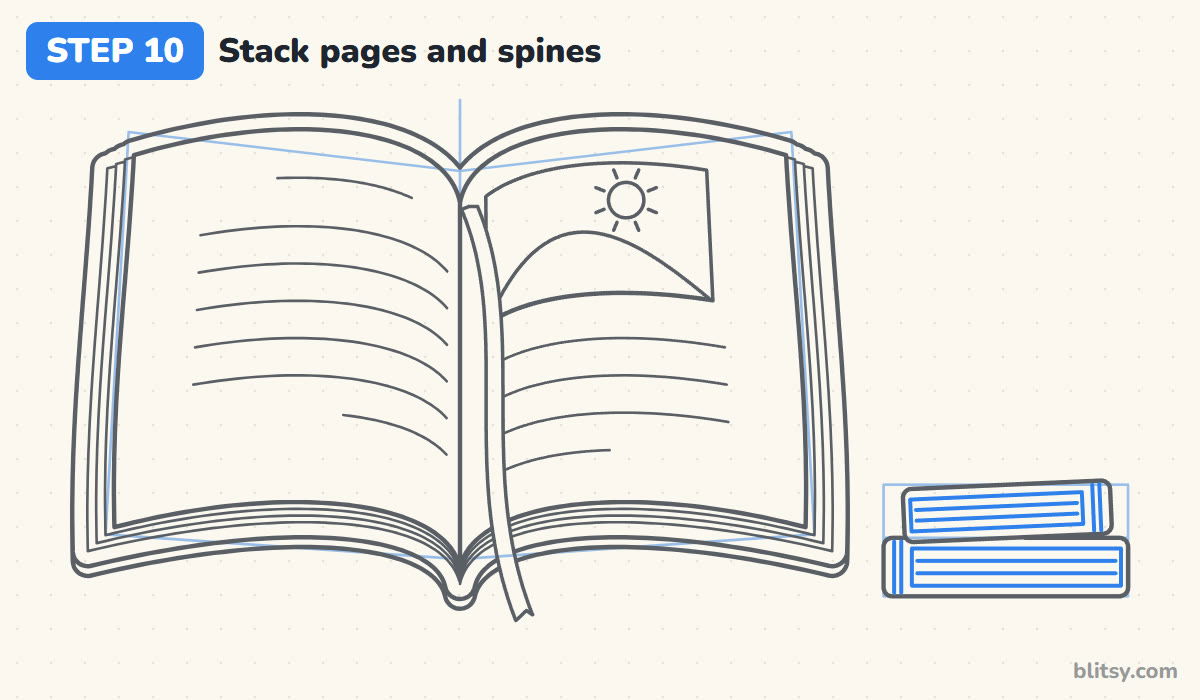
Inside each closed book, draw a slightly smaller rectangle for the pages, leaving a strip of cover above, below and at one end. Add two thin lines through each page block. At the cover end, add two short upright lines for the spine. I put the spines on opposite sides, the way books really pile up.
💡 Tip: Keep the cover strips thin. Fat covers make the books look like boxes.
Step 11: Ink the book and erase the guides
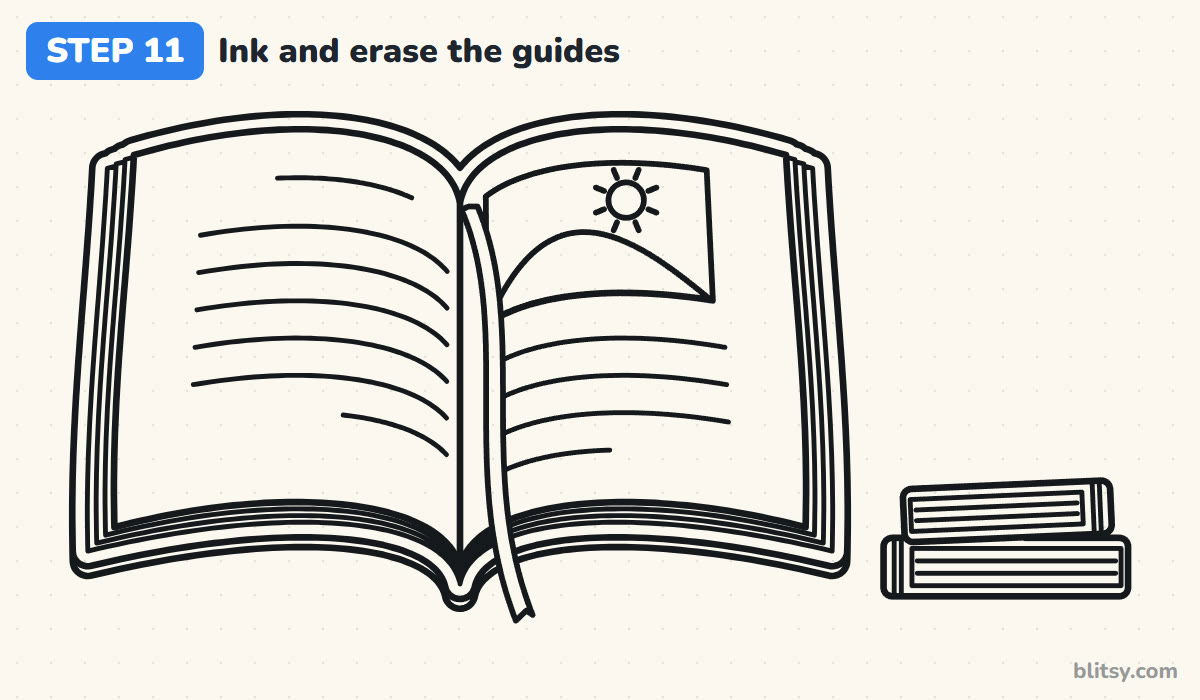
Trace every keeper line with your fineliner. I start with the two big page outlines, then the edges and cover, and save the text lines for last because they wobble most easily. Skip the guide box and the extra spine line. Let the ink dry, then erase all the pencil.
💡 Tip: For the curved page edges, pull the pen toward you rather than pushing it away.



Step 12: Color your book
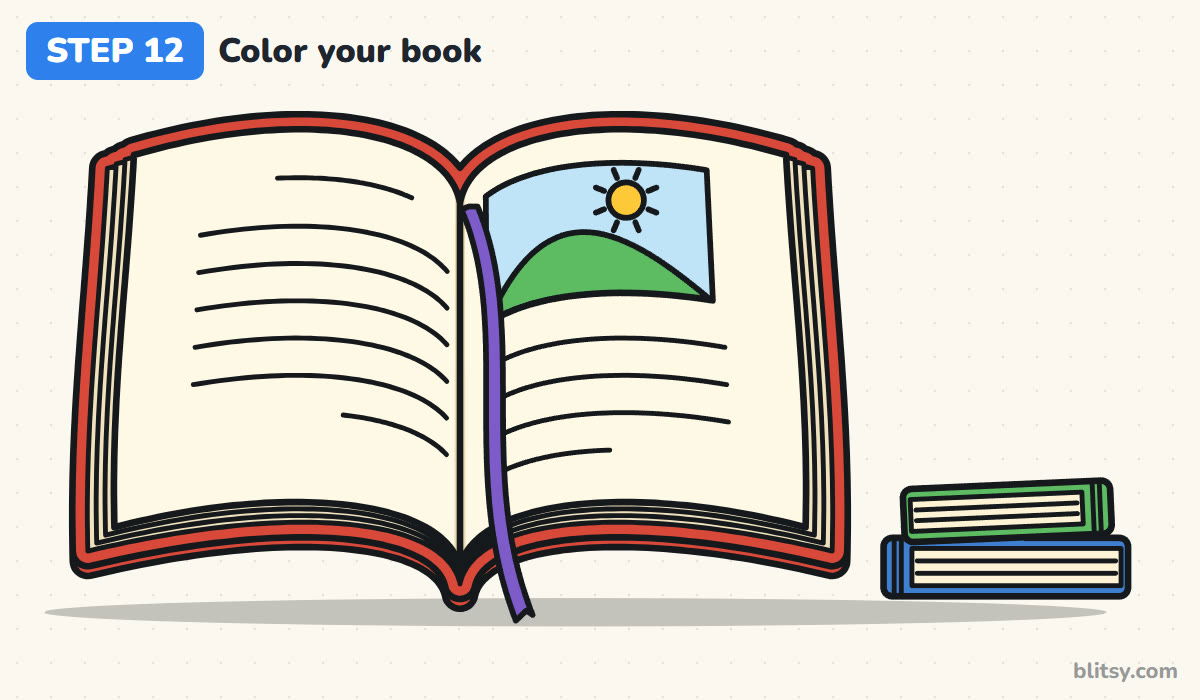
Color the cover red and the top pages cream. Light tan goes on the fanned edges and the thin strip by the spine, which shades the gutter. The ribbon is purple. In the picture, the sky is light blue, the hill green and the sun yellow. The bottom closed book is blue, the top one green, with cream pages.
💡 Tip: Color the cream pages very lightly. Pressing hard makes them look yellow and dirty.
Why Book Drawings Often Look Flat
- Straight page tops. A flat line across the top turns the book into a box. Curve each page up out of the spine and down to the corner.
- Text lines drawn with a ruler. Straight lines on a curved page cancel out the curve. Let every line dip as it reaches the spine.
- No page edges. Without the fanned lines on the sides, the book looks like a single sheet of paper. Three thin lines are enough.
- A cover the same size as the pages. The cover has to stick out a little all round, or it simply disappears.
- Two pages of different sizes. One giant page and one small page makes the book look torn. Compare the outer edges before you ink.
Storybook Ideas Beyond This One
Swap the picture doodle for your favorite story, or write a real title on the left page in tiny letters. A closed book standing up is fun too: a tall rectangle, a thin spine strip and page lines along one side. For a back-to-school scene, put your book in front of the building from this school drawing tutorial. Add a bright idea above the pages with the light bulb drawing step by step lesson, or let a wise reader perch on top using the owl drawing tutorial.
Free Open Book Coloring Page and Printable Guide
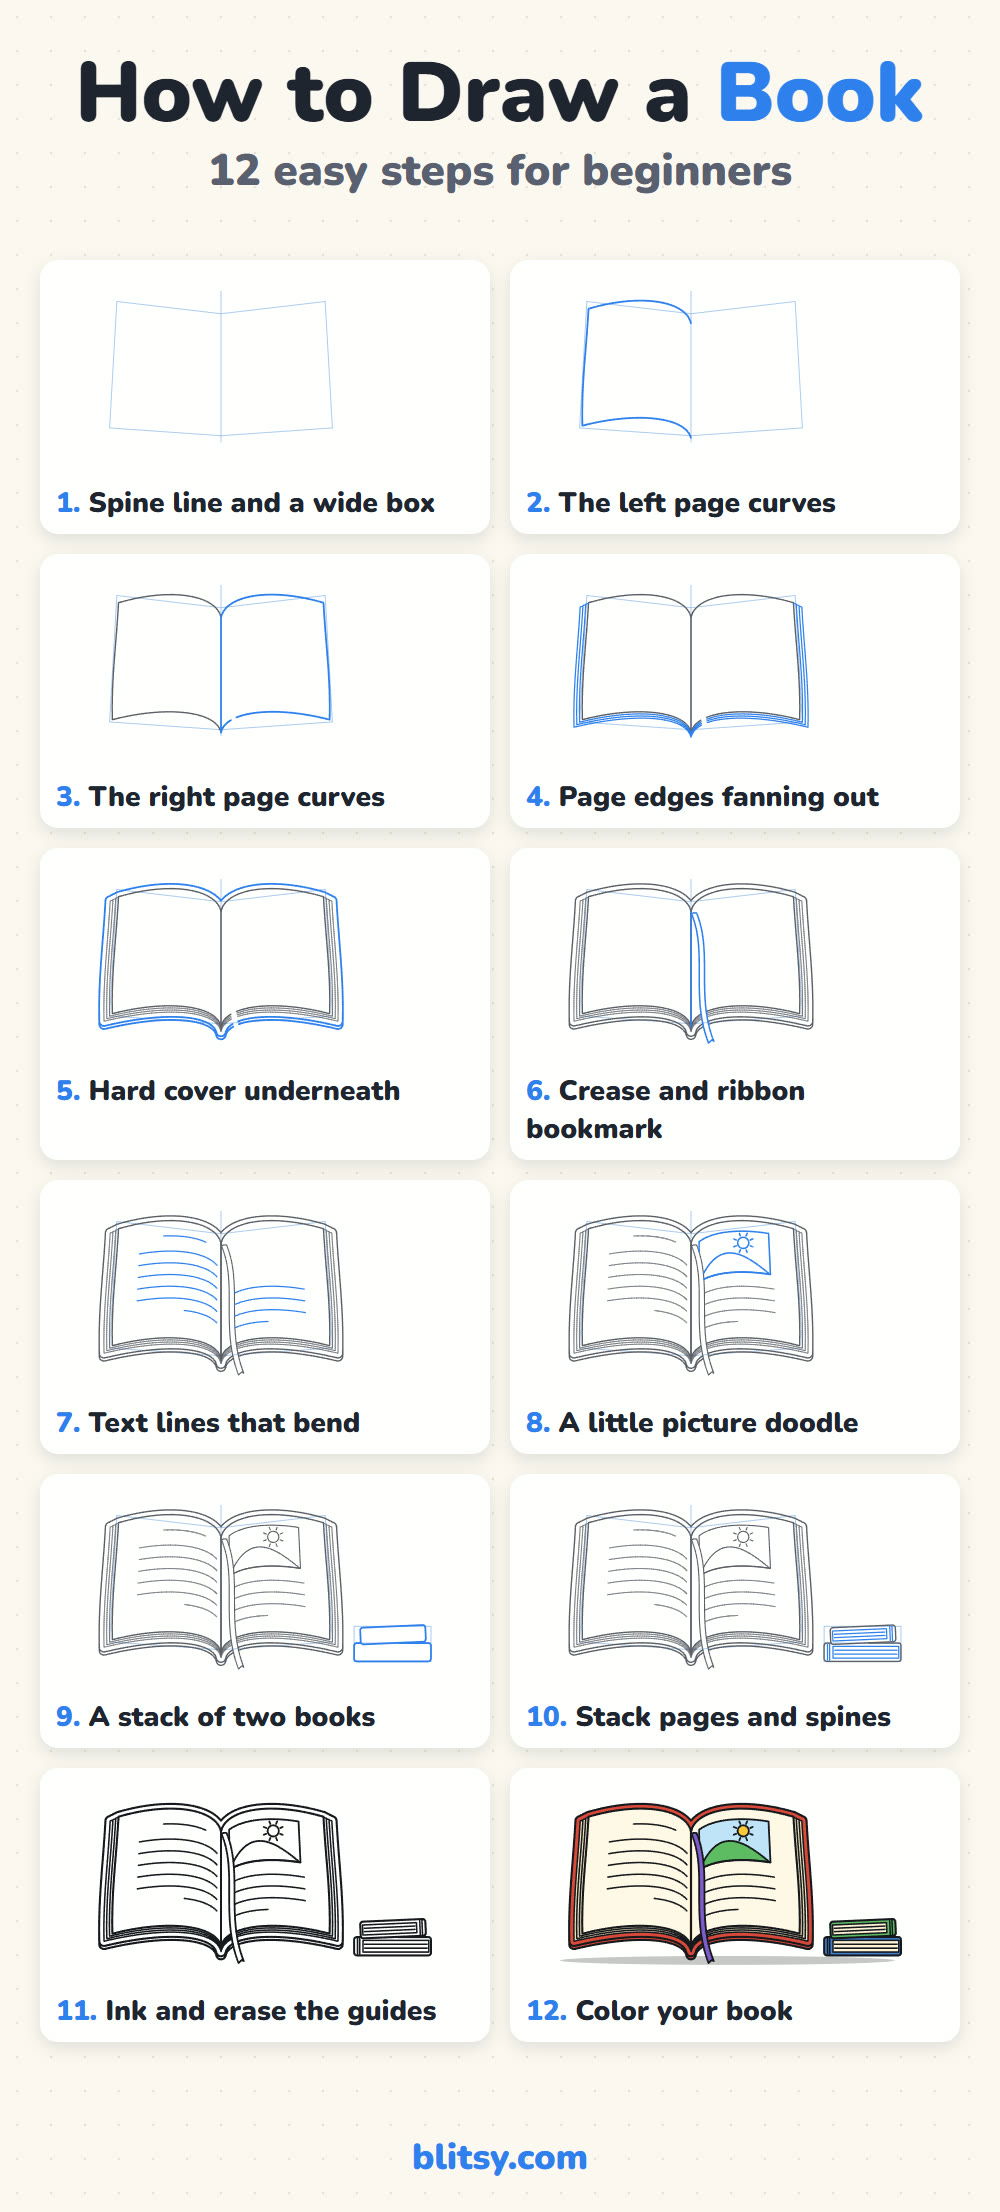
The free book coloring page has a colored model at the top with a key that names a color for each part, and a big clean outline underneath. The step-by-step PDF guide holds all 12 steps with their pictures and tips, so you can practice away from a screen. Both print fine on Letter or A4 paper.
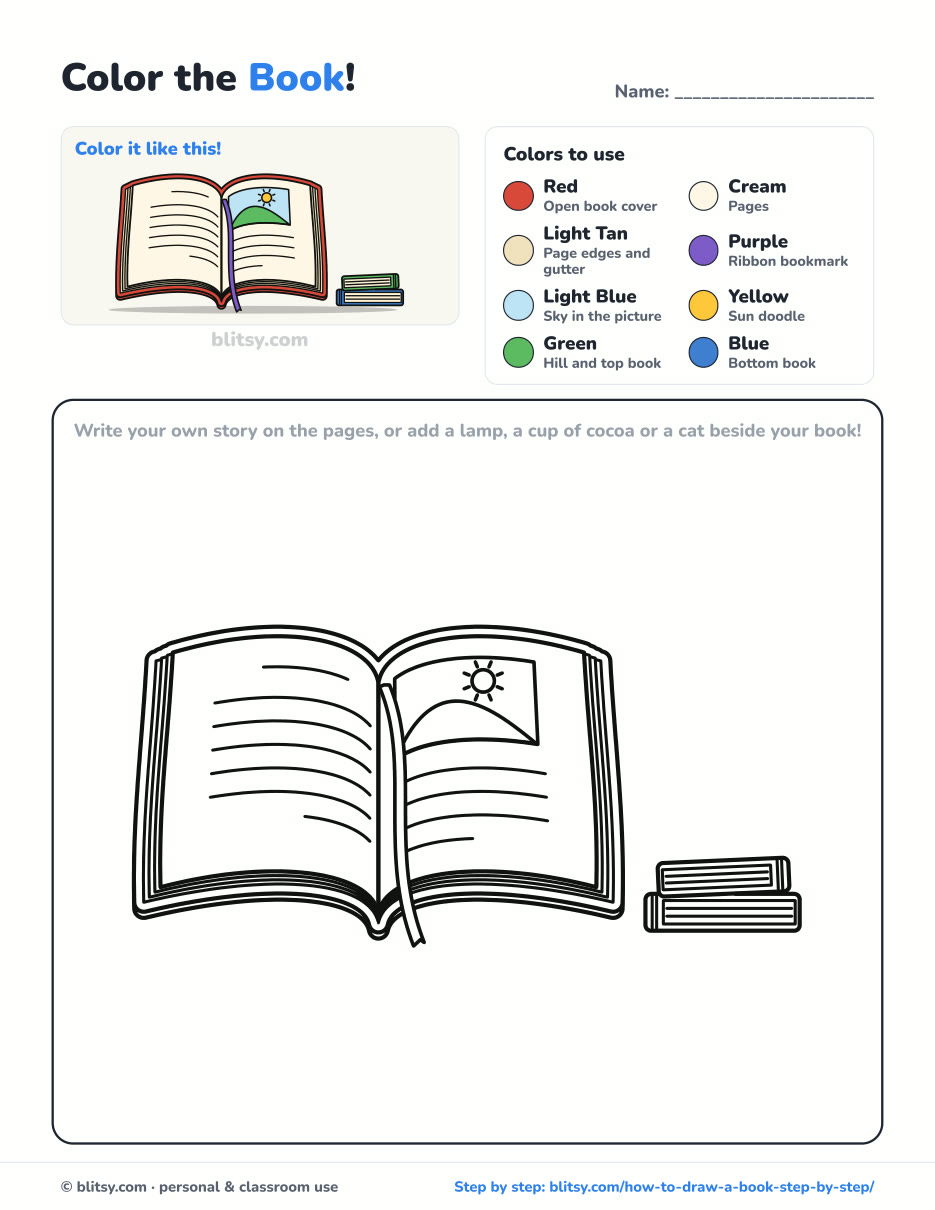
Black outlines with a colored example and the color names at the top. Ready to print and color.
⬇️ Download Coloring PageEvery step picture with its instructions and tips, to keep beside your paper while you draw.
⬇️ Download Drawing Guide📱 On a phone? Tap a download button, then open the file and choose Share → Save to Files or Print. On a computer, the PDF opens or saves straight to your Downloads folder.
Pin the Storybook Steps
More Easy Things to Draw After Your Book
Each one is a full tutorial with a picture per step, so the method carries over.
- School Drawing: A red-brick school with a clock and a little bell tower comes together in this how to draw a school step by step lesson.
- Light Bulb Drawing: An old-style bulb with a curly filament and a ridged base, from this light bulb drawing tutorial.
- Owl Drawing: A round-eyed owl on a branch under a crescent moon in this owl drawing step by step guide.
- Apple Drawing: Two overlapping circles turn into a shiny red apple and a green one with a bite in this apple drawing tutorial.
- Music Notes Drawing: Draw a treble clef and a ribbon of bright notes with this music notes drawing lesson.
Book Drawing Questions From Beginners
How do you draw an open book easily?
Draw a spine line, then a page on each side whose top edge rises out of the spine and curves down to the outer corner. Add a few page lines along the outside, a cover around everything and a few bending text lines.
How do you make a book drawing look 3D?
Curve the pages, show the fanned page edges on the sides and bottom, and make the bottom of the book a little wider than the top.
How do you draw a closed book?
Start with a box shape, leave thin cover strips around a block of pages, and add a couple of lines through the pages. Two short lines at one end mark the spine.
What can I draw on the pages of my book?
Short text lines and one small picture work best. A sun, a cat, a star or a little house all read well and keep the pages from looking crowded.
Grab a pencil, curve those pages and fill your book with any story you like. 📖✏️
Related posts:
 How to Draw a Whale Step by Step (Easy for Beginners)
 How to Draw Lungs Step by Step (Easy Science Diagram)
 How to Draw a Pineapple Step by Step (Easy Crown and Slice)
 How to Draw Iron Man Step by Step (Easy Chibi for Kids)
 How to Draw a Dress Step by Step (Easy Party Dress)
 How to Draw a Chicken Step by Step (Easy for Beginners)
 How to Draw a UFO Step by Step (Cute Alien Saucer)
 How to Draw Flames Step by Step (Easy Campfire Drawing)
 How to Draw a Moon Step by Step (Sleepy Crescent + Phases)
 How to Draw a Sunflower Step by Step (Big and Bright)
 How to Draw a Fall Leaf Step by Step (Maple, Oak and Birch)
 How to Draw a Mushroom Step by Step (Easy Storybook Toadstool)

