
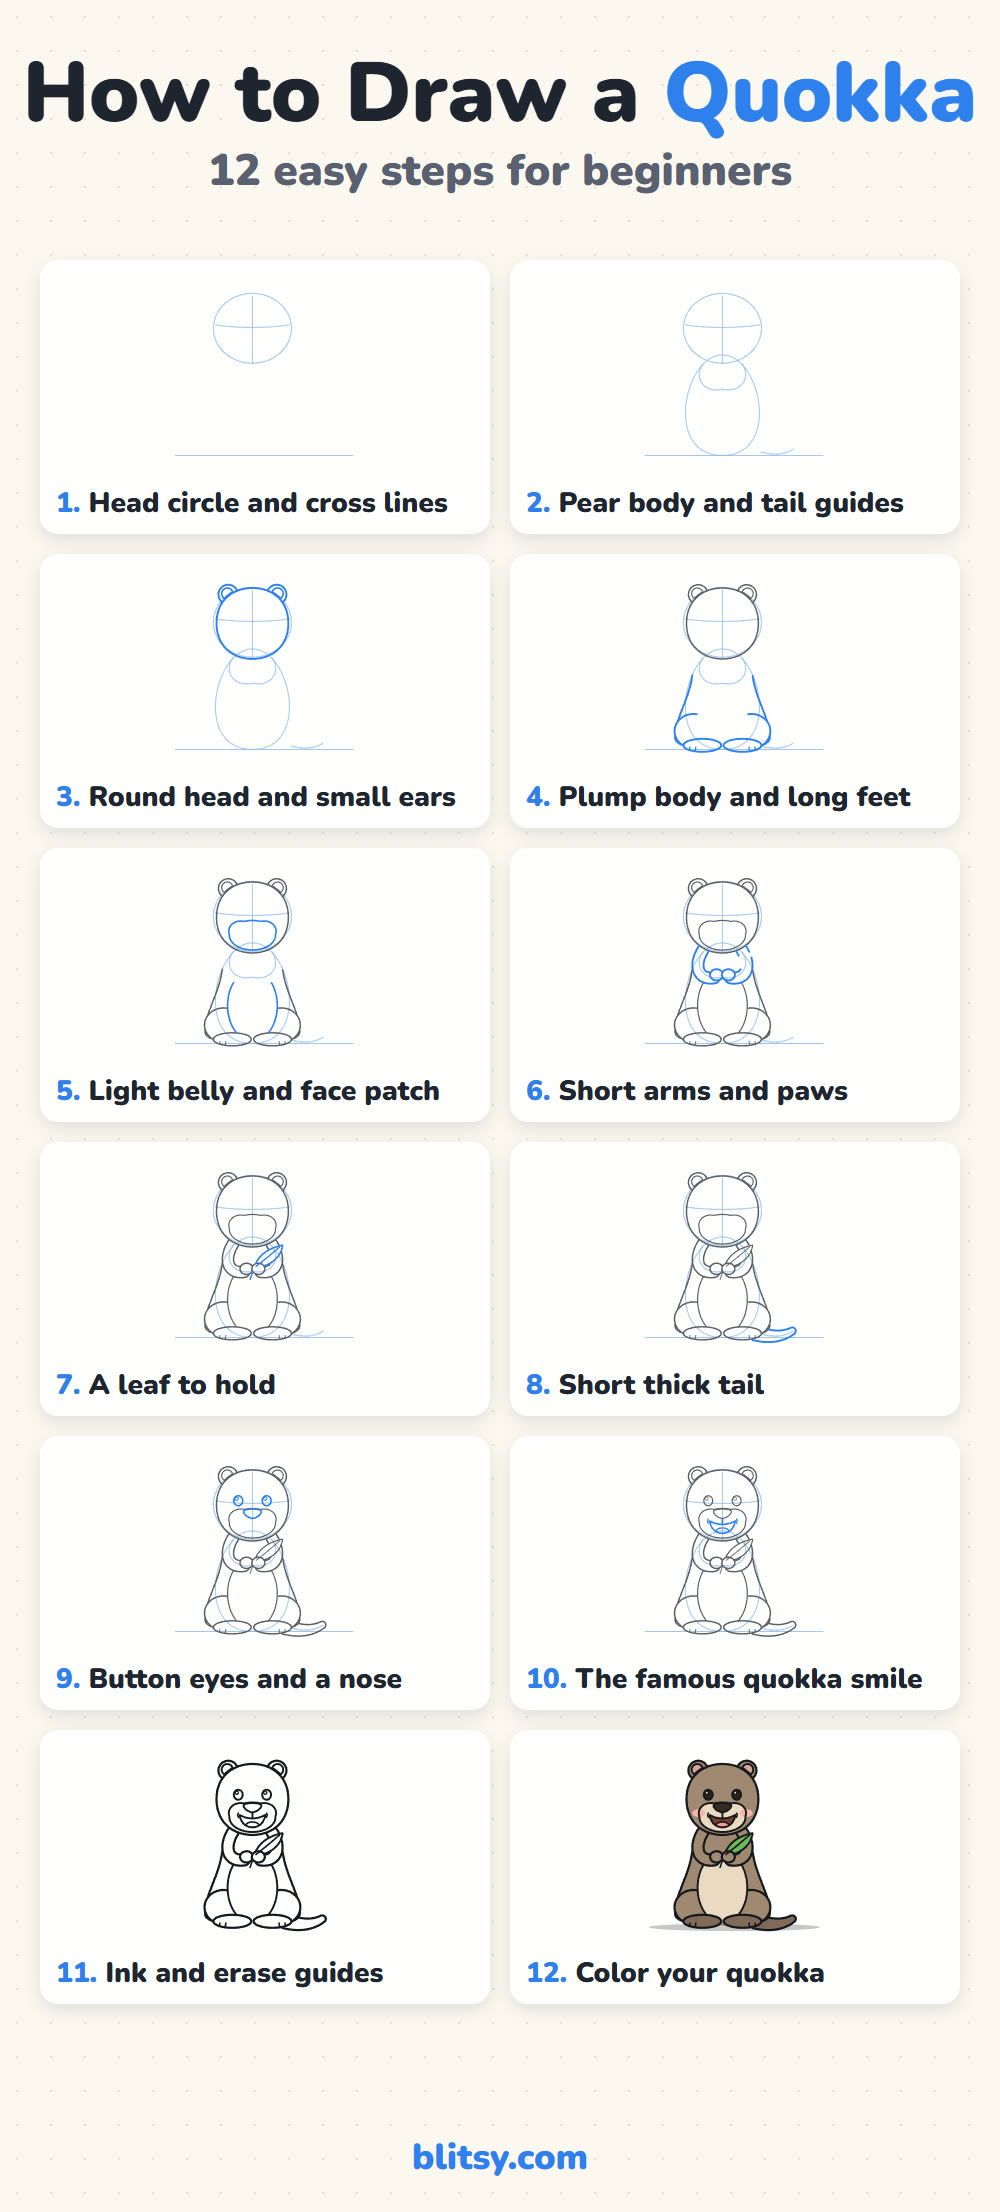
People call the quokka the happiest animal in the world, and it's all because of that grin. The corners of its mouth turn up so far that it always looks pleased to see you. Here I'll walk you through how to draw a quokka step by step, from one light circle to a chubby brown quokka sitting up on its long feet with a leaf held in its paws. Get the smile right and everything else falls into place.
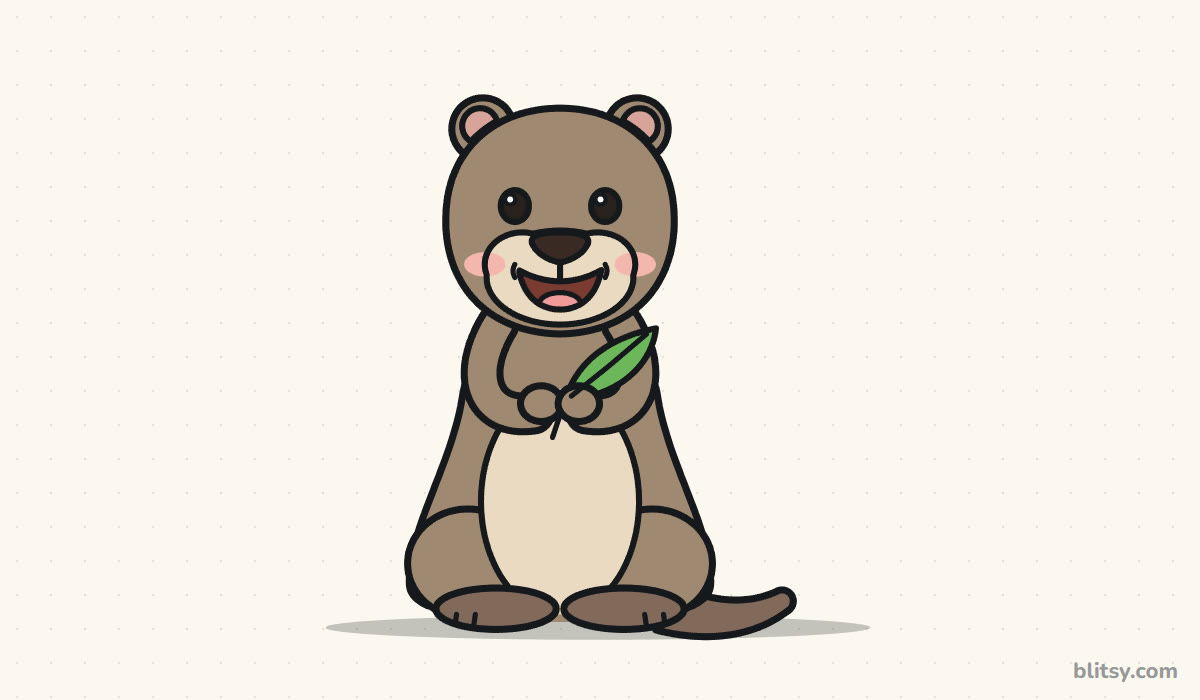
Each new line shows up in blue in its picture. Older lines fade to gray, so you only copy the blue part each time.
Quick overview
⏱️ Time: about 25 to 30 minutes, coloring included
🎯 Level: easy, good for kids from about 6
✏️ Steps: 12
🍃 You'll draw: a cartoon quokka sitting upright and holding a leaf
Grab These Before Your Quokka Sketch
- A pencil you can press lightly (HB is fine)
- A soft eraser that won't smudge
- A black marker or fineliner for the final lines
- Crayons or colored pencils: light brown, brown, cream, pink, green and black
- Plain white paper
The quokka is taller than it is wide, so you can hold the paper either way, but give the tail a little room on the right.
How to Draw a Quokka Step by Step
Step 1: Draw a head circle and cross lines
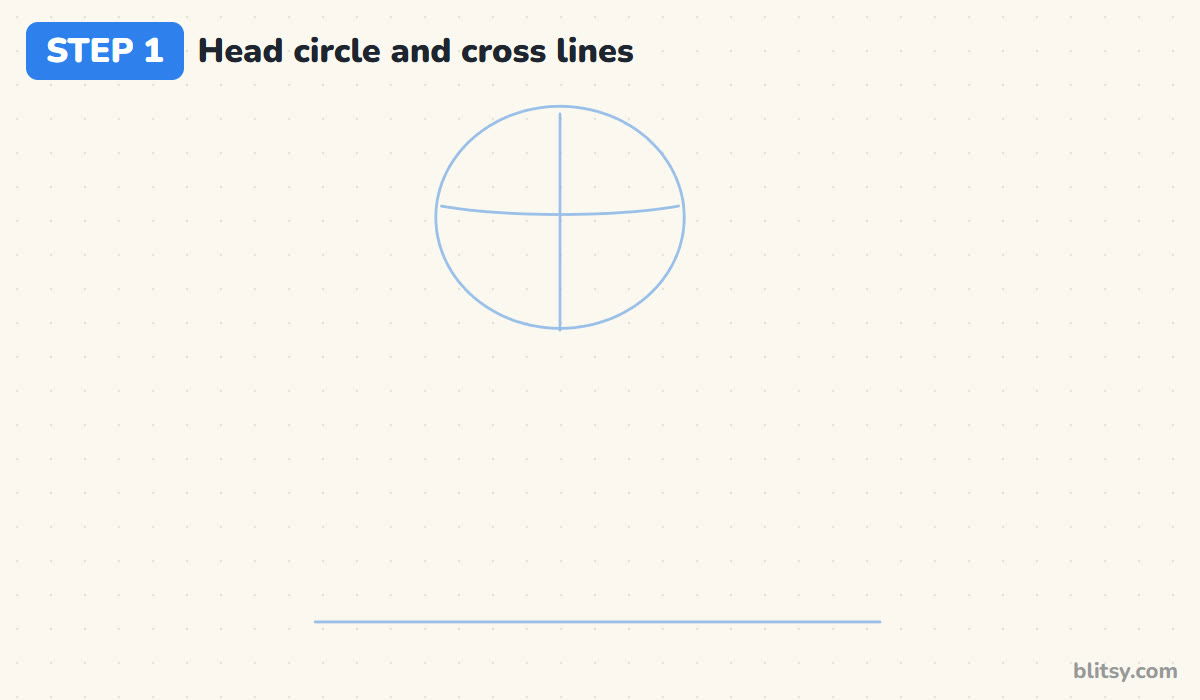
Start with a flat ground line near the bottom of the page. Well above it, draw a circle for the head, a touch wider than it is tall. Add a line straight down the middle and a soft curve across it, a little above halfway. The eyes will sit on that curve and the nose will sit on the middle line.
💡 Tip: Press so lightly that you can barely see the line. All of these guides get erased later.
Step 2: Add a pear body and the arm guides
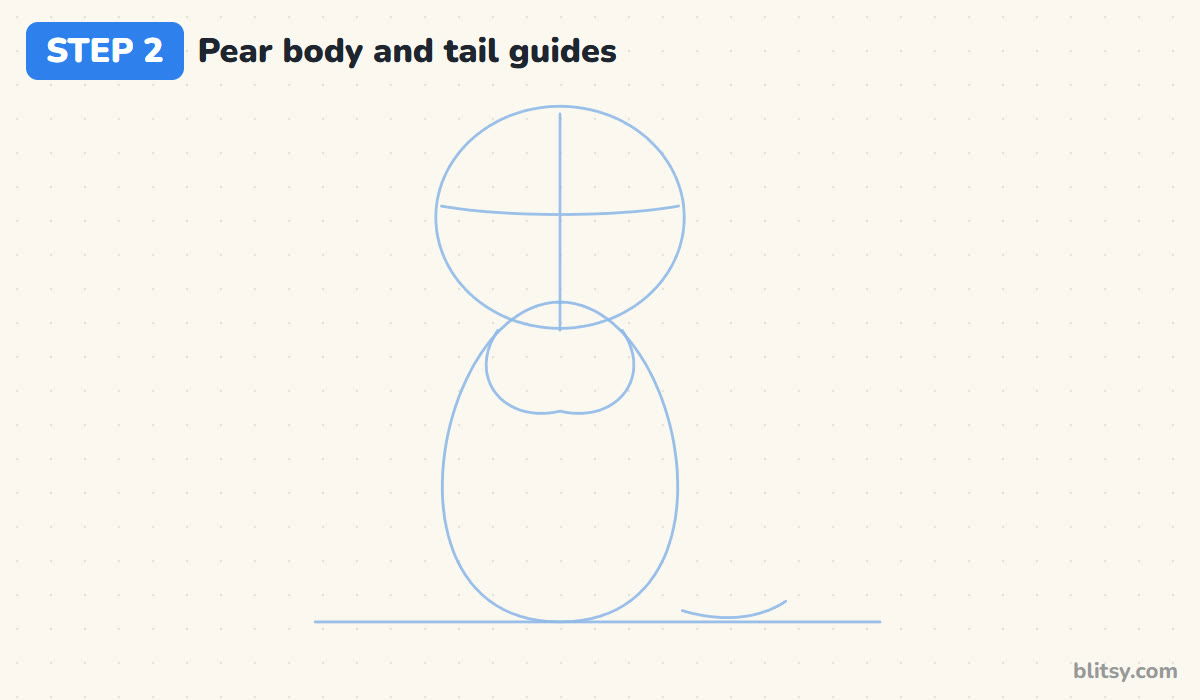
Under the head, draw a pear shape that's narrow at the top and wide at the bottom, sitting right on the ground line. I make the bottom of the pear wider than the head, because a quokka sits on big round haunches like a little kangaroo. Sketch a curved line from each shoulder to the middle of the chest for the arms, and a short curve off the lower right for the tail.
💡 Tip: If the pear comes out the same width all the way down, your quokka will look like a bear standing up. Push the bottom out.
Step 3: Outline the round head and small ears
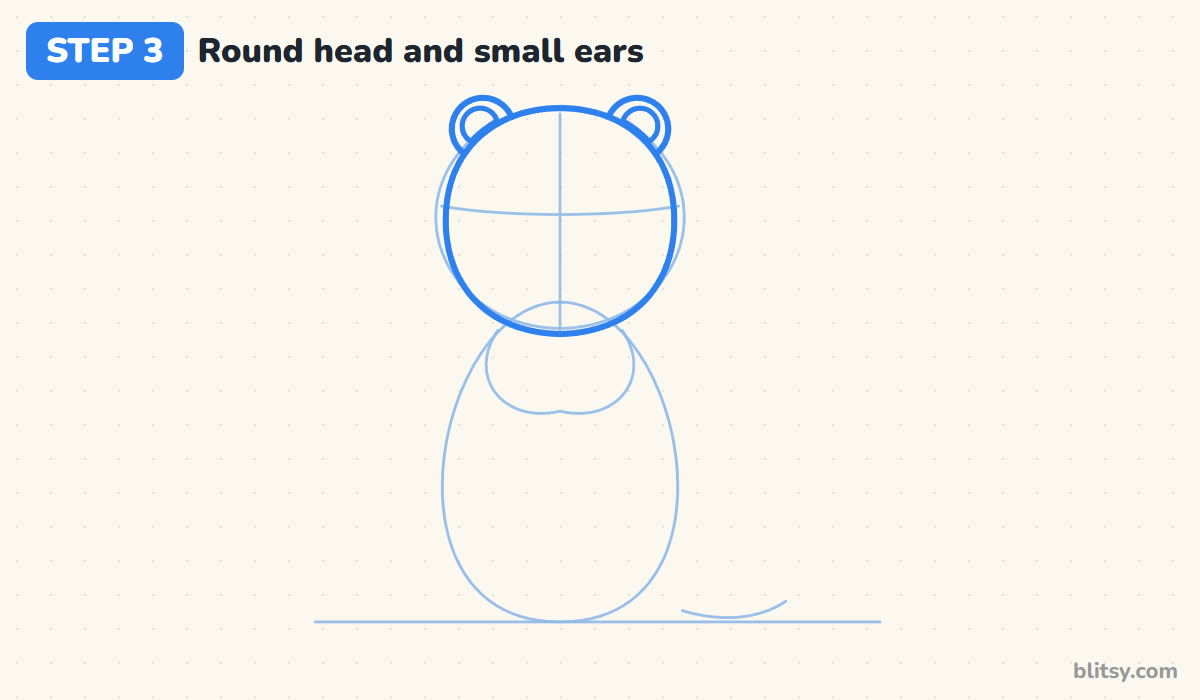
Go over the head circle with a firm line, letting the cheeks bulge out a little toward the bottom. Then add two small round ears on the top corners and a smaller circle inside each one. Quokka ears are short and round, much smaller than a bunny's or a mouse's.
💡 Tip: Keep each ear about a quarter as wide as the head. Bigger ears turn it into a mouse.




Step 4: Draw the plump body and long feet
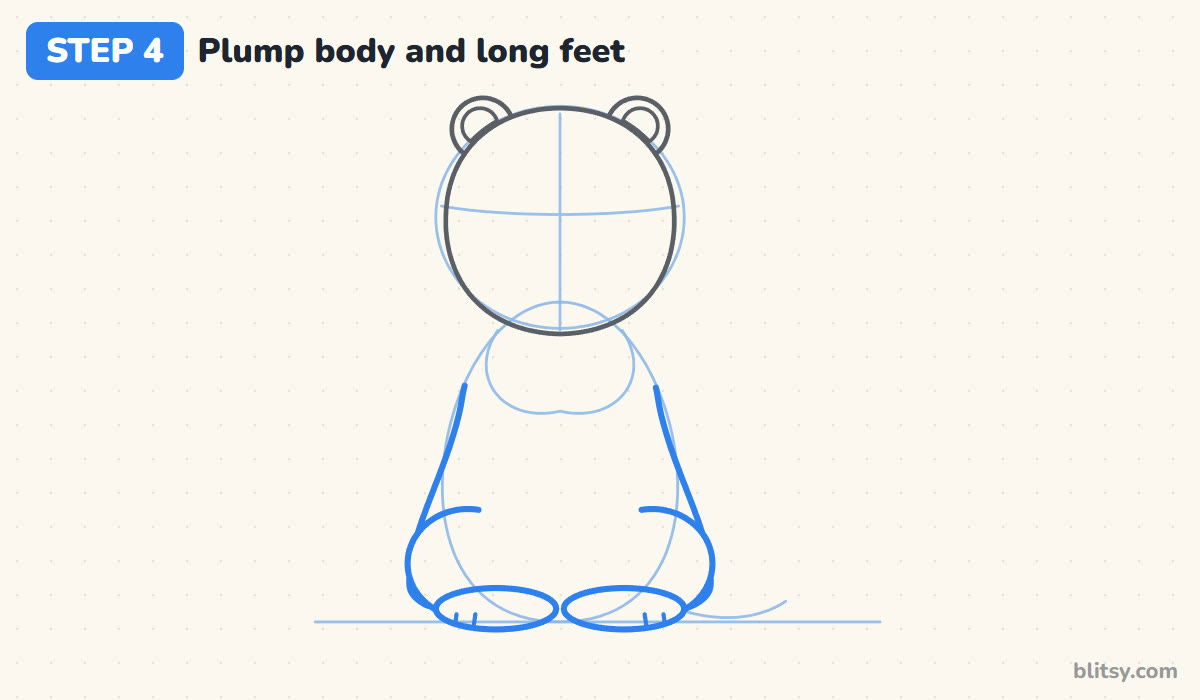
Follow the pear guide down each side of the body. Near the bottom, draw a big round hip on each side that bulges out past the body line. Next come two long oval feet side by side on the ground, each with two short toe lines. Leave the top of the body open where the arms will go.
💡 Tip: Overlap the feet onto the hips a little. That's what makes the quokka look like it's really sitting.
Step 5: Add the light belly and face patch
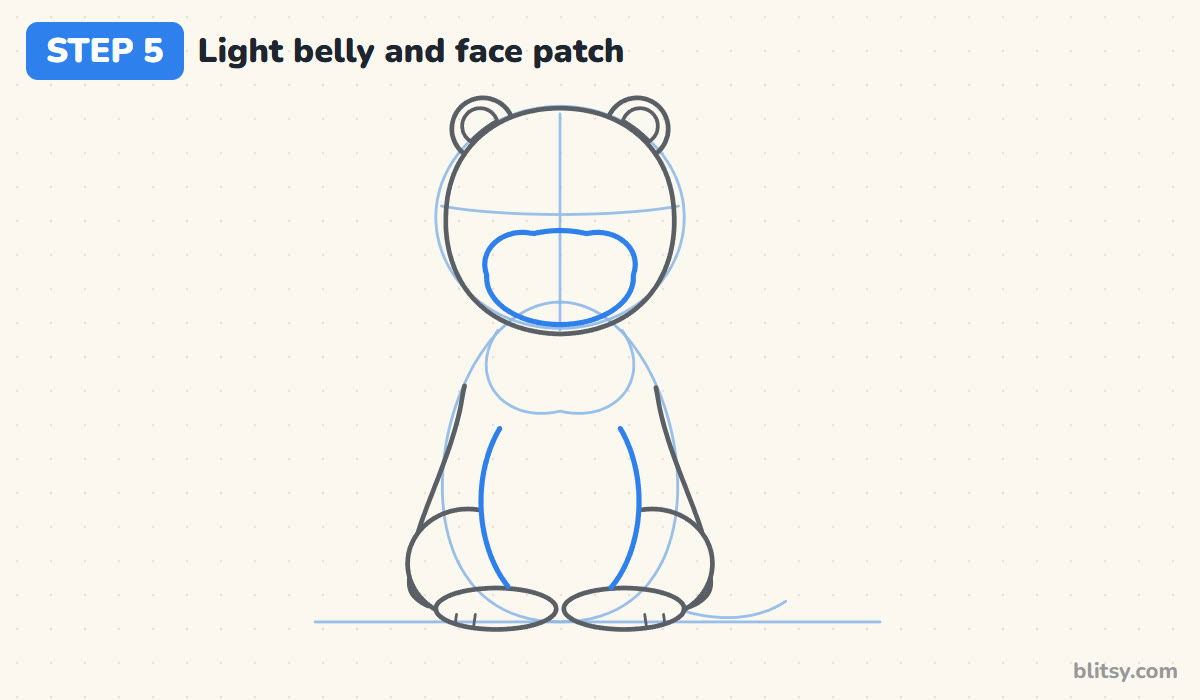
Draw a tall oval in the middle of the body for the pale belly, ending just above the feet. On the face, draw a rounded patch below the eye line with two small bumps on top, like a wide bean. This lighter area is where the nose and the smile go.
💡 Tip: Make the face patch reach almost to the bottom of the head. A small patch leaves no room for the big smile.
Step 6: Draw the short arms and paws
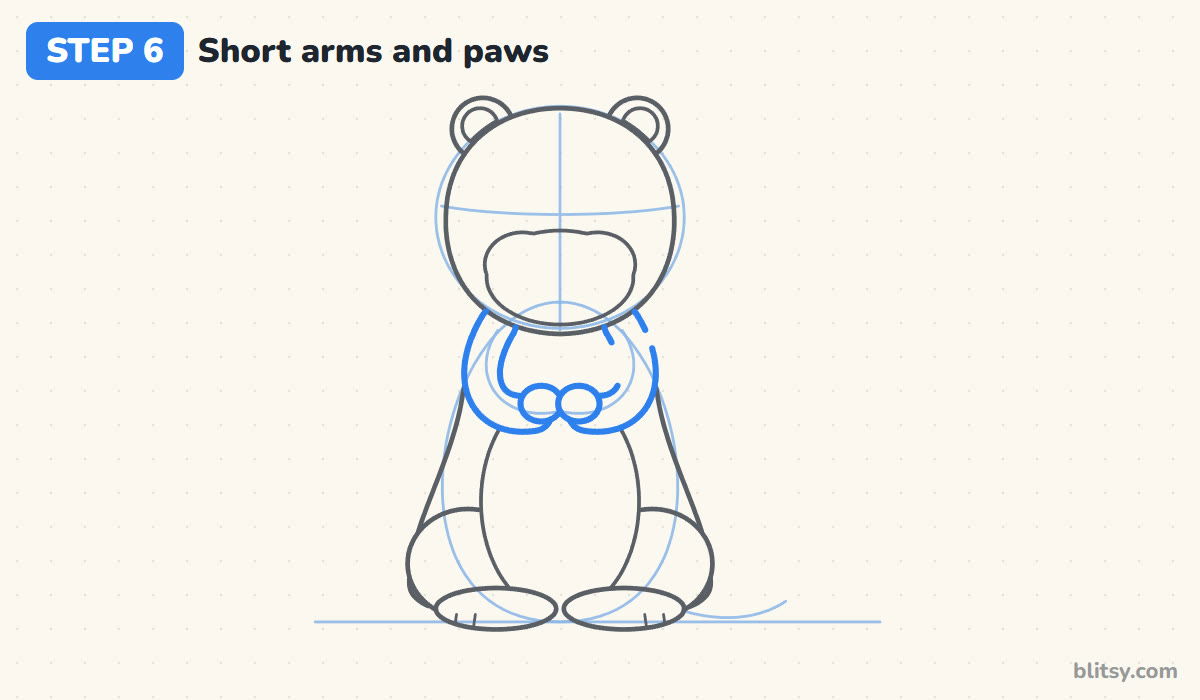
Each arm starts under the head and curves down and in toward the middle of the chest. Give the arms some real thickness, about as wide as an ear. At the ends, draw two small round paws that touch each other in the center, as if the quokka is clapping or holding something.
💡 Tip: Draw both arms as mirror images. Look from one to the other as you go so they match.
Step 7: Put a leaf in its paws
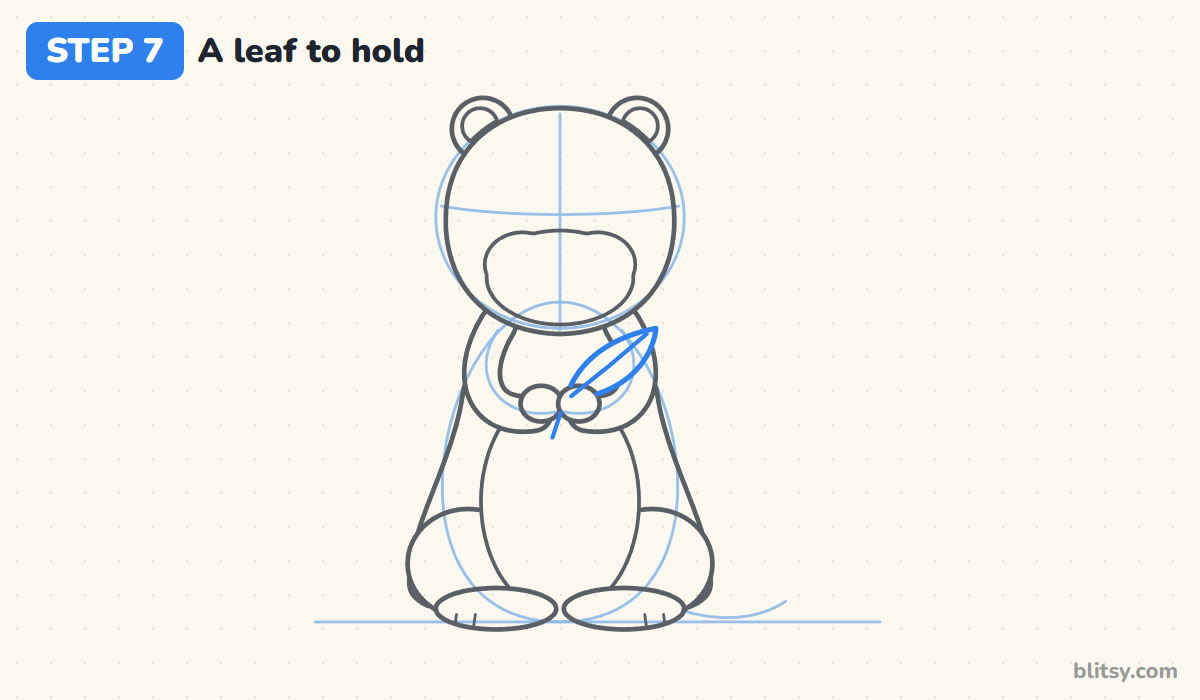
Quokkas eat leaves and grasses, so I like to give mine a snack. Draw a long leaf with a pointed tip coming up from the paws and leaning to the right. A line through the middle makes the vein, and a short stem pokes out under the paws.
💡 Tip: Tuck the bottom of the leaf behind the paws instead of on top of them, so it looks gripped.


Step 8: Add a short, thick tail
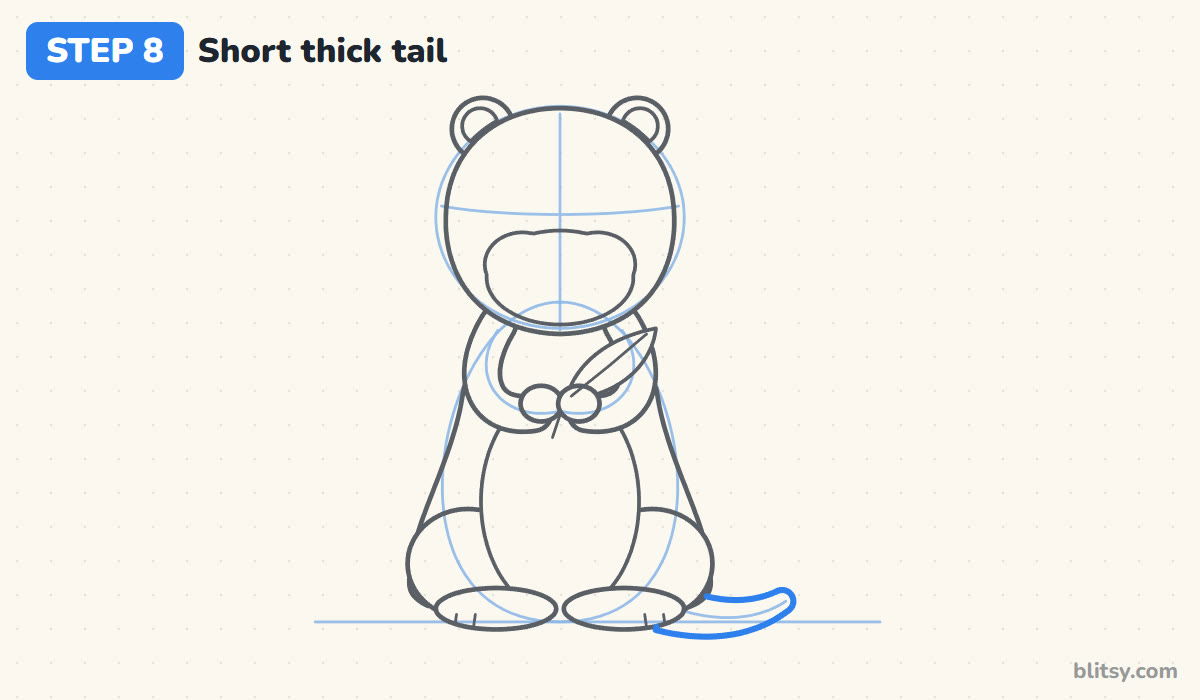
From the right side of the body, near the ground, draw a tail that sweeps out and curls up slightly at the end. It should be thick where it leaves the body and thinner at the rounded tip. Keep it fairly short.
💡 Tip: A long, skinny tail makes it look like an otter or a rat. Short and chunky reads as quokka.
Step 9: Draw button eyes and a small nose
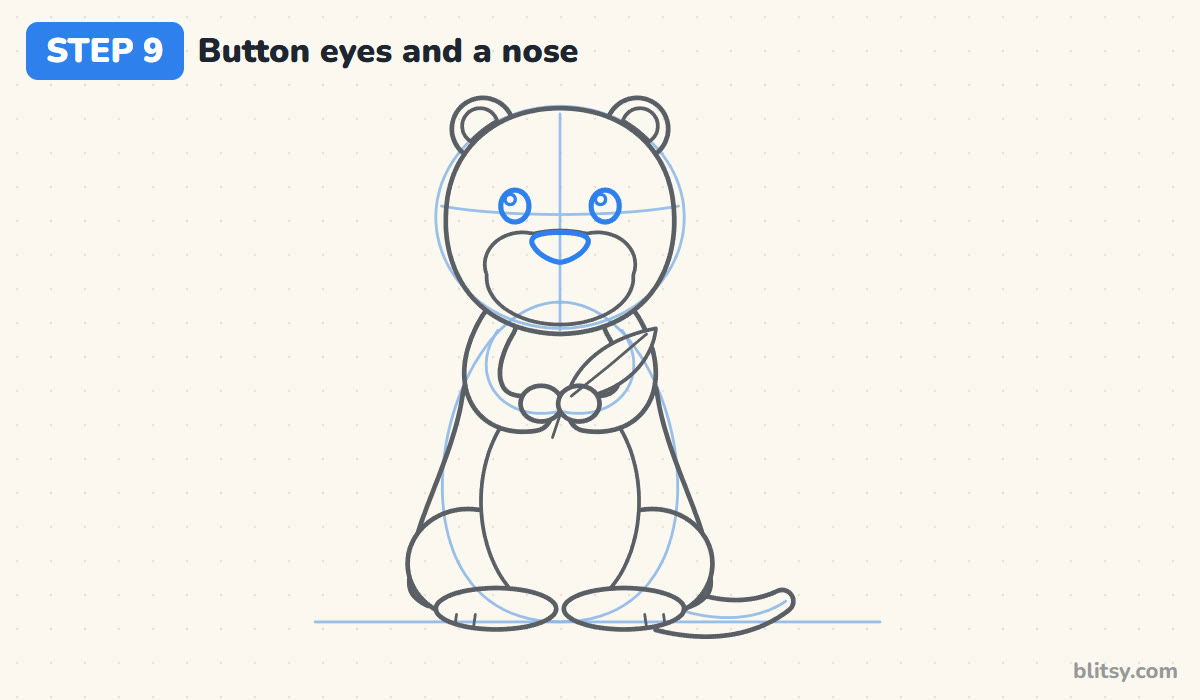
On the eye curve, draw two round eyes about the same distance from the middle line. Add a small circle in the top corner of each for the shine. Then draw the nose as a rounded triangle pointing down, sitting at the top of the face patch.
💡 Tip: Set the eyes a little wide apart. Close-set eyes make the face look worried instead of happy.
Step 10: Give it the famous quokka smile
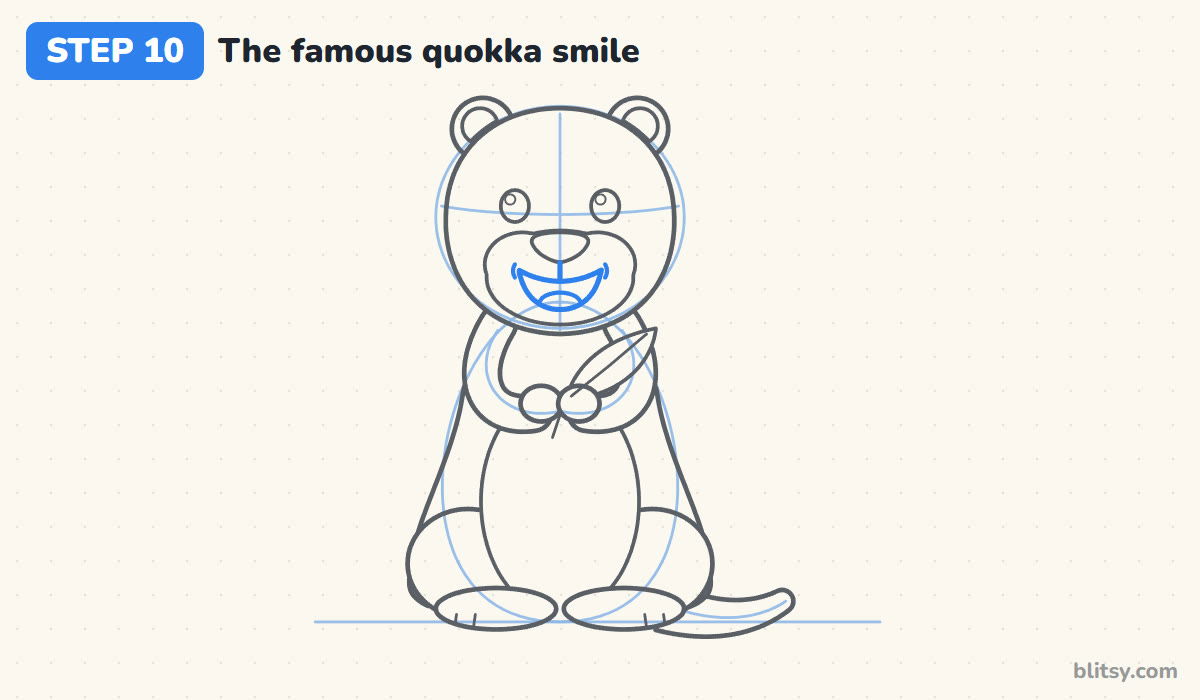
This is the step everyone waits for. Draw a short line down from the nose. From the bottom of that line, draw a wide curve up to each side, then a deeper curve underneath to close the open mouth. Add a small tongue at the bottom and a tiny curved dimple at each corner.
💡 Tip: Lift the corners of the mouth higher than the middle. That upturn is what makes it look like it's grinning.
Step 11: Ink the lines and erase the guides
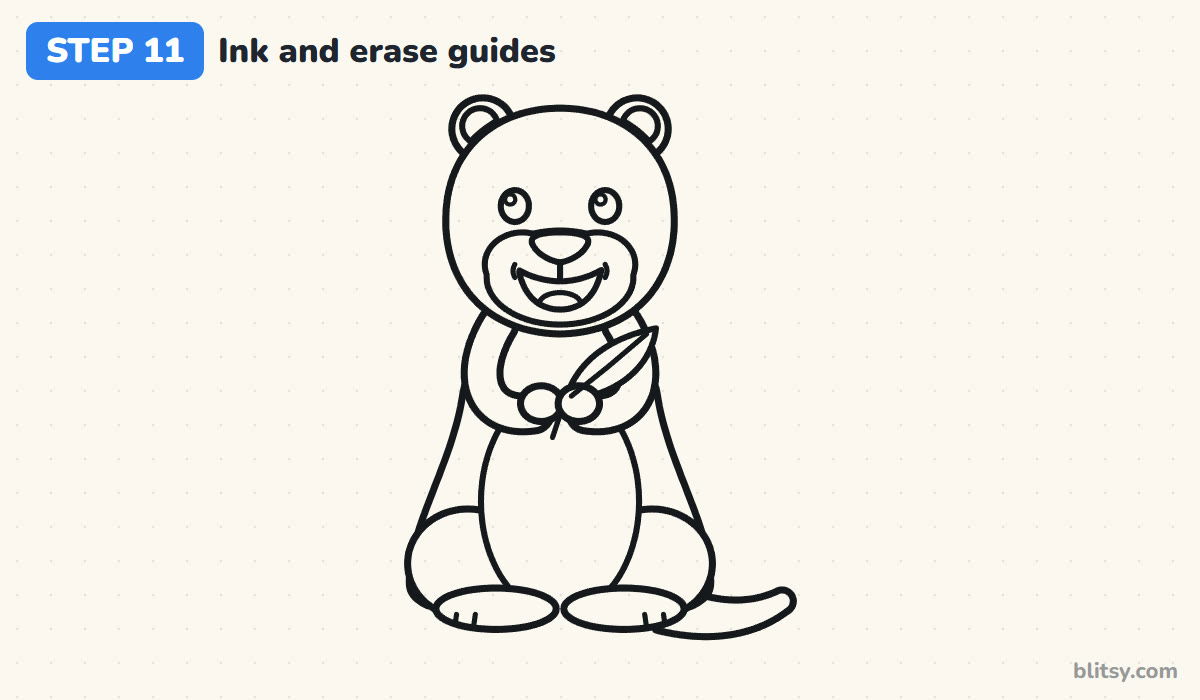
Trace every keeper line with your black marker. I start with the face while my hand is fresh, since a wobble in the smile shows the most. Wait a minute for the ink to dry, then erase all the pencil guides.
💡 Tip: Go slowly around the round paws. Short strokes keep them from turning into lumpy ovals.
Step 12: Color your quokka
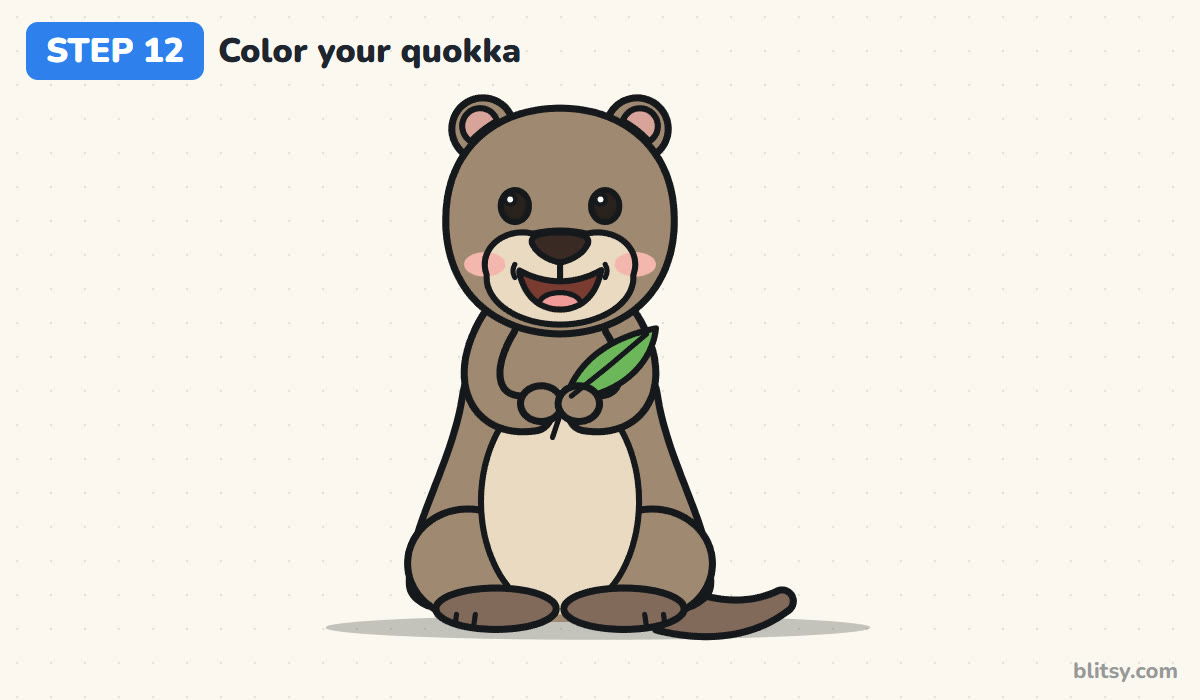
Color the head, body, arms and ears light brown, and use a darker brown for the feet and tail. The belly and face patch are cream. Fill the inner ears and tongue with pink and the mouth with dark red brown. The leaf is green. Finish with black eyes, a dark brown nose and two soft pink cheeks.
💡 Tip: Real quokkas have grayish brown fur, so a light layer of gray over the brown makes it look more natural.
Where Quokka Drawings Tend to Go Wrong
- A straight, bear-like body. Quokkas sit on wide haunches. Make the body a pear and add round hips at the bottom.
- A flat or tiny smile. Without the upturned grin it could be any small animal. Draw the mouth wide and lift the corners.
- Big pointy ears. Long ears turn it into a rabbit or a fox. Keep them small and round.
- A long skinny tail. Most beginners draw it like a rat's tail. Keep it short and thick at the base.
- Stick arms. Thin lines look stiff. Give the arms width and end them with soft round paws.
Twists on the Happiest Animal Drawing
Once the basic pose feels easy, try changing one thing at a time. Give your quokka a joey peeking out of a pouch, a flower instead of a leaf, or a selfie-style wave with one paw raised. Younger kids can skip the toe lines and dimples and it still looks great. If you liked the round body and soft paws, try the bunny drawing tutorial next, since that bunny sits up on its haunches too. The mouse drawing step by step lesson uses the same small round ears, and the raccoon drawing tutorial is a good pick when you want another furry animal with a bit more pattern.
Free Quokka Coloring Page and Printable Steps
The free quokka coloring page has a colored example at the top, a color key for every part, and a big outline to color underneath. The step-by-step PDF guide puts all 12 steps on paper with pictures and tips, so kids can draw away from a screen. Both print fine on Letter or A4.
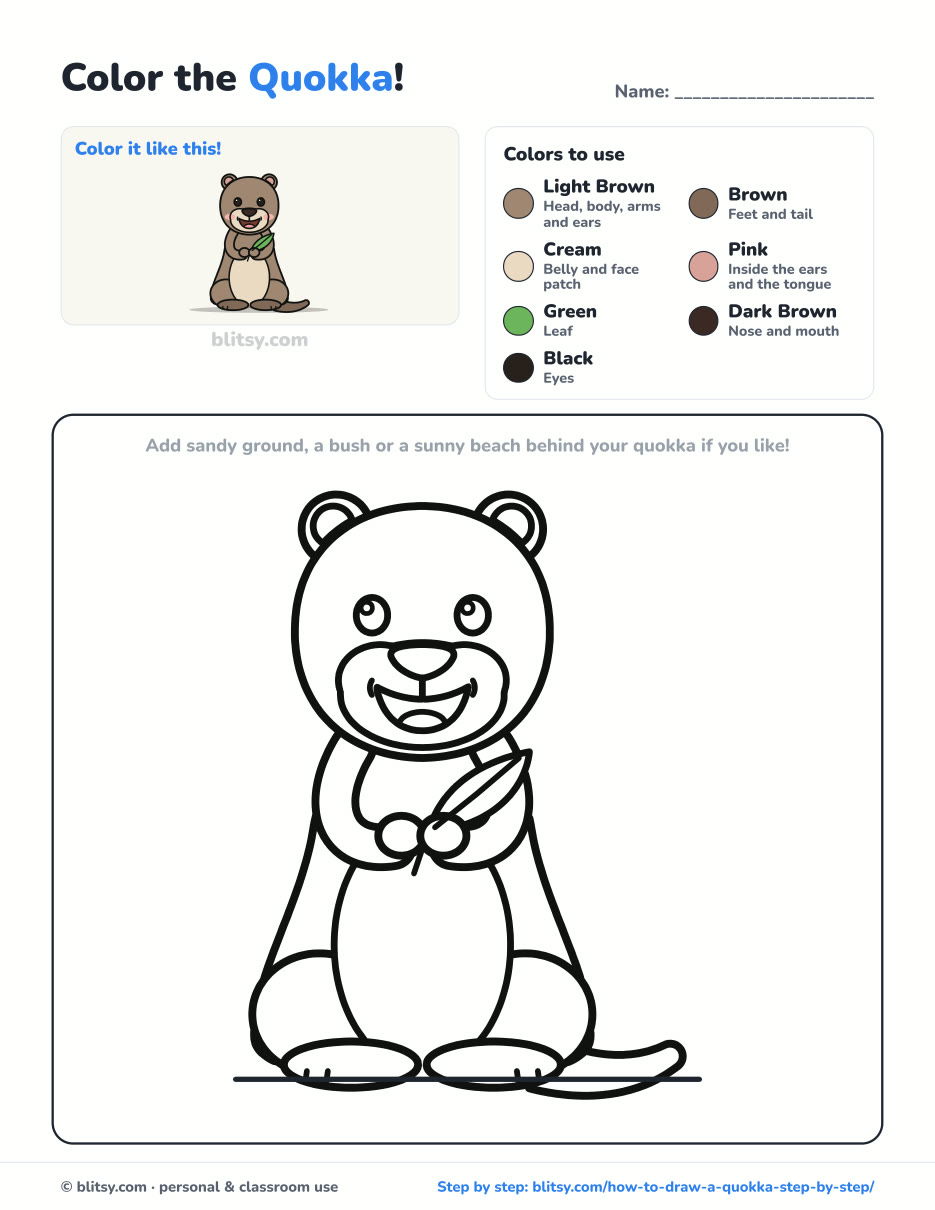
Black outlines with a colored example and the color names at the top. Ready to print and color.
⬇️ Download Coloring PageEvery step picture with its instructions and tips, to keep beside your paper while you draw.
⬇️ Download Drawing Guide📱 On a phone? Tap a download button, then open the file and choose Share → Save to Files or Print. On a computer, the PDF opens or saves straight to your Downloads folder.
Pin the Quokka Steps for Later
More Small Furry Animals to Draw Next
Each one is a full step-by-step tutorial with a picture for every stage and a free coloring page.
- Bunny Drawing: A sitting bunny with long ears and a carrot to nibble, in this how to draw a bunny step by step guide.
- Mouse Drawing: Round ears, a tiny nose and a curly tail in this mouse drawing tutorial.
- Raccoon Drawing: A masked face and a striped tail in this raccoon drawing step by step lesson.
- Sloth Drawing: Another animal with a sweet, sleepy smile, hanging from a branch in this sloth drawing tutorial.
- Rat Drawing: A friendly cartoon rat built from simple ovals in this rat drawing step by step guide.
Quokka Drawing Questions, Answered
What is the easiest way to draw a quokka?
Draw a circle for the head and a pear shape under it for the body. Add small round ears and long feet, then a short tail and a wide upturned smile.
Why do quokkas look like they're smiling?
The shape of their mouth turns up at the corners, so they look happy even when resting. That's why the smile is the most important part of the drawing.
What color is a quokka?
Quokkas have grayish brown fur with a lighter face and belly. Their eyes and nose are dark. A mix of light brown and a little gray works well.
Is a quokka a kangaroo?
Not quite, but they're related. A quokka is a small marsupial from Australia, about the size of a cat, and it hops and carries its baby in a pouch like a kangaroo.
Draw that big grin, add a leaf, and see if you can stop smiling back at your quokka. 🍃✏️
Related posts:
 How to Draw a Car Step by Step (Easy Drawing for Beginners)
 How to Draw a Whale Step by Step (Easy for Beginners)
 How to Draw an Arctic Fox Step by Step (Easy for Beginners)
 How to Draw a Chicken Step by Step (Easy for Beginners)
 How to Draw a Snowman Step by Step (Easy for Beginners)
 How to Draw an Airplane Step by Step (Easy Jet for Beginners)
 How to Draw a Mouse Step by Step (Easy for Beginners)
 How to Draw a T-Rex Step by Step (Easy for Beginners)
 How to Draw a Pig Step by Step (Easy for Beginners)
 How to Draw a Minion Step by Step (Easy for Beginners)
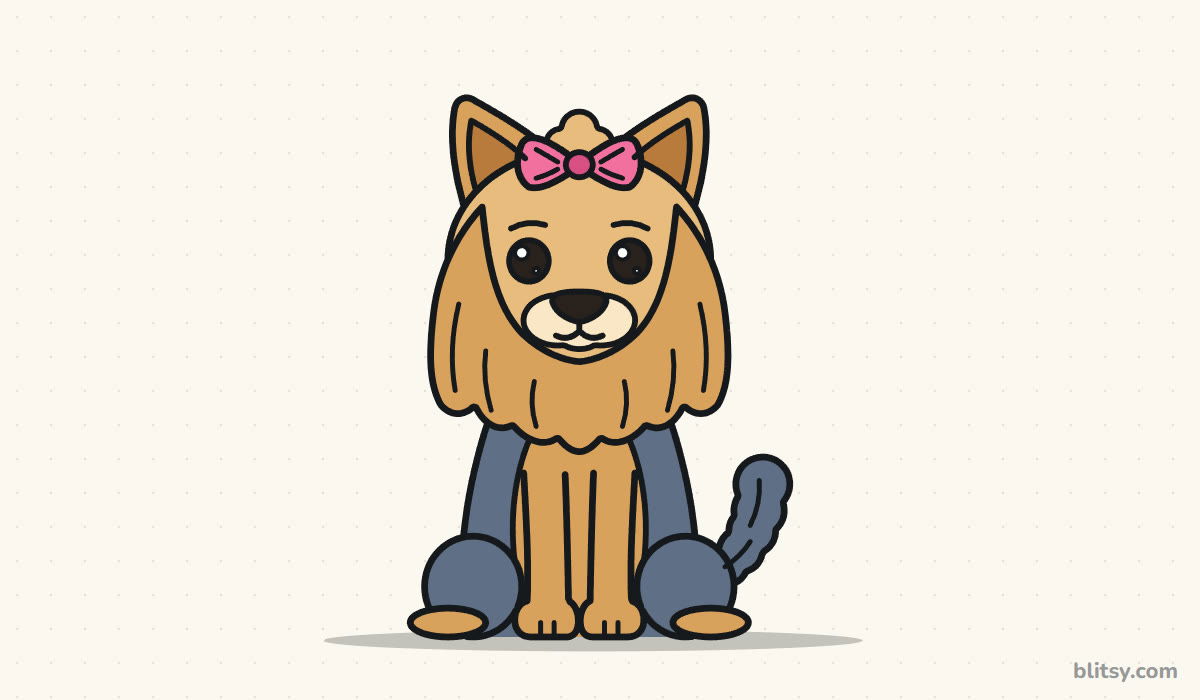 How to Draw a Yorkie Step by Step (Easy for Beginners)
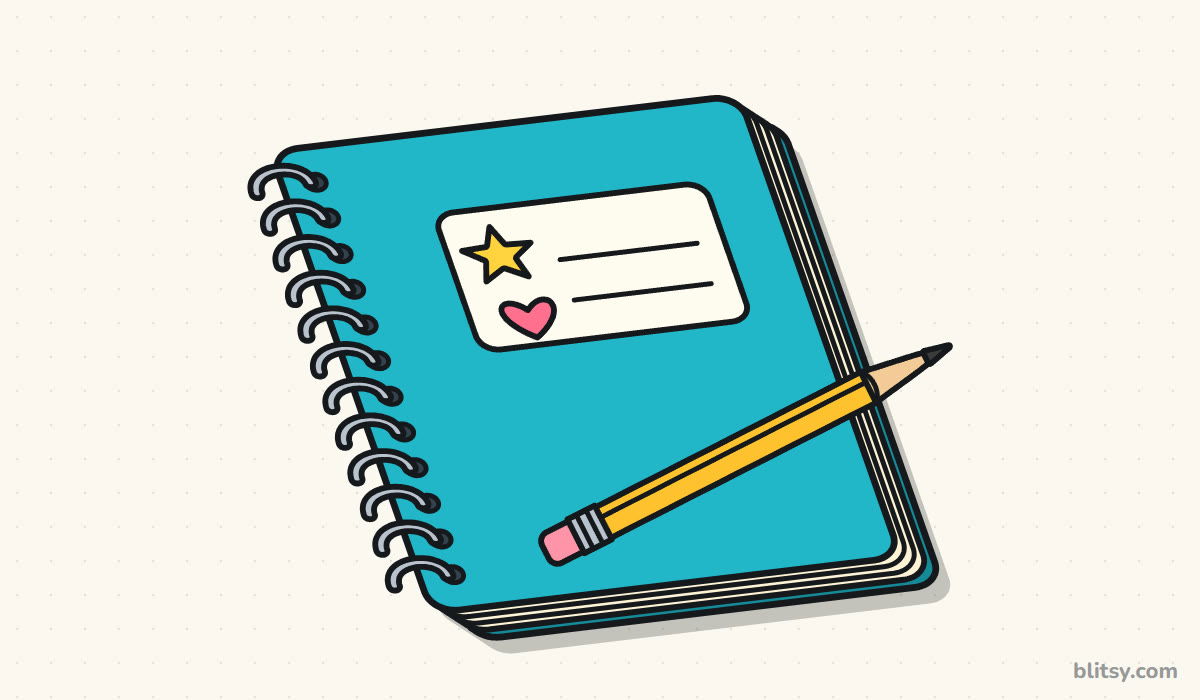 How to Draw a Notebook Step by Step (Easy for Beginners)

