
Skulls show up on every Halloween card and Day of the Dead altar, yet most people freeze when they try one, because the face part never seems to fit under the round top. It fits once you know where the eyes go. Below, I walk you through how to draw a skull step by step from the front, starting with a single circle and a few light lines. The finished skull is spooky enough for October and friendly enough for a kid's sketchbook.
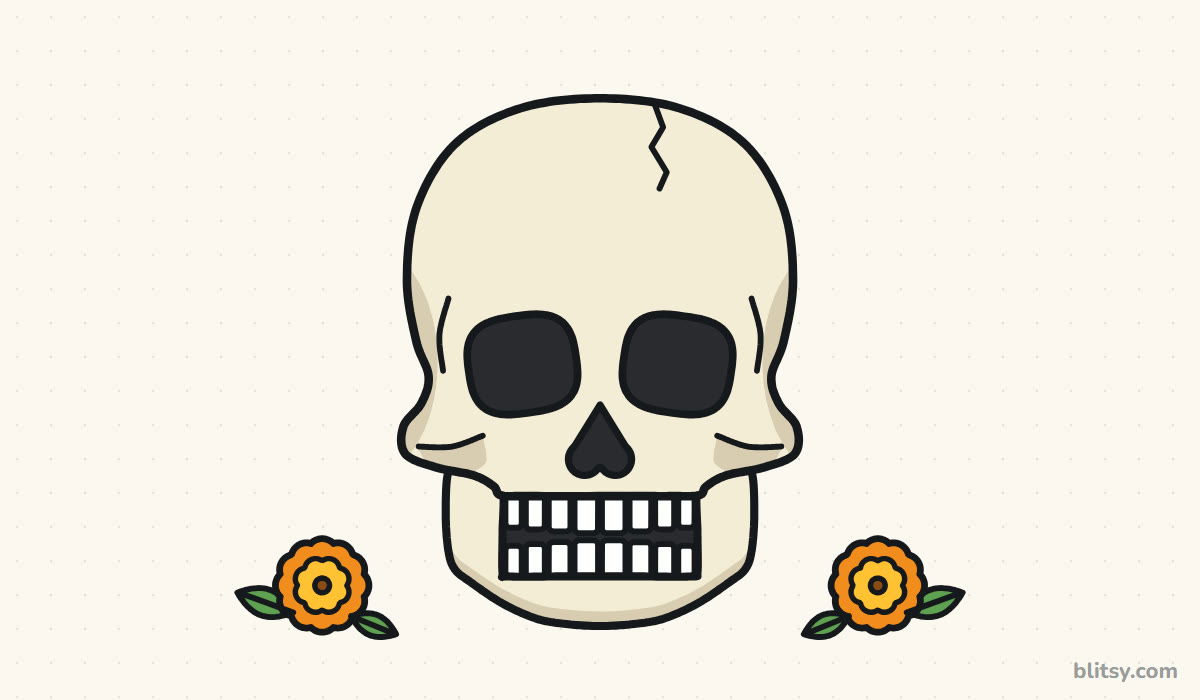
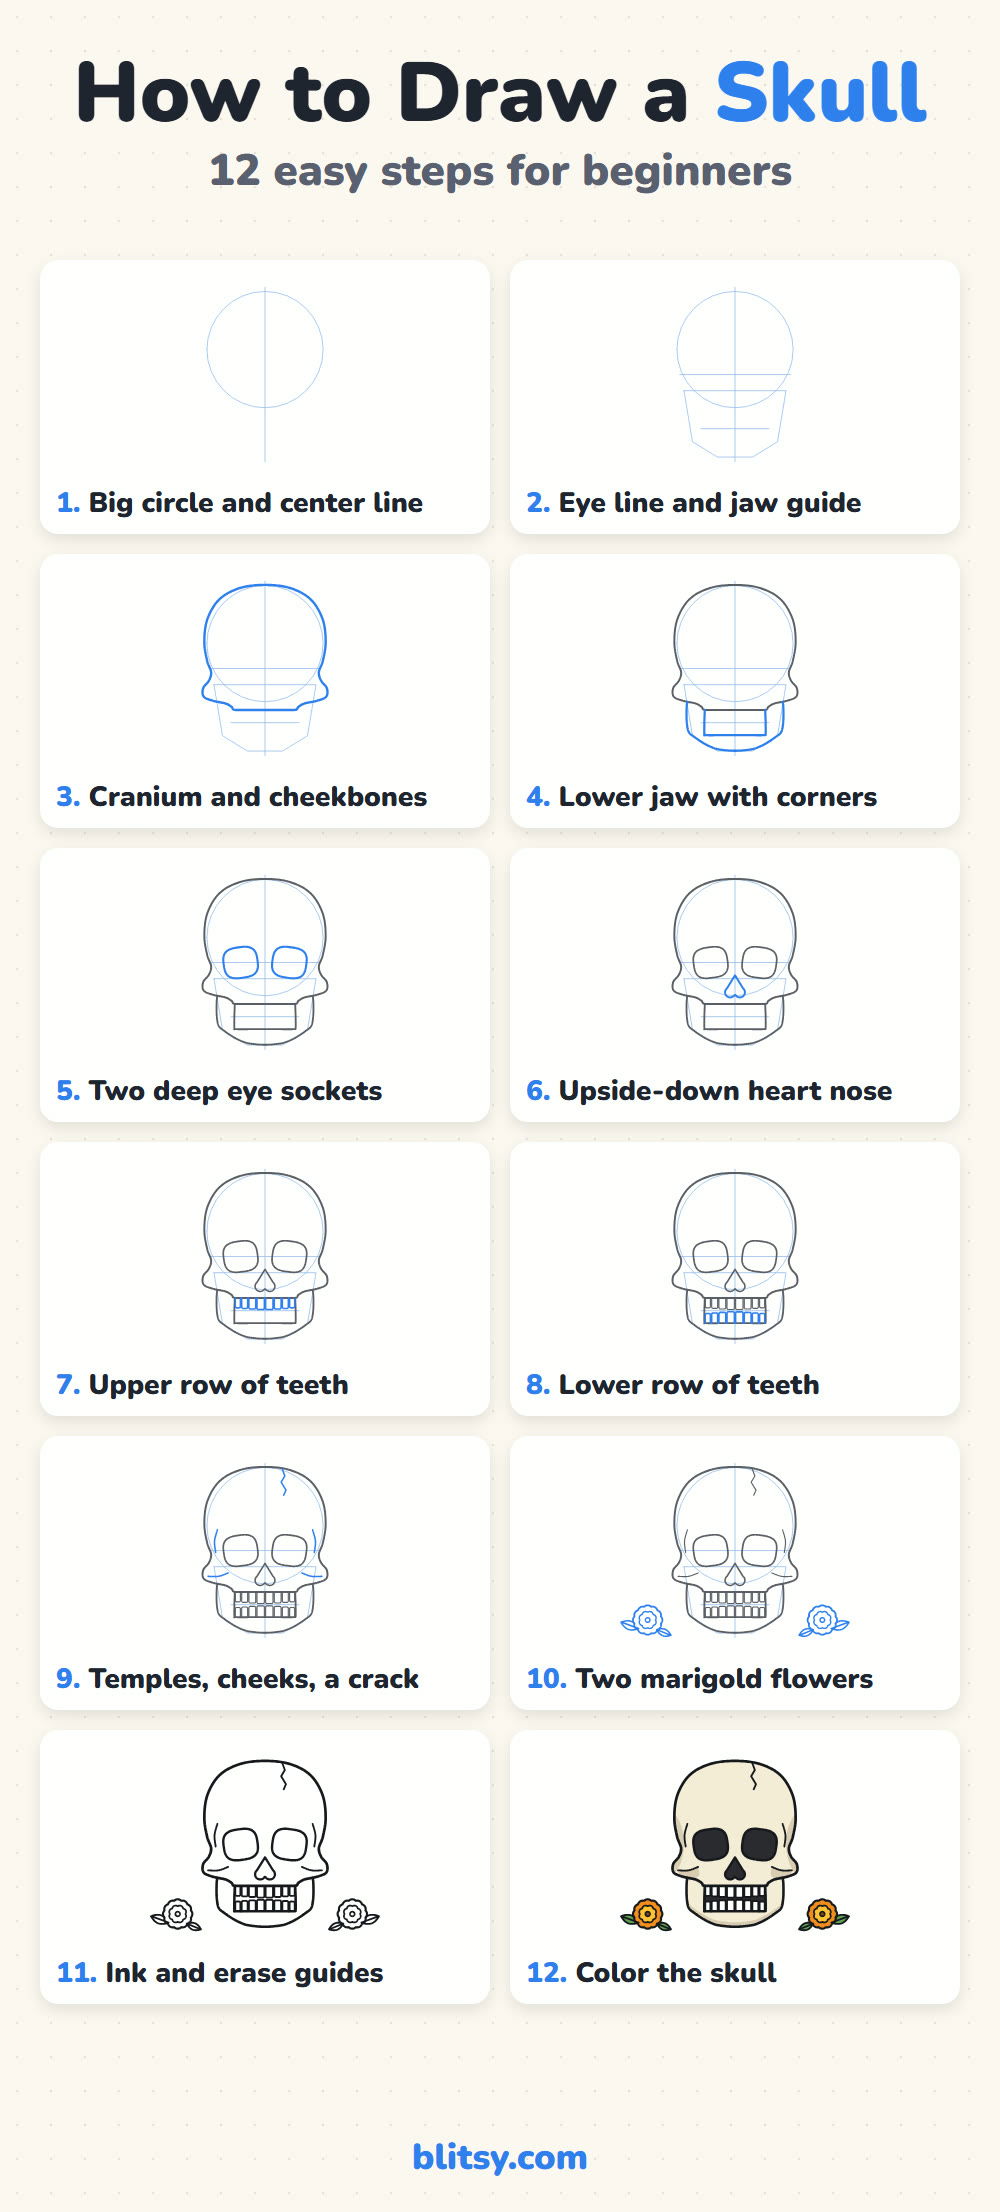
Follow the blue: those are the lines you add in that step, and gray ones are already on your paper from earlier steps. Pale blue helper lines stay light on purpose, since your eraser takes them away in step 11.
Quick overview
⏱️ Time: about 30 to 40 minutes
🎯 Level: easy, fine for kids from about 7
✏️ Steps: 12
💀 You'll draw: a front-view skull with teeth, cheekbones and two marigold flowers
Tools on My Desk for This Skull
- A regular pencil (HB is plenty)
- A clean eraser
- A black marker or fineliner
- Colored pencils or markers in cream, beige, dark gray, orange, yellow and green
- Plain white paper, held upright
- A cup or lid to trace the first circle (optional)
No cream pencil? Leave the bone white and add the beige shading only, and it still looks like bone.
How to Draw a Skull Step by Step
Step 1: Draw a big circle and a center line
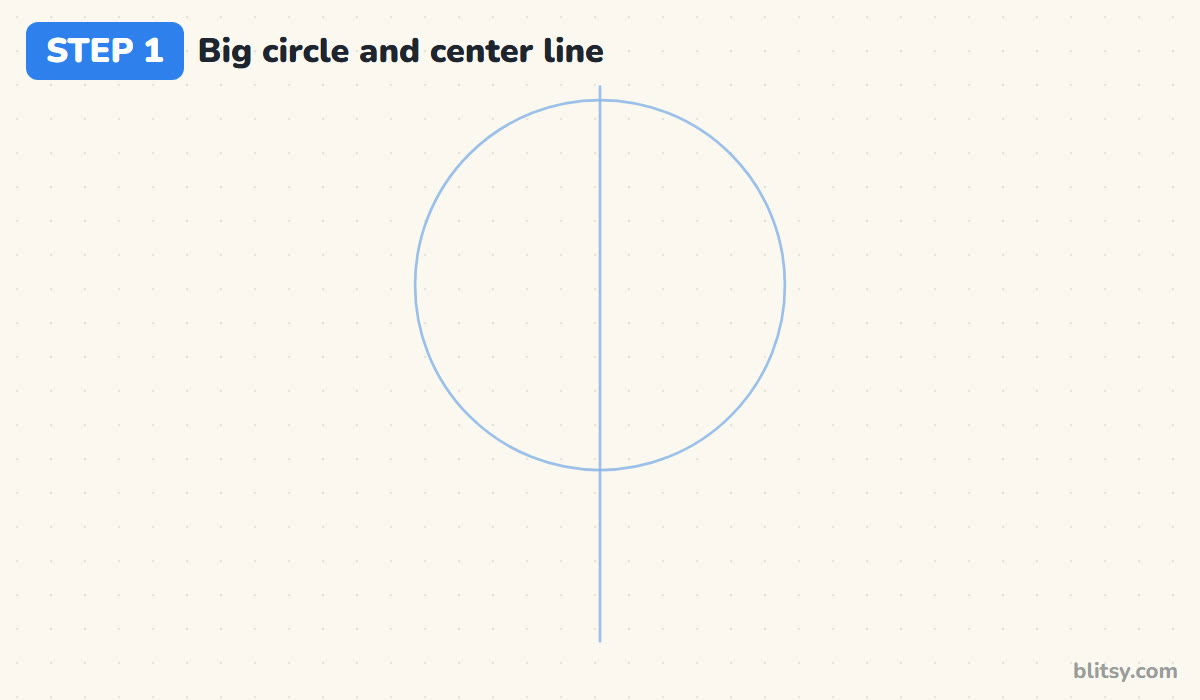
Place a large circle in the upper part of your page. This is the cranium, the round dome that holds the brain, and it takes up more than half of the whole skull. Then run a straight vertical line through the middle, from above the circle down to well below it. Every part of the face will be mirrored on that line.
💡 Tip: Leave space under the circle. The jaw hangs down almost half a circle further.
Step 2: Add the eye line and a jaw guide
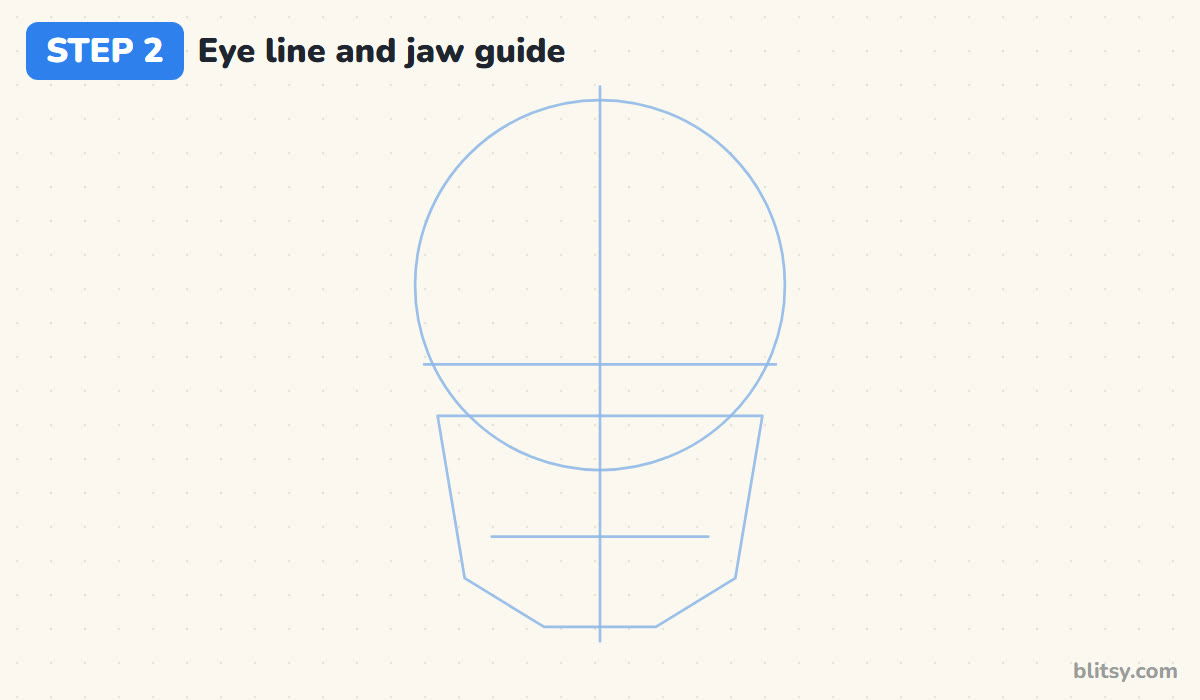
Measure from the top of the circle to where the chin will be, and draw a level line halfway between. That's the eye line, and it surprises most beginners because it sits so low. Under the circle, sketch a six-sided shape that is widest at the cheeks, narrows to two jaw corners and ends in a short flat chin. Finish with a short level line across the lower face where the teeth will meet.
💡 Tip: If the eye line feels too low, trust it. Real eye sockets sit near the middle of the head.
Step 3: Outline the cranium and cheekbones
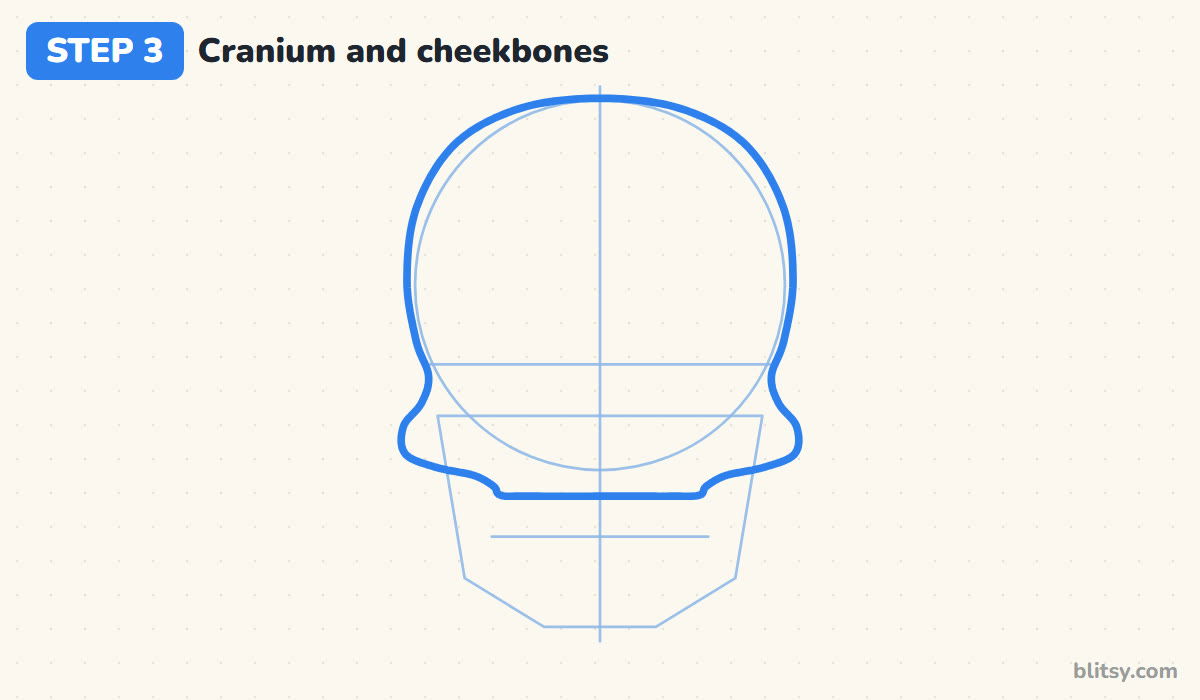
Trace the top of the circle in a firm line, then bring it down each side. Just above the eye line the outline dips inward a little, which is the temple. Below that it bumps out again for the cheekbones and then curves in toward the middle, where it ends in a flat bottom edge. That flat edge is the upper gum line.


💡 Tip: Draw one side, then check the other side against the center line before you go on.
Step 4: Draw the lower jaw with its corners
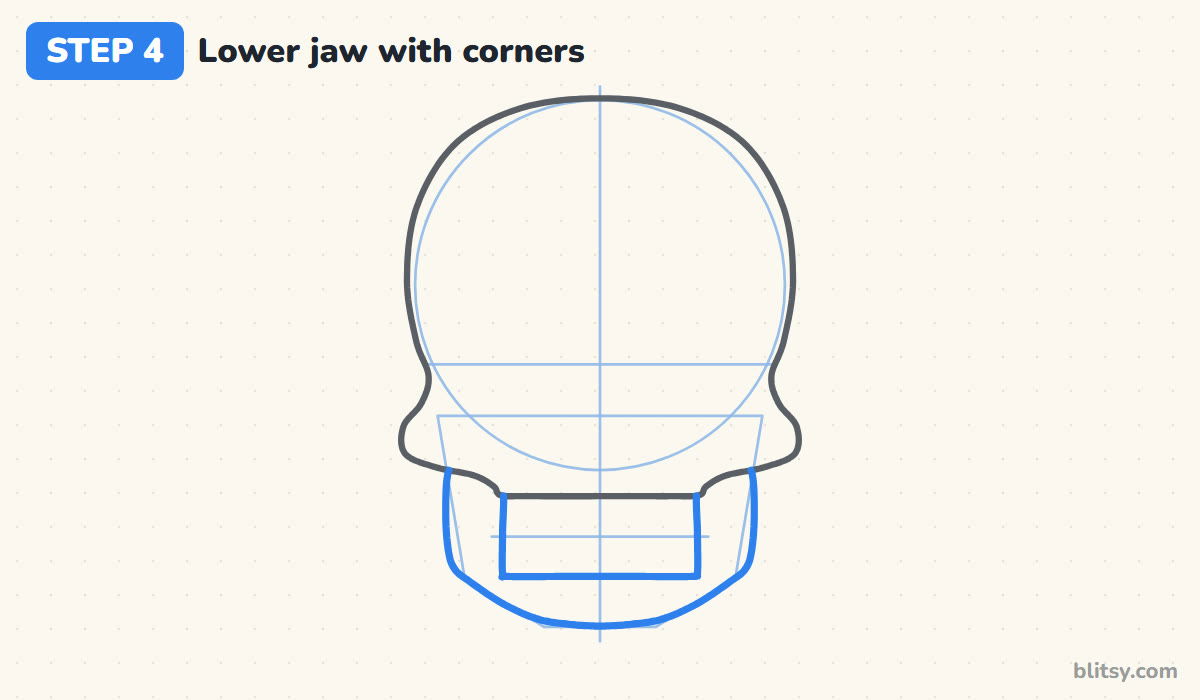
The jaw starts tucked under the cheekbones. Go straight down on each side, turn a rounded corner about level with the bottom of the lower teeth, and slope in toward a wide, slightly flat chin. Inside, draw the top of the jaw as a straight line with short walls at each end, so it looks like an open box for the lower teeth.
💡 Tip: Keep the jaw narrower than the cheekbones. A jaw as wide as the cranium looks like a helmet.
Step 5: Add two deep eye sockets
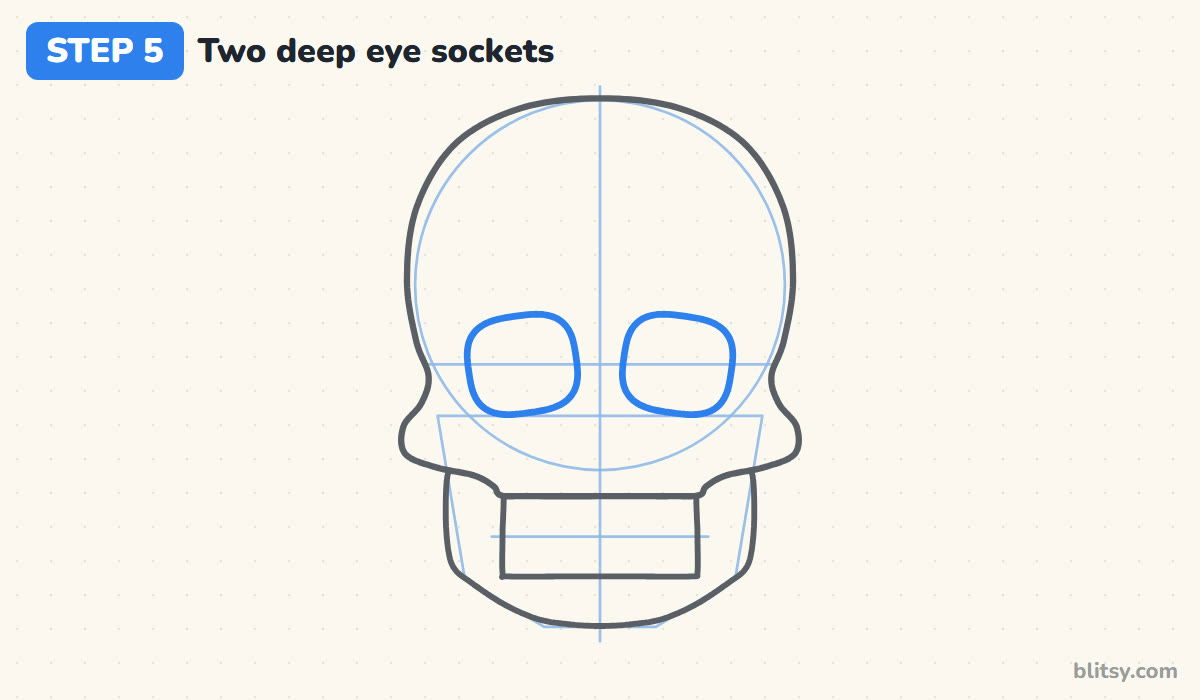
On the eye line, draw two big rounded squares with soft corners. I tilt them so the outer corners sit a bit lower than the inner ones, which gives the skull a calm look instead of an angry one. Leave a gap between them roughly half a socket wide.
💡 Tip: Make the sockets bigger than feels right. Small ones turn the skull into a cartoon face.
Step 6: Draw the upside-down heart nose
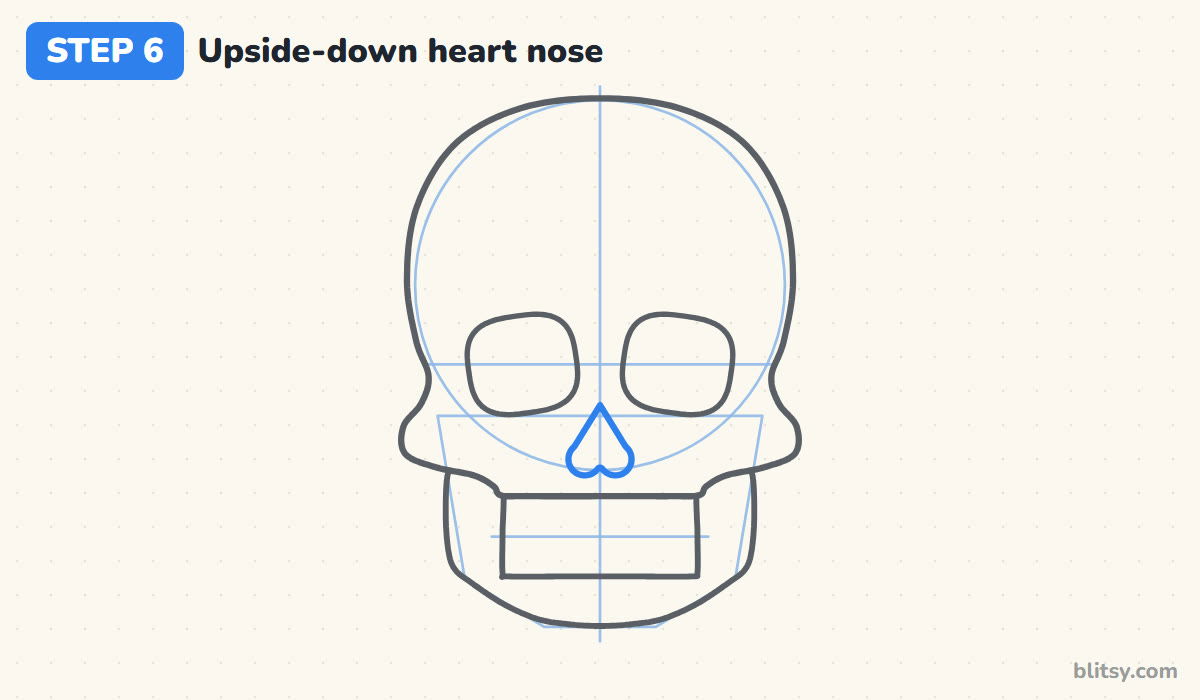
Below the sockets and on the center line, draw a heart flipped upside down. The point goes up, close to where the sockets end, and the two round lobes sit at the bottom. Living people have soft cartilage there, which is why a skull only shows a hole.
💡 Tip: Start with the point, then pull both sides down at the same time, one hand stroke each.
Step 7: Fill in the upper row of teeth
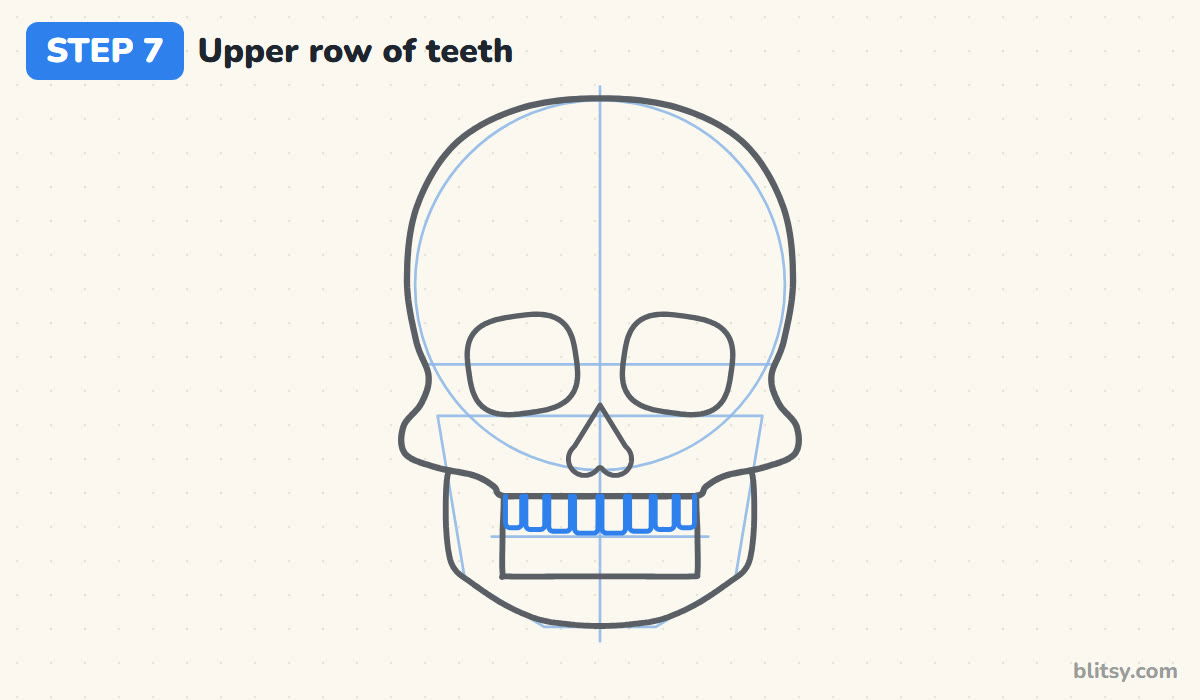
Hang the top teeth from the gum line. Begin with the two front teeth on either side of the center line, then add three more on each side, each a little narrower than the one before. Round off the bottom corners and leave a thin gap between neighbors.



💡 Tip: Count the teeth out loud as you go. Four per side keeps the row even.
Step 8: Add the lower row of teeth
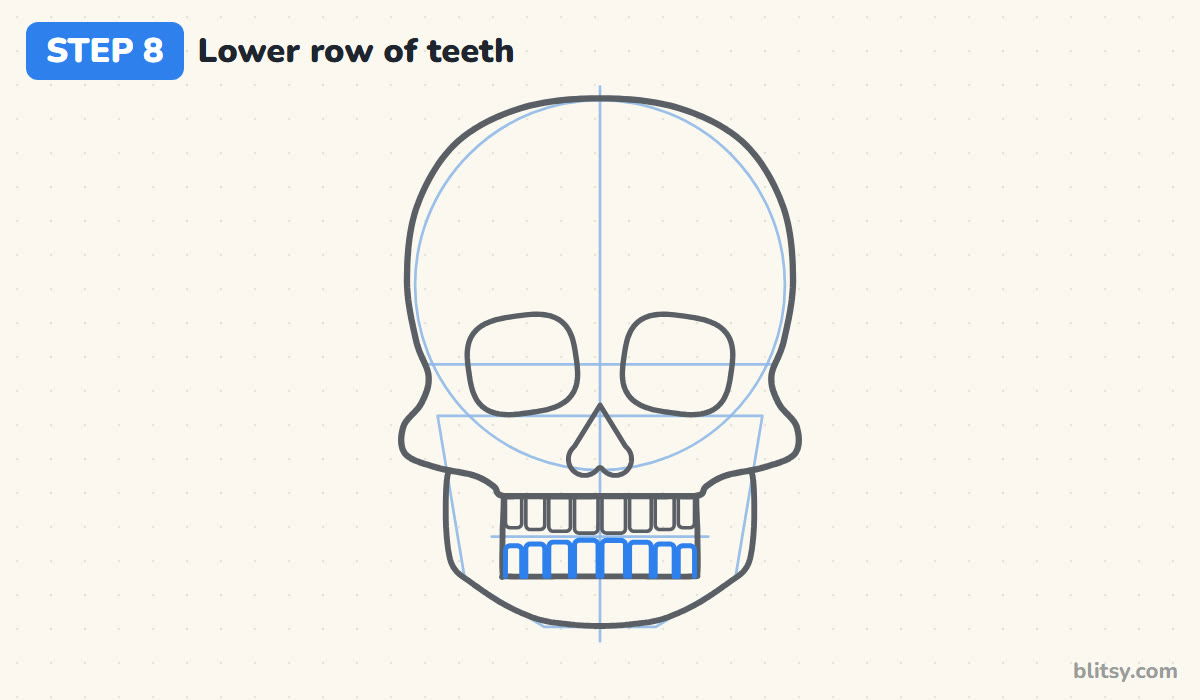
These stand on the top edge of the jaw and reach up toward the bite line. Line each one up under a tooth from the upper row, with rounded tops this time. A small space between the two rows reads as the closed mouth.
💡 Tip: Turn your paper upside down. The lower row then feels like drawing the upper row again.
Step 9: Add temples, cheek lines and a crack
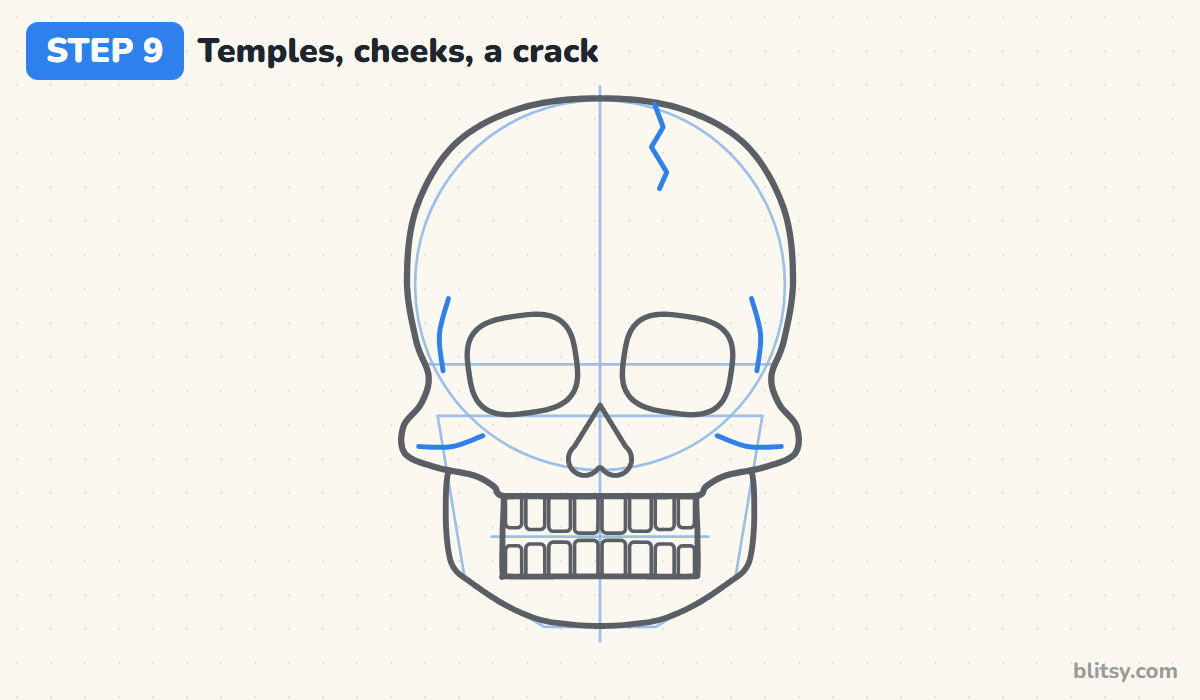
Draw a short curved line inside each temple dip, following the outline. Under each eye socket, add a gentle curve that runs out to the cheekbone, showing where the bone sticks out. For a finishing touch, a small zigzag crack near the top of the cranium works well. Keep it to a few short strokes.
💡 Tip: One crack is enough. Several start to look messy rather than old.
Step 10: Draw two marigold flowers
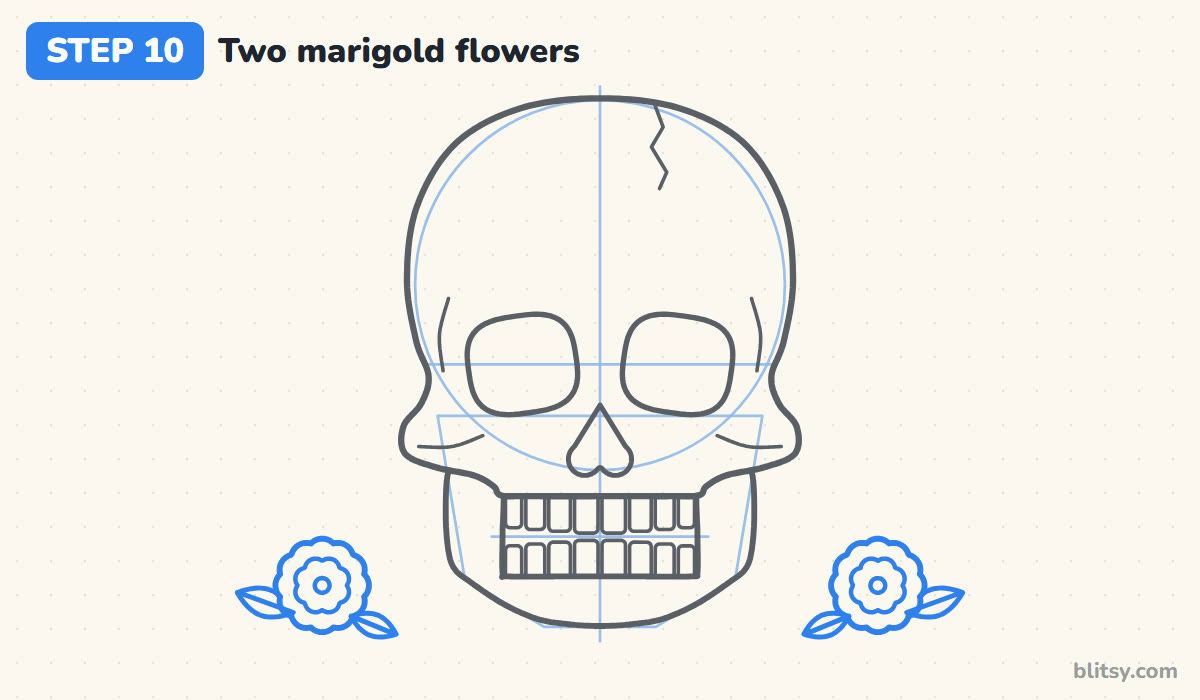
Marigolds are the flower of the Day of the Dead, so I like them next to a skull. On each side, near the jaw, draw a circle with a scalloped edge, a smaller scalloped ring inside it and a dot in the middle. Then add two pointed leaves that poke out from behind the flower head.
💡 Tip: Skip the flowers for a plain Halloween skull. The drawing works fine without them.
Step 11: Ink the lines and erase the guides
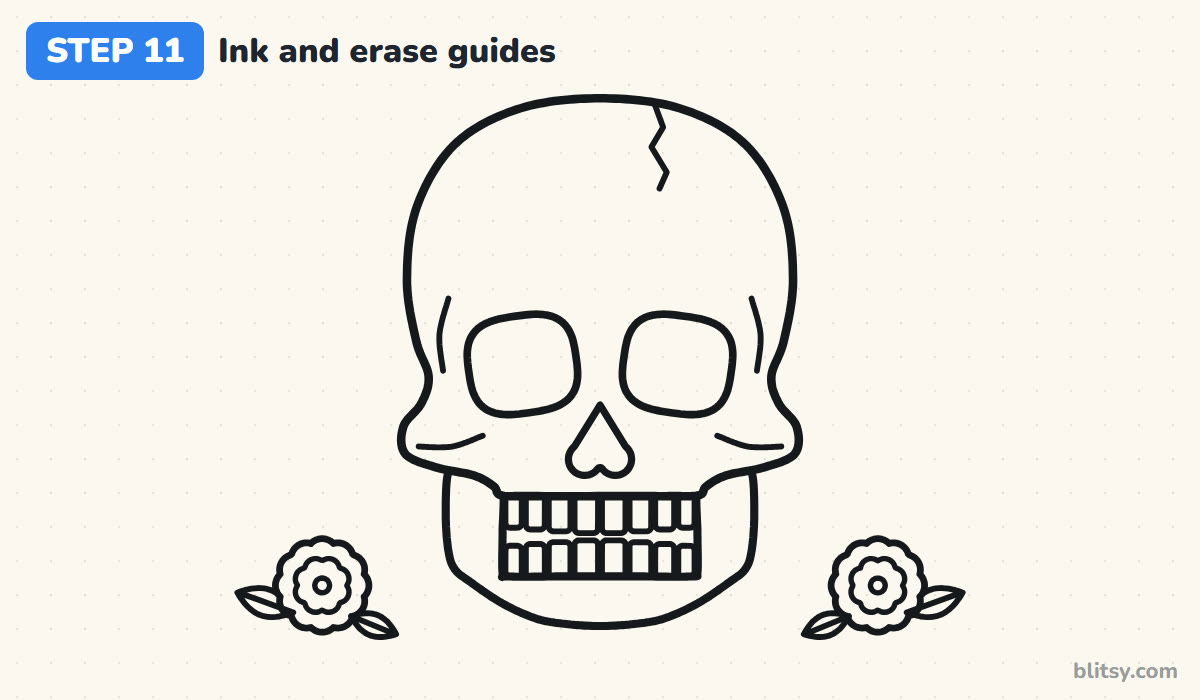
Go over every keeper line with your black marker: the outline, the jaw, the sockets, the nose, the teeth, the small detail lines and the flowers. Wait a minute for the ink to dry. After that, erase the circle, the center line and the jaw guide.




💡 Tip: Ink the teeth last, when your hand is warmed up. They're the fiddliest part.
Step 12: Color the skull and the flowers
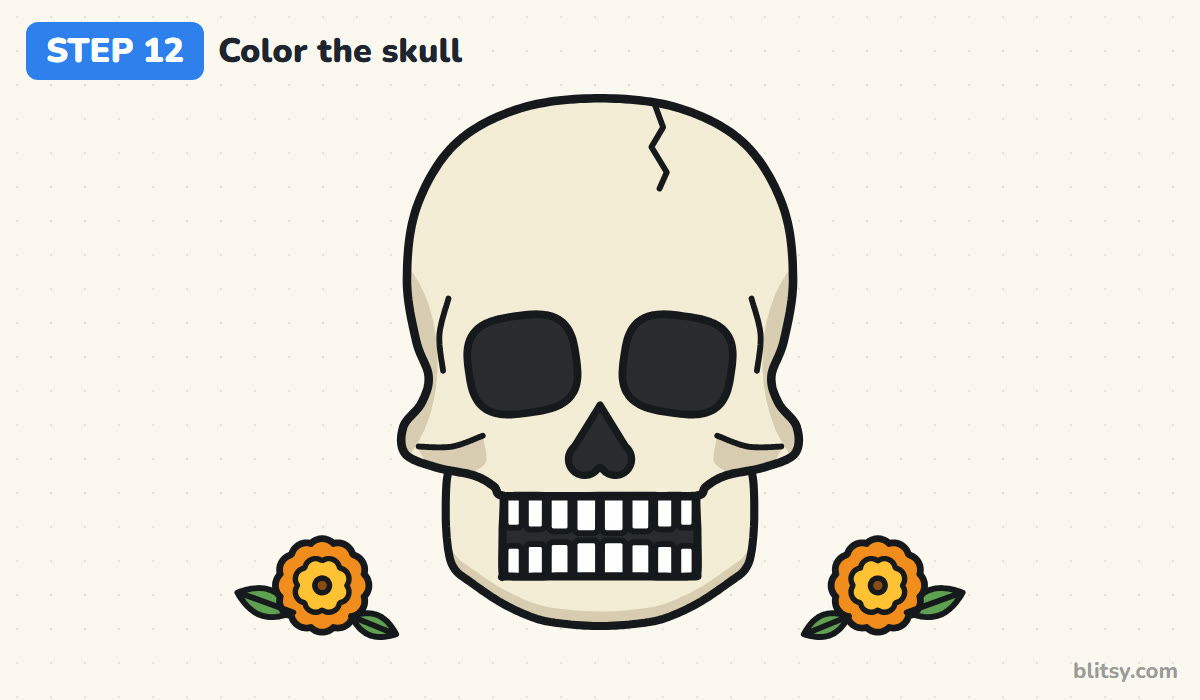
Color the skull and jaw cream and keep the teeth white. With beige, shade the temples, the hollows under the cheekbones and a thin band along the bottom of the jaw. Fill the eye sockets, the nose and the gaps between the teeth with dark gray. Give the marigolds orange outer petals, yellow inner petals, brown centers and green leaves.
💡 Tip: Press lightly with the beige. Soft shading looks like bone, heavy shading looks like dirt.
Why a Skull Drawing Starts Looking Odd
- Eye sockets placed too high. Put them on the halfway line of the whole skull, jaw included, not in the middle of the circle.
- Tiny sockets. Skull sockets are huge compared with eyes on a face. Draw them wide and dark.
- A pointy nose hole. A plain triangle looks like a jack-o'-lantern. Round the bottom into two small lobes.
- No cheekbones. A straight line from cranium to jaw makes a light bulb shape. Let the outline dip at the temples and bulge at the cheeks.
- Teeth all the same width. Narrow the side teeth a little. The row then curves around the face instead of looking flat.
Fun Skull Variations to Try Next
For a sugar skull, keep the outline and decorate it: petals around the eye sockets, a small heart on the forehead and dots along the cheekbones. A pirate version only needs a bandana over the cranium and two crossed bones behind the jaw. To give your skull a body, try my favorite skeleton drawing tutorial, and for a full spooky scene the Halloween haunted house tutorial pairs well with it.
Printable Skull Coloring Page and PDF Steps
Prefer paper? The skull coloring page has a small colored example and a key with the color words at the top, and a large outline below with thick lines for easy coloring. The step-by-step PDF guide holds all 12 steps with their tips. Both print on Letter or A4 paper.
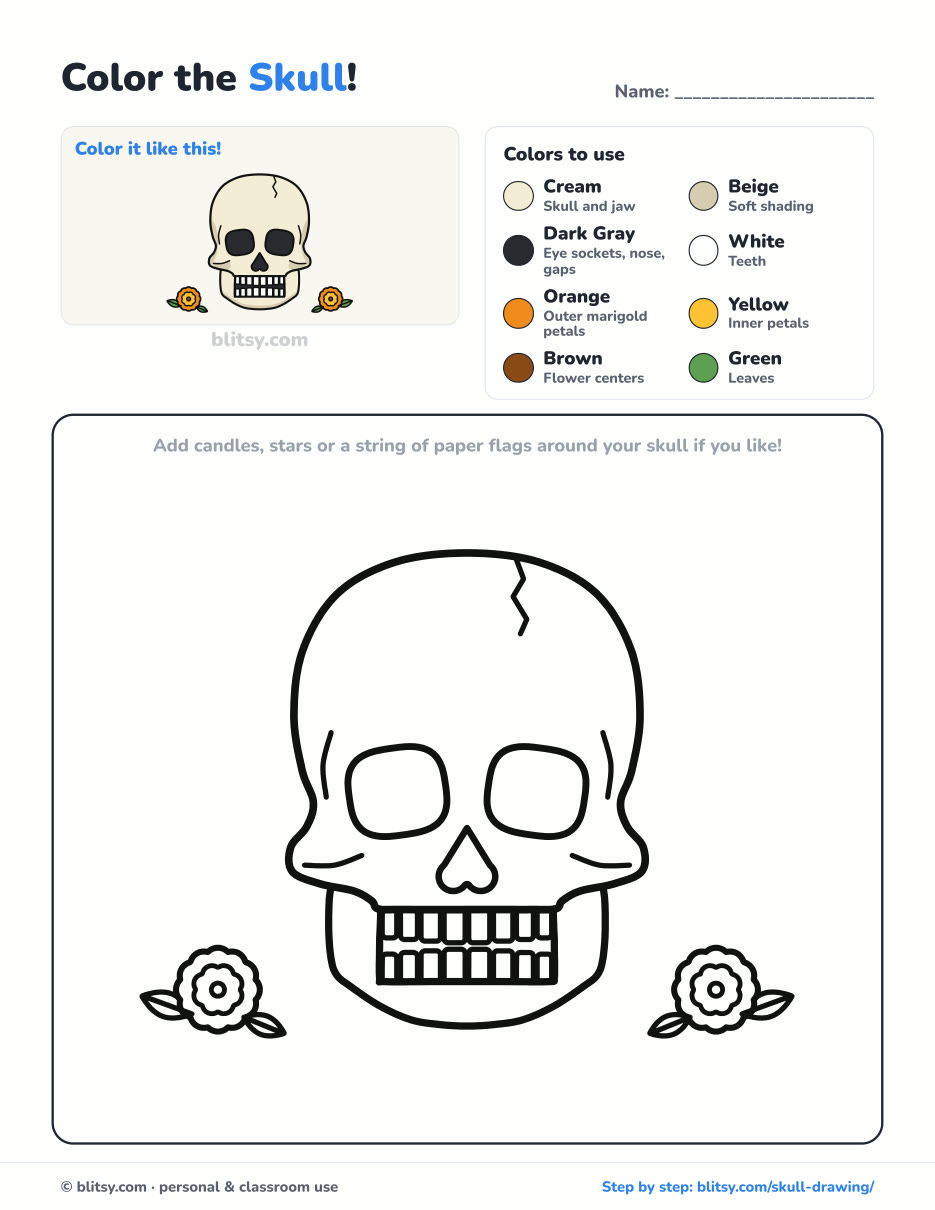
Black outlines with a colored example and the color names at the top. Ready to print and color.
⬇️ Download Coloring PageEvery step picture with its instructions and tips, to keep beside your paper while you draw.
⬇️ Download Drawing Guide📱 On a phone? Tap a download button, then open the file and choose Share → Save to Files or Print. On a computer, the PDF opens or saves straight to your Downloads folder.
A Skull Lesson for Your October Board
Skull Drawing Questions Answered
What is the easiest way to draw a skull?
Start with a circle for the cranium and a jaw guide under it. Put the eye sockets on the halfway line, then add the nose, teeth and jaw in that order.
How many bones are in a human skull?
An adult skull has 22 bones. Most of them are joined tightly together, and the lower jaw is the only one that can move.
Is drawing a skull okay for kids?
Yes. This version is round and friendly, with flowers instead of anything scary. Kids from about 7 can follow it, and younger ones can skip the teeth gaps.
How long does a skull drawing take?
About 20 minutes for the pencil steps and another 15 for inking and coloring. The teeth take the longest.
Put your skull on the fridge for October, or draw a second one with sugar skull patterns and see which you like better. 💀
Related posts:
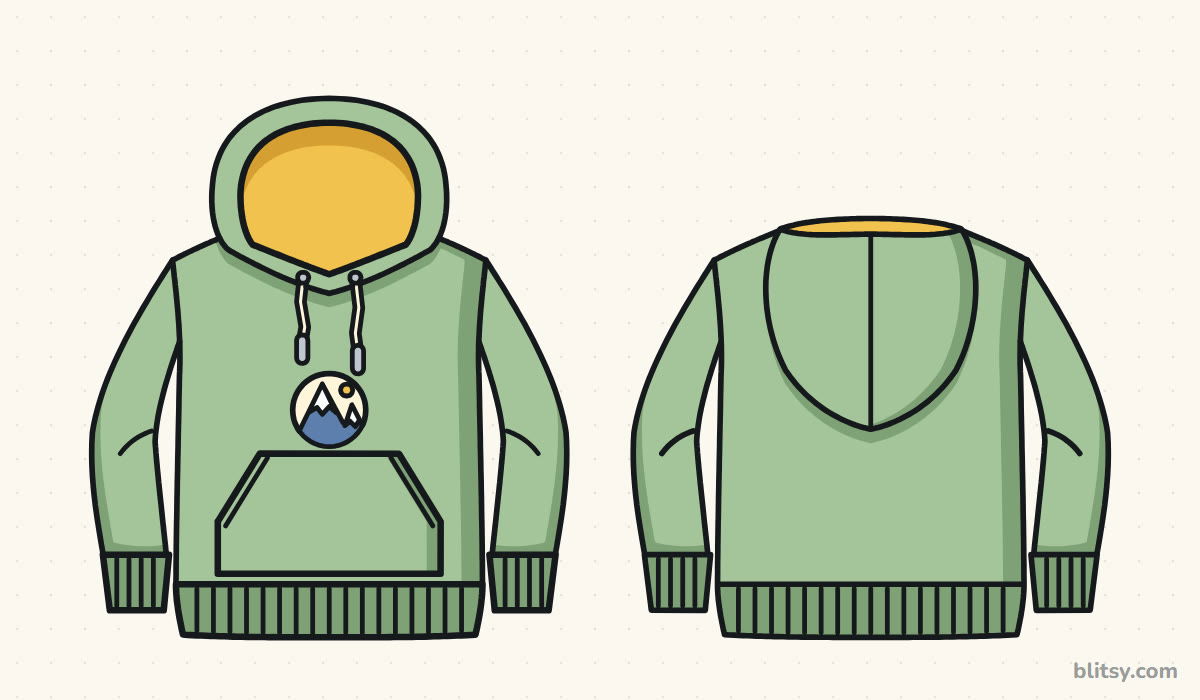 How to Draw a Hoodie Step by Step (Front and Back View)
 How to Draw a School Step by Step (Easy Front View)
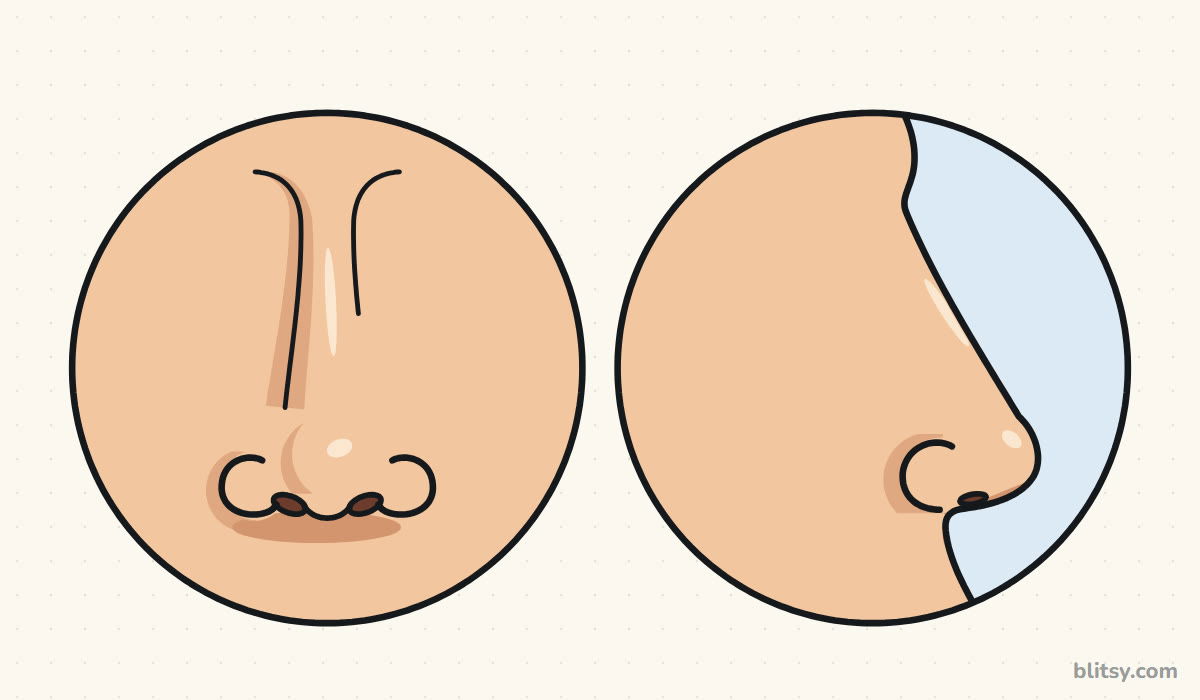 How to Draw a Nose Step by Step (Front and Side View)
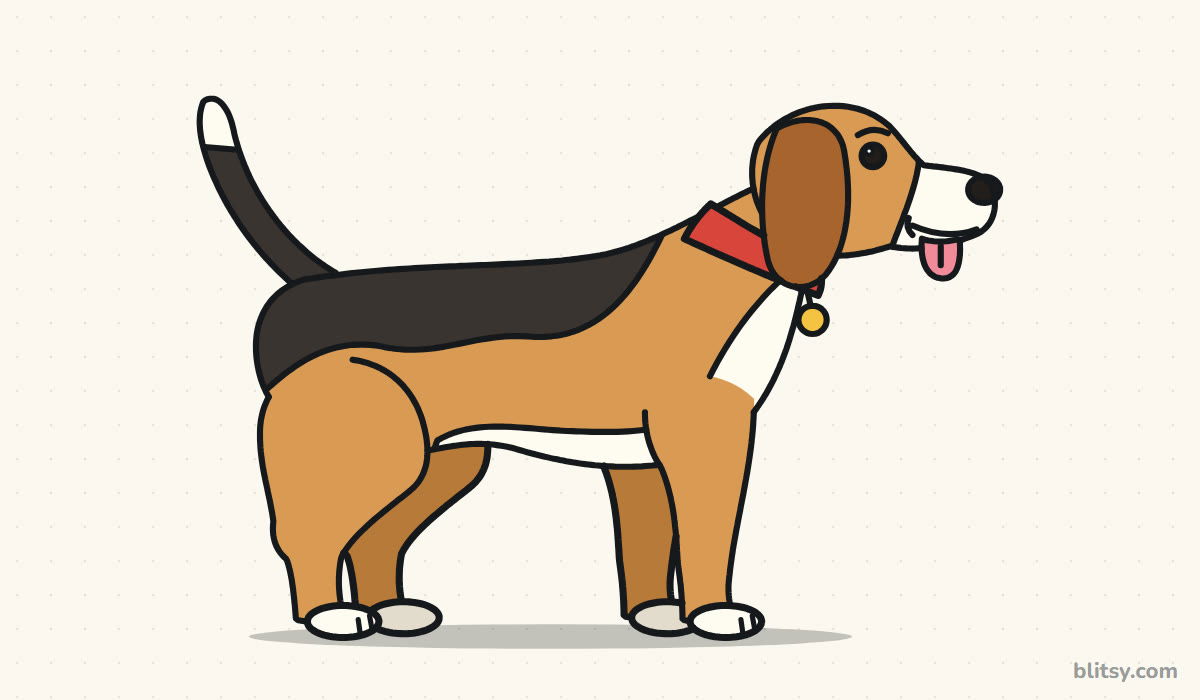 How to Draw a Dog Step by Step (Easy Side View for Beginners)
 How to Draw an Alligator Step by Step (Easy Side View)
 How to Draw a Horse Step by Step (Easy Side View)
 How to Draw Hands Step by Step (Easy Palm View for Beginners)
 How to Draw a Brain Step by Step (Easy Side View)
 How to Draw a Dragon Head Step by Step (Easy Side View)
 How to Draw a UFO Step by Step (Cute Alien Saucer)
 How to Draw Flames Step by Step (Easy Campfire Drawing)
 How to Draw a Moon Step by Step (Sleepy Crescent + Phases)

