
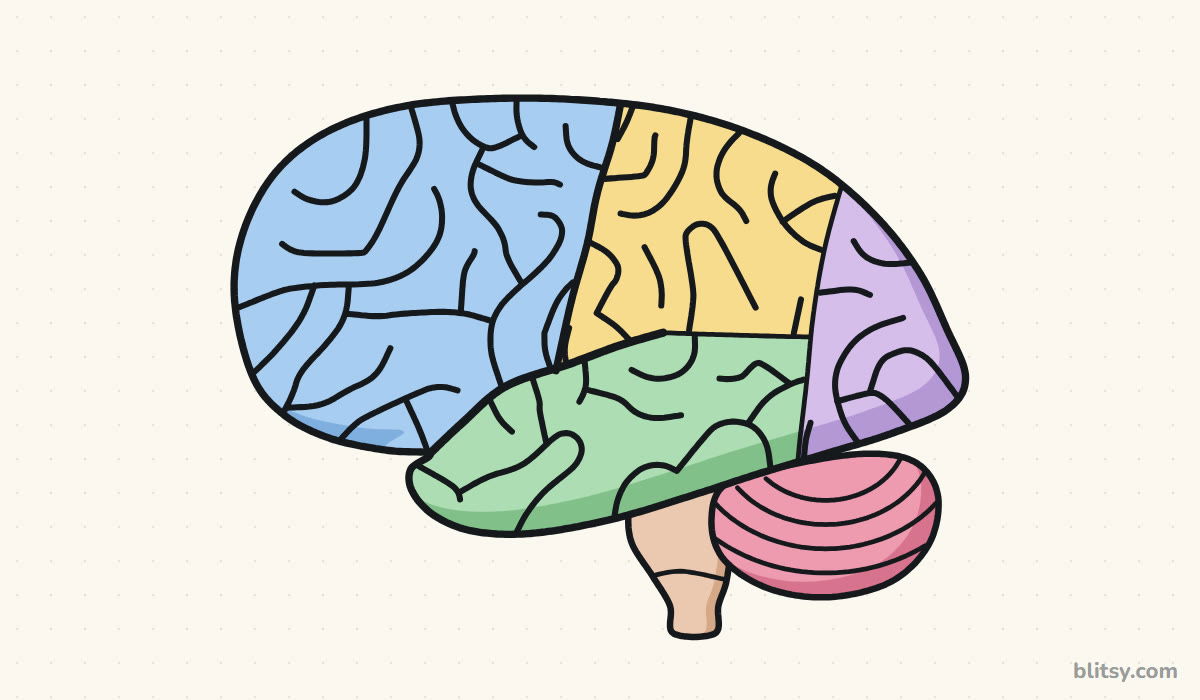
Brains look like a tangle of spaghetti at first glance, so most people assume they're too messy to draw. They aren't. Once you know which groove to draw first, how to draw a brain step by step turns into a calm lesson in ovals and winding lines. We'll draw the side view you see in science books, with the four lobes colored so you can learn their names while you sketch.
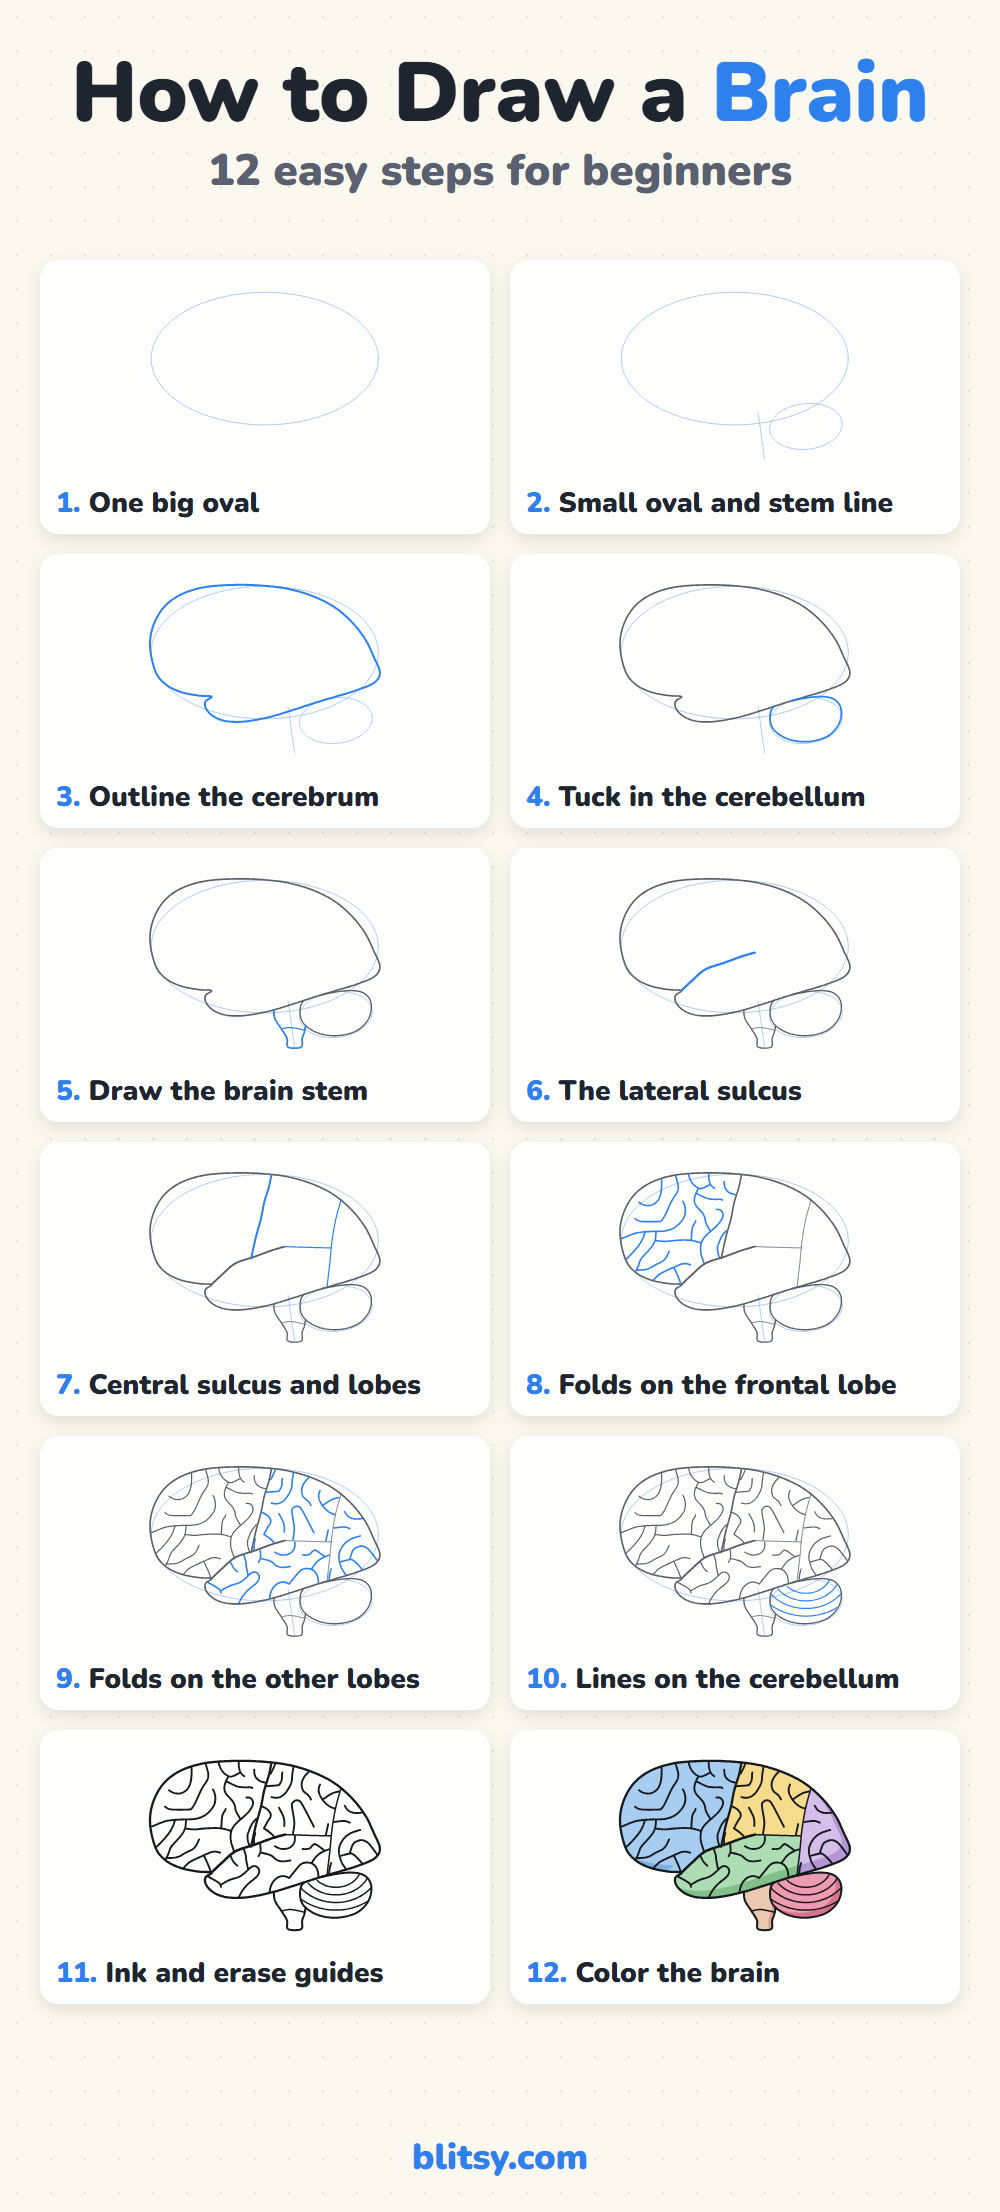
Think of the gray lines as your map: they are everything from earlier steps. The blue lines are the new part, so line up the gray with your paper before you add them.
Quick overview
⏱️ Time: about 35 to 45 minutes, coloring included
🎯 Level: easy to medium, fine from about age 9
✏️ Steps: 12
🧠 You'll draw: a human brain from the side, with color-coded lobes
Brain Sketch Supplies, Including Four Pastels
- An HB pencil for the light guide shapes
- A kneaded or soft white eraser
- A black fineliner or thin felt-tip pen
- Colored pencils: light blue, yellow, light green, lavender, pink and peach
- A darker pencil in each lobe color for shading (optional)
- Plain paper, turned sideways
Turn the paper sideways, because a brain seen from the side is much wider than it is tall.
How to Draw a Brain Step by Step
Step 1: Sketch one big oval
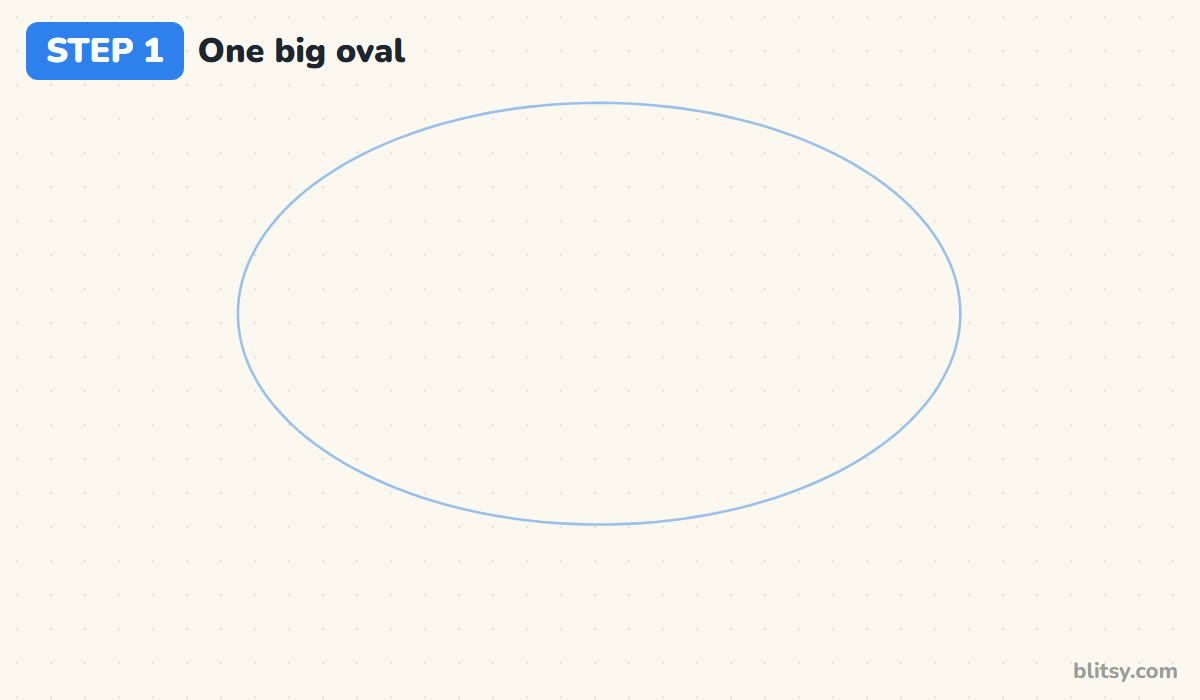
Start with a wide oval that fills most of your paper, leaving a band of space underneath. This is the cerebrum, the big wrinkled part. I make it about one and a half times as wide as it is tall. The cerebellum and the stem will hang below it later.
💡 Tip: Hold the pencil near its end so the line stays faint and loose.
Step 2: Add a small oval and a stem line
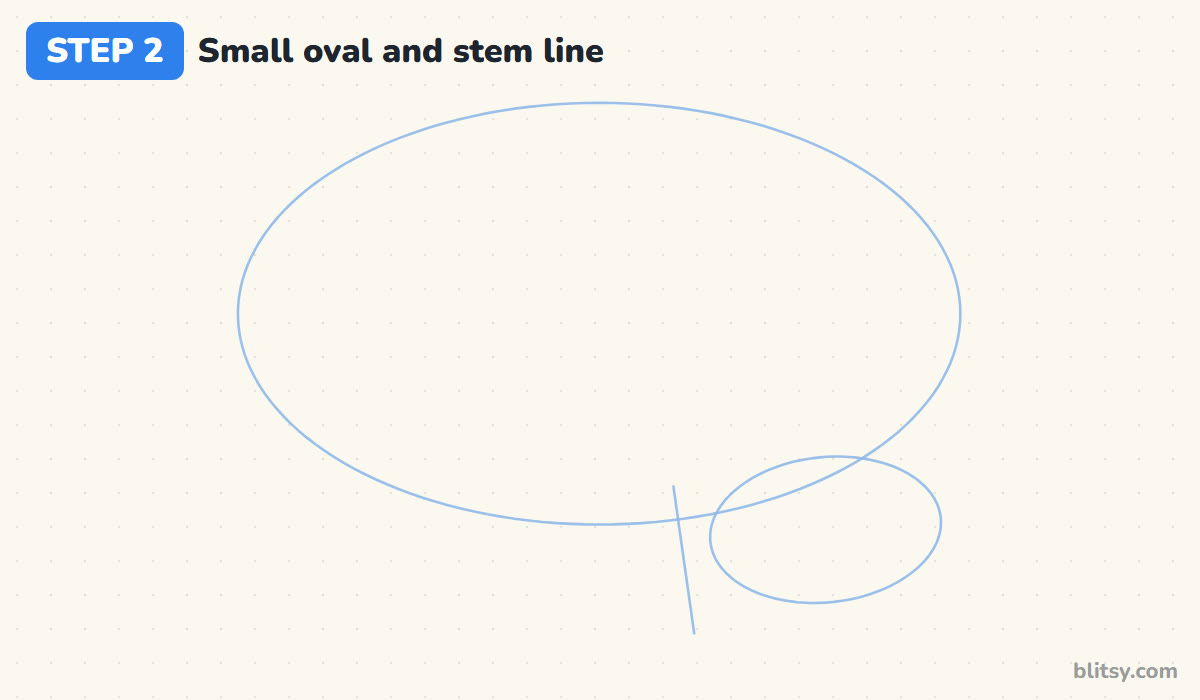
Under the right end of the big oval, sketch a small flattened oval that tucks partly behind it. It marks the cerebellum. Just in front of that small oval, draw a short line going straight down, tilted a hair to the right. That line is the path of the brain stem. Our brain faces left, so the back of the head is on the right.
💡 Tip: Decide which way the brain faces before you add anything else, then stick to it.
Step 3: Outline the cerebrum
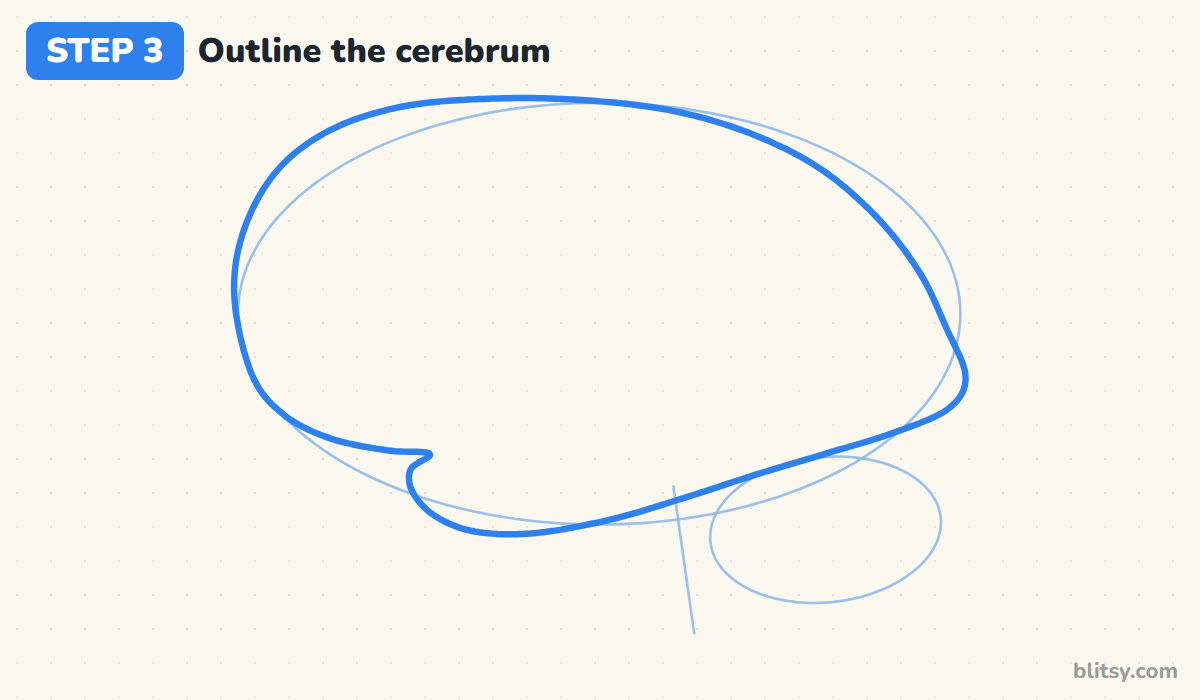
Go around the big oval with a firmer line, but change its shape as you go. The front on the left should be full and round, and the underside curves gently back from it like the bottom of an egg. The back on the right narrows to a soft point. Near the front of the bottom edge, make a tiny notch, with the rounded tip of the temporal lobe tucked just below it.
💡 Tip: Draw the top curve in one long sweep, moving your whole arm.



Step 4: Tuck in the cerebellum
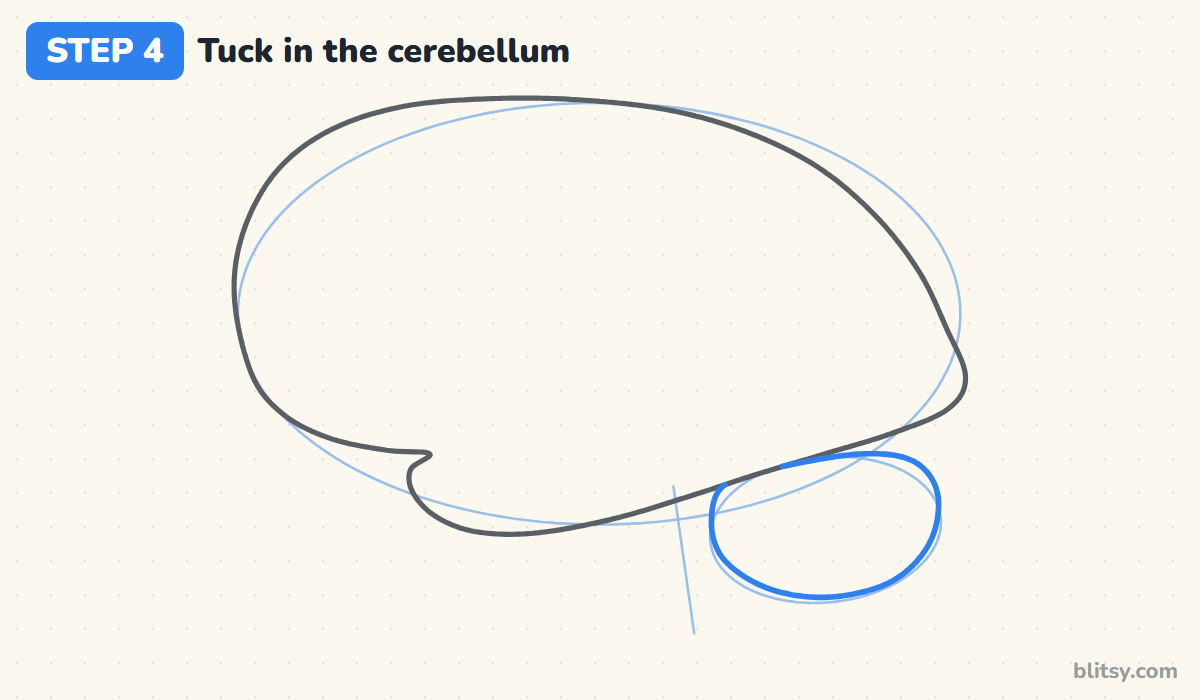
Now trace the lower part of the small oval to make the cerebellum. Its top hides behind the cerebrum, so draw only the part that shows. Keep its back end a little in front of the pointed back of the cerebrum. The cerebellum helps with balance and smooth movement, which is why it sits so close to the stem.
💡 Tip: Stop each line the moment it touches the cerebrum's outline.
Step 5: Draw the brain stem
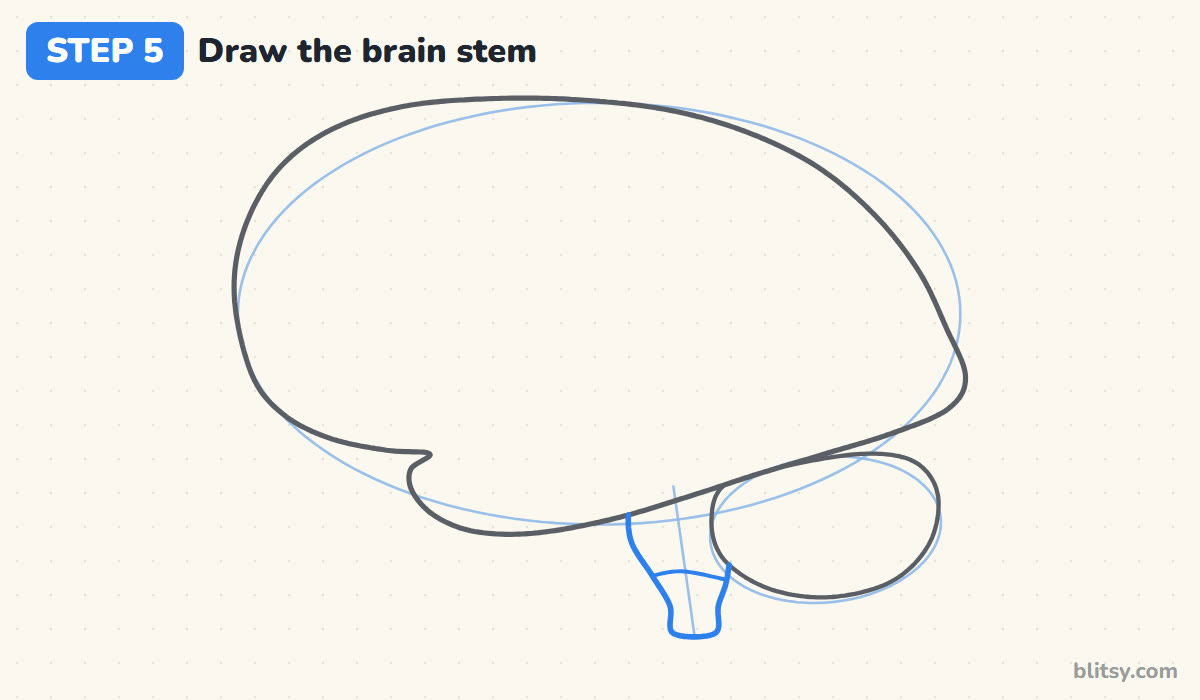
Follow the stem line down with two outlines. Bulge them out at the top for the pons, then narrow them into the thinner medulla and finish with a flat end. The back edge disappears behind the cerebellum. Add one short curved line across the stem where the bulge ends. The stem links the brain to the spinal cord and runs automatic jobs like breathing.
💡 Tip: A flat bottom end looks neater than a rounded one, like a cut stem on a flower.
Step 6: Draw the lateral sulcus
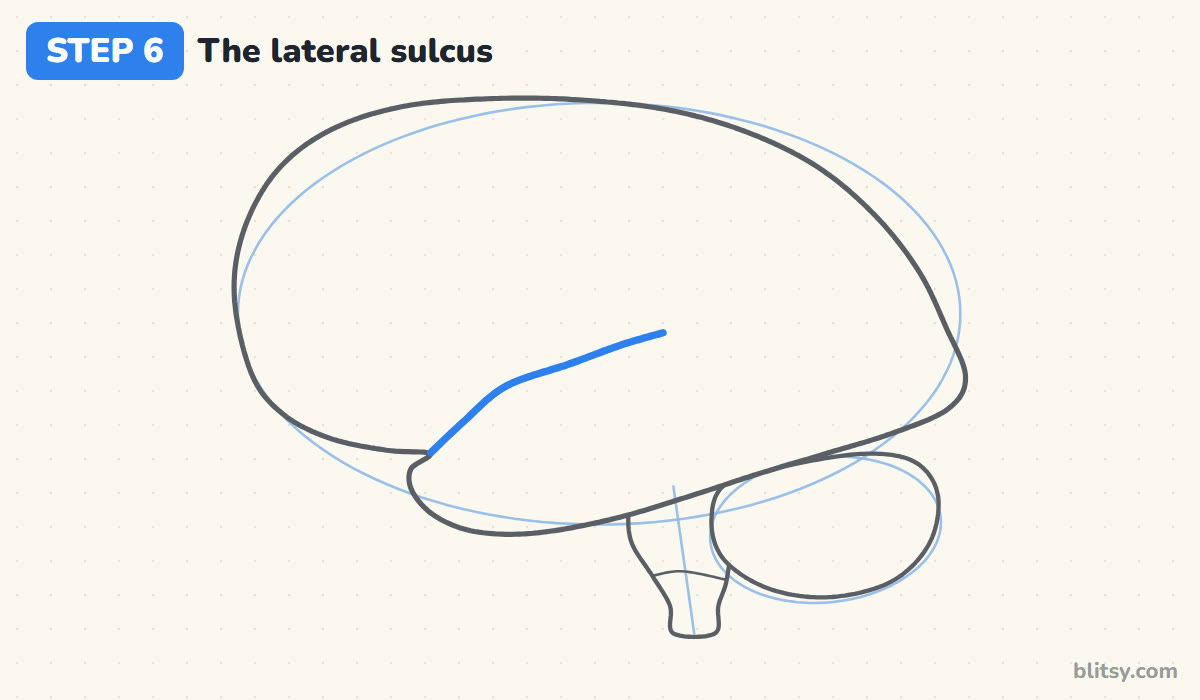
This is the most important line in the whole drawing. Start at the notch you made in step 3 and draw a smooth line up and back, ending a little past the middle of the brain. Scientists call this deep groove the lateral sulcus, or Sylvian fissure. It separates the temporal lobe below it from the lobes above. Once I have this line, the brain already reads correctly.
💡 Tip: Press a bit harder here than for the folds, since this groove is deeper.
Step 7: Add the central sulcus and lobe borders
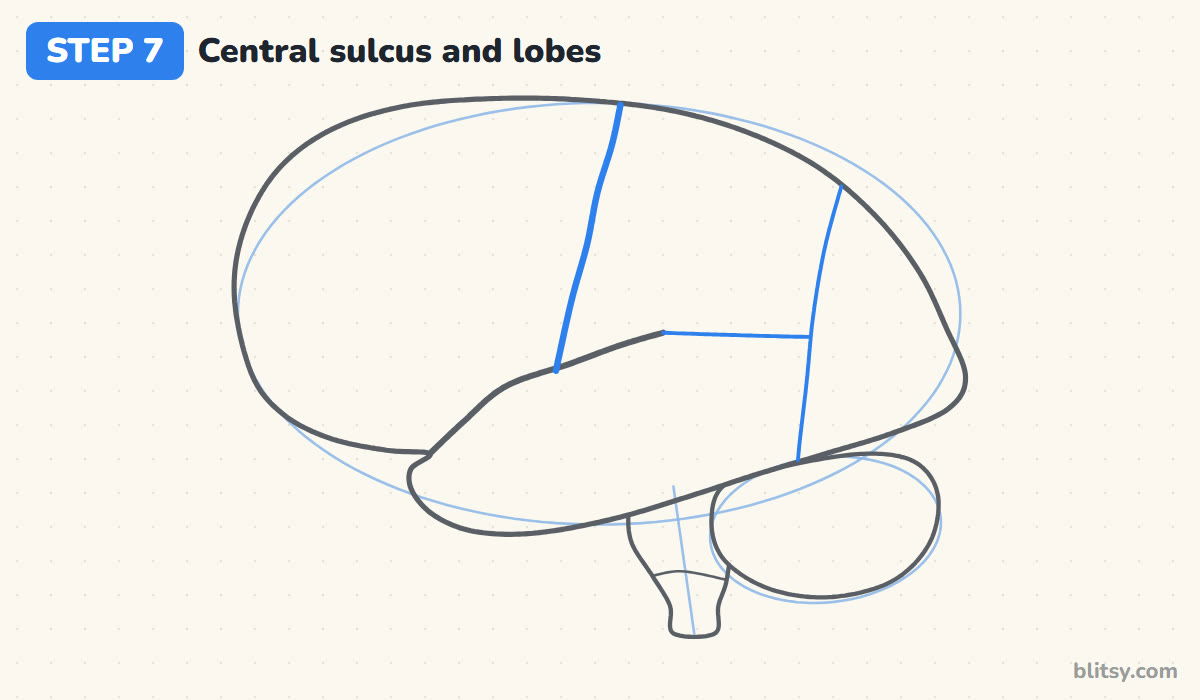
From the top of the outline, a bit forward of the middle, draw a slightly wavy line down to the lateral sulcus. That's the central sulcus, the border between the frontal and parietal lobes. Then carry a thin line back from the end of the lateral sulcus, and drop another from the top near the back to the bottom edge. They box in the occipital lobe.
💡 Tip: Keep the two border lines thinner than the real grooves. They are mostly for coloring.



Step 8: Draw folds on the frontal lobe
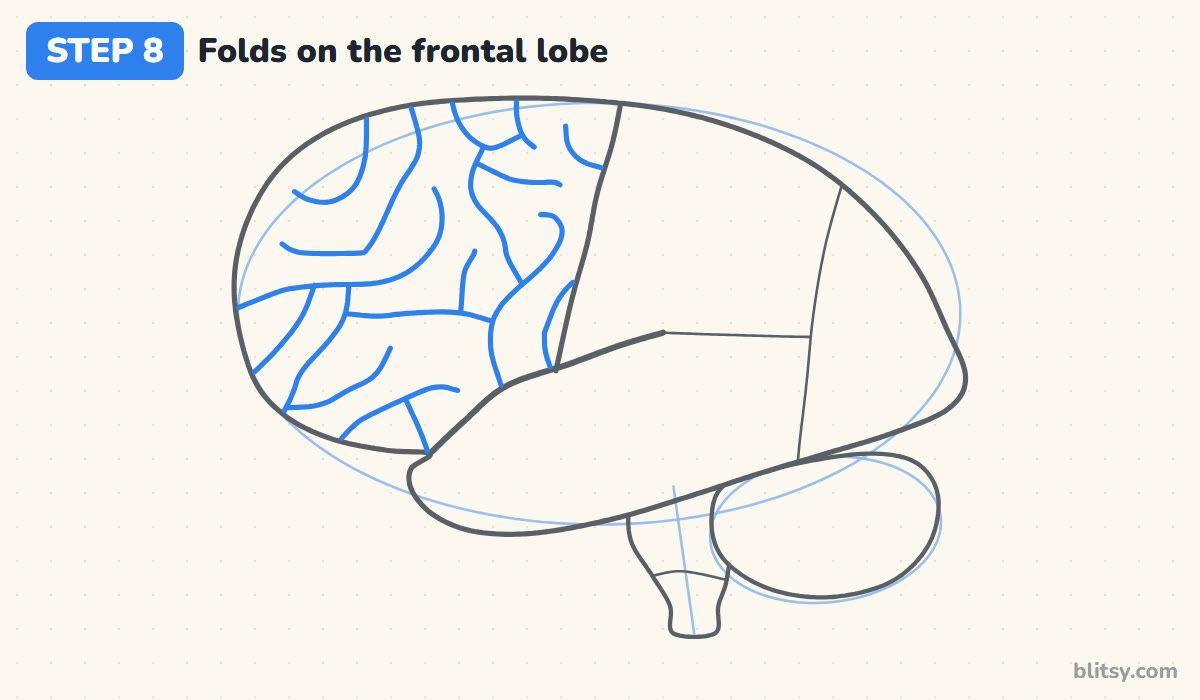
Here come the wrinkles. Draw a smooth, winding line that starts at the outline and wanders across the lobe, bending like a lazy river. Add more of them about a finger's width apart. Some can end freely with a rounded turn, and some can run into a neighbor or the edge. The spaces between your lines become the worm-shaped folds.
💡 Tip: Keep the gaps between lines about even, and let the curves stay round instead of sharp.
Step 9: Fold the other three lobes
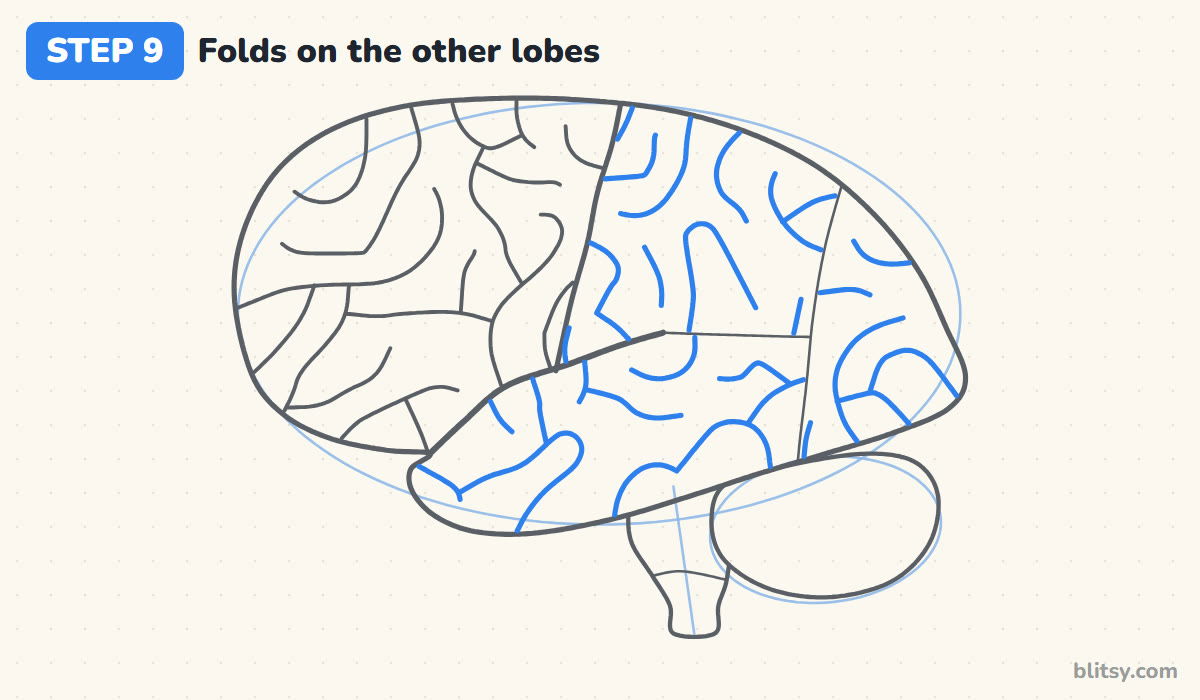
Fill the parietal, temporal and occipital lobes the same way. In the temporal lobe, let most lines run along its length, roughly parallel to the lateral sulcus. Real brains have more folds, and they matter: folding packs a much bigger surface into the skull. Stop each line just short of the two big grooves, so those stay the boldest marks.
💡 Tip: If two lines start to crowd each other, end one with a soft U-turn.
Step 10: Add lines to the cerebellum
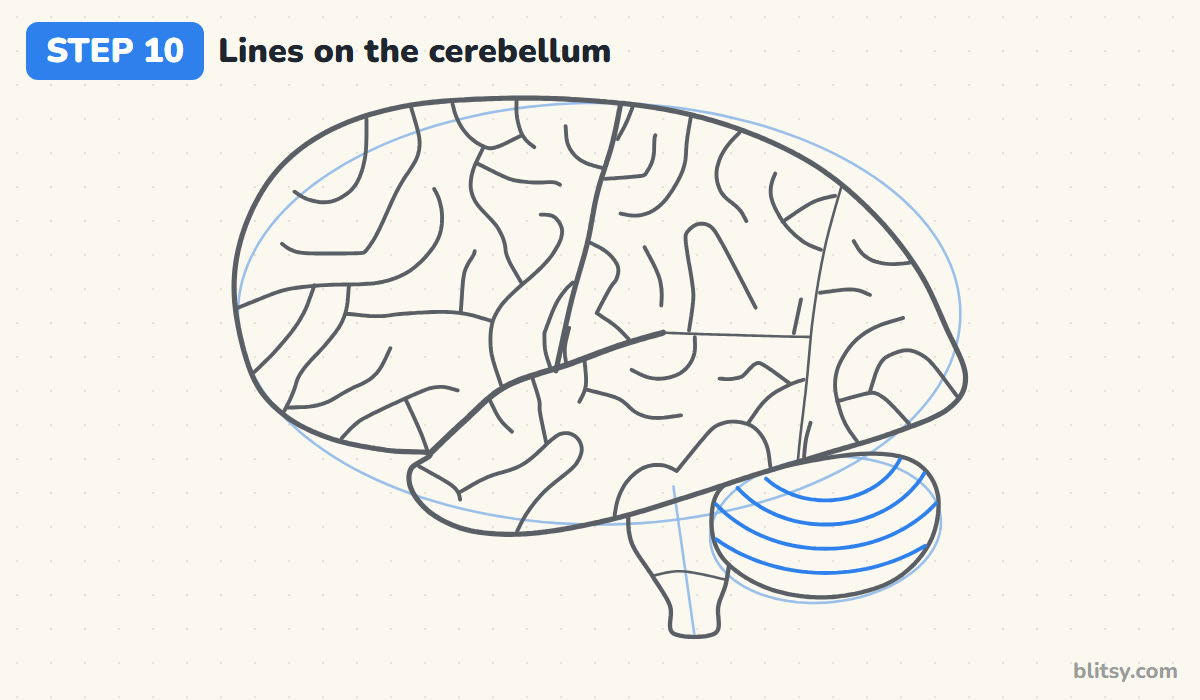
The cerebellum has its own tiny folds, packed close together. Draw four curved lines across it, stacked one under the other like the lines on a seashell. Each one bends down in the middle and ends at the outline on both sides. This striped look is what tells people at a glance that it's the cerebellum.
💡 Tip: Turn the paper so your hand can swing each curve naturally.
Step 11: Ink the lines and erase the guides
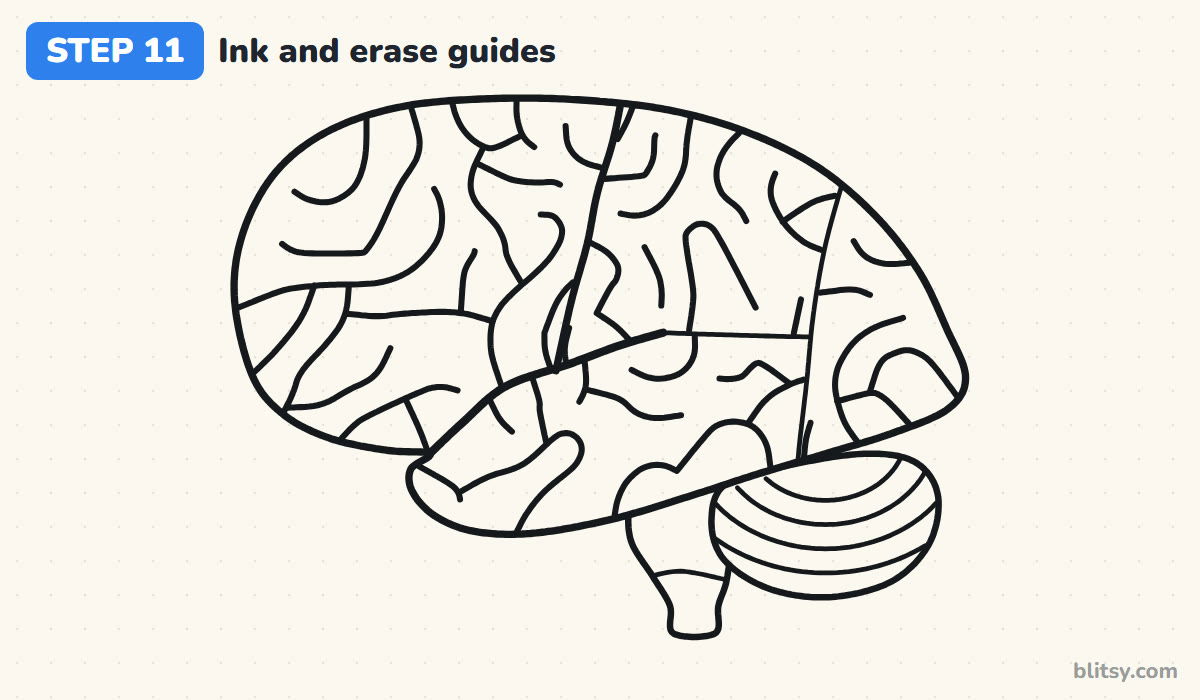
Go over every keeper line with your fineliner. I start with the outline and save the small folds for last, when my hand is warmed up. Once the ink is fully dry, erase the ovals and the stem guide line.
💡 Tip: Wait at least a minute before erasing, or the black ink may smear.




Step 12: Color the brain
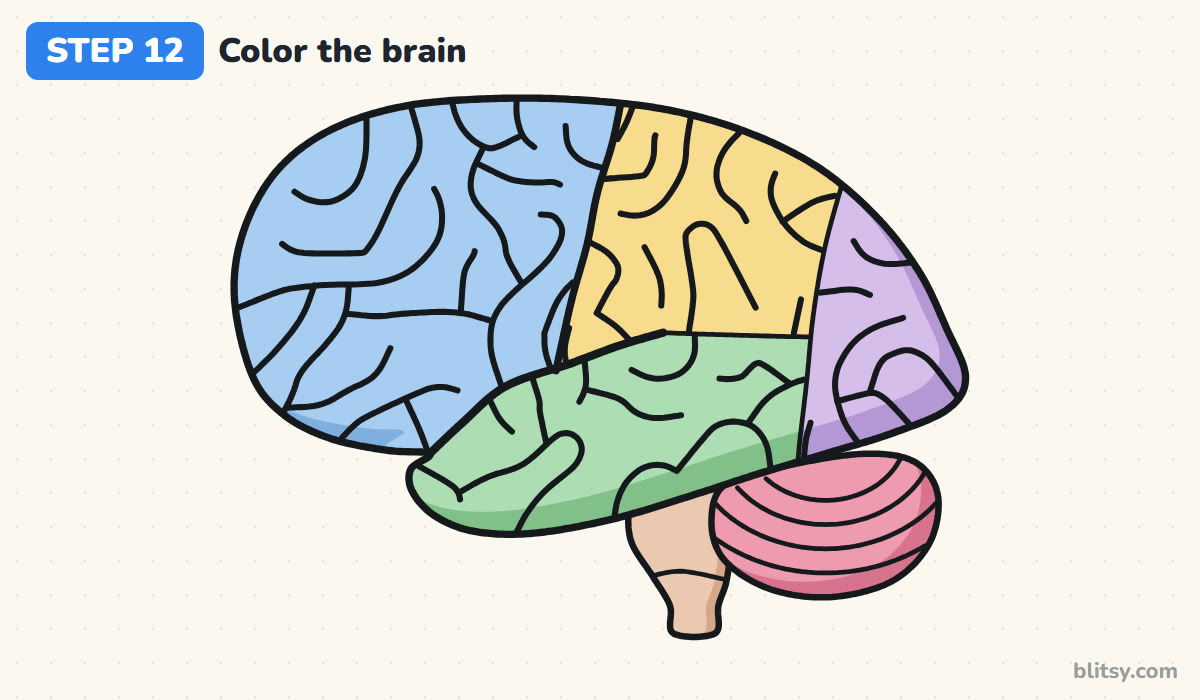
I color the frontal lobe light blue, the parietal lobe yellow, the temporal lobe green and the occipital lobe lavender. The cerebellum gets pink; the stem gets peach. Add a darker shade along the bottom edges. These colors are only a learning code. A real brain is a soft grayish pink all over.
💡 Tip: Color with light, even strokes in one direction, then layer a second coat for depth.
Folds and Fissures That Trip People Up
- Drawing folds before the big grooves. The wrinkles need something to follow. Draw the two main grooves first, then fill each lobe.
- Scribbling tight little loops. Small loops packed edge to edge turn into gray noise. Long winding lines a finger's width apart read as folds.
- Making both ends of the cerebrum round. The front is fuller and the back narrows a little. Two identical ends make the shape look like a bean.
- Letting the cerebellum stick out behind. It sits under the back of the cerebrum, not beyond it. Pull it forward until the pointed back of the cerebrum overhangs it.
- Forgetting the brain stem. Without it, the brain seems to float.
Labeling the Lobes for a Science Fair Poster
For a school project, write each lobe's name inside its color, or use thin leader lines out to the side. You can add what each lobe is known for: frontal for planning and movement, parietal for touch, temporal for hearing, occipital for vision. Younger kids can skip the borders and color the whole cerebrum pink, which is closer to the real thing. My favorite twist for little ones is a cartoon face: two eyes and a smile on the frontal lobe. To build a set of organ drawings for biology class, try the human heart drawing tutorial, and the brain sits right inside the head, so the skull drawing tutorial pairs nicely with it.
Brain Lobes Coloring Page With a Step PDF
The free brain coloring page shows a colored example at the top, next to a key that matches each color to its lobe, and a big outline below with room for labels. The printable step guide puts all 12 steps on paper with pictures and tips. Both print on Letter or A4.
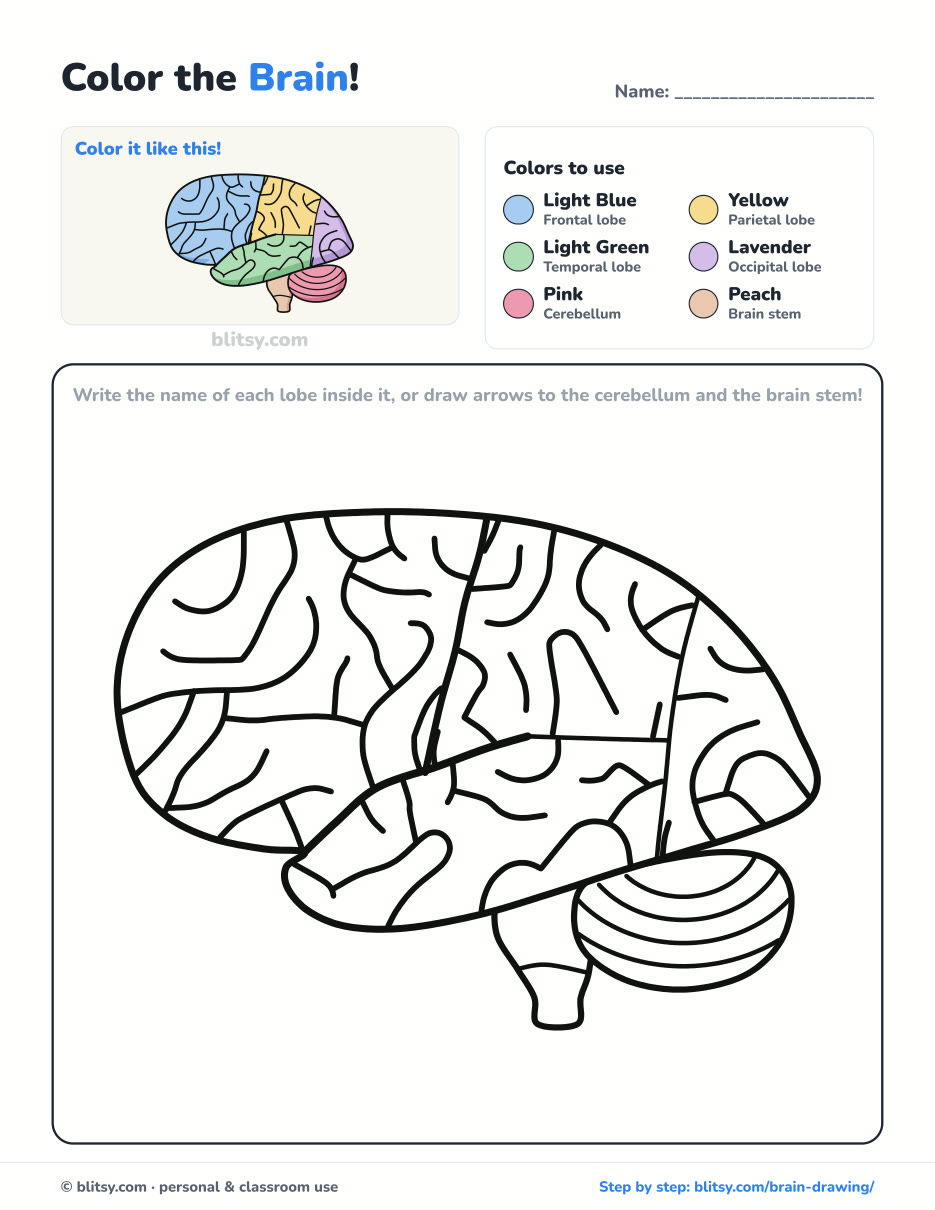
Black outlines with a colored example and the color names at the top. Ready to print and color.
⬇️ Download Coloring PageEvery step picture with its instructions and tips, to keep beside your paper while you draw.
⬇️ Download Drawing Guide📱 On a phone? Tap a download button, then open the file and choose Share → Save to Files or Print. On a computer, the PDF opens or saves straight to your Downloads folder.
Stash the Whole Brain Lesson for Study Night
Neuroscience Questions From Curious Students
What is the easiest way to draw a brain?
Start with a wide oval, add a small oval underneath at the back, then draw the lateral sulcus. After that, fill each lobe with winding lines spaced about a finger's width apart.
Why does the brain have so many folds?
The folds let a large surface fit inside the skull. Flattened out, the outer layer would take up far more room than the head allows.
What are the four lobes of the brain?
The frontal lobe at the front, the parietal lobe on top toward the back, the temporal lobe on the lower side and the occipital lobe at the very back.
How long does it take to draw a brain?
Plan on 35 to 45 minutes with coloring. The folds take the longest.
Get that one deep groove in place, keep the folds calm and you'll have a brain worth pinning above your desk. 🧠✏️
Related posts:
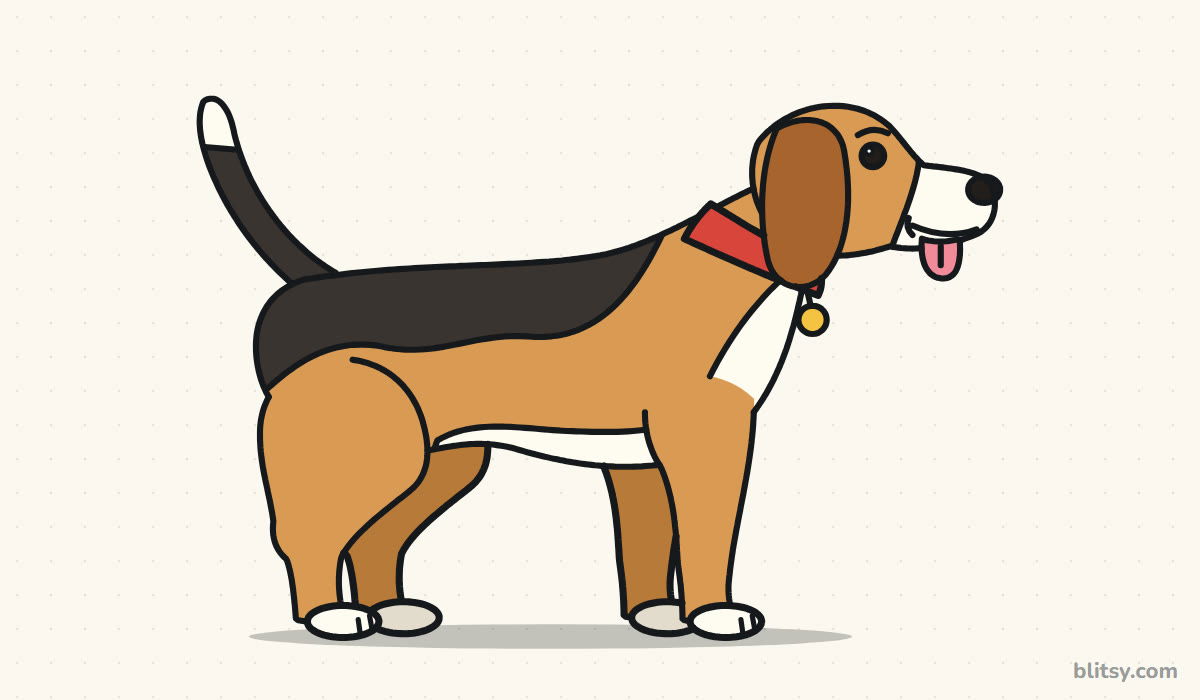 How to Draw a Dog Step by Step (Easy Side View for Beginners)
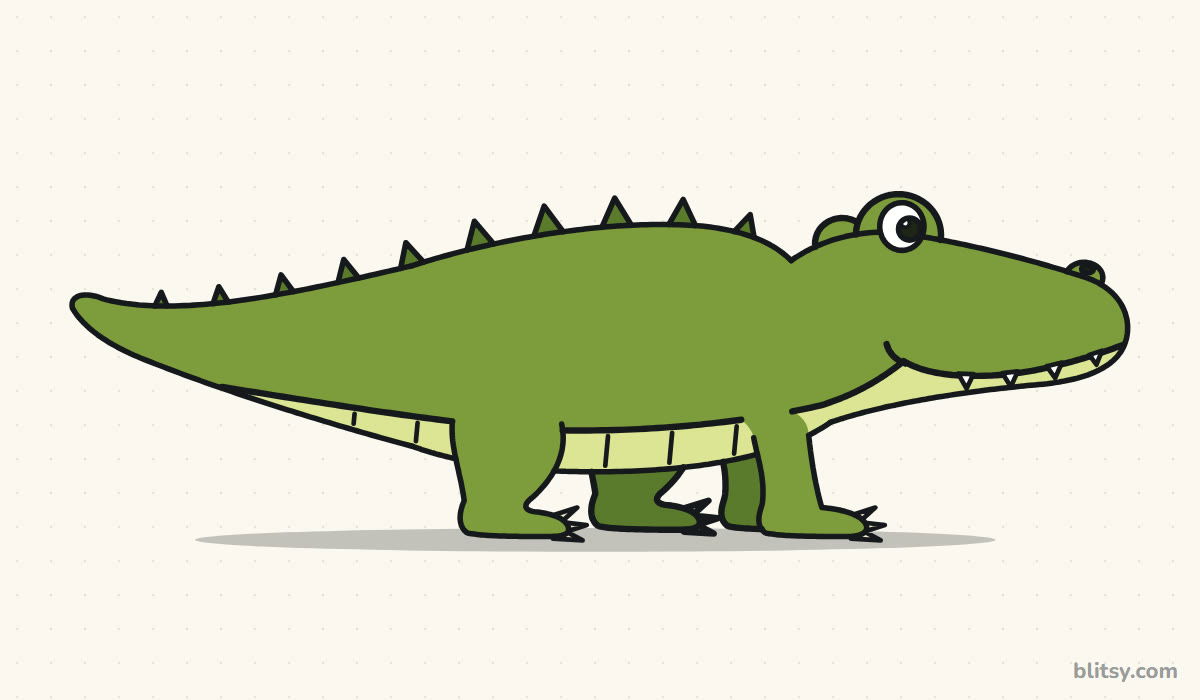 How to Draw an Alligator Step by Step (Easy Side View)
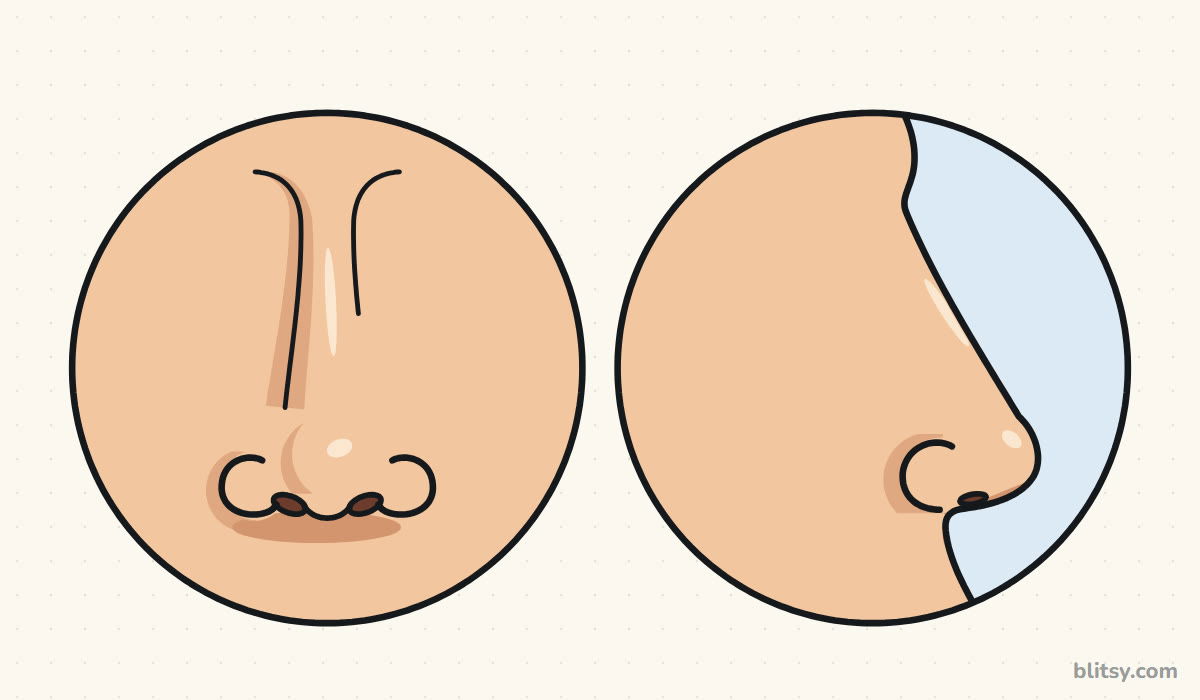 How to Draw a Nose Step by Step (Front and Side View)
 How to Draw a Horse Step by Step (Easy Side View)
 How to Draw a Dragon Head Step by Step (Easy Side View)
 How to Draw a Hoodie Step by Step (Front and Back View)
 How to Draw a School Step by Step (Easy Front View)
 How to Draw Hands Step by Step (Easy Palm View for Beginners)
 How to Draw a Skull Step by Step (Easy Front View)
 How to Draw a Side Profile Step by Step (Easy Head Guide)
 How to Draw a Whale Step by Step (Easy for Beginners)
 How to Draw Lungs Step by Step (Easy Science Diagram)

