
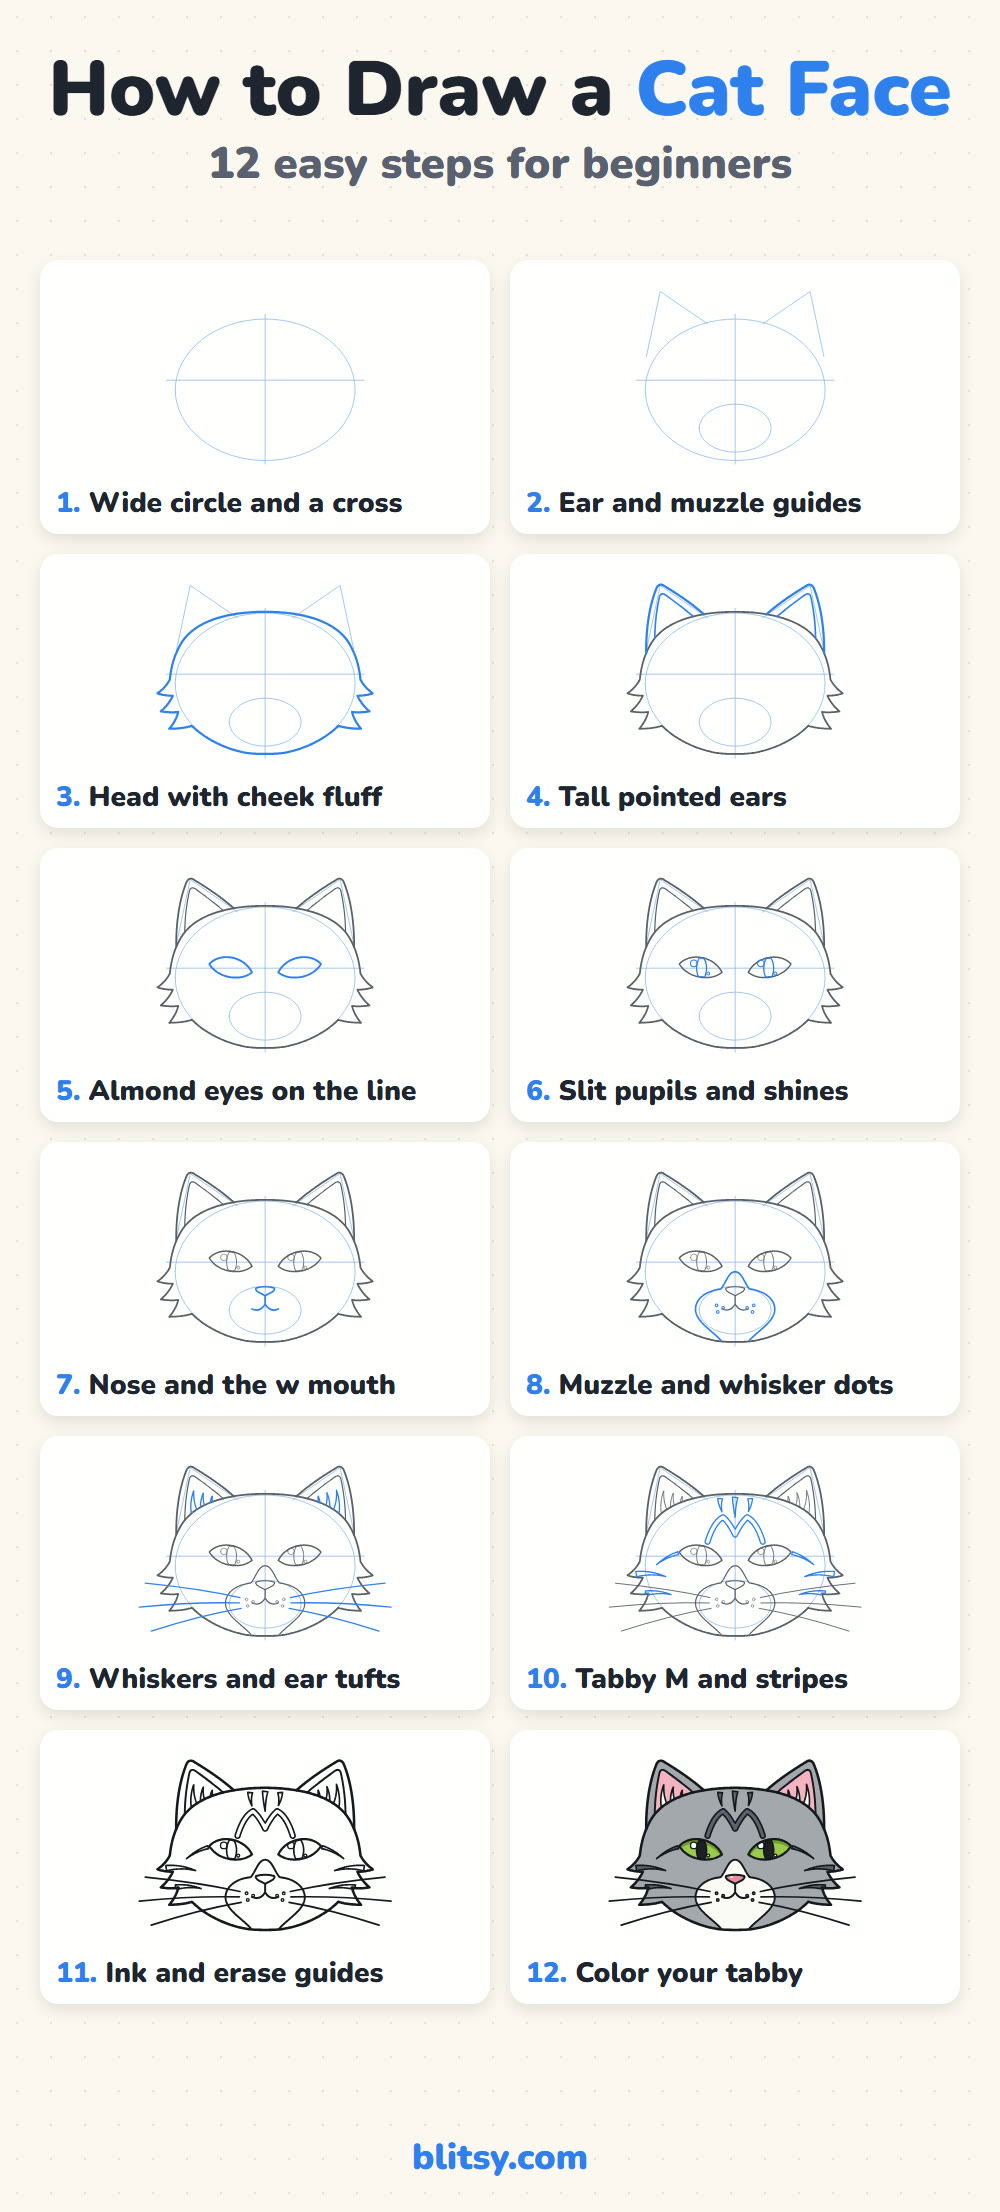
Draw a cat face and nobody will ever ask you what it is, as long as the eyes, nose and ears land in the right places. That placement is really the whole lesson here. In this post I'll show you how to draw a cat face step by step using one wide circle and a cross, so every feature has a line to sit on. We'll finish with a gray tabby that has green eyes, a white chin and the classic M on its forehead.
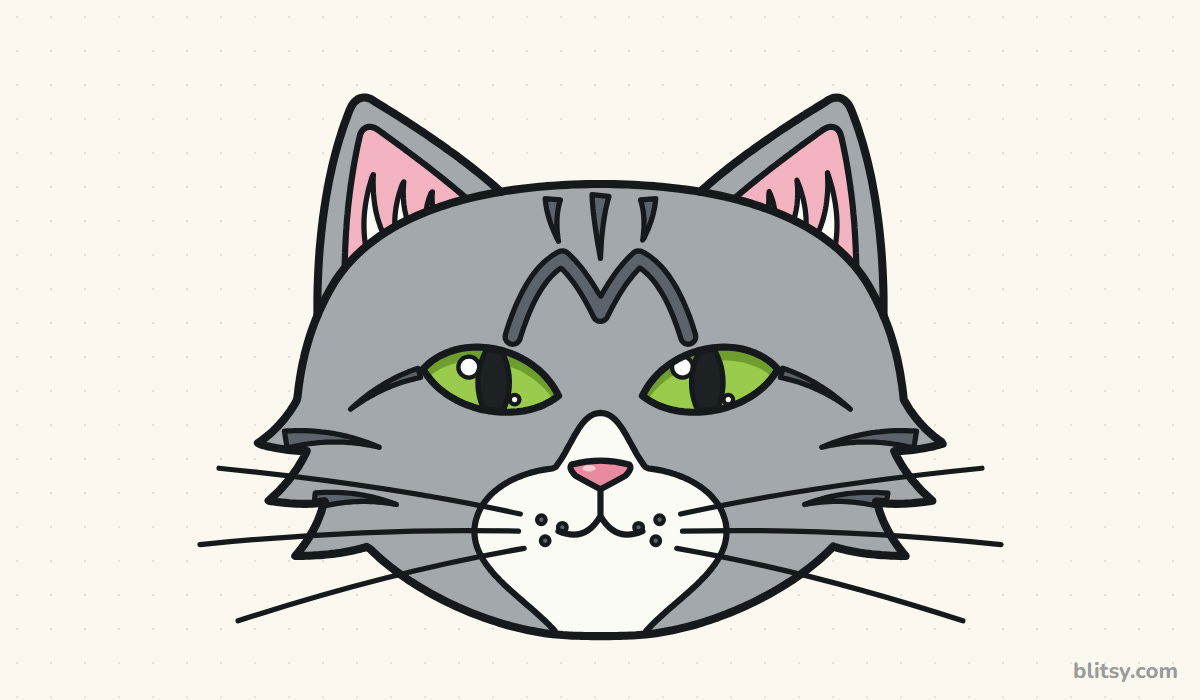
Every new line in a picture shows up blue, while gray is the work already done. Copy just the blue lines, compare, then go on.
Quick overview
⏱️ Time: about 30 to 40 minutes
🎯 Level: beginner, fine for kids around 7 and up
✏️ Steps: 12
🐈 You'll draw: a close-up tabby cat face, front view, with long whiskers
Tools on My Desk for a Tabby Cat Face
- A pencil (HB or 2B both work)
- A soft eraser
- A black fineliner or thin marker for the final lines
- Colored pencils or markers in gray, dark gray, pink, green and black
- Plain paper, held sideways
The whiskers reach well past the cheeks, so hold the page sideways and start the circle in the middle.
How to Draw a Cat Face Step by Step
Step 1: Draw a wide circle and a cross
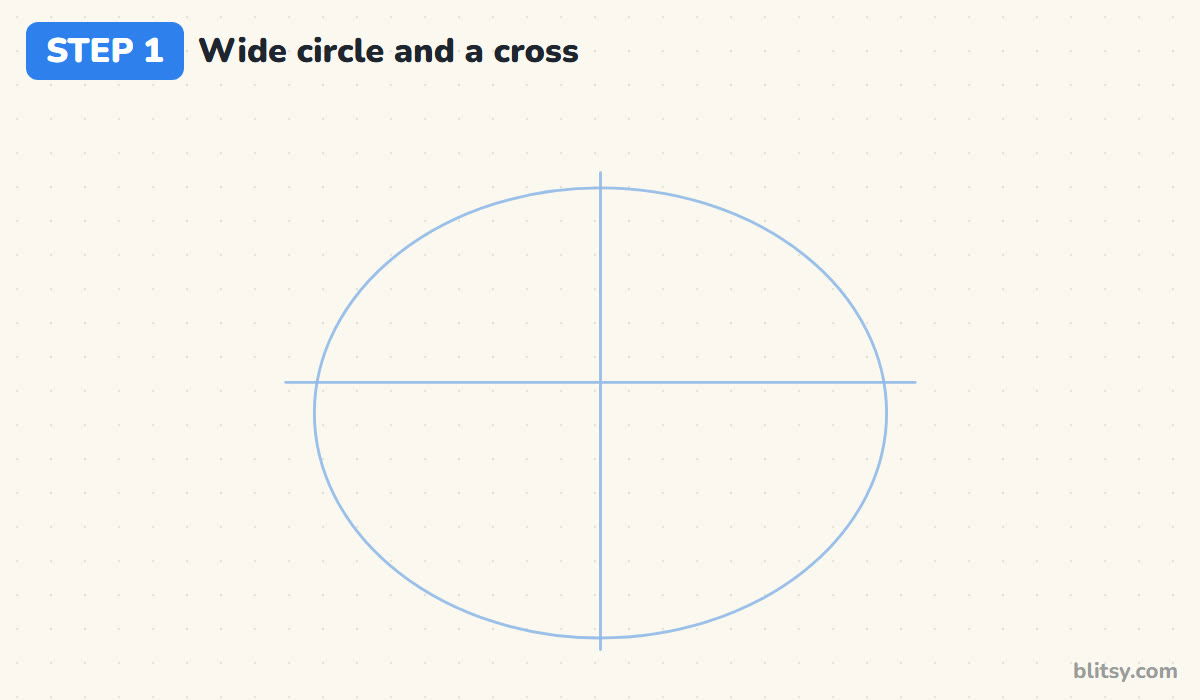
Sketch a circle that is a bit wider than it is tall, right in the middle of the page. Draw a straight line down through the center, then a level line across, just a little above the middle. I call this the cross. The level line is where both eyes will sit, and the vertical one keeps the two sides matching.
💡 Tip: Press so lightly that you can barely see the lines. They all disappear later.
Step 2: Add ear and muzzle guides
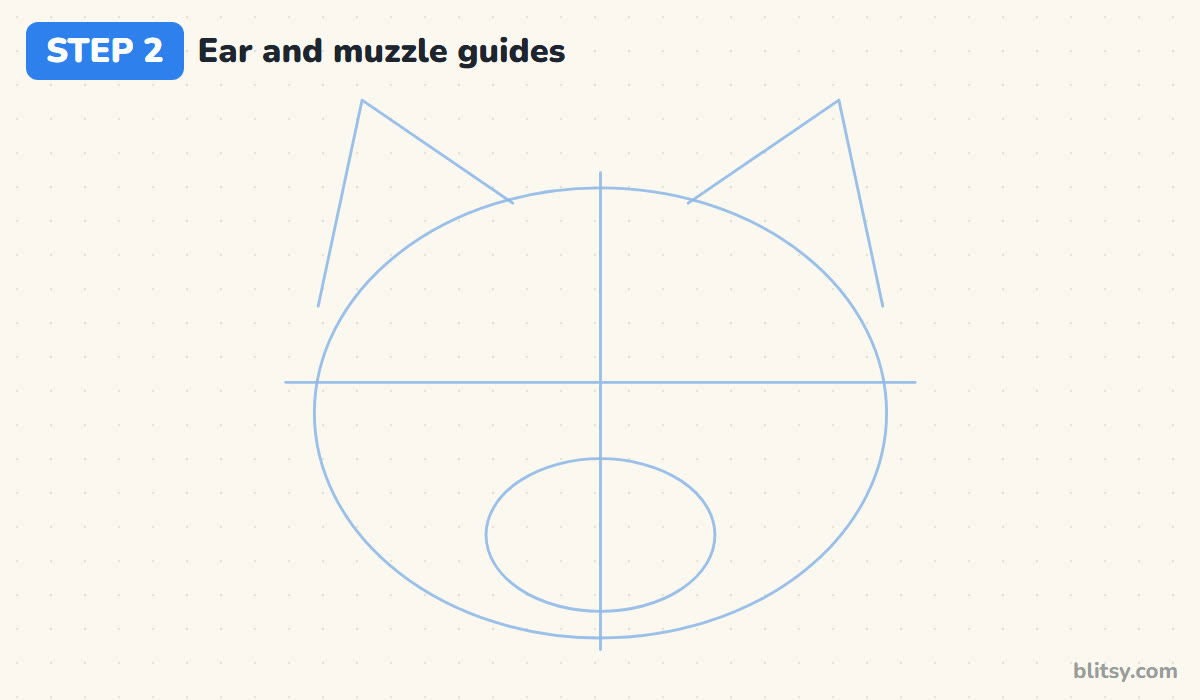
On each top corner of the circle, draw a tall triangle that leans outward. The outer side of each triangle starts low, near the level line, and the tip goes well above the circle. Then put a small flat oval at the bottom of the vertical line. That oval marks the muzzle, where the nose and mouth go.
💡 Tip: Check that both ear tips sit at the same height before you go on.
Step 3: Outline the head with cheek fluff
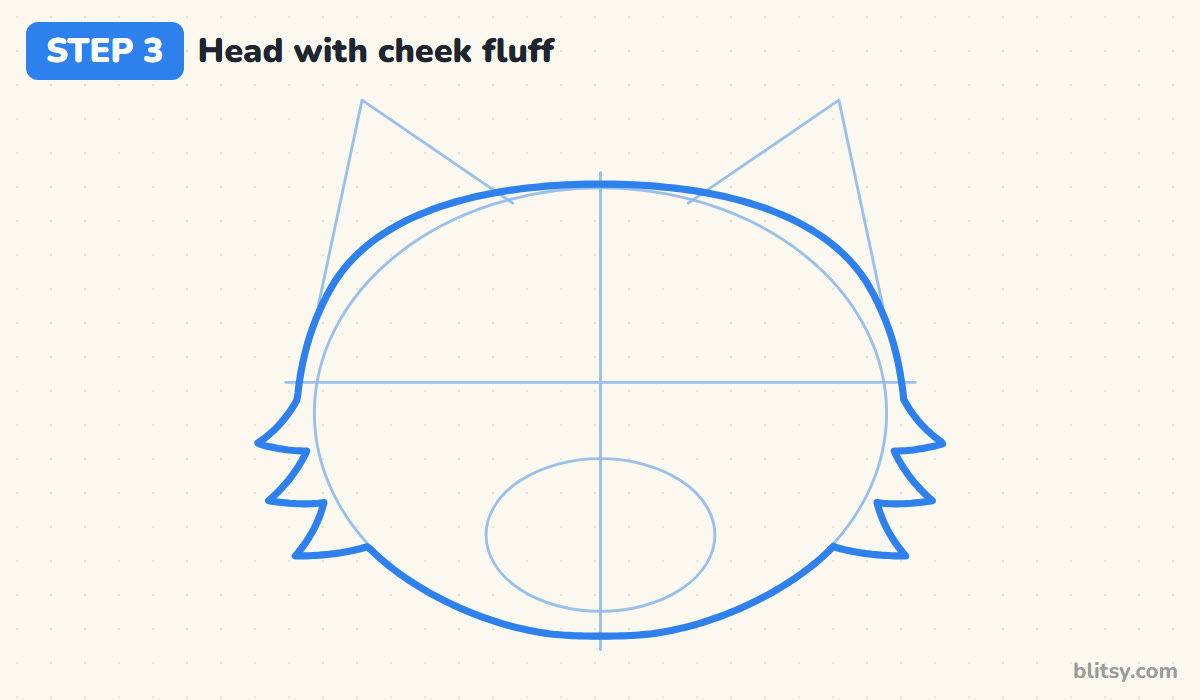
Now go around the circle with a firmer line, but make the top flatter and let the sides swell out a little. At cheek level, just under the cross line, break the outline into three pointed tufts on each side. Then curve the line down and around into a soft, rounded chin. Those tufts are what tell people this is a cat and not a bear.




💡 Tip: Make each tuft a quick zigzag: out to a point, then back in.
Step 4: Draw the tall pointed ears
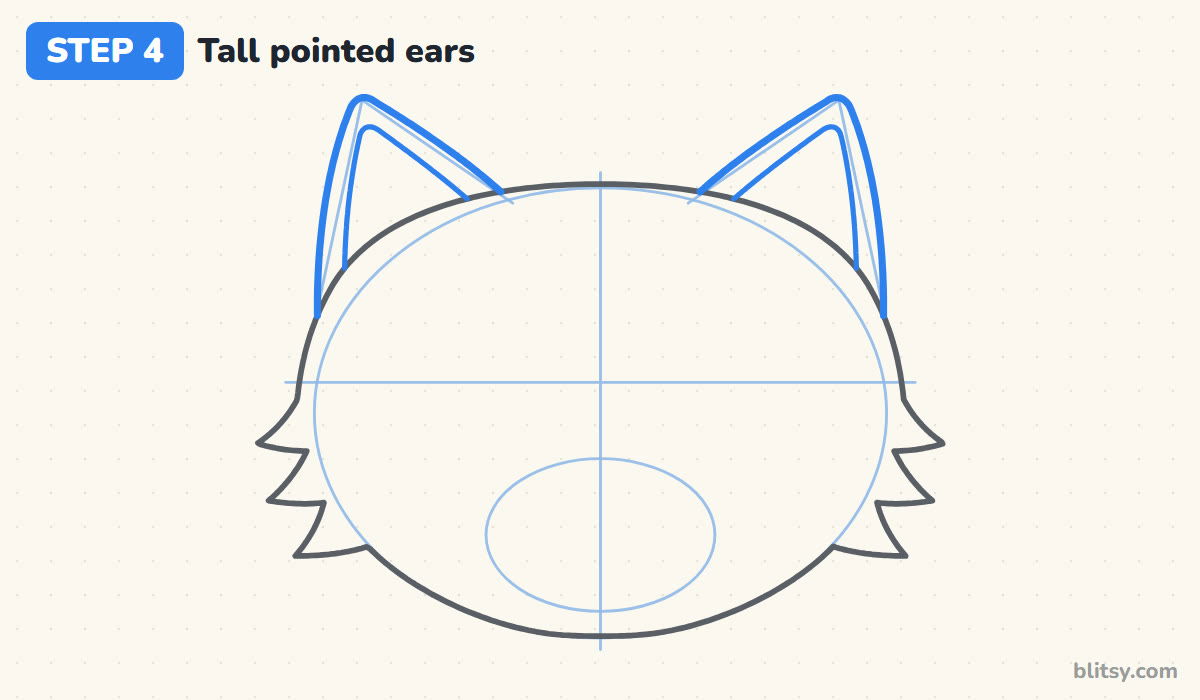
Follow your ear guides and draw each ear with slightly curved sides and a softly rounded tip. Stop both sides where they meet the head, since the bottom of the ear is hidden. Inside each ear, draw a smaller copy of the same shape for the pink part. Keep a narrow, even border between the two lines.
💡 Tip: Round the very tip a little. Sharp points make the ears look like paper.
Step 5: Place the almond eyes on the line
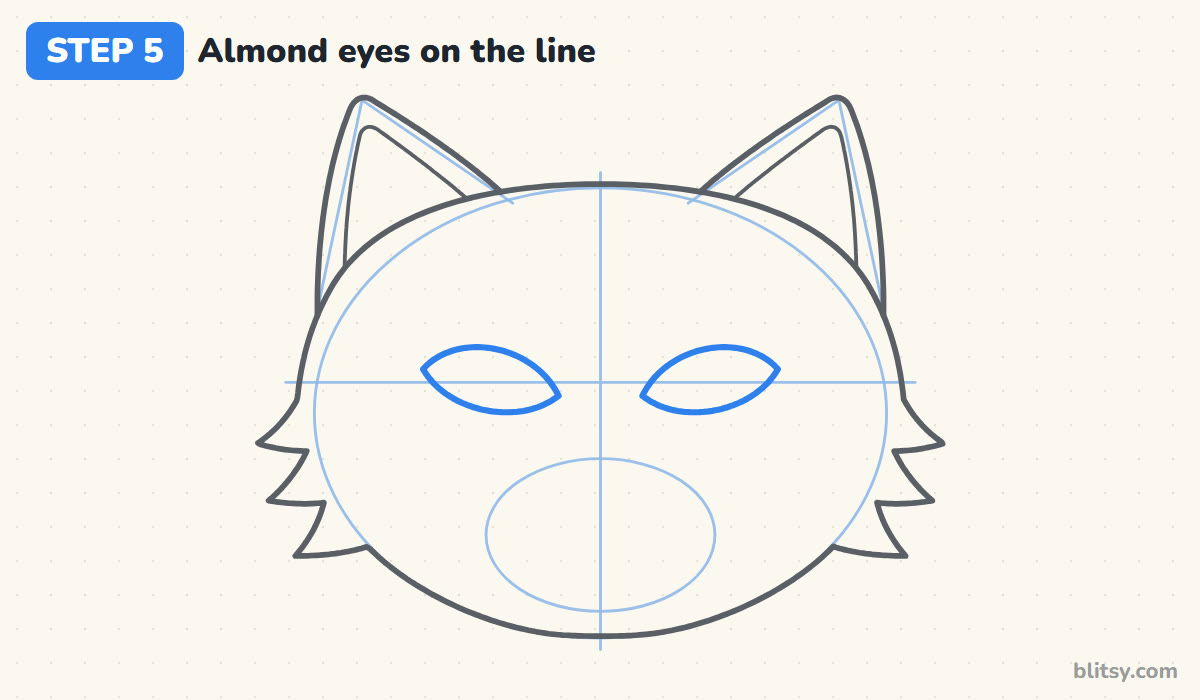
This is the step that decides the whole face. Draw two almond shapes centered on the level line, one on each side of the center line. Leave a gap between them that is about one eye wide. Point the outer corners up a little and the inner corners down toward the nose, which gives the slanted look cats have.
💡 Tip: Draw the top lid as one curve and the bottom as another, then join the corners.
Step 6: Add slit pupils and shines
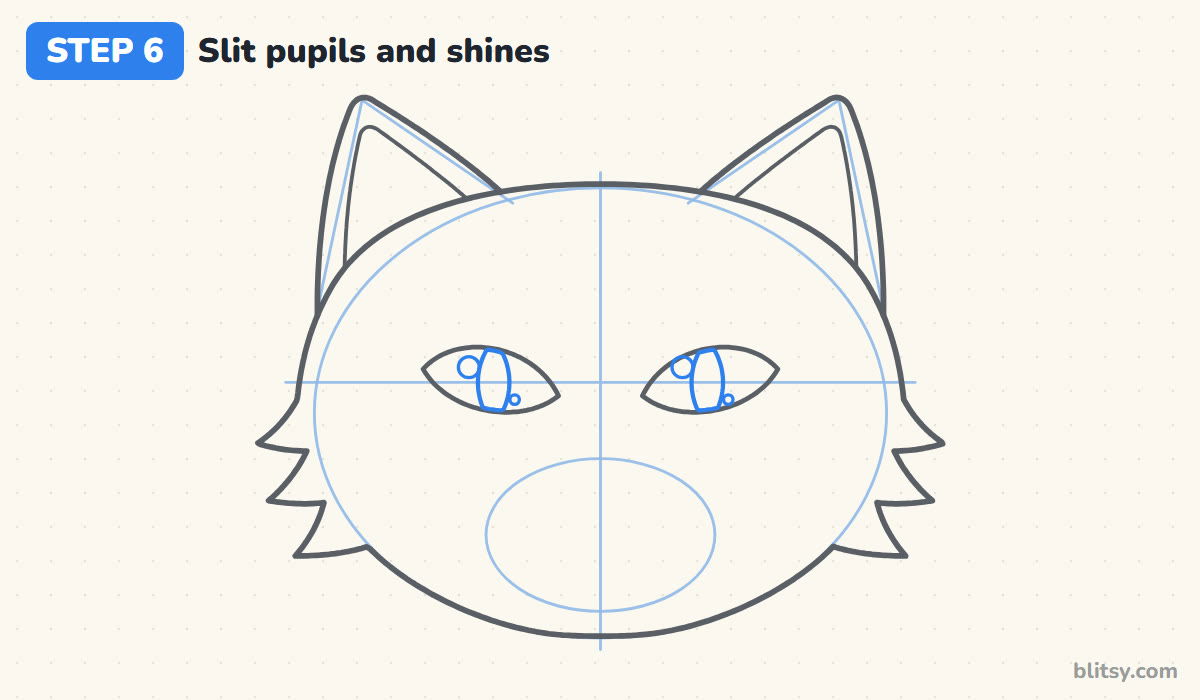
Inside each eye, draw a tall, narrow pupil shaped like a pointed oval, straight up and down in the middle of the eye. Then add two small circles for the shine: a bigger one near the top and a tiny one lower down. I put the shines on the same side in both eyes, so the light seems to come from one window.
💡 Tip: Thin pupils look alert. Make them rounder if you want a sleepy, softer cat.
Step 7: Draw the nose and the w mouth
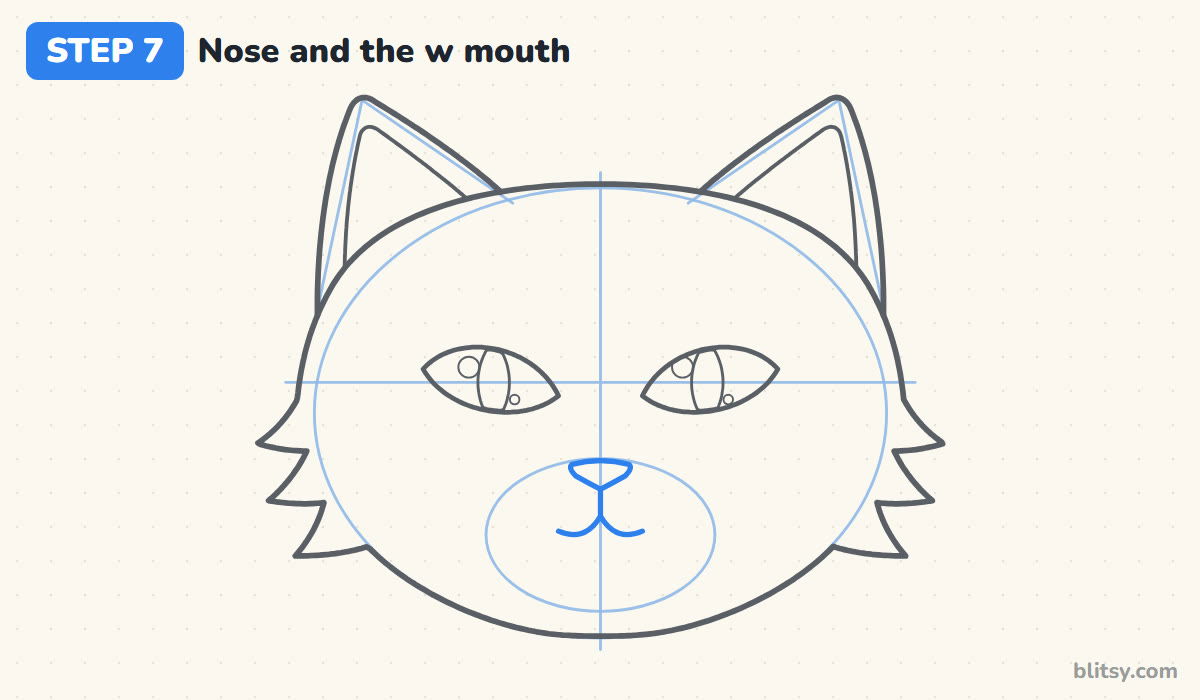
The nose goes about halfway between the eye line and the chin, on the center line. Draw a small upside-down triangle with rounded corners. From its point, drop a short straight line, then curve out to each side to make a w shape. Most beginners draw the nose too big, so keep it smaller than one eye.



💡 Tip: Draw the w as two little smiles that touch in the middle.
Step 8: Shape the muzzle and whisker dots
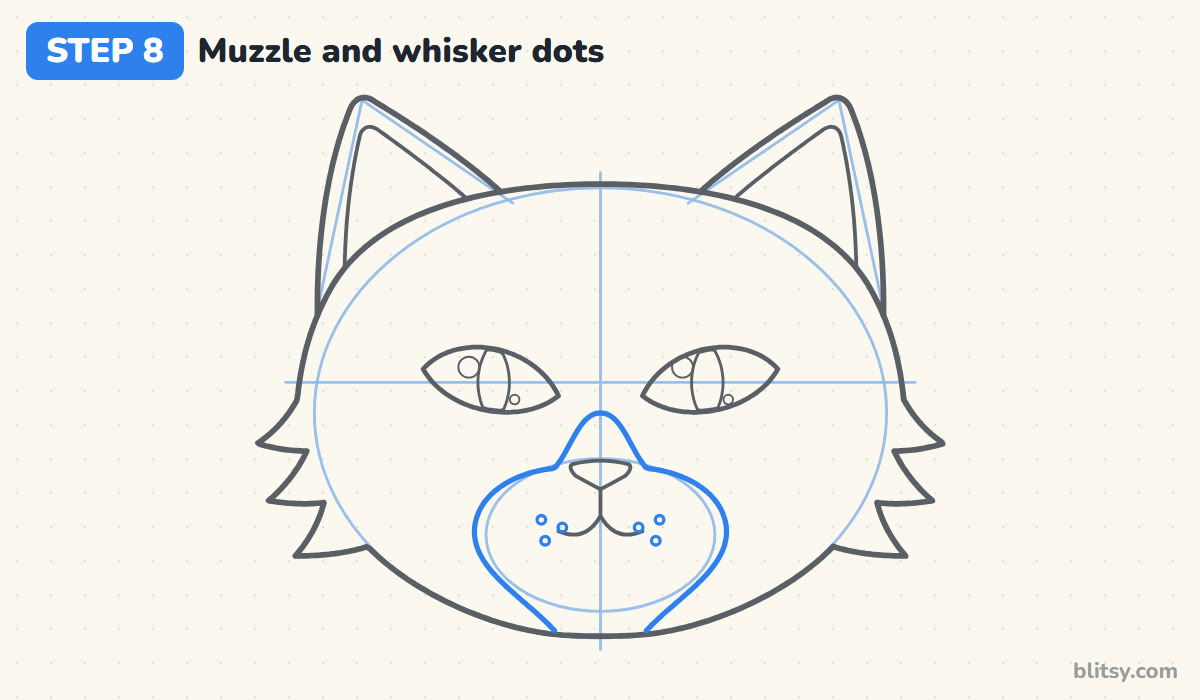
Start a thin line just under the gap between the eyes. Bring it down around the nose, swing it out over the whisker area on each side, then run it down to the bottom of the chin. Everything inside that line will stay white. Add three small dots on each side of the mouth, where the whiskers grow from.
💡 Tip: Use the muzzle oval guide as your edge, then let the line flow past it to the chin.
Step 9: Add whiskers and ear tufts
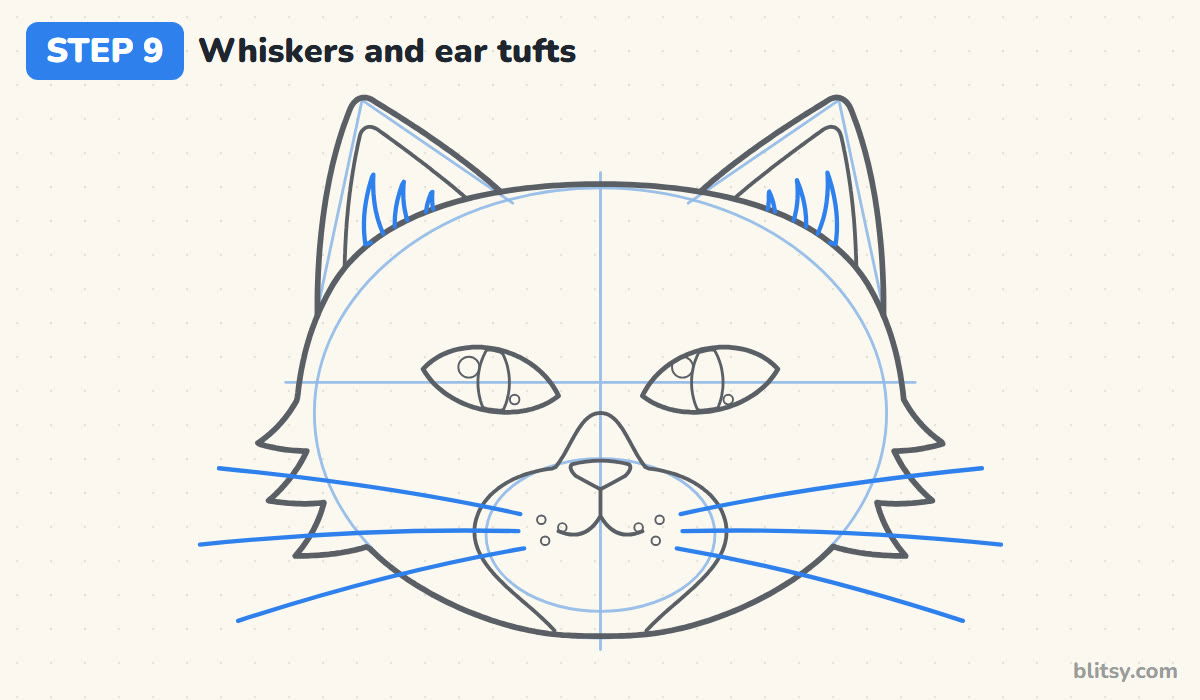
Draw three long whiskers on each side, starting near the dots and fanning out past the cheek fluff. Make the top one rise slightly, the middle one go straight and the lowest one droop. Then add three thin flame shapes inside each ear, rising from the head line. These are the fluffy tufts many cats have.
💡 Tip: Pull each whisker away from the face in a single fast stroke.
Step 10: Sketch the tabby M and stripes
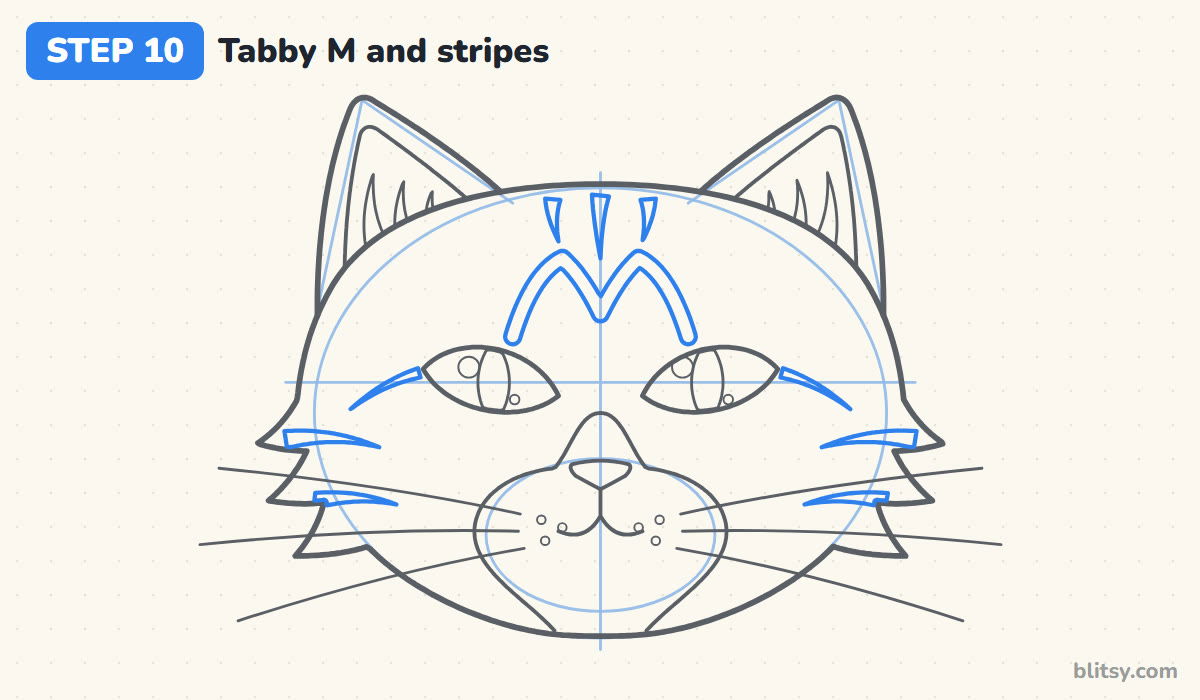
Tabby cats wear a dark letter M on the forehead, so draw a rounded M as a thick band above the eyes. Over it, add three short spikes pointing down. On each cheek, draw two tapered stripes coming in from the edge, and one thin line running back from the outer corner of each eye. Leave the muzzle free of marks.
💡 Tip: Make every stripe thick at the edge of the face and thin where it ends.
Step 11: Ink the lines and erase the guides
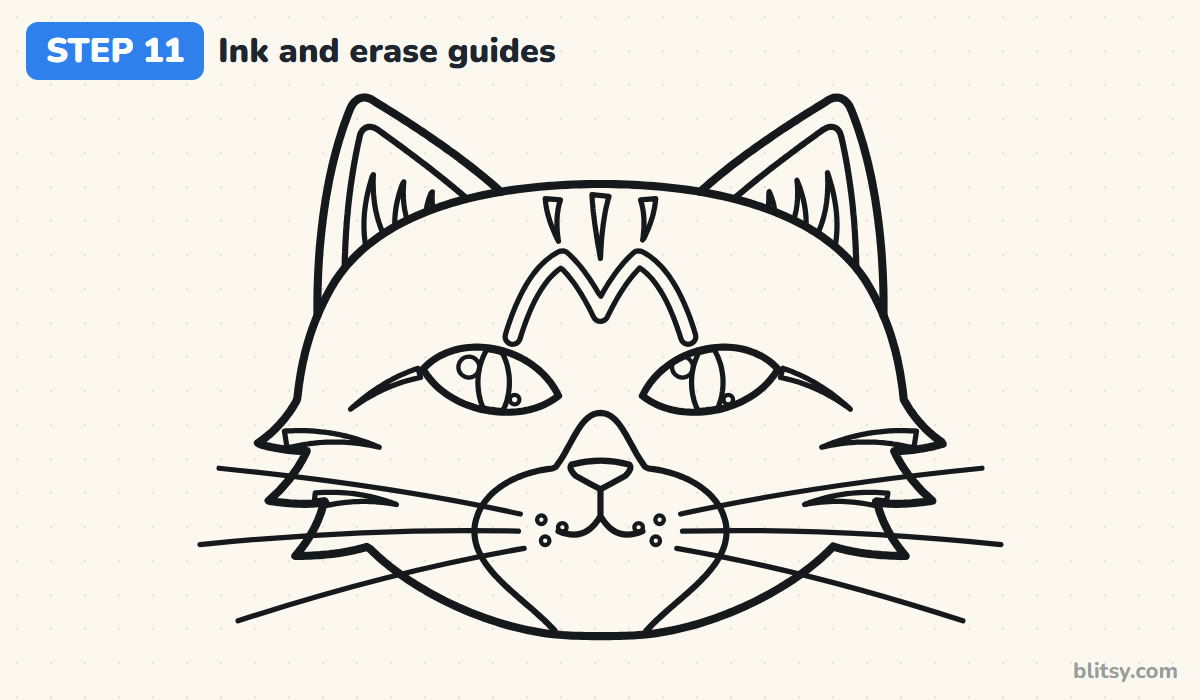
Go over every keeper line with the black pen. I start with the eyes and nose, because they need the steadiest hand, and leave the long outline for last. Don't ink the circle, the cross or the ear and muzzle guides. Wait a minute for the ink to dry, then erase all the pencil.


💡 Tip: Turn the paper so you always pull the pen toward you on curves.
Step 12: Color your tabby cat
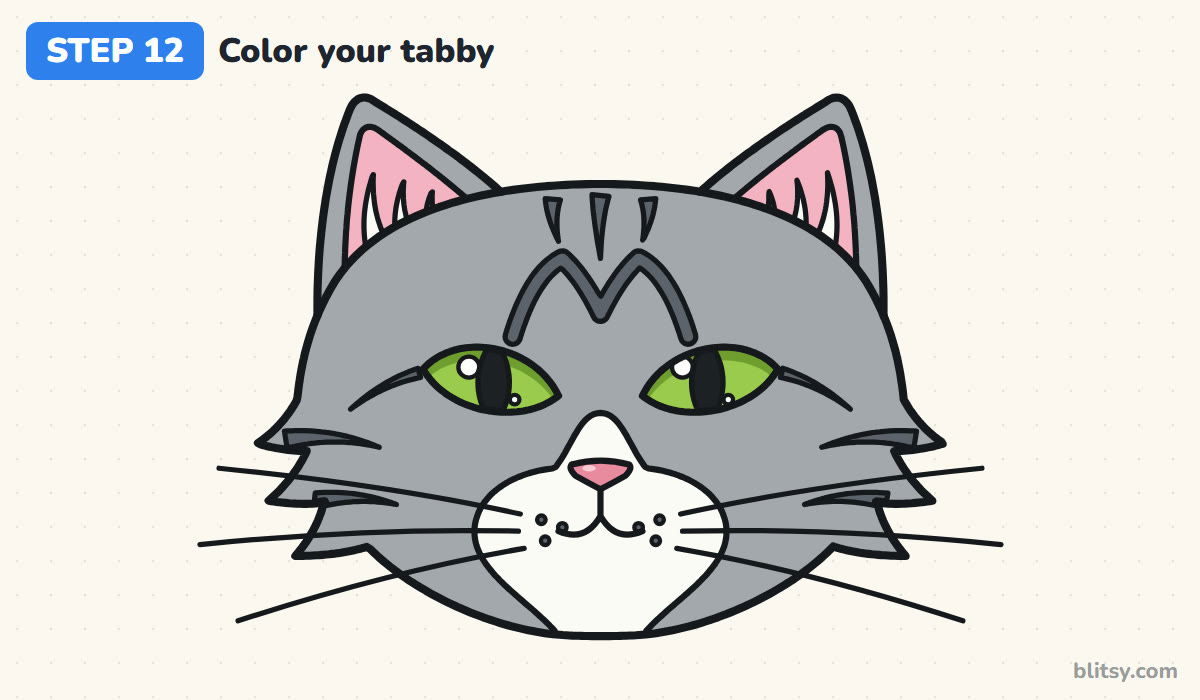
Fill the head and ears with gray, and the M and stripes with dark gray. The muzzle, chin and ear tufts stay white. Color the inner ears and nose pink, the eyes green and the pupils black. Leave the shine circles white, and you can add a slightly darker green along the top of each eye for depth.
💡 Tip: Color the fur in short strokes that follow the direction of the stripes.
Where Cat Faces Usually Go Wrong
- Eyes placed too high. The face suddenly looks like an owl. Keep both eyes centered on the cross line, not above it.
- A nose as big as an eye. Cat noses are small. If yours is wider than one eye, erase it and try a smaller triangle.
- Round pupils with no slit. Round pupils are fine for a cartoon kitten, but a tabby face reads more like a cat with tall, narrow ones.
- A perfectly round head. Without the cheek tufts and a flatter top, the outline looks like a ball. Break up the sides with fluff.
- Whiskers starting on the nose. They grow from the muzzle beside the mouth. Start them at the dots.
Turning This Tabby Into Other Cats
Change the coat and you get a different cat on the same skeleton. Leave out the stripes and color it black with yellow eyes, or make it orange with cream stripes. A white face with gray patches over one eye works well too. For a Persian look, add more cheek fluff and shorten the ears. If the eyes were your favorite part, the cat eye drawing tutorial goes deeper into them, and when you want to draw the whole animal, try this easy cat drawing step by step lesson.
Free Cat Face Coloring Page and PDF Steps
Prefer paper? The free cat face coloring page has the colored tabby at the top as a guide, with a key that shows each color and where it goes. The step-by-step PDF guide holds all 12 steps and their tips, two per page. Both print on Letter or A4.
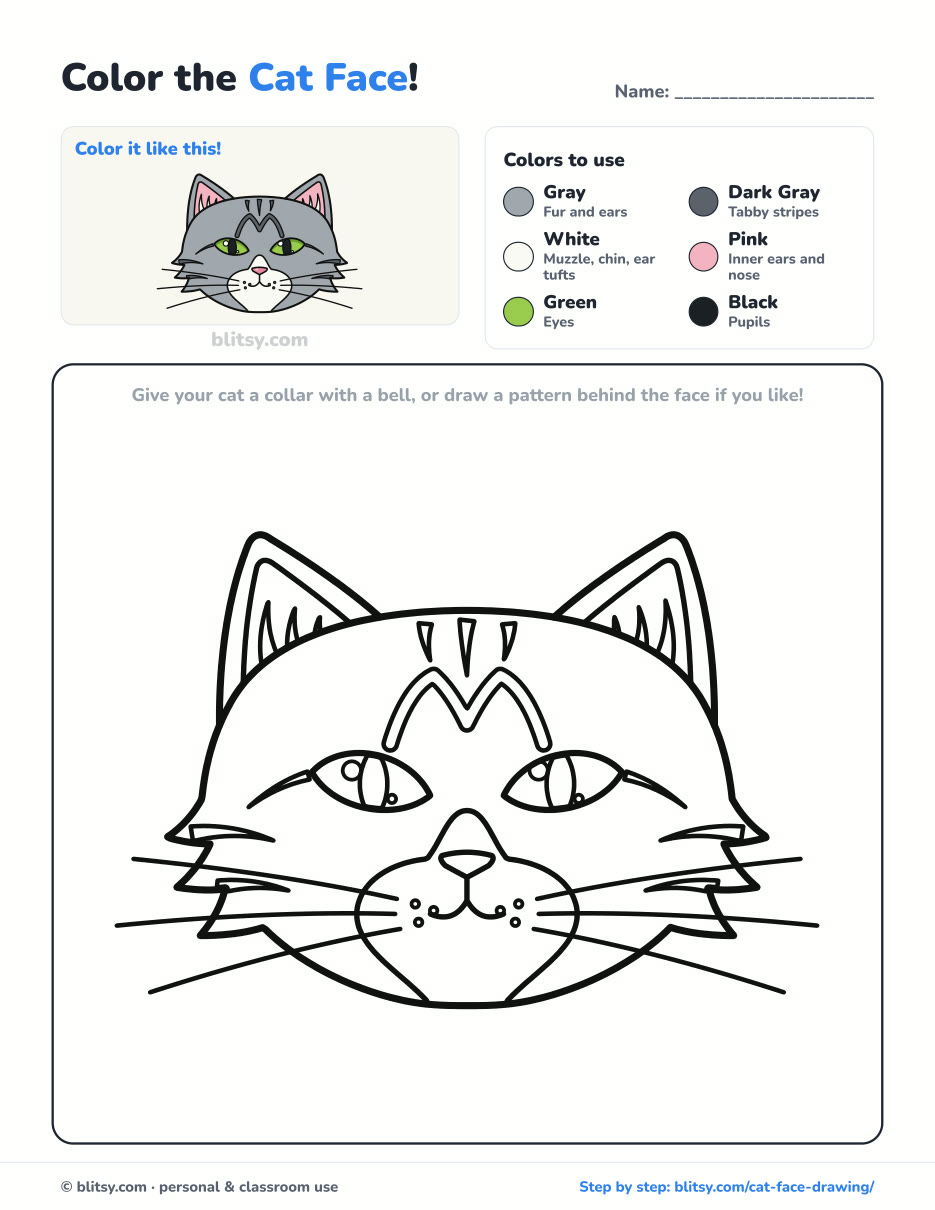
Black outlines with a colored example and the color names at the top. Ready to print and color.
⬇️ Download Coloring PageEvery step picture with its instructions and tips, to keep beside your paper while you draw.
⬇️ Download Drawing Guide📱 On a phone? Tap a download button, then open the file and choose Share → Save to Files or Print. On a computer, the PDF opens or saves straight to your Downloads folder.
Keep the Tabby Steps on Pinterest
Whiskers, Wings and Paws: Tutorials After the Cat Face
These are all step-by-step tutorials, so each one shows you a picture for every stage from the first guide shape to color.
- Simba Drawing: Draw a curious lion cub face with big amber eyes and a red-brown tuft in this Simba drawing step by step lesson.
- Peacock Drawing: A proud peacock with its tail fanned open is colored in blue, green and gold in this peacock drawing tutorial.
- Mouse Drawing: The cat's favorite neighbor sits up with a wedge of cheese in this how to draw a mouse tutorial.
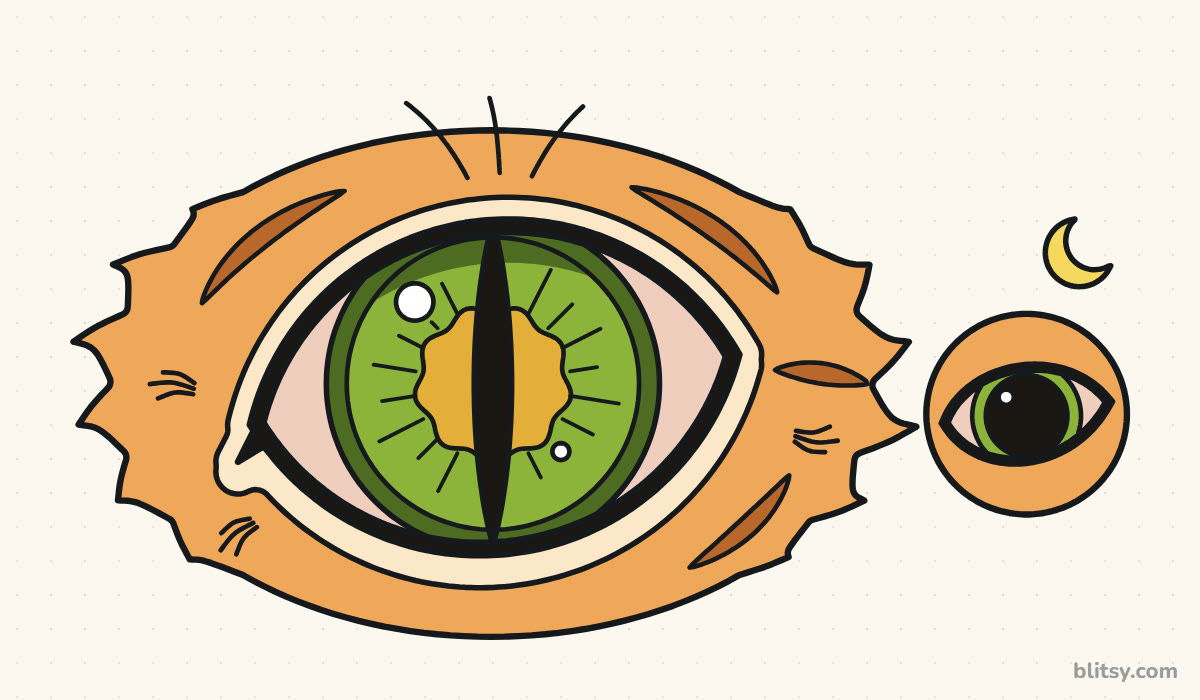
- Cat Eye Drawing: Zoom in on one eye with a slit pupil and a round night pupil in this cat eye drawing tutorial.
- Snow Leopard Drawing: A pale snow leopard stretches out on a mountain rock, tail curled along the stone, in this snow leopard drawing step by step guide.
- Leopard Drawing: A cartoon leopard sits up tall with amber eyes and a dozen rosettes in this leopard drawing tutorial.
- Polar Bear Drawing: Draw a chubby polar bear on an ice floe from a circle, an oval and a box with this polar bear drawing step by step lesson.
- Parrot Drawing: A scarlet macaw with a hooked beak and a very long tail is the goal of this how to draw a parrot lesson.
- Butterfly Drawing: An orange butterfly seen from above teaches you to mirror both wings in this butterfly drawing tutorial.
- Gorilla Drawing: A calm silverback sits on the grass with a banana in this gorilla drawing step by step guide.
- Bunny Drawing: A sitting bunny with long ears and a cotton tail eyes its carrot in this bunny drawing tutorial.
Cat Face Questions From Beginners
What is the easiest way to draw a cat face?
Draw a wide circle with a cross through it. Put the eyes on the level line, the nose halfway down to the chin, and two triangle ears on top. Once those are placed, the rest is details.
How do you draw a cat face for kids?
Skip the stripes and ear tufts, make the eyes round and the head simple. A thick marker outline is easier for small hands to color inside.
How do you make a cat face look realistic?
Use almond eyes with slit pupils, keep the nose small, and add fur tufts on the cheeks and in the ears. Shading the top of each eye a little darker adds depth too.
How long does it take to draw a cat face?
Plan on 30 to 40 minutes with inking and coloring. The eyes take the most care, so slow down there.
Grab a pencil, draw that circle and cross, and tell me what color coat you gave your cat. 🐈✏️
Related posts:
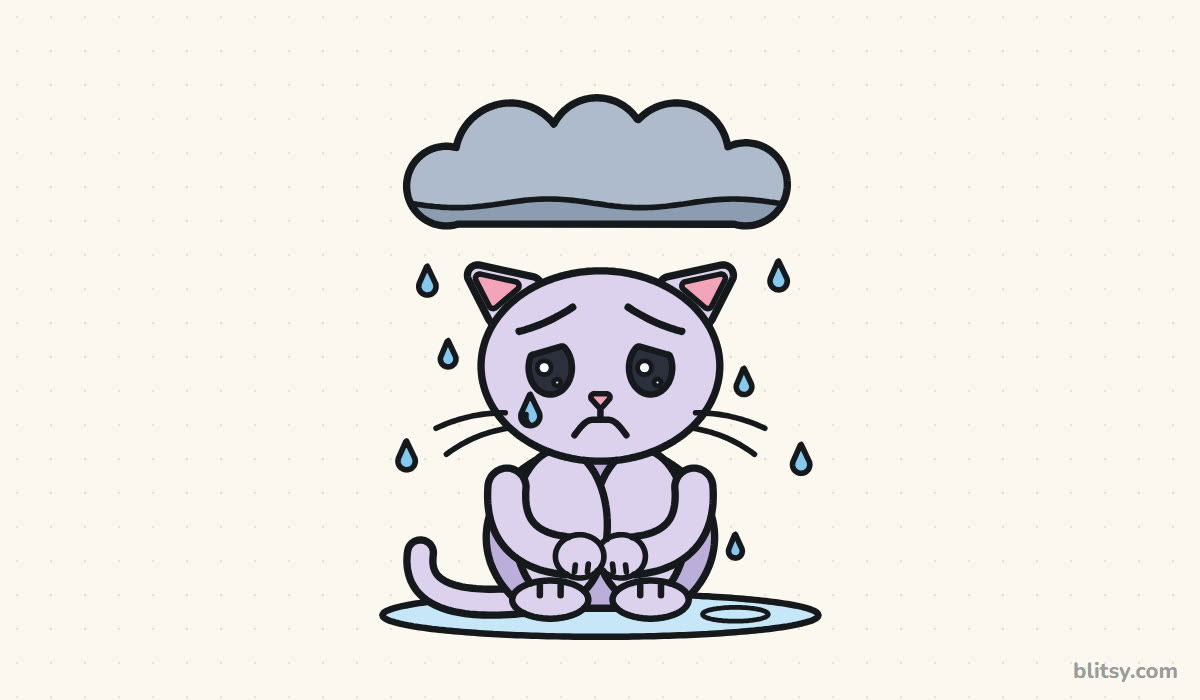 How to Draw a Sad Cat Step by Step (Easy Sad Face Lesson)
 How to Draw an Anime Girl Step by Step (Easy Face Guide)
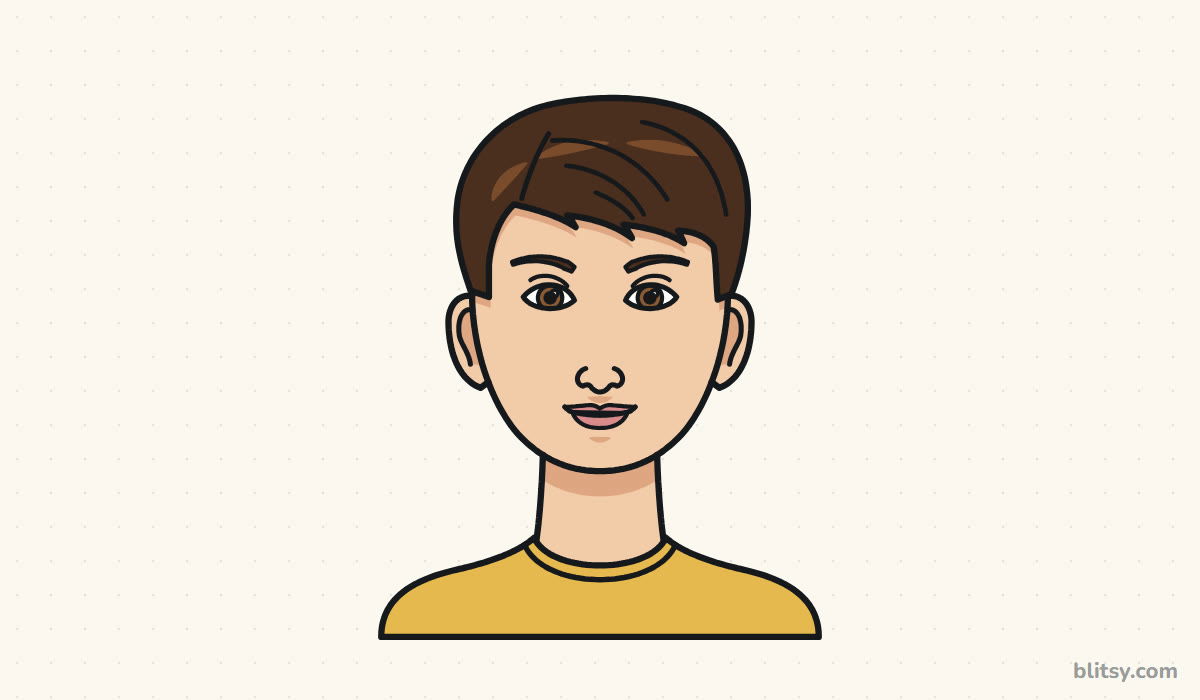 How to Draw a Face Step by Step (Easy Proportions Guide)
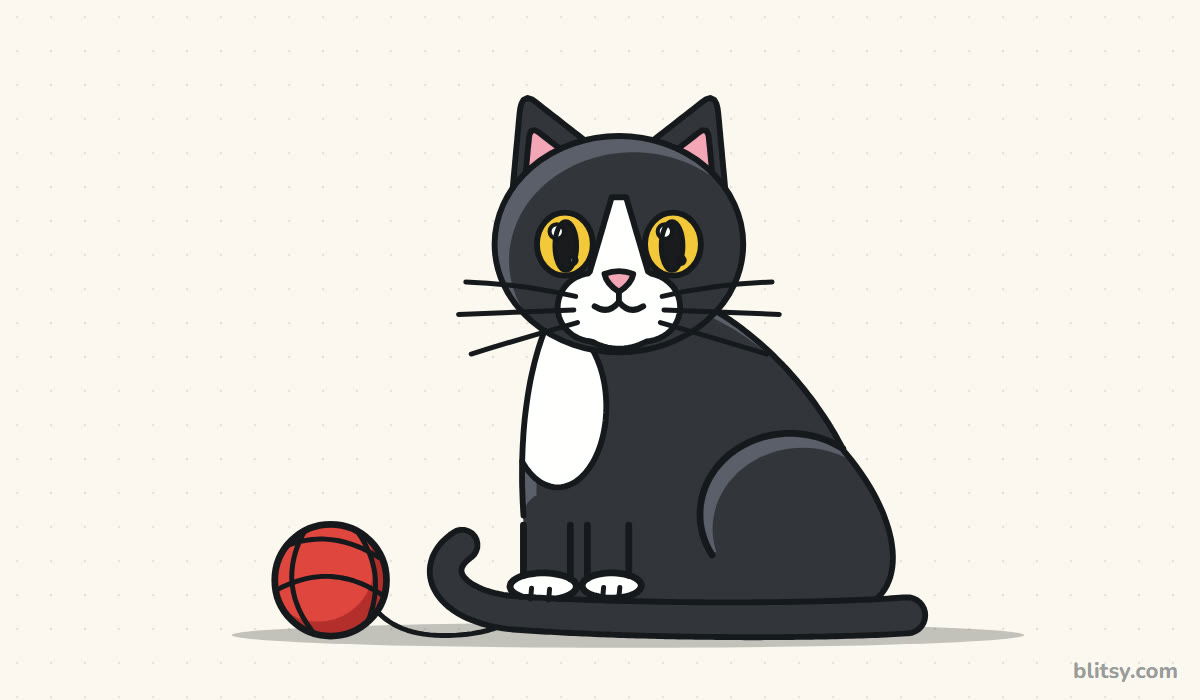 How to Draw a Cat Step by Step (Easy Tuxedo Cat)
 How to Draw a Male Face Step by Step (Easy Proportions)
 How to Draw Anime Step by Step (Easy Anime Boy Face)
 How to Draw a Paw Print Step by Step (Dog and Cat)
 How to Draw a Cat Eye Step by Step (Slit and Round Pupil)
 How to Draw Cat Noir Step by Step (Easy Chibi Hero)
 How to Draw Cute Animals Step by Step (Cat, Bear & Bunny)
 How to Draw a Snow Leopard Step by Step (Easy Guide)
 How to Draw a Jellyfish Step by Step (Cute, Easy Guide)

