
Some drawings ask for a hug before you've even finished them, and a Care Bear is one of those. This lesson walks you through how to draw a Care Bear step by step, starting with two circles and ending with a pink bear holding its arms wide open. It's my own simple fan-art version for practice, not official artwork, so you can copy it, change it and give it any tummy picture you like.

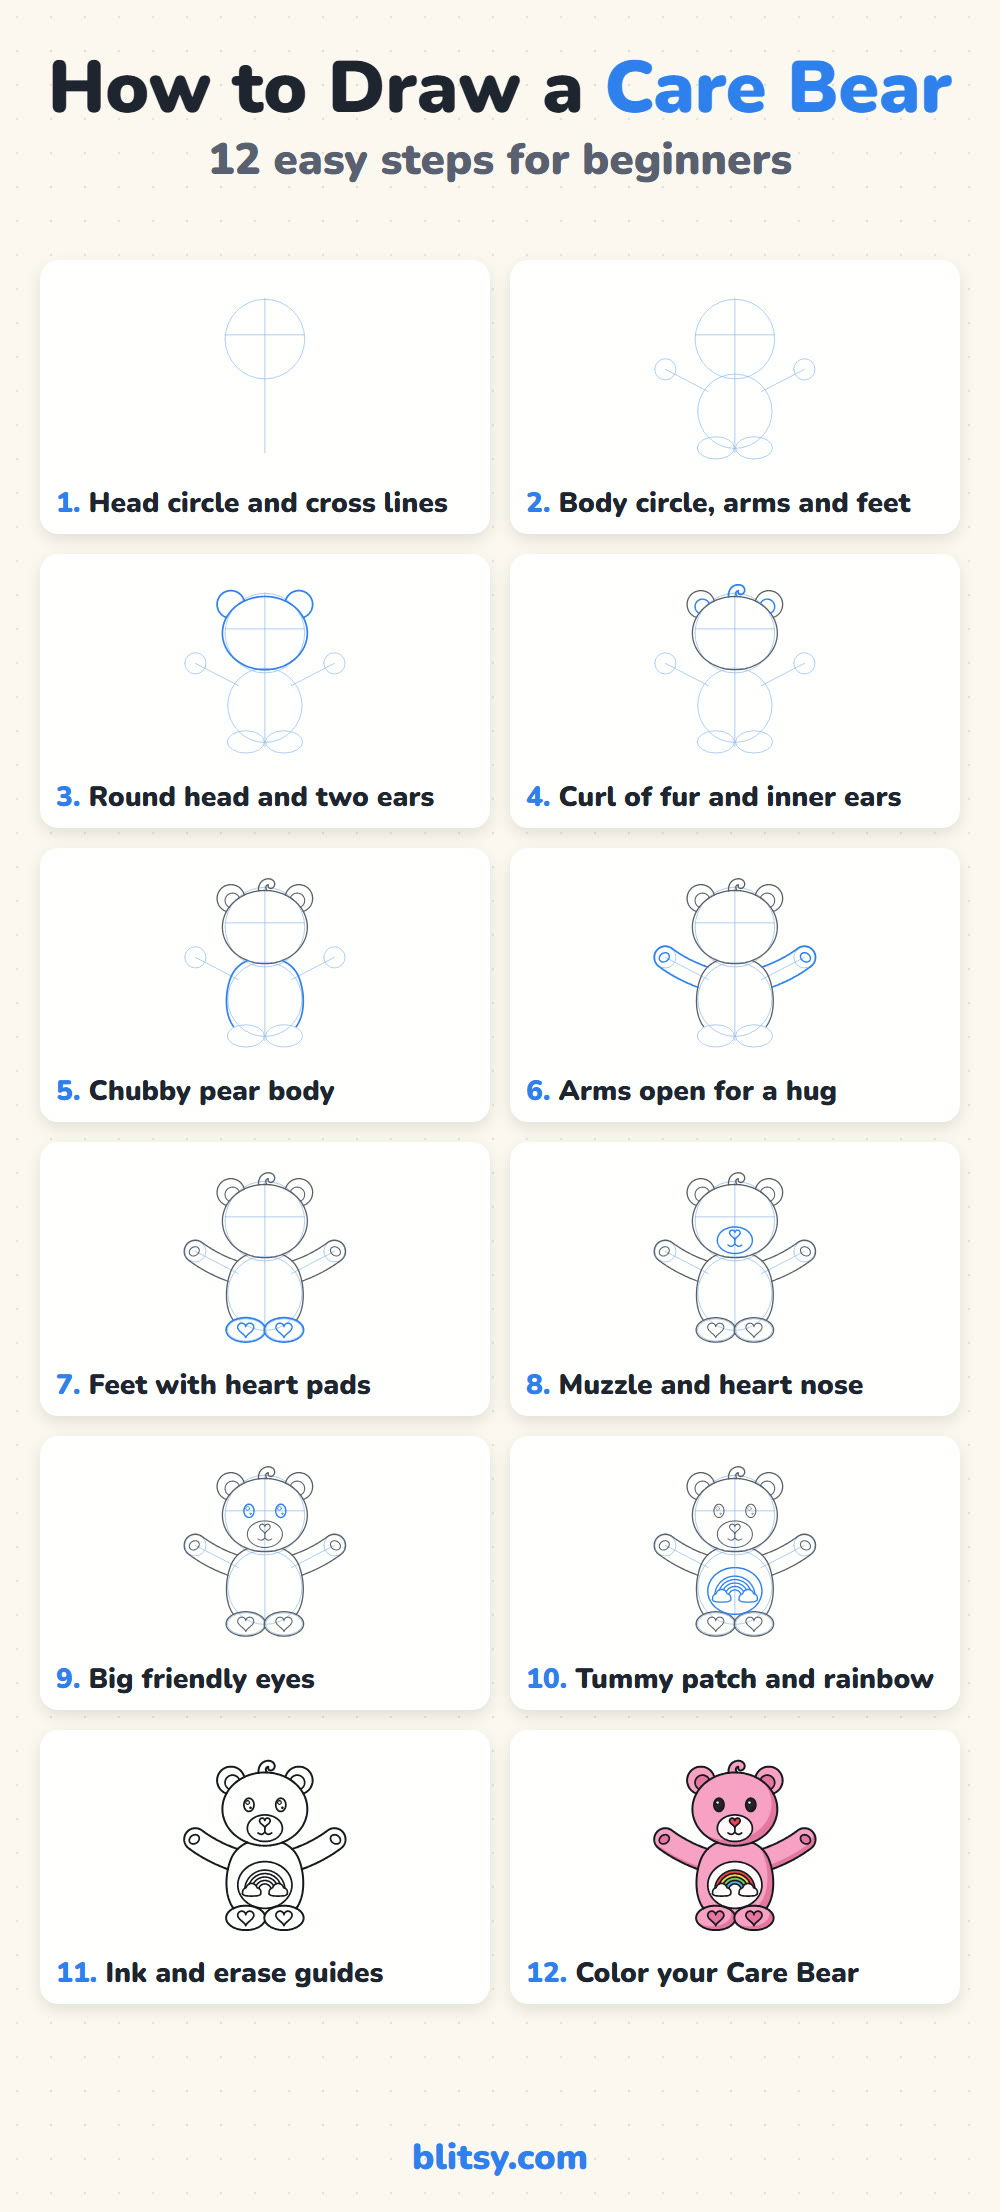
In every picture, the newest part is blue and older work is gray. The faint blue circles are scaffolding, so sketch them softly; they vanish in step 11.
Quick overview
⏱️ Time: about 30 to 35 minutes with coloring
🎯 Level: easy, fine for kids from about 5 and for grown-up beginners
✏️ Steps: 12
🌈 You'll draw: a pink bear with open arms, heart-shaped paw pads and a rainbow belly badge
Supplies for a Huggable Pink Bear
- A regular pencil (HB is fine) for the light sketch
- An eraser, ideally a soft white one
- A black marker or fineliner for the final lines
- Colored pencils or markers in the eight colors from the coloring key
- Plain paper held upright, since this bear is taller than it is wide
No fancy art set needed; a pencil and a few kids' markers will do the job nicely.
How to Draw a Care Bear Step by Step
Step 1: Draw a big head circle and cross lines
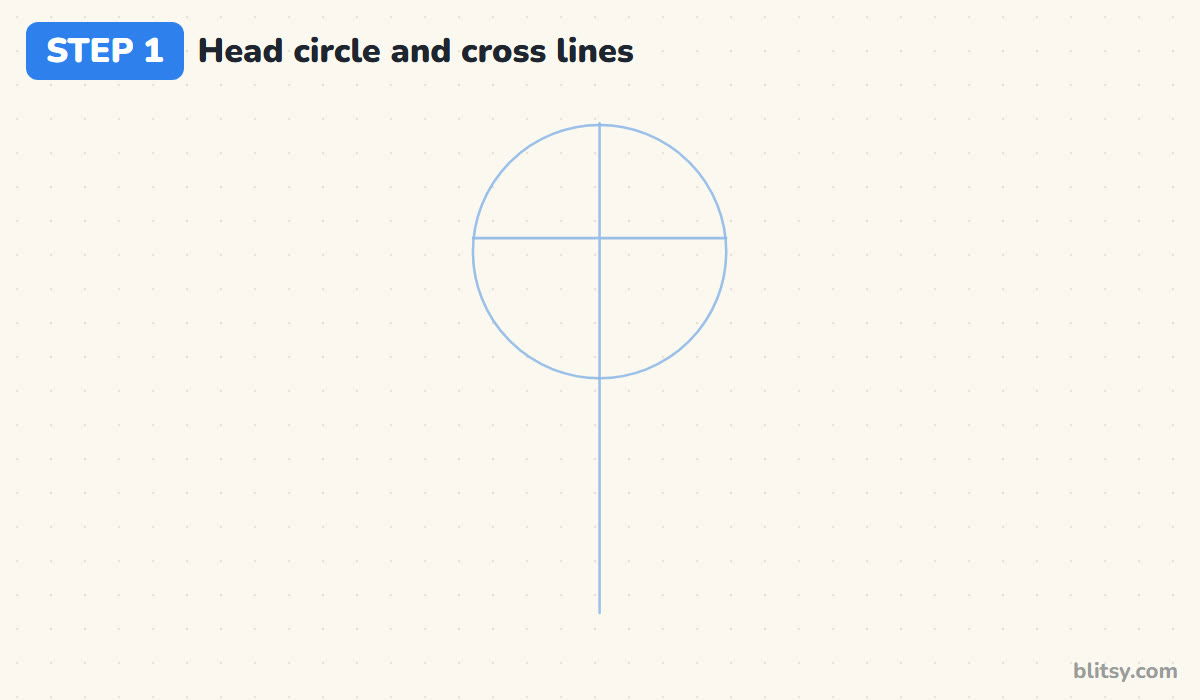
Start near the top of the page with a large circle. Make it about a third of the height of the whole bear. Draw a straight line down through the middle, past the bottom of the circle, and a short line across it a little above the center. Your eyes will sit on that line later.
💡 Tip: Hold the pencil farther back from the tip. Your lines come out lighter without you having to think about it.
Step 2: Sketch guides for the body and limbs
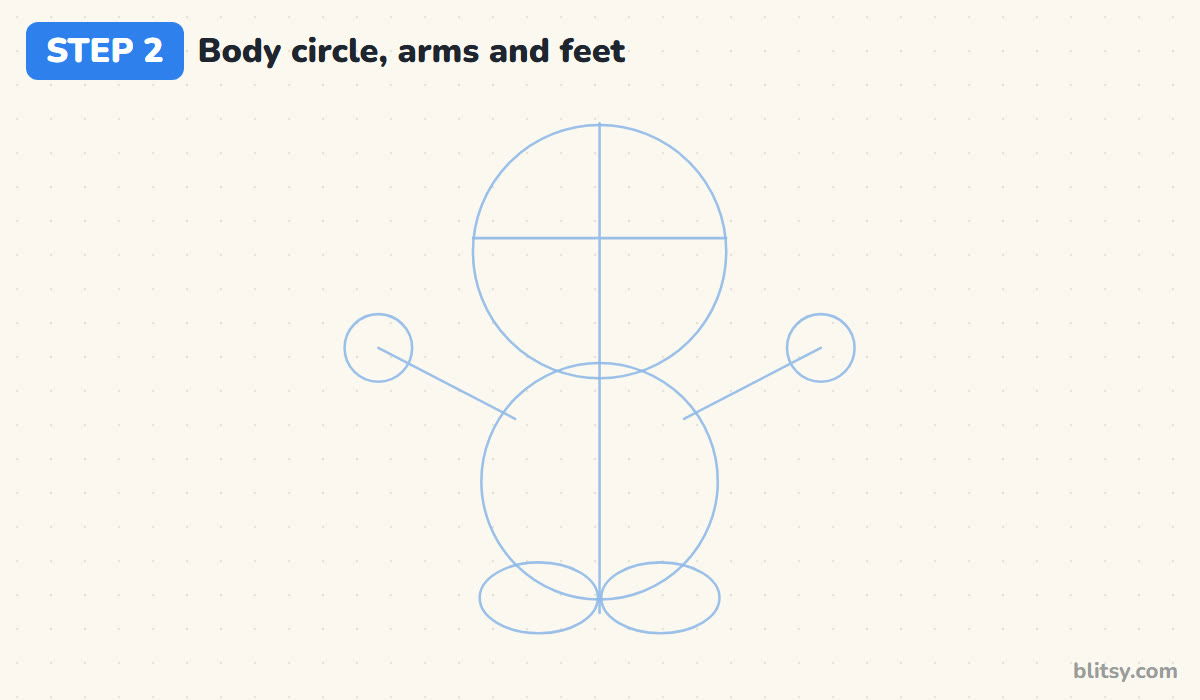
Below the head, draw a second circle about the same size, overlapping the head a little. From each side of it, sketch a line slanting up and out, with a small circle at the end for the paw. Finish with two flat ovals under the body for the feet. I map the whole pose this early because a lopsided arm is easy to fix now.
💡 Tip: Check that both arm lines rise at the same angle. Cover one side with your hand and compare.
Step 3: Outline the round head and two ears
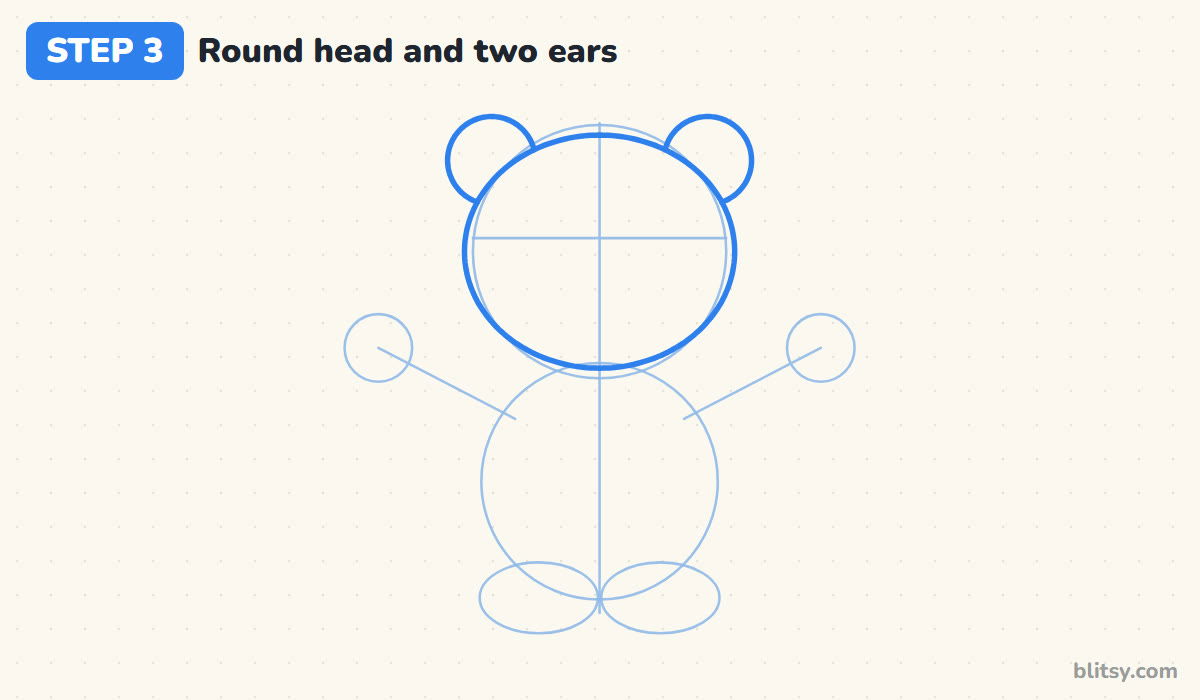
Go around the head circle with a firmer line, letting it stretch a touch wider than it is tall. Then add two round ears on the top corners. Only the outer part of each ear shows, so stop the ear line where it touches the head.




💡 Tip: Make both ears the same size before you move on. Mismatched ears make the head look tilted.
Step 4: Draw the curl of fur and the inner ears
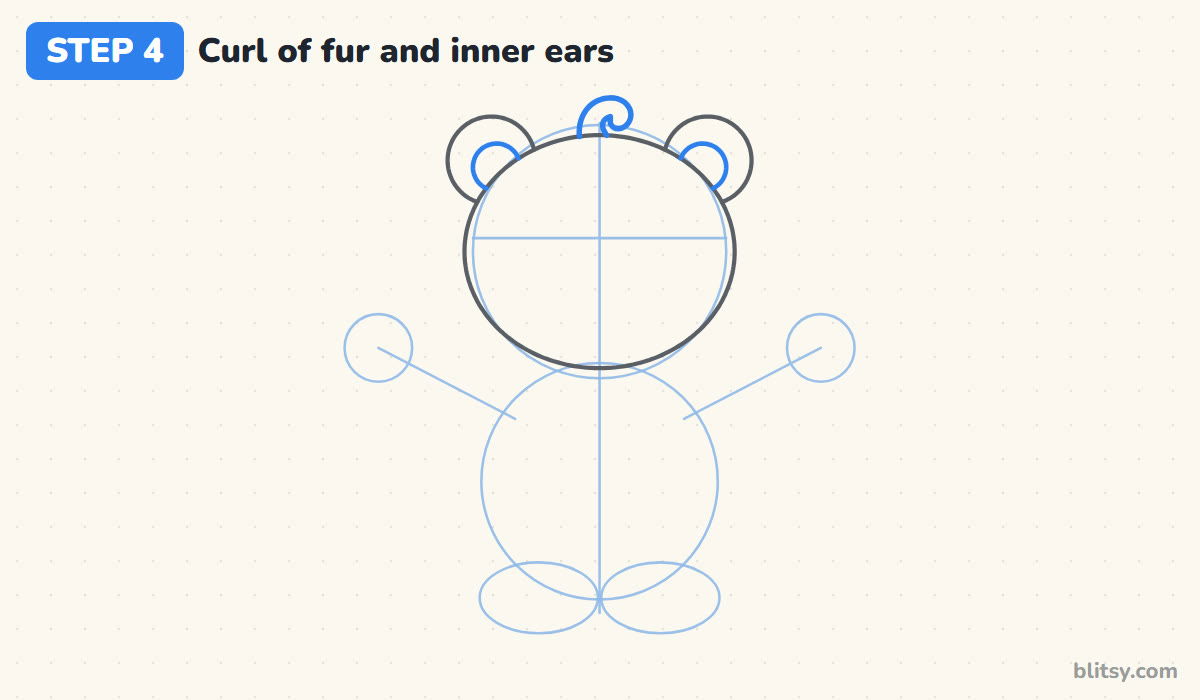
Right on top of the head, in the middle, draw a small lock of fur that curls over to one side and ends in a tiny swirl. Inside each ear, draw a smaller circle nudged toward the face. That inner patch gets a darker pink later.
💡 Tip: Draw the curl in one slow, smooth motion. Two short strokes joined together tend to leave a bump.
Step 5: Shape the chubby pear body
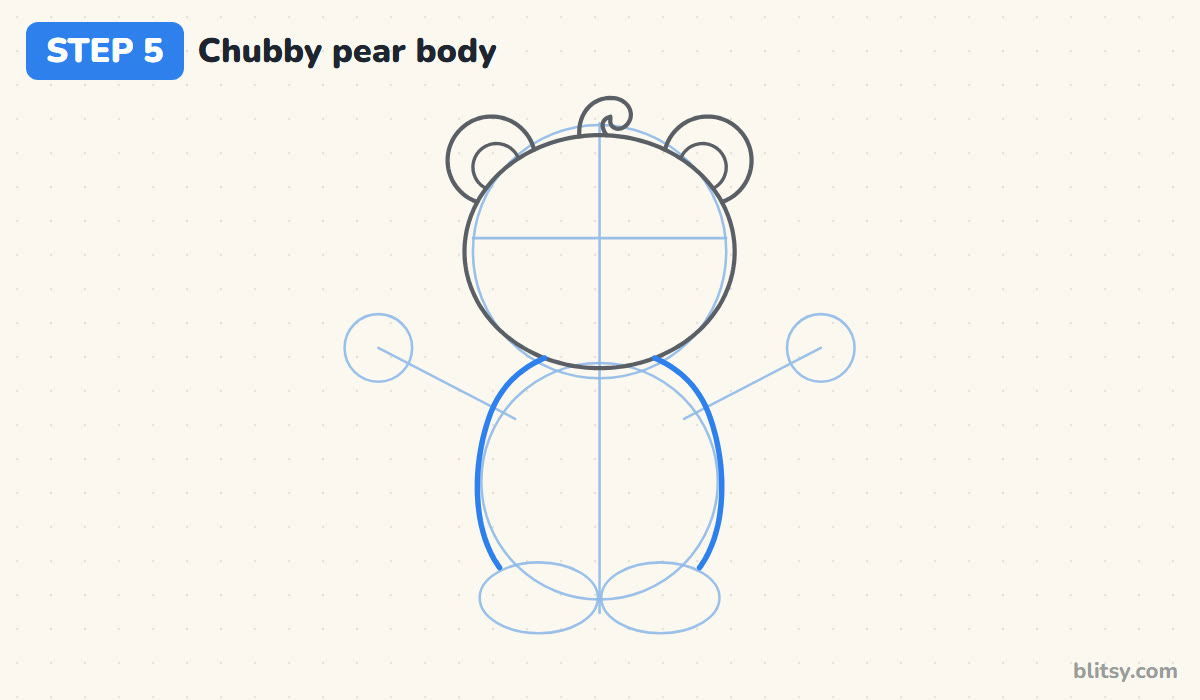
Trace over the body circle, but bulge the sides outward as you move down, so the bear gets wider toward the bottom like a pear. Don't draw any body line inside the head. Let the bottom of the body disappear behind where the feet will go.
💡 Tip: Keep the body a little narrower than the head. That big-head look is what reads as cuddly.
Step 6: Draw the arms open for a hug
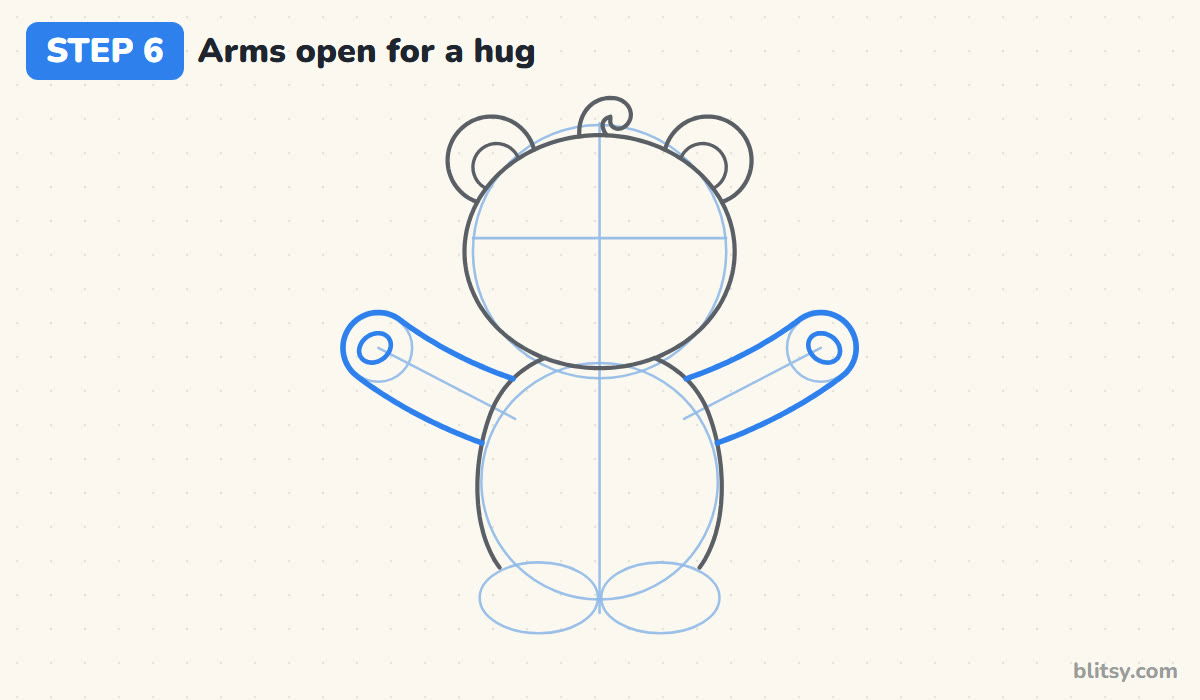
Turn each arm guide into a thick, soft tube that curves gently upward. End it with a round paw shaped like a mitten. The arms start behind the body, so their lines stop where they meet its side. Then put a small oval pad on each paw.
💡 Tip: Keep both arms as thick as the paw circle all the way along. Arms that thin out look like noodles.
Step 7: Add the feet and their heart pads
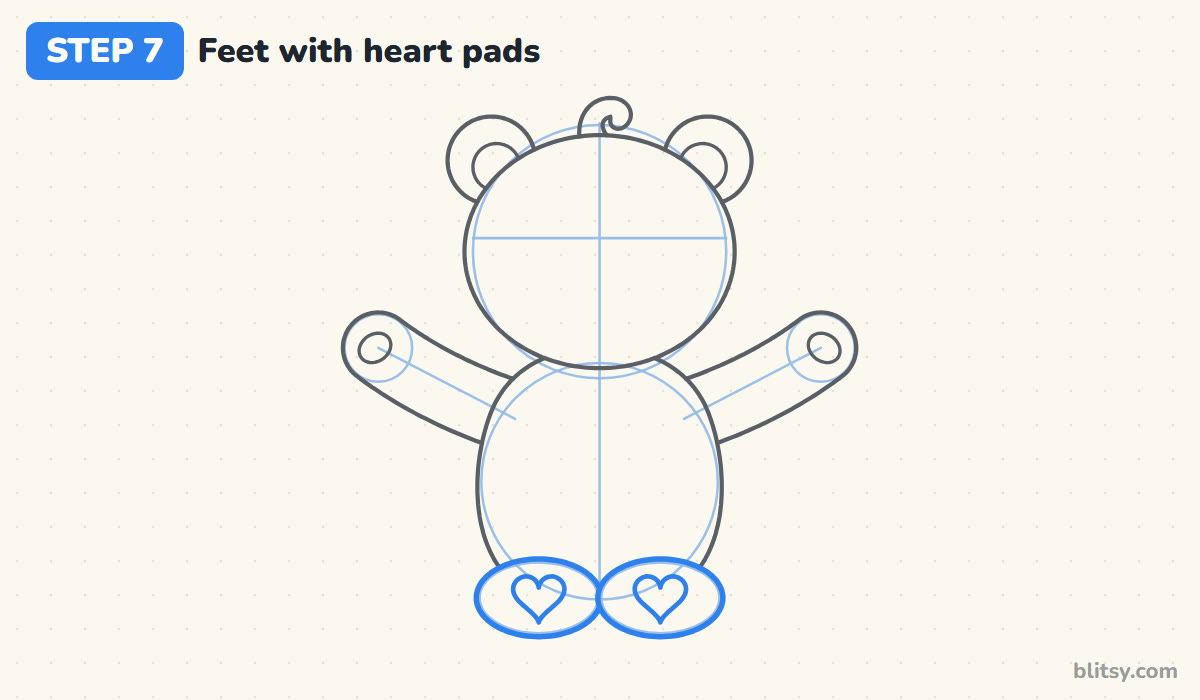
Draw a wide oval over each foot guide, letting the two feet touch in the middle. In the center of each foot, draw a heart for the paw pad. The heart pads are my own small touch; they echo the heart nose and make the bear look sweeter than a plain teddy.




💡 Tip: Keep the hearts in the middle of each foot with some pink around them, so they don't crowd the outline.
Step 8: Draw the muzzle and heart-shaped nose
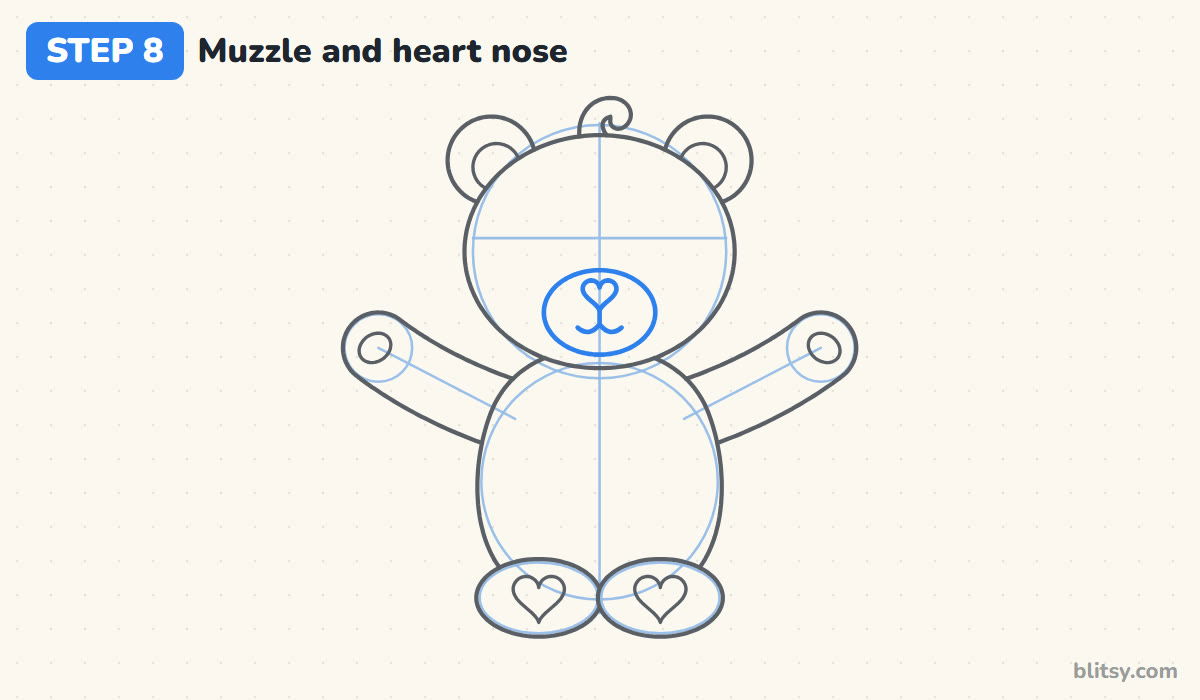
Below the eye line, draw a wide oval for the muzzle so its bottom sits just above the chin. At the top of the muzzle, add a small heart for the nose. From the point of the heart, draw a short line down, then two little curves out to the sides for the smile.
💡 Tip: Leave a little gap between the nose and the top of the muzzle so the two lines don't merge.
Step 9: Place the big friendly eyes
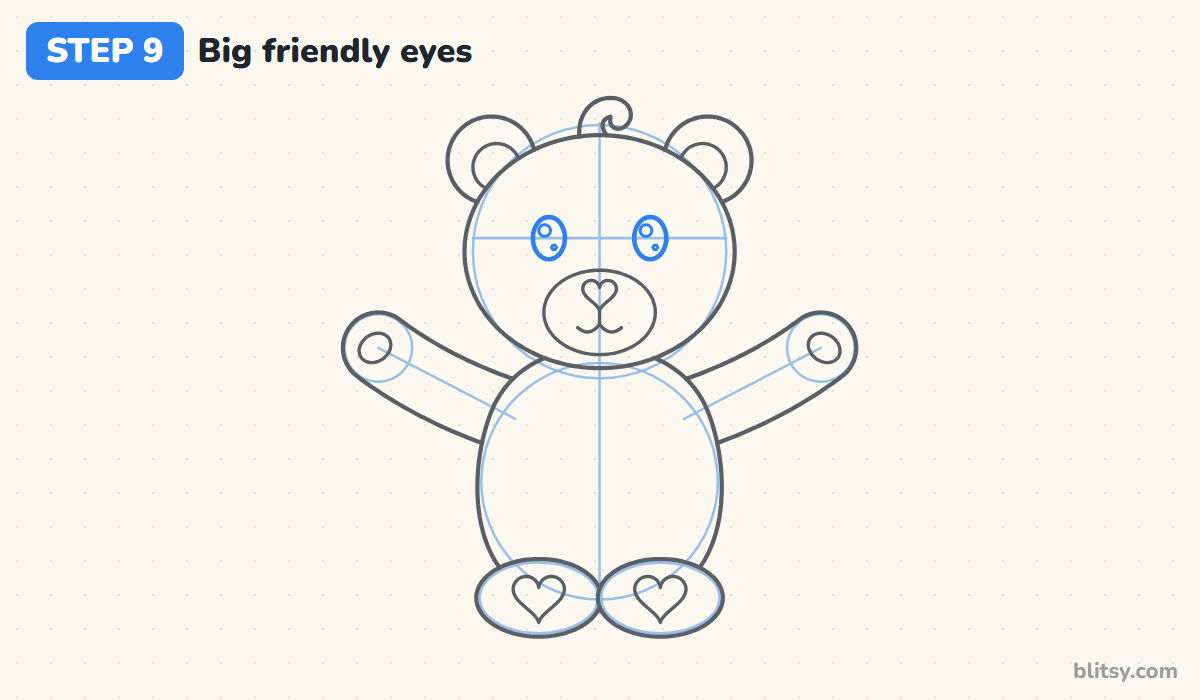
Draw two tall ovals sitting on the cross line, spaced about one eye's width from the muzzle on each side. Inside each one, add a small circle near the top and a tiny dot lower down. Those shine spots stay white, and they're what makes the eyes look friendly and awake.
💡 Tip: Put both shine circles on the same side of each eye. If they don't match, the bear looks cross-eyed.
Step 10: Draw the tummy patch and rainbow badge
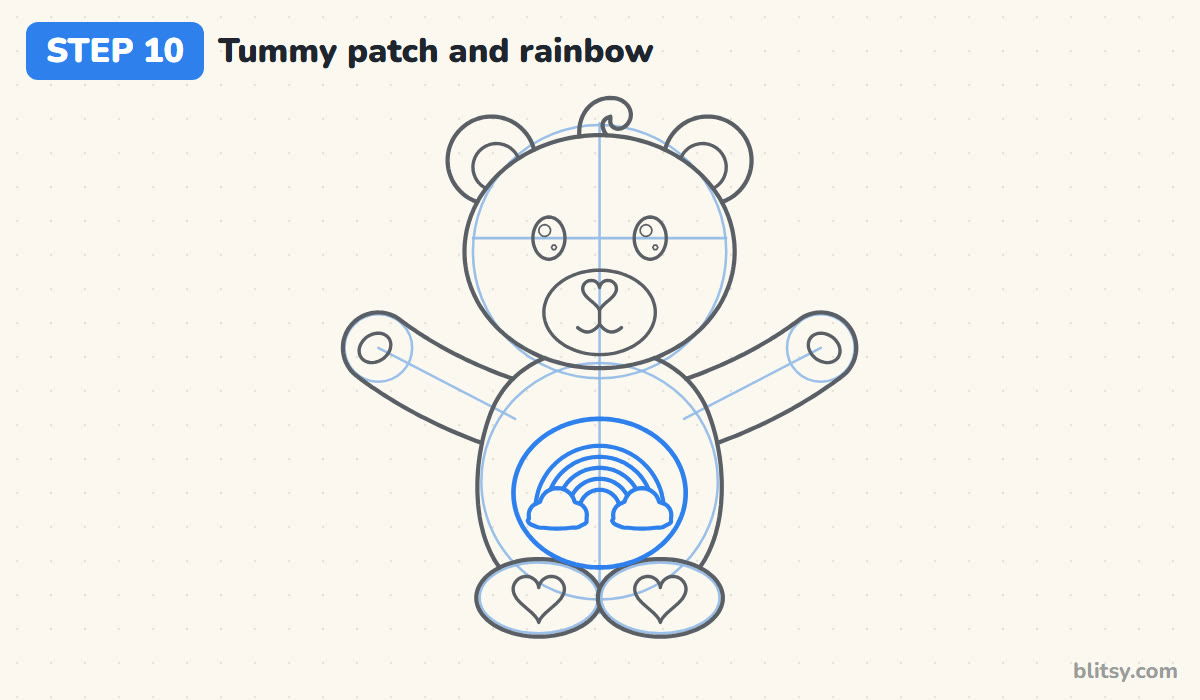
In the middle of the body, draw a large oval for the tummy patch. Inside it, draw a rainbow as five curved lines stacked like a bridge, then add a fluffy cloud over each end so the stripes seem to rise out of them. I often see this badge drawn too small. Let the rainbow fill most of the patch so it still reads from across the room.
💡 Tip: Draw the outer arc first, then space the inner arcs evenly toward the middle.
Step 11: Ink the outline and erase the guides
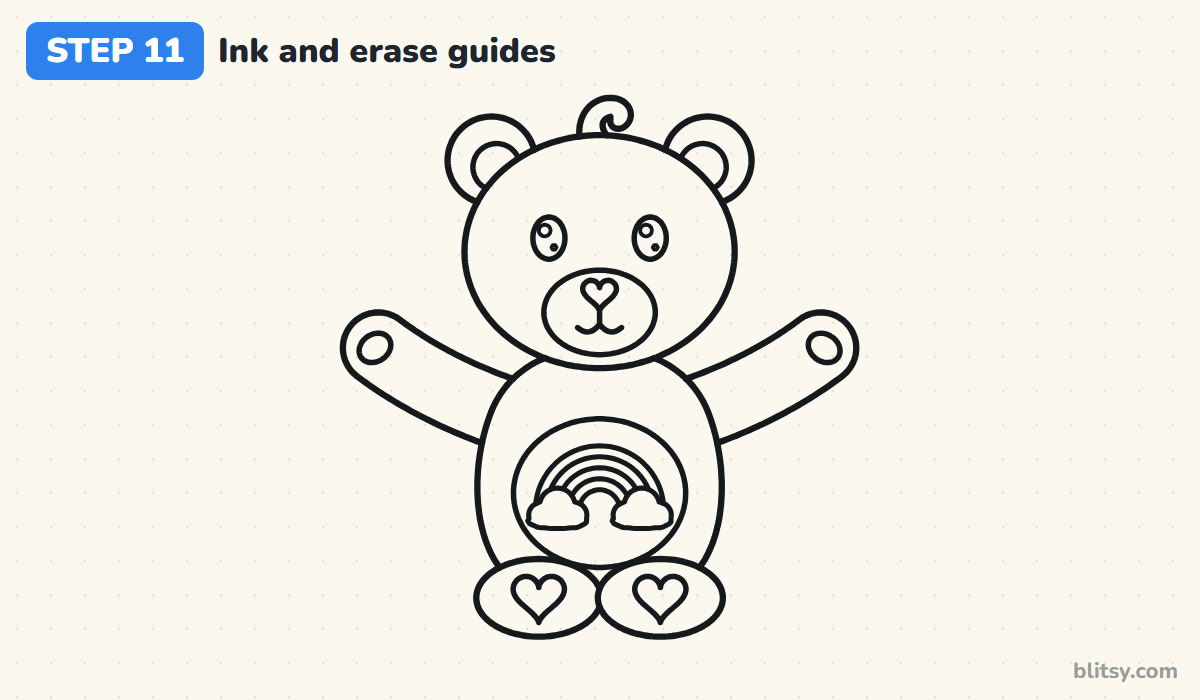
Go over every keeper line with the black marker. I slow down on the rainbow and hearts; small curves show every wobble. Once the ink is dry, rub out all the guide circles and the center line.



💡 Tip: Give the ink a full minute before erasing. Wet ink smears into gray streaks.
Step 12: Color your Care Bear
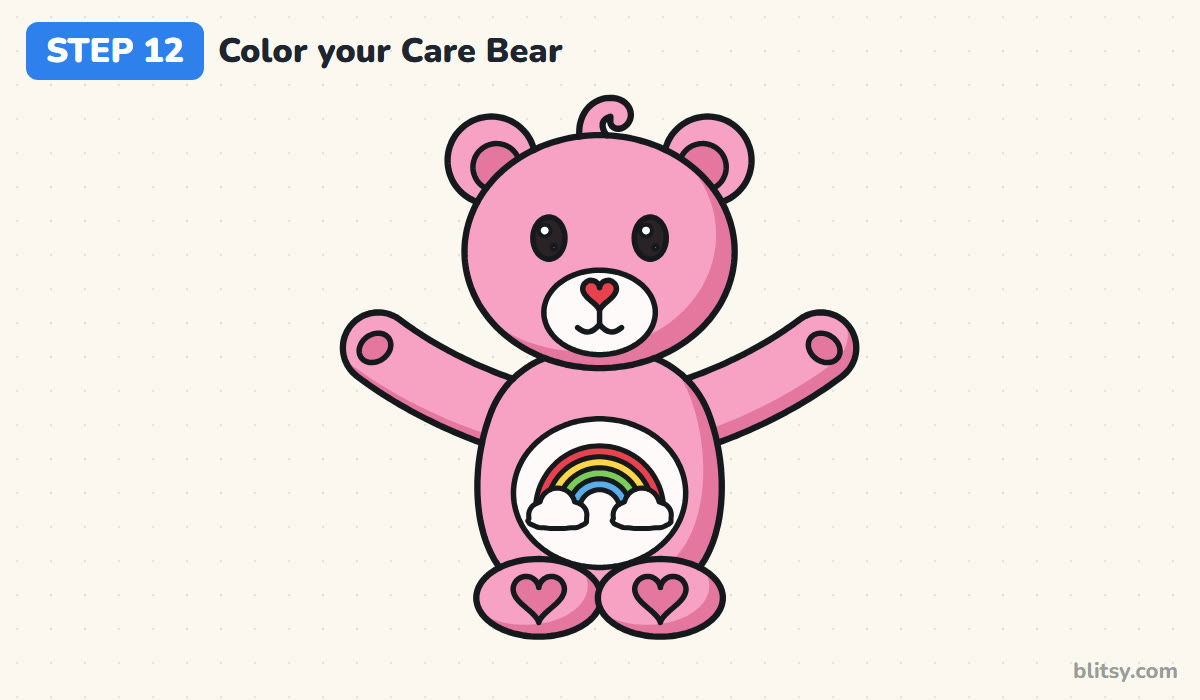
Color the fur pink, then shade the right edge of every part with dark pink. Use the same dark pink on the inner ears and paw pads. Leave the tummy patch, the muzzle and the clouds white. From the top, the rainbow stripes are red, yellow, green, then blue. The nose is red, and the eyes are black with white shine spots.
💡 Tip: Color the big pink areas in small circles instead of back-and-forth lines. The fur looks softer and more even.
Where a Care Bear Sketch Tends to Slip
- A head that's too small. With a small head, the drawing looks like an ordinary bear. Keep the head at least as wide as the body.
- A tiny belly badge. A small symbol gets lost on the tummy. Make the white patch big and let the picture fill most of it.
- Ears drawn as full circles. The ears sit behind the head, so their lines should stop where they meet the head outline.
- Thin, stiff arms. Thin arms make the hug look awkward. Draw them thick and slightly curved, with round mitten paws.
- Pressing hard on the guides. Dark guide lines leave ghost marks after erasing. I sketch mine so lightly I can barely see them.
Swap the Belly Badge, Change the Bear
The tummy picture is where this drawing really becomes yours. Each Care Bear has its own symbol, known as a belly badge, and every bear's badge is different. Try a smiling sun on a yellow bear, a single big heart on a red one, or a crescent moon and a star on a blue bear. The Care Bears started out as greeting-card art in the early 1980s, so a little card with your bear on the front makes a sweet gift. If you'd like a more realistic animal, try the easy bear drawing tutorial, and how to draw a heart is good practice for noses and paw pads.
Free Care Bear Coloring Page and PDF Steps
Print the free Care Bear coloring page for a calm afternoon. A small colored example at the top shows where each color goes, and the large outline below has thick lines that are easy to stay inside. The step-by-step guide PDF puts all 12 steps and tips on a few pages, two steps per page, and it prints well on Letter or A4.
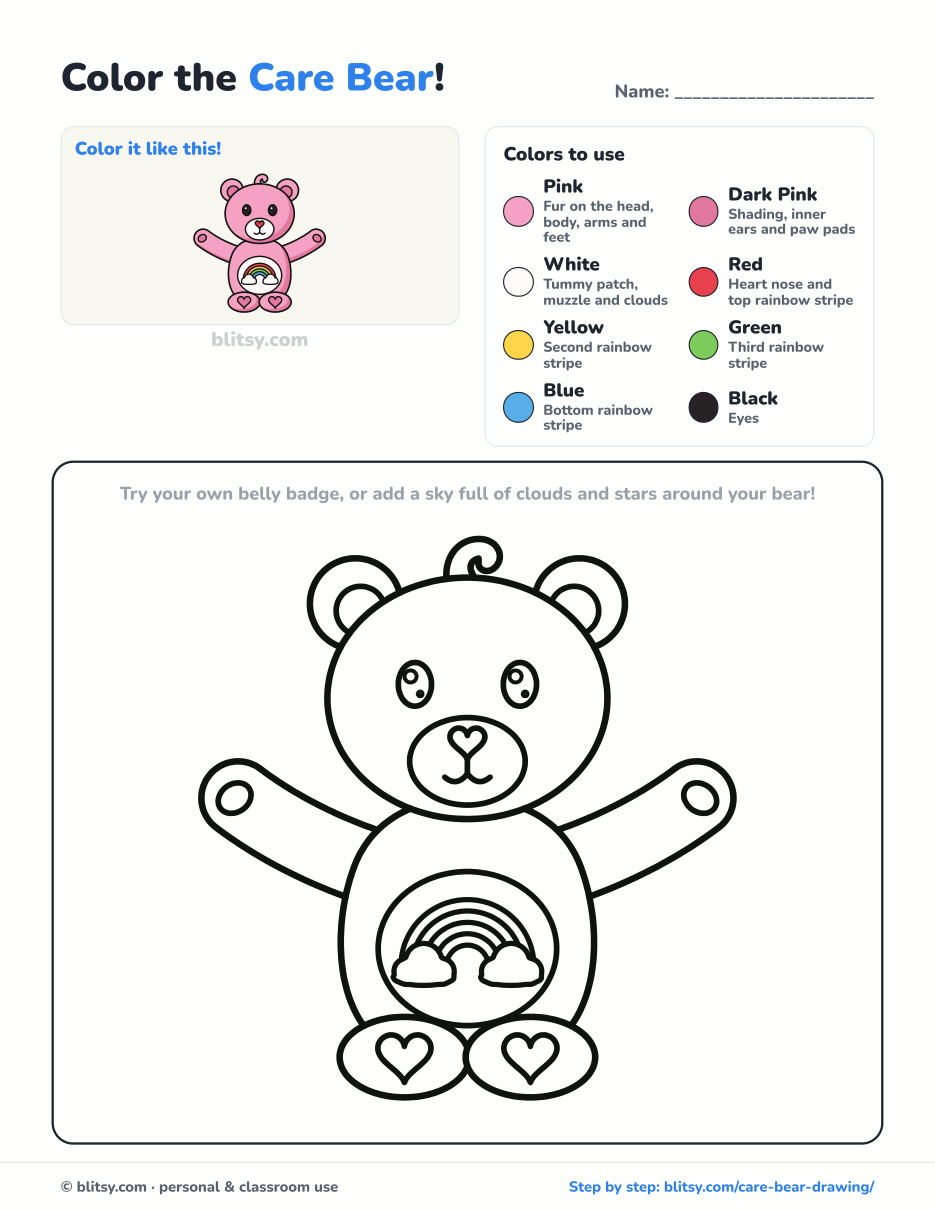
Black outlines with a colored example and the color names at the top. Ready to print and color.
⬇️ Download Coloring PageEvery step picture with its instructions and tips, to keep beside your paper while you draw.
⬇️ Download Drawing Guide📱 On a phone? Tap a download button, then open the file and choose Share → Save to Files or Print. On a computer, the PDF opens or saves straight to your Downloads folder.
Pin the Rainbow Bear for Later
Little Artists Ask: Care Bear Edition
How do you draw a Care Bear easily?
Start with a big circle for the head and a slightly smaller circle for the body, then add round ears, a heart nose, a white tummy patch and a symbol on the tummy.
What is the symbol on a Care Bear's tummy called?
It's called a belly badge. Each bear has its own badge, such as a rainbow, a sun or a heart, and it usually matches the bear's personality.
Is this Care Bear drawing good for young kids?
Yes. Kids around 5 or 6 can do it with a little help on the rainbow. They can also skip the rainbow and draw one big heart on the tummy instead.
How long does it take to draw a Care Bear?
Most people need about 20 minutes for the pencil sketch and ink, plus another 10 to 15 minutes to color it in.
Grab a fresh sheet, pick a badge of your own and see which bear turns up next. 🌈
Related posts:
 How to Draw Ariana Grande Step by Step (Cute Chibi Fan Art)
 How to Draw the Fortnite Llama Step by Step (Easy Fan Art)
 How to Draw Cute Animals Step by Step (Cat, Bear & Bunny)
 How to Draw a Bear Step by Step (Easy for Beginners)
 How to Draw a Polar Bear Step by Step (Easy for Beginners)
 How to Draw a Tooth Step by Step (Cute and Easy for Kids)
 How to Draw Springtrap Step by Step (Cute Chibi for Kids)
 Halloween Drawing Step by Step (Cute Haunted House for Kids)
 How to Do Chalk Art Step by Step (Hopscotch and Rainbow)
 How to Draw a UFO Step by Step (Cute Alien Saucer)
 How to Draw an Astronaut Step by Step (Cute and Easy)
 How to Draw Cerberus Step by Step (Cute and Easy)

