
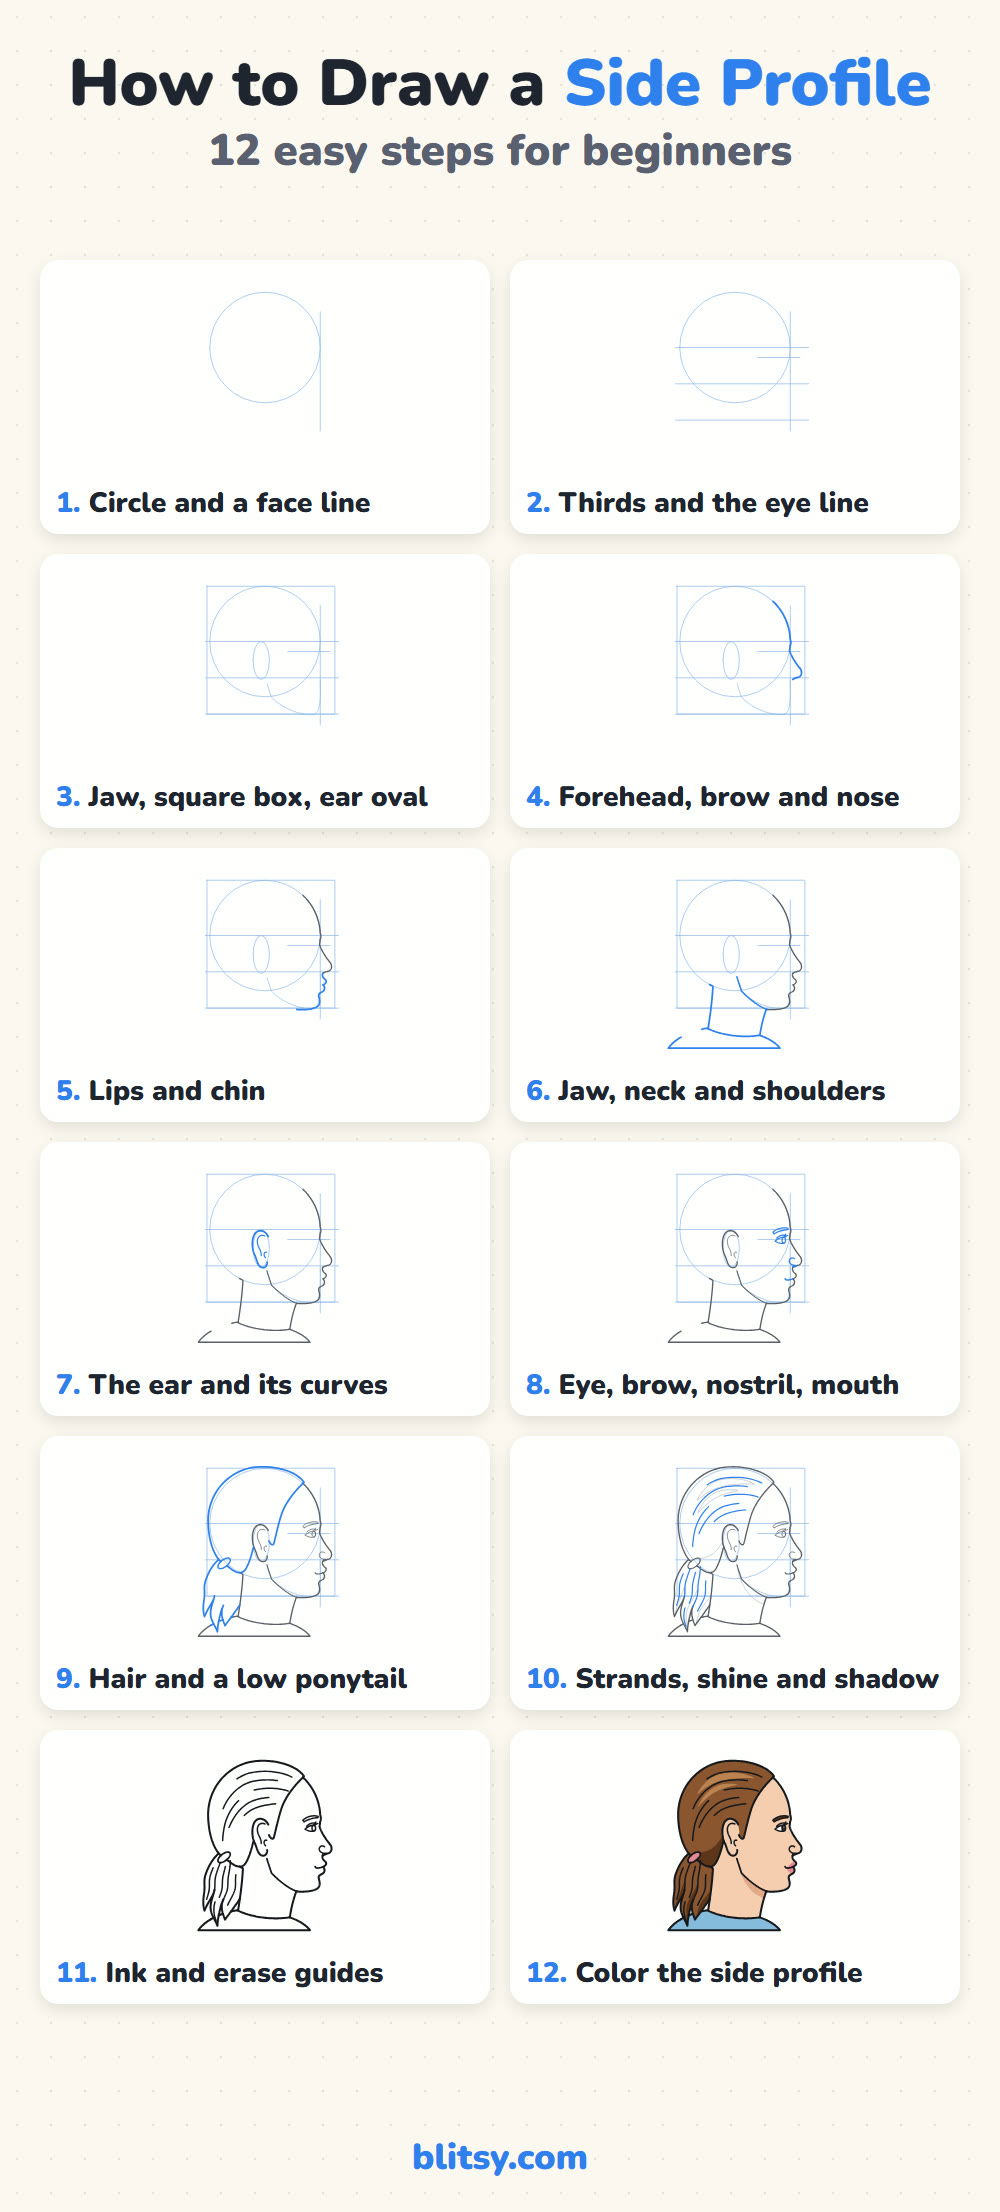
A side view looks easy, just one wiggly line, yet that line is where most beginners get stuck. The nose grows too big, the chin slides back, and the ear lands near the cheek. In this lesson on how to draw a side profile step by step, I place everything with a circle, a few level lines and a square box before the real outline goes down. You'll finish with a young woman facing right, her hair pulled back into a low ponytail.
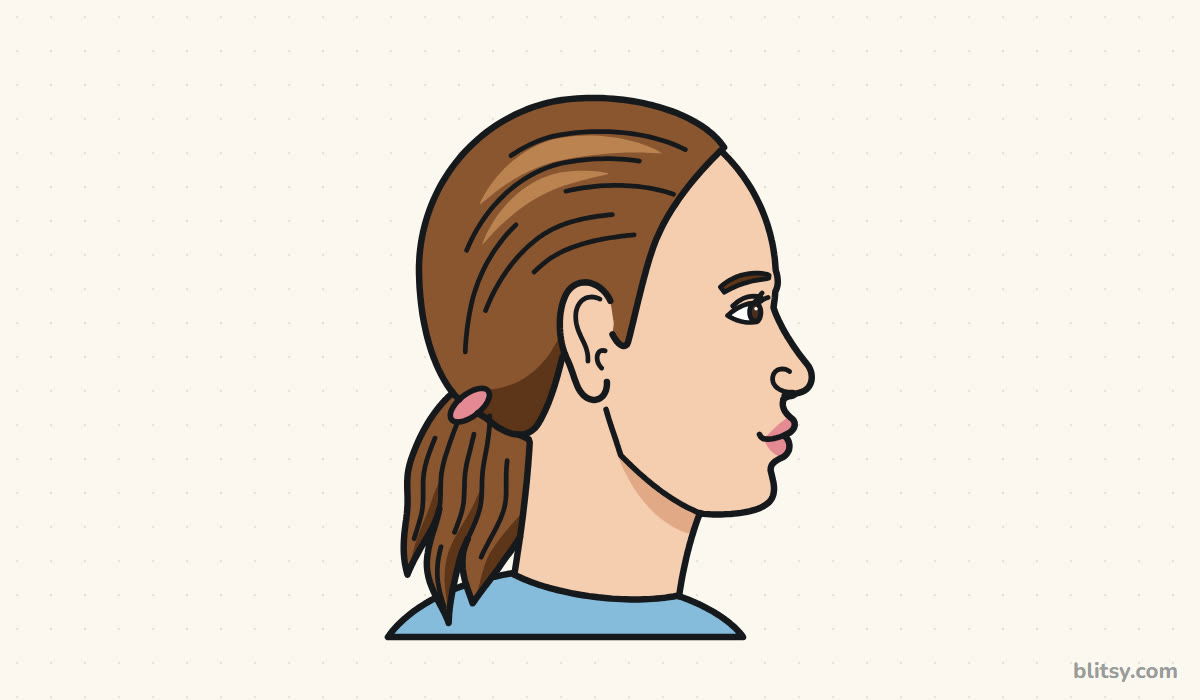
Every image adds one stage. Look for the blue strokes, which are the new ones; gray lines are from earlier steps, and the pale blue measuring lines get erased near the end.
Quick overview
⏱️ Time: about 30 minutes, plus 10 to 15 for coloring
🎯 Level: easy to medium, good for ages 10 and up
✏️ Steps: 12
👤 You'll draw: a young woman's head and shoulders in side view, facing right
Supplies for Measuring Out a Profile
- An HB pencil for the light measuring lines
- A kneaded or soft eraser
- A black fineliner or felt-tip pen
- A ruler for the guide lines (optional)
- Colored pencils in peach, pink, three browns and light blue
- Plain white paper
Any skin and hair colors work; the method stays the same.
How to Draw a Side Profile Step by Step
Step 1: Draw a circle and a straight face line
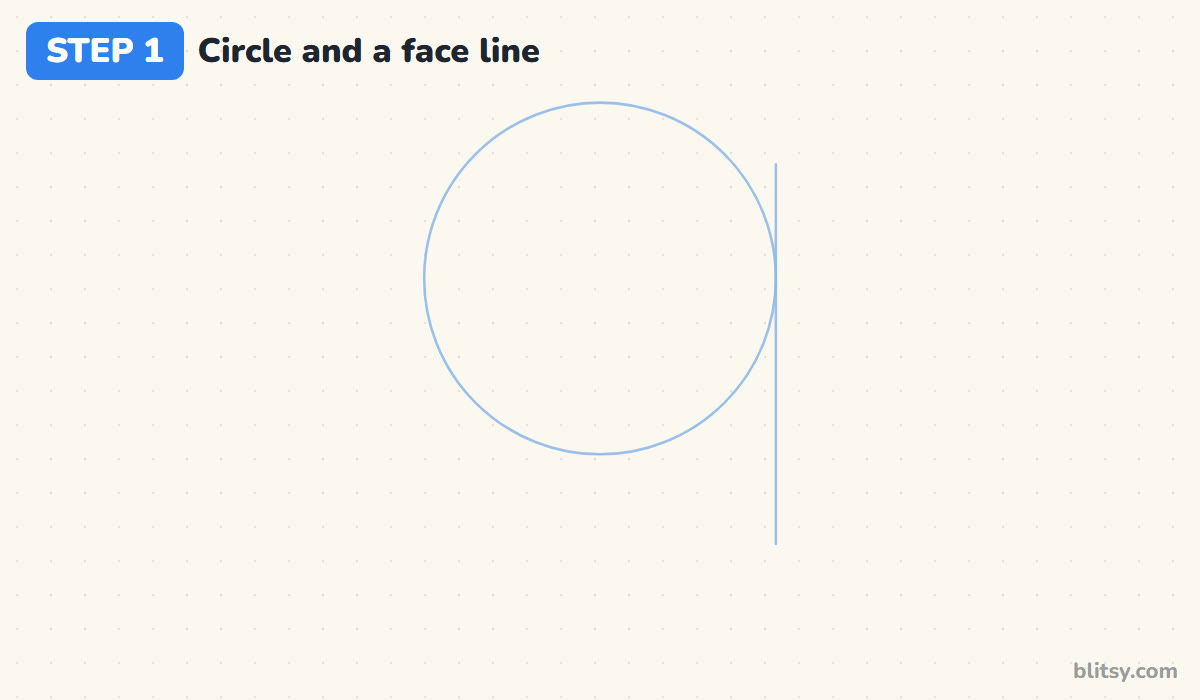
Lightly draw a circle a little left of the middle of your page. It stands for the round back part of the skull, and its top is the top of the head. Then drop a vertical line that just touches the right edge of the circle and runs well below it.
💡 Tip: Trace around a roll of tape if your circles come out lumpy.
Step 2: Add the thirds and the eye line
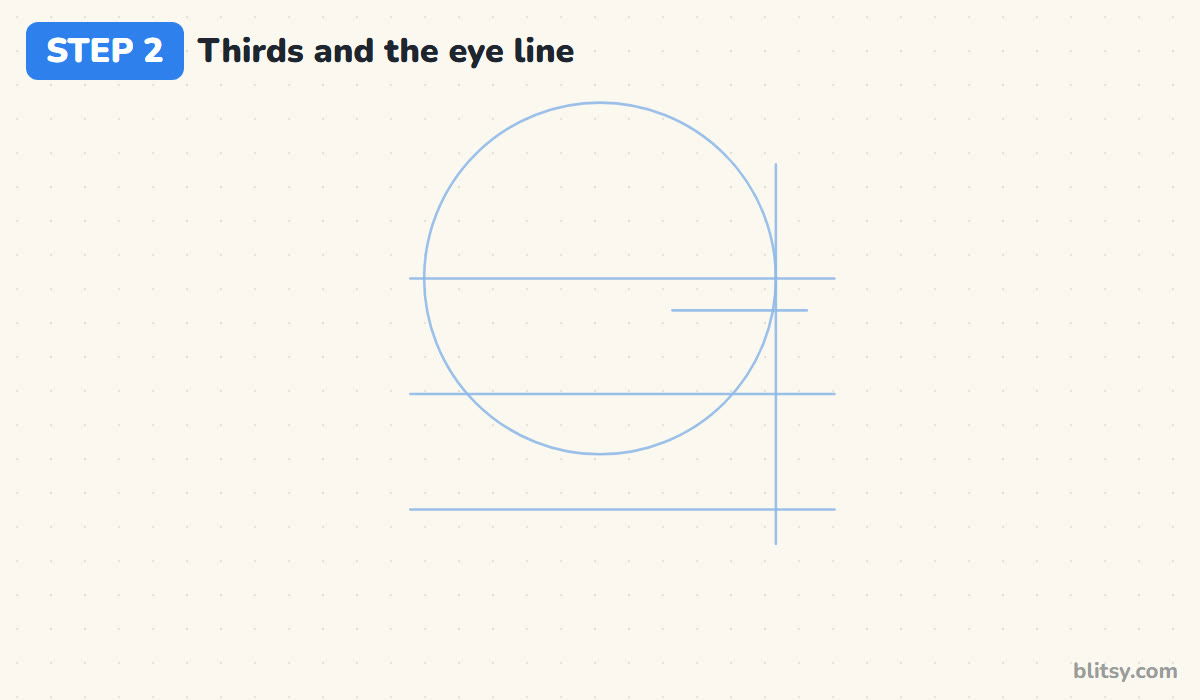
Draw a level brow line through the middle of the circle. Mark the hairline where the front of the circle starts curving back, a third of the way down from the top. That gap, hairline to brow, is one third of the face: copy it down once for the nose line and again for the chin line. Then add a short eye line halfway between the top of the head and the chin.
💡 Tip: Hold your pencil against the paper to measure the first gap, then slide it down to copy it.
Step 3: Sketch the jaw, a square box and the ear oval
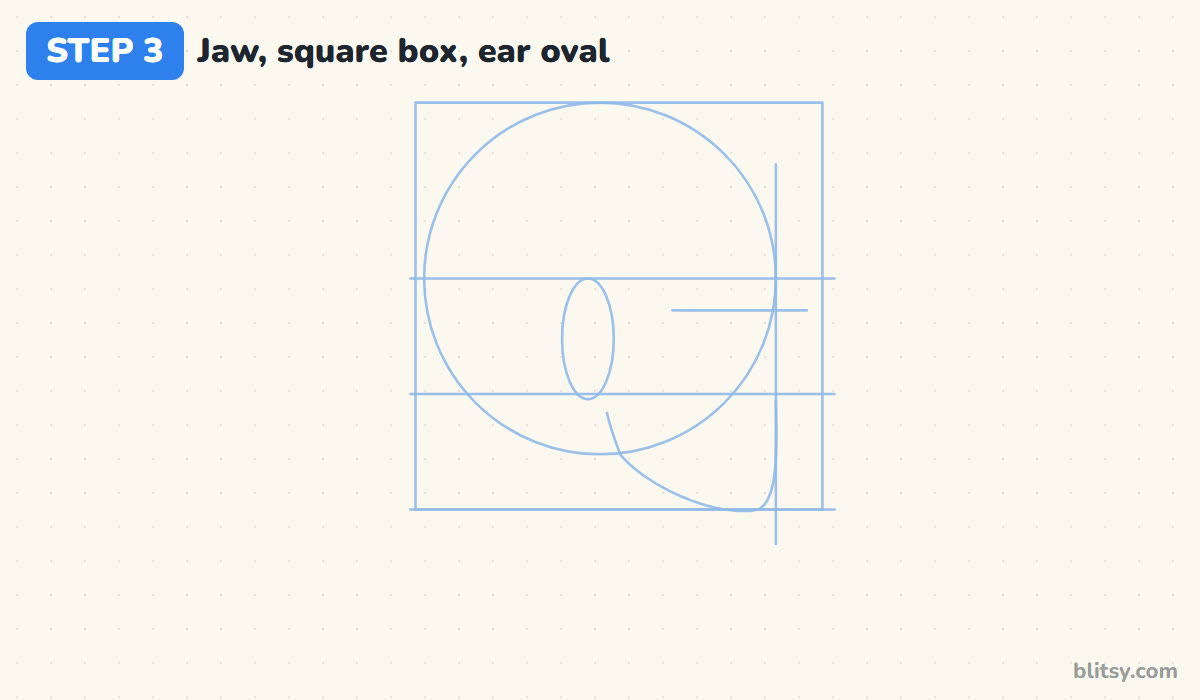
Hang a rough jaw from the circle: down the face line to the chin, then back to a corner below the ear. Then box the head in a square from the top of the circle to the chin. A head in side view is about as deep as it is tall, so the skull and nose should both reach the box. I add the ear as a tall oval just behind the middle of the box, between the brow and nose lines.



💡 Tip: The ear sits further back than most people expect. If yours is near the cheek, slide it back.
Step 4: Draw the forehead, brow and nose
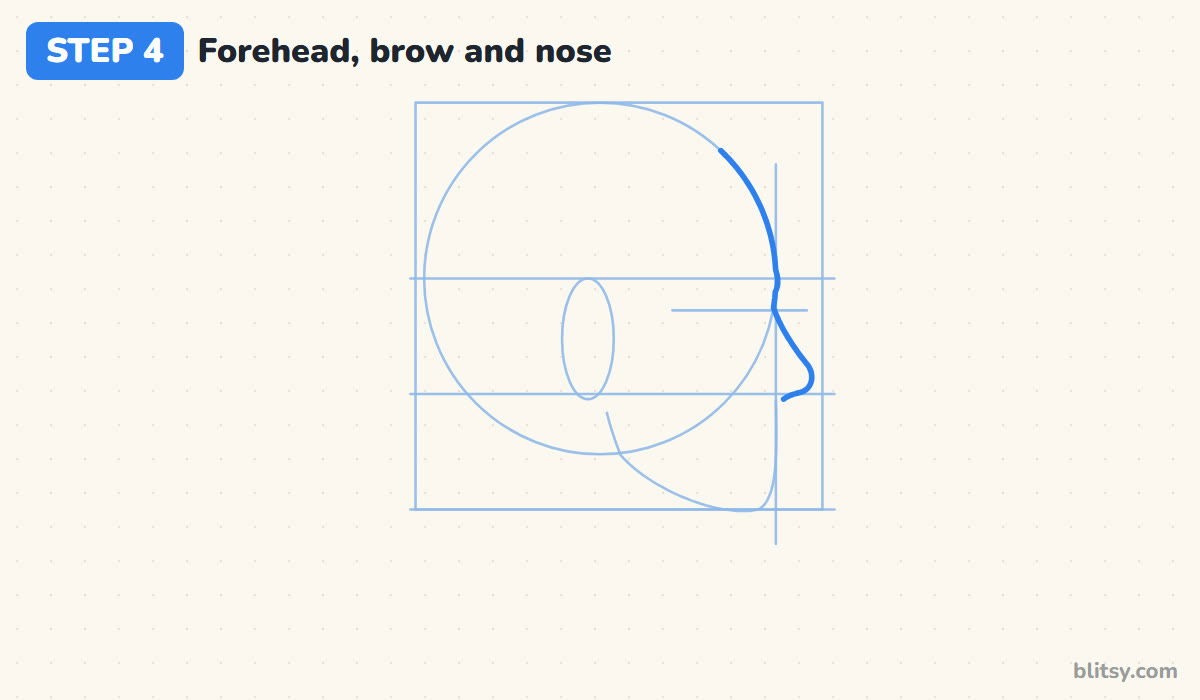
Now the real profile begins. Follow the circle from the hairline down to the brow line, where the brow sticks out a tiny bit. Dip in where the nose starts, then slope the bridge forward to a rounded tip just above the nose line. Curve under the tip and back.
💡 Tip: Keep the tip of the nose rounded. A sharp point turns a friendly face into a cartoon witch.
Step 5: Shape the lips and the chin
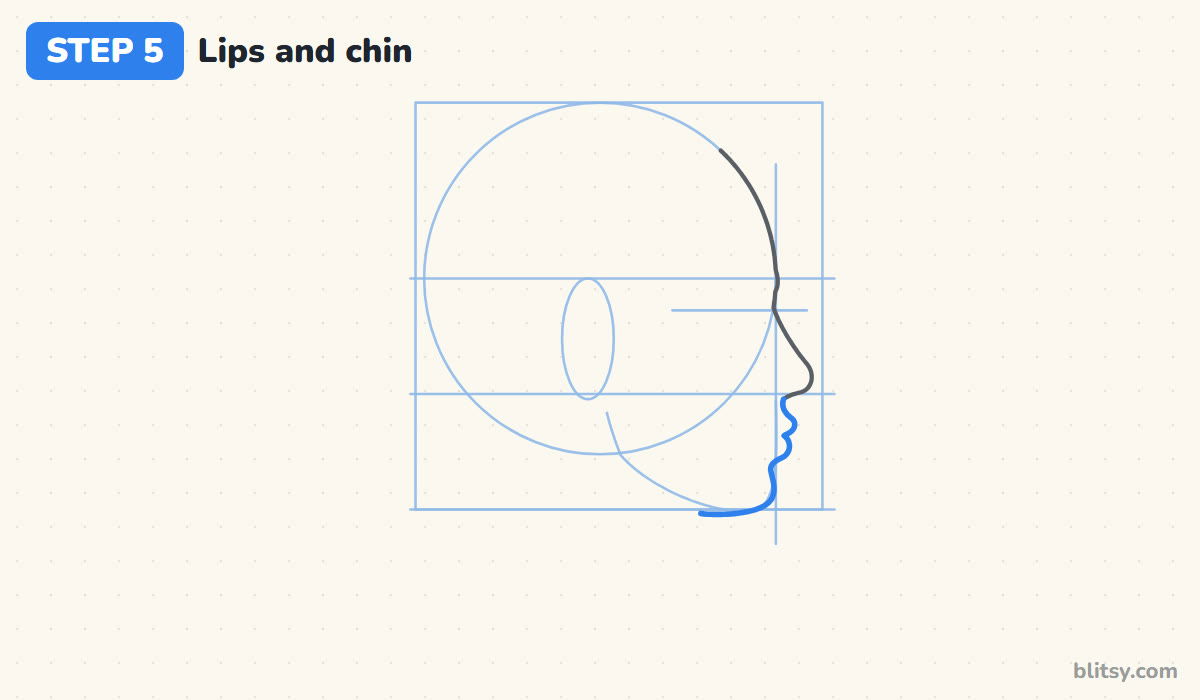
From under the nose, curve inward for the small groove above the mouth. Bump out for the upper lip, tuck in, then make a slightly smaller bump for the lower lip. My upper lip always sticks out a little further, because that's how most mouths look from the side. Curve in again, round a short chin out to the face line, then draw the under-chin line back to where the throat starts.
💡 Tip: Think of nose, upper lip and lower lip as three bumps that get smaller as you go down.
Step 6: Draw the jaw curve and a leaning neck
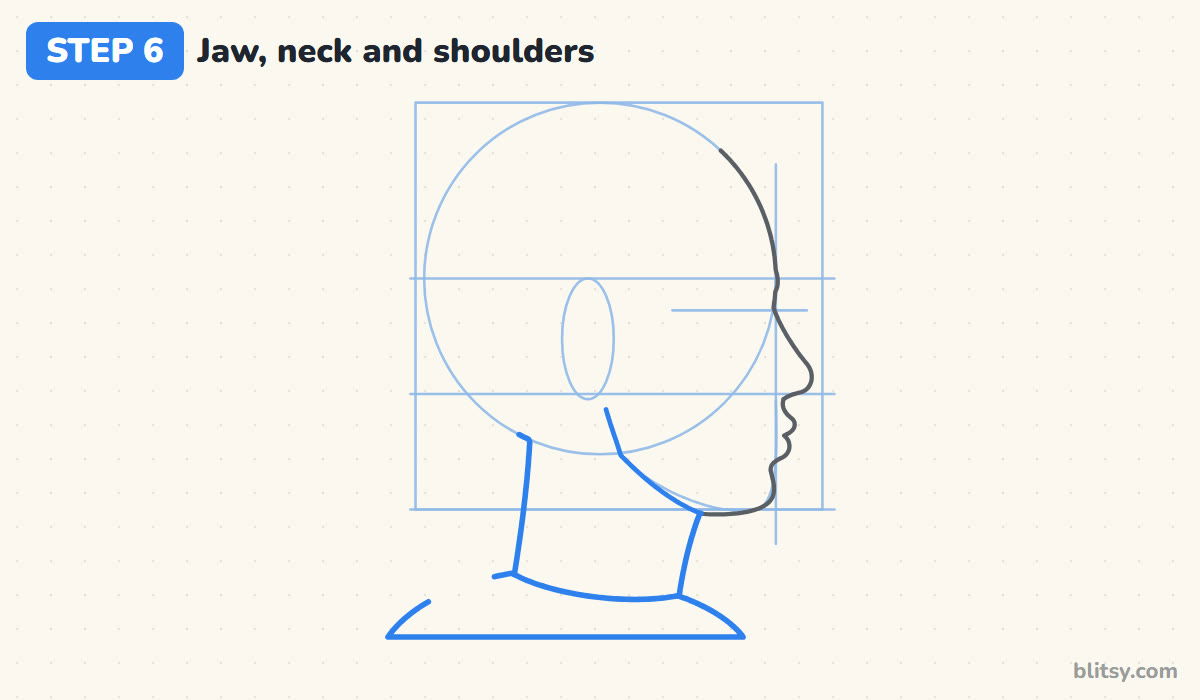
From the throat, run the jaw line back and up to a clear corner just below and in front of the ear, then up toward the earlobe. Drop the front neck line from the throat, and start the back line under the skull at the nape. Keep the neck clearly narrower than the head. Add a curved neckline and a rounded shoulder, leaving a gap behind the neck for the ponytail.
💡 Tip: Keep the chin short: about one mouth height below the lower lip is plenty.
Step 7: Draw the ear and its curves
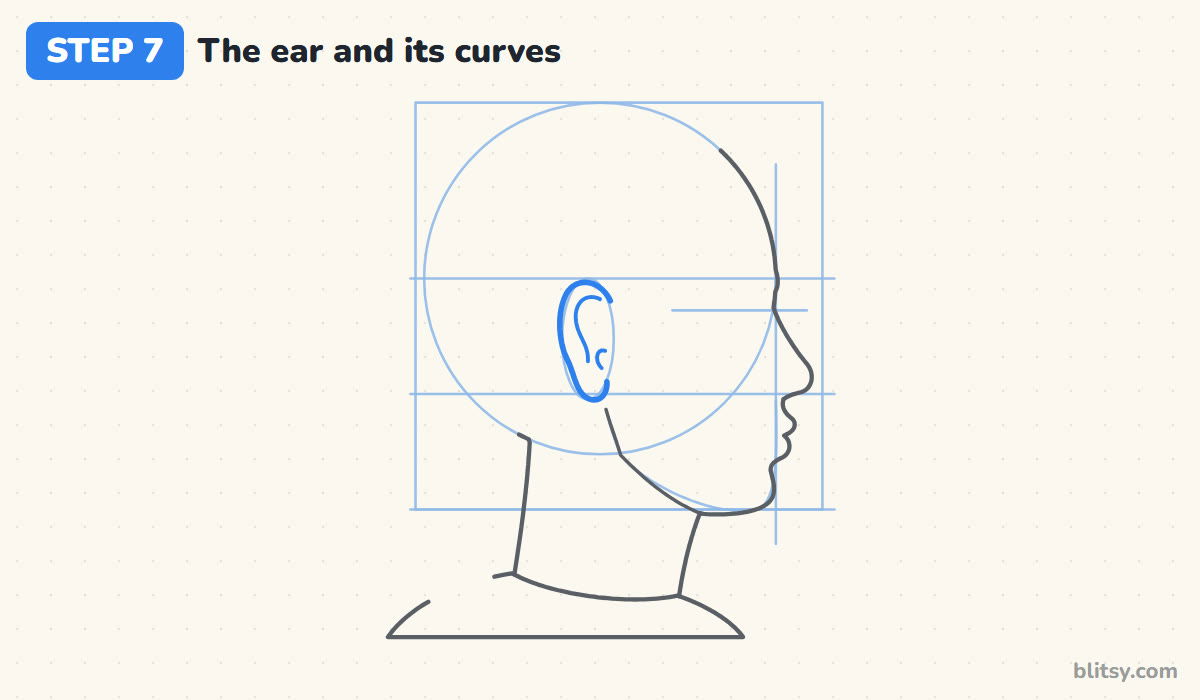
Use the oval as your guide. Draw a C-shape for the outer rim, wider at the top and narrowing to a soft earlobe. Inside, add a smaller curve that follows the rim and a little hook near the front for the opening. Extra folds only make a small ear look crumpled.




💡 Tip: The top of the ear lines up with the eyebrow, and the lobe with the bottom of the nose.
Step 8: Add the side-view eye and small details
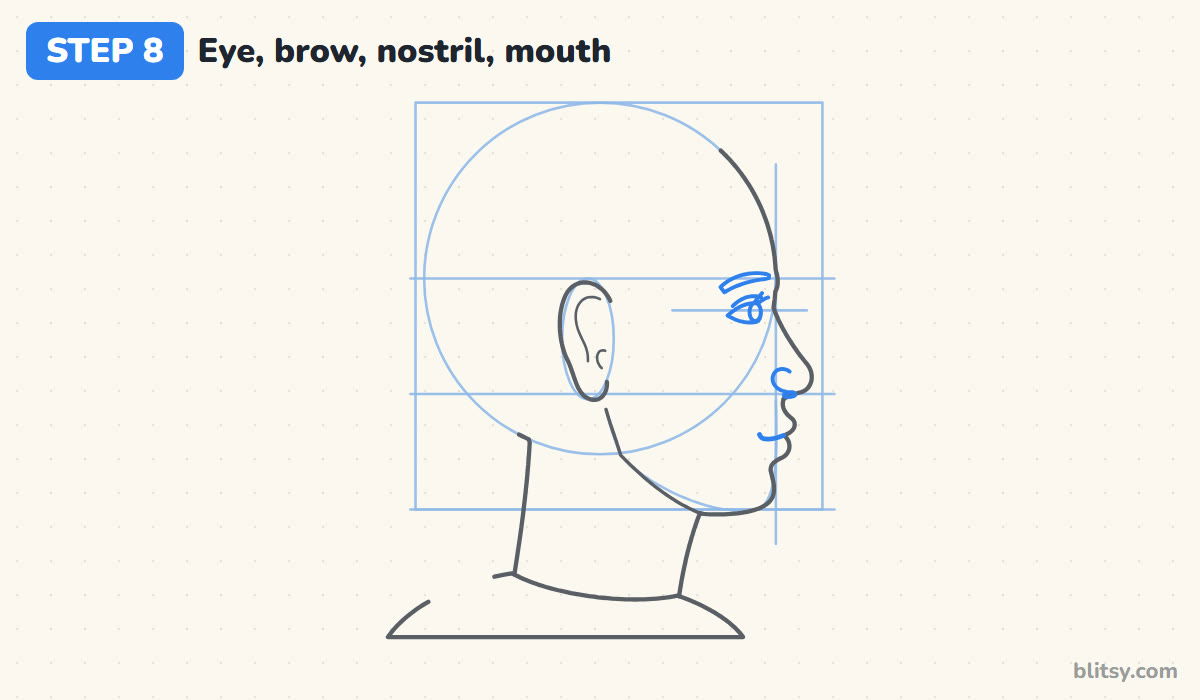
Set the eye back from the nose bridge, on the eye line. From the side it's a sideways V, pointed at the back and open at the front, with the iris as a narrow oval peeking out. Add a lid crease, two short lashes and the brow above. Finish with a small C for the nostril wing and a short mouth line running back from the lips.
💡 Tip: Leave a little skin between the eye and the outline. An eye touching the edge looks glued on.
Step 9: Draw the hair and a low ponytail
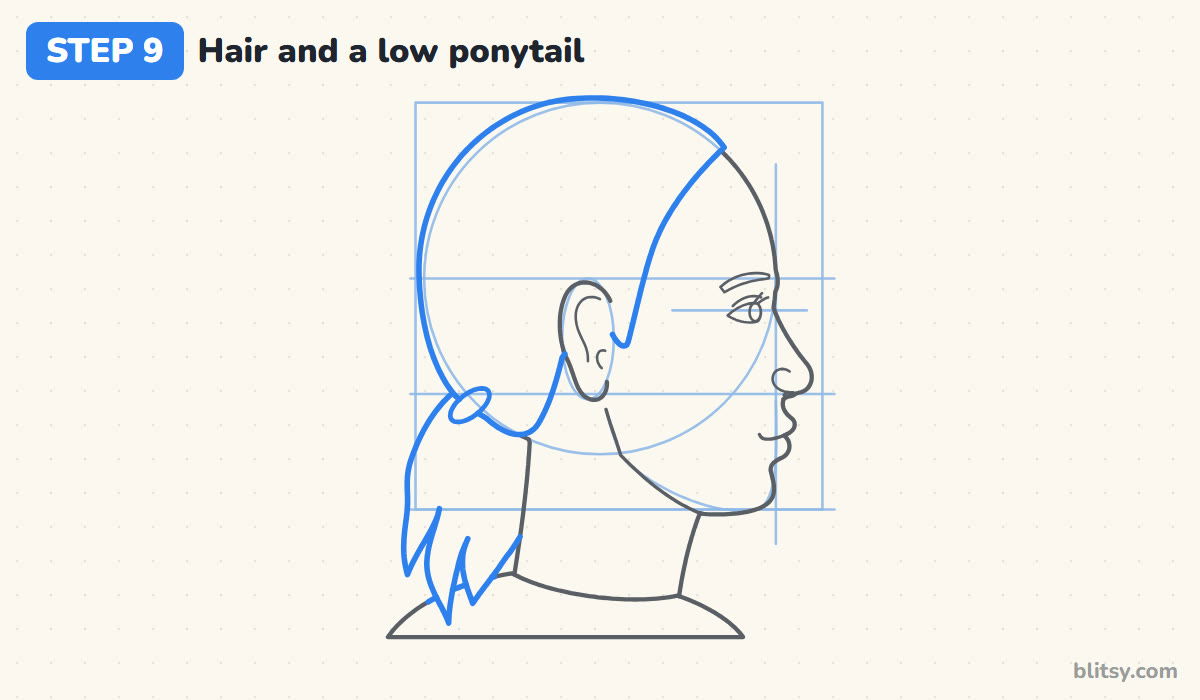
Draw the hair outline a little outside the circle, since hair has thickness. Start the hairline at the top of the forehead and curve it past the temple to a small sideburn in front of the ear. Behind the ear, bring the hair down to the nape. Add a hair tie, then let the ponytail hang in a few wavy locks with pointed ends.
💡 Tip: Draw the ear on top of the hair so it looks neatly tucked behind it.
Step 10: Add strands and map the shine and shadow
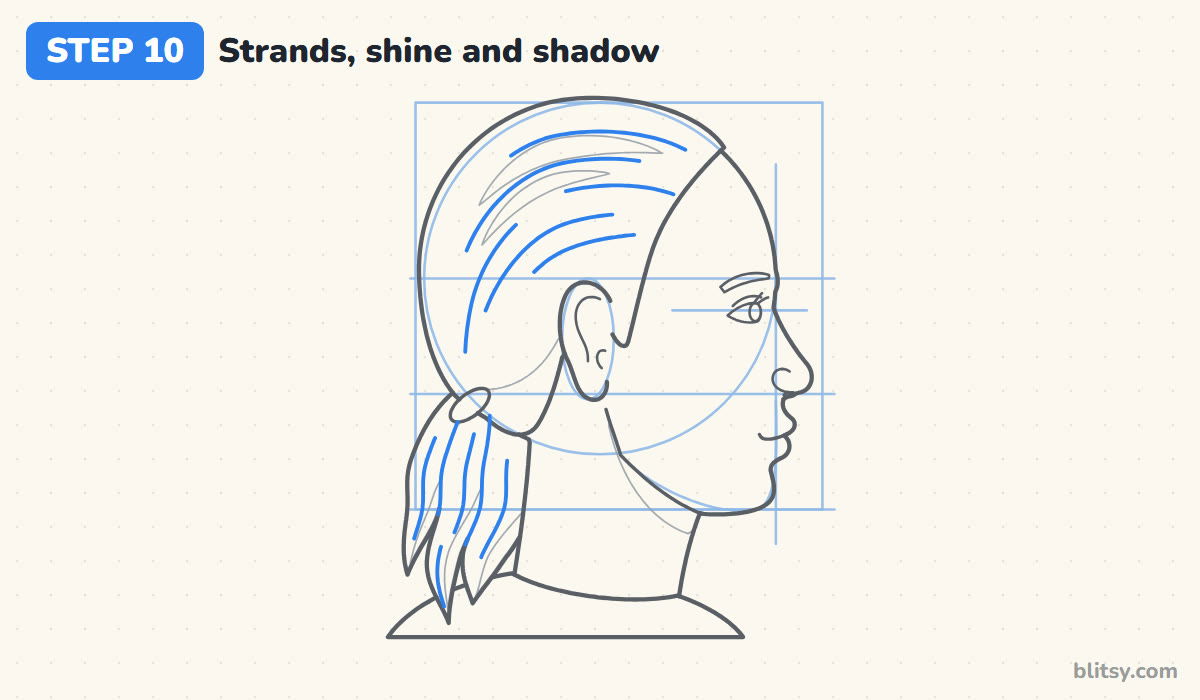
Sketch a few broken curves from the hairline sweeping back toward the tie. Split the ponytail with two clump lines. Then lightly outline where the color will change: two shine streaks on top of the head, a shadow band at the nape, and a shadow under the jaw.
💡 Tip: Every hair line should point toward the tie. Lines going sideways make the hair look messy.
Step 11: Ink the keeper lines and erase the guides
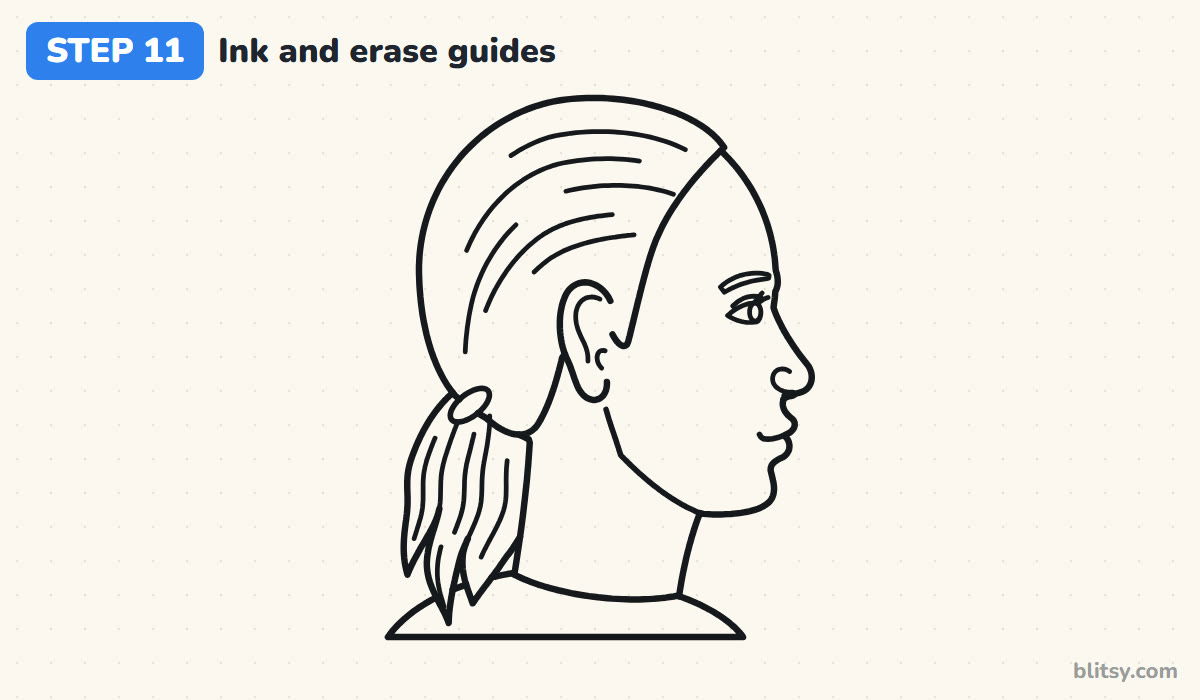
Go over every keeper line with your black pen. Skip the circle, the thirds, the box and the shading map; they only helped you measure. Let the ink dry, then erase all the pencil.



💡 Tip: Ink the profile slowly from top to bottom. Rushing causes wobbles around the lips.
Step 12: Color the side profile
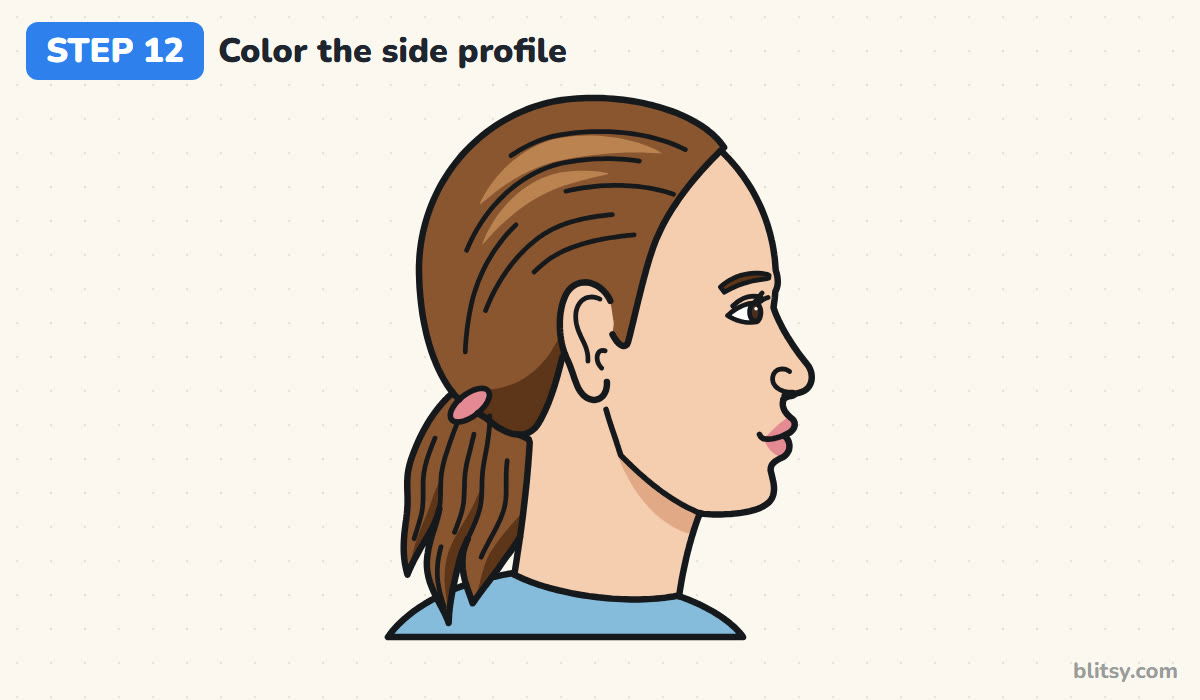
Fill the skin with peach and the shirt with light blue. Color the hair brown, stroking from the hairline toward the tie and down the ponytail. Add dark brown at the nape and along the ponytail, plus dark peach under the jaw. I finish with light brown shine streaks, pink lips and tie, and a dark brown eyebrow.
💡 Tip: Press lightly for the shadow under the jaw. It should whisper, not shout.
Where Side Profile Drawings Usually Slip
- A head that is too shallow. Check that the back of the skull and the nose both reach the box.
- The ear sits on the cheek. Keep it just behind the middle of the head, between the brow and nose lines.
- A front-view eye. From the side, use a sideways V with only part of the iris showing.
- A long nose and a weak chin. Let the nose come out only a little past the face line, and bring the chin forward to touch that same line.
- A neck that drops straight down. It makes the head look stiff. Slope the neck lines so it leans forward from the shoulders.
Profiles You Can Try Next With the Same Lines
The circle, the thirds and the square work for almost anyone, so changing the person comes down to details. For a man, I give the brow and chin more weight and the jaw a squarer corner. For a child, make the circle bigger and the face shorter. Swap the ponytail for a bun or short curls. The nose drawing tutorial is good practice for the shape at the front of the face, and the hair drawing step by step lesson helps when you want a new hairstyle on this head.
Side Profile Coloring Page and Printable PDF Lesson
Want to practise away from the screen? The free side profile coloring page has the finished head in thick outlines plus a colored example and a color key. The step-by-step PDF guide holds all twelve steps with their tips, two per page.
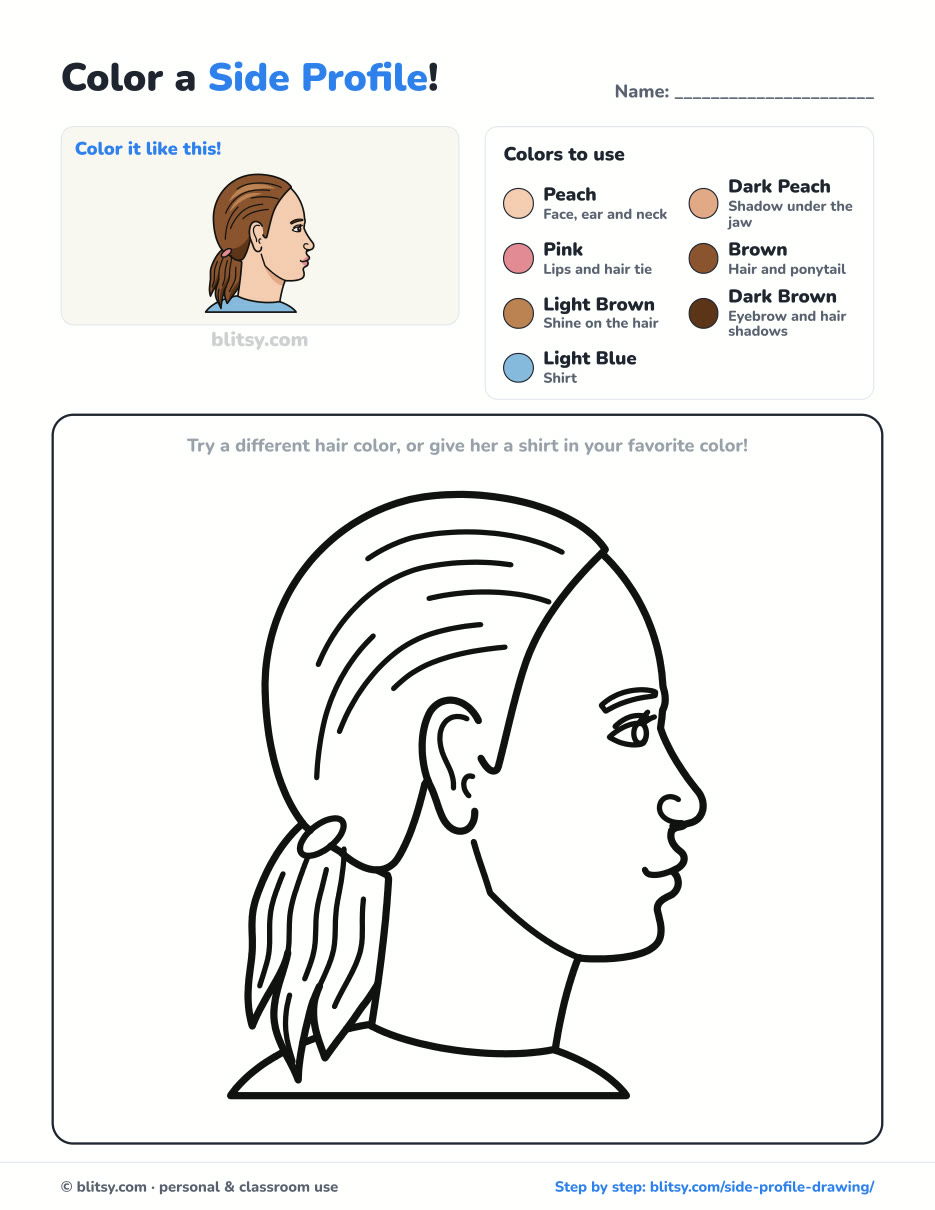
Black outlines with a colored example and the color names at the top. Ready to print and color.
⬇️ Download Coloring PageEvery step picture with its instructions and tips, to keep beside your paper while you draw.
⬇️ Download Drawing Guide📱 On a phone? Tap a download button, then open the file and choose Share → Save to Files or Print. On a computer, the PDF opens or saves straight to your Downloads folder.
Pin the Profile Steps for Your Next Sketch Session
Side View Face Questions Beginners Often Ask
What is the easiest way to draw a side profile?
Start with a circle for the skull and a straight line off its front edge. Split the face into three equal parts with level lines, then draw the profile along the front line using those marks.
Where does the ear go on a side profile?
Just behind the middle of the head, between the brow line and the nose line.
How do you draw an eye from the side?
Draw a sideways V that points toward the back of the head, and show only a narrow slice of the iris at the front. Set it a little behind the nose bridge.
How long does it take to get good at drawing side profiles?
This lesson takes about half an hour. One new profile a day for a week usually makes the proportions feel natural.
Once she looks right, mirror her to face the other way and notice how much easier the second one feels. ✏️🙂
Related posts:
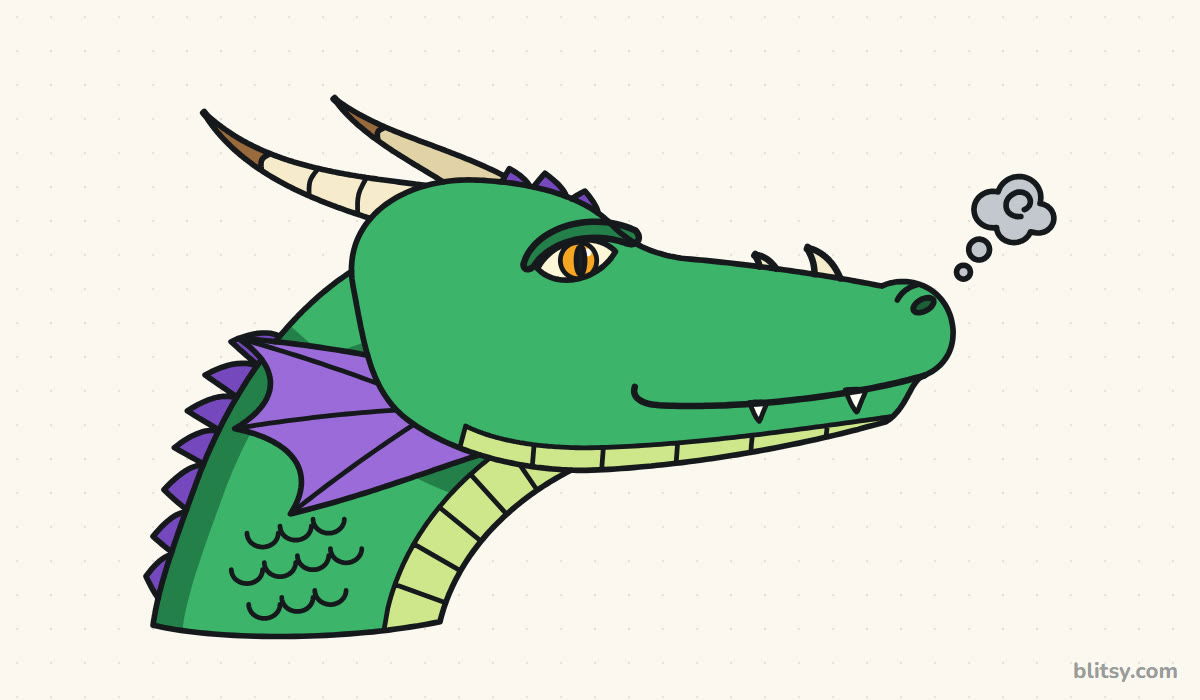 How to Draw a Dragon Head Step by Step (Easy Side View)
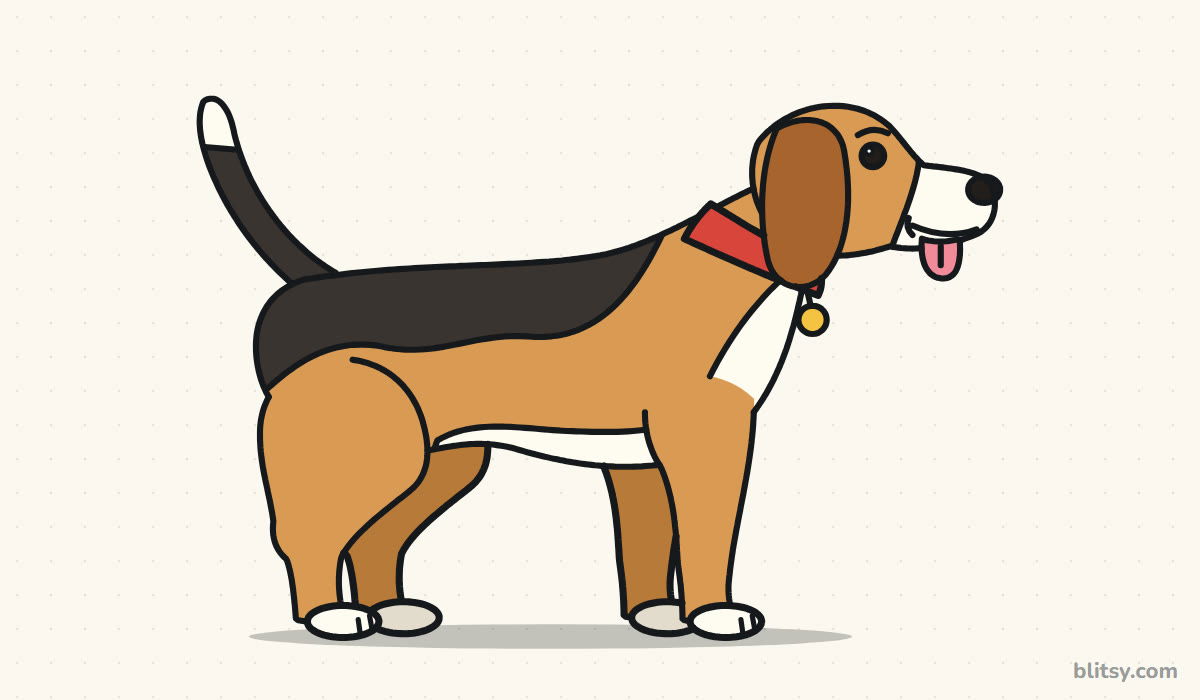 How to Draw a Dog Step by Step (Easy Side View for Beginners)
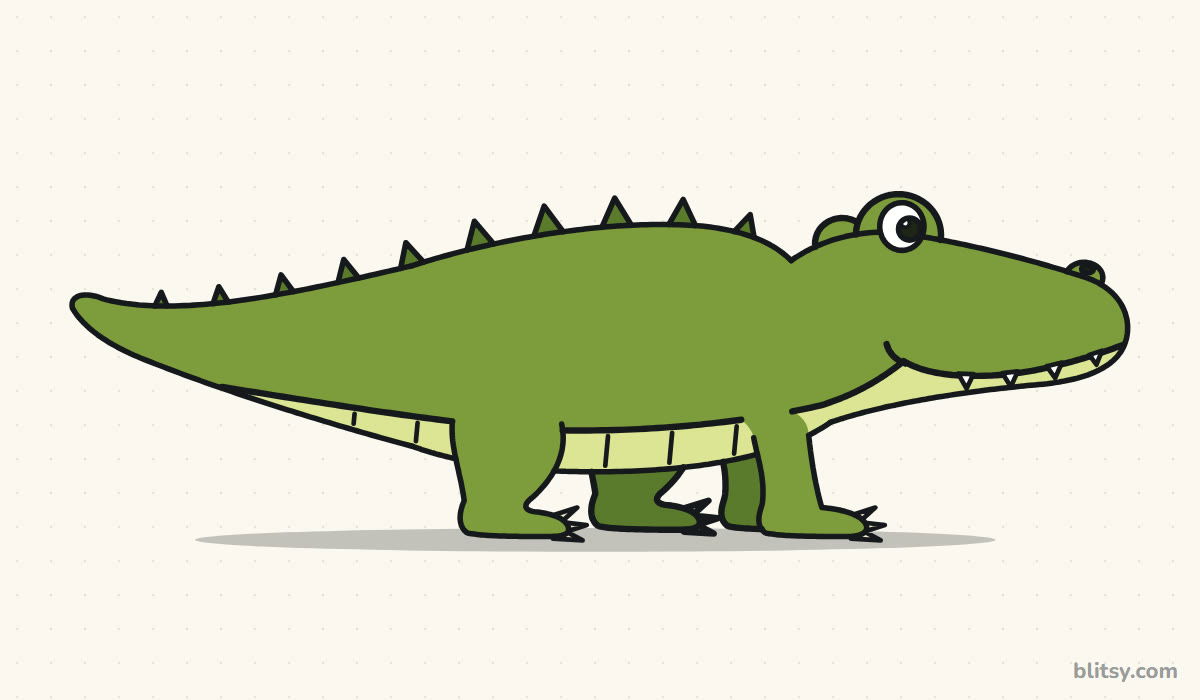 How to Draw an Alligator Step by Step (Easy Side View)
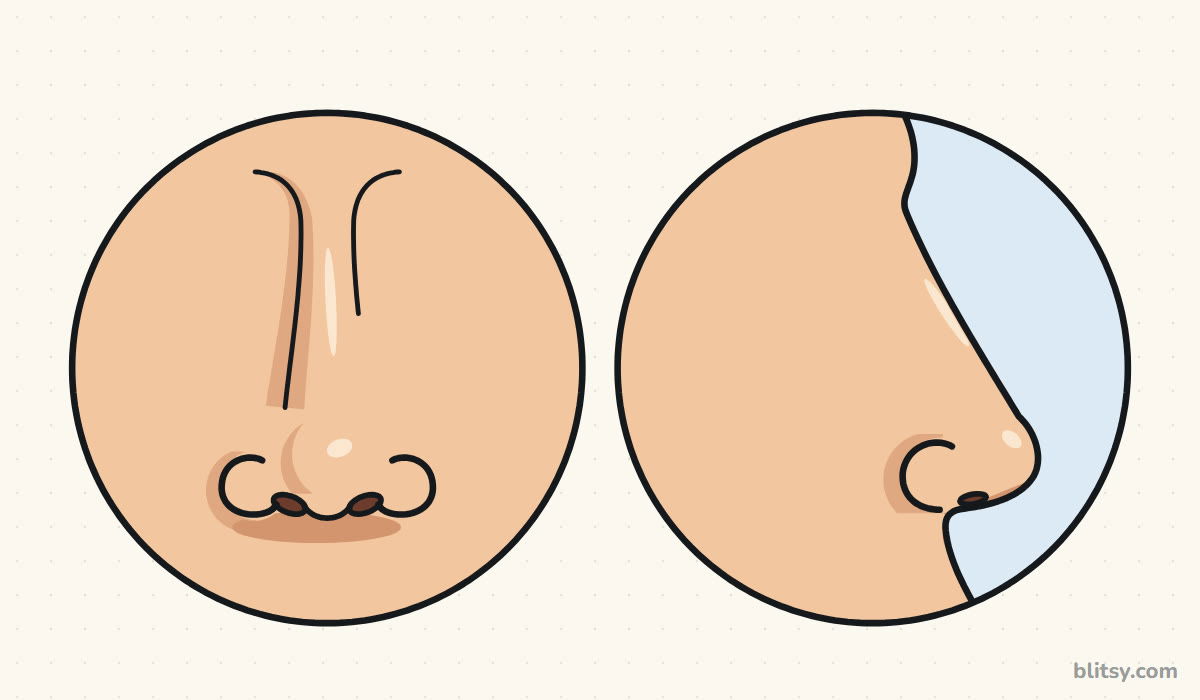 How to Draw a Nose Step by Step (Front and Side View)
 How to Draw a Horse Step by Step (Easy Side View)
 How to Draw a Brain Step by Step (Easy Side View)
 How to Draw a Dandelion Step by Step (Flower + Seed Head)
 How to Draw a Chibi Step by Step (Easy 2-Head Method)
 How to Draw an Anime Girl Step by Step (Easy Face Guide)
 How to Draw a Snow Leopard Step by Step (Easy Guide)
 How to Draw a Face Step by Step (Easy Proportions Guide)
 How to Draw a Jellyfish Step by Step (Cute, Easy Guide)

