
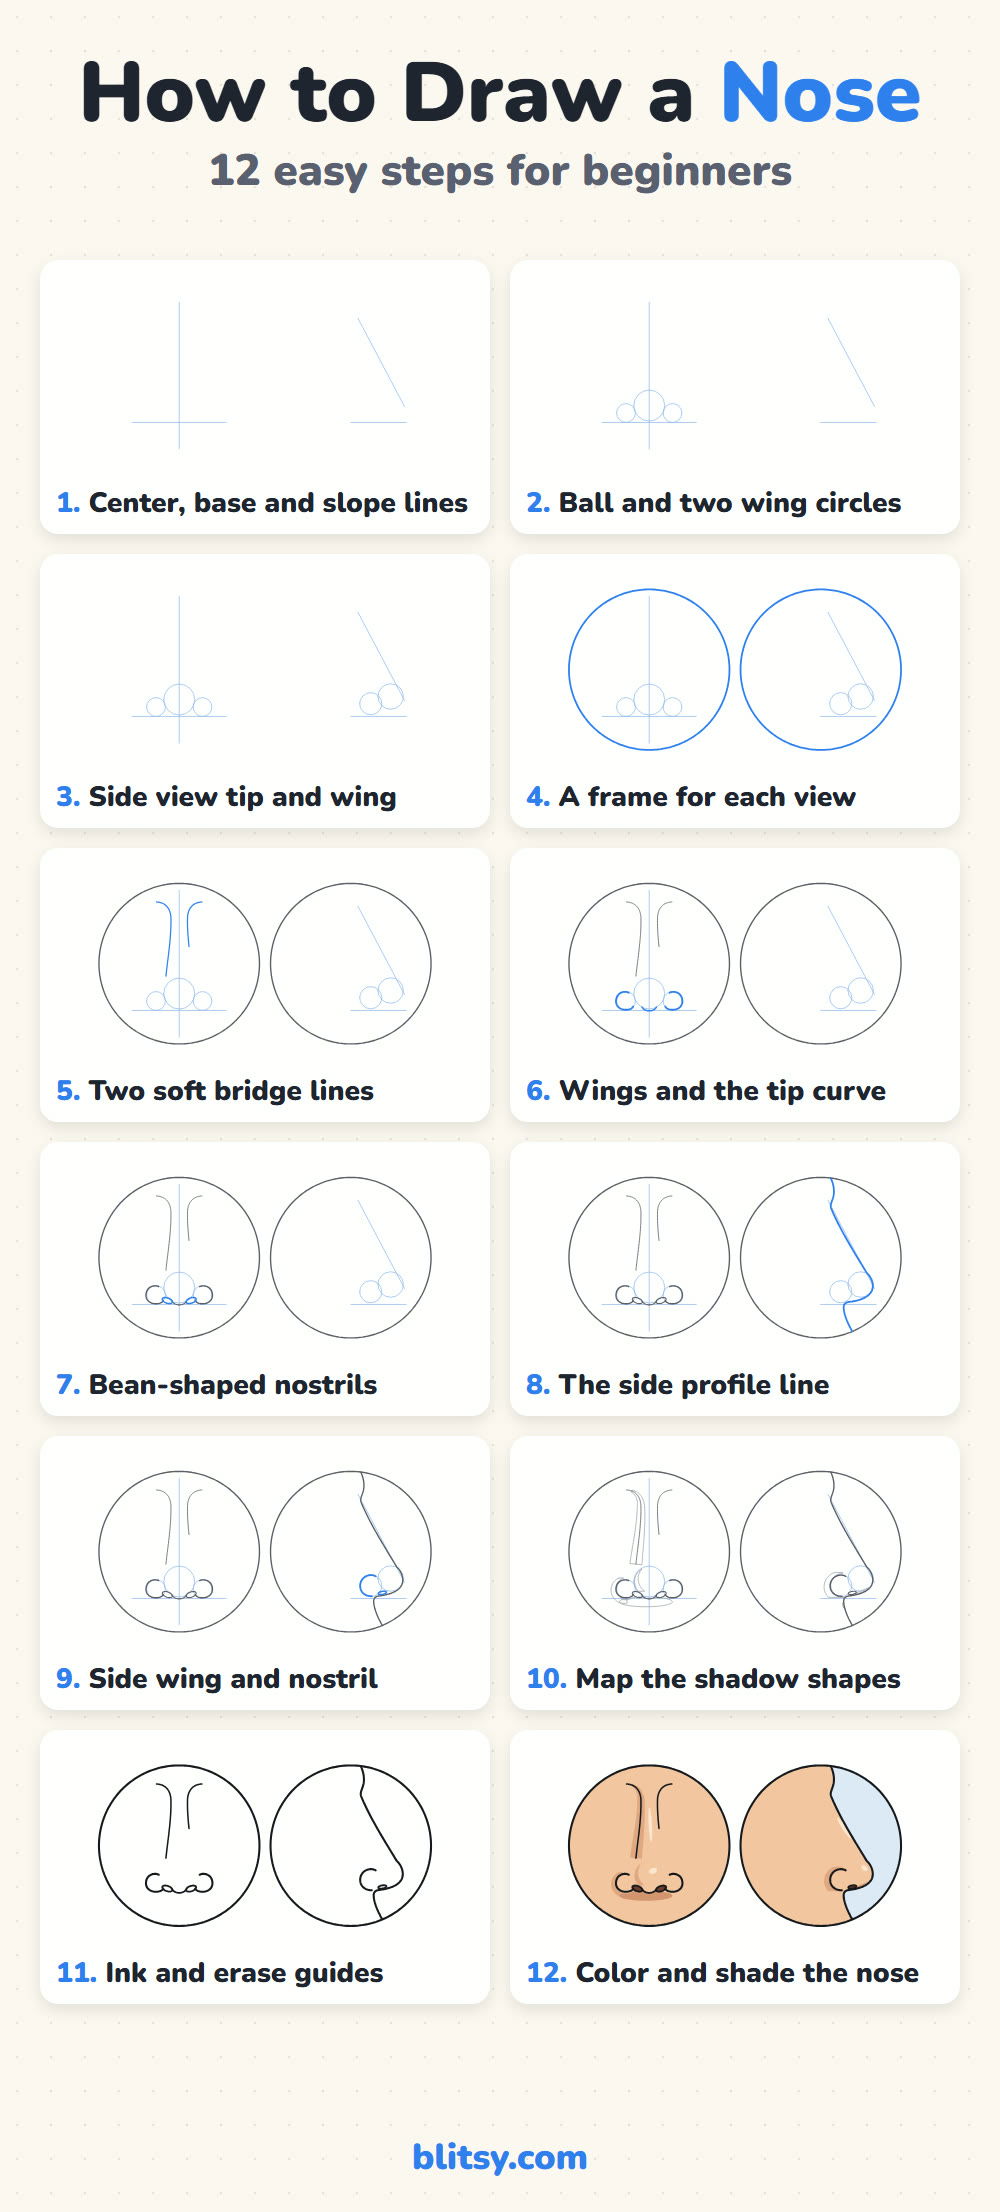
Noses give beginners more trouble than eyes or mouths, mostly because there's hardly a clear edge to follow. The trick I rely on is to stop thinking of it as a triangle and build it from three circles instead. That's the whole idea behind this lesson on how to draw a nose step by step: one round ball for the tip, two smaller balls for the nostril wings, and a couple of soft lines for the bridge. You'll draw it from the front and from the side, so you can see how the same three shapes turn when the head turns.
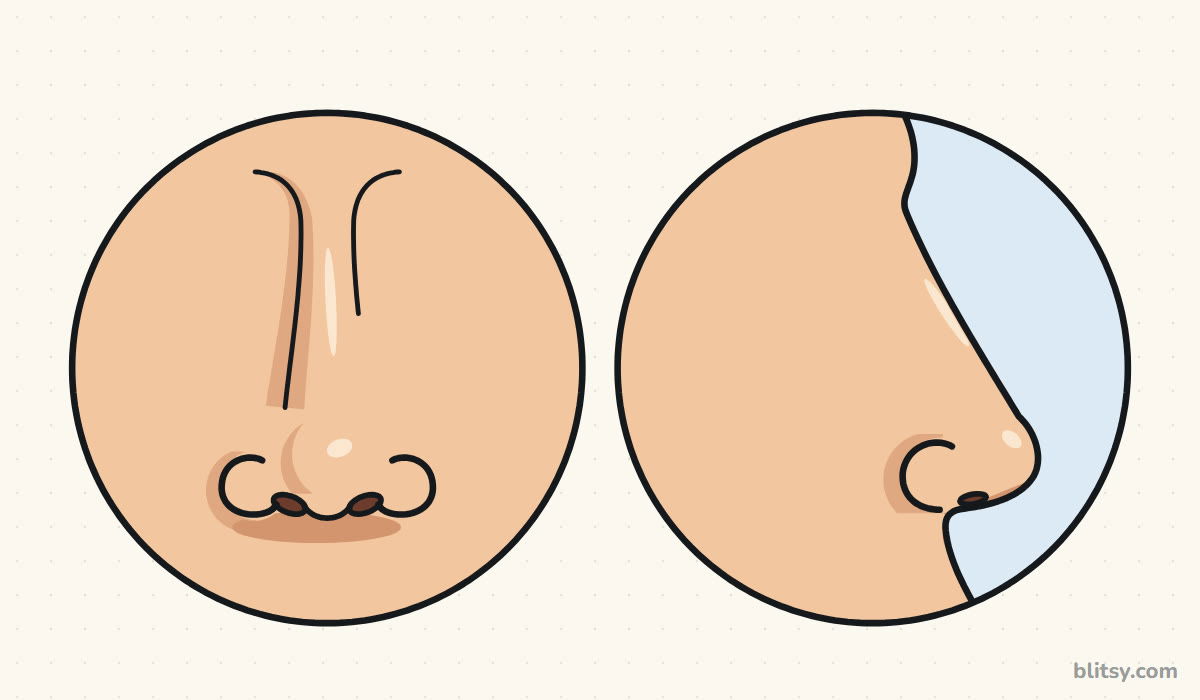
Think of the pictures as a flip book: fresh lines show up blue, older ones go gray, and the pale blue circles are helpers you'll rub out near the end.
Quick overview
⏱️ Time: around 30 minutes, then 10 to 15 for shading
🎯 Level: easy, fine for ages 9 and up
✏️ Steps: 12
👃 You'll draw: a front-view nose and a side-view nose in two round frames
Nose Sketching Supplies, Short and Simple
- An HB pencil for the helper circles
- A kneaded or soft eraser
- A coin, a cup and a jar lid if you want neat circles
- A black fineliner
- Colored pencils in peach, tan, light brown, cream, dark brown and light blue
- White paper turned sideways
Only have a plain pencil? Shade it all in gray tones and skip the colors.
How to Draw a Nose Step by Step
Step 1: Draw the center, base and slope lines
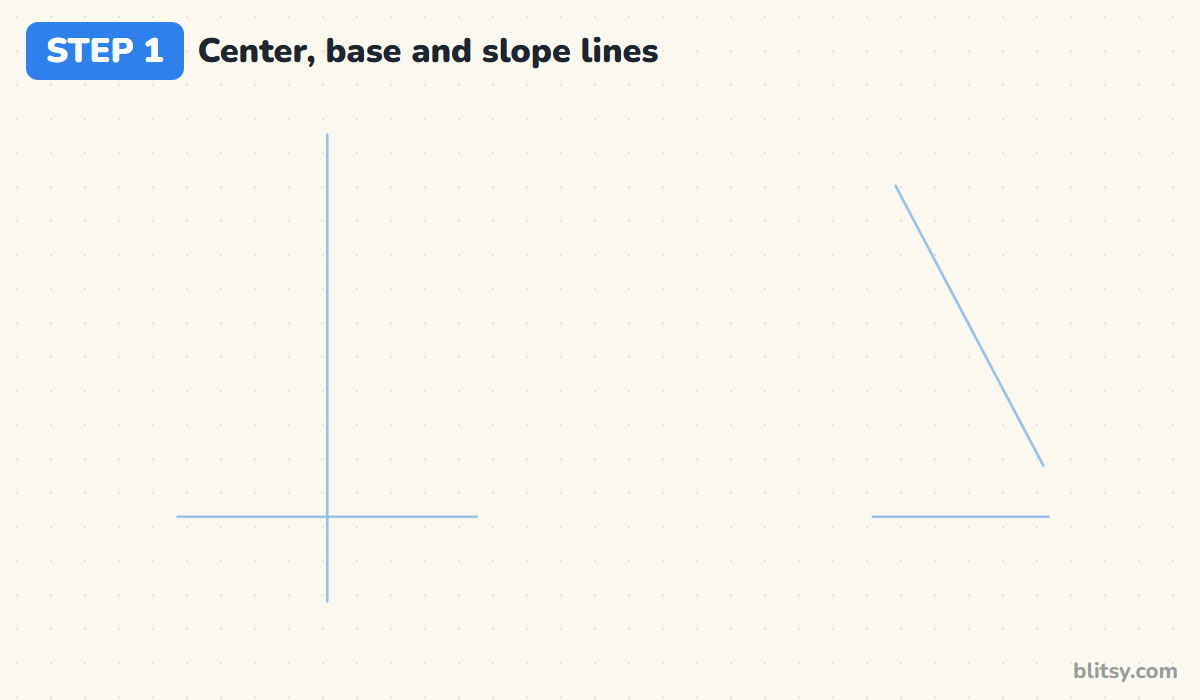
Turn your paper sideways and think of it as two halves. On the left, draw a vertical center line and a short level line across its lower part, where the bottom of the nose will sit. On the right, draw a matching base line and a straight line slanting down toward it. That slant is the bridge in profile.
💡 Tip: Press so lightly that you can barely see the lines. Every one of them gets erased later.
Step 2: Add the ball and two wing circles
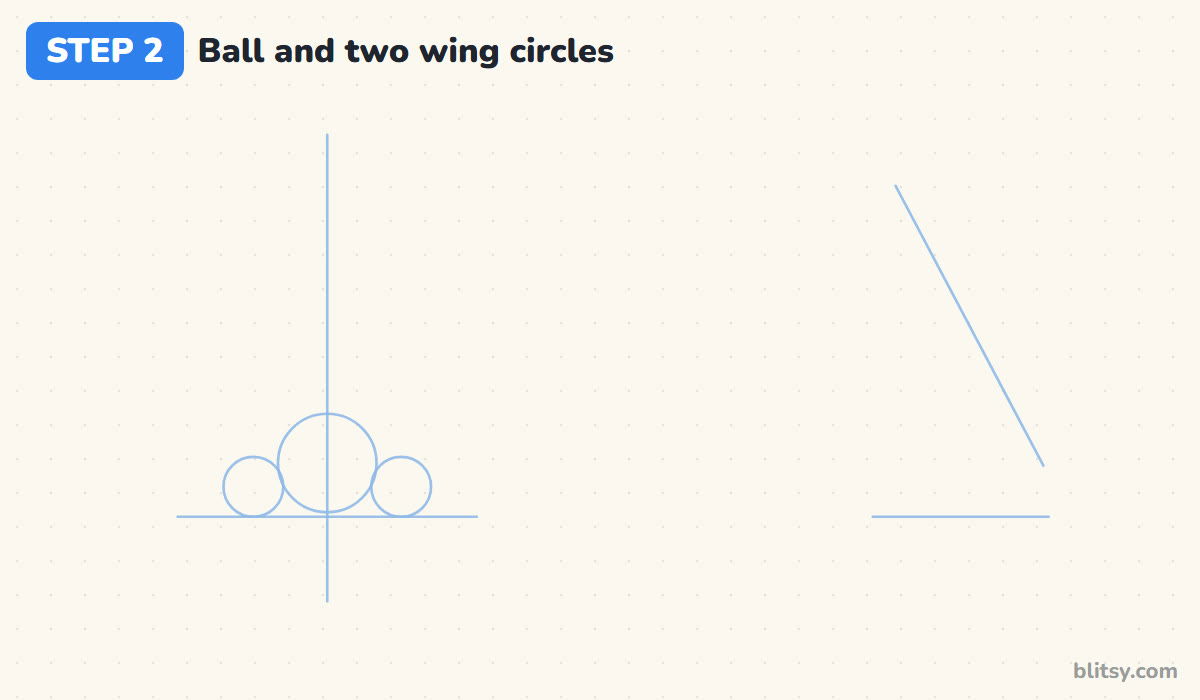
On the base line, right on the center line, draw a circle for the tip of the nose. Then draw a smaller circle on each side, a little lower and about two thirds the size, so the three just touch. I call this the ball and wings. On most people the group is about as wide as the gap between the eyes.
💡 Tip: Keep both wing circles the same size. Uneven wings make the nose look bent.
Step 3: Place the tip and wing for the side view
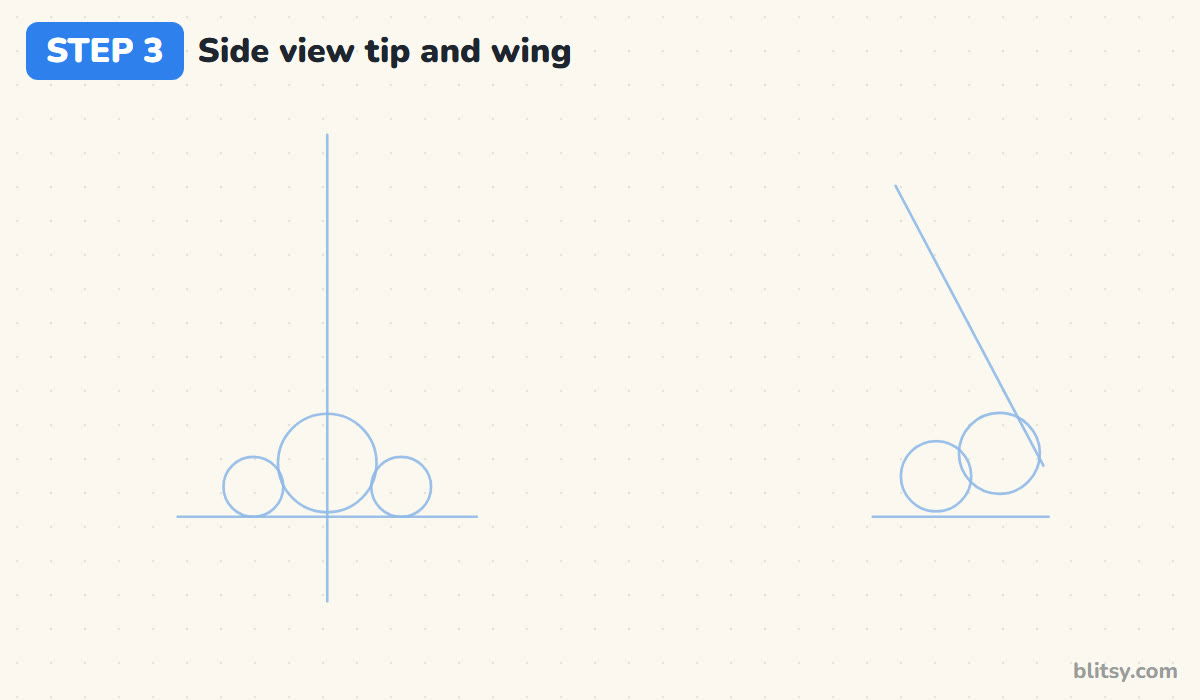
Now the profile. Put a circle at the bottom end of the slanted line, so the line just grazes its front. That's the same tip ball, seen from the side. Behind it and slightly lower, add one wing circle of about the same size. From the side you only see one wing, because the other one hides behind the nose.



💡 Tip: Let the wing circle overlap the tip a little. If they float apart, the nose looks stuck on.
Step 4: Draw a frame around each view
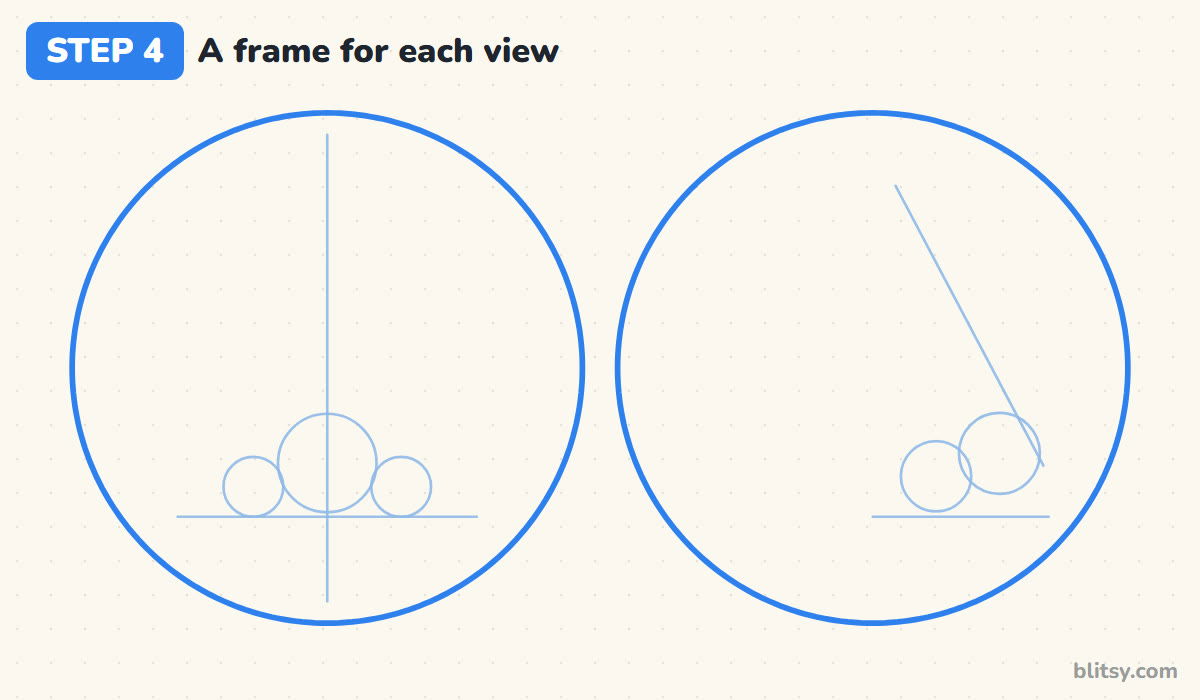
Draw a large circle around each set of guides, with plenty of room above the nose for the bridge. Each frame is a close-up window on a face, so you can color skin inside it instead of leaving a nose floating in the air. Drawing a nose inside a full face? Skip this step.
💡 Tip: Trace a plate or a bowl for the frames. Hand-drawn big circles wobble for almost everyone.
Step 5: Sketch two soft bridge lines
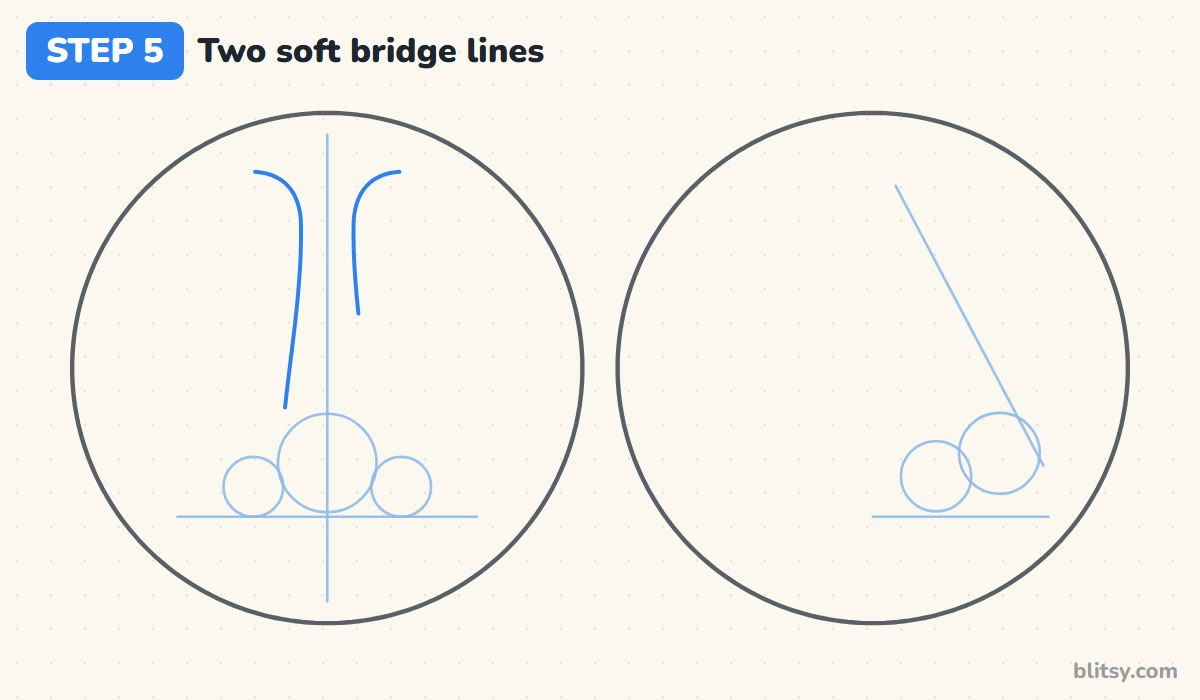
Start each bridge line high up, at the inner end of where the eyebrow would be, curving it gently down and in. Then let it run straight down toward the ball. I end the left line just above the tip and stop the right one shorter, because the lit side barely needs a line.
💡 Tip: Draw the bridge lines thinner than everything else. Heavy ones turn the nose into a pipe.
Step 6: Shape the wings and the tip curve
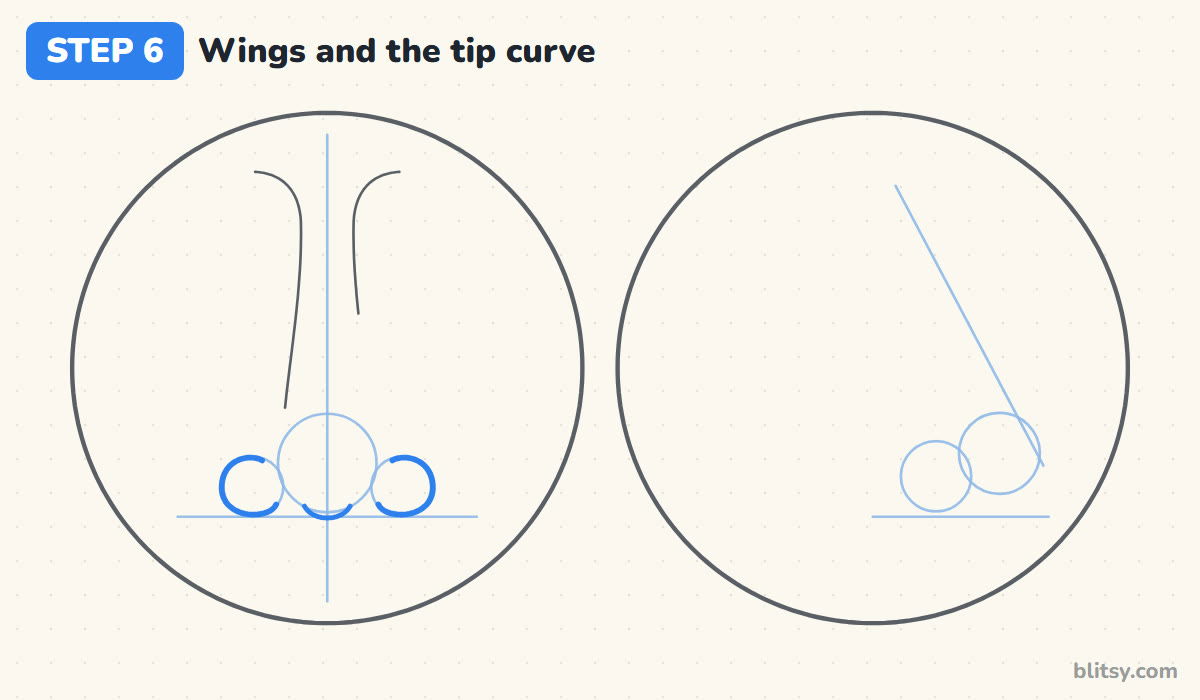
Trace around the outside of each wing circle with a C-shaped curve. Start at the top of the wing, swing out and down, and hook the line back in underneath, toward the middle. Between the two hooks, draw a shallow U along the bottom of the tip ball. This little U is the underside of the tip, and it pulls the whole nose together.
💡 Tip: Leave a small gap where each wing meets the tip ball. Closed loops look like bubbles.
Step 7: Add bean-shaped nostrils
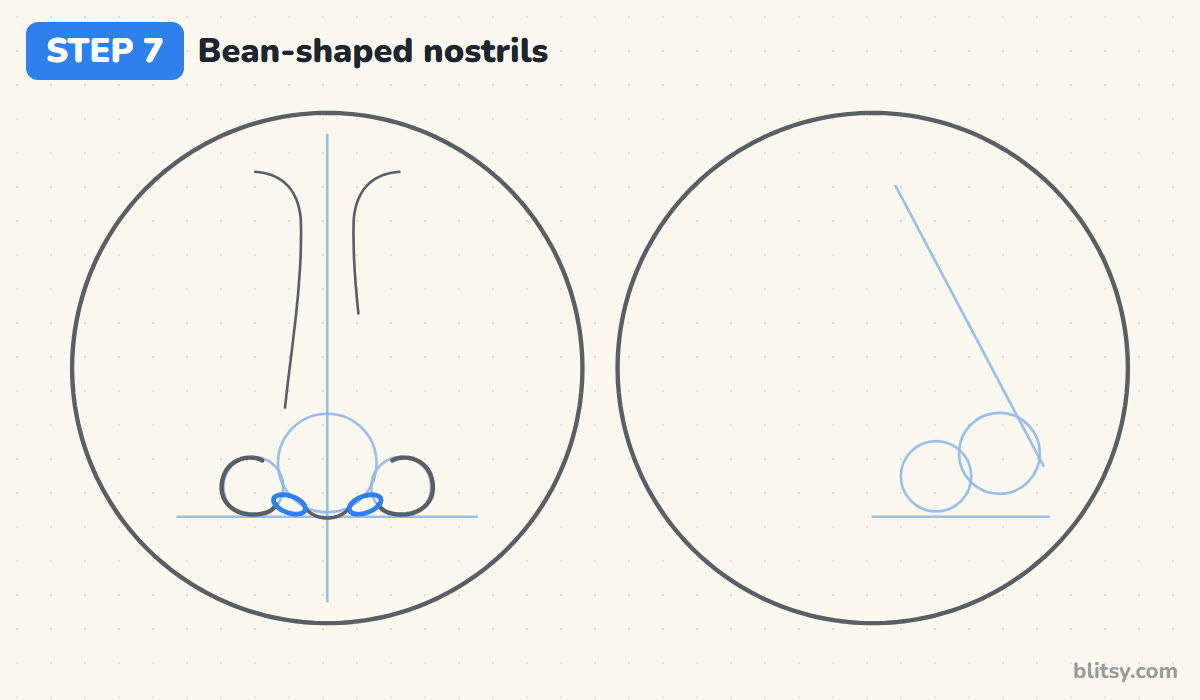
Each nostril sits where the wing hook ends, tucked under the tip. Draw it as a small bean, tilted so the end nearest the center is a bit lower. Honestly, this is where most noses go wrong: big round holes look like a snout.

💡 Tip: Make the nostrils smaller than you think. You can always widen them, but shrinking is hard.
Step 8: Draw the side profile line
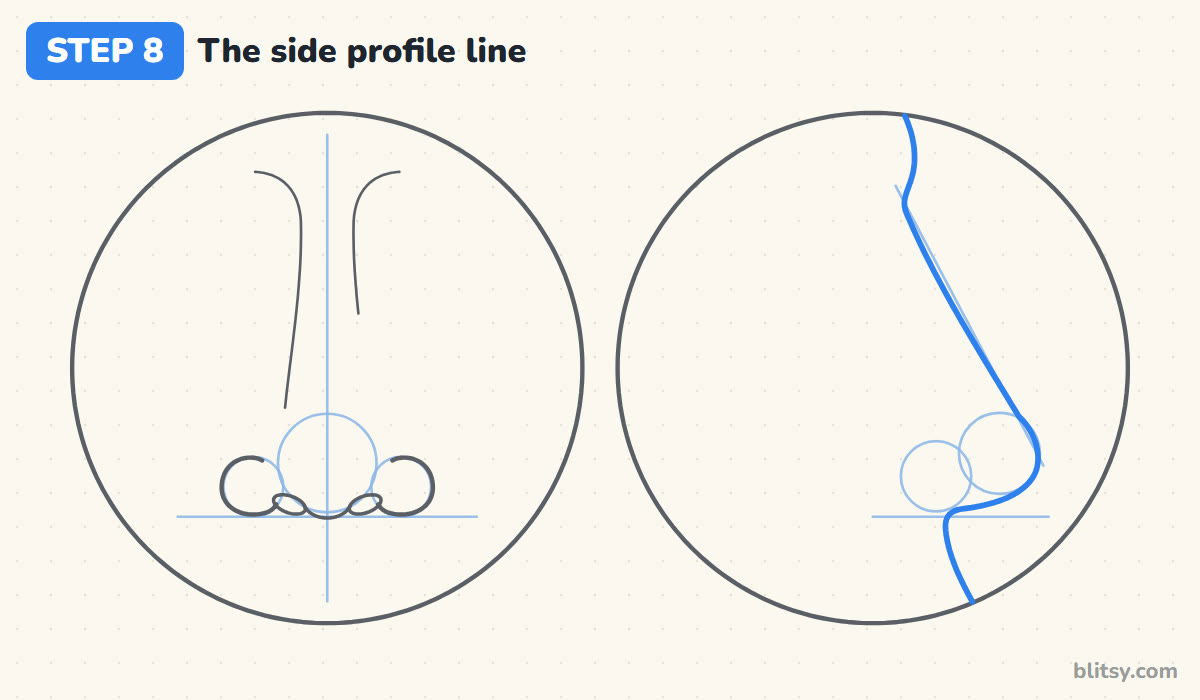
This is one long line, so take it slowly. Start at the top of the right frame, bulge out a little for the brow, then dip in where the eyes are. Follow the slanted guide down to the tip ball and curve around its front. Under the tip, run the line back toward the face, then turn down for the upper lip.
💡 Tip: Stop at each bend, lift your pencil and check the guide before carrying on.
Step 9: Add the side wing and nostril
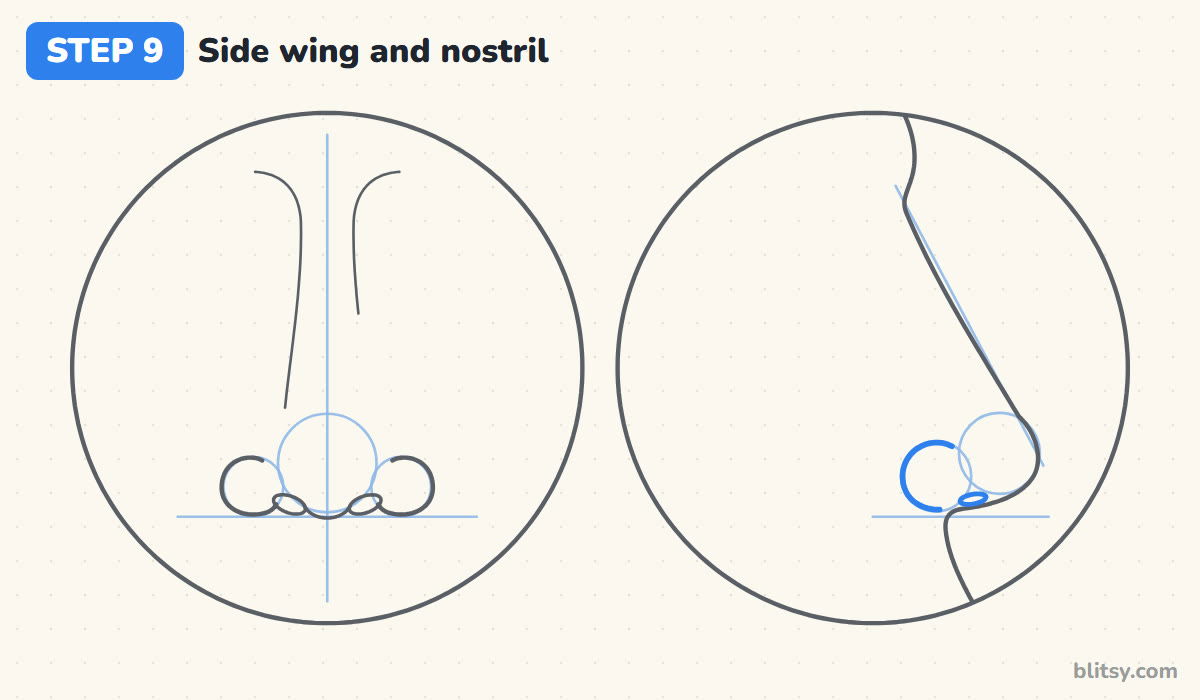
Wrap a C-shaped curve around the back of the wing circle, open toward the tip. It starts near the top of the circle and finishes low, close to the line under the tip. Just in front of the curve, under the wing, draw a thin, flat nostril. From the side, the nostril is only a narrow slit, much smaller than in the front view.
💡 Tip: Keep the side nostril flat and narrow. A tall oval here looks like a hole punched in the cheek.
Step 10: Map the shadow shapes lightly
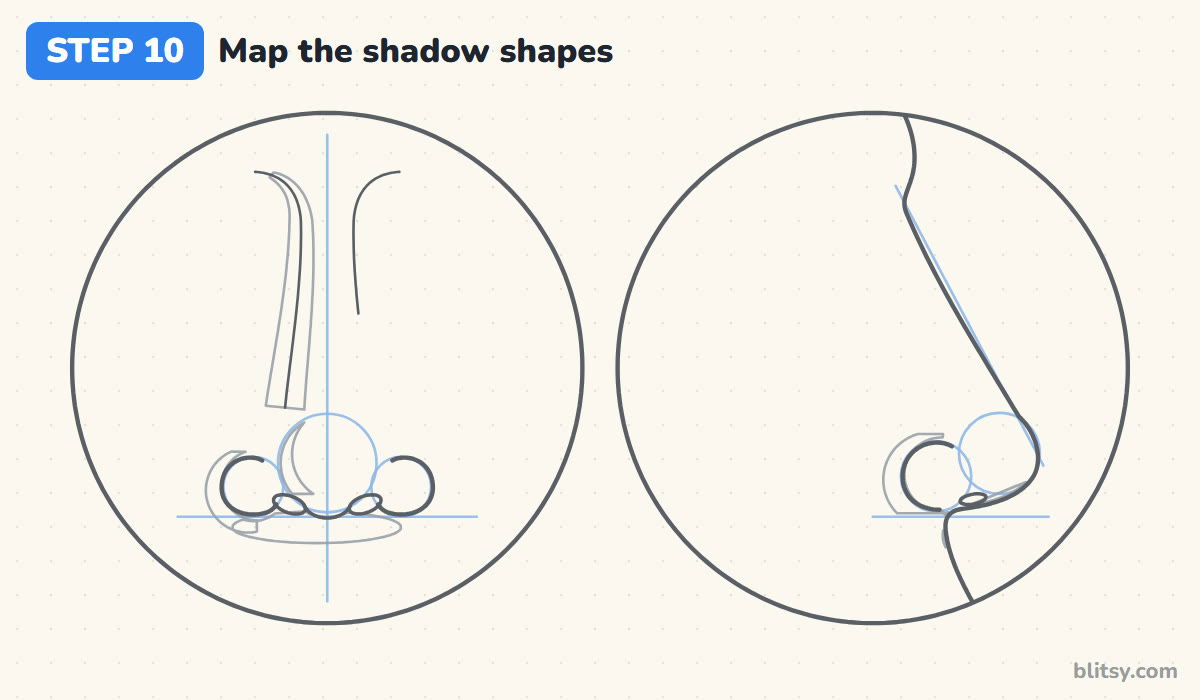
Before you shade, decide where the light comes from. I put it at the upper right, so the left side of the nose is in shadow. Lightly outline a strip down the left of the bridge, a crescent on the ball, a curve hugging the left wing and a band under the nose. In profile, mark the cheek behind the wing and the area under the tip.
💡 Tip: Shadows are shapes, not smudges. Outlining them first keeps your shading clean.
Step 11: Ink the nose and erase the guides
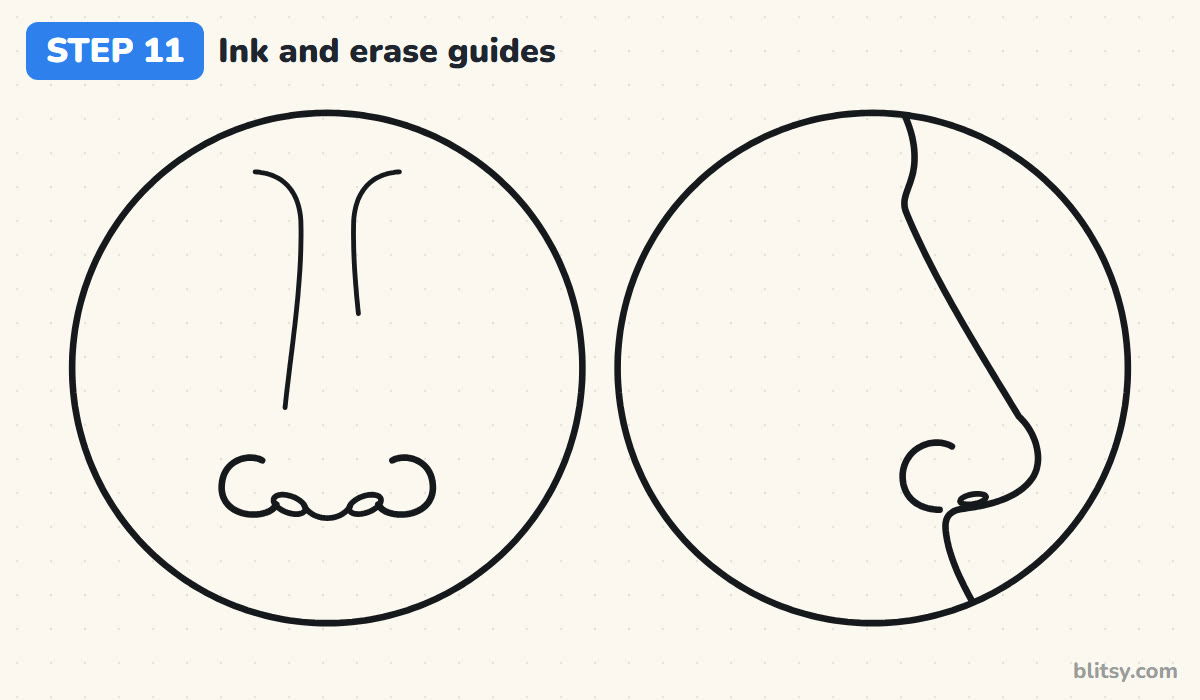
Go over the frames, the bridge, the wings, the tip curve, the nostrils and the profile with a black fineliner. Leave the circles and the shadow map in pencil. Give the ink a minute, then erase every helper line. What's left looks simple, and that's honest: real noses have very few hard lines.


💡 Tip: Ink the long profile line in two or three smooth strokes rather than many short ones.
Step 12: Color and shade the nose
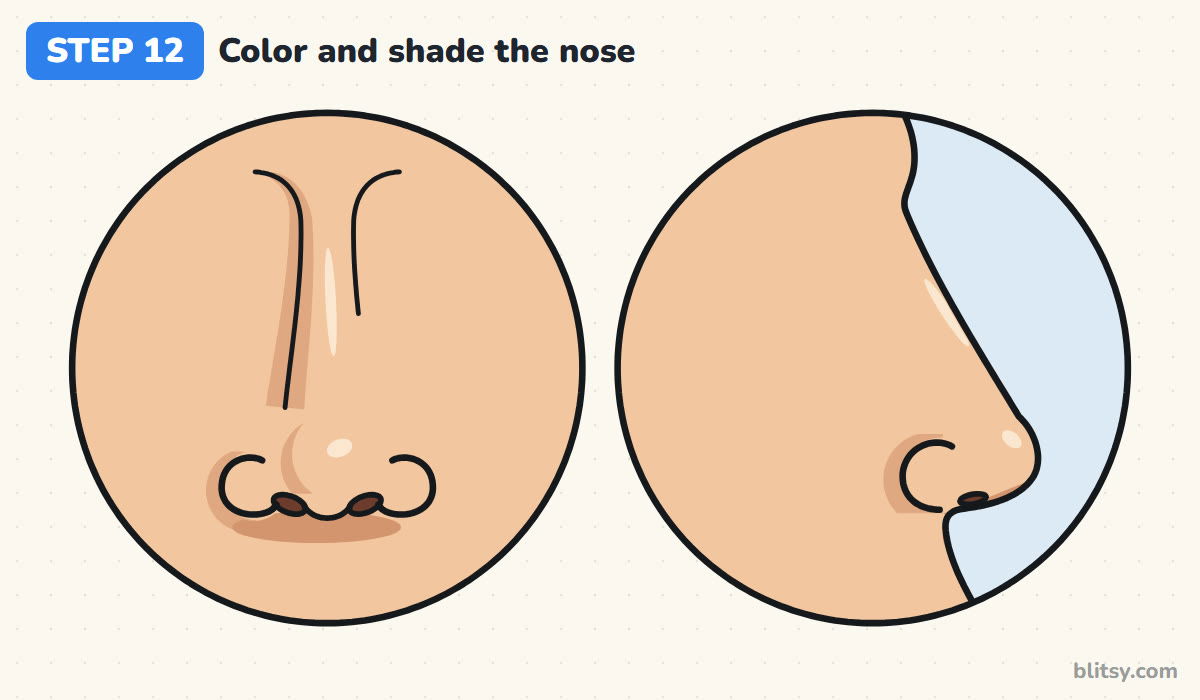
Fill both frames with a light peach skin tone, and the space in front of the profile with light blue. Layer tan over the shadow shapes on the bridge, the ball and the wings, then a slightly deeper brown for the band under the nose. Color the nostrils dark brown and add cream highlights on the tip and bridge.
💡 Tip: Shade in small circles with light pressure. It blends skin tones far better than back-and-forth strokes.
Nose Shapes That Usually Look Off
- Outlining the whole nose like a triangle. A nose has almost no outline from the front. Draw only the wings, the tip curve and the nostrils, and let shading show the rest.
- Nostrils drawn as big dark circles. Keep them small, tilted beans tucked under the tip.
- Wings wider than the eyes are apart. Check the width of your three circles against the gap between the eyes.
- A straight ruler line in profile. Real bridges dip between the eyes and round off at the tip. Follow the slope guide but keep the bends.
- Shading everywhere at once. Pick one light direction and shade only the side facing away from it.
Nose Variations Worth Practicing
Once the ball and wings feel easy, change their sizes. A bigger ball with small wings gives a round button nose, while a narrow ball and a long slope line make a sharper, longer one. When you're ready to put the nose into a full head, try the face drawing tutorial, and use the side profile drawing step by step lesson to practice the second view.
Printable Nose Coloring Page and Step Sheet
Want to practice on paper? The free nose coloring page has both views inked and ready, plus a colored example and a key for each skin tone. The step-by-step PDF guide collects all twelve steps and tips, two per page.
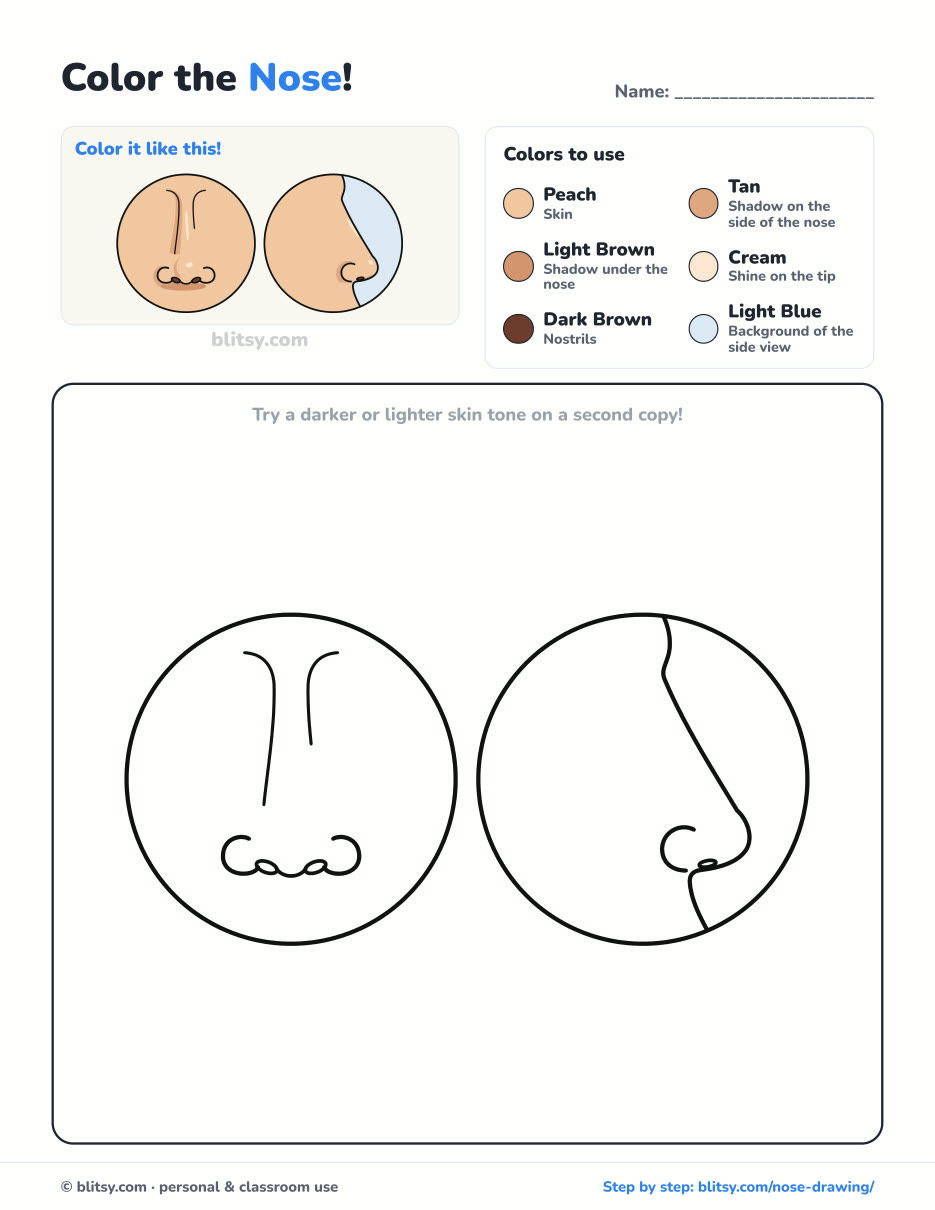
Black outlines with a colored example and the color names at the top. Ready to print and color.
⬇️ Download Coloring PageEvery step picture with its instructions and tips, to keep beside your paper while you draw.
⬇️ Download Drawing Guide📱 On a phone? Tap a download button, then open the file and choose Share → Save to Files or Print. On a computer, the PDF opens or saves straight to your Downloads folder.
Keep the Ball and Wings Method on Pinterest
Nose Drawing Questions From Beginners
What is the easiest way to draw a nose?
Draw one circle for the tip and a smaller circle on each side for the wings. Then trace a C around each wing, a small U under the tip and two little nostrils. That's enough for a believable nose.
How do you draw a nose from the side?
Draw a slanted bridge line with a circle at its lower end for the tip, then one wing circle just behind it. The profile follows the slant, curves around the tip and tucks back under it.
How do you shade a nose for beginners?
Choose where the light comes from and shade the opposite side of the bridge, the wing on that side and a band under the nose. Leave a light spot on the tip.
Why does my nose drawing look flat?
Usually it's all outline and no shadow. Swap some bridge lines for tone and add a highlight on the tip so it looks round.
Three circles, a few curves and two shadows, and you've got a nose that works from two angles. Try a button nose next! 👃✏️
Related posts:
 How to Draw a Hoodie Step by Step (Front and Back View)
 How to Draw a School Step by Step (Easy Front View)
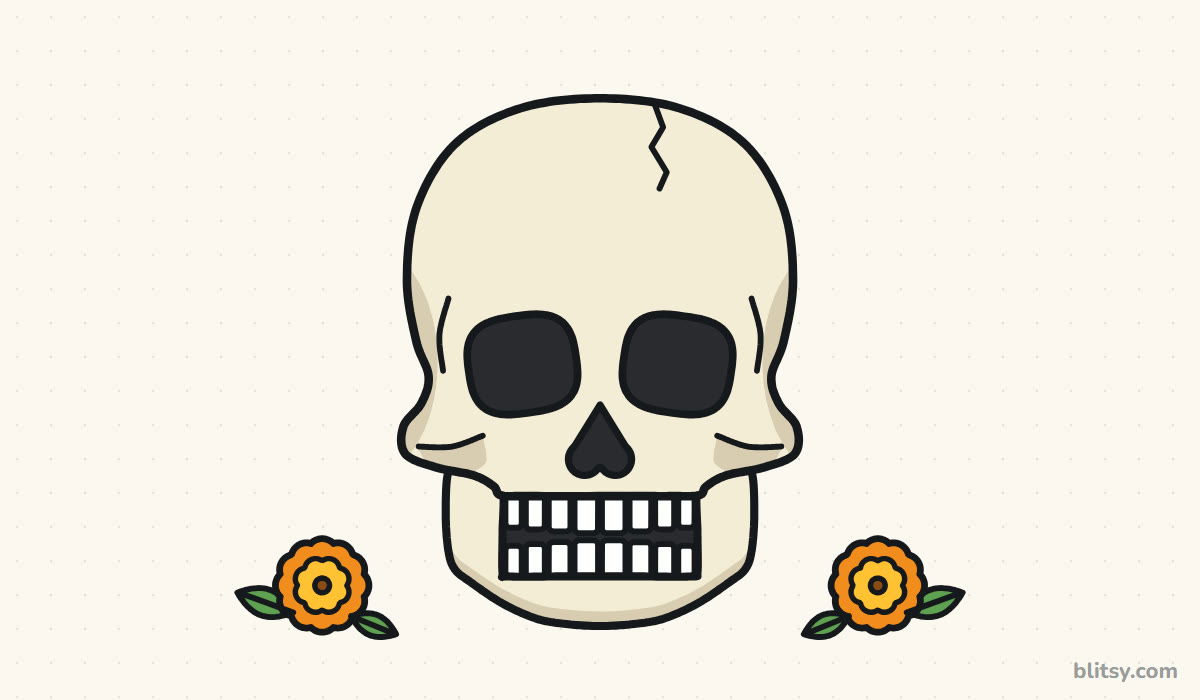 How to Draw a Skull Step by Step (Easy Front View)
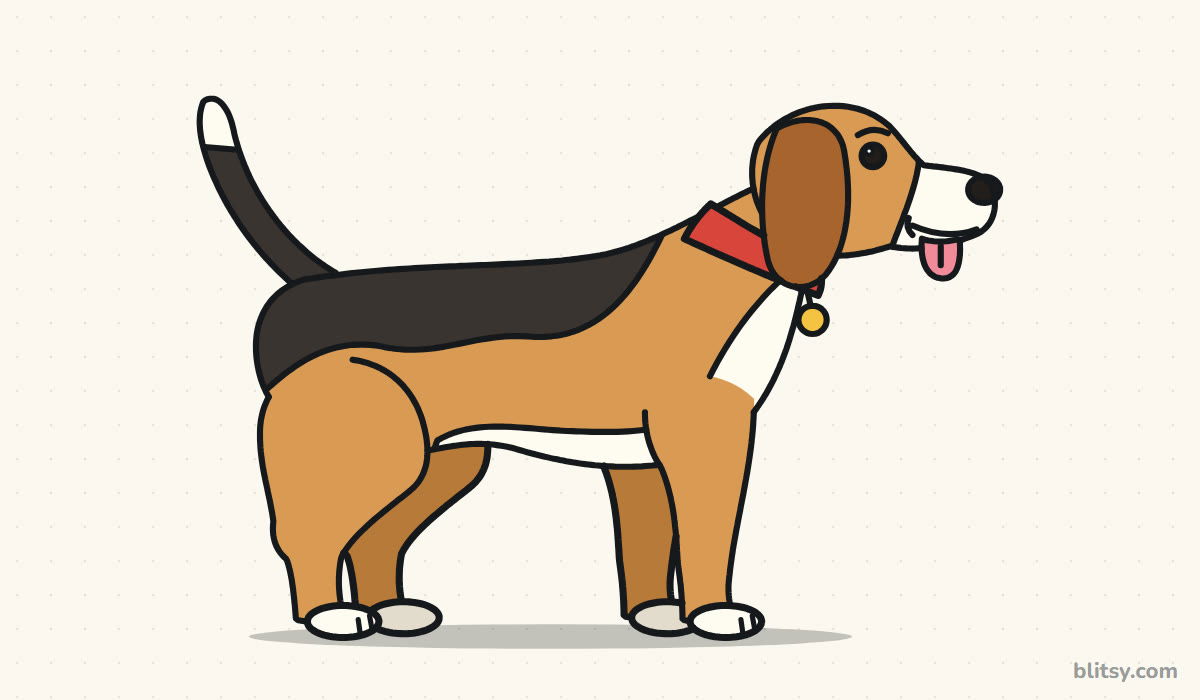 How to Draw a Dog Step by Step (Easy Side View for Beginners)
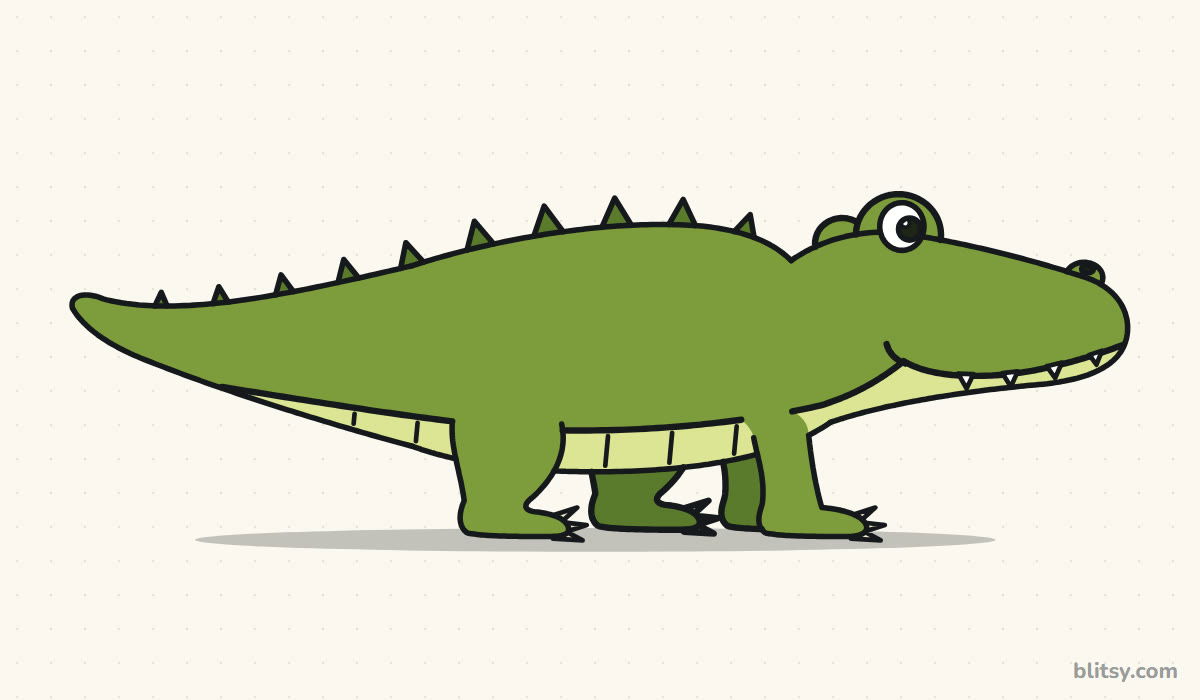 How to Draw an Alligator Step by Step (Easy Side View)
 How to Draw a Horse Step by Step (Easy Side View)
 How to Draw a Brain Step by Step (Easy Side View)
 How to Draw a Dragon Head Step by Step (Easy Side View)
 How to Draw Hands Step by Step (Easy Palm View for Beginners)
 How to Draw a Side Profile Step by Step (Easy Head Guide)
 How to Draw a Whale Step by Step (Easy for Beginners)
 How to Draw Lungs Step by Step (Easy Science Diagram)

