
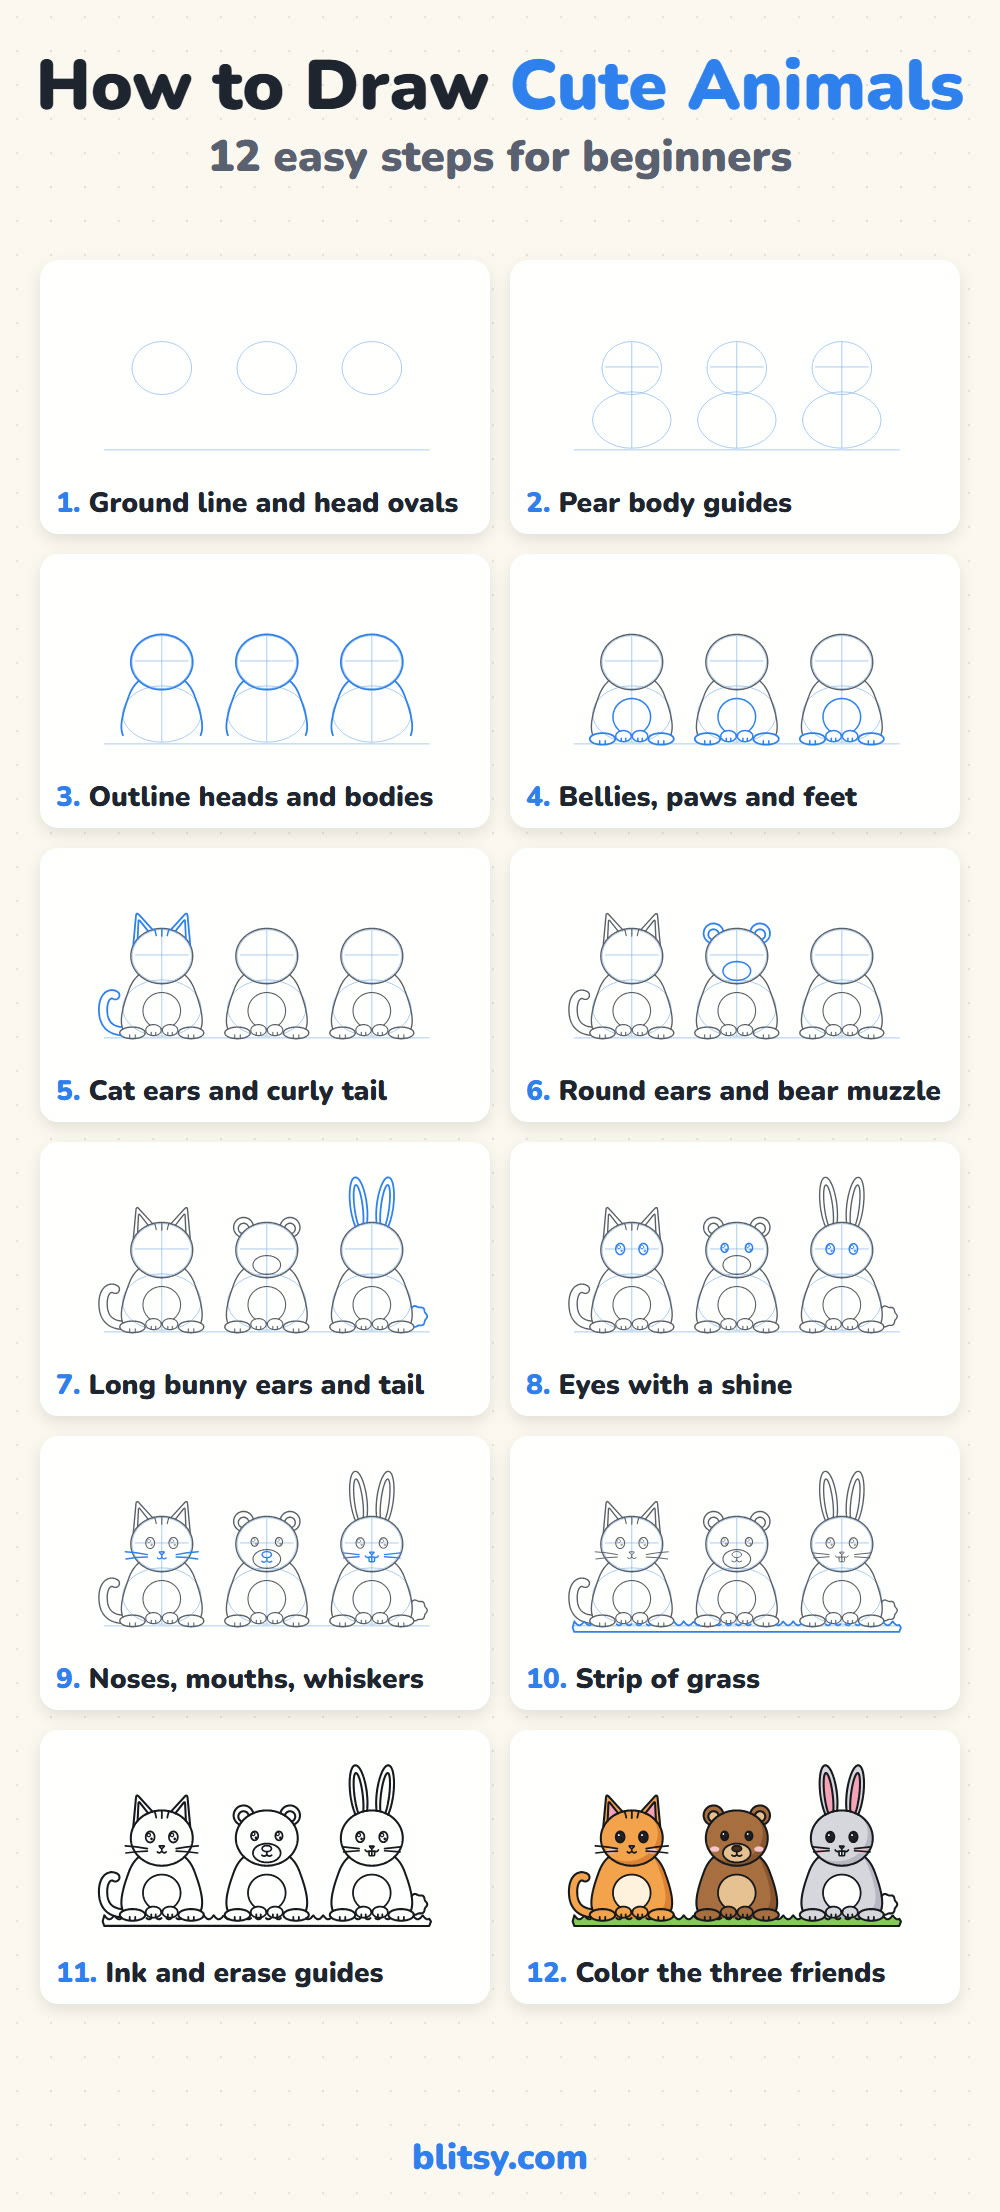
Here's a secret that makes animal drawing far less scary: most cartoon animals are the same little creature wearing different ears. In this lesson you'll draw a cat, a bear and a bunny sitting side by side, and every one of them starts from an identical oval head and pear-shaped body. I chose this trio to show how to draw cute animals step by step, because once you see the shared base, you can turn it into almost any animal you like.
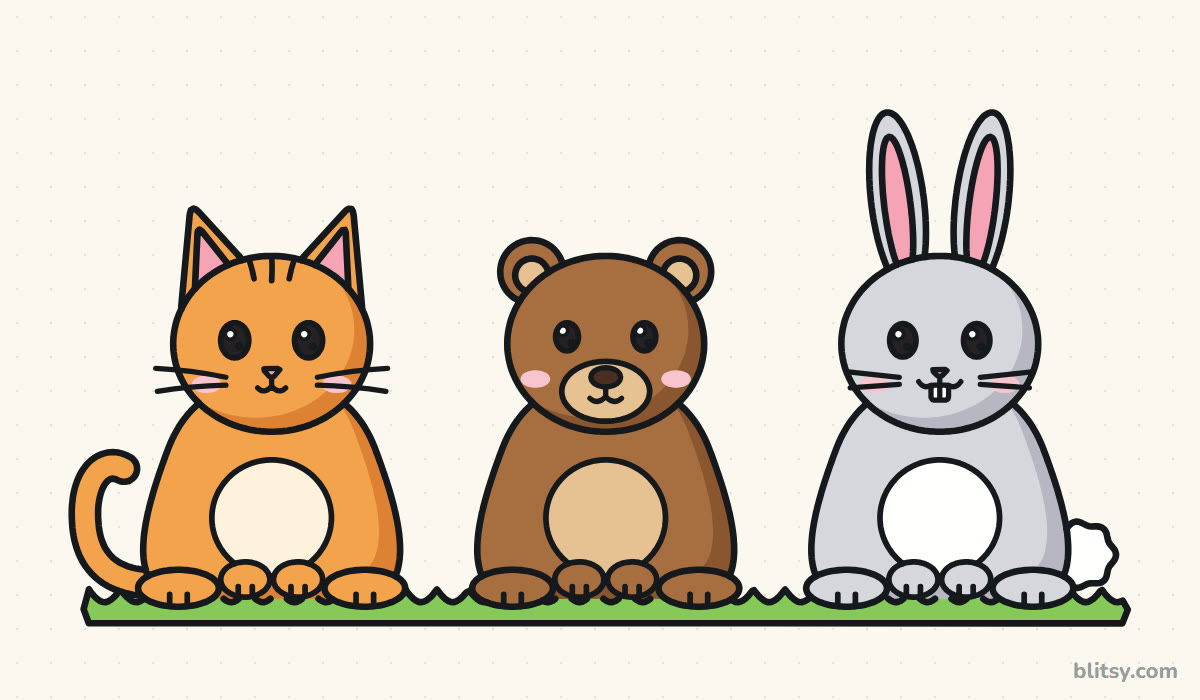
In these pictures, fresh lines for the current step are blue and finished work is gray. The pale blue ovals and cross lines are only helpers, so I sketch them very softly and rub them out in step 11.
Quick overview
⏱️ Time: roughly 40 minutes, including the coloring
🎯 Level: beginner, good for kids around 6 and up and for adults starting out
✏️ Steps: 12
🐾 You'll draw: an orange tabby cat, a brown bear and a gray bunny sitting together on the grass
Gather Supplies for Three Animal Friends
- A light pencil, HB or 2B works well
- A soft eraser that won't smudge
- A black fineliner or thin marker for the final outline
- Colored pencils or felt pens in the six colors from the coloring key
- A sheet of paper turned sideways so all three animals fit in a row
If you only own a pencil and an eraser, you can still draw the whole thing and add color another day.
How to Draw Cute Animals Step by Step
Step 1: Draw a ground line and three head ovals
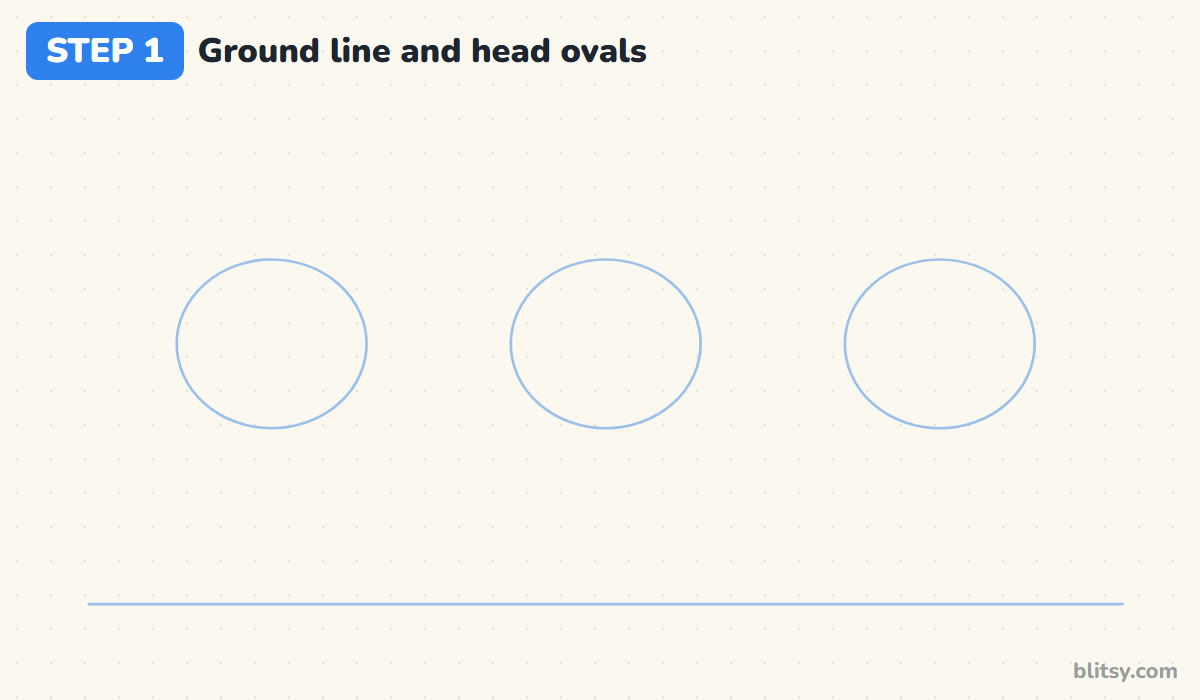
Turn your paper sideways and draw one long, light line near the bottom. All three animals will sit on it. Above it, sketch three ovals in a row, each a little wider than it is tall. Leave about one oval's width between them so the ears and tails have room later.
💡 Tip: Draw the middle oval first, then copy its size to the left and right. Matching heads make the trio look like a set.
Step 2: Add pear body guides and center lines
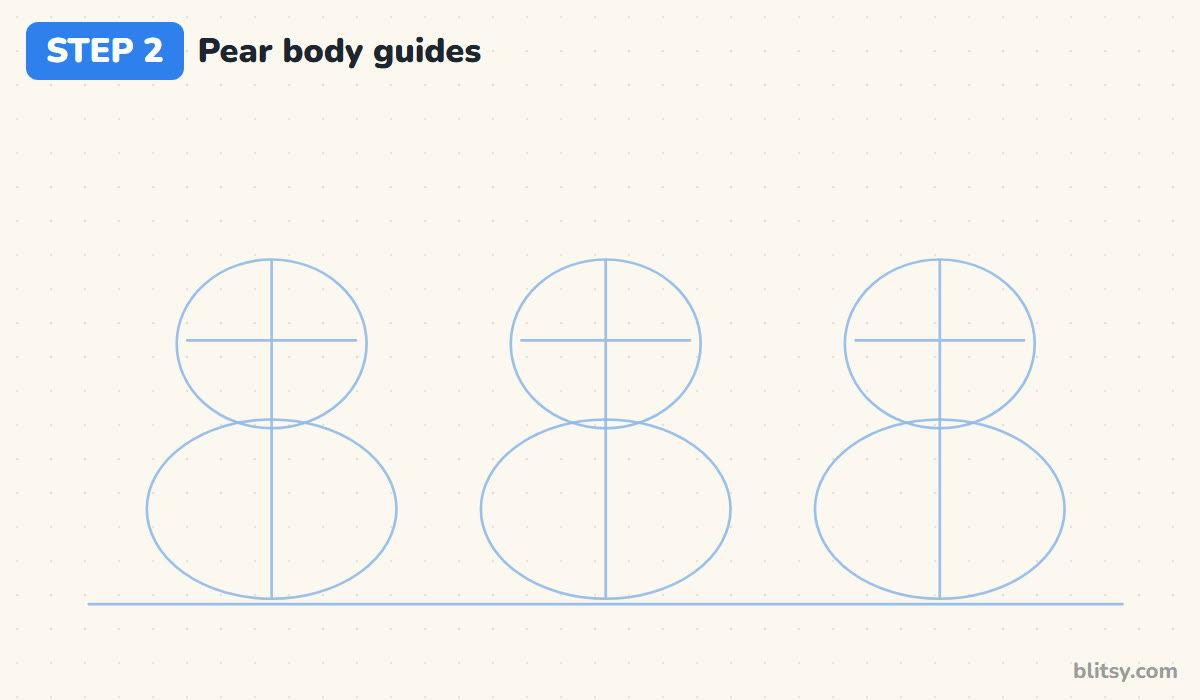
Under each head, draw a bigger oval that rests on the ground line and tucks up behind the chin. Then run a line down the middle of each animal and a short line across the head for the eyes. I never skip these cross lines, because they keep the face level.
💡 Tip: Let each body oval overlap the bottom of its head a little. A gap there makes the head look like it's floating.
Step 3: Outline the heads and bodies
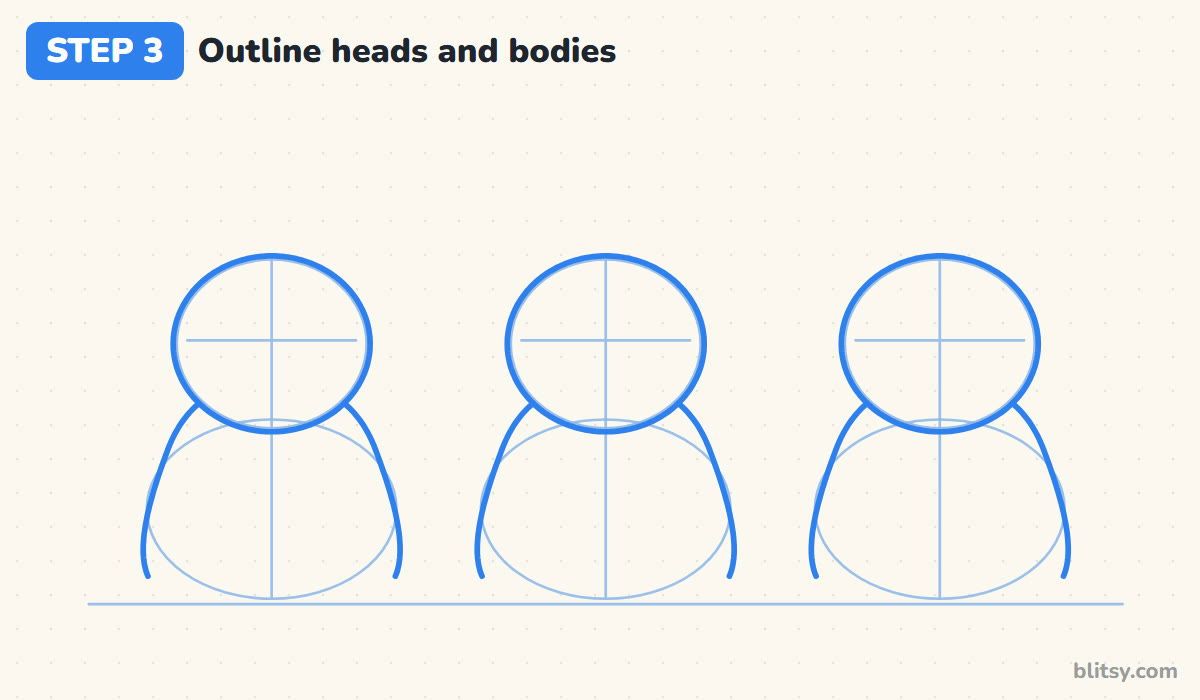
Go over each head oval with a firmer line. For the body, start under the chin where it's narrow and curve outward as you go down, like the shape of a pear. Stop the sides just above the ground line. The bottom edge stays open for now since the paws and feet will cover it.

💡 Tip: Push the widest part of the pear low, near the bottom. That makes a sitting animal look heavy and settled.
Step 4: Draw the bellies, then paws and feet
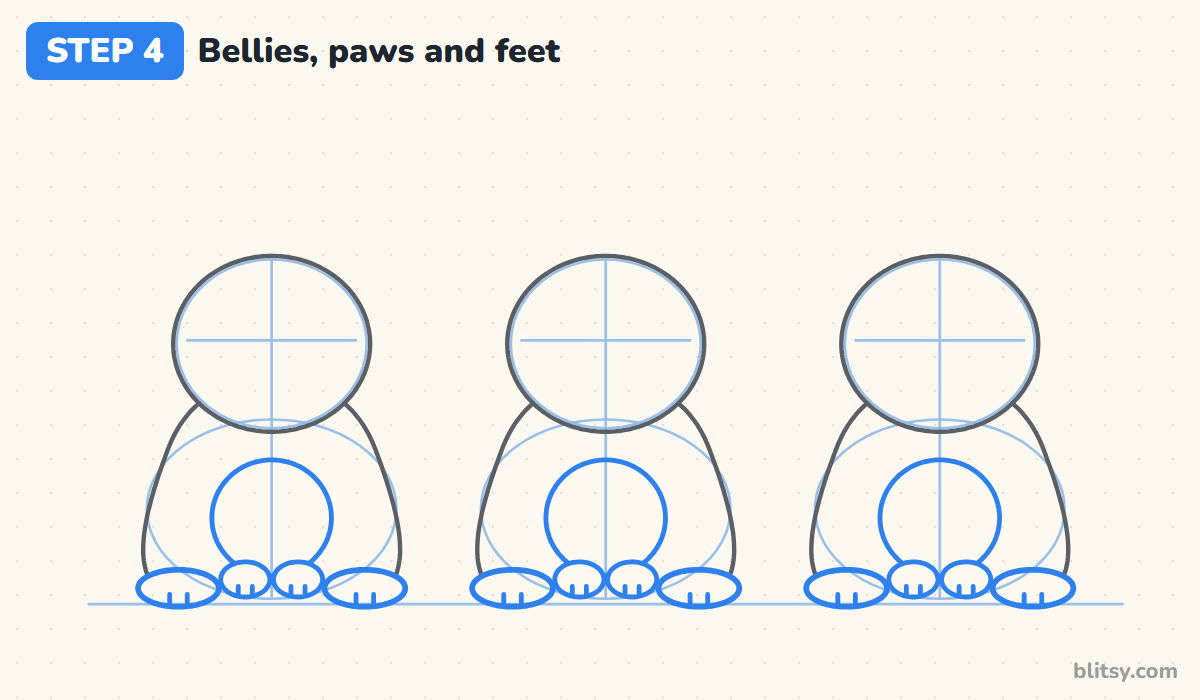
Put a round belly patch in the middle of each body, starting just below the chin. Along the bottom, draw two small ovals side by side for the front paws, then a wider flat oval on each side for the back feet. Two short lines on every paw and foot turn them into toes.
💡 Tip: Keep the back feet flatter than the front paws. Flat ovals read as feet resting on the ground.
Step 5: Give the cat pointy ears and a curly tail
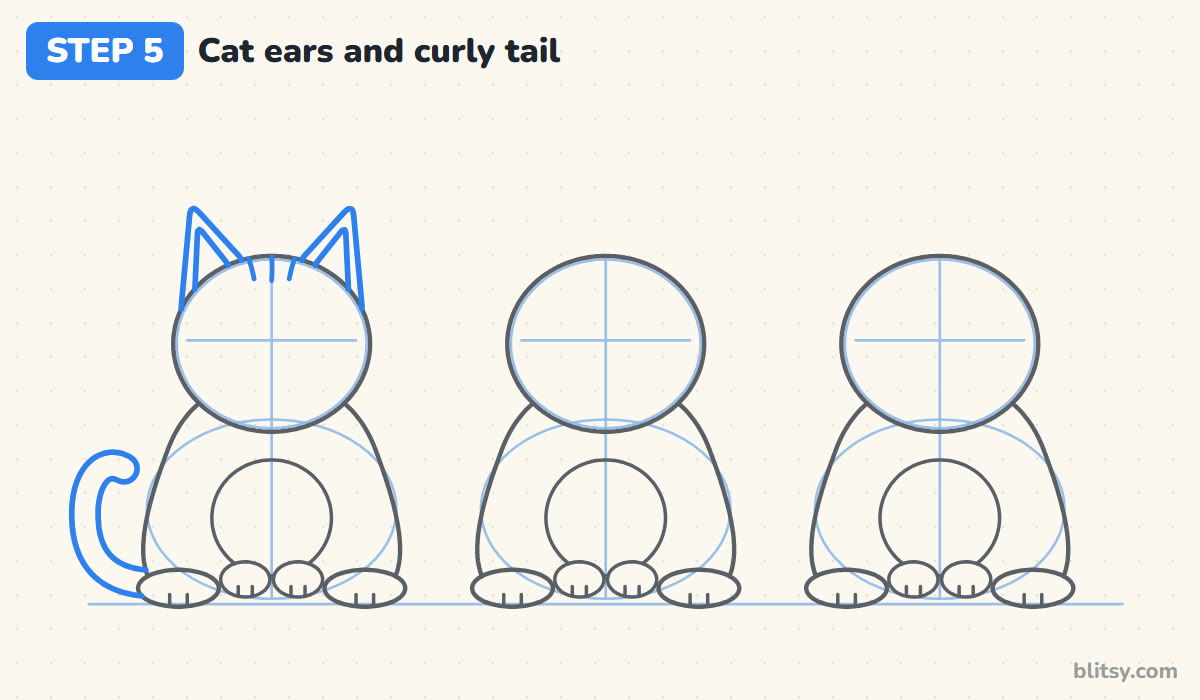
On the left head, draw two triangle ears with softly rounded tips, with a smaller triangle inside each one. Out of the cat's left side, draw a thick tail that runs along the ground and curls up like a question mark. Three short stripes on the forehead make it a tabby.
💡 Tip: Place the ears near the outer edges of the head, not close together. Wide-set ears look friendlier.
Step 6: Add round ears and the bear's muzzle
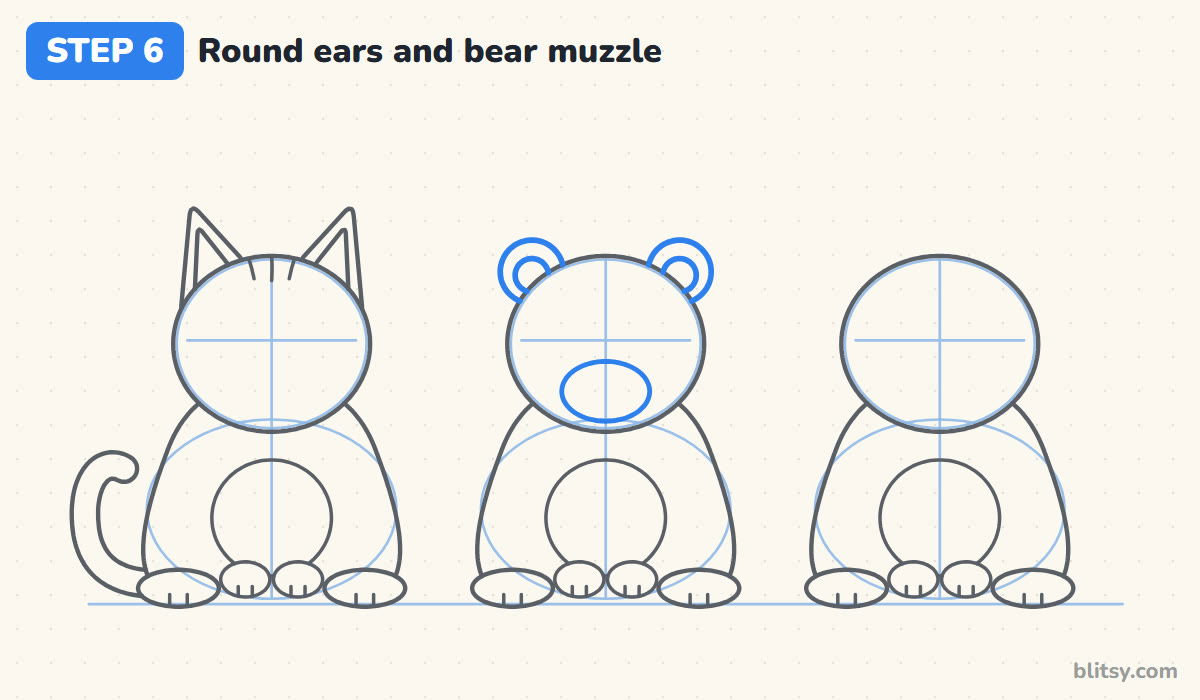
The bear gets two round ears on top of its head, half hidden behind the oval, and a smaller circle inside each. Then draw a wide oval low on the face for the muzzle. That big muzzle does most of the work. Without it, the same head could pass for a hamster.
💡 Tip: Set the muzzle so its bottom almost touches the chin. Placed higher, it looks like a pig's snout.
Step 7: Draw long bunny ears and a cotton tail
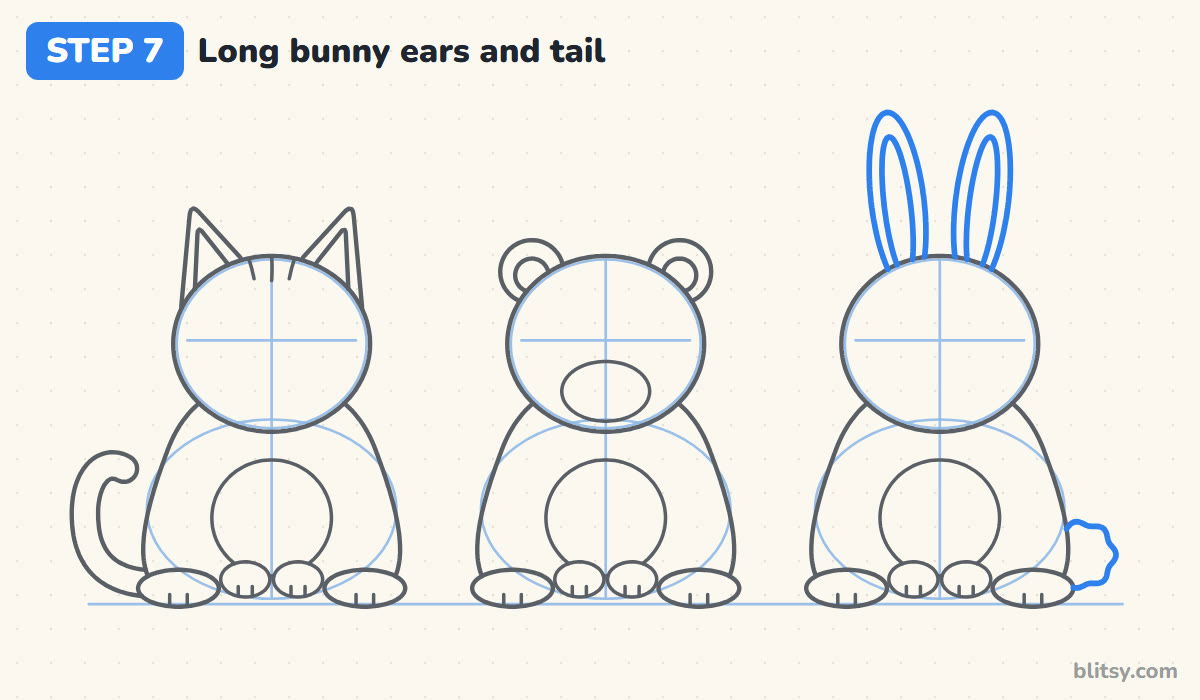
On the right head, draw two long, narrow ovals pointing up, tilted slightly apart at the top. They should be nearly as tall as the head itself. Add a thinner oval inside each one. Then put a fluffy little tail on the bunny's right side, drawn with a wavy line so it looks soft.

💡 Tip: Tilt the bunny's ears outward just a touch. Perfectly straight ears look stiff, like two posts.
Step 8: Place the eyes and add a shine
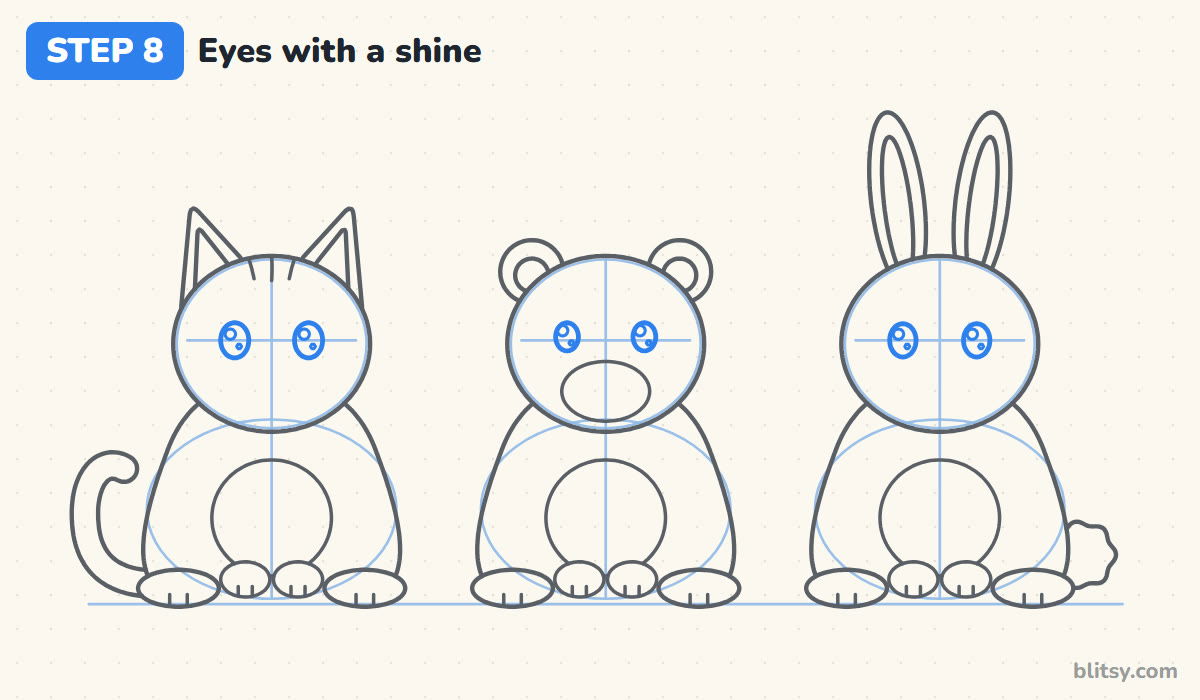
Each animal gets two dark ovals sitting right on that line, spaced well apart. Inside every eye, draw one small circle near the top and a tiny dot near the bottom for the shine. Eyes set too close together make a face look worried.
💡 Tip: Big eyes set low on the head look babyish and cute. Small eyes placed high look grown-up.
Step 9: Add the noses, mouths and whisker lines
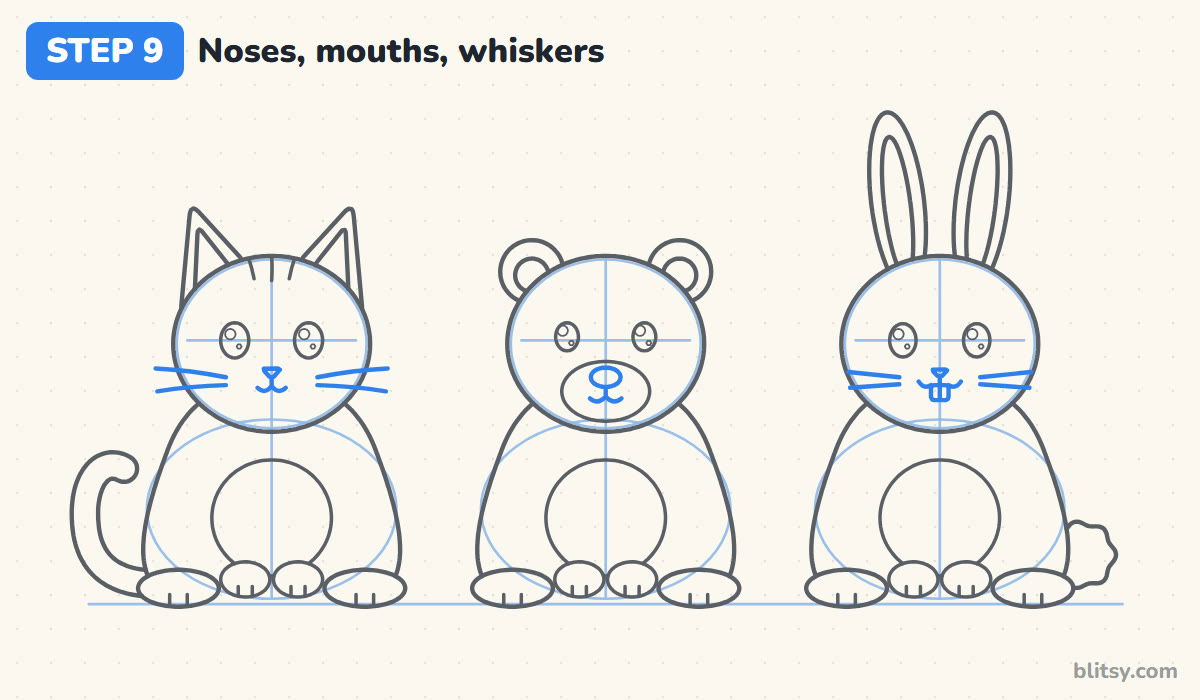
The cat and the bunny each get a tiny upside-down triangle nose with a mouth shaped like a sideways number 3 under it. Give the cat two long whiskers on each cheek. The bear's nose is a dark oval at the top of its muzzle. The bunny also gets two front teeth peeking out and shorter whiskers.
💡 Tip: Draw whiskers with a quick flick of the wrist. Slow whiskers come out wobbly.
Step 10: Sketch a strip of grass
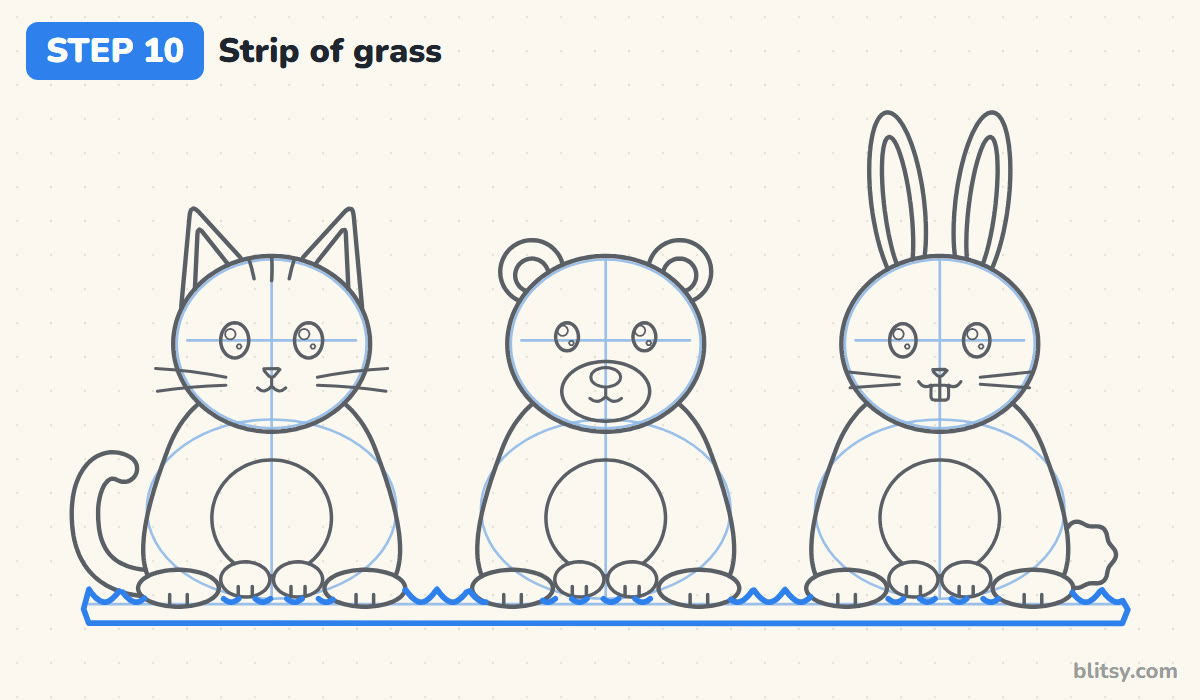
Below the animals, draw a long strip with a zigzag top edge to make the grass. Stop the line wherever it meets a foot or a tail so the animals sit in front of it. I like this small touch because it keeps the trio from hovering on the page.
💡 Tip: Keep the grass blades small and even. Tall grass would hide the feet you just drew.
Step 11: Ink your lines and erase the helpers
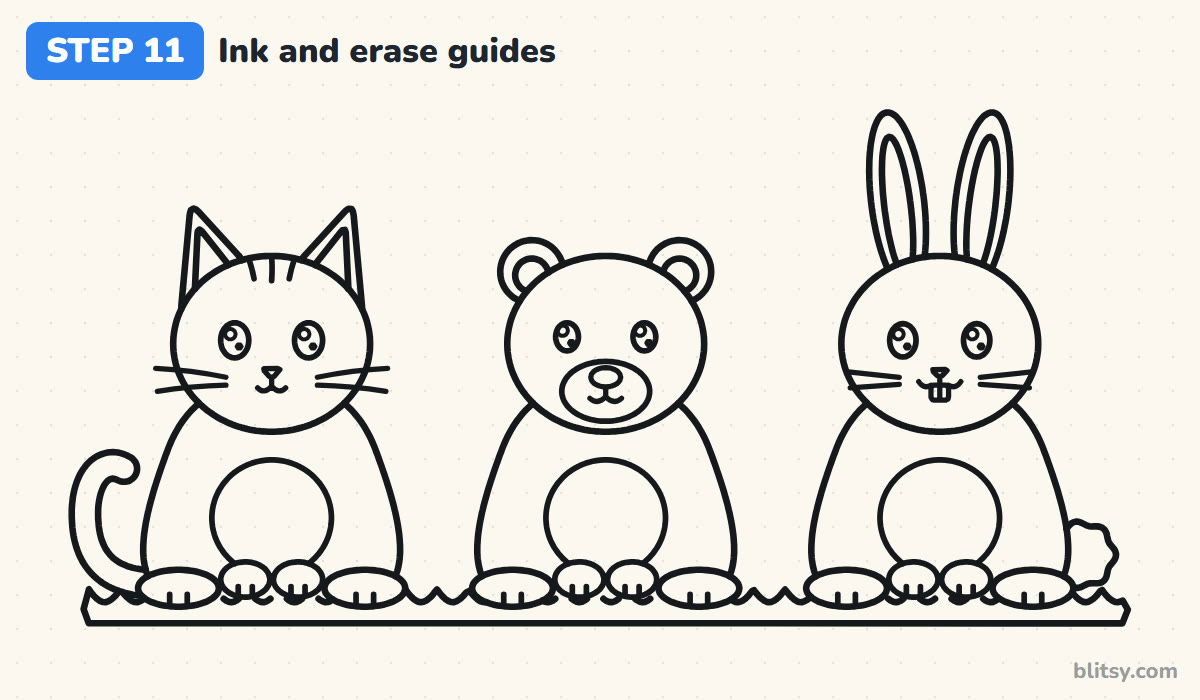
Trace every line you want to keep with the black fineliner. I slow down around the ears and paws, since those small curves show every wobble. Wait a minute for the ink to dry, then erase the ovals, the center lines and the ground line.



💡 Tip: Turn the paper as you ink curves. Your hand moves more smoothly when it pulls the pen toward you.
Step 12: Color the three friends
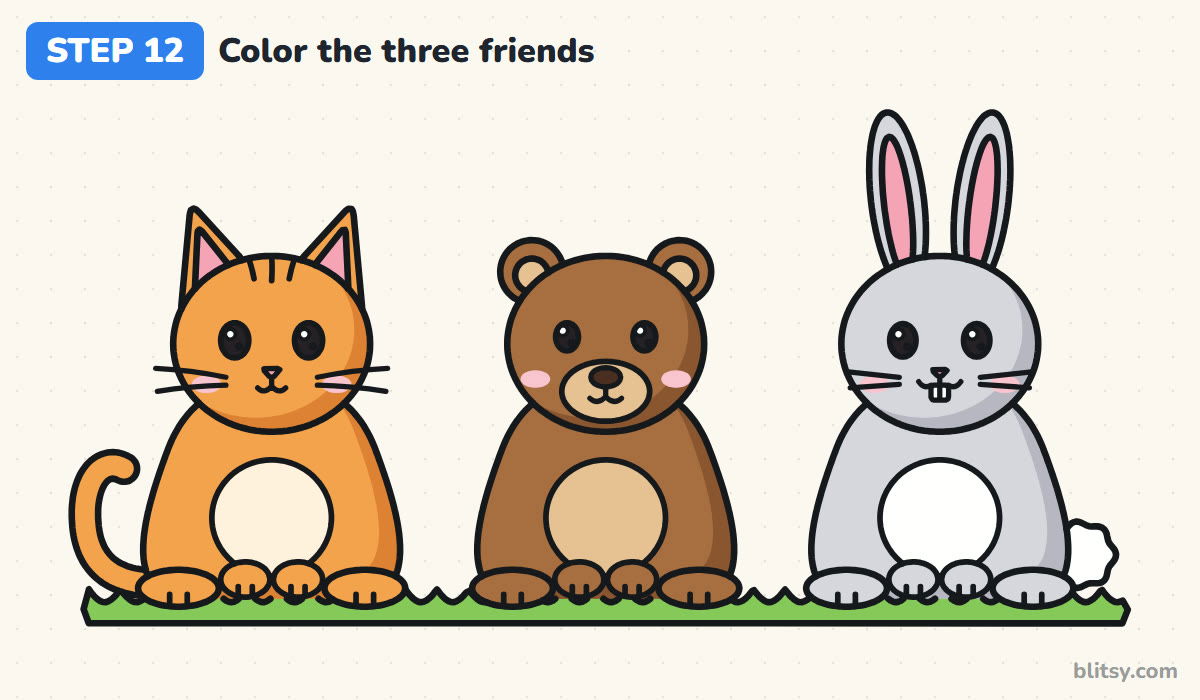
Color the cat orange with a cream belly, the bear brown with a tan muzzle and belly, and the bunny light gray with a white belly and tail. The inner ears of the cat and bunny are pink, and the bear's are tan. A darker shade along the right side of each head and body adds roundness. Finish with green grass and pink cheeks.
💡 Tip: Leave the white shine dots in the eyes uncolored. Those tiny white spots make the faces come alive.
Why a Cute Animal Can Turn Out Strange
- Heads that are too small. A small head on a big body looks like a real animal, not a cute one. Make the head nearly as wide as the body.
- Eyes high on the head. Put them on the cross line, around the middle of the head or just below, and leave room for the muzzle.
- Different sized heads. If one oval is bigger, the animals stop looking like friends of the same age. Measure the middle head and copy it.
- Ears drawn in front of the head. Ears grow from behind the head, so stop their lines where they meet the oval.
- Pressing hard on the helper shapes. Dark guides won't erase cleanly. Sketch them as lightly as you can.
Turning the Same Base Into New Animals
My favorite part of this base is how far it stretches. Swap the ears and muzzle again and you get a mouse (big round ears, tiny pink nose), a fox (tall pointy ears, an orange face with a white chin) or a panda (black ears, black patches around the eyes). Give the bear white fur and you have a polar bear. If the cat was your favorite, the cute and easy cat drawing tutorial shows a tuxedo cat sitting by its yarn, and the bear drawing step by step lesson is great practice for round shapes.
Cute Animals Coloring Page and Printable Steps
For a quiet coloring session, print the free cute animals coloring page. The small colored version at the top shows which color goes where, and the big outline underneath has thick lines that little hands can stay inside. The step-by-step guide PDF holds all 12 steps and tips, two per page, and it prints on Letter or A4 paper.
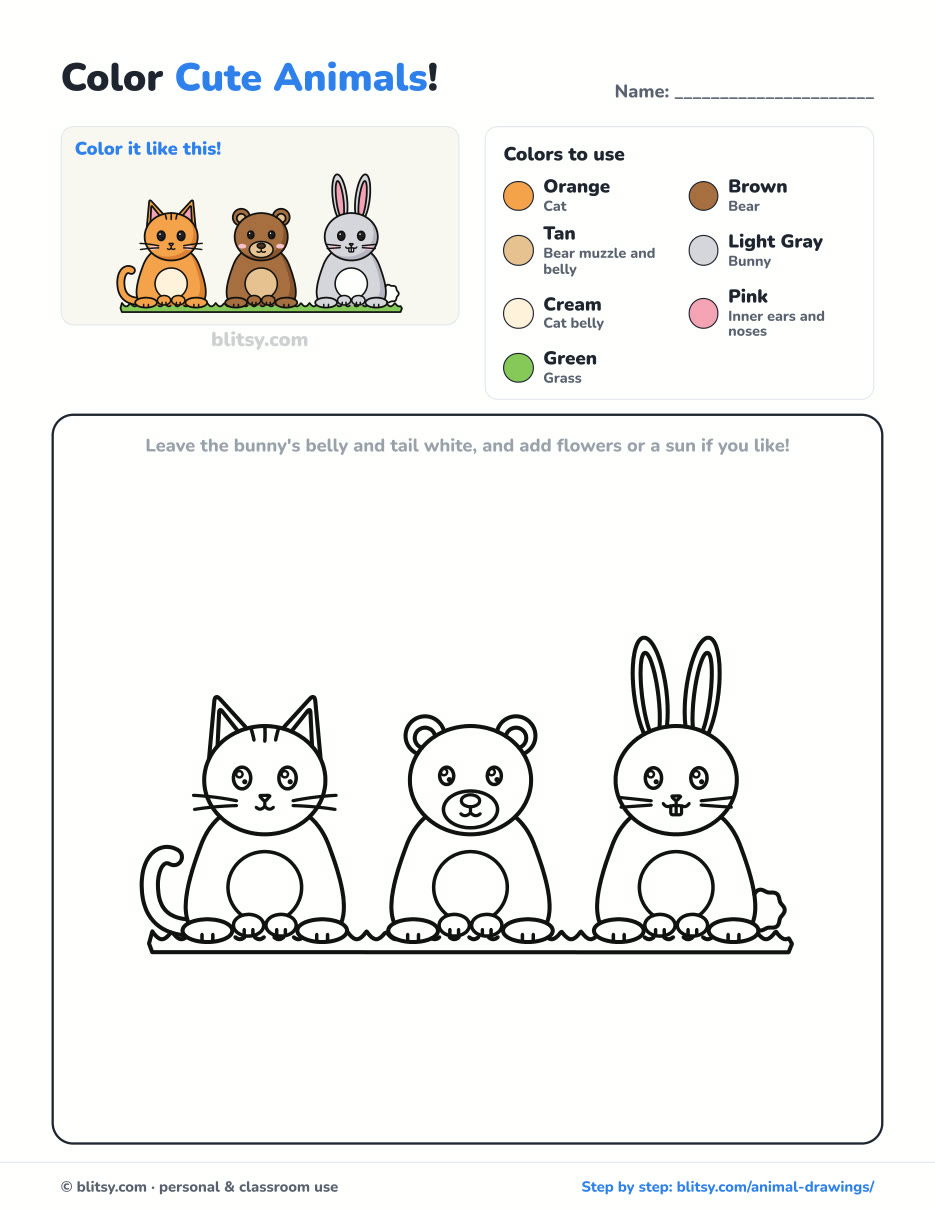
Black outlines with a colored example and the color names at the top. Ready to print and color.
⬇️ Download Coloring PageEvery step picture with its instructions and tips, to keep beside your paper while you draw.
⬇️ Download Drawing Guide📱 On a phone? Tap a download button, then open the file and choose Share → Save to Files or Print. On a computer, the PDF opens or saves straight to your Downloads folder.
Keep the Three Friends on Your Pinboard
Questions Beginners Ask About Drawing Animals
What is the easiest animal to draw for beginners?
A bear or a cat built from circles is a good first choice. Both use round shapes with only a few small details, so you can finish one in a short sitting.
How do you make animal drawings look cute?
Use a big head, a small round body, large eyes placed low and wide apart, and soft rounded shapes.
How can kids learn to draw animals?
Start with one base made of an oval and a pear shape, then change only the ears and the tail. Younger kids can skip the whiskers and teeth and still get three clear animals.
How long does it take to draw these animals?
Plan on about 25 minutes for the pencil and ink, and another 15 minutes or so to color.
Try the base once more on your own and see which animal shows up when you change the ears. 🐾
Related posts:
 How to Draw a Care Bear Step by Step (Cute Fan Art for Kids)
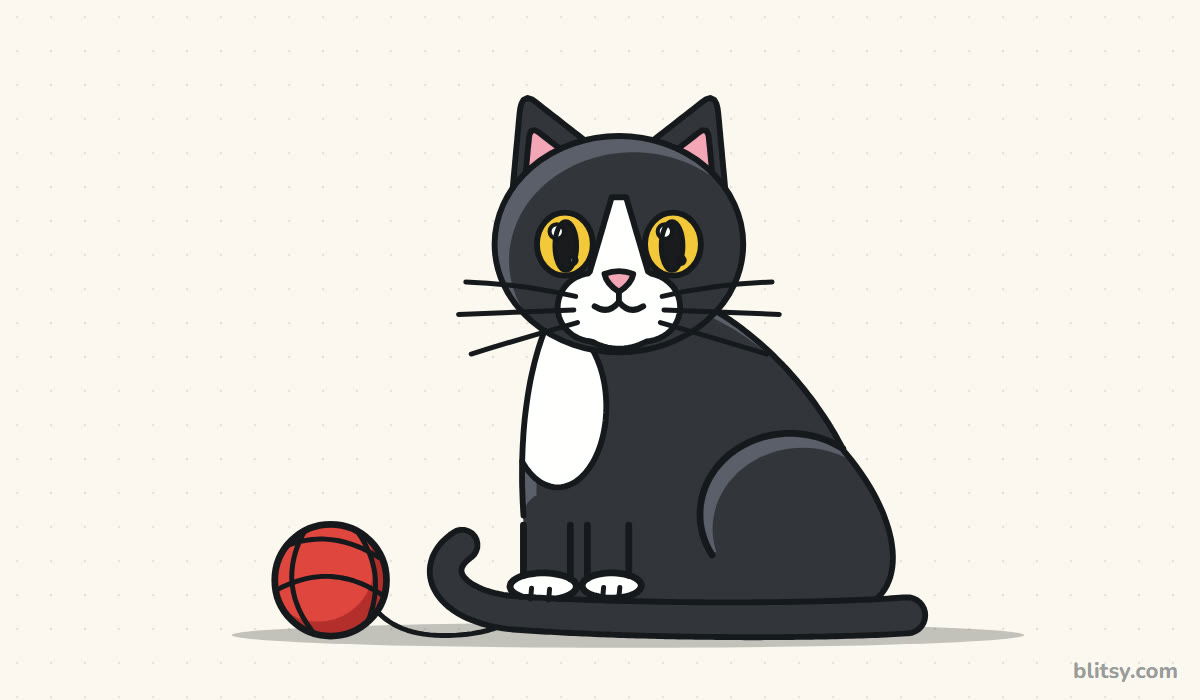 How to Draw a Cat Step by Step (Easy Tuxedo Cat)
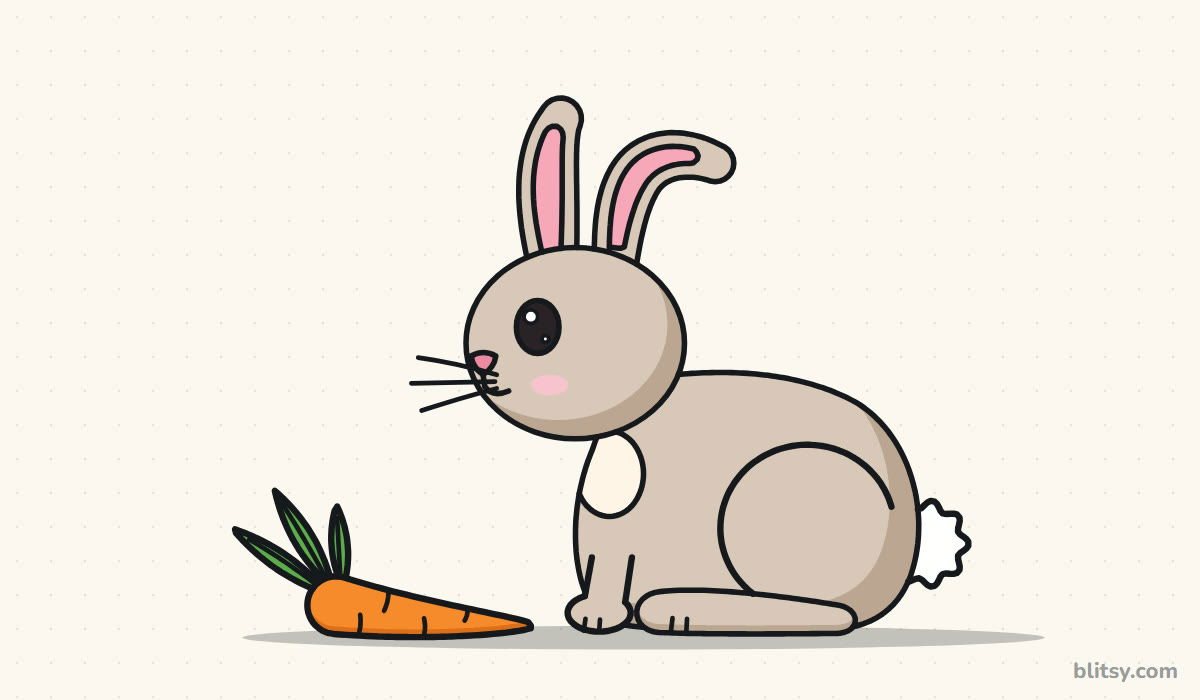 How to Draw a Bunny Step by Step (Easy for Beginners)
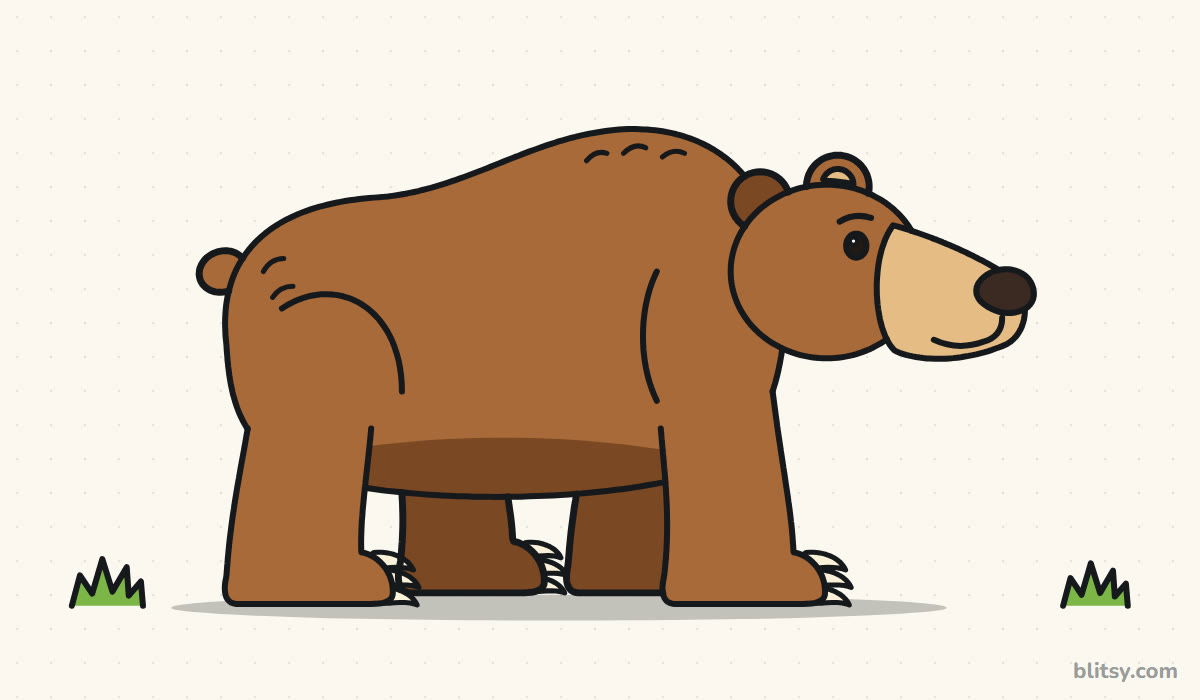 How to Draw a Bear Step by Step (Easy for Beginners)
 How to Draw a Polar Bear Step by Step (Easy for Beginners)
 How to Draw a Paw Print Step by Step (Dog and Cat)
 How to Draw a Cat Face Step by Step (Easy Tabby Guide)
 How to Draw a Cat Eye Step by Step (Slit and Round Pupil)
 How to Draw Cat Noir Step by Step (Easy Chibi Hero)
 How to Draw a Sad Cat Step by Step (Easy Sad Face Lesson)
 How to Draw a UFO Step by Step (Cute Alien Saucer)
 How to Draw a Jellyfish Step by Step (Cute, Easy Guide)

