Pouring a concrete slab might seem daunting if you're new to DIY construction projects. However, with the right guidance and a bit of patience, you can successfully complete this task with confidence. This step-by-step guide is designed to help beginners navigate the process of pouring a concrete slab, making your DIY journey easier and more enjoyable.
Preparing the Site
Step 1: Choose the Right Site
Select a suitable location for your concrete slab. Ensure the area is clear of any utilities, and you have the necessary permits if required.
Step 2: Clear and Level the Area
Remove any debris, grass, or rocks. Level the ground as much as possible. For a more stable base, consider removing the topsoil and adding a gravel layer.
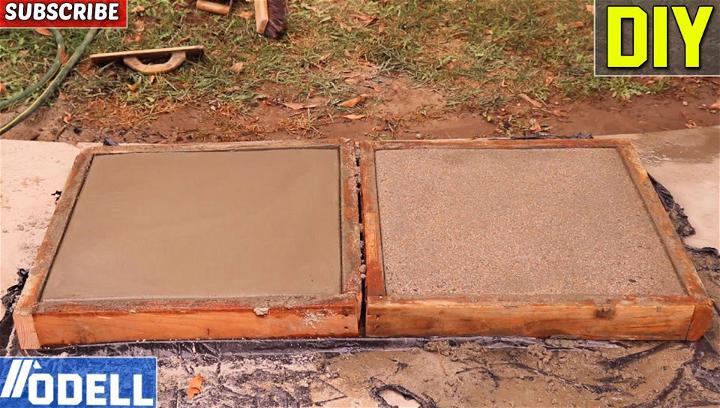
Step 3: Set Up the Forms
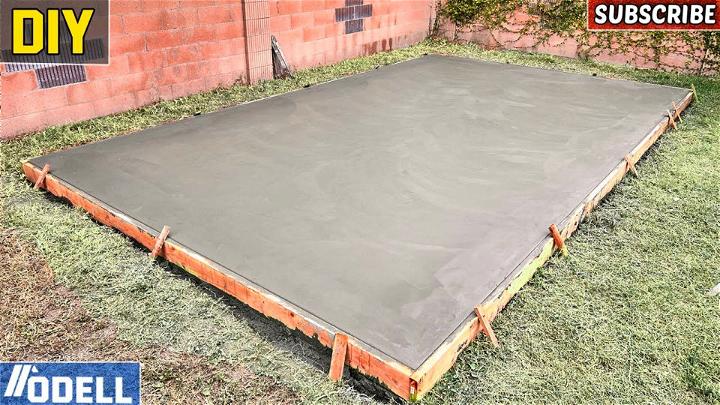
Using 2x4s or similar material, build the forms that will shape your slab. For the project described, a simple three-sided form measured at 12x16 feet is used. Secure the forms with stakes and ensure they are level and sturdy.
Preparing the Subbase
Step 4: Wet the Dirt Subbase
Particularly around the areas that will be directly on dirt, wetting it will help to slow the absorption of water from the concrete, promoting a more even cure.
Step 5: Pouring Over Existing Concrete
When pouring over an existing patio, extend the new concrete to ensure it overlaps, preventing cracking at the join. Reinforcing the slab with rebar over both the old concrete and new dirt areas can also help minimize cracking.
Mixing and Pouring the Concrete
Step 6: Choose the Right Mix
For a beginner's project, a 3000 psi mix with pea gravel and fiber mesh is recommended. The fiber mesh helps to prevent cracks and provides additional strength.
Step 7: Pour the Concrete
Start pouring your concrete, filling the forms you've prepared. If you're doing this on a small scale, a wheelbarrow and some physical labor might suffice. For larger projects, consider a concrete pump or mixing by hand.
Finishing the Concrete
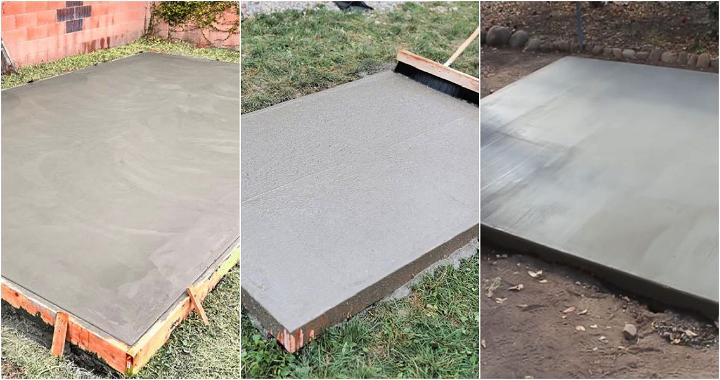
Step 8: Level the Concrete
Use a tool called a screed to level out the poured concrete. Move it back and forth across the surface to build a flat, even slab.
Step 9: Smooth the Surface
After screeding, smooth the concrete using a bull float. This process helps to push down the aggregate and brings the cream of the concrete to the surface for finishing.
Step 10: Cut Control Joints
Control joints help to control cracking. For this project, a joint splitting the slab into two 8x12 sections is suggested. This can be done when the concrete has started to set but is not fully cured.
Step 11: Edge the Slab
Using an edging tool, round the edges of your slab. This will help to prevent chipping and gives your slab a professional finish.
Step 12: Curing the Concrete
Properly curing the concrete is crucial for its durability. Keep the slab moist for at least a few days. If you're not able to wet it periodically, consider applying a concrete curing compound to lock in moisture.
Removing the Forms
Step 13: Remove the Forms
Once the concrete has cured for at least 24 hours, you can remove the forms. If they were oiled beforehand, they should come away easily without sticking.
Maintenance Tips
- Keep your slab clean and reapply sealer as recommended.
- Avoid using deicing chemicals in winter, as these can damage the surface.
Video Tutorial
For a step-by-step video tutorial, watch this informative YouTube video: how to pour a concrete slab for beginners DIY.
It pairs well with this written guide, enriching your learning experience by showing the techniques discussed in an engaging and straightforward manner.
Pouring concrete solo can be satisfying with prep, the right tools, and safety. Take time and follow the steps for a strong surface.
Discover 20 Expert Ways to Pour a Concrete Slab Efficiently and Effectively
1. How to Build a Concrete Slab

Building a concrete slab is simpler than you might think. It's all about making a sturdy foundation for anything from sheds to garages. With the right mixture and tools, you gain a durable, flat space ideal for various projects.
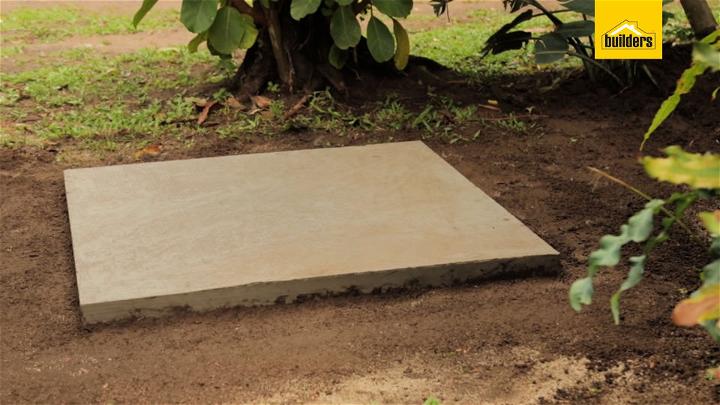
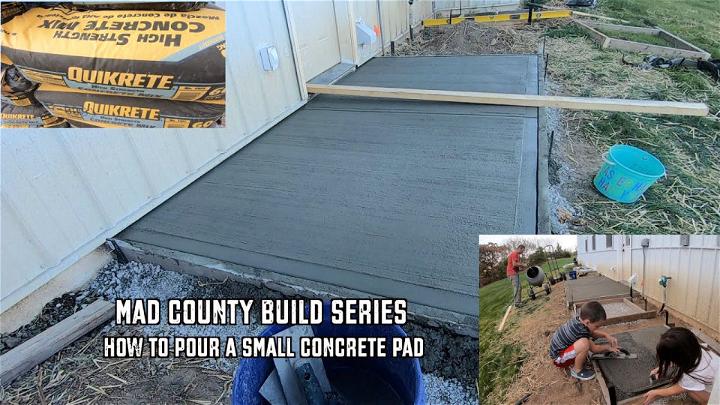
2. How to Pour a Small Concrete Pad
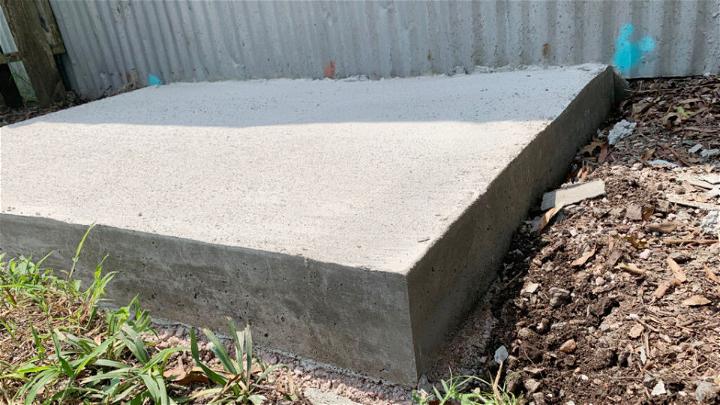
Pouring a small concrete pad can offer a solid base for air conditioning units or outdoor seating. This project doesn't require much concrete but calls for precision and smoothing to achieve a flat, functional surface.
3. Making a Concrete Slab

Making a concrete slab involves more than just concrete; it's about careful planning and preparation. Begin with a well-leveled site and build a solid frame to hold the concrete. Once poured, ensure an even surface for a quality finish.
4. DIY Concrete Slab for Trash Bins
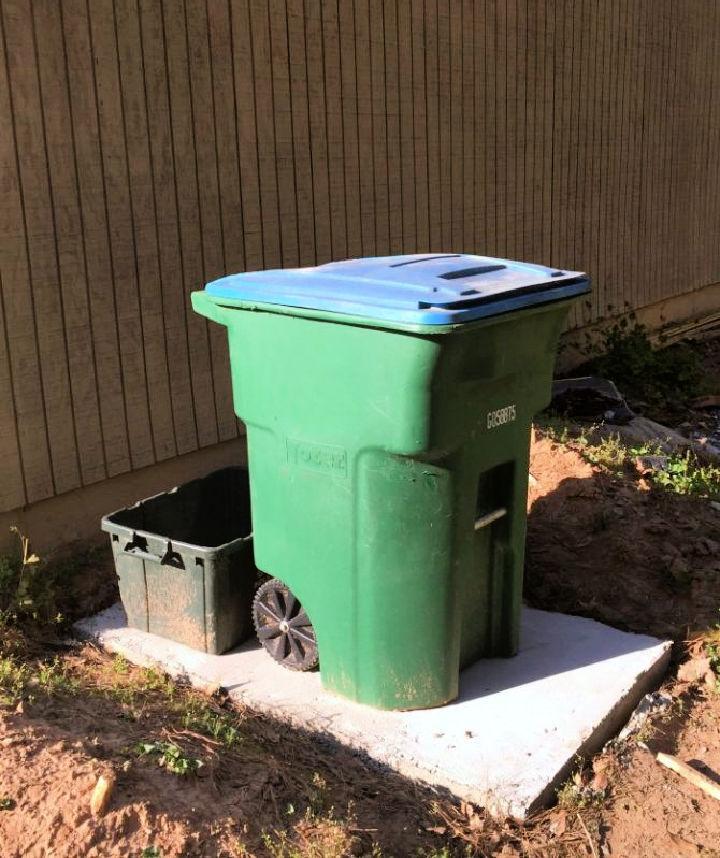
A DIY concrete slab for trash bins enhances your home's tidiness. It's a straightforward task that prevents bins from tipping over and improves accessibility. It's a practical addition to the exterior of your home, blending utility with design.
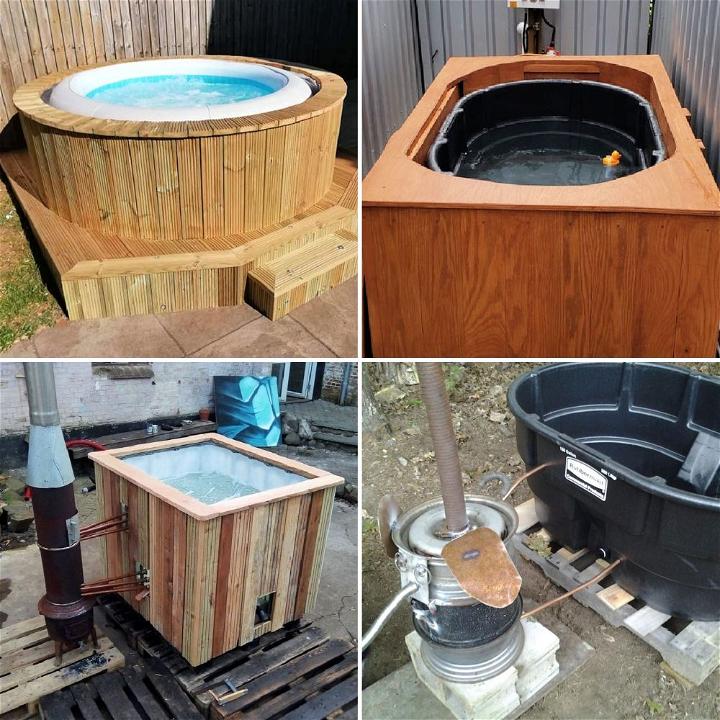
5. Build a Concrete Slab for Hot Tub

When you build a concrete slab for your hot tub, you ensure a stable and level foundation that can withstand the weight and moisture. It's an essential step for enjoying your hot tub safely and with peace of mind.
6. How to Form a Concrete Slab
Forming a concrete slab is all about the framework. It requires setting up wooden forms to the desired shape and size, ensuring they're level and securely in place. This form becomes the guide for your concrete pour, promising crisp edges.
7. Pouring a Concrete Slab for Beginners
Pouring a concrete slab for beginners might seem daunting, but it's achievable. Starting with a small project can help you learn the basics of mixing, pouring, and leveling concrete, providing a strong foundation for future projects.
8. DIY Laying a Concrete Slab
DIY laying a concrete slab allows homeowners to tackle significant upgrades without the need for professionals. It's all about preparation, from ensuring the ground is level to mixing concrete with precision, resulting in a satisfying and functional slab.
9. Homemade Concrete Slab Installation
Homemade concrete slab installation brings a sense of accomplishment. Whether you're making a base for garden structures or pathways, the key is in the preparation and care taken during pouring and finishing to ensure longevity and aesthetics.
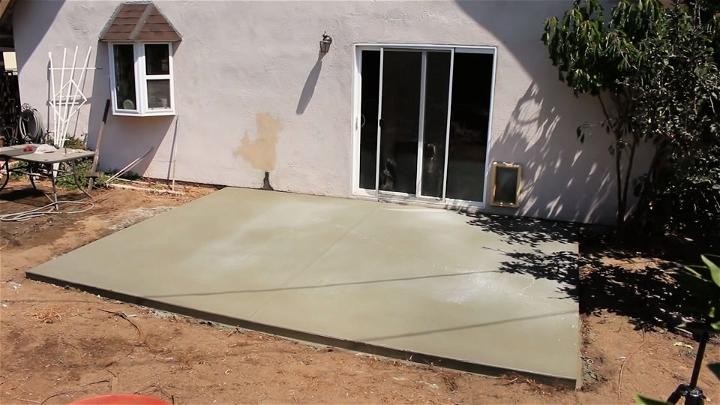
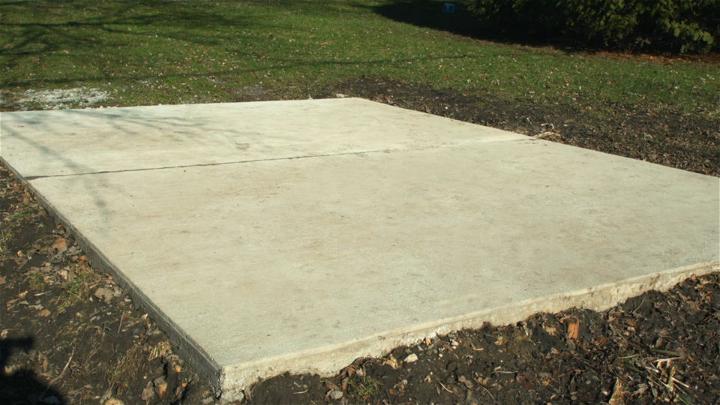
10. Large Concrete Slab for Patio

A large concrete slab for your patio transforms your outdoor area into a versatile space for dining or relaxation. Attention to detail in the ground preparation and concrete mix will provide a smooth, durable surface for years of enjoyment.
11. Pour a 15' X 12' Concrete Slab

Pouring a 15' x 12' concrete slab can significantly expand your outdoor living space. It's perfect for setting up a pergola or outdoor kitchen, adding both function and value to your home with a touch of do-it-yourself pride.
12. DIY Small Concrete Slab Less Than
DIY small concrete slab projects are not only cost-effective; they're also a great way to learn a useful skill. Whether it's a pathway or a small patio, the key lies in meticulous preparation and execution.
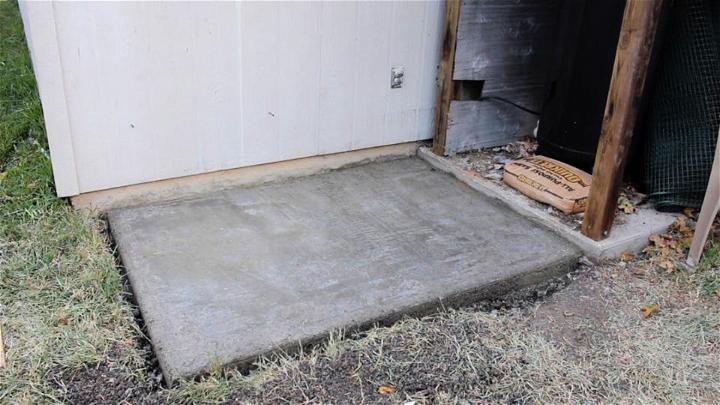
13. How to Make a Concrete Shed Slab

Building a concrete slab for a shed ensures a solid, level foundation that protects the structure from moisture and shifting ground. It's a vital step for anyone looking to add a durable and weather-resistant storage space to their property.
14. Pouring a Cement Slab
Pouring a cement slab is an essential skill for any homeowner interested in upgrades and repairs. Suitable for anything from sidewalks to driveways, mastering this skill means making long-lasting surfaces that stand the test of time.
15. Build a Storage Shed Slab with Concrete
To build a storage shed slab with concrete is to give your outdoor structures a robust base. It not only elevates the shed, protecting it from dampness but also adds to the overall stability and longevity of your building.
16. How to Do Cement Slab

When you do a cement slab, you're laying the groundwork for a multitude of projects, from patios to pathways. Understanding the mix and settle time of cement is crucial for achieving a smooth, durable surface that endures.
17. Pouring a 14ft X 10ft Concrete Slab

Pouring a 14ft x 10ft concrete slab could be the foundation of your next big project. Perfect for outdoor uses like terraces or basketball courts, a well-executed slab is the first step toward transforming your backyard.
18. DIY Concrete Side Walk Slab
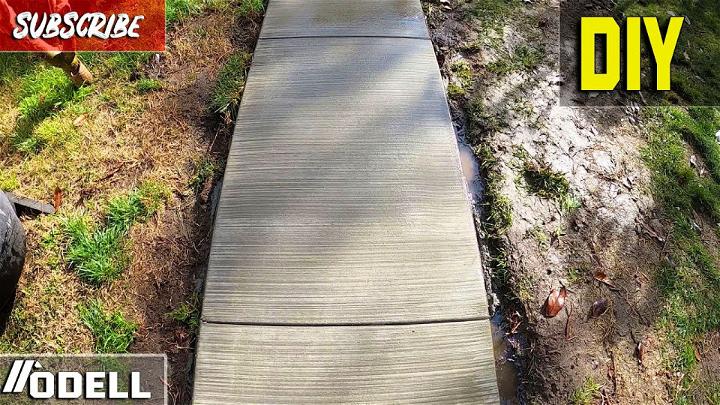
A DIY concrete sidewalk slab enhances curb appeal and provides a safe path. With careful planning and execution, you can build a straight or curving pathway that beautifully complements your landscape.
19. Building Concrete Pavers with Exposed Aggregate
Building concrete pavers with exposed aggregate provides a decorative touch to any garden path or patio. This technique involves polishing the surface to reveal the textured stones within, combining durability with aesthetic appeal.
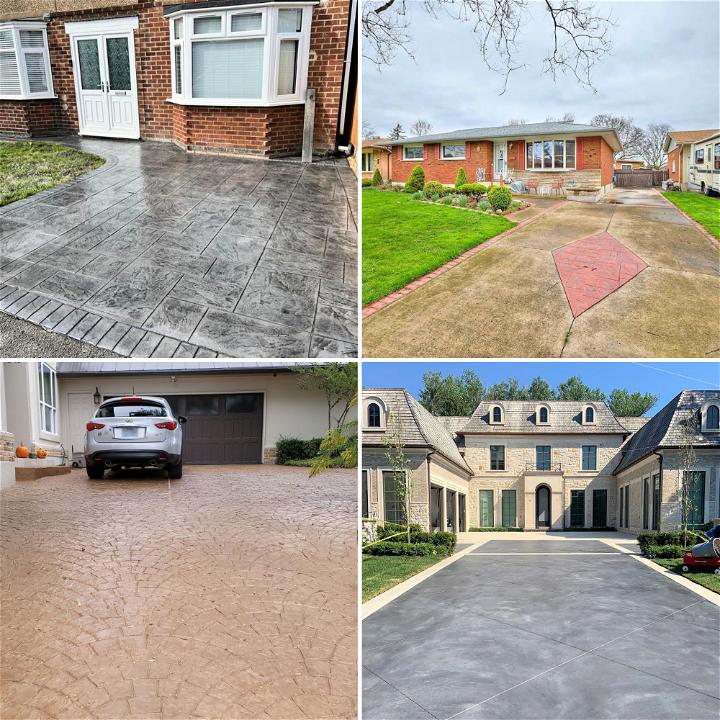
20. Pouring a Concrete Slab for Garage

Pouring a concrete slab for a garage is crucial for a stable and level base that supports the weight of vehicles and resists cracking. It involves proper preparation and reinforcement to ensure a smooth, durable surface that will serve for years to come.
Conclusion:
Wrapping up, pouring a concrete slab is a crucial project for many homeowners and DIY enthusiasts. By following the step-by-step guide provided in this article, you can successfully build a sturdy and durable foundation for various purposes. Remember to prioritize safety, gather the necessary materials and tools, and pay attention to detail. With proper preparation and execution, you can achieve a professional-looking concrete slab that will last for years to come.
Related posts: