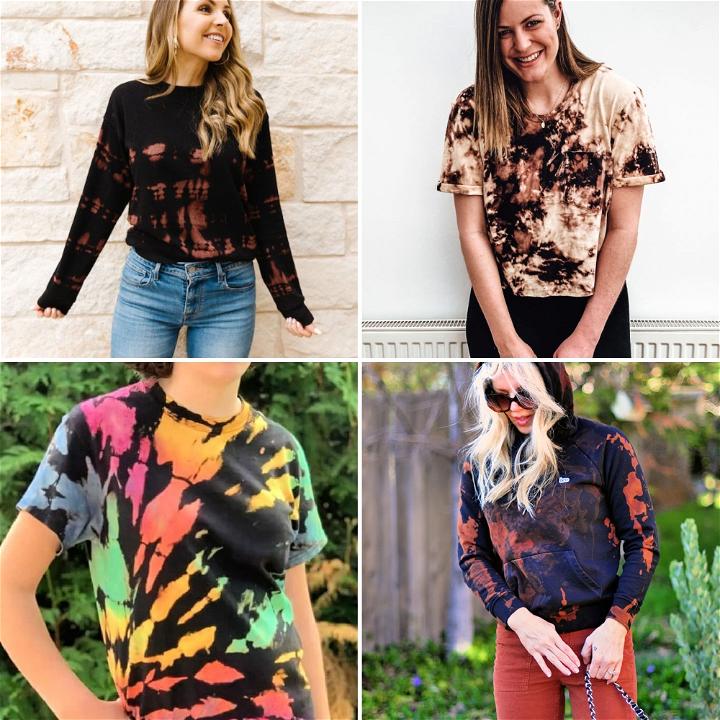
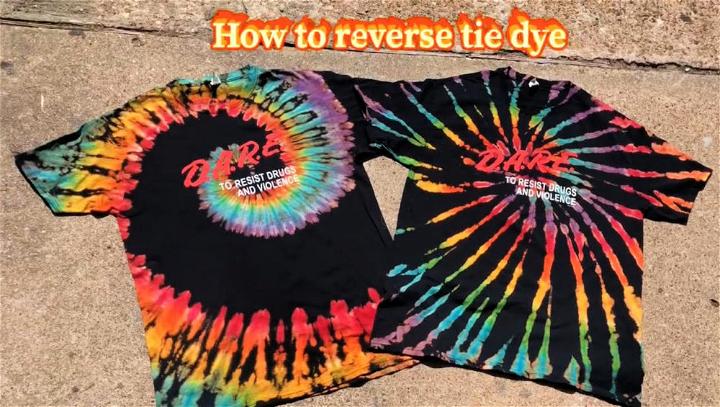
The reverse tie dye technique is a fun and easy way to create unique and stylish clothing. Unlike traditional tie-dye, where bright colors are added to a white garment, reverse tie-dye involves removing color from a dark garment to create eye-catching patterns. It is a two-step process that involves bleaching a dark-colored garment and then adding color to the bleached areas. The result is a stunning contrast between the original color of the fabric and the lighter areas where the color has been removed. Learn how to reverse tie dye with these 25 free and unique reverse tie dye patterns and techniques, including step by step instructions for beginners.
One of the great things about reverse tie-dye patterns is that it’s an easy and accessible craft that anyone can do at home. You only need a dark-colored garment, some bleach, rubber bands, and a small creativity. The process involves twisting and tying the garment with rubber bands to create the desired pattern, then carefully applying bleach to remove color from the exposed areas. After rinsing and washing the garment, you’ll have a one-of-a-kind piece that will turn heads.
Not only is reverse tie-dye a fun and creative activity, but it’s also a great way to breathe new life into old clothes. Instead of throwing away that faded black t-shirt or those old jeans, why not give them a new lease on life with some reverse tie-dye patterns? It’s an eco-friendly and budget-friendly way to update your wardrobe and express your personal style. So go ahead and give it a try with our list of 25 easy reverse tie dye patterns and techniques – you might just surprise yourself with what you can create!

How to Reverse Tie Dye: A Fun and Easy Way to Customize Your Clothes
If you love the look of tie dye but want to try something different, reverse tie dye is the perfect technique for you. Reverse tie dye, also known as bleach tie dye, is a technique of removing dye from sections of a dark-colored garment using bleach and water, and then optionally dyeing the bleached areas different colors. It can be done in various patterns and creates an edgy effect. It works best with natural or blended fiber fabrics.
Reverse tie dye is a unique way to transform your old or plain black shirts into colorful and unique creations. Also, use this technique on other dark-colored garments, such as sweatshirts, hoodies, pants, hats, and more. Reverse tie dye is a fun and easy craft project that you can do at home with some simple supplies and a bit of creativity. Learn how to reverse tie dye step by step and give you some tips and tricks to make your designs stand out.
What You Need for Reverse Tie Dye
Before you start your reverse tie dye project, make sure you have the following supplies:
- Dark-colored shirts (or other garments) made of 100% cotton or cotton blend. Cotton absorbs bleach and dye better than other fibers, so it is ideal for this technique. You can use black shirts for a classic contrast, or experiment with other dark colors, such as navy blue, brown, or maroon.
- Bleach. You can use any brand of household bleach for this project. You will need about 2 cups of bleach per shirt. You will also need a squirt or spray bottle to apply the bleach to your shirt. Alternatively, you can use bleach toilet bowl cleaner, which is thicker and easier to control than liquid bleach.
- Rubber bands. You will need rubber bands to create different patterns on your shirt by tying and bunching it in various ways. You can use any size or color of rubber bands, but non-colored ones are preferable as they won’t stain your shirt.
- Disposable gloves. Bleach can irritate your skin and damage your clothes, so it is important to wear gloves when handling it. You will need at least two pairs of gloves per person working on the project: one pair for applying the bleach and another pair for rinsing and dyeing the shirt.
- Dye (optional). If you want to add some color to your bleached areas, you will need some fabric dye. You can use a tie dye kit that comes with pre-mixed colors and bottles, or you can mix your own colors using powdered or liquid dye and water. You can choose any colors you like, but bright and vibrant ones will create a more striking contrast with the dark background.
- Other supplies. You will also need some scissors to cut the rubber bands, a rinsing station (such as a sink, bathtub, or bucket) to wash off the bleach and dye from your shirt, a drying rack or clothesline to hang your shirt until it is dry, and some detergent to wash your shirt after it is done.
How to Reverse Tie Dye Step by Step
Now that you have all your supplies ready, it is time to start your reverse tie dye project. Follow these steps to create your own unique design:
Step 1: Prepare Your Shirt
Lay your shirt flat on a clean surface. Decide what pattern you want to create on your shirt. You can crumple it into a tight mound for a random splatter effect, twist it into a spiral for a swirl effect, fold it into pleats for a stripe effect, or use any other technique you like. Secure your shirt with rubber bands to hold it in place.
Step 2: Apply Bleach
Take your shirt to the rinsing station and pour about 2 cups of bleach into a squirt or spray bottle. If you are using bleach toilet bowl cleaner, you can skip this step as it comes in a ready-to-use bottle. Put on your first pair of gloves and apply the bleach directly onto the rubber bands and let it soak into the shirt for about 10 to 15 seconds. Then pour or spray the excess bleach all over the shirt, making sure to cover both sides. You will see the color start to fade from the shirt as the bleach reacts with the fabric.
Step 3: Remove Rubber Bands
Carefully use scissors to cut the rubber bands and remove them from your shirt. If you are using a rinsing station with a drain, make sure to clear the rubber bands from the drain to prevent plumbing problems. You will see the bleached areas on your shirt where the rubber bands were.
Step 4: Rinse Bleach
Thoroughly rinse the bleach from your shirt with warm water. You will notice orange-tinted water coming from your shirt. Rinse until the water is clear again. Wring out the excess water from your shirt and hang it on a drying rack or clothesline until it is completely dry. You can also use a dryer if you prefer, but make sure to use a low heat setting.
Step 5: Apply Dye (Optional)
If you want to add some color to your bleached areas, you will need to dye your shirt. Put on your second pair of gloves and prepare your dye according to the instructions on the package. You can use a tie dye kit that comes with pre-mixed colors and bottles, or you can mix your own colors using powdered or liquid dye and water. You can choose any colors you like, but bright and vibrant ones will create a more striking contrast with the dark background.
Apply the dye to the bleached areas of your shirt using the bottles or a brush. You can use one color or multiple colors, depending on the effect you want to achieve. Be careful not to apply too much dye or overlap the colors, as this can make your shirt look muddy or dull. You can also leave some bleached areas undyed for a more subtle look.
Step 6: Set Dye
Once you are happy with your design, wrap your shirt in plastic wrap or put it in a sealable plastic bag. This will keep the dye moist and allow it to set into the fabric. Leave your shirt wrapped for about 6 to 8 hours or overnight. The longer you leave it, the more vibrant the colors will be.
Step 7: Wash Shirt
After the dye has set, unwrap your shirt and rinse it with cold water until the water runs clear. This will remove any excess dye from your shirt and prevent it from bleeding onto other clothes. Then wash your shirt separately in cold water with a small amount of detergent. Dry your shirt as usual.
Step 8: Enjoy Your Shirt
Congratulations! You have just created your own reverse tie dye shirt. You can wear it proudly or give it as a gift to someone special. Also, use this technique on other dark-colored garments, such as sweatshirts, hoodies, pants, hats, and more. Reverse tie dye is a fun and easy way to customize your clothes and express your personality.
Tips and Tricks for Reverse Tie Dye
Here are some tips and tricks to make your reverse tie dye project even better:
- Experiment with different patterns and colors. You can create endless variations of reverse tie dye by using different techniques of tying and bunching your shirt and by using different combinations of colors. You can also use stencils, stickers, or masking tape to create shapes or words on your shirt.
- Use high-quality shirts and dyes. For best results, use 100% cotton or cotton blend shirts that are dark-colored and plain. Avoid shirts that have prints, logos, or embellishments, as they may interfere with the bleach and dye process. Also, use high-quality fabric dyes that are suitable for cotton fabrics and have good colorfastness.
- Protect yourself and your surroundings. Bleach can irritate your skin and damage your clothes, so wear gloves when handling it and avoid contact with your eyes and mouth. Bleach can also stain or damage other surfaces, such as countertops, floors, or furniture, so cover them with plastic sheets or newspaper before starting your project. Work in a well-ventilated area to bypass inhaling bleach fumes.
- Follow the instructions carefully. To ensure that your reverse tie dye project turns out well, follow the instructions on the packages of bleach and dye carefully. Pay attention to the amounts, temperatures, and times recommended for each step. Do not skip any steps or rush through them, as this may affect the quality of your final product.
How to Care for Your Reverse Tie Dye Clothes
After you have made your reverse tie dye clothes, you will want to keep them looking good for as long as possible. Here are some tips on how to care for your reverse tie dye clothes and prevent them from fading or bleeding:
- Wash your reverse tie dye clothes separately from other clothes, especially for the first few washes. This will control the dye from transferring to other garments and ruining them.
- Wash your reverse tie dye clothes in cold water with a mild detergent. This will help keep the color and prevent it from fading or washing out.
- Dry your reverse tie dye clothes on a low heat setting or hang them to air dry. This will prevent the fabric from shrinking or losing its shape.
- Store your reverse tie dye clothes in a cool and dry place, away from direct sunlight. This will prevent the color from fading or changing over time.
By following these tips, you can enjoy your reverse tie dye clothes for a long time and show off your unique style. Reverse tie dye is a fun and easy way to customize your clothes and make them more interesting and colorful. You can also use this technique on other dark-colored garments, such as sweatshirts, hoodies, pants, hats, and more. Reverse tie dye is a way to express yourself and have fun with your clothes. Try it today and see what amazing reverse tie dye patterns you can come up with!
Easy Reverse Tie Dye Patterns and Techniques
Get creative with reverse tie dye and create unique, eye-catching designs with this guide to 25 easy reverse tie dye patterns! Learn how to reverse tie dye and give your clothes a new look with intricate, vibrant designs. Shop now for the perfect supplies and get started on your next project.
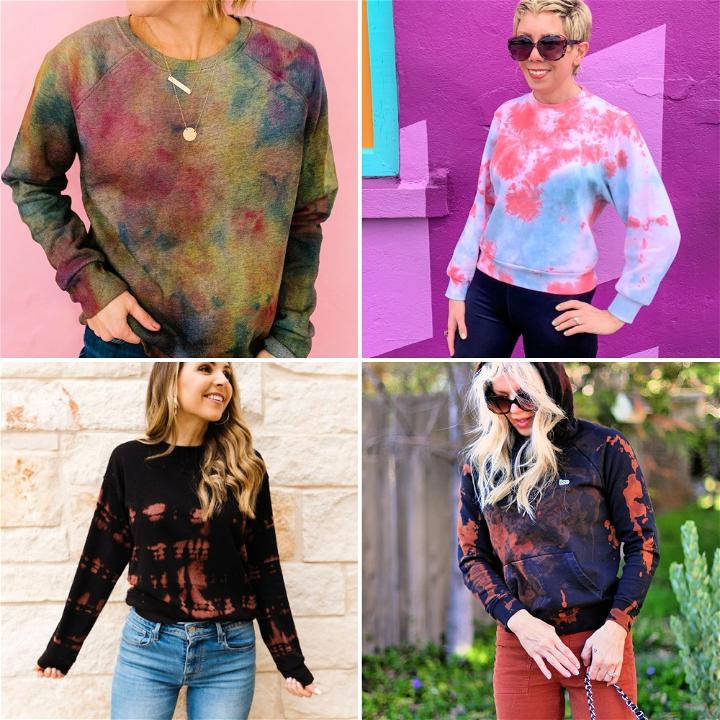
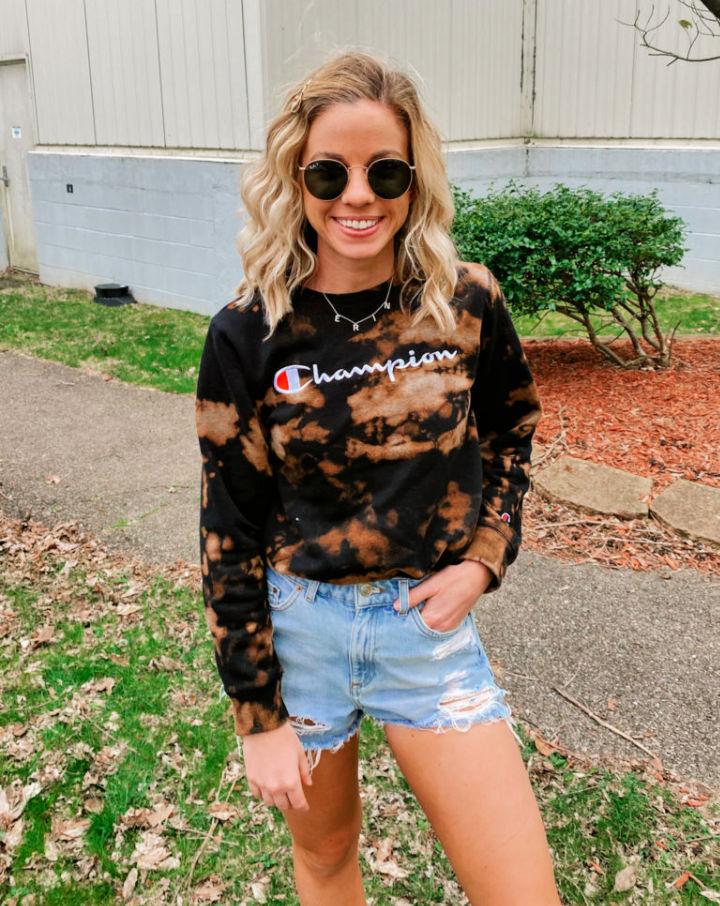
1. Reverse Tie Dye Sweatshirt with Bleach

The tie-dye technique is the most loved one for adding custom design patterns and prints on the fabric items like t-shirts. However, you can reverse tie-dye the t-shirts also for some cool effects. Look at the given reverse tie-dye sweatshirt that looks cool, and you have to bleach it first before the reverse tie-dye magic starts. It will only take about $4 to make this reverse tie-dye sweatshirt that will cost $50 in market price. The required materials will be a sweatshirt or shirt, bleach, squeeze bottle, rubber bands and rubber gloves. emilybelloma
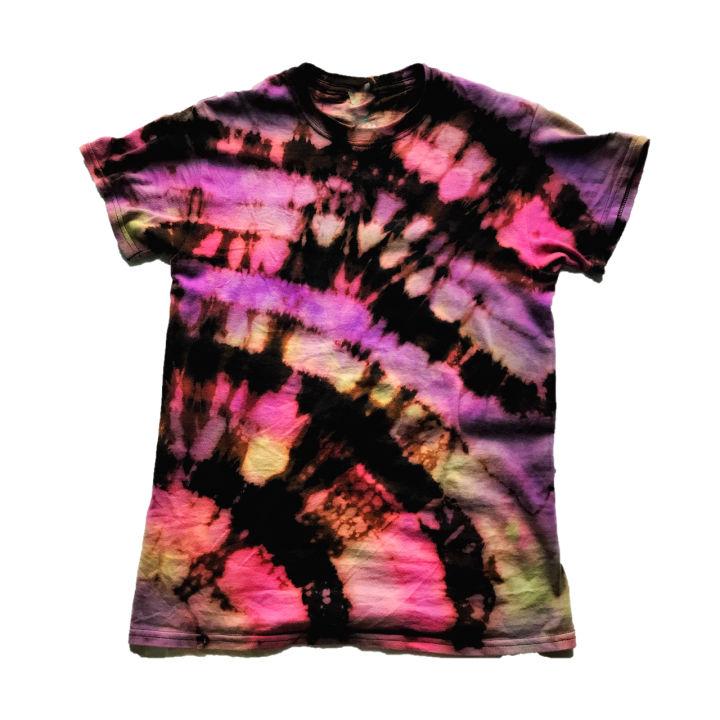
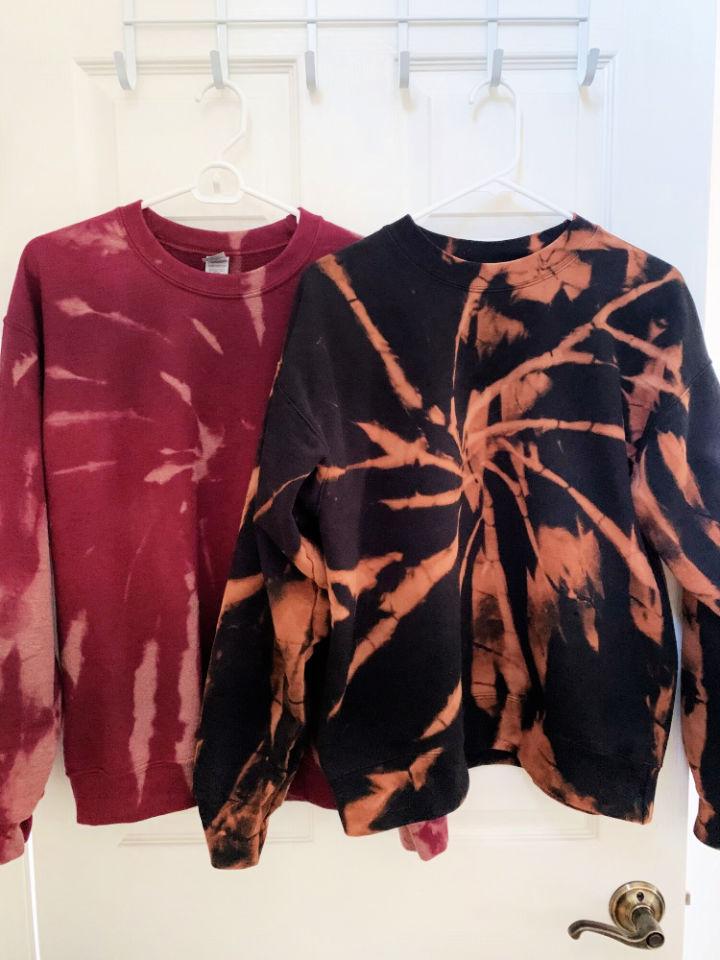
2. Red and Purple Reverse Tie Dye Shirt
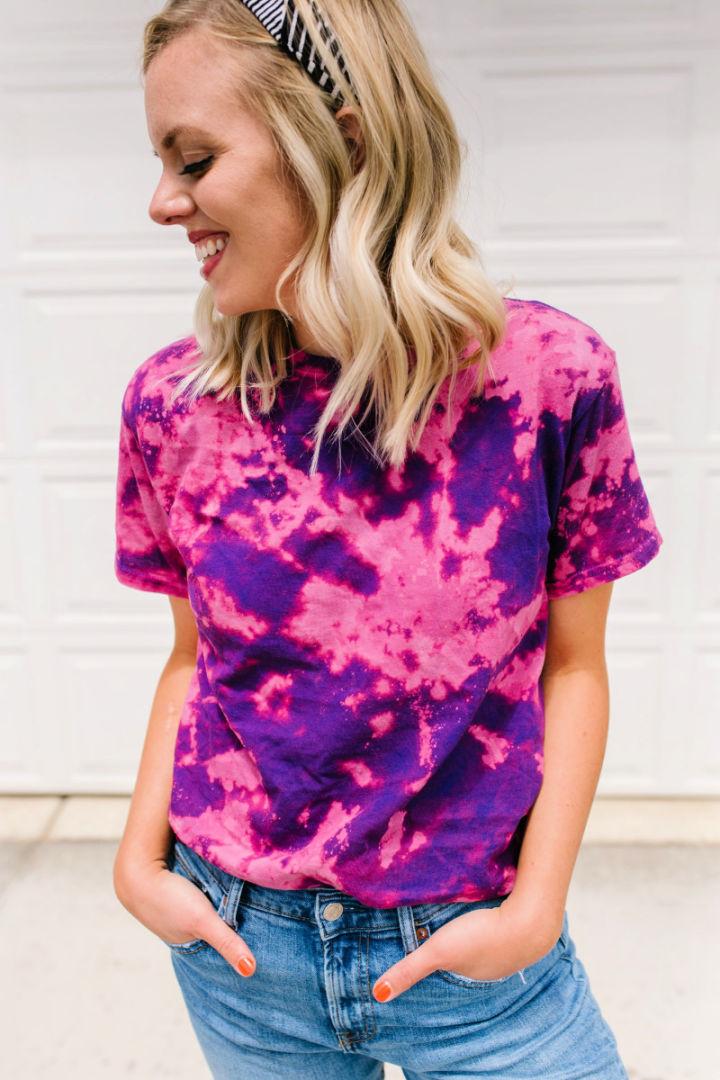
Celebrate the summer season by wearing thee brightly colorful t-shirts, the bright reverse t-shirts. You need 100% cotton-colored shirts in purple and red color, rubber bands, bleach and a squirt bottle to do this project. Just smartly fold the t-shirts, and then go for rubberbanding. Apply the bleach, and then rinse with water. Don’t leave the shirts for too long after applying beach as it can also remove all the shirt colors. prettylifegirls
3. Reverse Tie Dye Technique
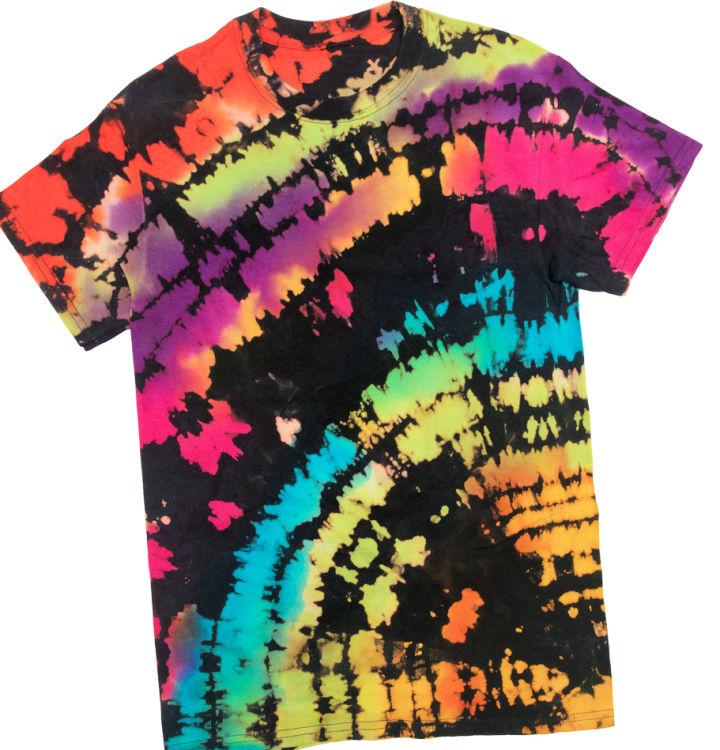
You will get professional guides here about how to reverse tie-dye a shirt so it will look outstanding and beautiful. First, grab a darker 100% cotton t-shirt and bleach it to remove its color in a patterned way. Rinse the bleached shirt with water and then apply the reverse tie-dye kit Color Changer to the exposed parts of the crumpled t-shirt and gain that magical reverse tie-dye effect on the shirt. Wash the shirt with water and also apply the dye colors randomly on the bleached parts. tiedyeyoursummer
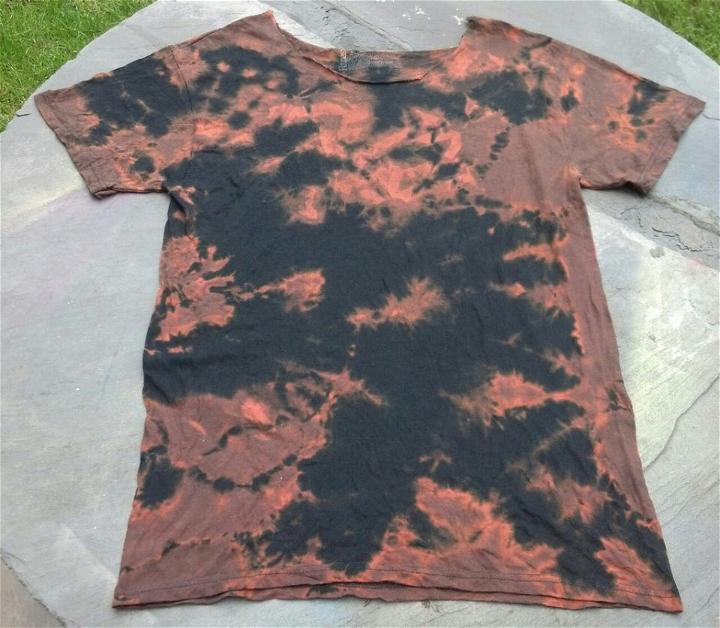
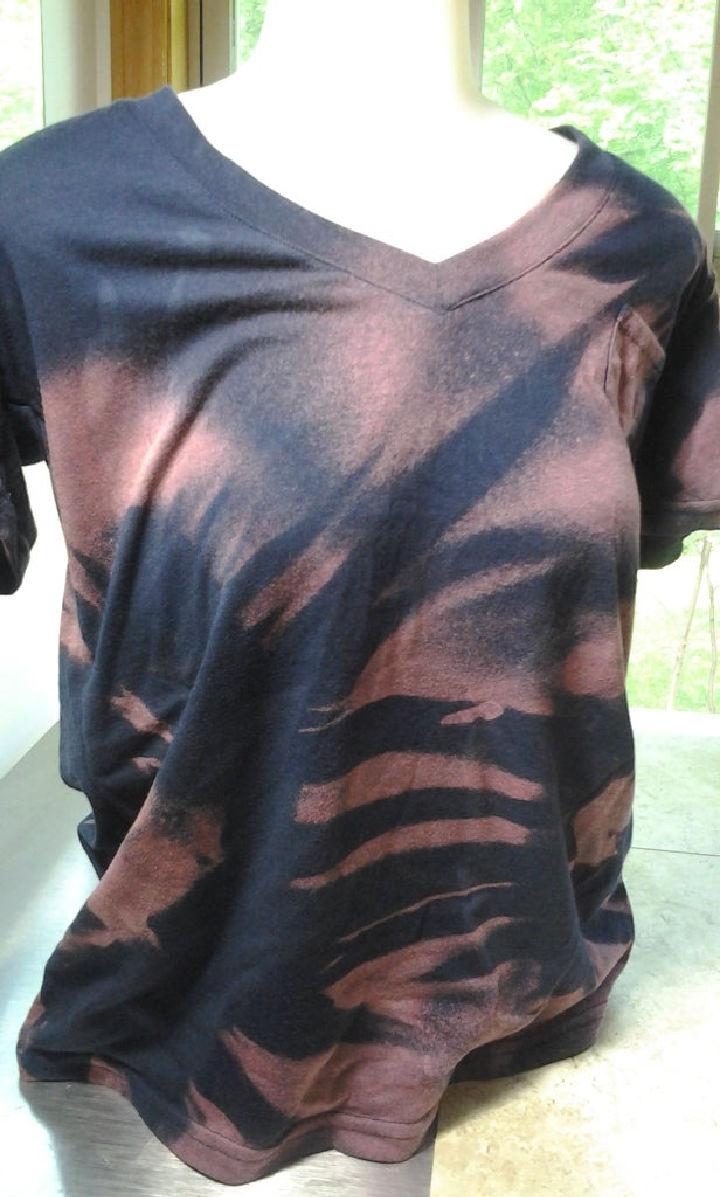
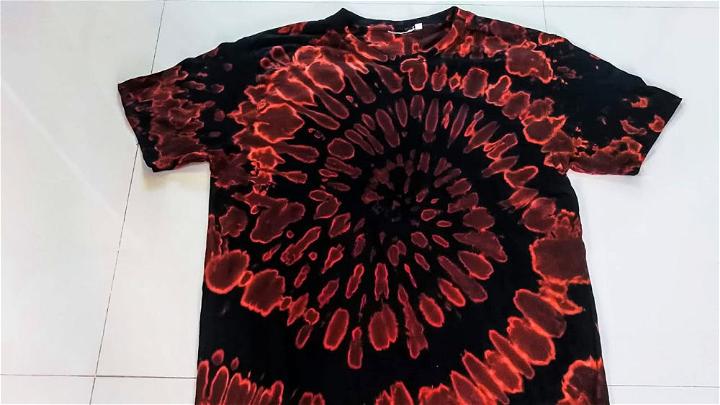
4. Reverse Red Bleach Tie Dye Top
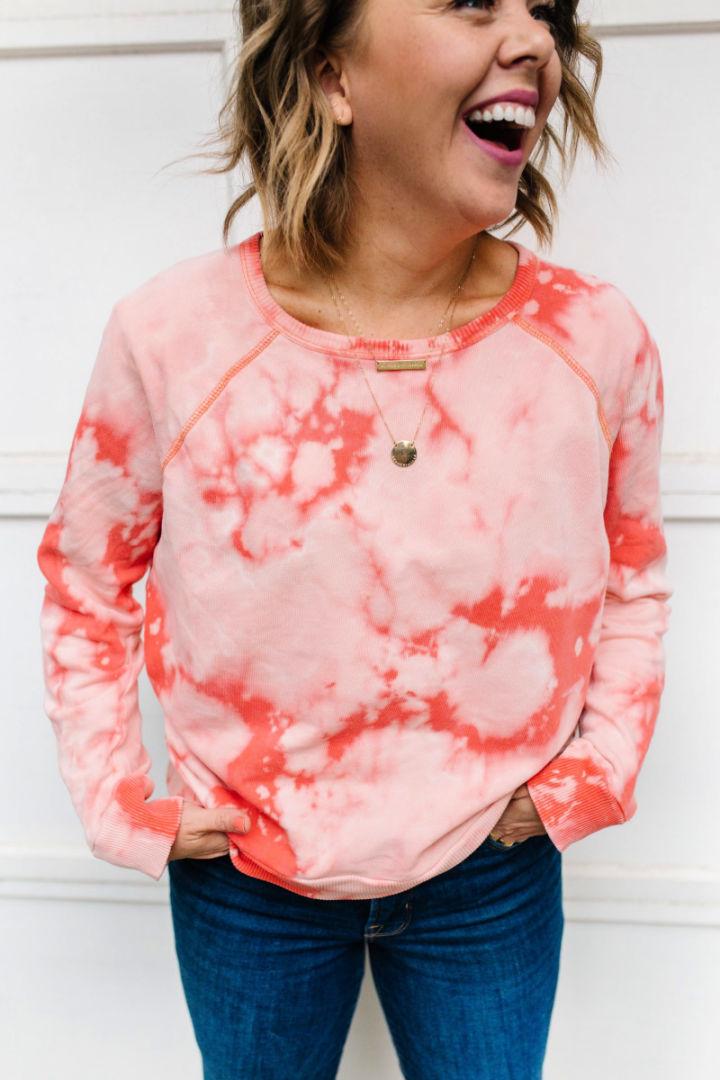
Are you new to the reverse tie-dye technique? Then learn it here like a pro, and it will not be a big challenge for you anymore. So, follow the here instructions about how to reverse tie-dye a top that will go for bigger fashion statements. You need a 100% colored sweatshirt, rubber bands, squirt bottle and bleach to easily make this fashion-forward design of tie-dye t-shirt. Just for a smart rubberbanding on the folded parts of the sweatshirt, and then apply the bleach. Leave it for some time, and then rinse with water to smartly discolor your sweatshirt. Use the darker sweatshirts for the project. prettylifegirls
5. DIY Bleach Tie Dye Pattern

Create eye-catching reverse tie dye patterns with the help of this helpful step-by-step tutorial. Do you love the t-shirt fashion and want to update your t-shirts with some lovely t-shirts? Then make the expensive-looking reverse tie-dye t-shirts at home using bleach and dyes. Look at the given colorful t-shirt that is colorful and looking just outstanding. It will make a sweet handmade gift to any favorite kid or style-loving teen girl or boy. You need a black t-shirt, a tie-dye kit, bleach toilet bowl cleaner, rubber bands and disposable gloves to complete this project quickly. chaoticallyyours
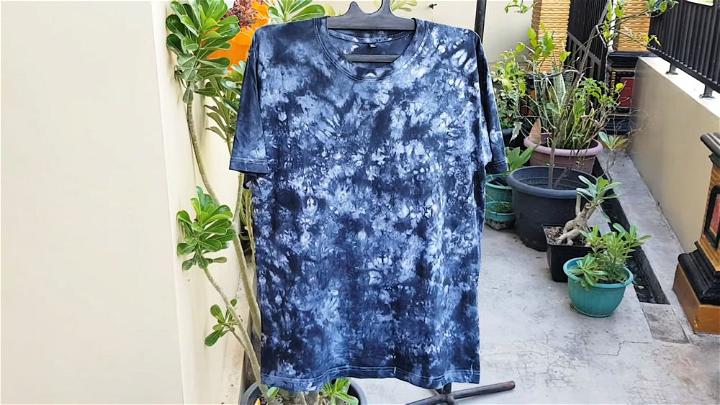
6. Reverse Tie Dye Blue Shirts
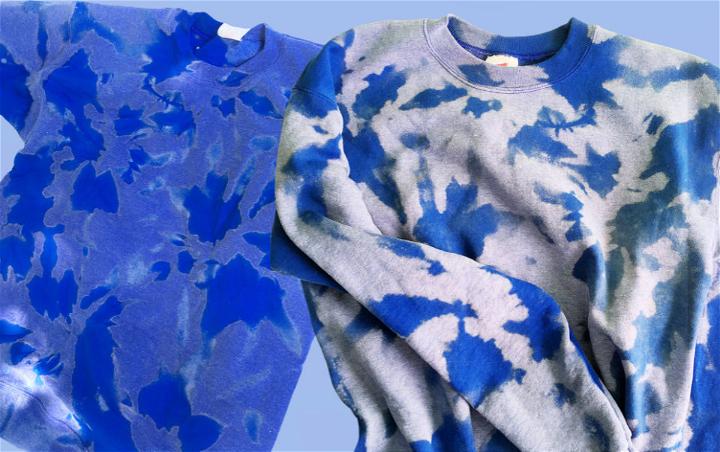
Like the tie-dye t-shirts, you can create amazing reverse tie-dye t-shirts that will be the coolest fashion. The tie-dye technique involves dyeing the t-shirt using the tie-dye technique, while the reverse tie-dye technique involves bleaching the t-shirts by tying the shirts with rubber bands. Fold the custom parts of the dark-colored t-shirt or sweatshirt and then rubberband them. Apply the bleach solution and leave for some time to remove the t-shirt color. Next, rinse it well with water, and that’s it. To duplicate this project, you need a plastic tarp, rubber gloves, solid color sweatshirt or shirt, rubber bands, spray bottle, bleach, and bucket. bhg
7. How to Reverse Tie Dye Shirt

Beaching the darker shirts for some light or no-color patches is the technique known as reverse tie-dye. This helps create amazing t-shirts for the fashion wardrobe. Look at this another great reverse tie-dye t-shirt, is not it looking super cool? The project is completed in just 25 minutes, and you need bleach, rubber bands and a dark-colored t-shirt to do this project. The project is all about rubberbanding the t-shirt smartly and then applying the bleach to remove the colors of the t-shirt fashionably. instructables
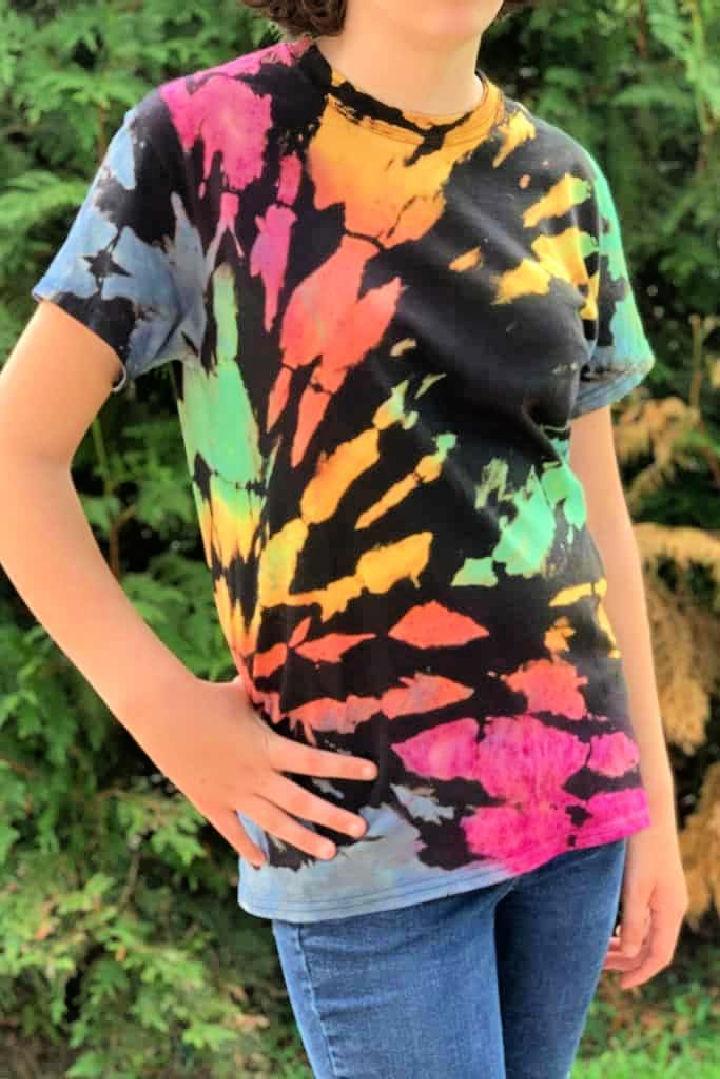
8. Reverse Tie Dye Using Black Shirt

Tie-dye is all about dying your t-shirts for a new glam, colorful appeal. However, you can also go with the reverse tie-dye technique to remove colors from the darker t-shirts in a patterned way. Look at this reverse tie-dye shirt that enchants with the coolest color effect and makes a heart-winning gift for a fashion lover. To duplicate this project, you need a dark-colored t-shirt, bleach, water, squeeze or spray bottle, rubber bands, gloves, tie-dye, and some creativity. afeatheredstitch
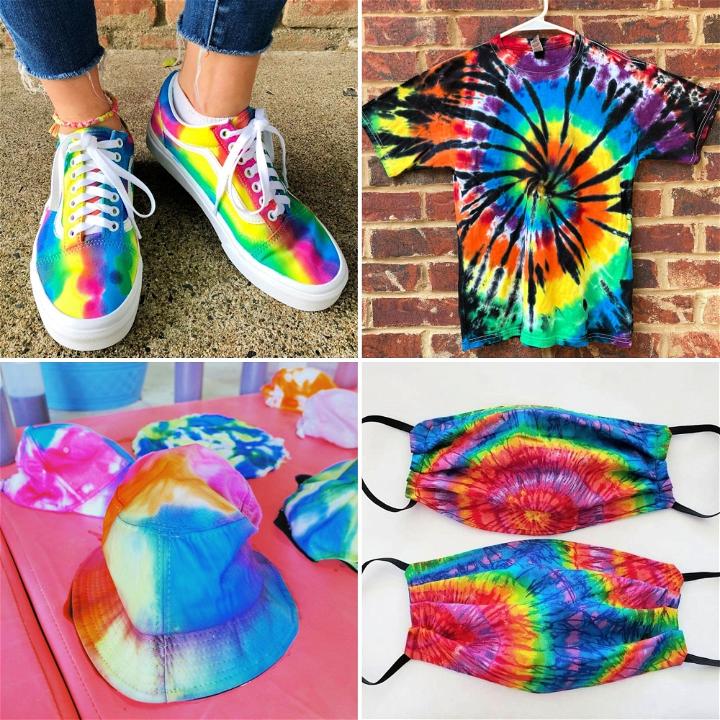
Tie Dye Shirts: Unleash your inner artist with vibrant tie dye shirts, perfect for expressing your unique style and creativity in every color.
9. Reverse Tie Dye Sheets with Bleach
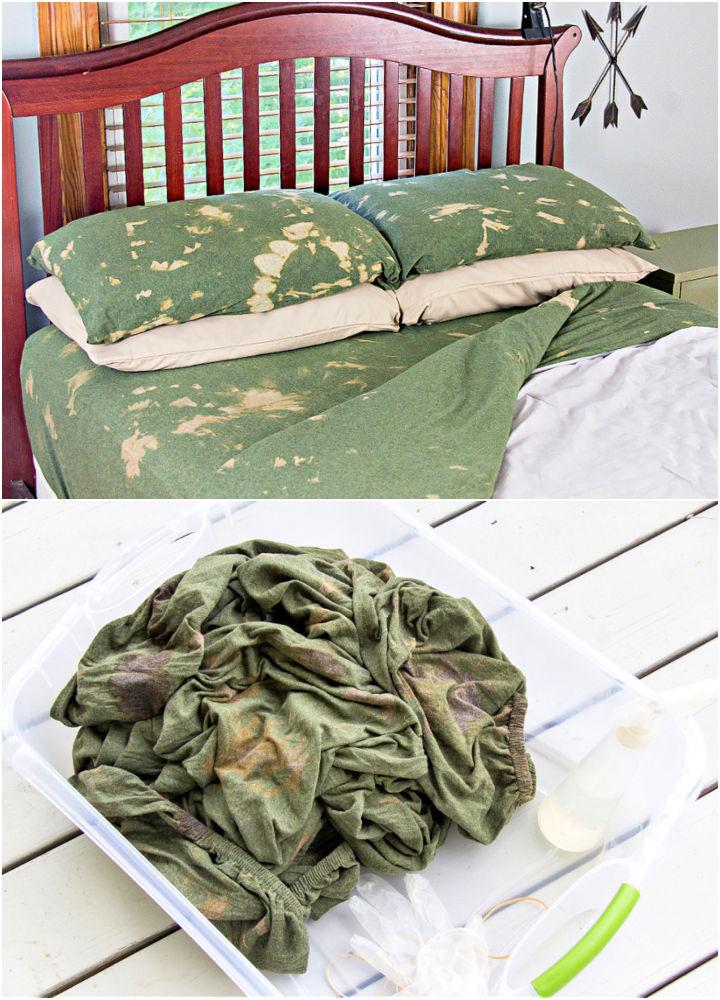
Just like the t-shirts, you can make beautiful reverse tie-dye sheets also using the bleaching method. Look at the given reverse tie-dye sheet samples that look amazing and will surely transform the entire bedroom. You need a dark-colored sheet set, household bleach, a bucket, gloves, rubber bands and a spray bottle to easily reverse tie-dye the sheets. However, you can apply different dyes again on the bleached parts for some amazing color effects also. The project is as easy as a normal tie-dye project. makeandtakes
10. How to Reverse Tie Dye

You will surely fall in love with this another great reverse tie-dye shirt, sure to boost the fashion of the teen girls. Must update your wardrobe with this bleached sweatshirt, will come with a high price tag when buying it from the market or stores. You need a dark-colored tee, bleach, spray bottle, rubber bands and rubber gloves to complete this project. Just rubber band the t-shirts and then apply the bleach on the t-shirt and leave for 20-25 minutes. Finally, rinse it up with water and get a lovely bleached t-shirt. One of the best and quick-to-do DIY tie-dye projects ever. inspirationmade
11. How to Make Reverse Tie Dye

Take your summer fashion to the next level with this reverse tie-dye t-shirt, impresses with the v-shape neck. The design is bleached to remove the colors from the darker t-shirt, creating a stylish appeal of the final t-shirt. You need a clean dark t-shirt, a spray bottle, some rubber bands, bleach and a breach-proof space to complete this project quite efficiently and quickly. The finally completed t-shirt will be a big wardrobe must-have for every style lover. Embellish the finished product in the way you like. instructables
12. Reverse Ice Tie Dye Hoodie
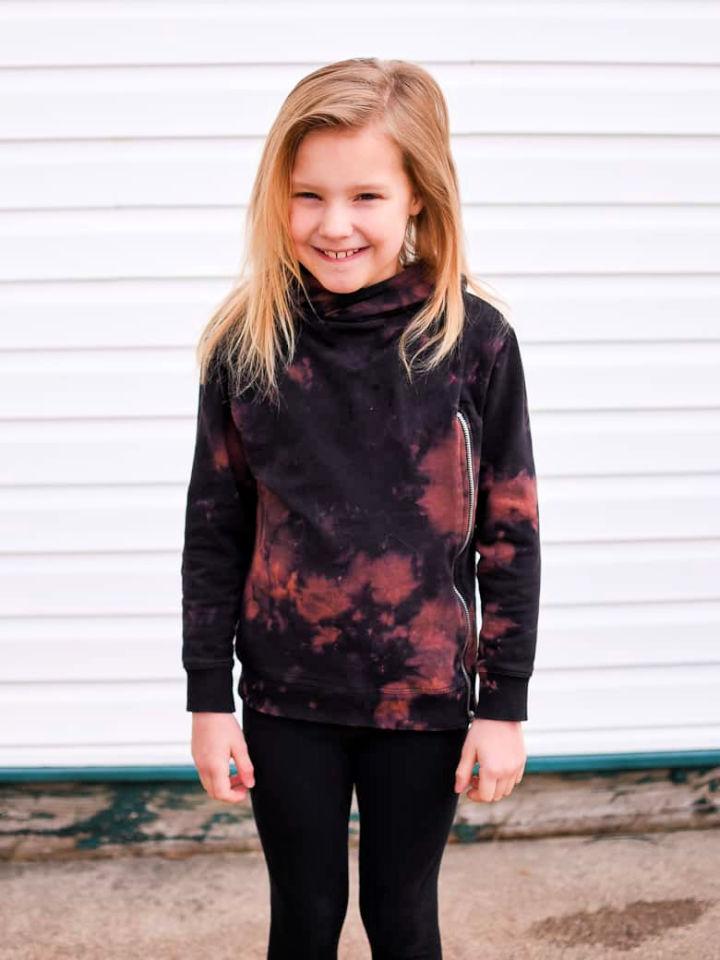
Check out here another gorgeous design of the bleached shirt that is amazingly cute and fashion-worthy and also makes a sweet handmade gift. You need a dark-colored item of clothing, Clorox bleach crystals and ice to complete this project. You also need a rack and large glass container for this project will be more than easier to do, even for a beginner. Just fold the different parts of the t-shirt and then tie them with rubber bands. Apply the bleach, and then leave it on a metal rack for some time. The completed design will be a great addition to one’s wardrobe. brepea
13. Unique DIY Reverse Tie Dye

Get creative and add a splash of color to your wardrobe with our amazing selection of reverse tie dye patterns! You will love the bleached champion sweatshirt here that goes outstanding with the jeans shorts. The bleached t-shirt will impress all the onlookers and is a total breeze to make at home. Buying this shirt will cause a big load on your wallet as they are always expensive to buy. Here you need bleach or any cleaning product needing bleach, rubber bands, a champion sweatshirt and some creativity to duplicate this t-shirt, sure to make an amazing handmade gift to a favorite teen girl. So, get ready for the coolest summer fashion. everythingerz
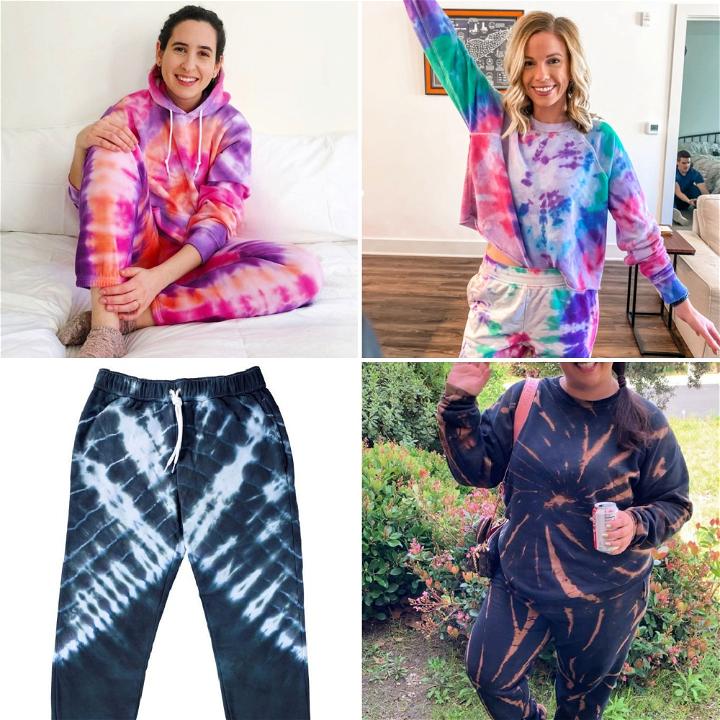
14. DIY Tie Dye Sweatpants

Just like the t-shirts, you can reverse tie-dye the pants also. This will help take your fashion to the next level. Look at the sample tie-dye sweatpants, are not they looking amazing and lovely? You need a tulip one-step tie-dye kit in black or your favorite color, white 100% cotton sweatpants, disposable plastic table cover, zip ties, washable marker and scissors to complete this tie-dye trouser. The completed sweatpant will make a lovely handmade gift to a style-loving lady or teen girl also. instructables
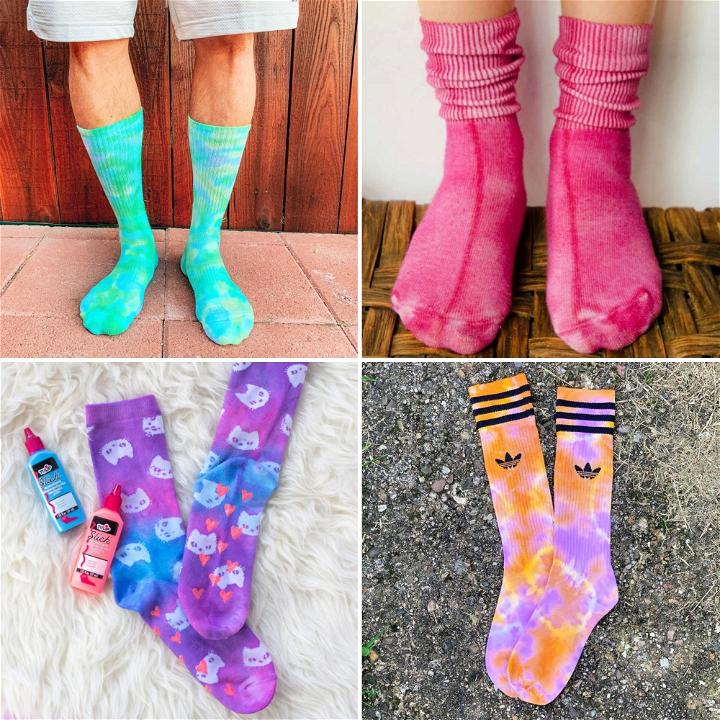
15. DIY Reverse Tie Dye Socks
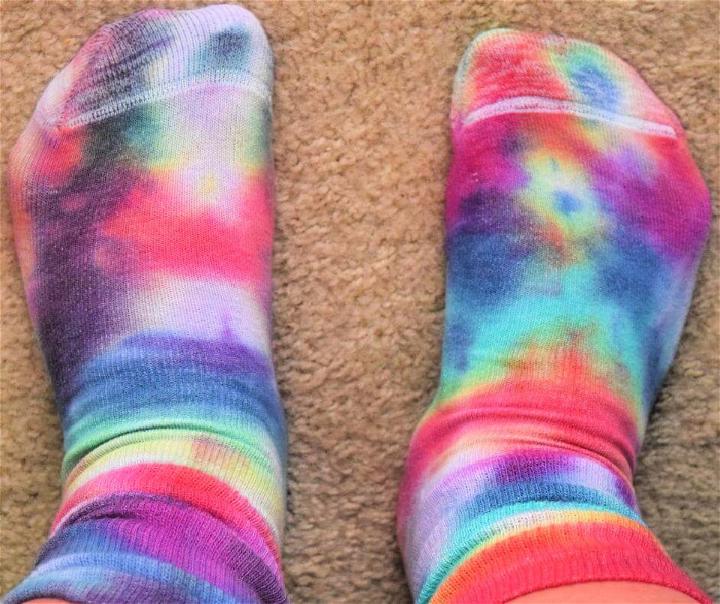
The tie-dye projects are never-ending, and you can make amazing fashion wear using this technique. Learn how to make the tie-dye socks, will be much visually captivating and will never get out of style. You need 12 pairs of white cotton socks, rainbow jumbo tie-dye squirt bottles, rubber bands, water, a plastic tote and gloves to whip up this project like a pro. One of the best and quick-to-do DIY tie-dye projects. The completed socks are dyed sing 5 different dye colors like purple, blue, green, yellow and red, and you can pick your favorite colors for the project. thetiptoefairy
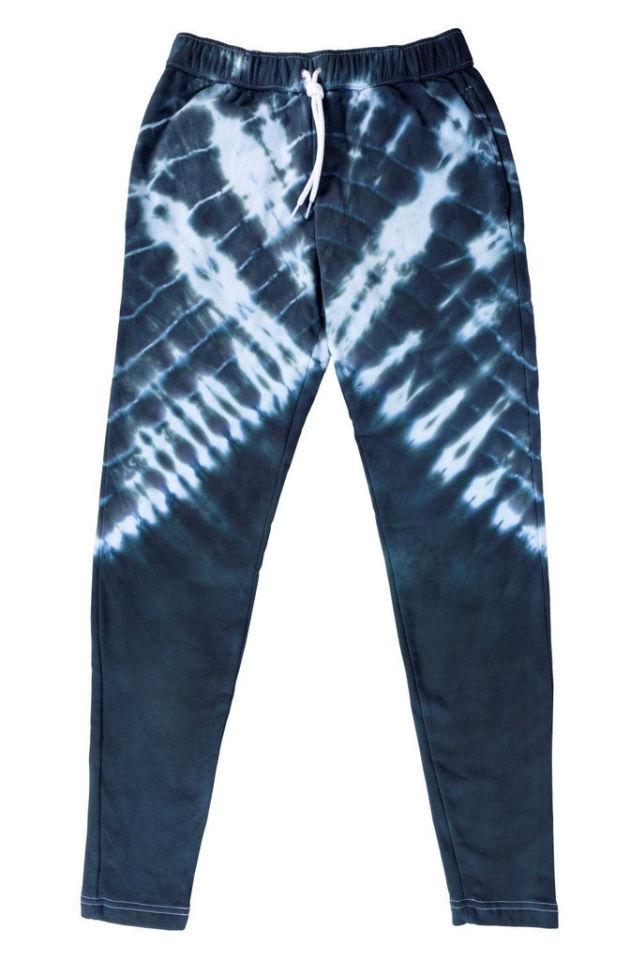
16. Reverse Tie Dye Jogger Pant

Refashion your jogger pants also using the reverse tie-dye technique. So, you will get praised again and again in the new outfit. Here again, you need the minimal tie-dye skills and some handful of supplies like RIT color remover, rubber bands, gloves, pink RIT dye, water, plastic tub and stirring stick to complete this project. You can reverse tie-dye both pants and shirts for the coolest effect, and you will love the final look of the entire outfit for sure. The cost prices for the project are much less. swoodsonsays
17. Reverse Tie Dye Shibori Sweatshirt
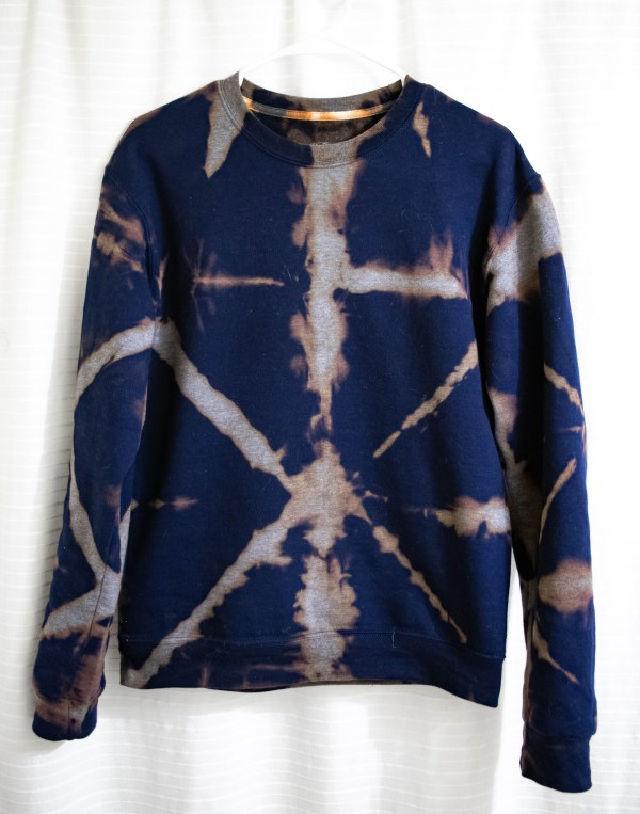
There are so many different tie-dye techniques that help give some amazing dyed effects to the targeted cloth. So, you can use some of those techniques in the reverse tie-dye technique also. You will get here instructions about how to reverse tie-dye sweatshirts using the shibori method. You need a sweatshirt, rubber bands, bleach and a piece of cardboard to duplicate this project. The completed shirt grabs much of the attention of onlookers and is extremely easy to dye. onecrafdiygirl
18. How to Reverse Tie Dye with Bleach

The bleaching effect rocks when you need to style up your jeans, t-shirts and other fabric stuff. So, go with the reverse tie-dye technique here and bleach your t-shirts for some outstanding color effect. Get inspired by the given sample t-shirt. Is not it looking graceful? You need bleach, a t-shirt, plastic colander, condiment bottle, sink, or bucket to duplicate this reverse tie-dye shirt. The completed shirt just looks stunning and can be gifted to any style-loving girl or lady. The shirt will rock for your make and sell business also. karametta
19. Reverse Tie Dye Anti Valentines Day Shirt

It will not take much time to refashion your t-shirts as they are complete tie-dye, and reverse tie-dye kits are available in the market. They aid in getting the personalized fashion outfit at minimal cost prices. So, you will love this reverse tie-dyed anti-Valentine’s shirt that makes a gorgeous handmade gift for a favorite person. To complete this project, you need a solid black tee, reverse tie-dye kit, Fuschia 1-color tie-dye kit, bucket for dyeing, stencil, and opaque fabric markers. You can experiment with this t-shirt with your favorite letter or art stencils. prettylifegirls
20. Reverse Tie Dye Design

In terms of summer fashion, this reverse tie-dye shirt will get ten out of ten from you. The reverse tie-dye technique beautifully removes the color of your garment to reveal the colorful design patterns that enchant the audience. The design is brightly colorful and will not take that too long to complete. Everyone can do this project with ease, and it will also go much easy on your wallet. You need RIT color remover, all-purpose liquid dyes, black 100% cotton sweatshirt, stainless steel pot, tongs, rubber bands, squeeze bottles, plastic gloves, paper towels, plastic table cover, measuring spoon and salt. ritdye
21. Navy Blue Bleach Tie Dye Sweatshirt
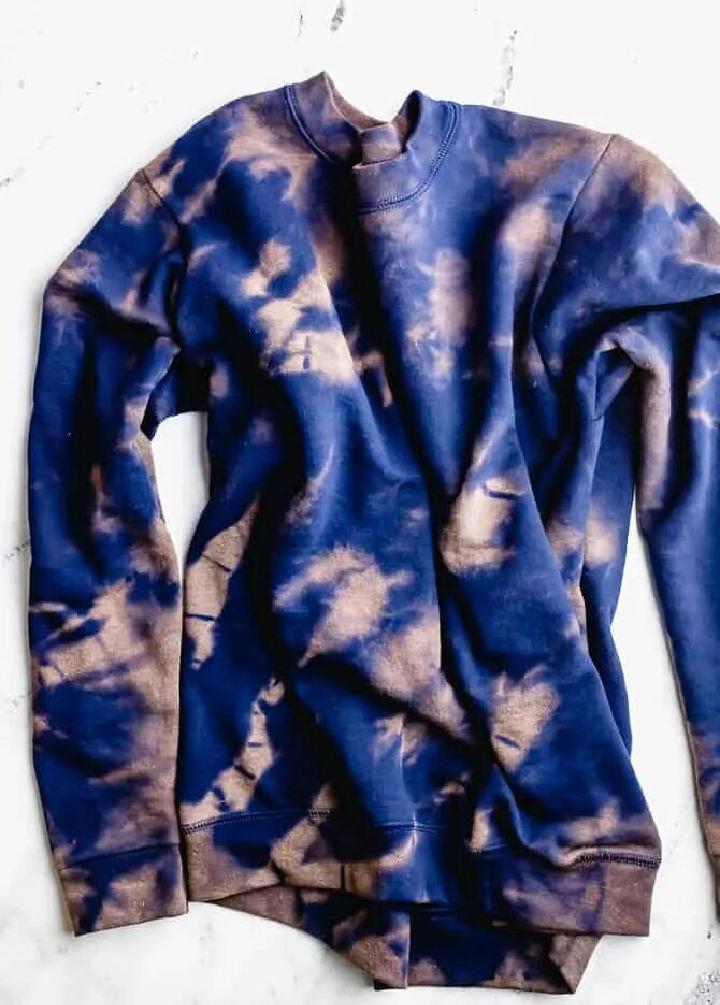
Update your summer fashion wardrobe with this classic tie-dye shirt, sure to be an impressive outfit to wear this summer. The project involves bleaching the t-shirts using the tying technique and is fairly easy to dye at home. You need a dark-colored cotton sweatshirt, bleach, a plastic bucket, a pair of gloves, several rubber bands, a spray bottle and mild laundry detergent to complete this brilliant reverse tie-dye summer t-shirt, will never get out of style. The completed shirt makes a sweet handmade present to a favorite person also.
22. DIY Reverse Tie Dye with Bleach

Take your summer fashion to the next level with this reverse tie-dye shirt. The design is crazily cute and lovely to look at and will bring tons of grace to the user. You need clothing items, rubber bands, bleach, water, a spray bottle and gloves to complete this reverse tie-dye t-shirt. The entire project is more than easier to do and will surely surprise all the fashion lovers. Just tie your shirt or trouser beautifully with rubber bands and then bleach to remove the color of the shirt, making love design patterns. takeoffyourpart
23. Grey Black and White Crumple Tie Dye

You will surely fall in love with this tie-dye t-shirt hack that looks super cute and stylish at the same time. The finished product is a grey, black and white crumple tie-dye t-shirt, sure to take your fashion to the next level. Just fold the entire t-shirt smartly and then wrap the string or rubber bands around. Next, dye the shirt or bleach it to remove or add the colors, and this will result in a fantastic dyed appeal of the entire t-shirt. The completed shirt will surely be a big surprise for all.
24. How to Reverse Tie Dye

Everyone will fall in love with these t-shirts that come with brilliant colorful design patterns. The shirts are cute and colorful and also come with brilliant overwritten letters for a cool personalized appeal. You will get the most professional tie-dye instructions that will help transform the t-shirts into something extra brilliant and stylish. You need bleach, soda ash, a measuring cup, cleaning rag, gloves, hydrogen peroxide, your favorite t-shirts etc, to complete this project quite easily.
25. Easy DIY Reverse Tie Dye

You will love doing this another reverse tie-dye project that involves bleaching a t-shirt for some epic color removal. You need a black t-shirt, bleach, hydrogen peroxide, and rubber bands to easily duplicate this project. Start rolling up the t-shirt around the center and then tie it with the custom rope and thread. Apply the bleach on the t-shirt, which will remove the color from the t-shirt in an exciting way.
Related Tie Dye Patterns:
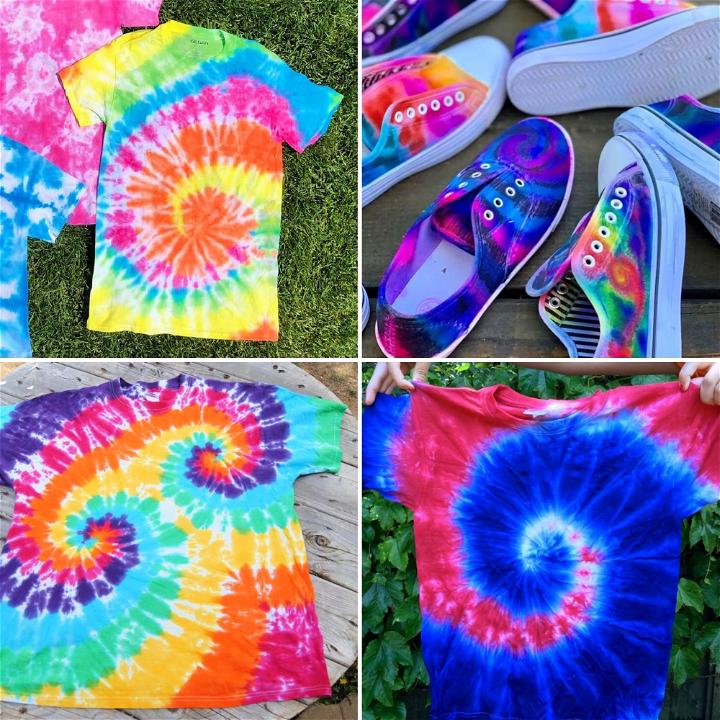
Learn how to create unique and stylish tie dye patterns and techniques with this comprehensive guide. Perfect for all levels of experience!
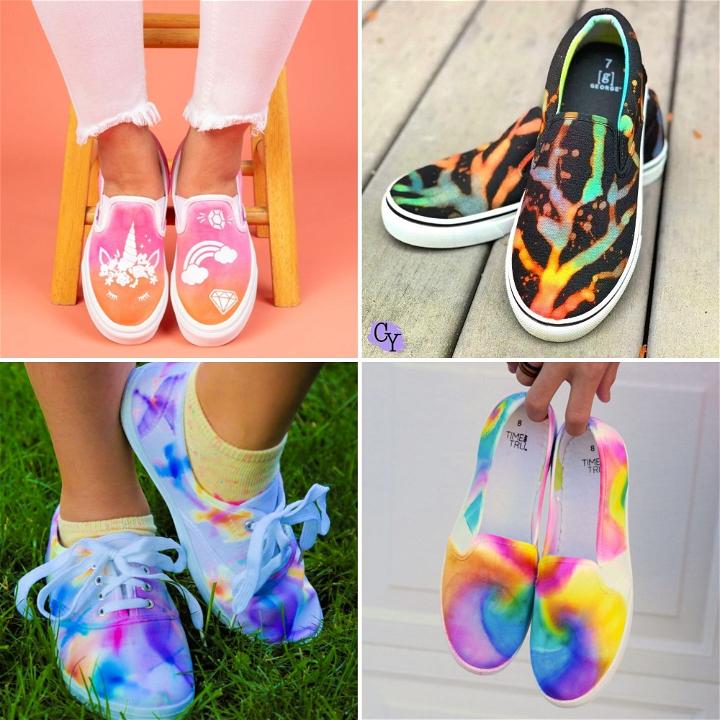
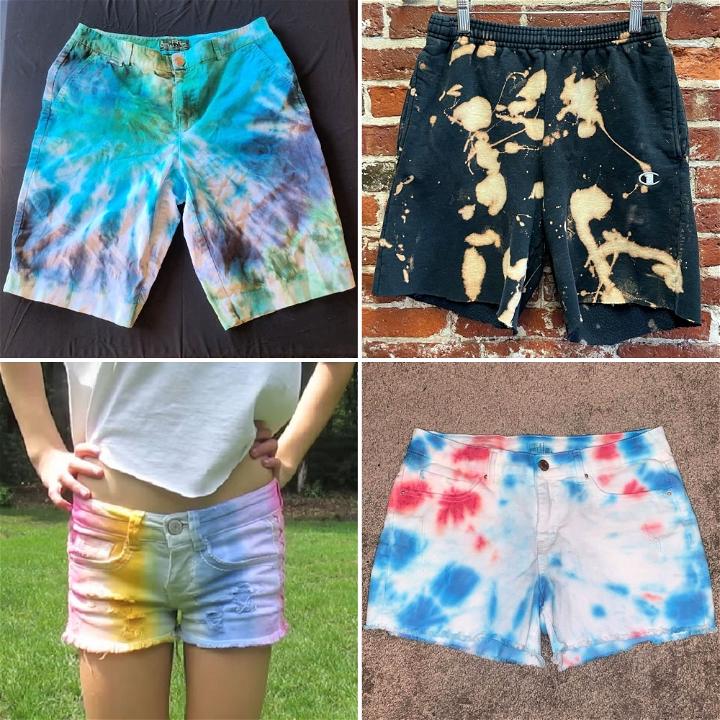
- How to Tie Dye Shorts: Master the art of creative tie dyeing shorts with our easy-to-follow guide, featuring splendid techniques to transform your wardrobe.
- Tie Dye Socks Techniques: Step up your style with impressive tie dye sock pattern! Learn how to create stunning designs for unique, eye-catching footwear.
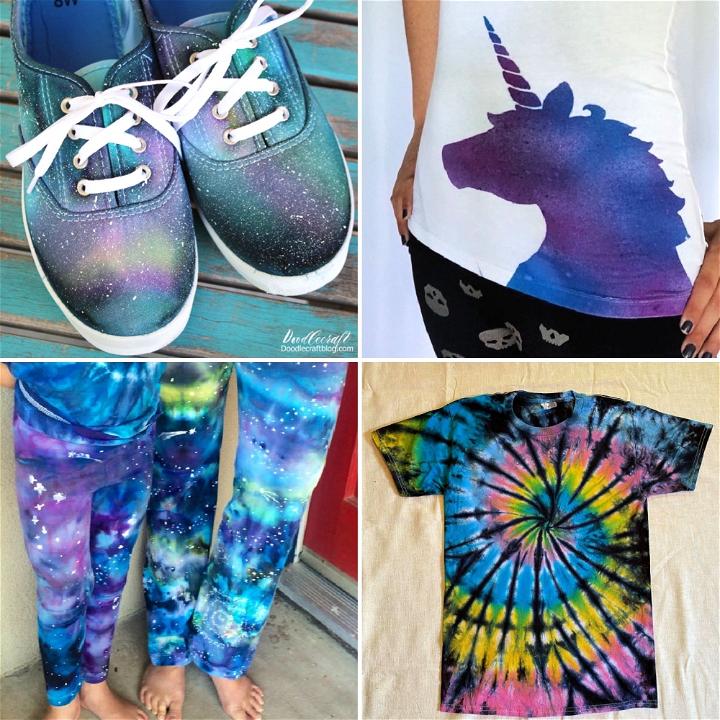
- Galaxy Tie Dye Patterns: Explore stunning galaxy tie dye patterns to make cosmic creations that are out of this world!
- Ice Tie Dye Tutorials: Create mesmerizing fabric designs with our incredible ice tie dye technique for a frosty, unique look.
- Bullseye Tie Dye Patterns: Discover astonishing bullseye tie dye patterns await with our comprehensive tutorial on this classic tie dye technique. Let your creativity shine!
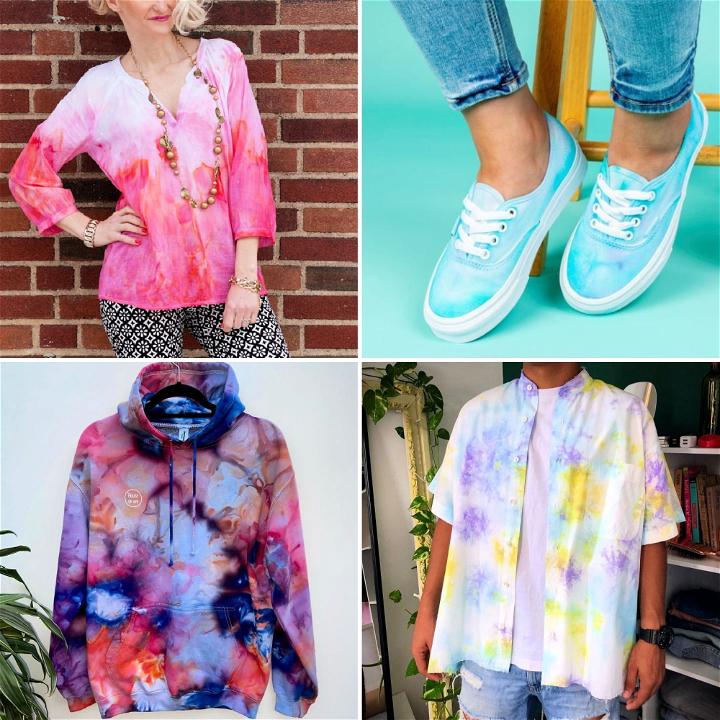
- Pastel Tie Dye Techniques: Embrace soft hues with our wonderful pastel tie dye patterns guide, perfect for crafting dreamy, subtle designs on fabric.
- Shibori Tie Dye Tutorials: Discover the ancient art of adorable tie dye shibori tutorials and techniques to create intricate, stunning textile masterpieces.
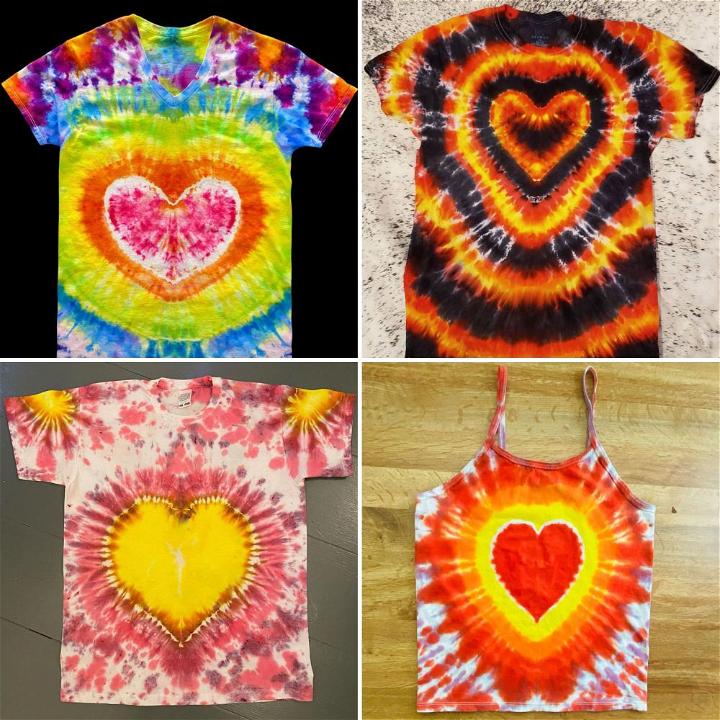
- Heart Tie Dye Patterns: Show your love with remarkable heart tie dye patterns! Learn how to heart tie dye a shirt for a heartfelt gift.
Conclusion:

In conclusion, reverse tie dye is a fun and creative way to add a unique twist to your wardrobe. With 25 different reverse tie dye patterns to choose from, the optionsare endless. Whether you want to add a pop of color to your favorite shirt or create a bold statement piece, reverse tie-dye has something for everyone. So why not try it and see what amazing reverse tie dye creations you can develop? You might just surprise yourself with your own artistic abilities. Remember to have fun when doing reverse tie dye and let your creativity flow! 😊