Transforming your workspace can significantly impact your productivity and comfort, especially for those who spend countless hours at their desks. A common struggle is managing desk space efficiently, particularly if you're working with limited room. The solution? A slide-out tray and floating keyboard shelf. This guide will walk you through building these features, enriching your workspace without compromising aesthetics or functionality.
What Will You Gain?
This article will teach you how to build a custom slide-out tray and floating keyboard shelf for your desk. It solves the problem of limited desk space and enhances ergonomic comfort, ensuring that your workspace is not only tidier but also more tailored to your needs. By the end of this guide, you will have a practical, stylish, and custom-made solution informed by first-hand experience and practical know-how.
Why Trust This Guide?
Crafted from the personal experience of a DIY enthusiast, this guide merges firsthand knowledge with practical tips and solutions learned through trial and error. The author, backed by a community of followers and recognized for their creative and effective solutions, brings credibility and insightful advice to this project. By adapting and overcoming challenges in their own workspace, they offer you tested and approved methods to enhance yours.
Materials Needed
- Shelf: Choose a sturdy but lightweight board. It should fit the size of your keyboard and mouse comfortably while allowing for elbow room.
- Runners: Essential for your slide-out mechanism. Opt for smooth ball-bearing runners for ease of use.
- Brackets: For building your floating shelf. Ensure they are strong enough to support the weight of the shelf and computer equipment.
- Screws and Drill: For assembling the components securely.
- Measuring Tape: Precision is key in ensuring your tray and shelf fit and operate smoothly.
- Saw (optional): If you need to cut your materials to size.
Step-by-Step Instructions
Building a Slide-Out Tray
- Measure and Plan: Before purchasing materials, measure the space under your desk where the tray will slide. Consider the height of your keyboard and the clearance needed for comfortable use.
- Prepare the Shelf: If necessary, cut your shelf to the desired size. Pay attention to the finish of the material; you may prefer the smoother side to face outward for aesthetics.
- Install the Runners: Attach the runners to the underside of the desk and the shelf. Ensure they are parallel and the shelf slides smoothly without obstruction.
- Adjust for Height: Depending on your chair and preferred posture, you may need to add spacers between the runners and the shelf to lower the tray to a comfortable typing height.
Building a Floating Keyboard Shelf
- Choose the Right Location: Determine where on your wall the floating shelf will be most ergonomically beneficial and mark it clearly.
- Fix the Brackets to the Wall: Use a drill to secure the brackets at the marked locations, ensuring they are level and spaced appropriately for your shelf's width.
- Mount the Shelf: Place the shelf on the brackets and, if necessary, secure it with screws from underneath to prevent it from sliding off.
Common Pitfalls and Solutions
- Misalignment: Double-check measurements before cutting or drilling. Even small errors can lead to the tray or shelf not fitting correctly.
- Stability Issues: Ensure brackets and runners are of high quality and securely fixed. Adding additional support may be necessary for heavier items.
- Aesthetics: Consider how the modification will look. Choose materials and finishes that complement your existing desk and workspace.
Expanding Your Workspace
While this guide focuses on a slide-out tray and floating keyboard shelf, these principles can be applied to make other custom workspace solutions, such as monitor stands or additional storage compartments.
Video Tutorial
Want a visual demonstration? Watch a step-by-step video tutorial on YouTube for building a slide-out tray and floating keyboard shelf.
It provides a clear and easy-to-understand visual walkthrough of the techniques, making it a great companion to this written guide.
Build a slide-out tray and floating keyboard shelf to improve your workspace. Follow the guide for a professional upgrade to fit your needs. Refresh your workspace now!
FAQs About DIY Keyboard Trays
Discover all you need to know about DIY keyboard trays with our comprehensive FAQ guide. Find answers to your questions here!
What materials do I need for a DIY keyboard tray?
To build a DIY keyboard tray, you'll need:
- A flat piece of wood or any sturdy material for the tray itself.
- Drawer slides or brackets for mounting under the desk.
- Screws and a screwdriver for assembly.
- Optional: A finish or paint to match your desk.
How do I measure my desk for a keyboard tray?
Measure the width of the space under your desk where the tray will go. Ensure there's enough depth to accommodate the tray when it's retracted. Leave some clearance for your knees when seated.
Can I make an adjustable keyboard tray?
Yes, you can make an adjustable tray by using adjustable brackets or a sliding mechanism. This allows you to change the height and tilt for better ergonomics.
What is the ideal depth for a keyboard tray?
The ideal depth is about 10 to 14 inches. This provides enough space for your keyboard and mouse while maintaining comfort.
How do I ensure my keyboard tray is ergonomic?
Position the tray so that when typing, your elbows are at a 90-degree angle. The tray should be at or slightly below elbow height when seated.
Can I add extra features to my keyboard tray?
Certainly! Consider adding a wrist rest for comfort or compartments for storing pens and notepads. Some people also add USB hubs or cable management systems.
What should I do if my keyboard tray wobbles?
Check all connections and ensure the mounting hardware is tight. If the issue persists, reinforce the tray with additional brackets or a thicker material.
15 DIY Keyboard Tray Ideas and Inspirations
Discover 15 DIY keyboard tray ideas and inspirations to enhance your workspace. From sleek designs to creative solutions, find your perfect fit here.
1. DIY Walnut and Leather Keyboard Tray

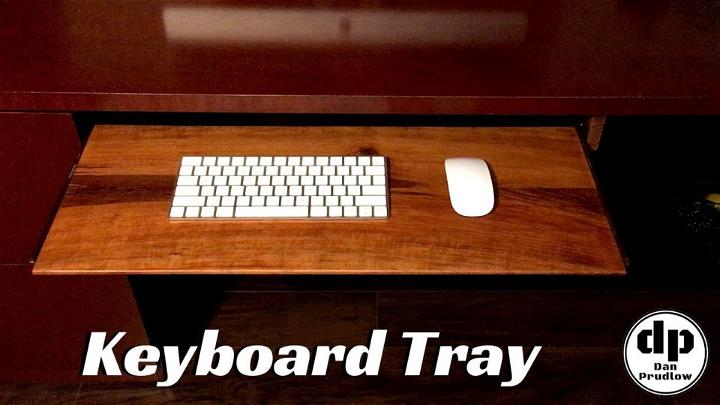
Embrace the elegance of minimalism with a DIY walnut and leather keyboard tray. This tray not only adds a touch of sophistication to your workspace but is also remarkably durable, thanks to the premium materials used. Its sleek design is as functional as it is beautiful, making your desk look neater while ensuring your keyboard is always within easy reach.
2. DIY Slide Tray for Midi Keyboards

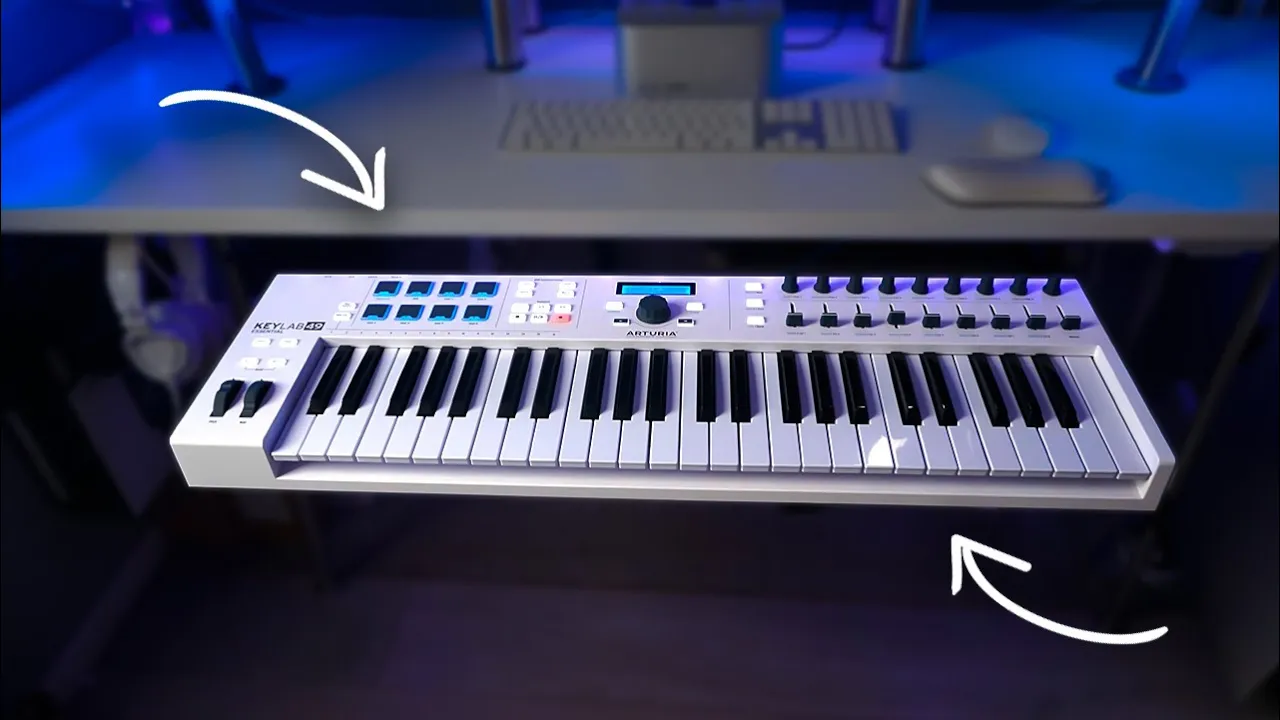
Transform your music-making space with a DIY slide tray for midi keyboards. This simple, cost-effective solution optimizes your studio's ergonomics, allowing seamless keyboard accessibility. Perfect for musicians looking to streamline their setup without compromising on functionality or style.
3. How to Build an Adjustable Keyboard Tray

Consider building an Adjustable Keyboard Tray if you're seeking flexibility and comfort in your workspace. This design allows you to change the height and angle according to your needs, reducing strain on your wrists and neck. It's a fantastic project for anyone wanting to improve their ergonomic setup at home.
4. DIY Under Desk Swivel Keyboard Tray

A DIY under desk swivel keyboard tray adds an ingenious twist to your setup. This design neatly tucks your keyboard away under the desk when not in use, maximizing your workspace. The swivel feature allows for easy access, making it a smart solution for small spaces.
5. Building a Keyboard Tray with Reclaimed Hardware
Harnessing the charm of upcycling, a Keyboard Tray constructed with Reclaimed Hardware not only gives new life to old materials but also reduces waste. This eco-friendly project can add a unique, rustic appeal to your office, blending sustainability with style. Plus, it's a conversation starter!
6. Homemade Sliding Keyboard Tray
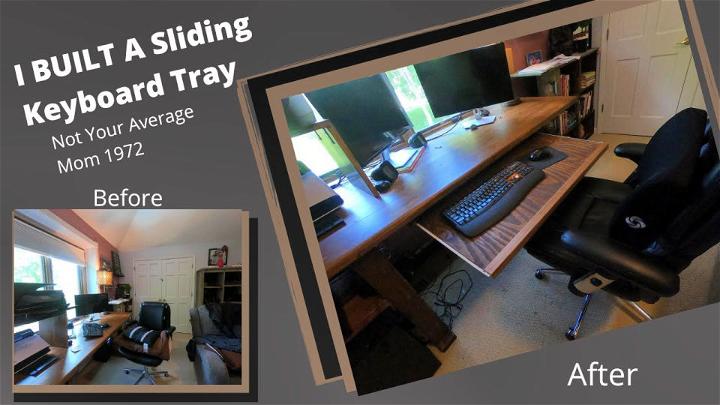
Make a homemade sliding keyboard tray for a neat and practical addition to your desk. This slide-out feature ensures your keyboard is out of the way when you need more desk space, yet easily accessible. It's a straightforward project that significantly enhances the functionality of your workspace.
7. Custom Walnut Keyboard Tray

Indulge in the luxury of a custom walnut keyboard tray, handcrafted to fit your specific needs and aesthetics. Walnut is well-loved for its durability and rich color, making this tray not only a practical piece but also a stylish statement in your office. It's perfect for those who appreciate the finer details.
8. How to Make a Gaming Keyboard Drawer

Making a gaming keyboard drawer can turn your gaming setup into an ergonomic haven. By crafting a drawer specifically for your gaming keyboard, you not only save desk space but also position the keyboard at a more comfortable height. Choose materials that match your desk and ensure smooth sliding mechanisms for easy access. This addition not only enhances your gaming experience but also adds a touch of organization and style to your gaming area.
9. DIY Desk Pull-out Tray for Keyboard

A DIY desk pull-out tray for your keyboard can significantly enhance your workspace ergonomics. By having your keyboard at a more accessible level, you can maintain a better posture, potentially reducing strain on your wrists and back. Plus, it's a great way to keep your desk looking tidy and organized.
10. How to Install Slide Out Keyboard Tray

Installing a slide-out keyboard tray is a smart move for anyone looking to improve their desk's functionality. Such trays not only offer a sleek, under-the-desk keyboard storage solution but also allow for adjustable positions, helping you make a more comfortable and personalized workstation.
11. Wooden Apple Keyboard and Trackpad Tray

Consider the beauty and functionality of a wooden Apple keyboard and trackpad tray. Crafted from quality wood, this tray not only provides a stable and stylish platform for your devices but also complements any desk setup, adding a touch of elegance. Its natural material offers a warm and inviting feel to your workspace.
12. DIY Midi Keyboard Tray for Chair

For music enthusiasts, a DIY Midi keyboard tray for a chair can be a game-changer. This innovative solution allows you to have your Midi keyboard conveniently close while playing, ensuring a more relaxed and immersive experience. The mobility it offers is perfect for those who like to move around or have a compact space.
13. Handmade Midi Keyboard Desk Tray

Building a handmade Midi keyboard desk tray marries creativity with functionality. This personalized approach lets you tailor the size, height, and materials to your specific needs, ensuring your Midi keyboard fits perfectly into your musical and spatial setup. Plus, it adds a unique, personal touch to your workspace.
14. Making a Computer Keyboard Stand

Making a computer keyboard stand from scratch might seem like a small project, but it's one with big benefits. A custom stand can elevate your keyboard to an angle that suits you best, improving typing comfort and efficiency. It's also an opportunity to introduce a bespoke element to your desk.
15. DIY Slide Out Desk Extension
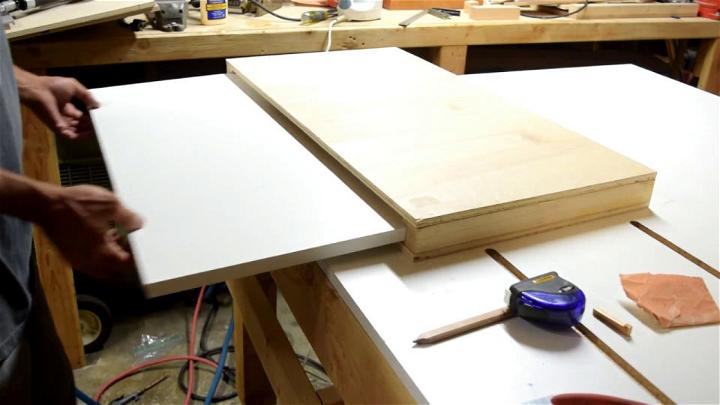
Embarking on a DIY slide-out desk extension can revolutionize your working area. Not only does it provide additional space for when you need it, but it retracts neatly when not in use, maintaining a clean aesthetic. This flexibility makes it ideal for compact spaces or for anyone who loves an organized desk.
Conclusion:
In conclusion, adding a DIY keyboard tray to your workstation can greatly improve comfort and productivity. With simple materials and tools, you can make a custom solution that fits your needs perfectly. This practical project will not only enhance your workspace but also showcase your creativity and handy skills. Upgrade your desk setup today with a personalized keyboard tray!


