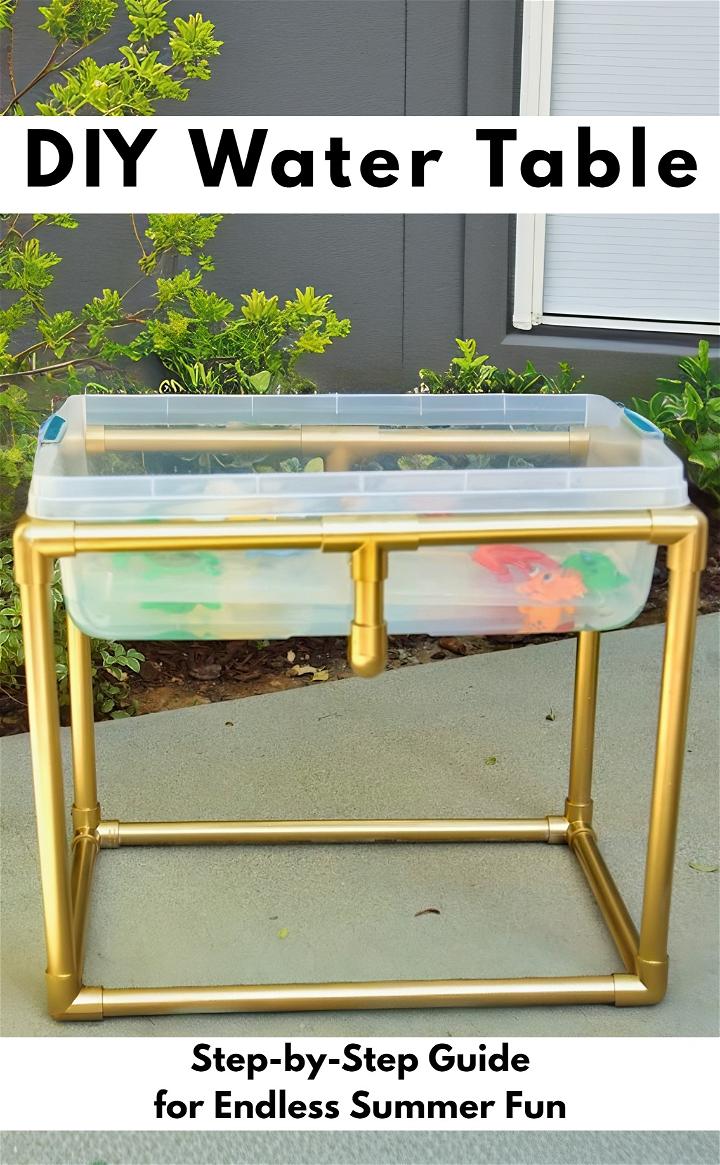
As a parent, I'm always searching for fun, engaging activities to do with my kids, especially during the summer months. When I stumbled upon the idea of creating a DIY water table, I knew I had to give it a shot. Not only did it seem like a relatively simple project, but it also promised endless hours of play. Here's how I did it, broken down into easy-to-follow steps, so you can recreate this water wonderland for your little ones.
Materials Needed
- PVC Pipe (¾ inch, approx. 19 feet): This forms the structure of the water table, providing a sturdy frame.
- Eight 3-Way Elbow Connectors: These help connect the PVC pipes at right angles, crucial for the base and top of the frame.
- Two ¾ Inch T-Connectors: These are used for attaching the middle stabilizer bar.
- Two ¾ Inch Elbow Connectors: For the ends of the stabilizer bar, ensuring it stays in place.
- Large Plastic Bin (40 gallons preferably): This acts as the actual table where the water play occurs. The size can vary, but ensure it's large enough for multiple children to play around.
- PVC Pipe Cutter: A safer and more precise way to cut the PVC pipes to the required lengths.
Step 1: Cutting Your PVC Pipe
Measure and mark your PVC pipe as per the required lengths: two 21-inch pieces, four 10-inch pieces, five 14.5-inch pieces, four 16-inch pieces, and two 3.5-inch pieces. Use the PVC pipe cutter to cut along these marks. Ensuring you have accurate lengths is crucial for the overall stability of the water table.
Step 2: Building the Base
Connect two 21-inch and two 14.5-inch pieces using four 3-way elbow connectors to make a rectangle. This forms the base of the water table and serves as a sturdy foundation.
Step 3: Assembling the Top Frame
Take two of your 10-inch pieces and join them using a T-connector. Repeat this with the remaining 10-inch pieces. These will form the sides of the top frame. Connect these sides with your remaining 3-way connectors and 14.5-inch pieces, just like you did with the base, to complete the top frame.
Step 4: Creating the Stabilizer Bar
For additional stability, insert your 3.5-inch pieces into the bottom of each T-joint and add an elbow connector to each end. This bar will help keep the structure from wobbling once the water table is in use.
Step 5: Attaching the Legs
Insert the four 16-inch pieces into the base as legs. Then, carefully place the top frame onto these legs. Ensure a tight, secure fit to prevent any accidents during play.
Step 6: Final Touches and Playtime
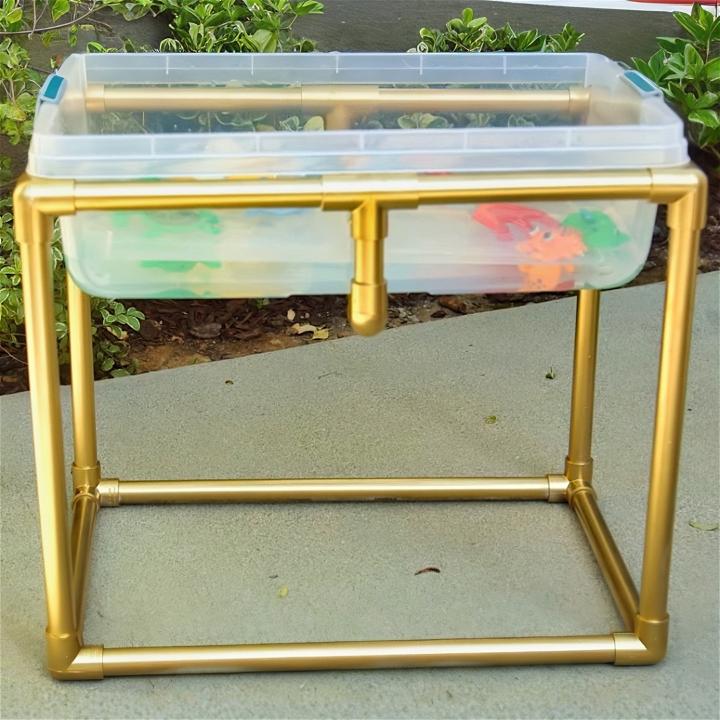
Now that your frame is complete, place the large plastic bin on top. It should fit snugly inside the frame. And just like that, your DIY water table is ready for action!
Personal Touches and Tips
To make our water table unique, I added some gold spray paint to the frame for a chic look. It's such a simple addition, but it truly made the water table stand out in our backyard.
For playtime, we filled the bin with water and added various toys. My kids had a blast splashing around, playing with floating toys, and simply enjoying the water. The beauty of this DIY project is its versatility; you can also fill the bin with sand for a different sensory experience or add a lid to keep it clean when not in use.
Storage Solution
One of my favorite aspects of this DIY water table is how easily it can be dismantled for storage. Simply take apart the frame, and all the pieces, including the bin, can be stored away compactly, ready for the next sunny day.
Final Thoughts
Making this DIY water table was a rewarding experience, not just for the fun it brought my kids but also for the satisfaction of building something with my own hands. It was a project that didn't require expert skills but ended with a professional-looking, highly functional play table. If you're looking for a unique, cost-effective way to entertain your kids this summer, I highly recommend giving this project a try. Happy building and playing!
Share This DIY Water Table
Don't let this fun idea float away, save and share it on Pinterest! 🌊💦
Related posts:
 DIY Table Legs - Step by Step Guide
 DIY Bar Table - Step by Step Guide
 Easy DIY Deck - Step by Step Guide
 DIY Hot Tub - Step by Step Guide
 DIY Septic Tank Installation - Step by Step Guide
 DIY Rat Cage - Step by Step Guide
 DIY Marquee Letters - Step by Step Guide
 DIY Squirrel Baffle - Step by Step Guide
 DIY Disc Golf Basket - Step by Step Guide
 Homemade DIY Cold Smoker - Step by Step Guide
 DIY Outdoor Countertops - Step by Step Guide
 DIY Futon - Step by Step Guide