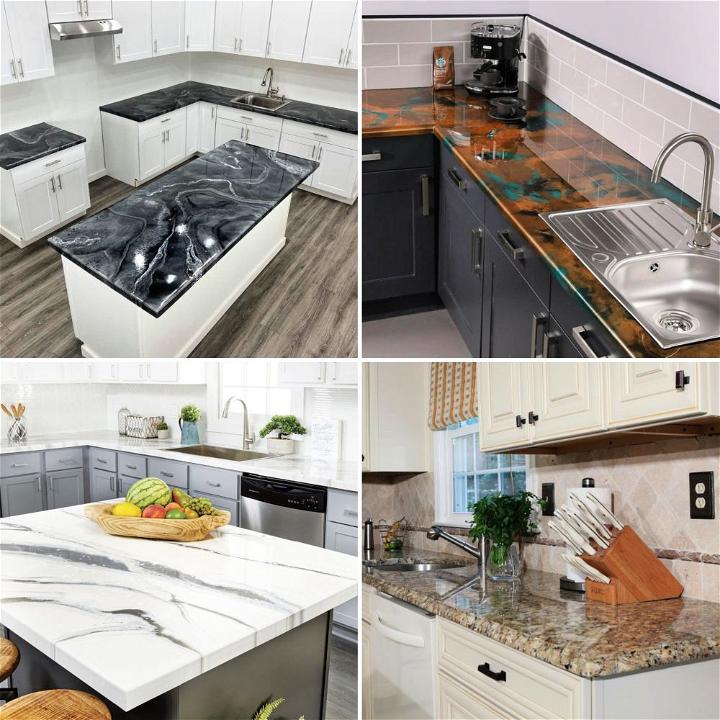
Epoxy resin is a unique material known for its strong adhesive qualities and versatility in various applications. It's a thermosetting polymer, which means it cures from a liquid to a solid state when a hardener is added. This transformation results in a durable, high-strength material that's widely used in industries ranging from construction to art.
What is Epoxy Resin?
At its core, epoxy resin is a synthetic substance that forms a rigid, plastic-like material. It's maked by mixing two components: a resin and a hardener. The chemical reaction between these two makes a cross-linked, three-dimensional network, giving the final product its robust characteristics.
Properties of Epoxy Resin
Epoxy resin is favored for its:
- Strong Adhesion: It can bond to almost any surface, making it ideal for various projects.
- Chemical Resistance: Once cured, it's resistant to water, heat, and many solvents.
- Durability: It forms a hard, impact-resistant surface that can withstand heavy loads.
- Electrical Insulation: Epoxy is an excellent insulator, often used in electronic applications.
Uses of Epoxy Resin
Due to its properties, epoxy resin is used in:
- Coatings: Protect surfaces from corrosion and wear.
- Adhesives: Bonds materials together with superior strength.
- Electronics: Insulates and protects circuit boards.
- Art: Builds stunning, clear finishes on artwork and furniture.
Working with Epoxy Resin
When using epoxy resin, it's essential to mix the resin and hardener in the correct proportions. The mixture then needs to cure, which can take anywhere from several minutes to hours, depending on the formulation. During this time, it's crucial to work in a well-ventilated area and use protective gear, as uncured resin can be harmful.
How to Make Epoxy Table - Step by Step Guide
Master epoxy table making with our step-by-step guide, covering material selection, prep, pouring, curing, and finishing for flawless results.
What Will I Get Out of This?
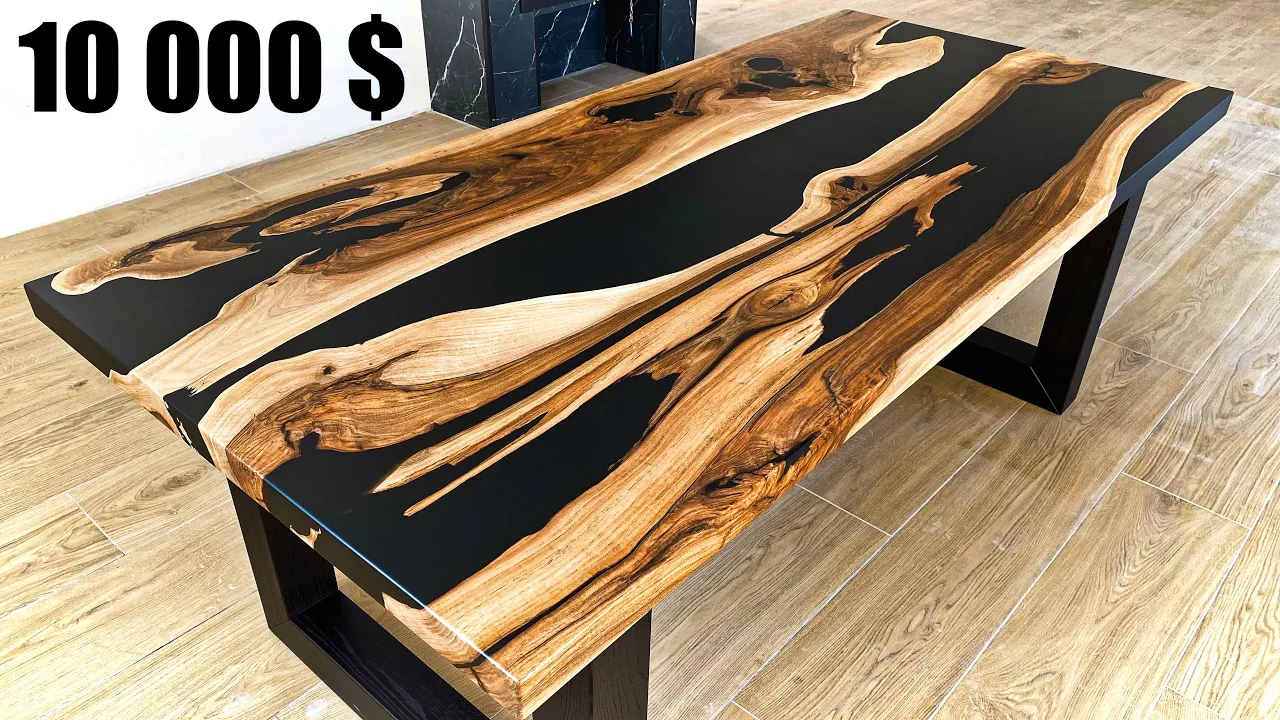
By the end of this guide, you'll learn how to choose the right materials, prepare the wood, mix and pour epoxy resin, and finish your table for a professional-looking result. This project answers the need for personalized, quality furniture that stands out. You'll solve the problem of finding that perfect dining table by making it yourself, tailored to your taste and room aesthetics.
Prioritizing Your Needs
Research showed high interest in combining traditional woodworking with modern materials like epoxy resin. To exceed existing guides, this article delves deeper into material selection, problem-solving, and the finesse of crafting with wood and resin.
Step by Step Instructions
1. Select Your Materials
- Wood: Choose European walnut with around 8% humidity for the table top. It's crucial for preventing future warping or cracking. For the legs, ash wood provides a strong, contrasting material that supports the table's weight.
- Epoxy Resin: You'll need approximately 28 kilograms for a 2000X900 mm table. Opt for a high-quality resin designed for deep pours to ensure clarity and strength.
- Why These Materials? Walnut is not just strong; it has rich colors and grain patterns that make each piece unique. The epoxy resin protects the wood and fills any imperfections, making a smooth, clear surface that highlights the wood's beauty.
2. Prepare the Table Top
- Humidity: Check Ensure your wood's humidity levels are around 8% using a moisture meter. This minimizes the risk of expansion or contraction post-completion.
- Sanding: Begin with a coarse P-60 grit sandpaper and progress to P-150 for a smooth finish that's ready for the resin.
3. Mixing and Pouring the Resin
- Mixing: Follow the resin's instructions closely. It's typically a 1:1 ratio of resin to hardener. Mix thoroughly to avoid any uncured spots.
- Pouring: Pour in three layers. This technique prevents overheating and potential cracking. You can also add wooden scraps into the voids. This not only saves resin but adds an interesting visual element to the table.
4. Curing and Demolding
After pouring, allow the resin to cure as per the manufacturer's guidelines. This could range from 24 hours to several days.
5. Finishing Touches
- Sanding Again: After demolding, sand the table top again to achieve a perfectly smooth surface. Begin with a more coarse grit and work your way up to a fine grit for a glossy finish.
- Sealing: Apply three coats of American wood oil. This seals both the wood and resin, providing a durable finish that enhances the table's appearance.
Common Pitfalls and Troubleshooting
- Bubbles in Resin: To avoid this, pour slowly and consider using a heat gun to pop any bubbles that rise to the surface.
- Resin Leaks: Ensure your mold is sealed properly. Use silicone caulking along the edges to prevent leaks.
The "Why" Behind the Steps
Understanding why each step matters helps in achieving better results. For instance, the progressive sanding is key to a smooth finish, and sealing with wood oil protects your table, extending its life.
Video Tutorial
Want a visual demonstration? Watch a step-by-step video tutorial on YouTube:
This video provides a clear and easy-to-understand walkthrough of the techniques, making it a great companion to this written guide.
FAQs About Making Epoxy Tables
Discover FAQs about making epoxy tables, including needed materials, costs, epoxy types, creation time, and embedding objects for unique designs.
What Do I Need to Make an Epoxy Table?
To start your epoxy table project, you'll need a wooden slab or board, epoxy resin and hardener, pigments or dyes if you want color, a mold or form, tools for spreading and shaping the epoxy, sandpaper, a blowtorch or heat gun for removing bubbles, and safety equipment like gloves and goggles.
How Much Does It Cost to Make an Epoxy Table?
The cost can vary widely depending on the size of the table and the type of materials you choose. Generally, you can expect to spend anywhere from a few hundred to several thousand dollars. It's best to budget carefully and shop around for the best deals on high-quality materials.
What Kind of Epoxy Should I Use for My Table?
There are different types of epoxy resins available, such as tabletop epoxy, casting epoxy, and deep-casting epoxy resin. Tabletop epoxy is best for projects with a thin layer, while casting epoxy is suitable for thicker layers. Deep-casting epoxy resin is designed for very thick pours.
How Long Does It Take to Make an Epoxy Table?
The time it takes to make an epoxy table can range from a few days to a couple of weeks. This includes preparing the wood, making the mold, mixing and pouring the epoxy, curing time, and finishing touches like sanding and polishing.
Can I Add Objects Into the Epoxy?
Yes, you can add objects like stones, shells, leaves, or even LED lights into the epoxy for a unique look. Just make sure to secure them in place and remove any air bubbles that may form around them during the pouring process.
25 DIY Resin Table Top Ideas and Inspirations
Discover 25 stunning DIY resin table top ideas to elevate your home decor. From colorful designs to unique patterns, get inspired today!

1. DIY Epoxy Resin Table Top
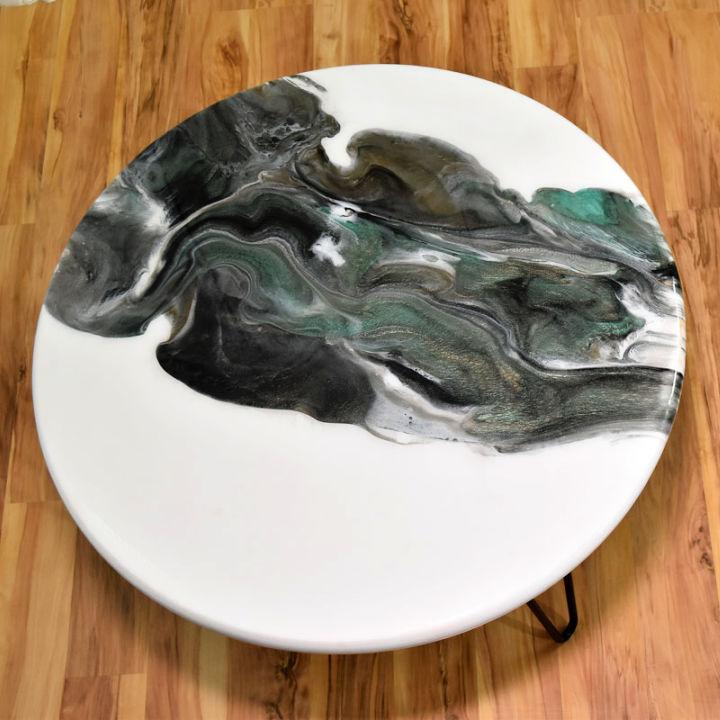
Making a DIY Epoxy Resin Table Top can transform any ordinary surface into a stunning centerpiece. Its durability and shine are ideal for high-use areas, offering both a protective layer and a touch of elegance.
2. How to Make Epoxy Resin Top for Coffee Table

Make an Epoxy Resin Top for your Coffee Table is a simple way to add a bespoke feel to your living space. It's a resilient and easy-to-clean choice, perfect for showcasing your favorite coffee table books and decor.
3. Epoxy Resin Glitter Table Top
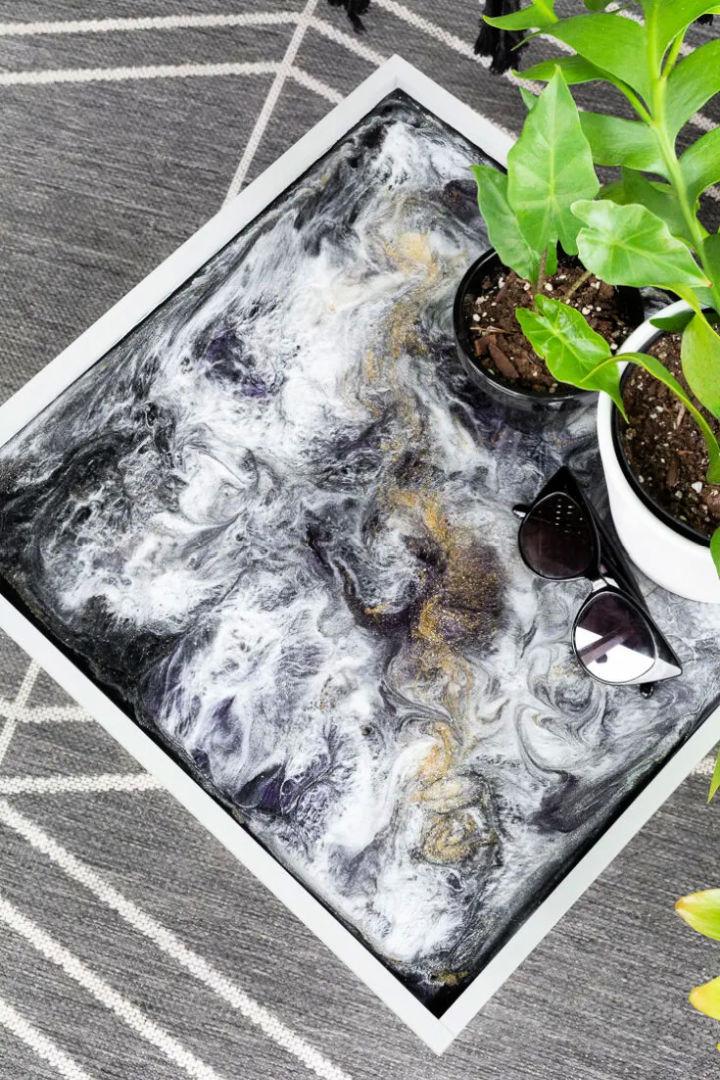
An Epoxy Resin Glitter Table Top brings a spark of joy and creativity into any room. It's a playful yet sophisticated option, ideal for adding a bit of glam without overwhelming the space.
4. DIY Terrazzo Resin Table Top
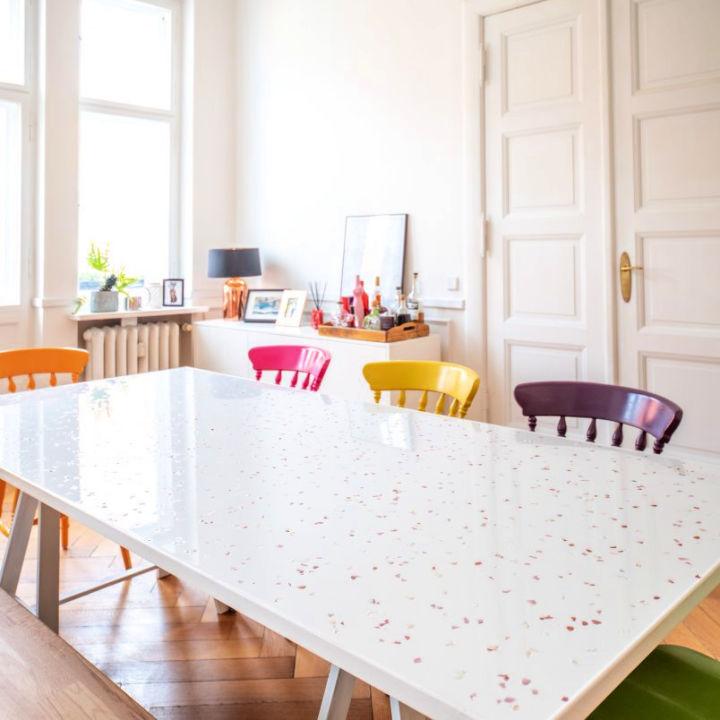
The DIY Terrazzo Resin Table Top merges classic design with modern materials. This approach gives a nod to traditional terrazzo while offering the seamless finish and longevity of resin, perfect for a fresh, contemporary look
5. Clear Epoxy Casting Resin Table Top
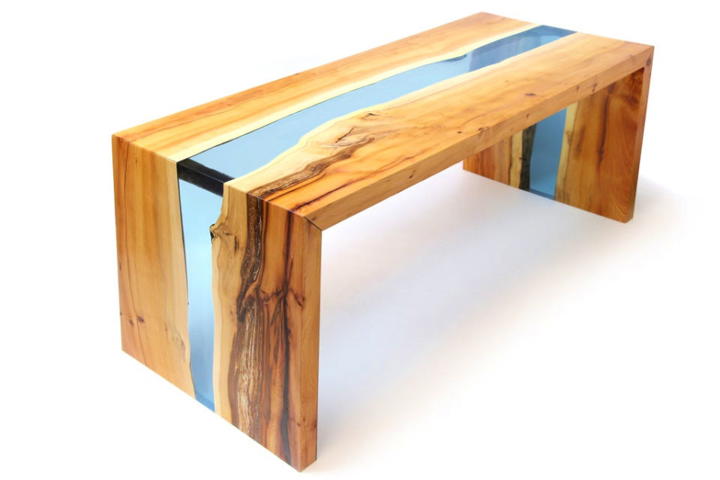
Embracing a Clear Epoxy Casting Resin Table Top means enjoying the beauty of your table's material with the added benefit of protection. It's an excellent choice for preserving the aesthetic of wood grain or other textures
6. Making Your Own Epoxy Resin Tabletop
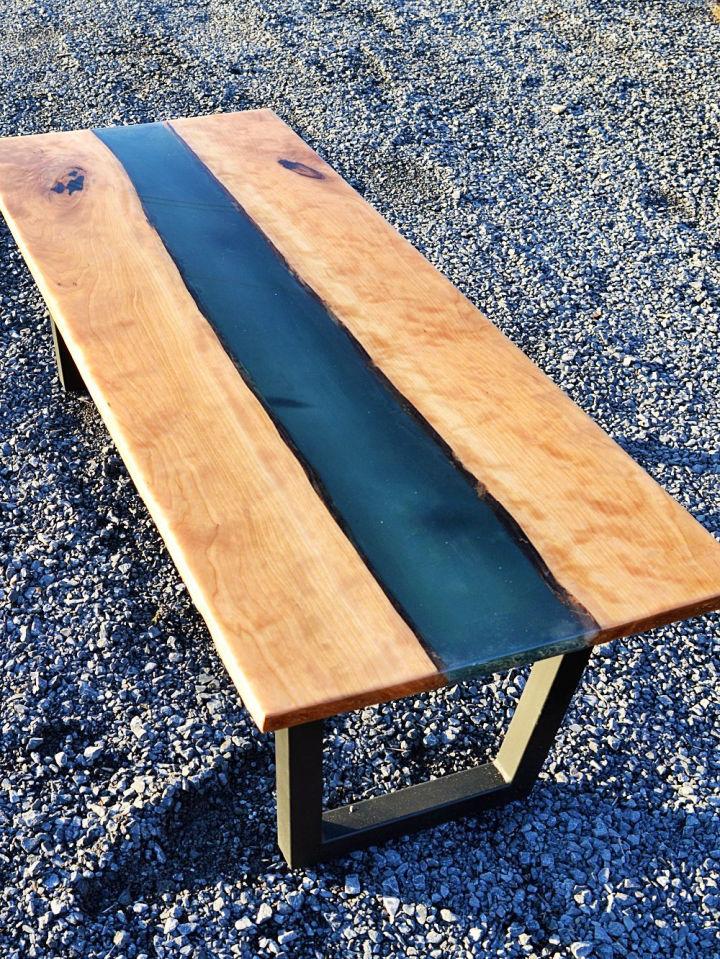
Making Your Own Epoxy Resin Tabletop is an adventure in customization. You have the freedom to choose colors, objects to embed, and the overall design, reflecting your personal style and creativity.
7. DIY Poured Epoxy Table Top
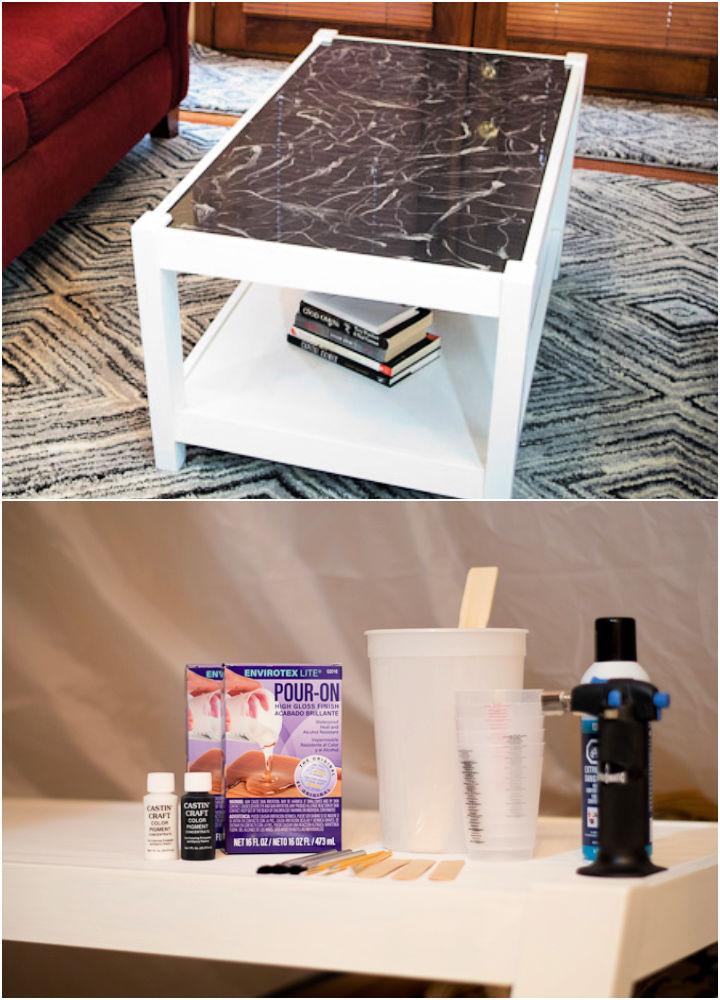
A DIY Poured Epoxy Table Top offers a fluid, organic look that can mimic everything from marble swirls to galactic scenes. It's a versatile choice that allows you to be as detailed or as minimalistic as you wish.
8. How to Make Resin Table Top
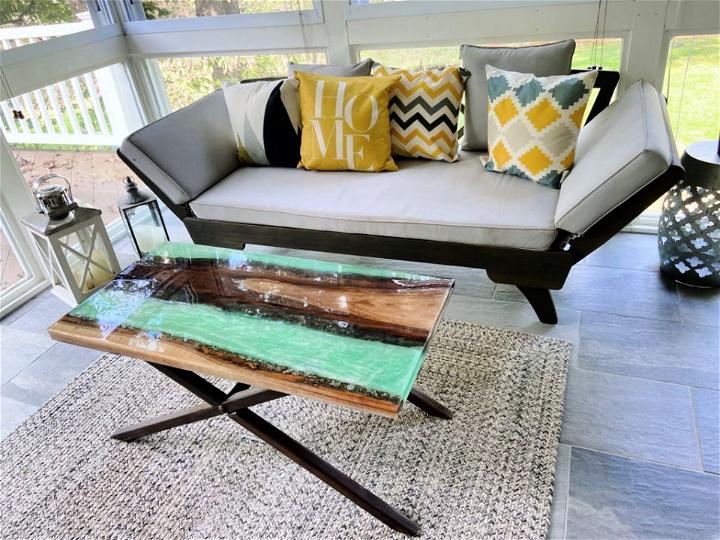
Learning How to Make a Resin Table Top can open the door to endless creative possibilities. This technique offers a solid, glossy finish that's both practical and visually appealing, suitable for any furniture piece.
9. Resin Table Top With Envirotex Lite
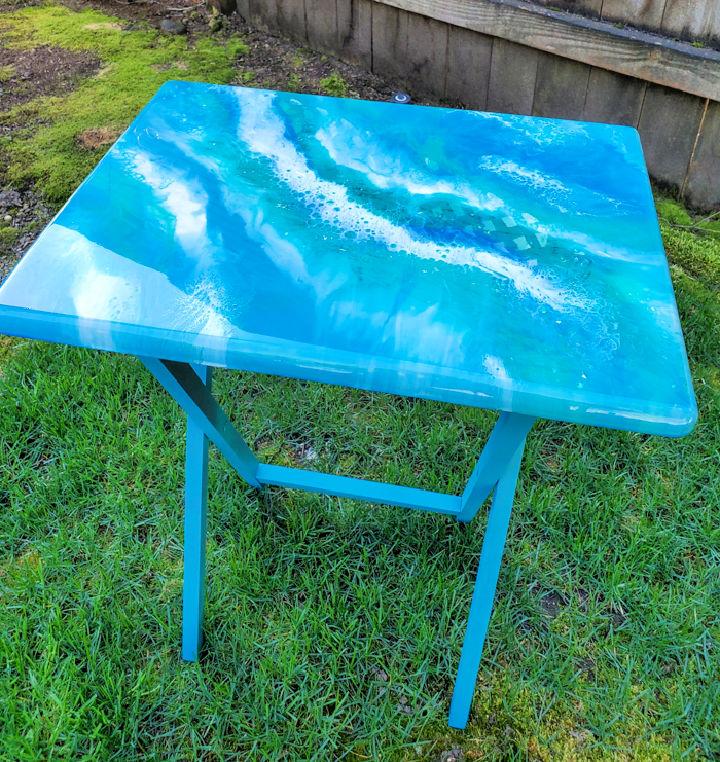
Using Resin Table Top With Envirotex Lite is a great way to achieve a high-gloss, waterproof finish that's robust and UV-resistant. It's ideal for surfaces that will be exposed to sunlight and everyday use.
10. Resin Dining Table Top Step by Step Instructions
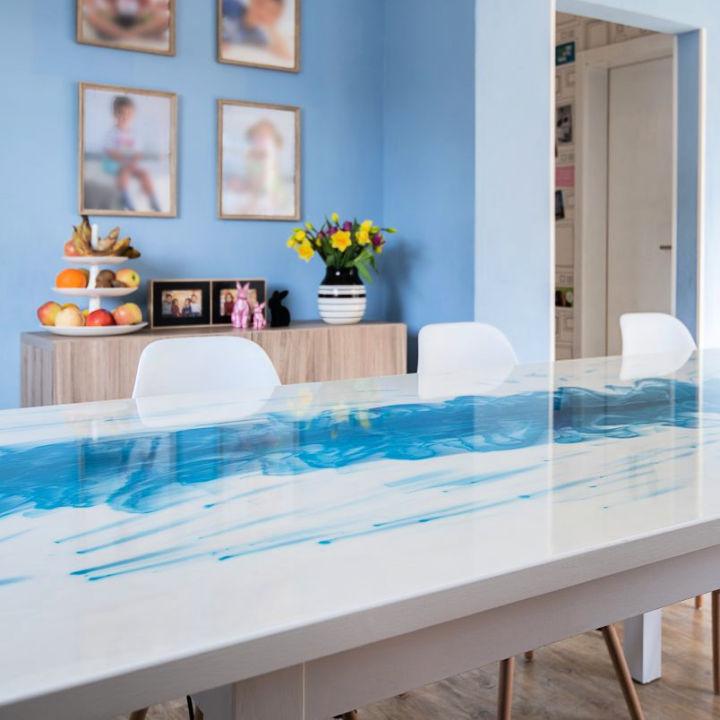
Following Resin Dining Table Top Step by Step Instructions can lead to making a stunning and durable focal point for your dining area. It's a project that combines both form and function, making every meal a beautiful experience.
11. Modern Resin River Tabletop

A modern masterpiece, the resin river tabletop combines natural wood beauty with the sleekness of resin. This style marries rugged charm with an elegant, flowing "river" centerpiece, adding a unique, dramatic flair to any room. It's not just a table; it's a conversation starter.
12. DIY Retro Glam Agate Slice Epoxy Resin Table Top
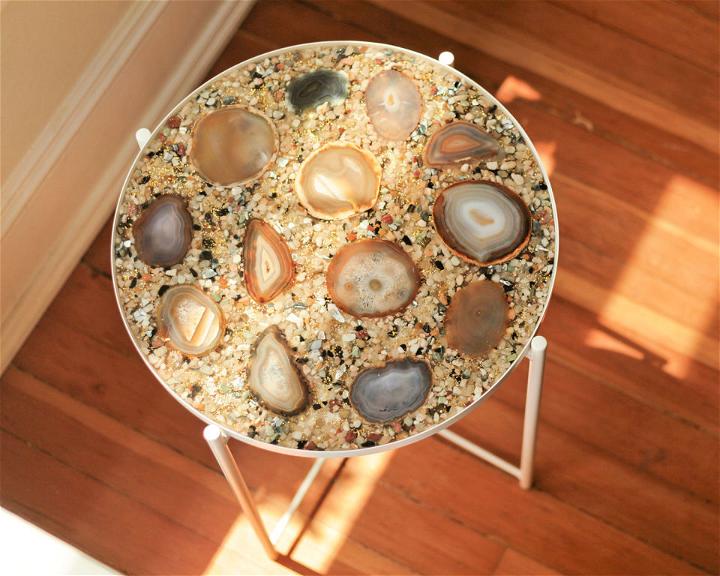
Channel your inner artist with a DIY retro glam agate slice epoxy resin table top. The vibrant, swirling patterns of agate slices, set in clear resin, lavish your space with a touch of sophistication and sparkle. It's a perfect blend of natural beauty and retro glam.
13. Mini Plastic Toy Animal Resin Table Top

Unlock a world of whimsy with a mini plastic toy animal resin table top. This playful design features an assortment of colorful toy animals embedded in clear resin, perfect for adding a fun, lighthearted touch to any room, especially children's spaces or creative studios.
14. How to Epoxy a Table Top
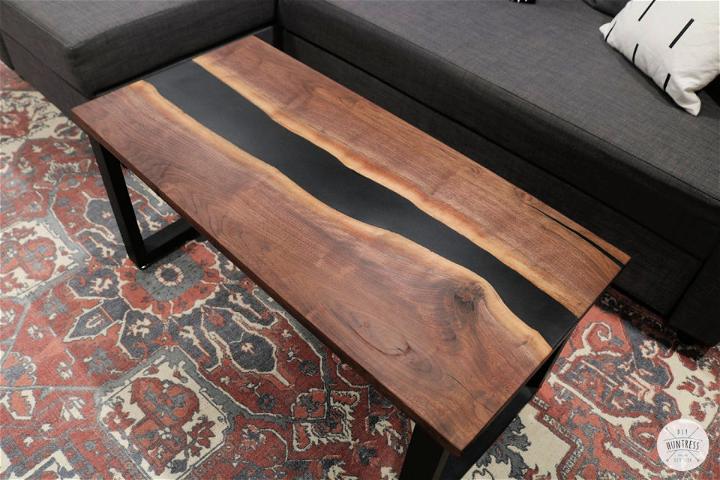
Epoxying a table top is an adventure in transformation, turning the ordinary into the exquisite. With the right supplies and a bit of patience, you can give any table a shiny, durable, and completely new look. It's a DIY project that's both satisfying and functional.
15. DIY Glam Resin Table Top
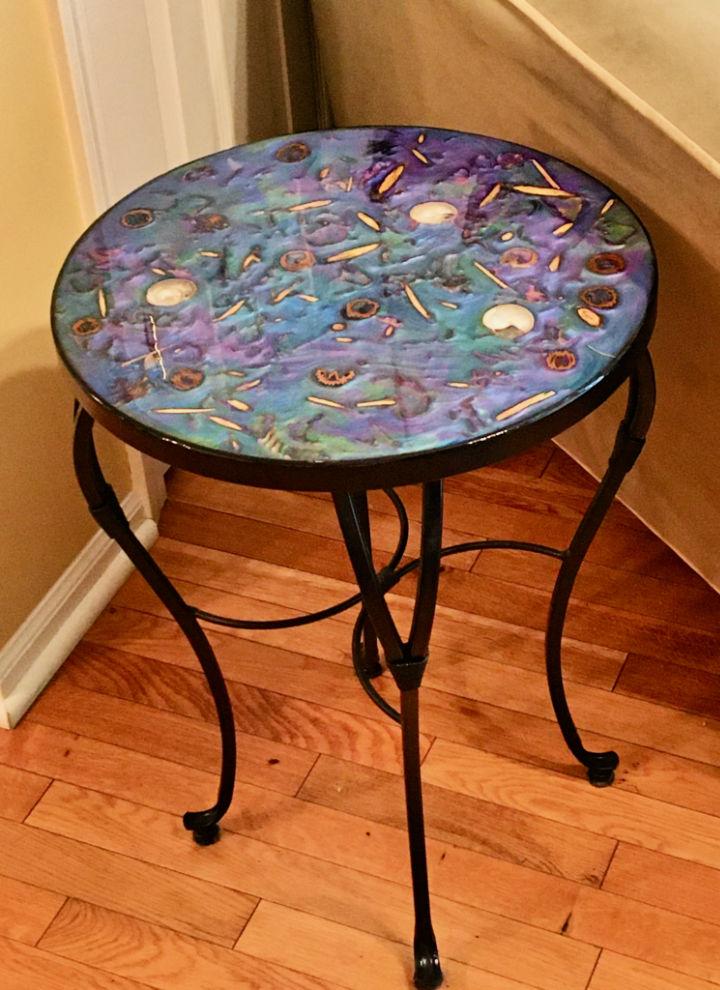
Embrace the sparkle with a DIY glam resin table top. Incorporating glitter or metallic flakes into the resin can turn an ordinary surface into a dazzling centerpiece. It's a simple way to inject a bit of glamour into your living space or work area.
16. DIY Neon Resin Plank Table Top
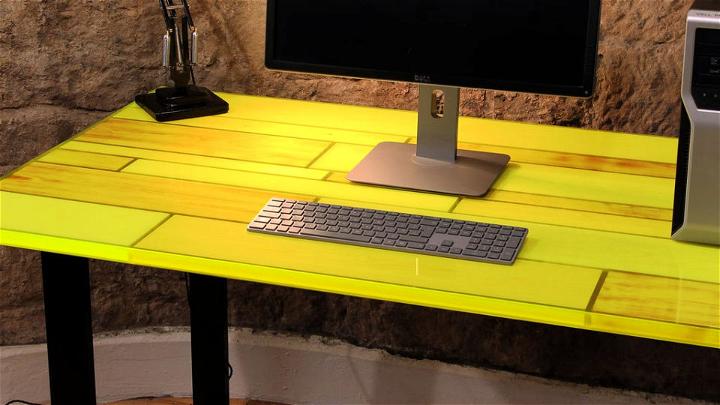
DIY enthusiasts, brighten your spaces with a neon resin plank table top. Blending vivid neon-colored resin with natural wood planks makes striking contrast and a bold, modern vibe. It's a fun project that packs a punch of personality and style.
17. Homemade Epoxy Resin Red Dinner Table Top
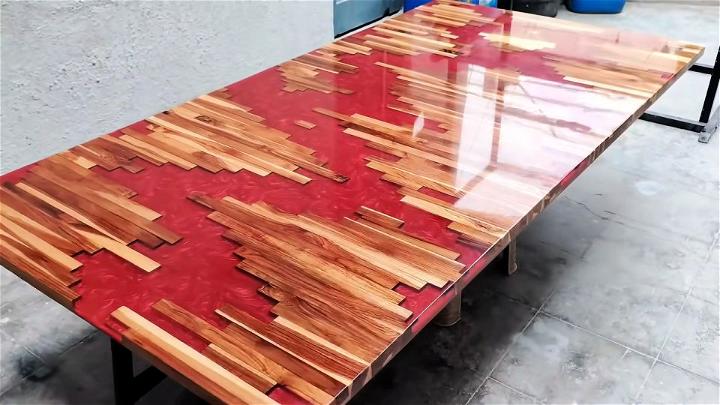
Set the stage for memorable meals with a homemade epoxy resin red dinner table top. The deep, vibrant red resin can evoke warmth, passion, and a sense of drama, perfect for those who love to entertain or simply dine in style.
18. Epoxy Resin Table Top with Ocean Design

Capture the calming essence of the sea with an epoxy resin table top featuring an ocean design. Layers of blue and white resin mimic the depth and movement of ocean waves, making a serene, coastal vibe ideal for any space that could use a touch of tranquility.
19. DIY Resin Coffee Table Top
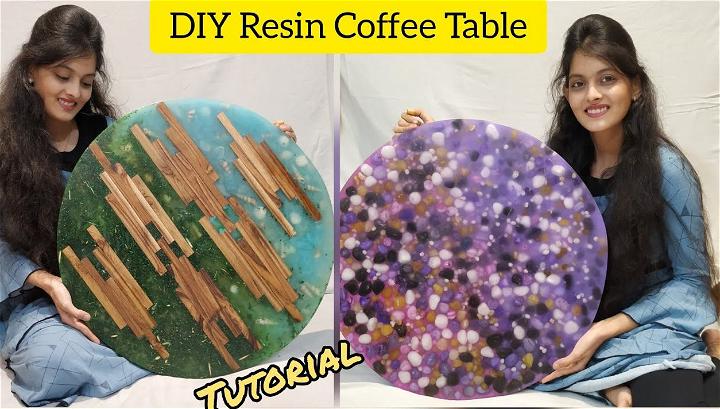
Revitalize your living area with a DIY resin coffee table top. Whether you embed memorable photos, unique fabrics, or keep it simple with a clear, glossy finish, the personal touch adds both character and durability to your coffee table, making it as unique as you are.
20. Build an Epoxy Table Top with a Floor Lamp

Imagine a fusion of light and surface with an epoxy table top that incorporates a floor lamp. This innovative design not only serves as a functional piece of furniture but also adds an ambient lighting element, enhancing the atmosphere of any room with its soft, warm glow.
21. DIY Resin River Table Top Design
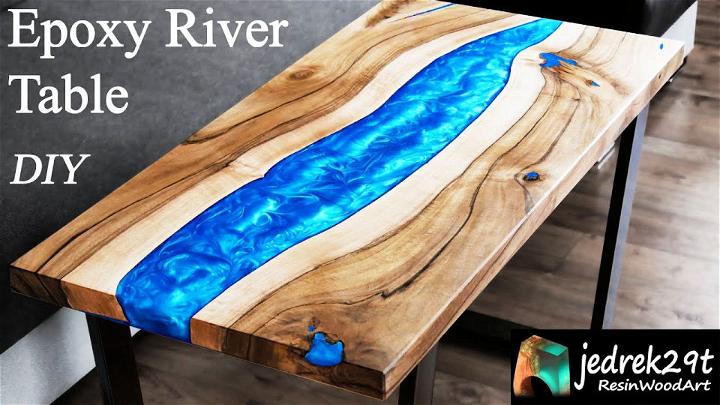
Imagine a river flowing through your living room. A DIY resin river table top brings this tranquil scene to life, combining the rustic appeal of wood with the sleek flow of colored resin. It's a project that not only amps up your décor but also reflects your creative flair.
22. Epoxy Wood Table Top Tutorial
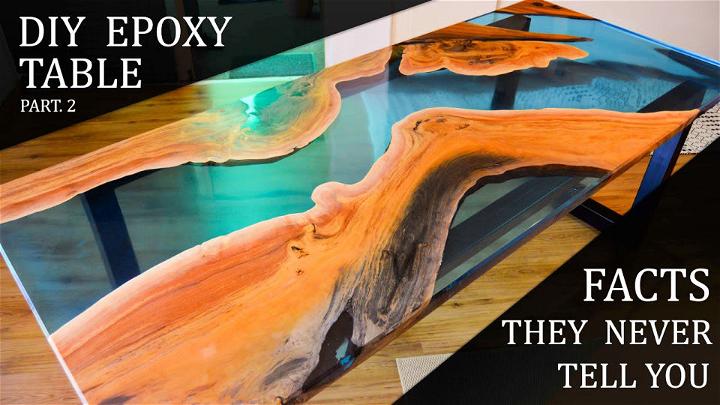
Making with epoxy and wood allows you to preserve the natural beauty of wood while adding a durable, glossy finish. This tutorial guides you through making a stunning, long-lasting table top that's as functional as it is beautiful. Perfect for both beginners and seasoned DIYers looking for a new project.
23. Pour Your Own Accent Table Top

Make your own accent table top with poured resin isn't just a craft; it's making a piece of art. The process allows for endless creativity, from embedding objects to playing with colors. It's a rewarding way to add a personal touch to your space.
24. Free Resin Table Top Plan
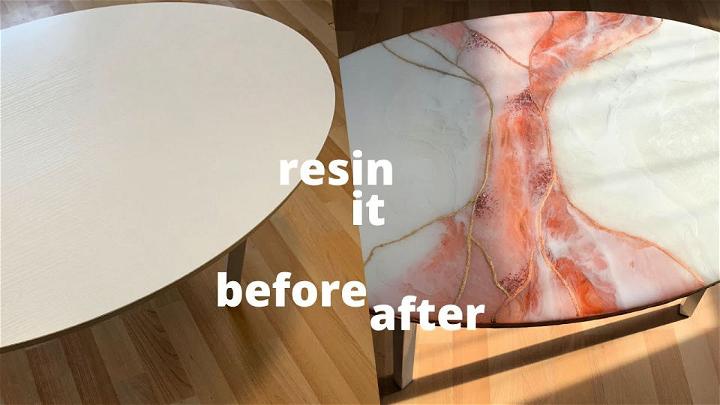
Dive into resin table top crafting without worry. Free plans offer a guided approach, making it easier to embark on this creative journey. They provide a roadmap to making a stunning piece that could become the centerpiece of any room, combining utility with the satisfaction of DIY.
25. Pour Your Own Accent Table Top
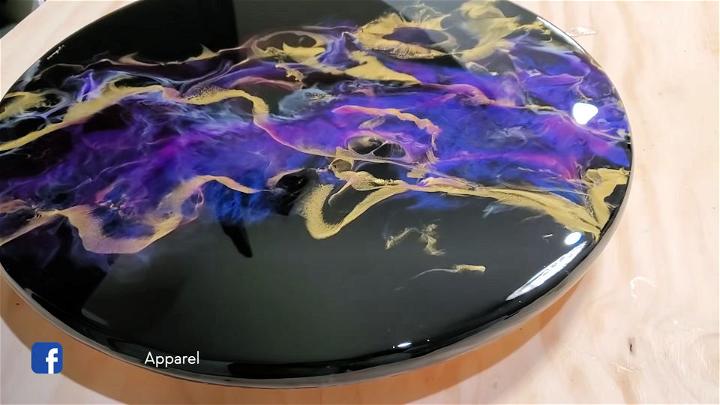
Bring your unique vision to life by pouring your own accent table top. This approach gives you the freedom to experiment with designs, colors, and finishes. Build a personalized statement piece that's not only a functional table but also a true reflection of your style and creativity.
Conclusion:
In conclusion, making an epoxy table can be a fun and rewarding DIY project. By following the steps outlined in this article, you can unleash your creativity and make a stunning piece of furniture for your home or as a gift. Remember to gather all the necessary materials and take your time to achieve a professional finish.


