Punching bags are a staple in martial arts and boxing training, but they're also an excellent addition to any fitness routine. They offer a dynamic workout that can improve your physical and mental health.
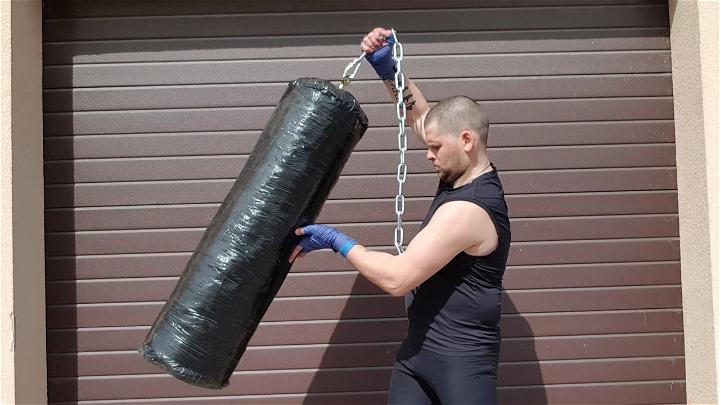
Benefits of Using a Punching Bag
- Full-body Workout: Engaging almost every muscle group, punching bags provide a comprehensive workout from your shoulders down to your legs.
- Cardiovascular Fitness: Regular sessions can significantly enhance heart health and increase lung capacity.
- Stress Relief: Hitting a punching bag can be a powerful way to release tension and improve mental well-being.
- Strength Building: The resistance of a heavy bag helps in developing muscle strength and power.
- Cost-effective: Making your own punching bag can be a budget-friendly alternative to purchasing expensive equipment.
How to Make a Punching Bag - Step by Step Guide
Learn how to make a punching bag with this step-by-step guide below:
Gather Your Materials
Before you start, ensure you have all the necessary materials:
- Two old carpets (preferably with a lot of stains and holes)
- A square or round piece of wood (shorter than the length of the carpet)
- A long bolt that fits through the wood
- A drill for making a hole in the wood
- Wood screws to secure the carpet to the wood
- Several large garbage bags for water resistance
- Duct tape for reinforcement
- A chain with two carabiners on each side for hanging
Step by Step Instructions
Step 1: Prepare the Carpets
Find two old carpets. These can usually be acquired for free from generous people in Facebook groups who would otherwise discard them. Fold each carpet in half to increase the thickness.
Step 2: Insert the Wood
Take your piece of wood (either square or round, it doesn't particularly matter) and cut it slightly shorter than the width of your folded carpets. Drill a hole through the center of the wood, where you'll later insert the bolt for hanging.
Step 3: Attach the Wood to the Carpets
Position the wood at the center of the folded carpets and use wood screws to securely attach it, ensuring it won't shift when the bag is hit.
Step 4: Add Water Resistance
To protect your punching bag from moisture, wrap it completely in large plastic garbage bags. The plastic acts as a waterproof barrier, keeping the inner materials dry.
Step 5: Secure with Duct Tape
Wrap the entire exterior with duct tape. Start at the center and work your way towards the ends evenly. This not only adds strength and durability but also gives your punching bag a more cohesive look.
Step 6: Prepare for Hanging
Attach a chain to the bolt protruding from the wood. Use carabiners or a similar secure connecting device to ensure the bag can be safely hung from a strong support.
Step 7: Hang Your Punching Bag
Find a suitable place for your new punching bag — a strong beam in your garage or basement is ideal. Hang the bag securely and ensure it has enough clearance on all sides for safe use.
Additional Tips
- For extra water resistance, consider using more garbage bags.
- Applying another layer of duct tape can enhance the bag's durability and impact resistance.
Video Tutorial
For a step-by-step video tutorial on making a homemade punching bag, watch this helpful video.
It pairs well with this written guide, offering a visual representation of each technique explained in a clear and manageable way for all viewers.
Making a punching bag at home is a fun project that is both practical and environmentally friendly. This guide offers an easy blueprint for making a durable bag from simple, often free, materials. Enjoy your new homemade punching bag!
Maintenance and Care
To ensure your DIY punching bag withstands the test of time, proper maintenance is crucial. Here's how you can keep it in top shape:
Regular Inspection
- Check for Wear and Tear: Look for any signs of damage or weakening, especially in areas that receive the most impact.
- Secure Mounting: Ensure that the bag remains firmly attached to its support system.
Cleaning
- Wipe Down: Use a damp cloth to clean the surface of the bag.
- Air Out: If possible, let the bag air dry to prevent mold and mildew.
Storage
- Keep Dry: Store in a dry area to avoid moisture damage.
- Avoid Sunlight: Prolonged exposure to sunlight can degrade the materials.
By following these tips, you'll lengthen your punching bag's lifespan for more effective training. A well-kept bag is safer, offers a better workout, and maximizes your fitness investment.
FAQs About DIY Punching Bags
Get answers to all your questions about DIY punching bags with this comprehensive FAQ guide. Learn how to make your own at home easily and affordably.
What materials do I need to make a DIY punching bag?
To make a DIY punching bag, you'll need durable fabric like canvas or leather for the outer shell, filling materials such as old clothes, sand, or sawdust, and a strong chain or rope for hanging.
How do I fill the punching bag to ensure it's not too hard or too soft?
Start by filling the bottom with heavier materials like sand or rubber mulch for stability. Then, add layers of softer materials like foam, fabric, or old clothes. Adjust the firmness by adding or removing layers until you achieve the desired density.
Can I use any fabric for the outer shell of the punching bag?
It's best to use a thick, tear-resistant fabric like canvas, leather, or vinyl. These materials can withstand repeated strikes without tearing.
How do I hang my DIY punching bag safely?
Choose a secure beam or bracket that can support the weight of your filled bag. Use a heavy-duty chain or rope and ensure all connections are tightly secured to prevent accidents.
What is the ideal height for hanging a punching bag?
The top of the punching bag should align with your head or slightly higher. This allows for a variety of punches and kicks at different heights.
How can I make my punching bag more resistant to weather if I want to hang it outdoors?
Cover the bag with a waterproof material or tarp when not in use. Additionally, use weather-resistant materials for the filling, like rubber mulch, to prevent mold and mildew.
Is it necessary to wear gloves when using a DIY punching bag?
Yes, wearing gloves is important to protect your hands from injury and provide additional cushioning for your knuckles.
How often should I replace the filling of my punching bag?
Inspect the bag regularly for signs of settling or compacting. Replace the filling as needed to maintain the bag's shape and firmness.
Can I make a punching bag that's suitable for children?
Absolutely! Just make a smaller bag with lighter materials and ensure it's hung at an appropriate height for the child's size.
How do I maintain my DIY punching bag?
Regularly check for tears or loose seams and repair them promptly. Clean the surface with a damp cloth and disinfectant to prevent odors and buildup of bacteria.
By addressing these FAQs, you can make a safe, durable, and effective DIY punching bag that caters to your training needs.
Explore 20 Easy DIY Punching Bag Ideas for Your Home Gym

1. DIY Punching Bag From Unused Item
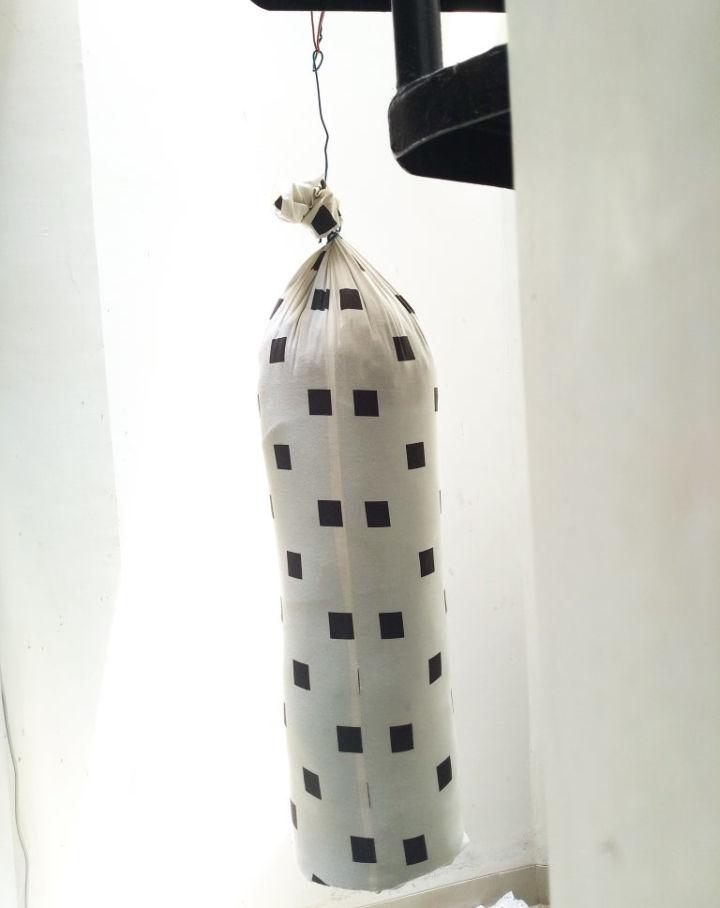
Transforming unused items into a punching bag is not just eco-friendly, it's also a creative outlet. From old clothes to scrap materials, virtually anything soft and durable can serve. This repurposing journey provides a satisfying way to vent while recycling.
2. Kids' Punching Bag for Under $10

A budget-friendly option for the little ones, this project involves lightweight materials like old pillows or stuffed toys, securely packed. It's an ideal way to offer kids a fun, physical activity without breaking the bank, fostering an early love for fitness and creativity.
3. Make Your Own Pocket Punching Bag

Perfect for stress relief on-the-go, this miniature version of a punching bag can be made from simple items like socks filled with sand or rice. It's a discreet, portable solution for those moments when you just need a quick punch-out.
4. DIY Homemade Punching Bag
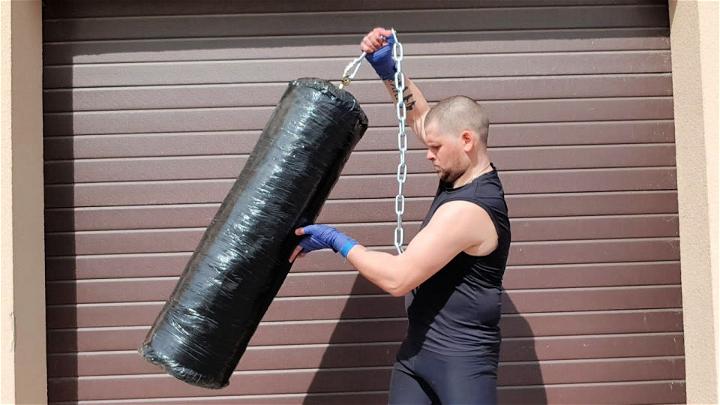
Making a punching bag at home can be a rewarding project for fitness lovers. By using robust materials like canvas bags filled with rags or sand, you get a custom workout equipment that's both sturdy and tailored to your training needs.
5. Quick and Easy DIY Punching Bag

If you're short on time but keen on getting physical, this approach is for you. Using a duffel bag and filling it with clothes or foam makes an instant, reliable punching bag. Perfect for an impromptu workout session.
6. DIY Punching Bag at Home for Under $20

Crafting a makeshift punching bag for less than $20 is surprisingly feasible. With cost-effective materials like old tires or fabric scraps, you can assemble a functional and durable punching bag, ensuring your fitness regime doesn't dent your wallet.
7. Wall Punching Bag from Tires

Reusing old tires to make a wall-mounted punching bag not only saves space but also contributes to sustainable living. This unique design offers a robust, long-lasting equipment for practicing punches and kicks, proving that innovative recycling can meet fitness goals.
8. DIY Punching Bag Using Old Jean

Utilizing old jeans provides a novel way to make a punching bag. Just stuff them tightly with fillers like sand or sawdust, and voilà! You have a low-cost, effective punching buddy that's also a conversation starter about recycling.
9. Build Your Own Quarantine Punching Bag

Quarantine projects got a whole lot healthier with this DIY punching bag. Scour your home for suitable materials like blankets or foam for a homemade gym equipment. It's a productive way to stay active and release stress while stuck indoors.
10. How to Make a Free-Standing Punching Bag

A free-standing punching bag can be an excellent addition to your home gym. With a base filled with sand or water for stability and a tall cylindrical shape for the bag, this project offers an adjustable, space-saving option for enthusiasts of all levels.
11. Homemade Standing Punching Bag

Crafting a DIY punching bag with old tires and sandbags is a cost-effective way to boost boxing skills and cardio health at home. Personalizing equipment saves money and optimizes training.
12. Reflex Punching Bag from Scrap Materials

Harness the potential of scrap materials around your home by fashioning a reflex punching bag. This project is not only cost-effective but also increases your agility and hand-eye coordination. Such a bag offers quick rebound action, sharpening reflexes in a fun, engaging way.
13. How to Make a Tire Punching Bag

Tires offer excellent durability and resistance, making them perfect for a DIY punching bag. By stacking and securing tires together, you make a tough, outdoor-friendly punching bag that can withstand all punching power. It's a rugged, resilient choice for those looking to level up their training.
14. DIY Boxing Bag - Step-by-Step Instructions
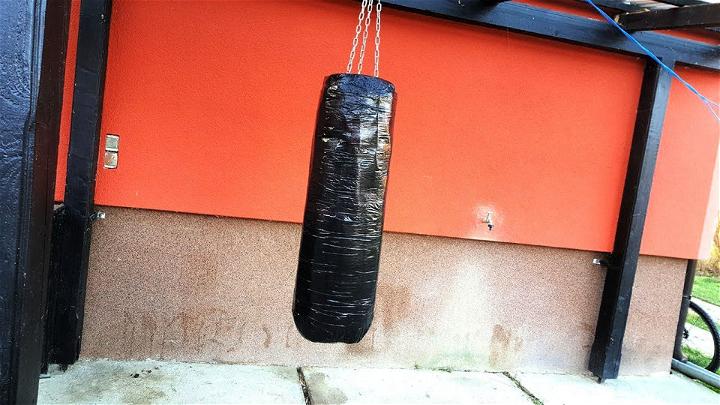
Imagine crafting your very own boxing bag from scratch. Following simple, step-by-step instructions, you can build a durable, customized punching bag that fits perfectly into your workout space. This project allows you to tailor size and weight, making an ideal training partner. youtube
15. Punching Bag for Garage Home Gym

Transform your garage into a functional home gym with a homemade punching bag. It's an effective, space-saving solution that adds a professional touch to your workouts. Perfect for fitness enthusiasts looking to integrate boxing into their regime without the commercial gym fees.
16. Cheap Aqua Punching Bag Tutorial

Dive into a unique project—making an aqua punching bag. Utilizing water's natural resistance, this bag offers a unique, fluid response to strikes, closely mimicking the feel of hitting a real opponent. It's a cost-effective way to bring professional-level equipment into your home gym.
17. DIY Punching Bag from Jute Sacks
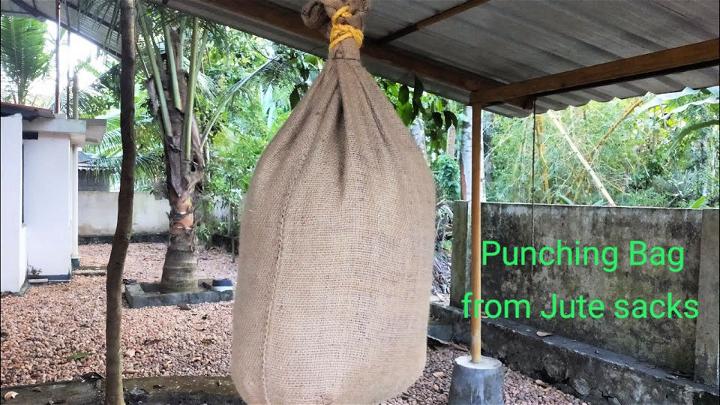
Jute sacks can be transformed into an eco-friendly, highly durable punching bag. This simple, robust design is ideal for those seeking a sustainable option. Filled with rags or sand, it offers adjustable weight and firmness, suiting various training needs while being kind to the planet.
18. Make a Punching Bag for Kids

Fostering an active lifestyle for children is fun with a DIY punching bag designed specifically for them. Using softer materials and a lighter design, you can make a safe, enjoyable training tool that helps kids develop coordination and strength while having a blast.
19. Easy and Heavy Punching Bag

For those seeking simplicity and durability, crafting a heavy punching bag out of basic materials like canvas and sand can be the answer. This straightforward project results in a robust training tool, ideal for those looking to add serious power to their punches.
20. DIY Punching Bag Hanger

Securely hanging your homemade punching bag is crucial. Fashioning a DIY hanger from strong, reliable materials ensures your bag stays in place, providing a safe training environment. This project enhances your workout area's functionality and safety, letting you focus on your training.
Conclusion:
In conclusion, making a DIY punching bag can be a fun and cost-effective way to enhance your workout routine. By following the steps outlined in this guide, you can enjoy the benefits of a punching bag without breaking the bank. Get started on this project today and elevate your fitness game with your very own homemade punching bag.
